Quick Start Guide
More information
On the web
Detailed support information, including device specifications and a full user's guide are available at www.cricketwireless.com/support/devices.
On the phone
•Call Customer Care at 1-855-246-2461 or
•Dial 611 from your phone
Accessories
Cricket offers a full line of accessories. For more information, go to www.cricketwireless.com/shop/accessories or visit your local Cricket retailer.
Product meets FCC Radio Frequency Exposure
© 2018 Cricket Wireless LLC. All rights reserved. Cricket and the Cricket logo are trademarks under license to Cricket Wireless LLC.
Printed in KoreaGetting to know your
Galaxy J2 Pure
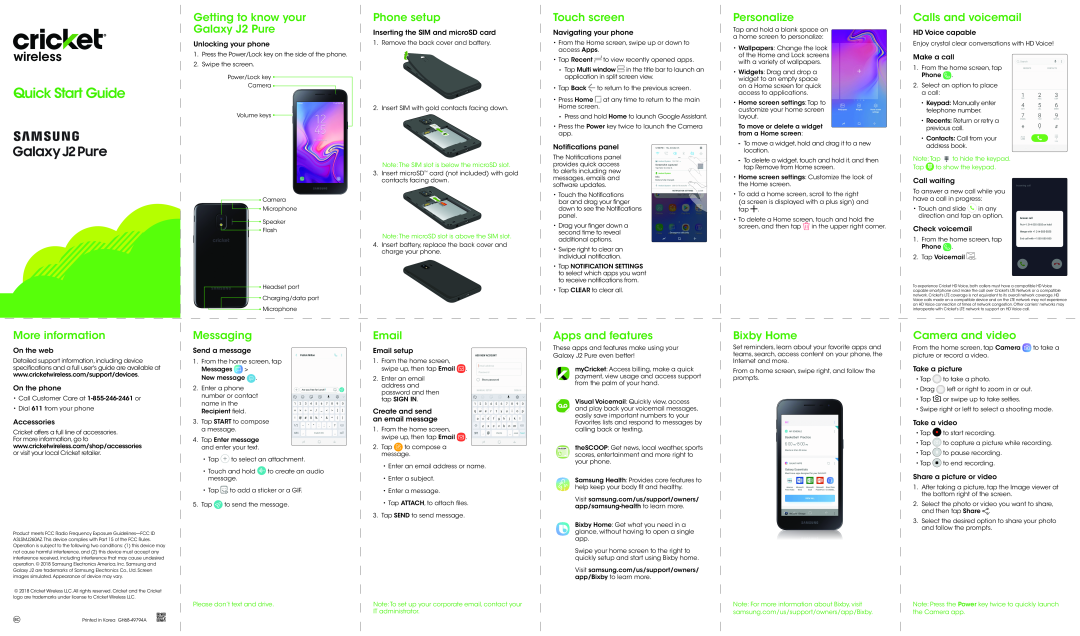
Unlocking your phone
1.Press the Power/Lock key on the side of the phone.
2.Swipe the screen.
Power/Lock key 
Camera 
Volume keys 
![]() Camera
Camera

 Microphone
 Speaker
 Flash
Flash
 Headset port
 Charging/data port
![]() Microphone
Microphone
Messaging
Send a message
1.From the home screen, tap Messages  >
>
New message  .
.
2.Enter a phone number or contact name in the Recipient field.
3.Tap START to compose a message.
4.Tap Enter message and enter your text.
•Tap  to select an attachment.
•Touch and hold 


 to create an audio message.
•Tap  to add a sticker or a GIF.
5.Tap  to send the message.
Please don’t text and drive.
Phone setup
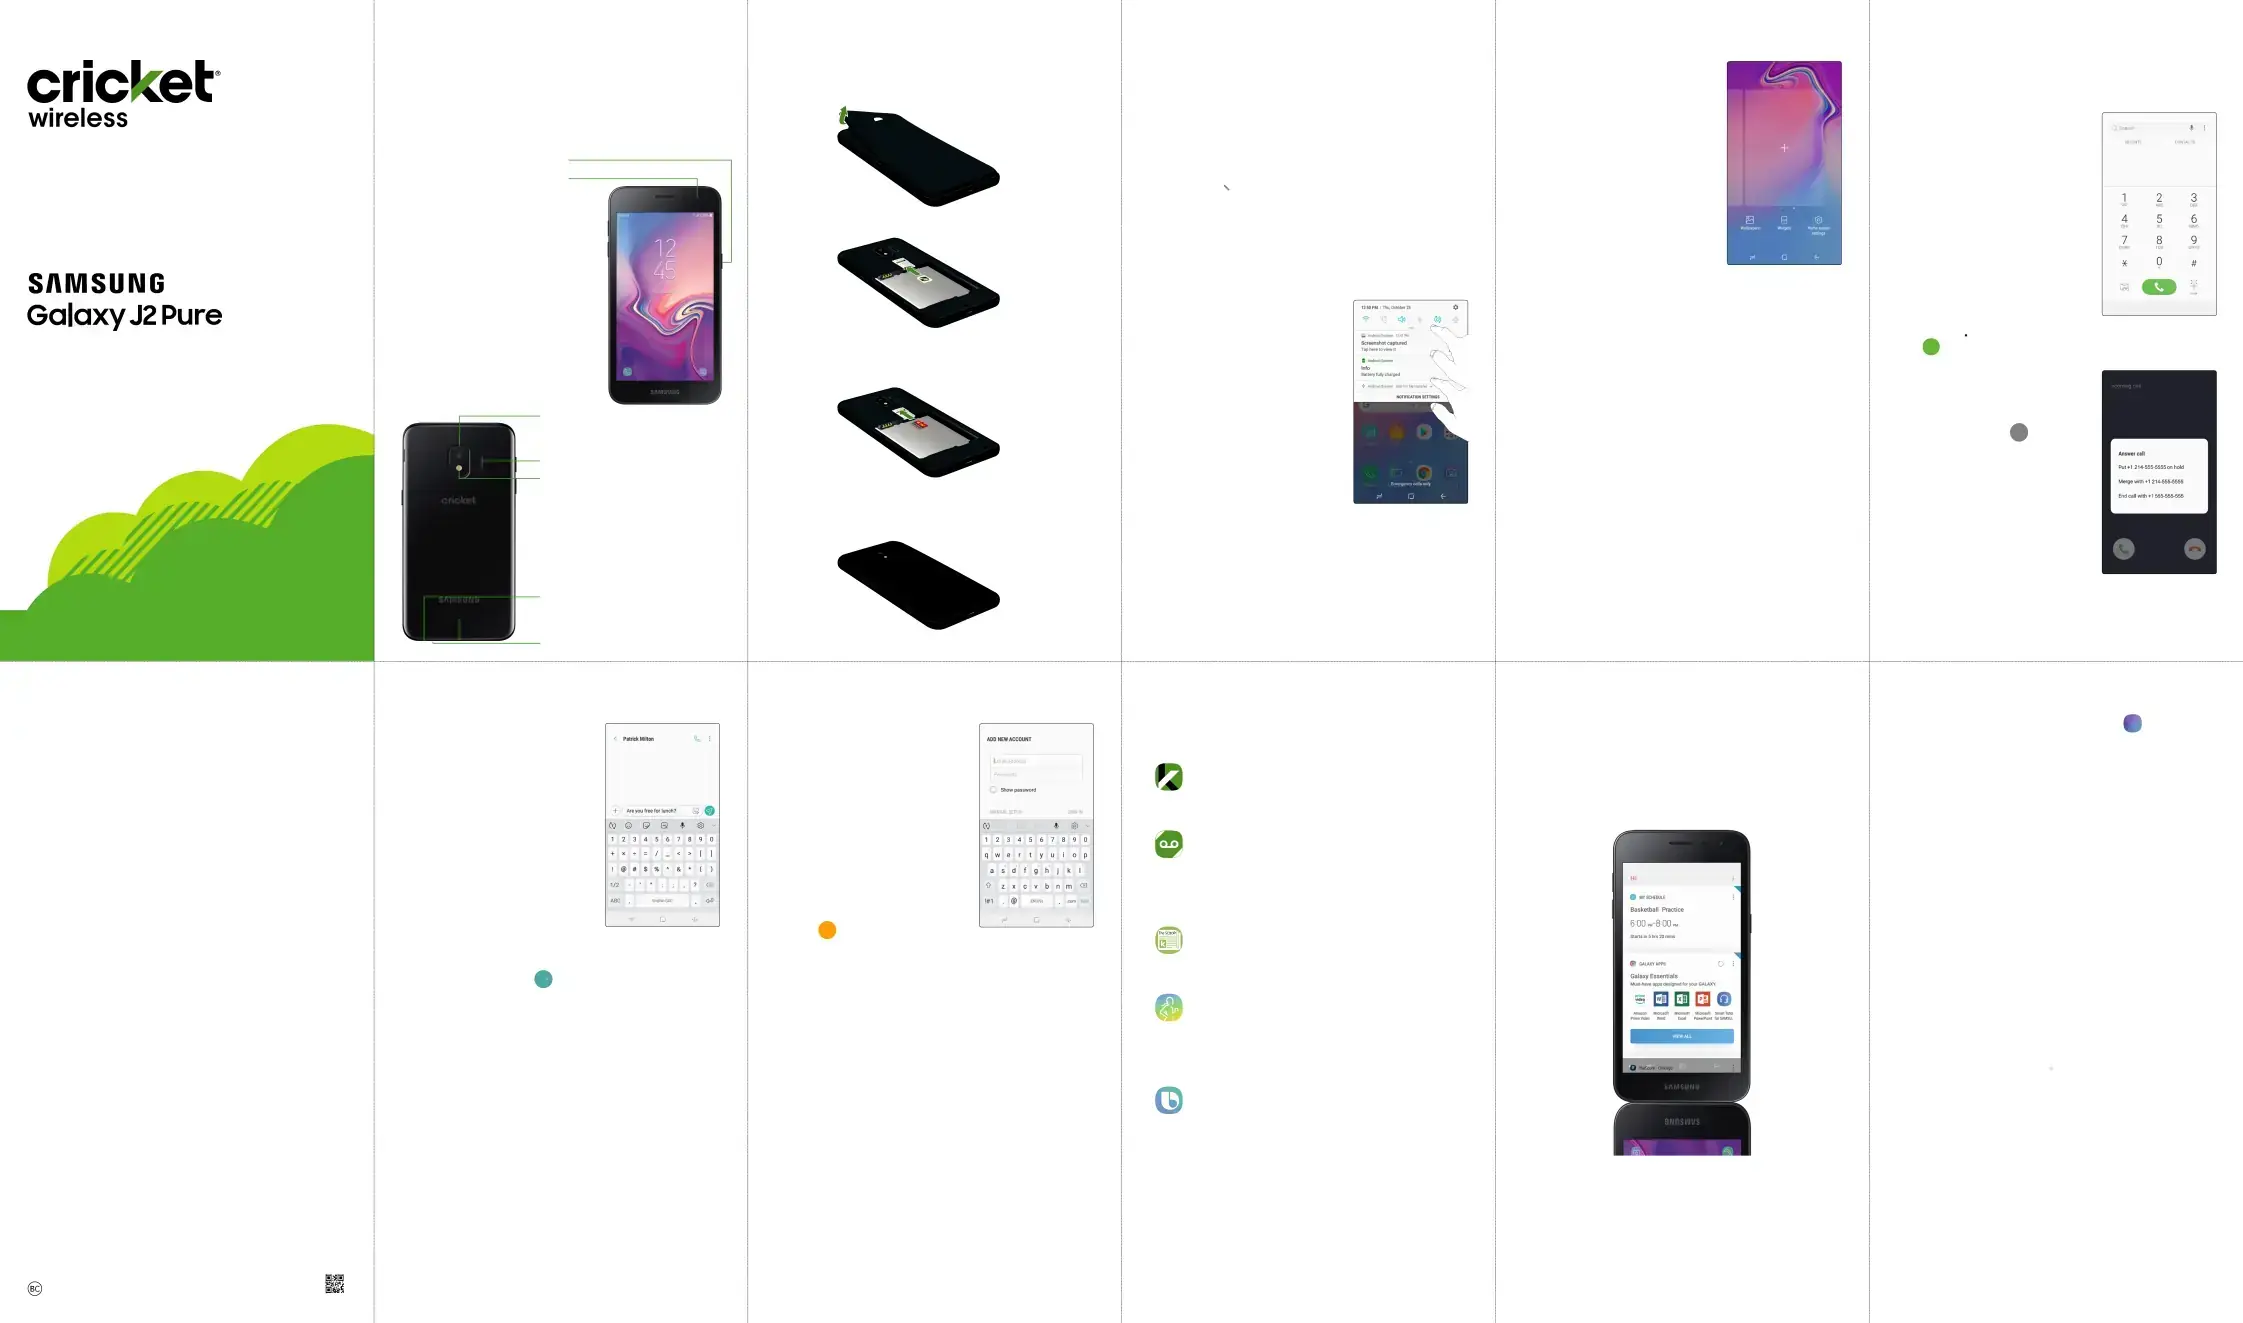
Inserting the SIM and microSD card
1.Remove the back cover and battery.
2.Insert SIM with gold contacts facing down.
Note: The SIM slot is below the microSD slot.
3.Insert microSD™ card (not included) with gold contacts facing down.
Note: The microSD slot is above the SIM slot.
4.Insert battery, replace the back cover and charge your phone.
Email setup
1.From the home screen, swipe up, then tap Email  .
.
2.Enter an email address and password and then tap SIGN IN.
Create and send an email message
1.From the home screen, swipe up, then tap Email ![]() .
.
2.Tap  to compose a message.
•Enter an email address or name.
•Enter a subject.
•Enter a message.
•Tap ATTACH, to attach files.
3.Tap SEND to send message.
Note: To set up your corporate email, contact your IT administrator.
Touch screen
Navigating your phone
•From the Home screen, swipe up or down to access Apps.
•Tap Recent  to view recently opened apps.
‐‐ Tap Multi window ![]() in the title bar to launch an application in split screen view.
in the title bar to launch an application in split screen view.
•Tap Back  to return to the previous screen.
•Press Home  at any time to return to the main Home screen.
‐‐ Press and hold Home to launch Google Assistant.
•Press the Power key twice to launch the Camera app.
Notifications panel
The Notifications panel provides quick access to alerts including new messages, emails and software updates.
• Touch the Notifications bar and drag your finger down to see the Notifications panel.
•Drag your finger down a second time to reveal additional options.
•Swipe right to clear an individual notification.
•Tap NOTIFICATION SETTINGS to select which apps you want to receive notifications from.
•Tap CLEAR to clear all.
Apps and features
These apps and features make using your Galaxy J2 Pure even better!
myCricket: Access billing, make a quick payment, view usage and access support from the palm of your hand.
Visual Voicemail: Quickly view, access and play back your voicemail messages, easily save important numbers to your Favorites lists and respond to messages by calling back or texting.
theSCOOP: Get news, local weather, sports scores, entertainment and more right to your phone.
Samsung Health: Provides core features to help keep your body fit and healthy.
Visit samsung.com/us/support/owners/ app/samsung-health to learn more.
Bixby Home: Get what you need in a glance, without having to open a single app.
Swipe your home screen to the right to quickly setup and start using Bixby home.
Visit samsung.com/us/support/owners/ app/Bixby to learn more.
Personalize
Tap and hold a blank space on a home screen to personalize:
•Wallpapers: Change the look of the Home and Lock screens with a variety of wallpapers.
•Widgets: Drag and drop a widget to an empty space on a Home screen for quick access to applications.
•Home screen settings: Tap to customize your home screen layout.
To move or delete a widget from a Home screen:
‐‐ To move a widget, hold and drag it to a new location.
‐‐ To delete a widget, touch and hold it, and then tap Remove from Home screen.
•Home screen settings: Customize the look of the Home screen.
•To add a home screen, scroll to the right (a screen is displayed with a plus sign) and tap ![]() .
.
•To delete a Home screen, touch and hold the screen, and then tap ![]() in the upper right corner.
in the upper right corner.
Bixby Home
Set reminders, learn about your favorite apps and teams, search, access content on your phone, the Internet and more.
From a home screen, swipe right, and follow the prompts.
Note: For more information about Bixby, visit samsung.com/us/support/owners/app/Bixby.
Calls and voicemail
HD Voice capable
Enjoy crystal clear conversations with HD Voice!
Make a call
1.From the home screen, tap Phone  .
.
2.Select an option to place a call:
•Keypad: Manually enter telephone number.
•Recents: Return or retry a previous call.
•Contacts: Call from your address book.
Note: Tap  to hide the keypad.
Tap 

 to show the keypad.
Call waiting
To answer a new call while you have a call in progress:
•Touch and slide  in any direction and tap an option.
Check voicemail
1.From the home screen, tap Phone ![]() .
.
2.Tap Voicemail  .
.
To experience Cricket HD Voice, both callers must have a compatible HD Voice capable smartphone and make the call over Cricket’s LTE Network or a compatible network. Cricket's LTE coverage is not equivalent to its overall network coverage. HD Voice calls made on a compatible device and on the LTE network may not experience an HD Voice connection at times of network congestion. Other carriers' networks may interoperate with Cricket's LTE network to support an HD Voice call.
Camera and video
From the home screen, tap Camera  to take a picture or record a video.
Take a picture
•Tap  to take a photo.
•Drag  left or right to zoom in or out.
•Tap  or swipe up to take selfies.
•Swipe right or left to select a shooting mode.
Take a video
•Tap  to start recording.
•Tap  to capture a picture while recording.
•Tap  to pause recording.
•Tap  to end recording.
Share a picture or video
1.After taking a picture, tap the Image viewer at the bottom right of the screen.