 Thank you for purchasing this Samsung product
To receive more complete service, please register your product at
 GETTING STARTED
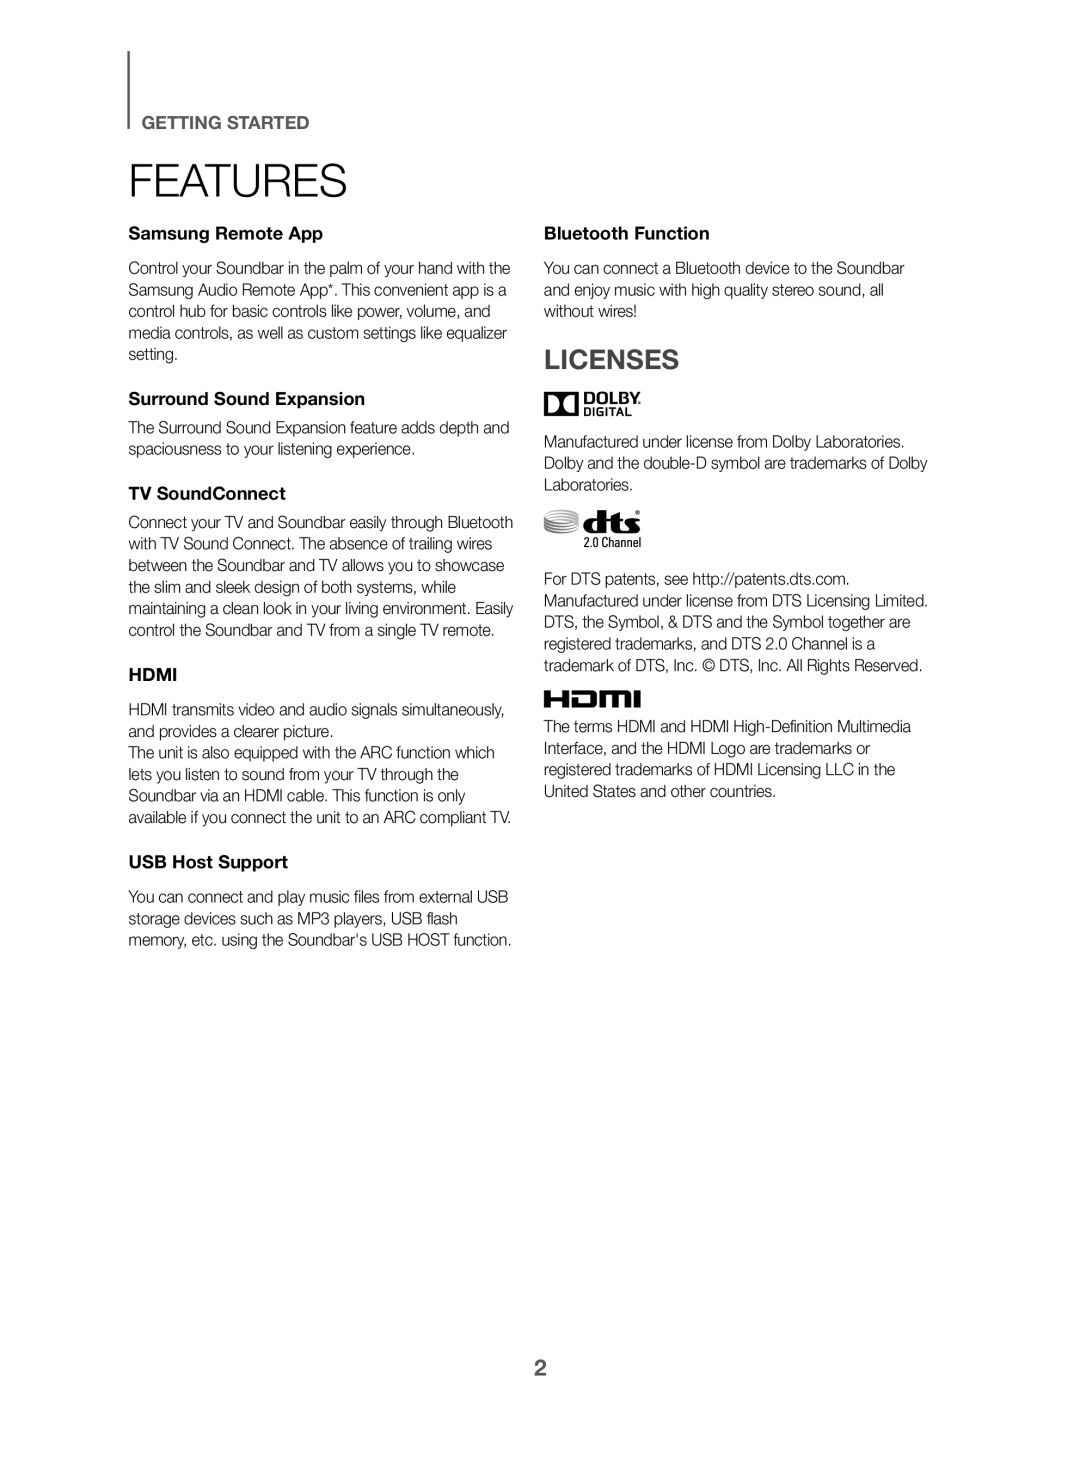
FEATURES
Samsung Remote App
Surround Sound Expansion
USB Host Support
Bluetooth Function
LICENSES
 SAFETY INFORMATION
SAFETY WARNINGS
 PRECAUTIONS
 CONTENTS
2Features
3Safety Information
6 What’s Included
7Top / Front Panel
8Rear / Bottom Panel
9 Remote Control
11 Installing the Soundbar
15Connecting the Subwoofer
17Connecting to a TV
20 Connections with External Device
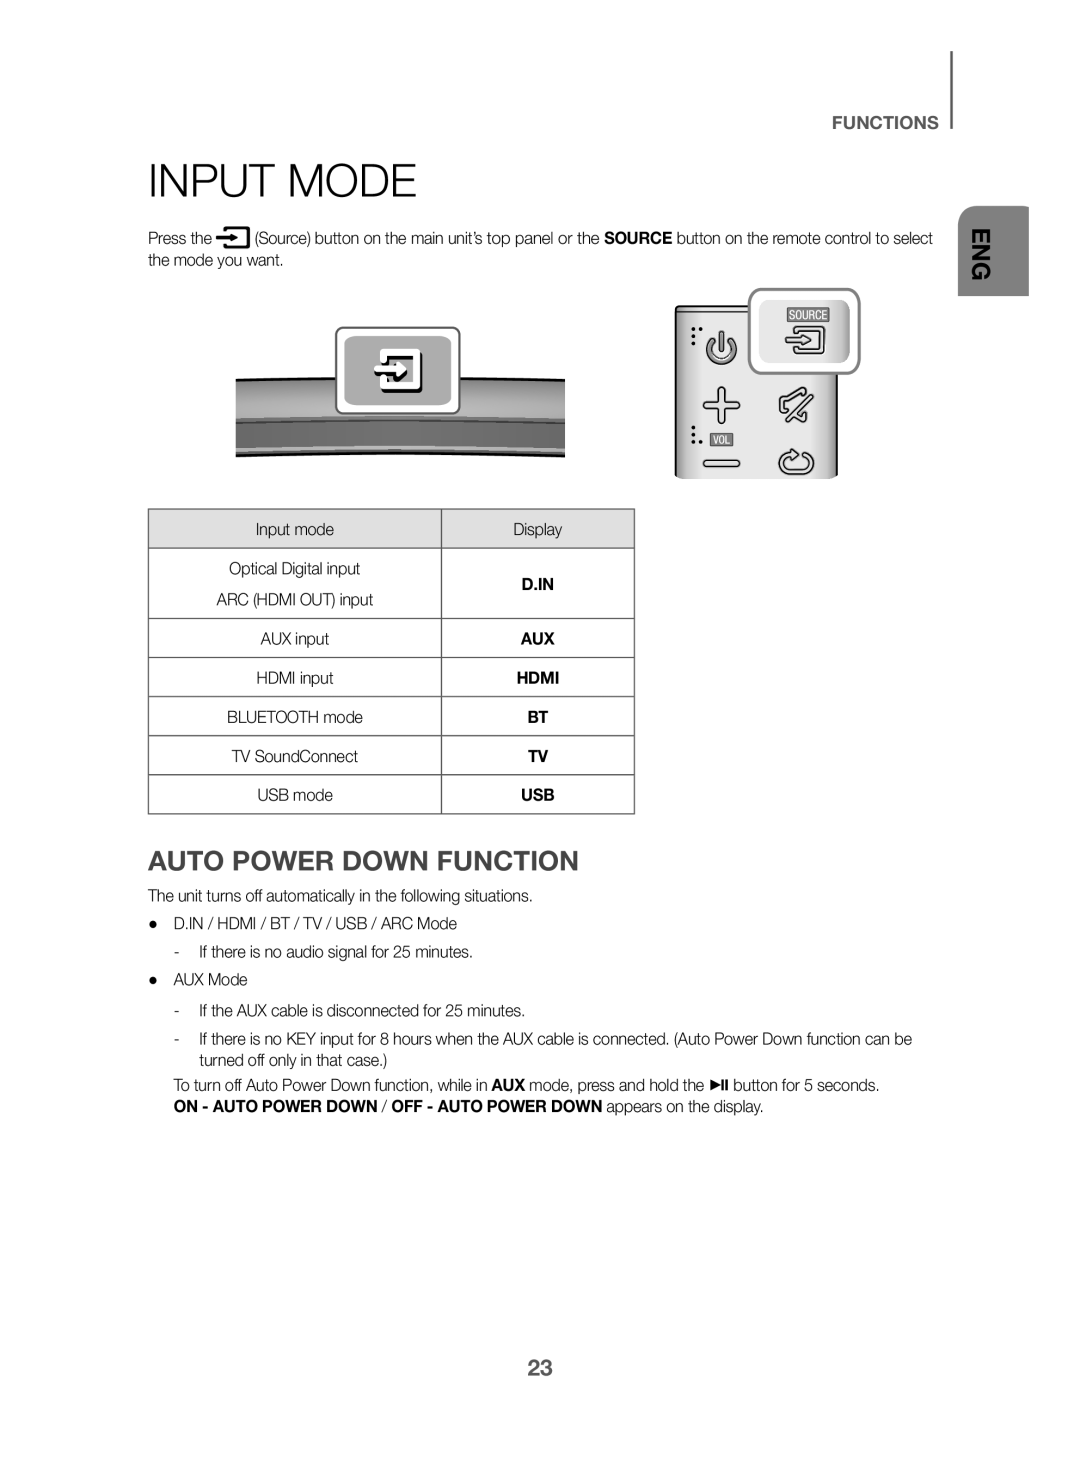
Input Mode
Bluetooth
27Software Update
28Troubleshooting
29 Specifications
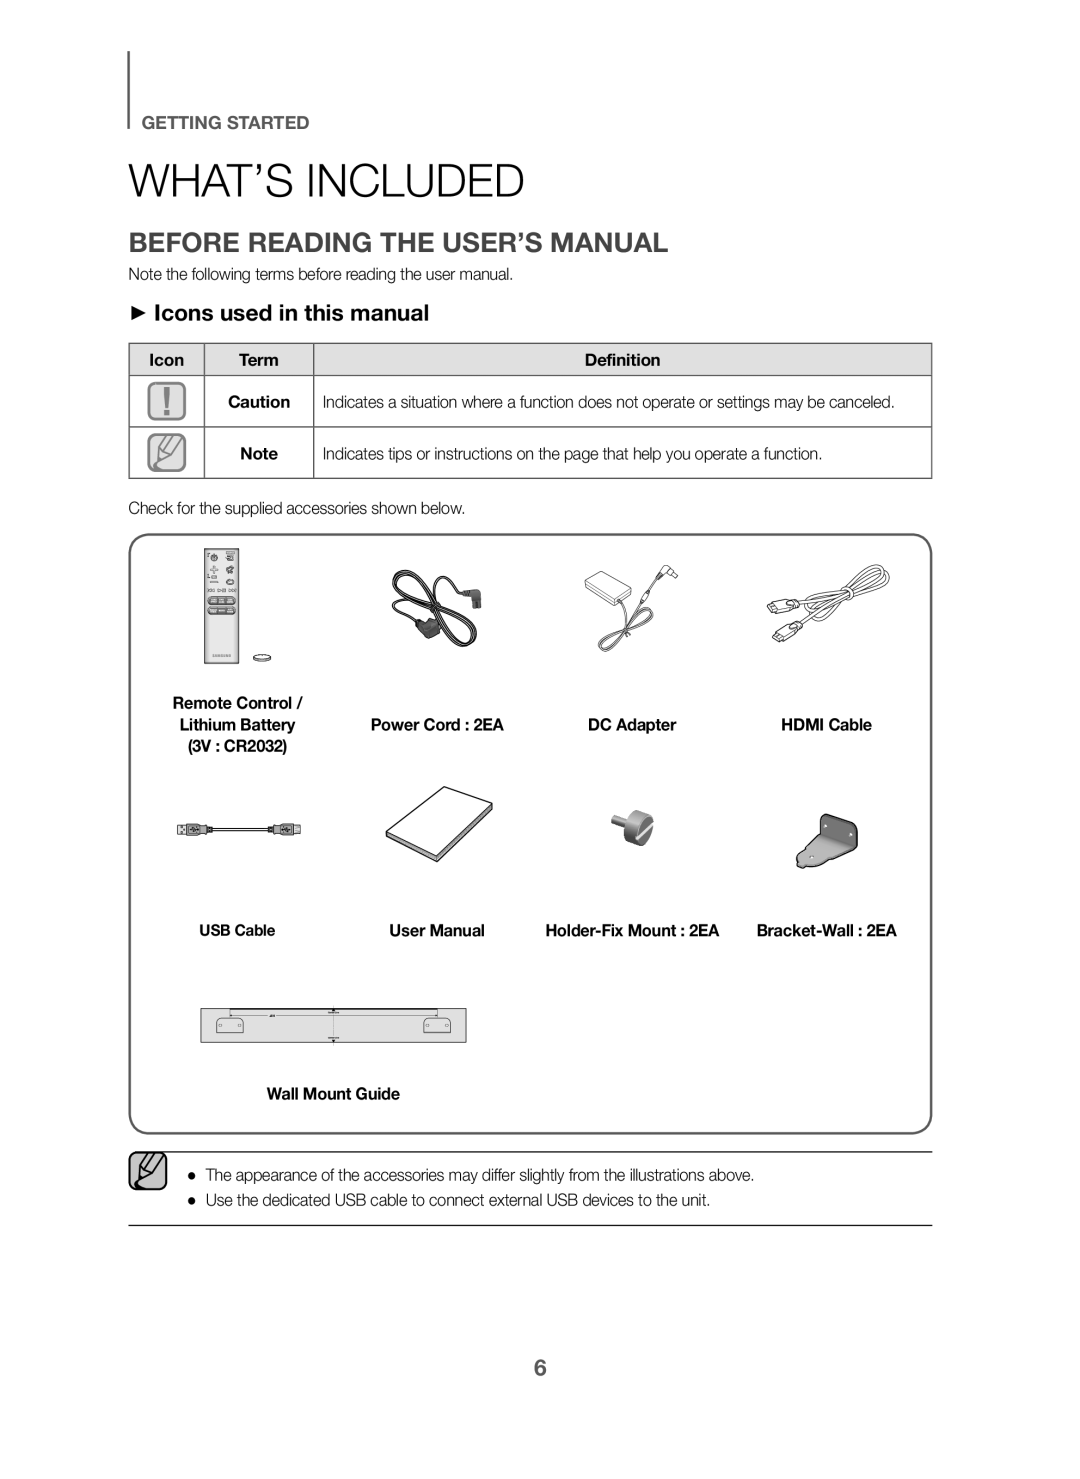 WHAT’S INCLUDED
BEFORE READING THE USER’S MANUAL
+Icons used in this manual
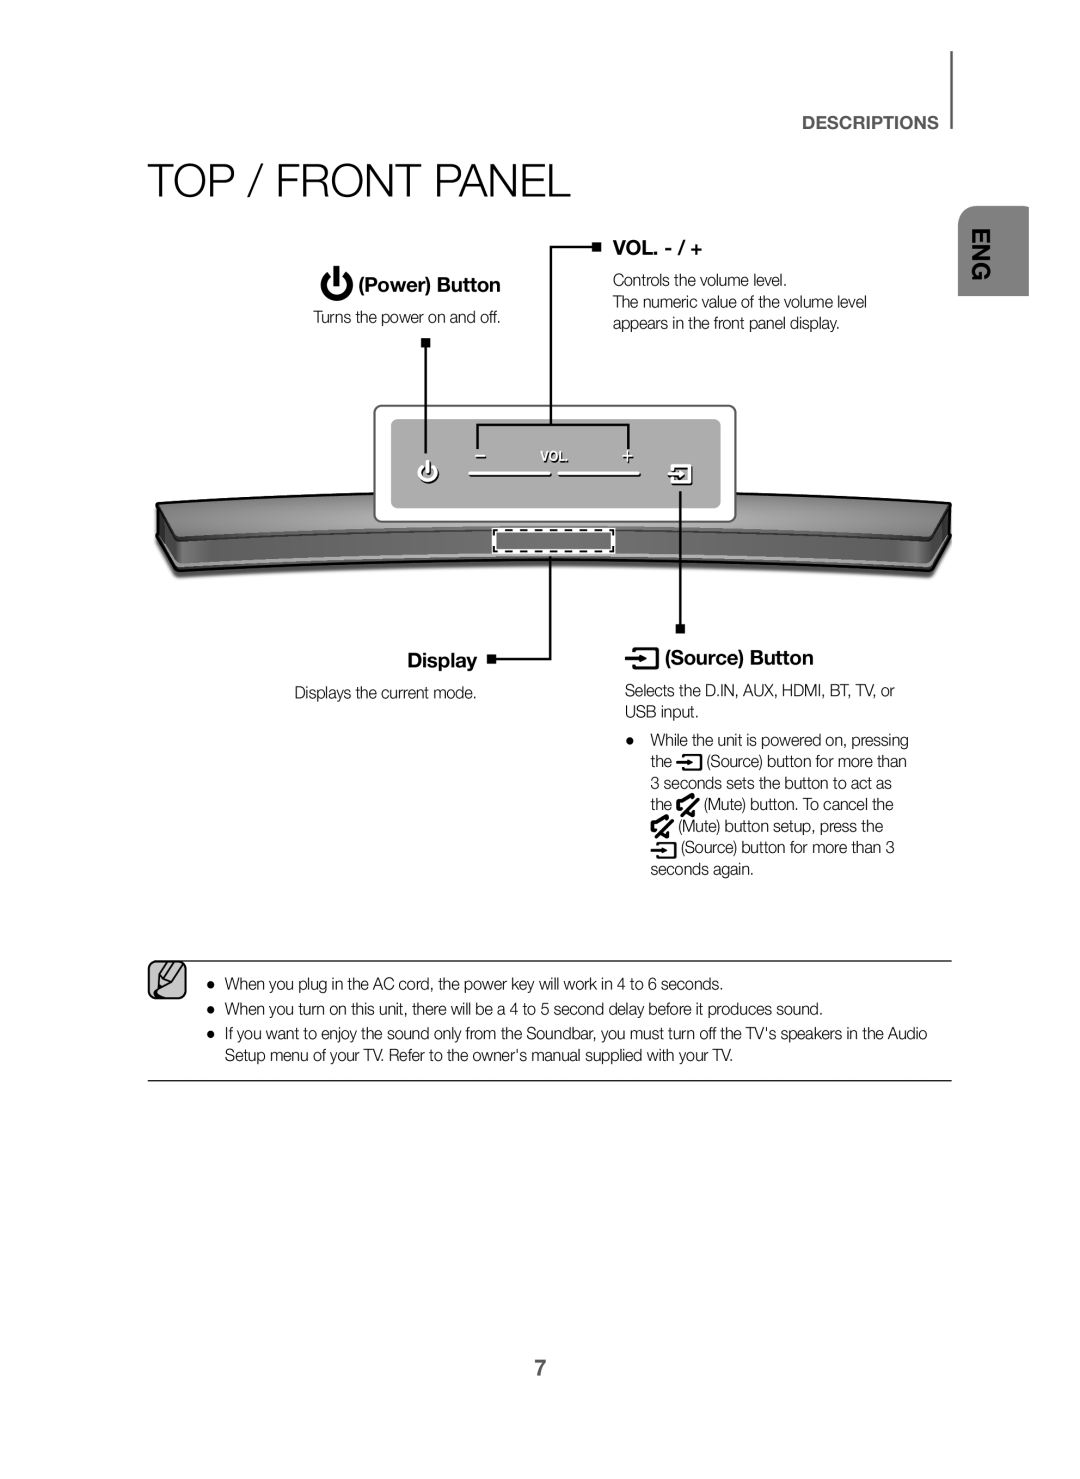 VOL. - /+
(Power) Button
Display
(Source) Button
 DESCRIPTIONS
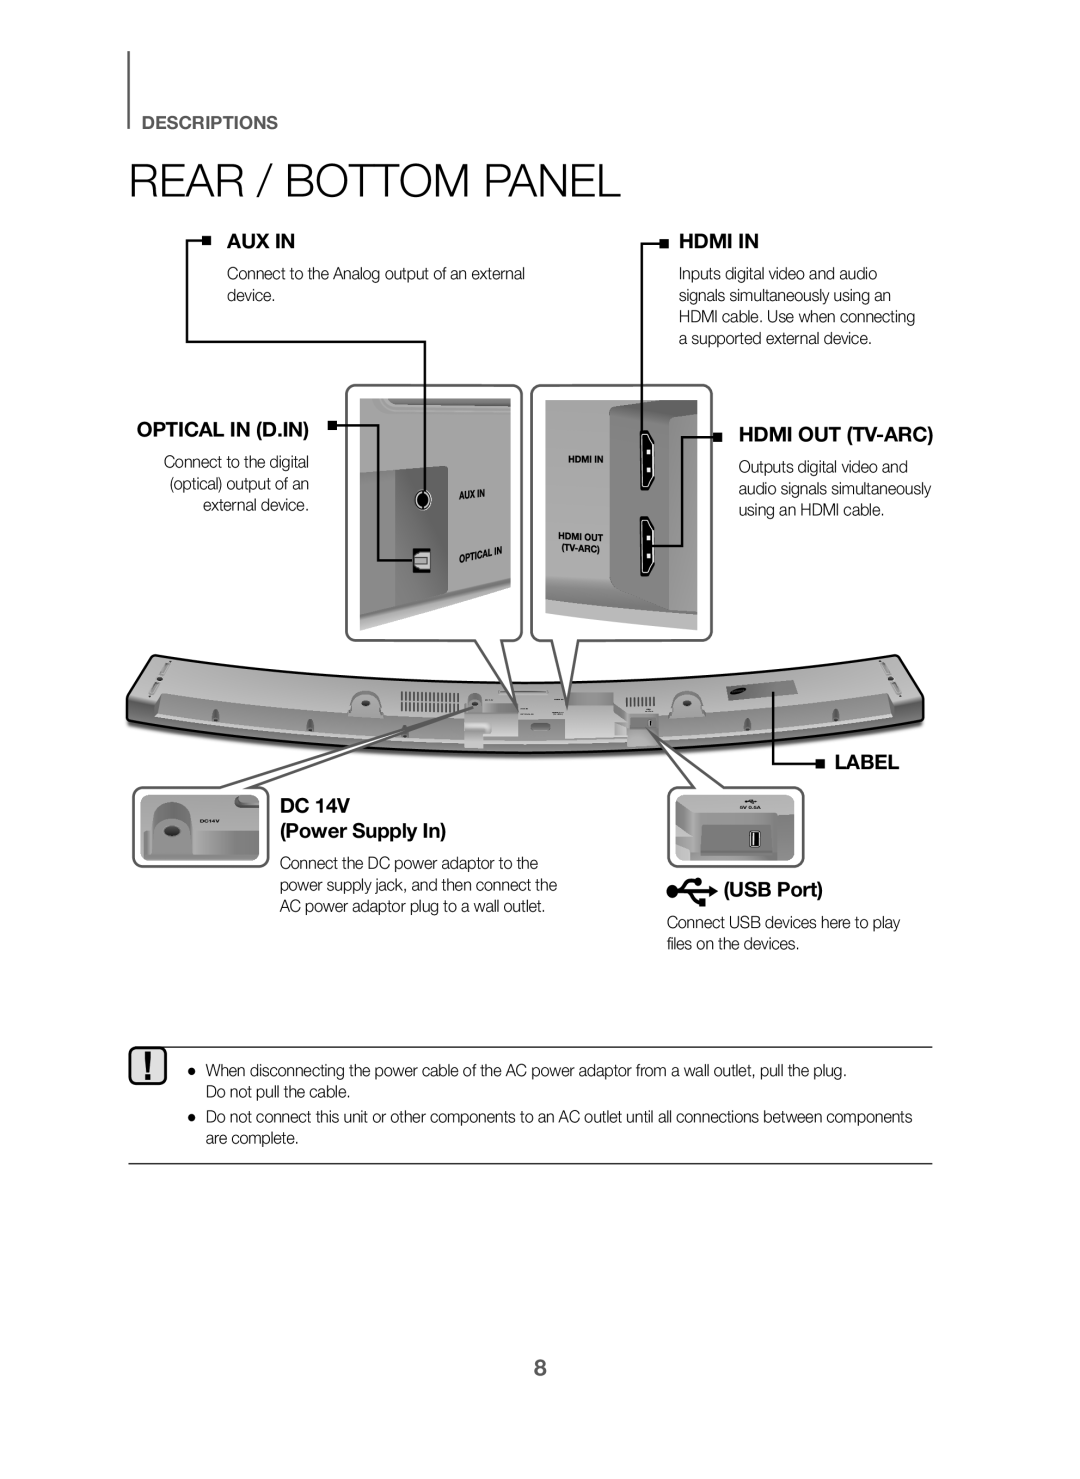
OPTICAL IN (D.IN)
(Power Supply In)
HDMI OUT (TV-ARC)
LABEL
(USB Port)
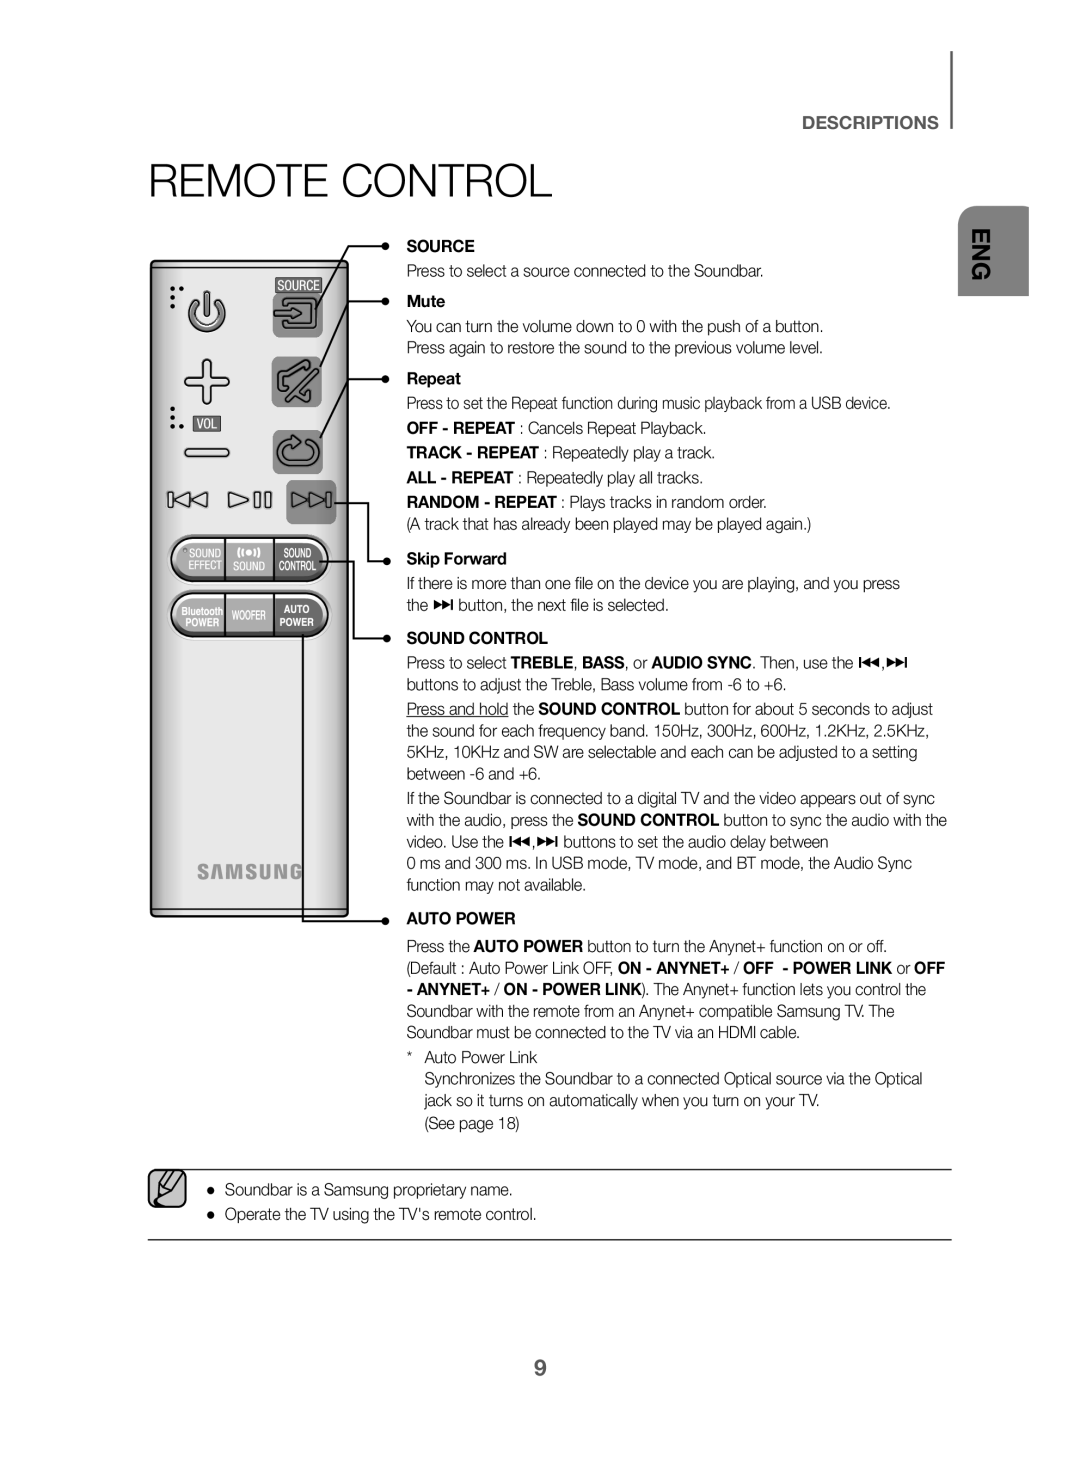 REMOTE CONTROL
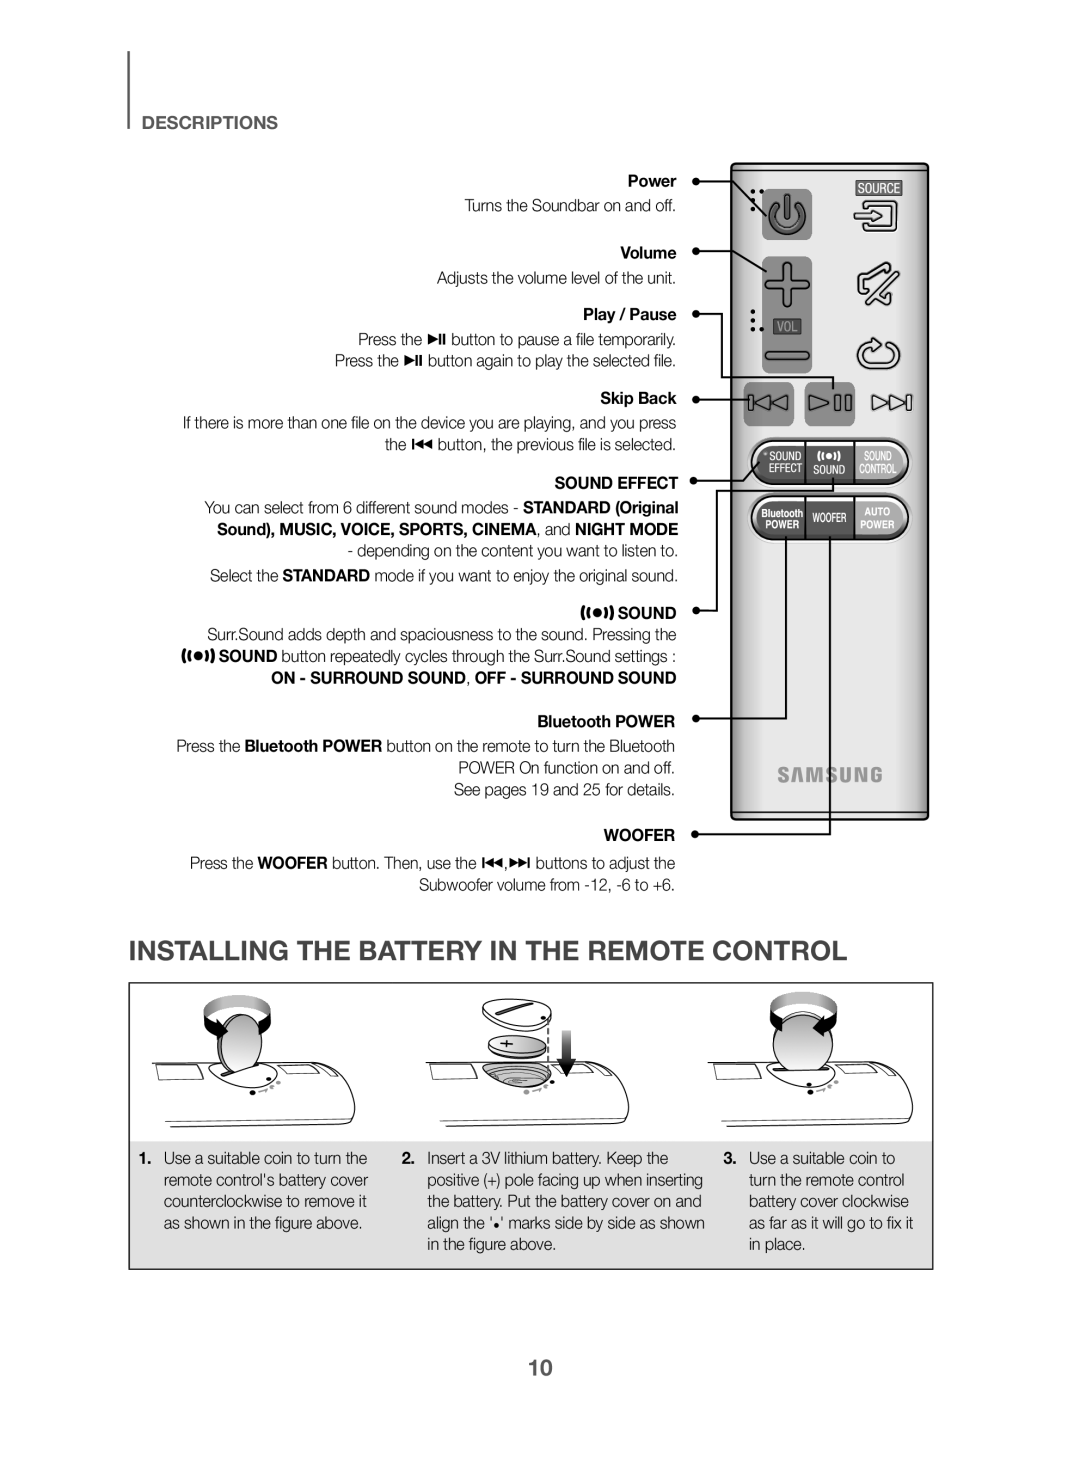 INSTALLING THE BATTERY IN THE REMOTE CONTROL
 INSTALLATION
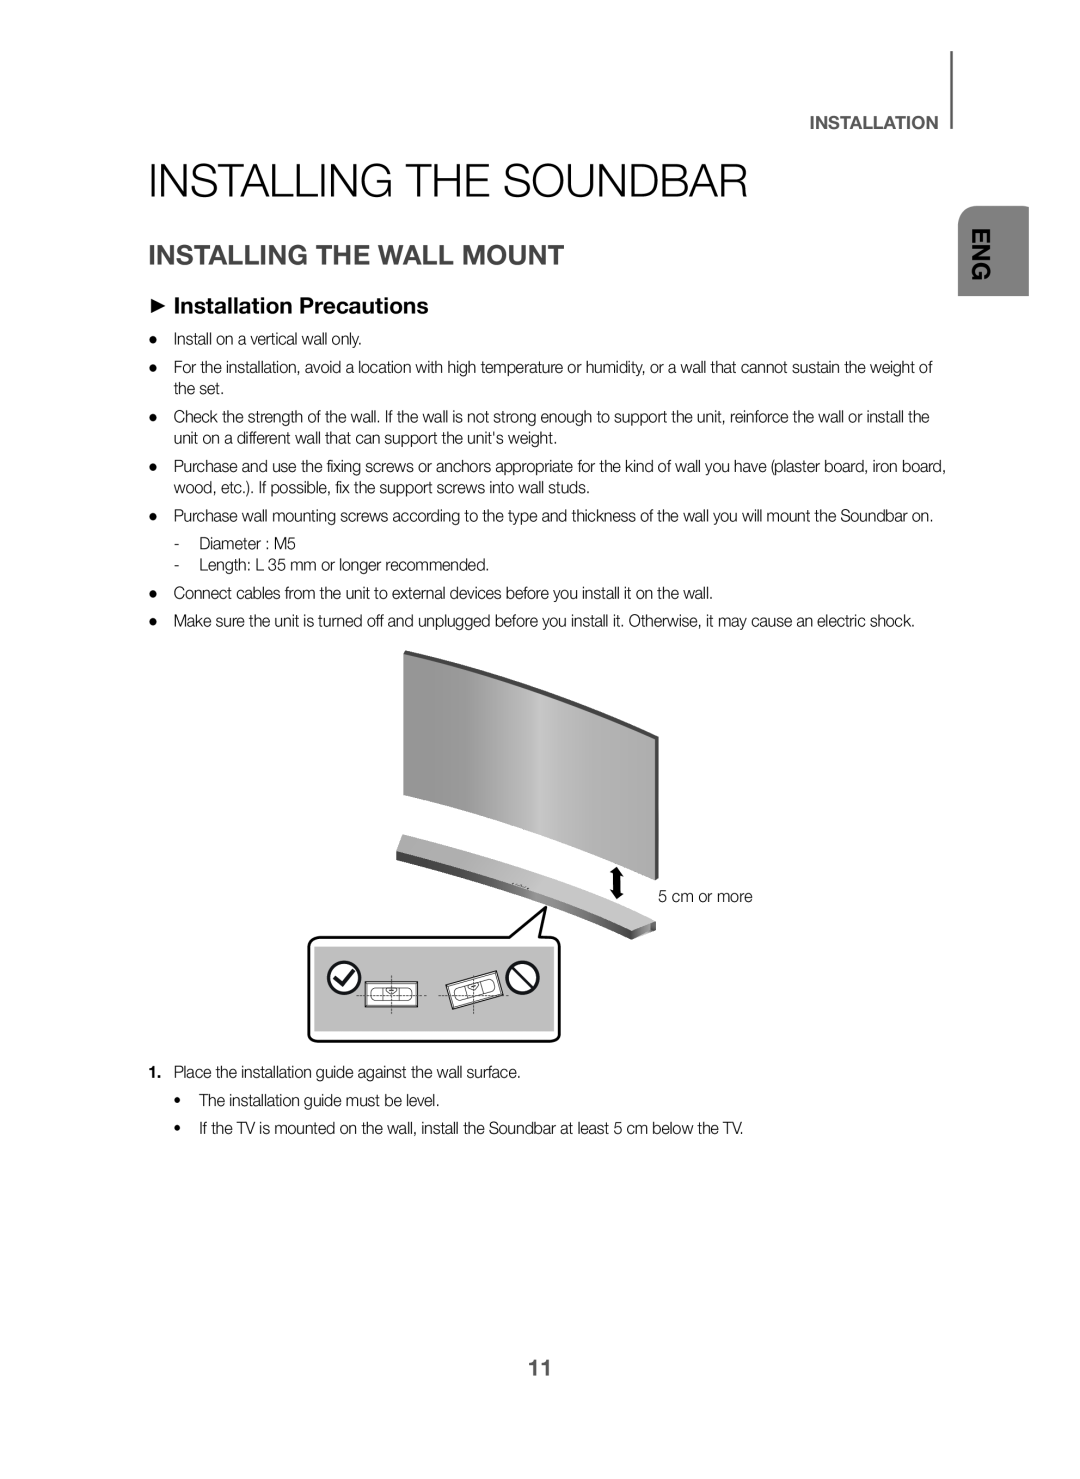
INSTALLING THE SOUNDBAR
INSTALLING THE WALL MOUNT
+Installation Precautions
 INSTALLATION
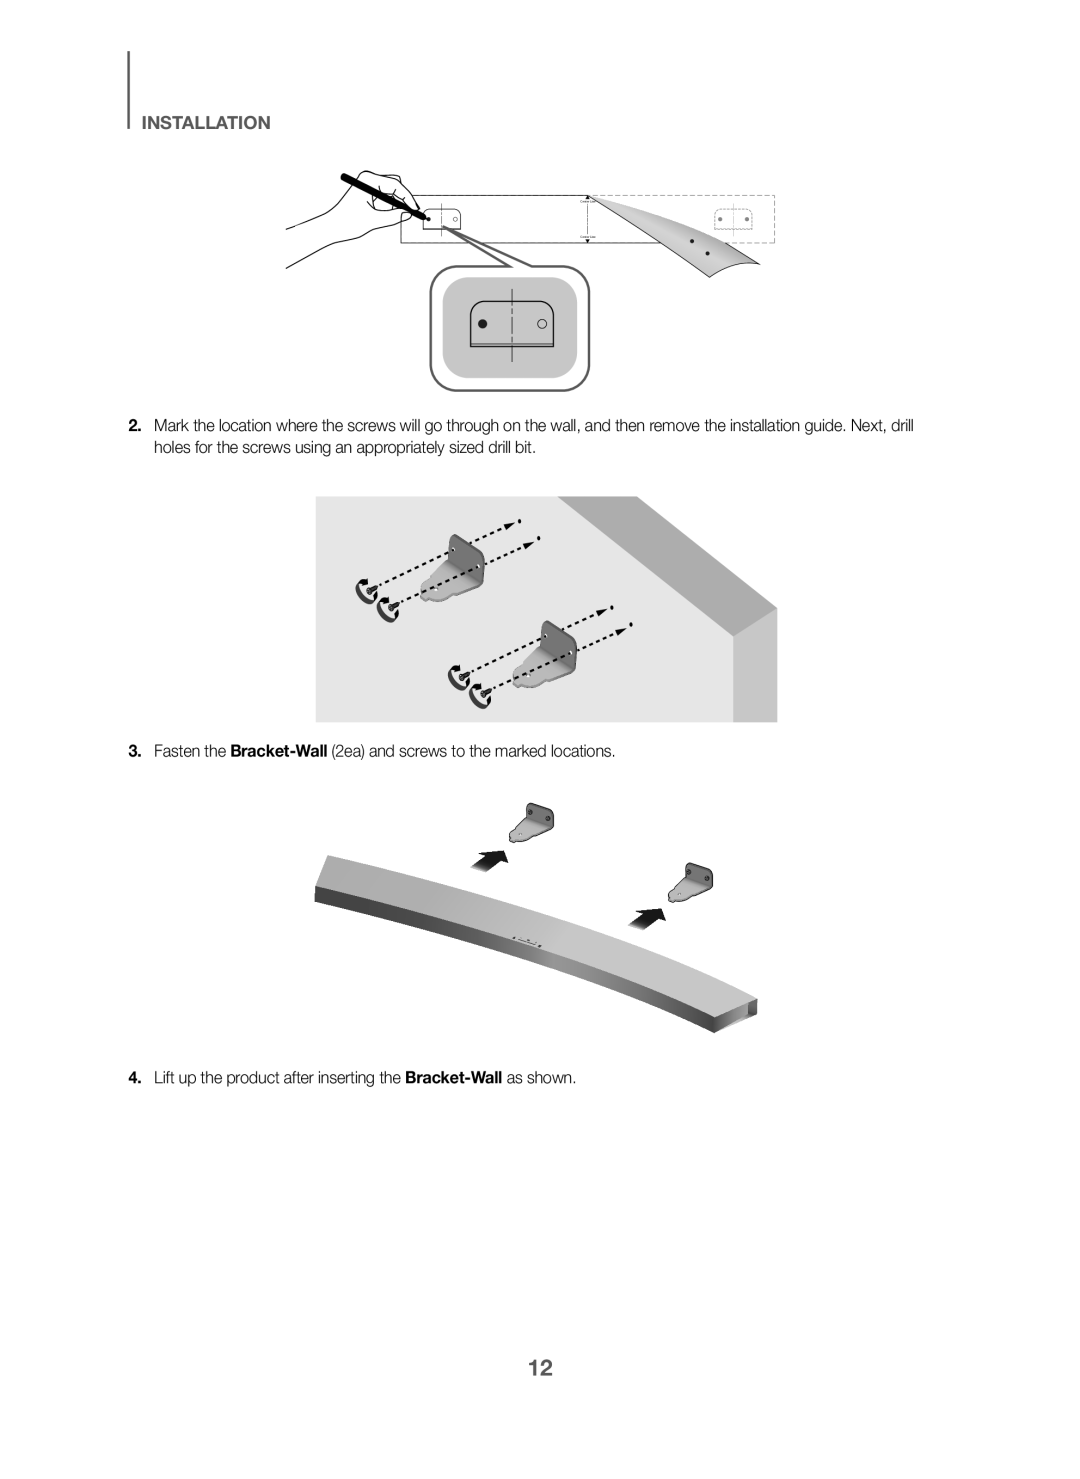
Bracket-Wall
Bracket-Wall
 INSTALLATION
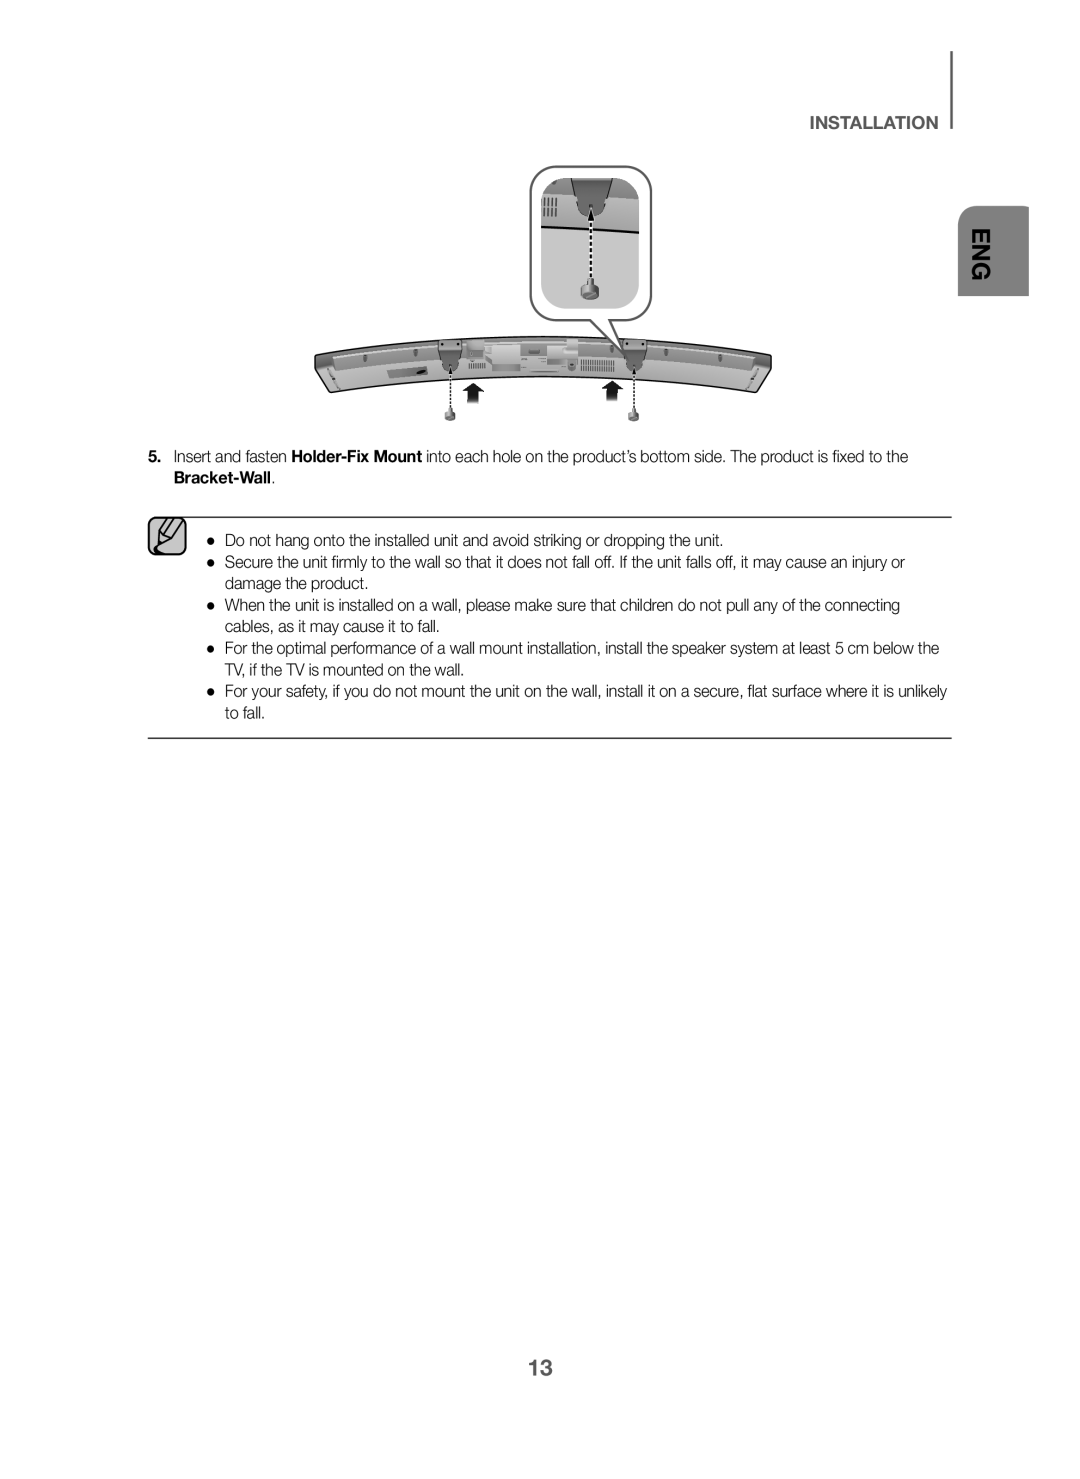
Holder-Fix
Mount
Bracket-Wall
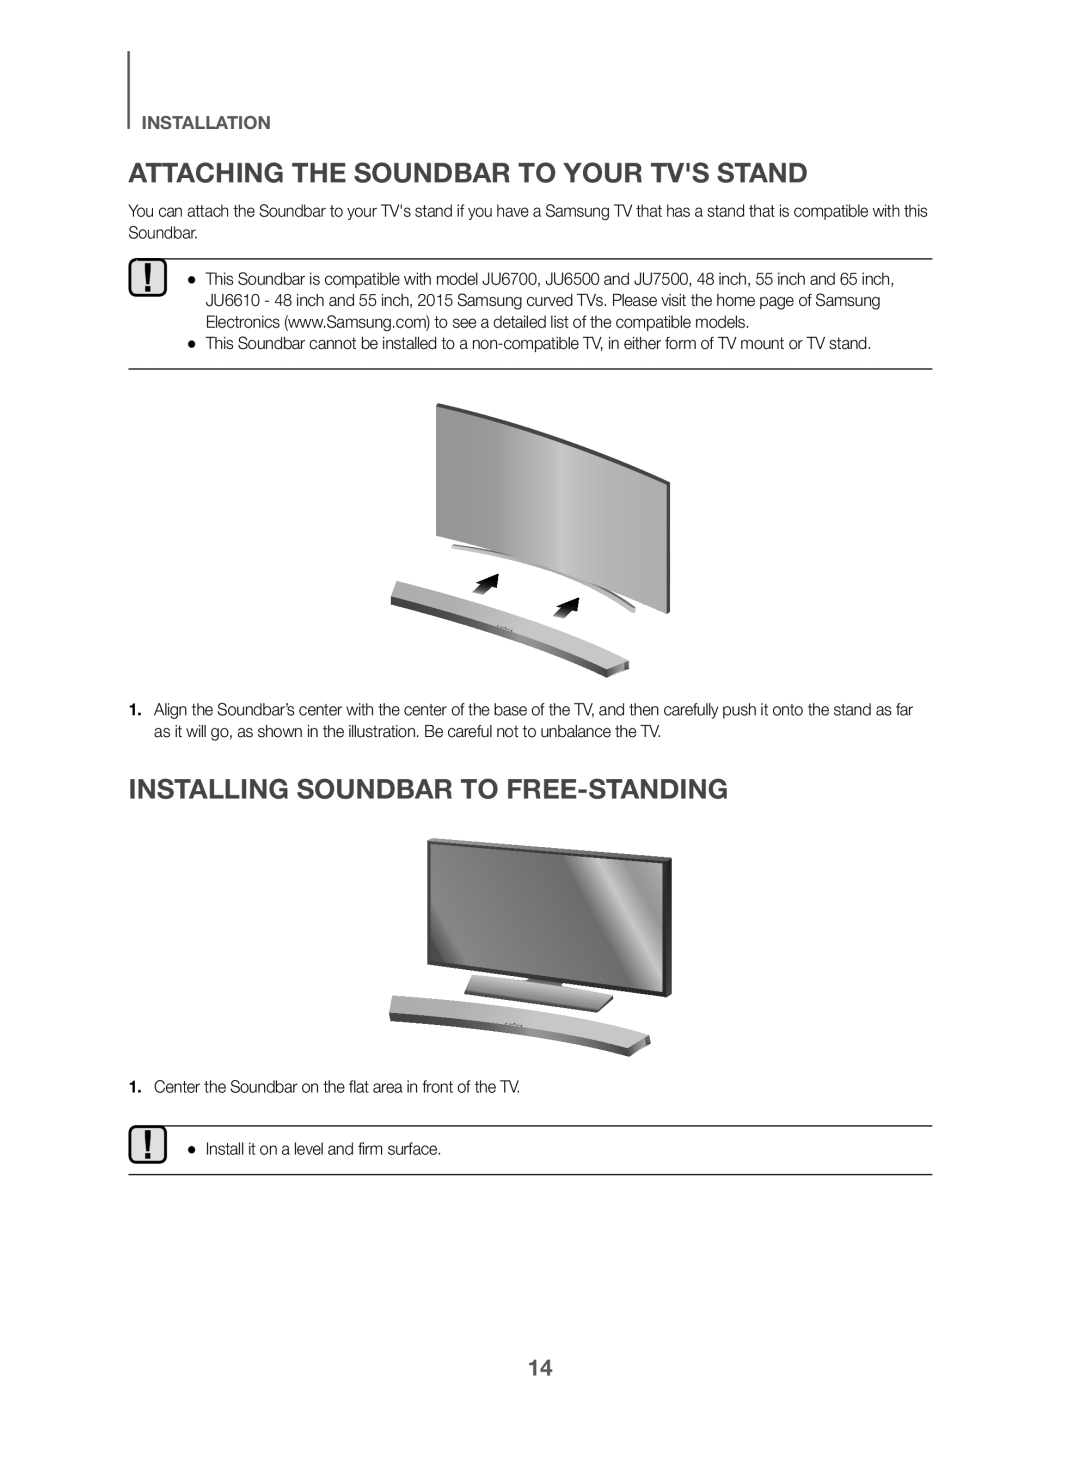 ATTACHING THE SOUNDBAR TO YOUR TV'S STAND
INSTALLING SOUNDBAR TO FREE-STANDING
 CONNECTIONS
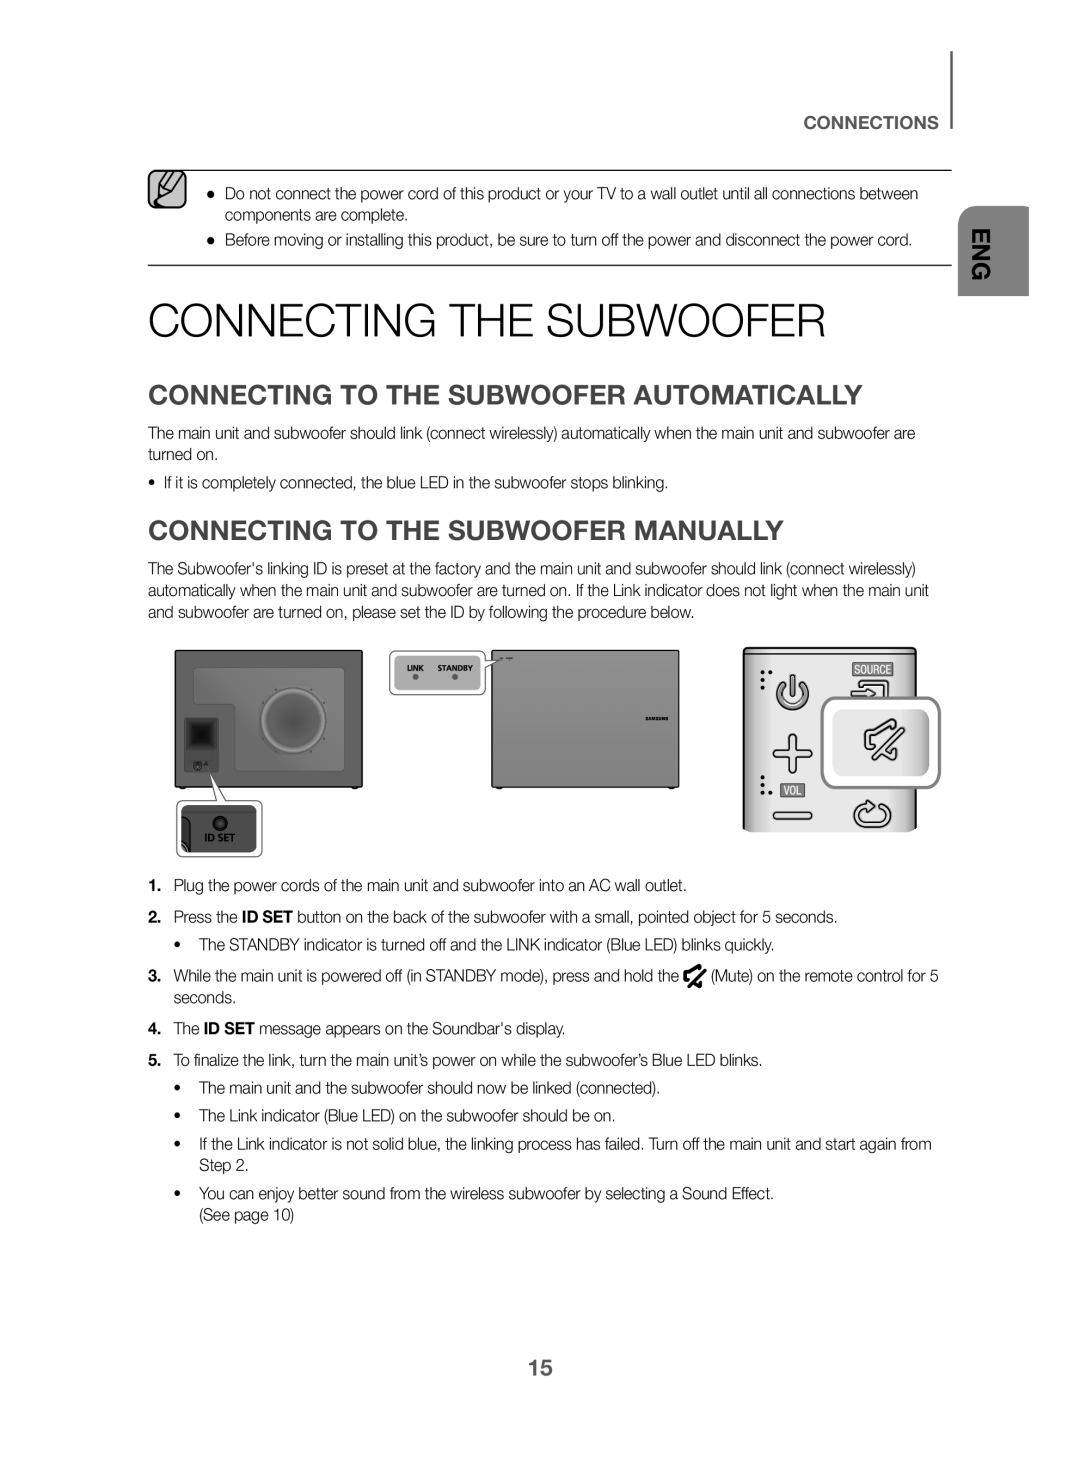
CONNECTING THE SUBWOOFER
CONNECTING TO THE SUBWOOFER AUTOMATICALLY
CONNECTING TO THE SUBWOOFER MANUALLY
 CONNECTIONS
If the main unit doesn't make a wireless connection, follow steps
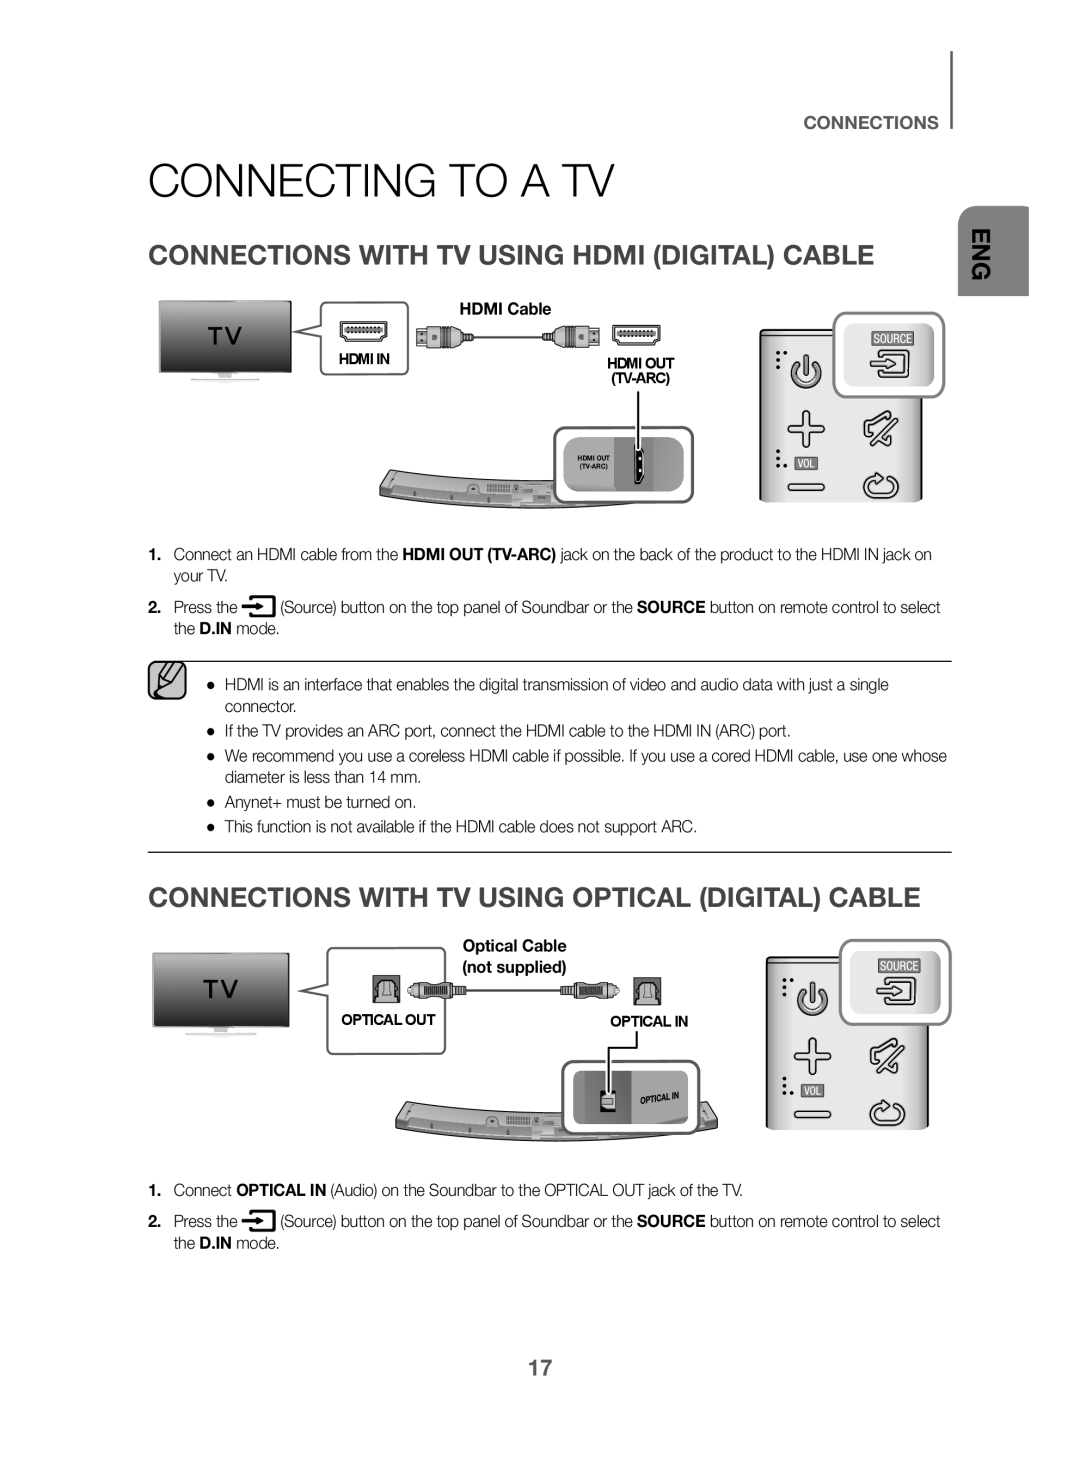 CONNECTING TO A TV
CONNECTIONS WITH TV USING HDMI (DIGITAL) CABLE
CONNECTIONS WITH TV USING OPTICAL (DIGITAL) CABLE
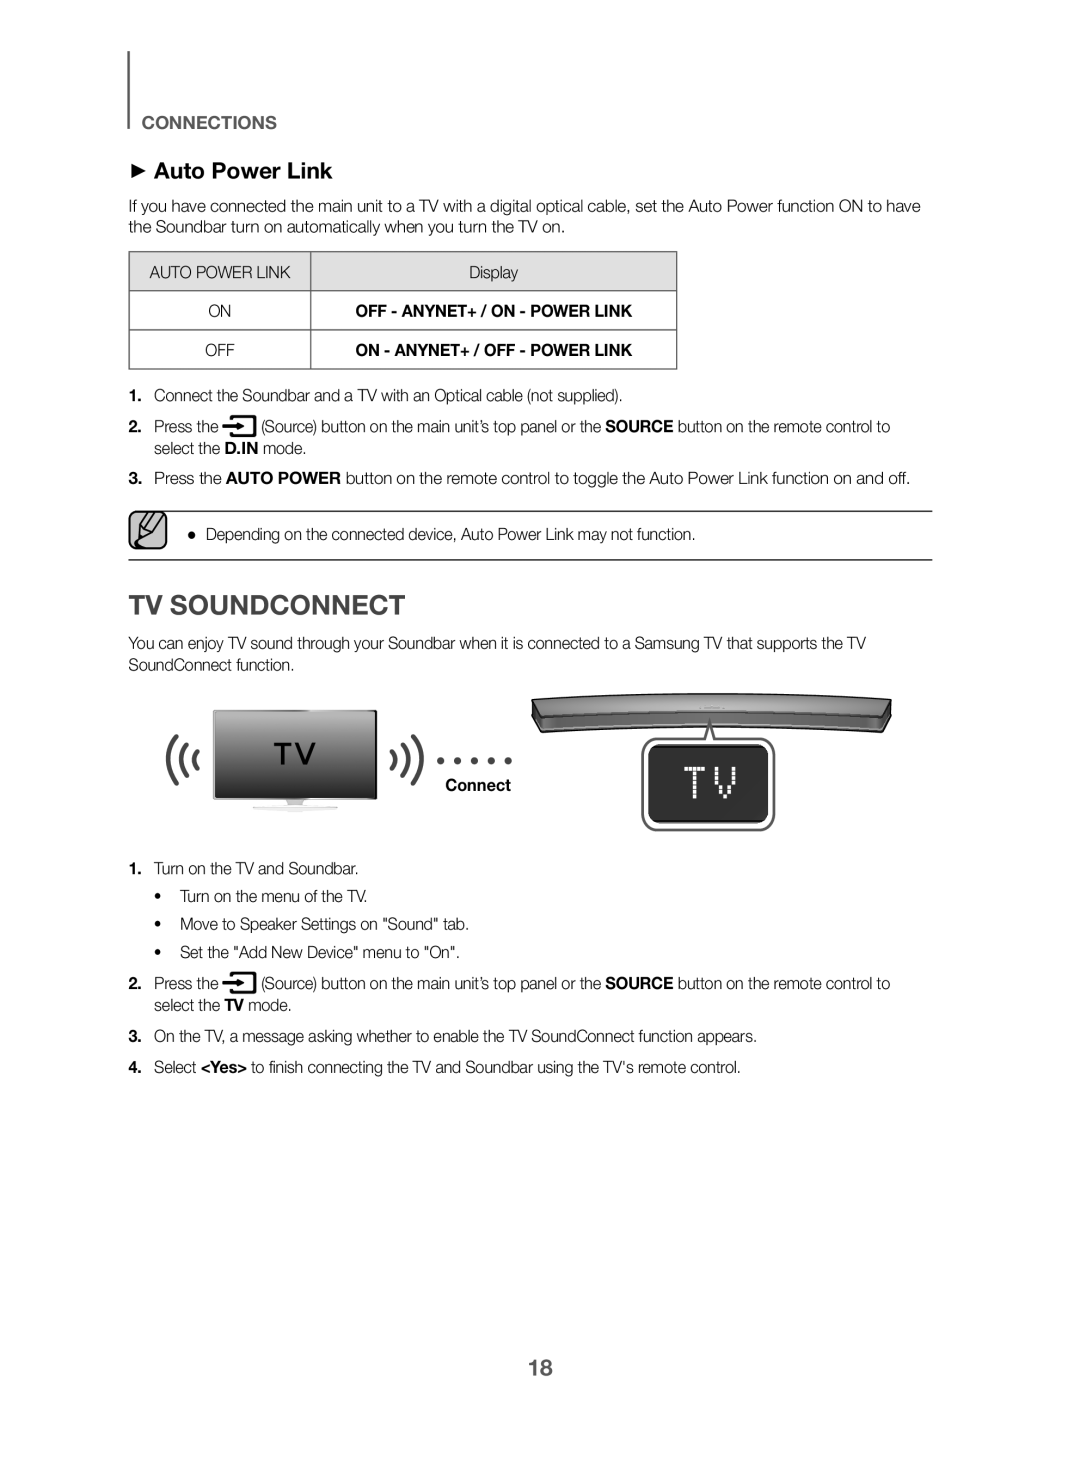 +Auto Power Link
TV SOUNDCONNECT
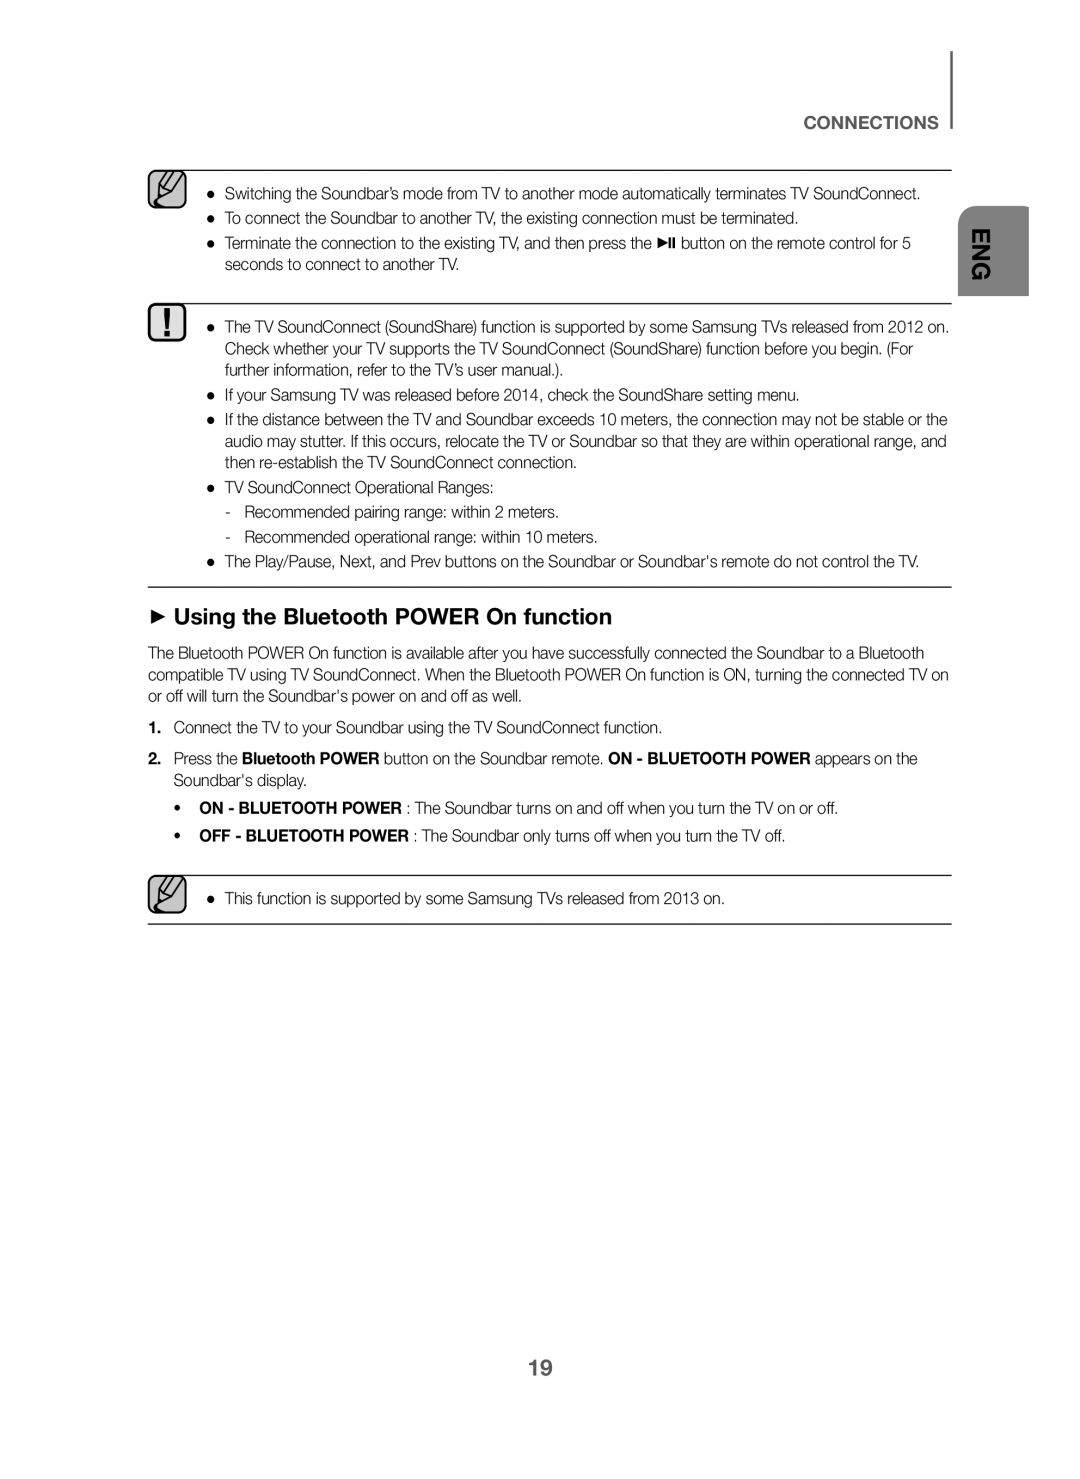 +Using the Bluetooth POWER On function
 CONNECTIONS WITH EXTERNAL DEVICE
HDMI CABLE
OPTICAL OR AUX CABLE
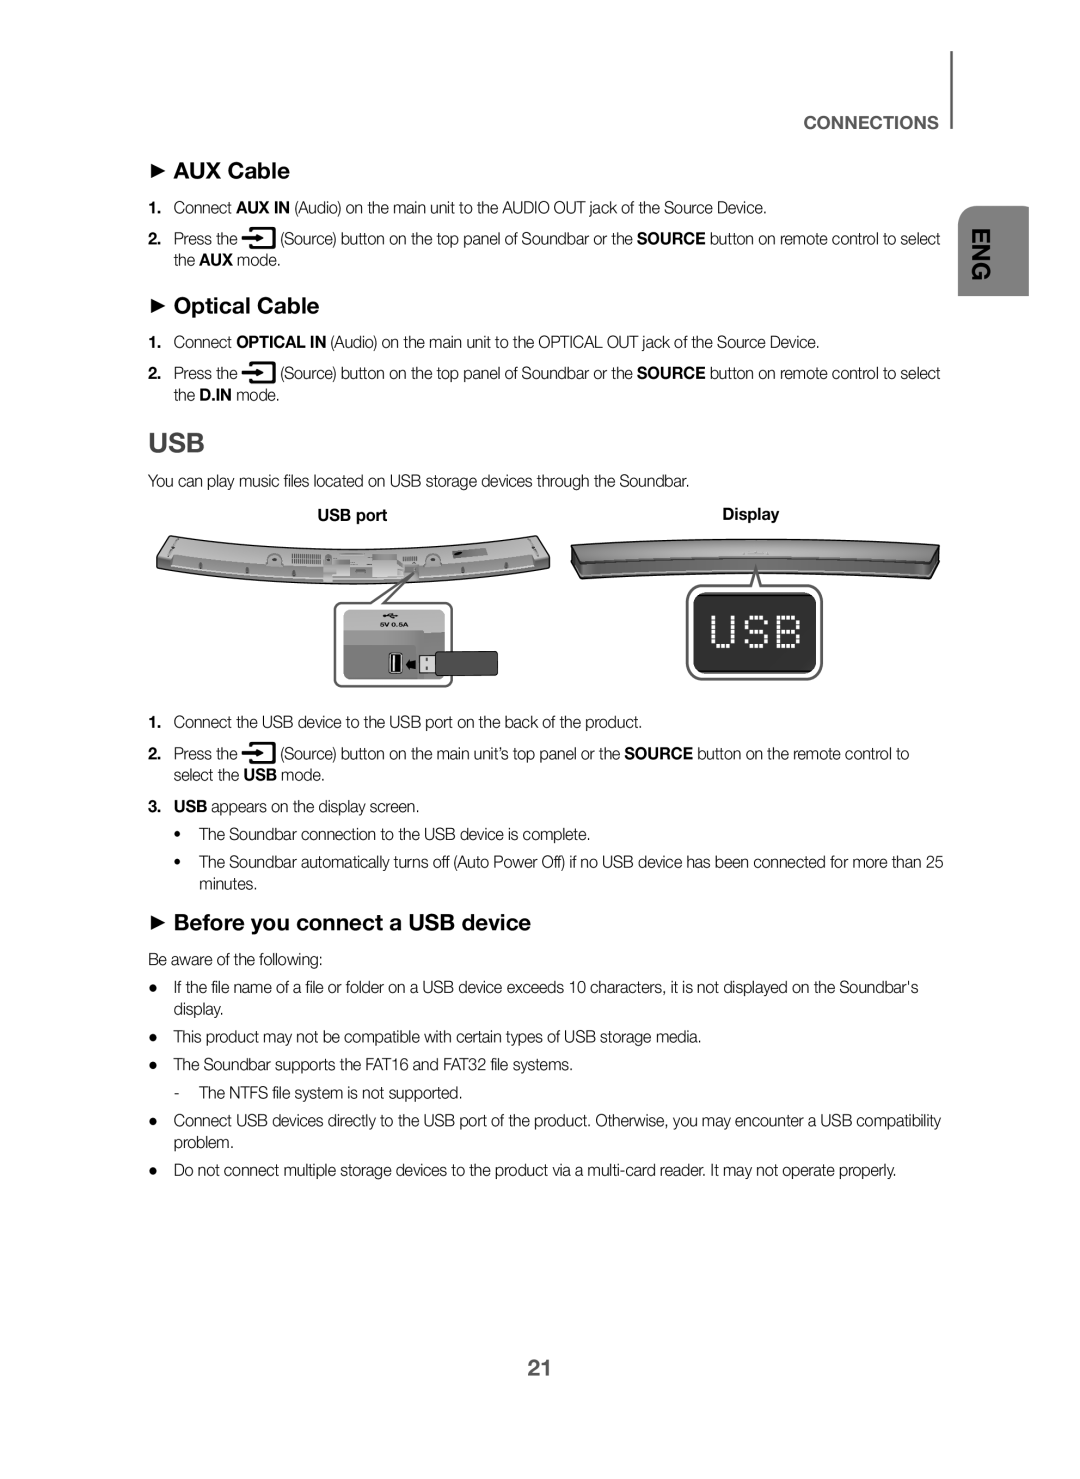 +AUX Cable
+Optical Cable
+Before you connect a USB device
 transferring files
 FUNCTIONS
INPUT MODE
AUTO POWER DOWN FUNCTION
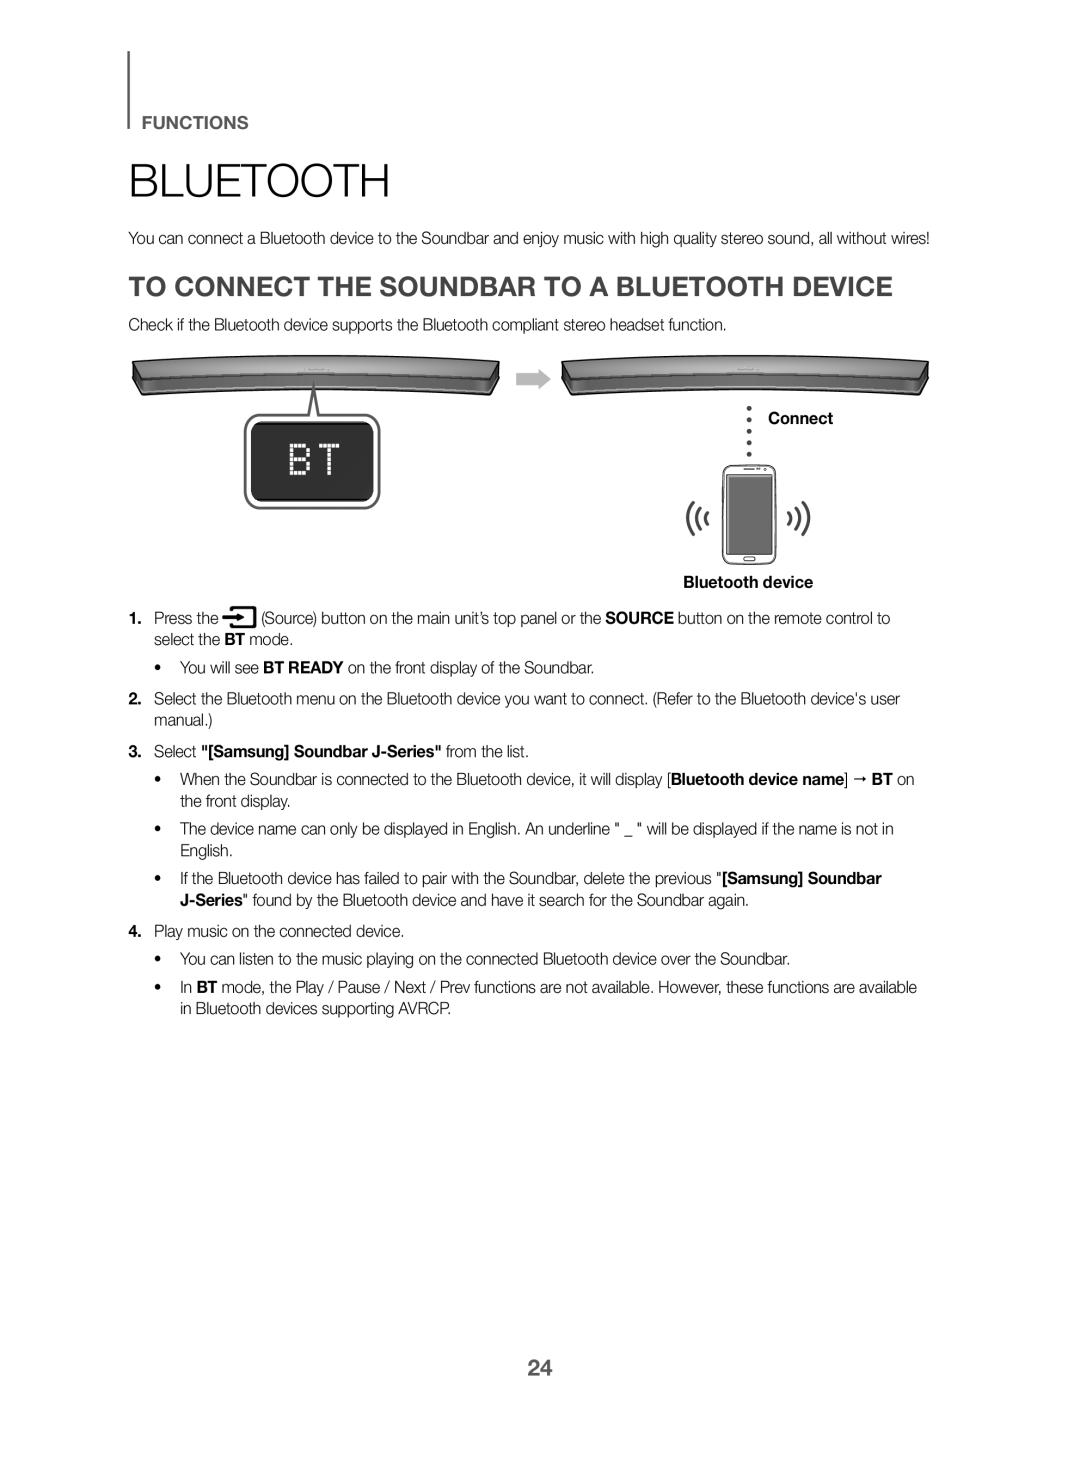 BLUETOOTH
TO CONNECT THE SOUNDBAR TO A BLUETOOTH DEVICE
 BLUETOOTH POWER ON (BLUETOOTH POWER)
TO DISCONNECT THE BLUETOOTH DEVICE FROM THE SOUNDBAR
TO DISCONNECT THE SOUNDBAR FROM THE BLUETOOTH DEVICE
 +More About Bluetooth
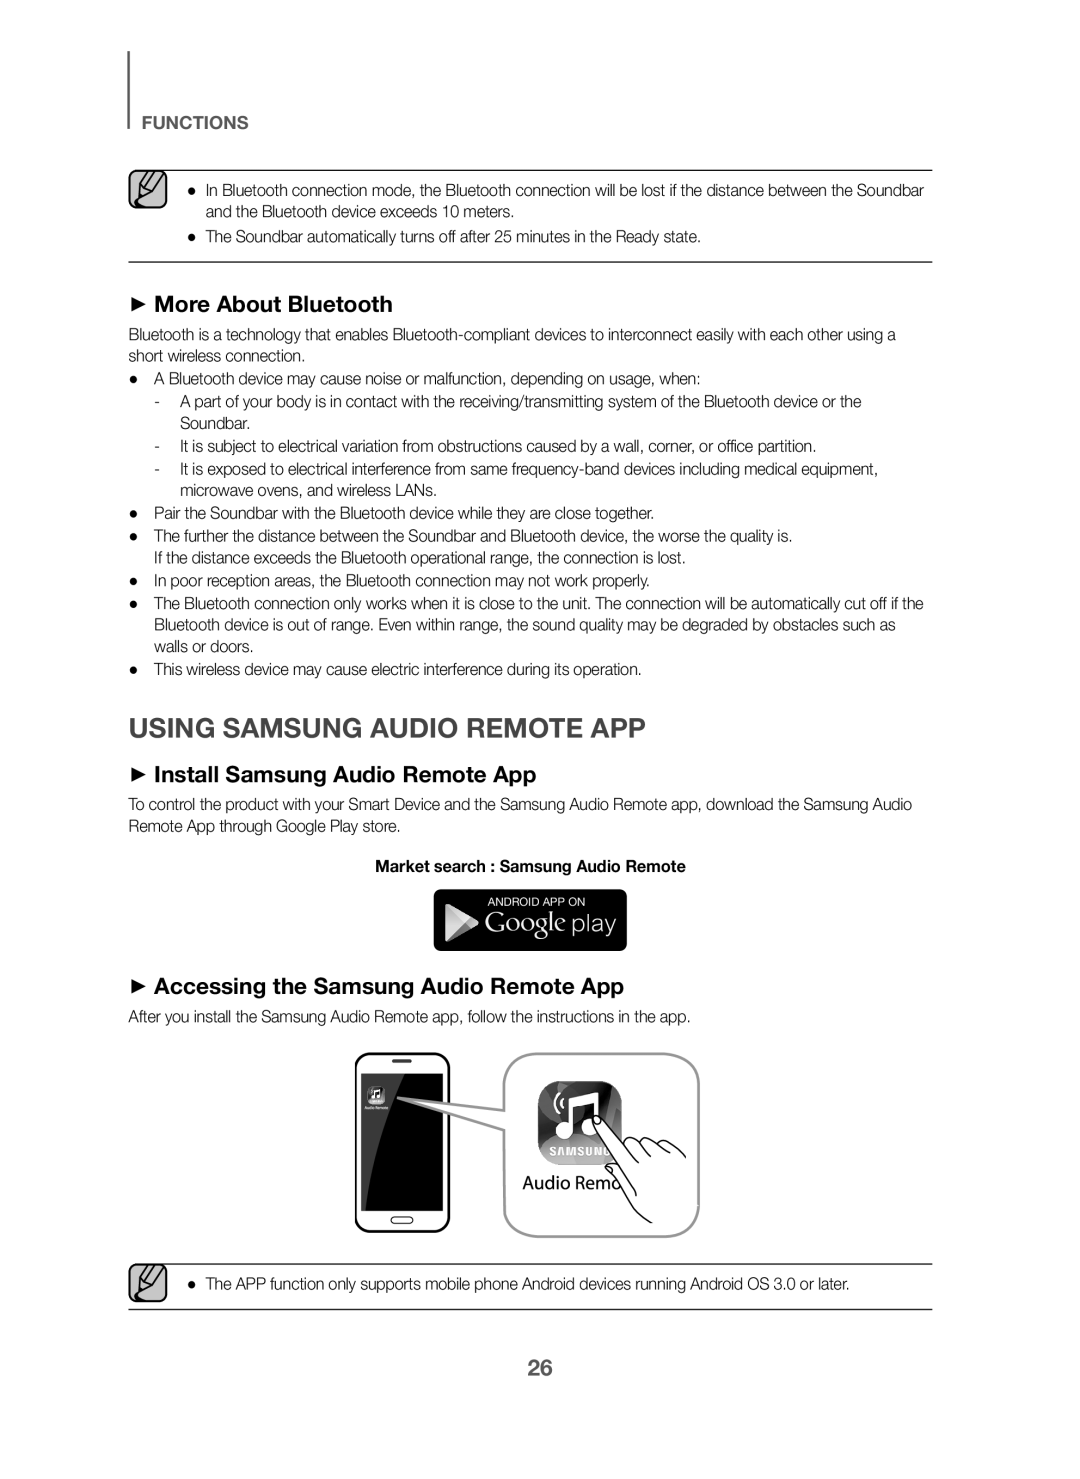
USING SAMSUNG AUDIO REMOTE APP
+Install Samsung Audio Remote App
+Accessing the Samsung Audio Remote App
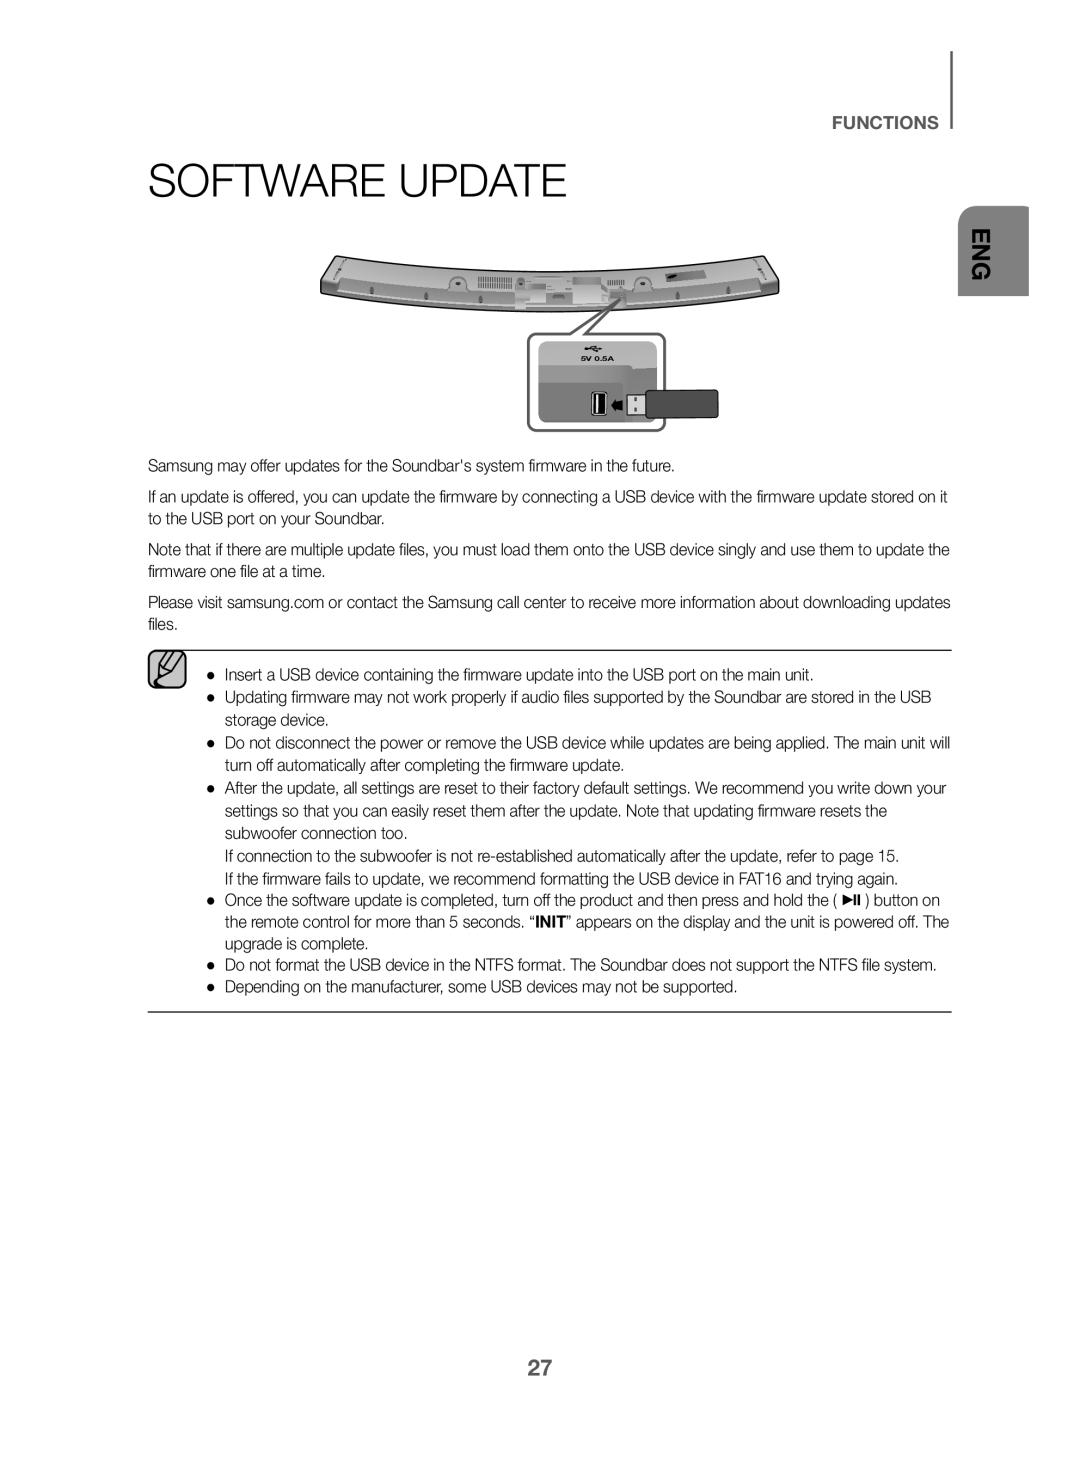 SOFTWARE UPDATE
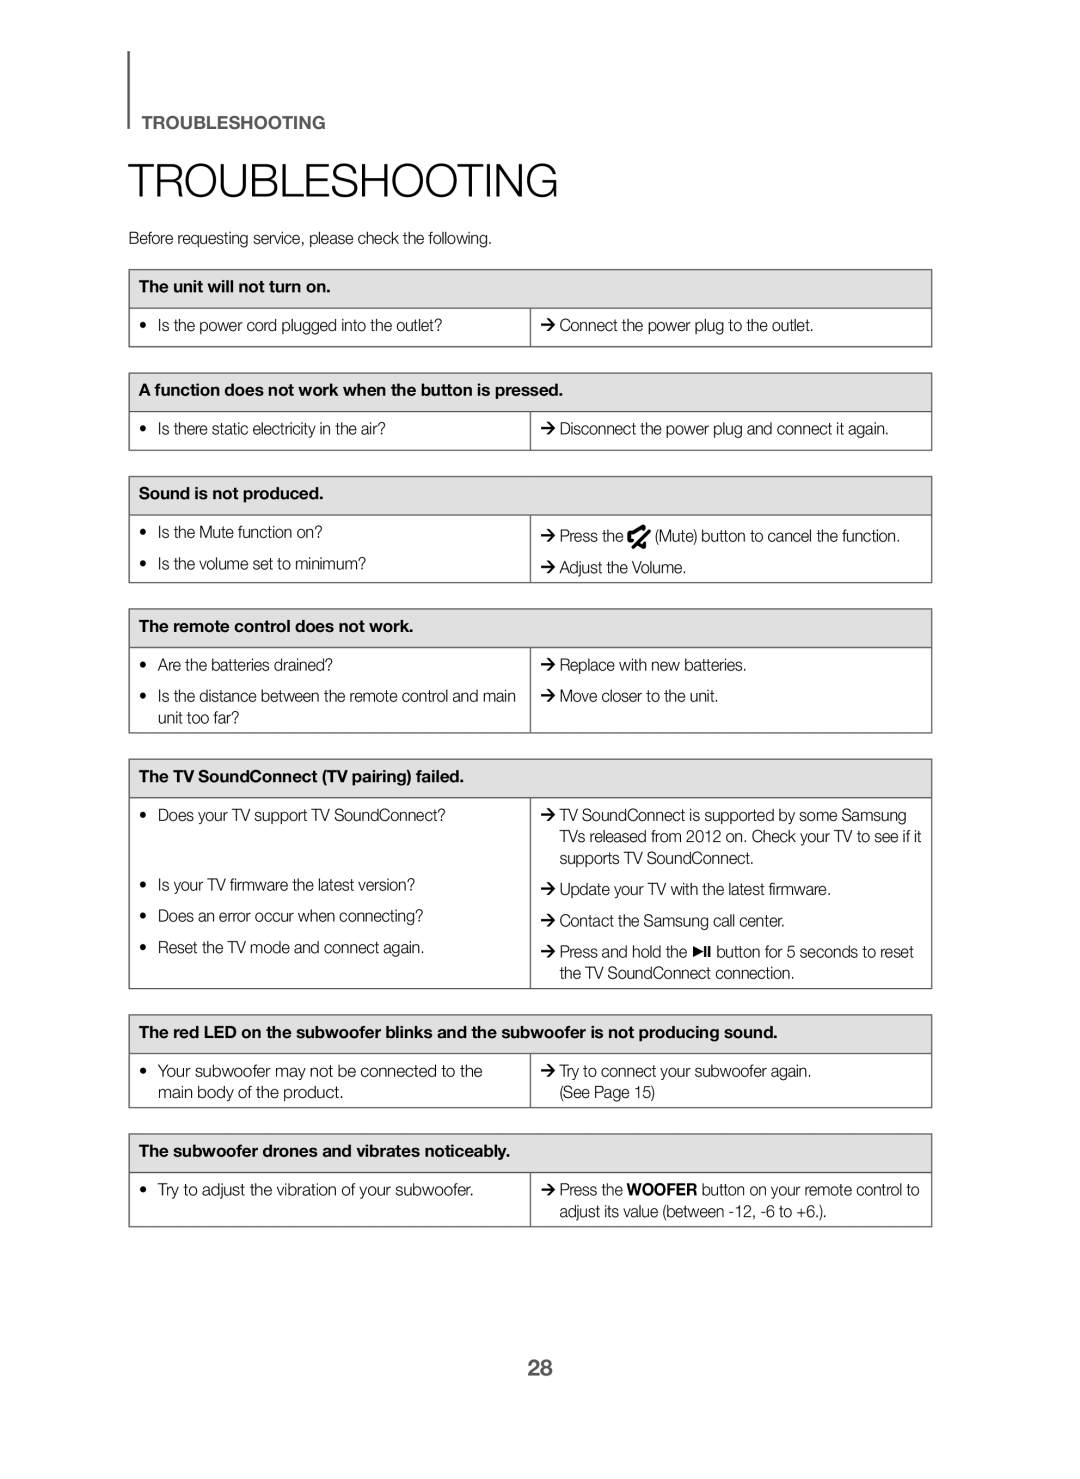 TROUBLESHOOTING
TROUBLESHOOTING
 APPENDIX
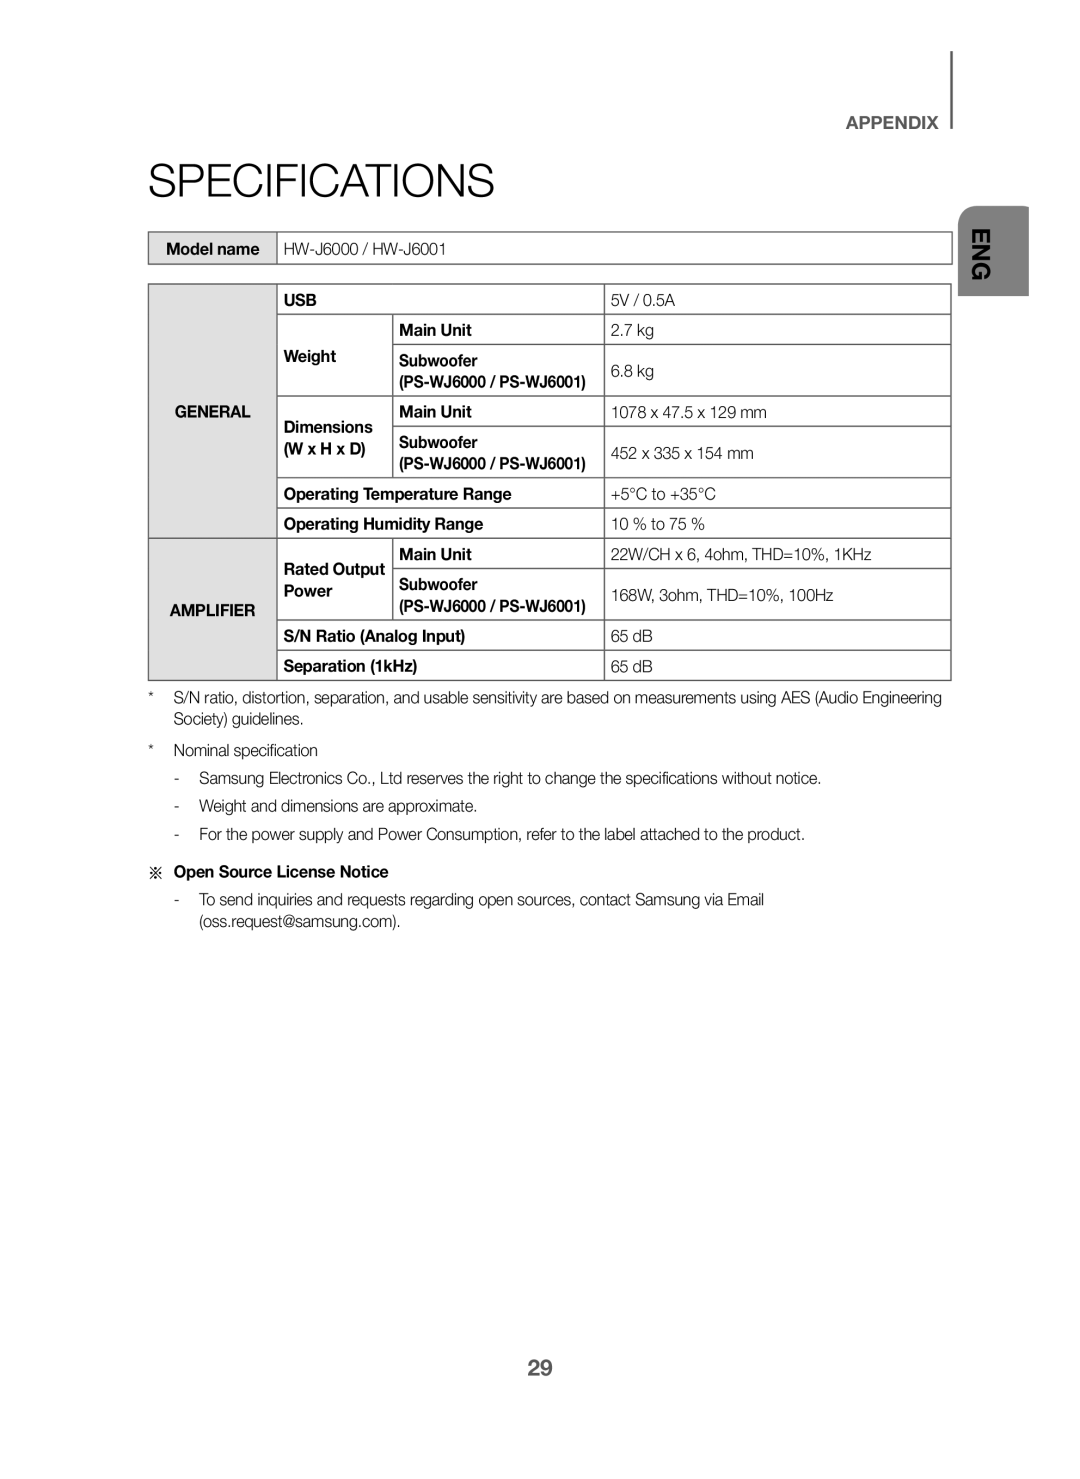
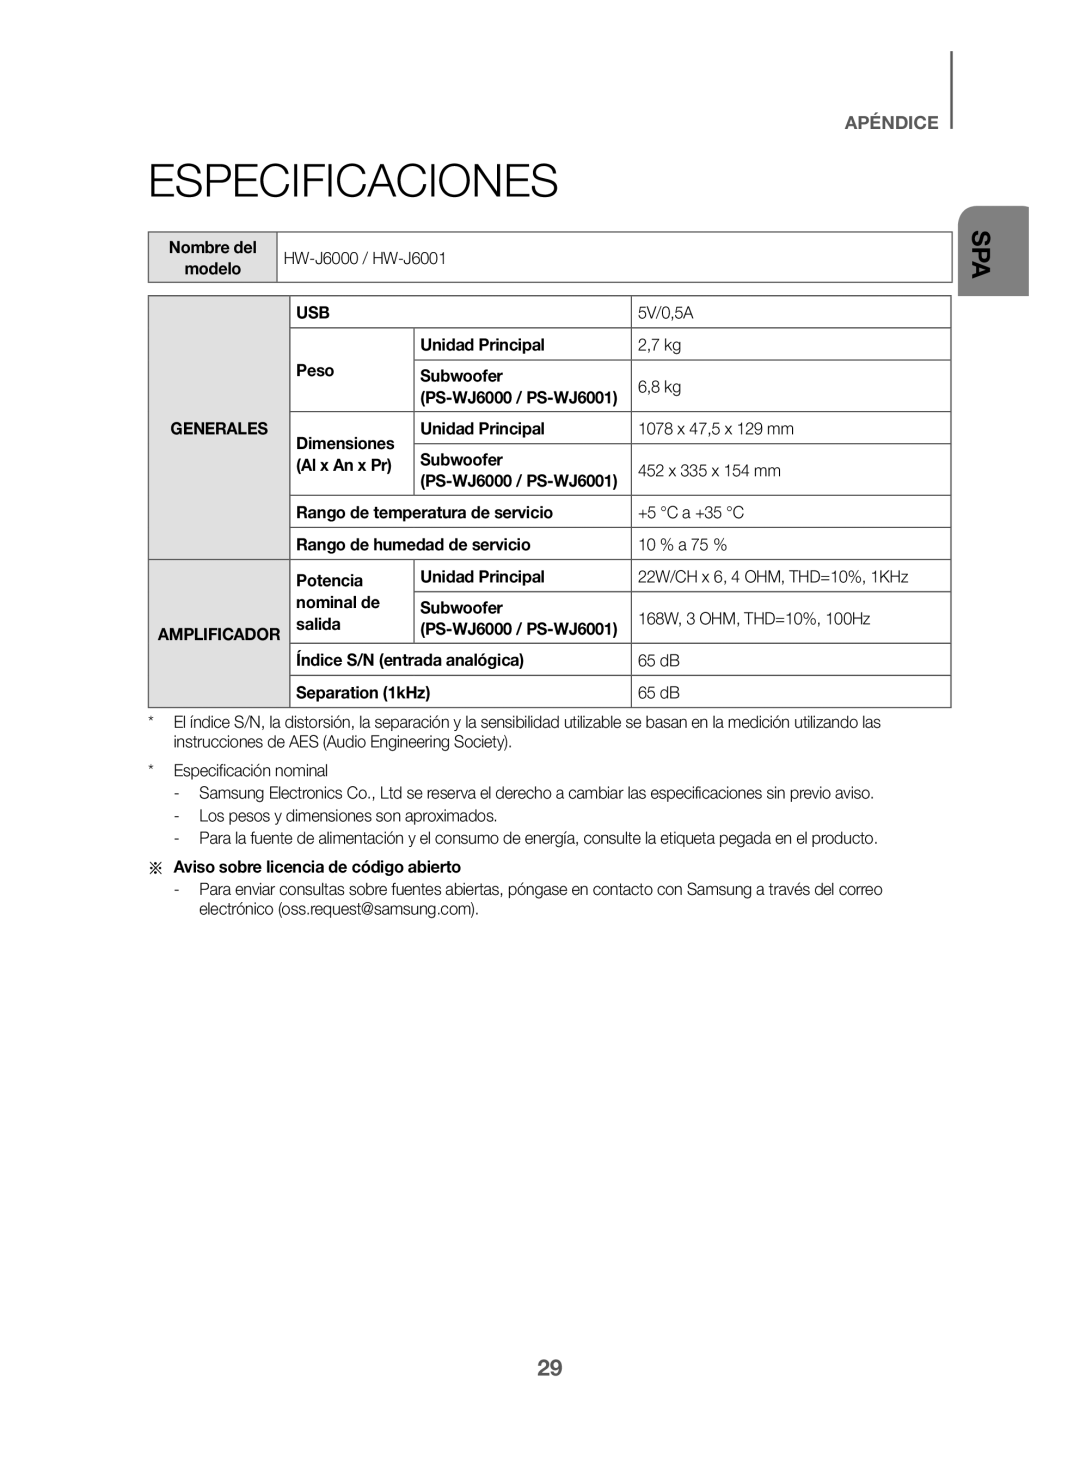
SPECIFICATIONS
 Gracias por adquirir este producto Samsung
Para recibir un servicio más completo, registre su producto en
 INTRODUCCIÓN
Función Bluetooth
LICENCIA
Soporte de USB Host
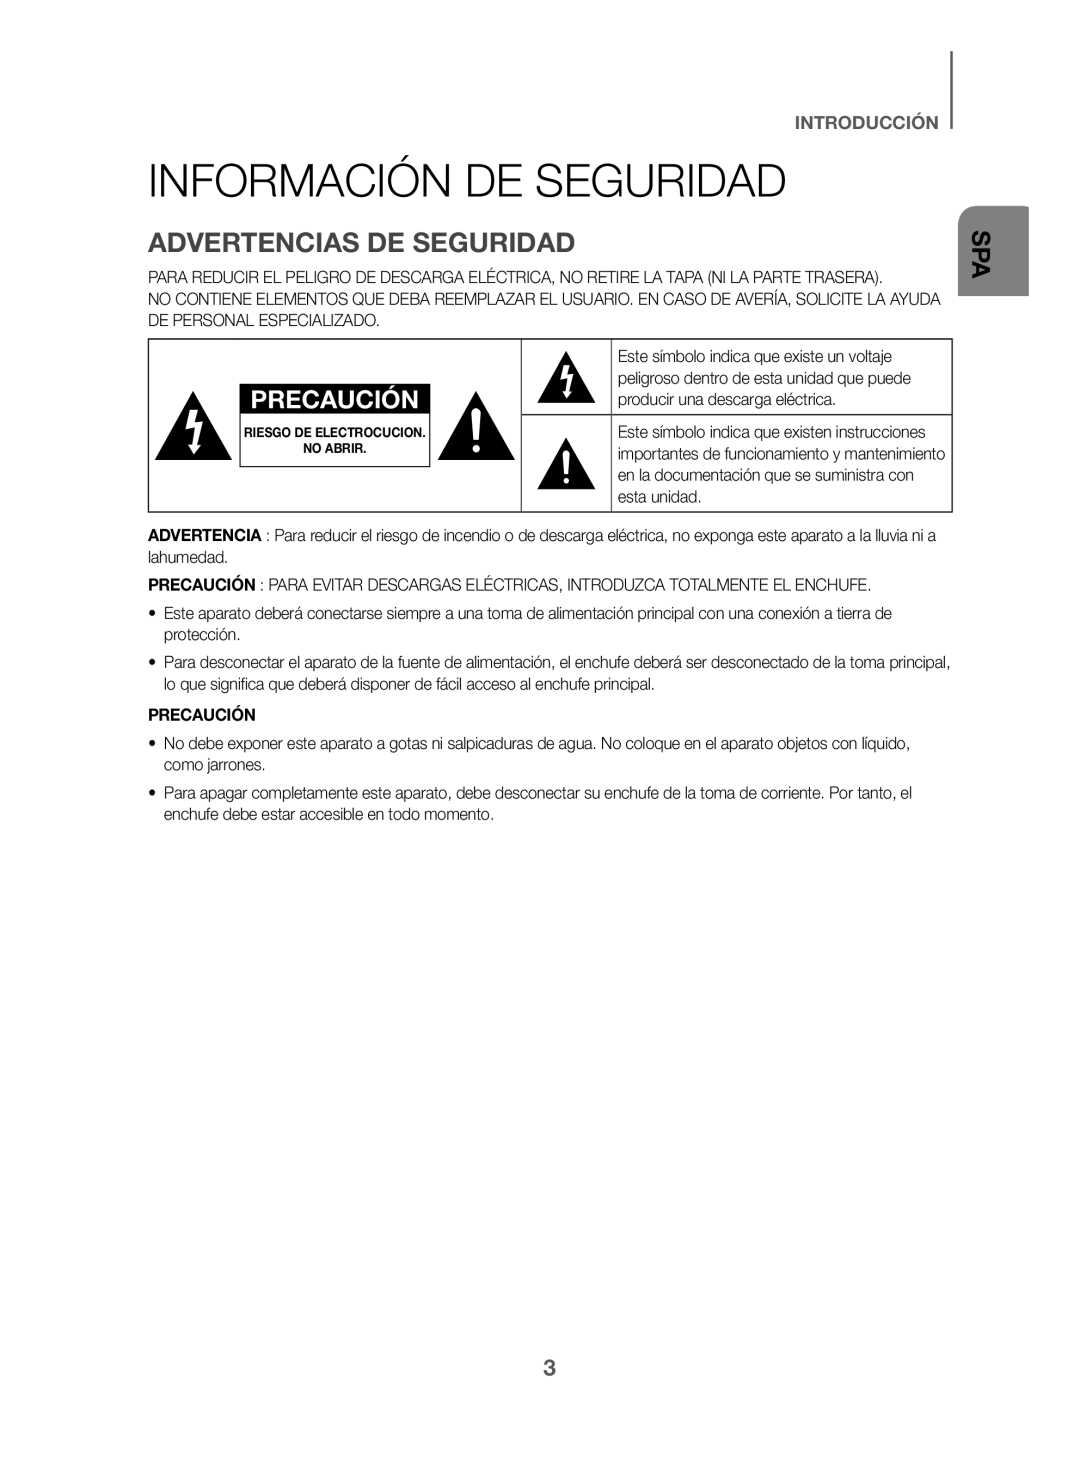 INFORMACIÓN DE SEGURIDAD
ADVERTENCIAS DE SEGURIDAD
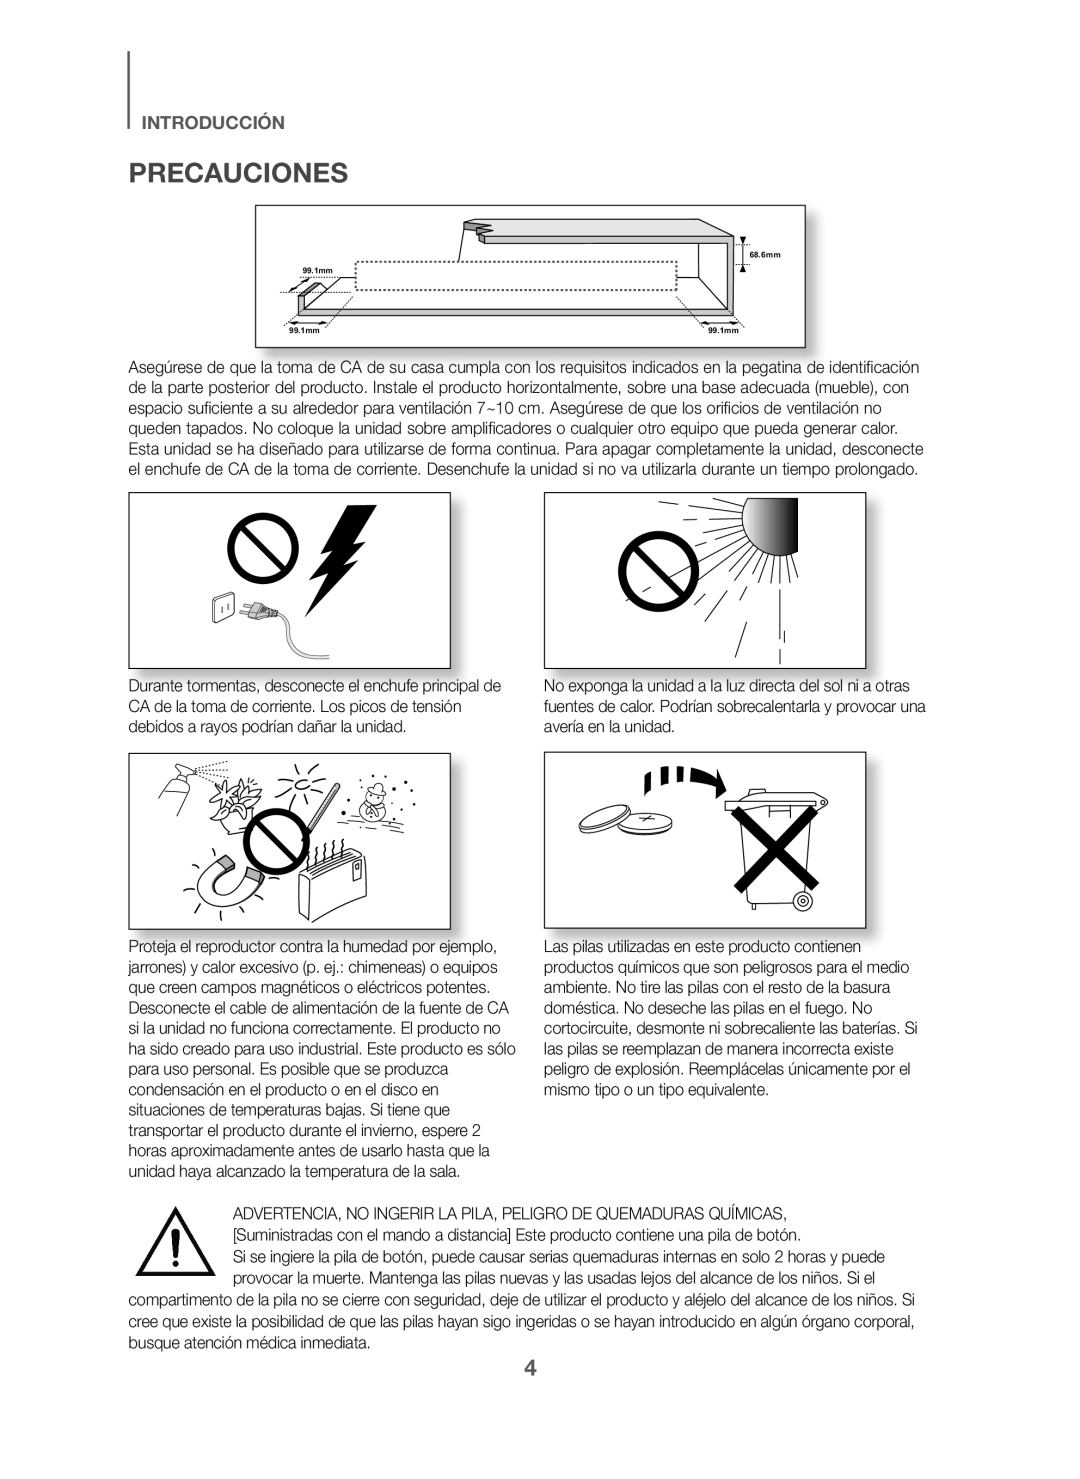 PRECAUCIONES
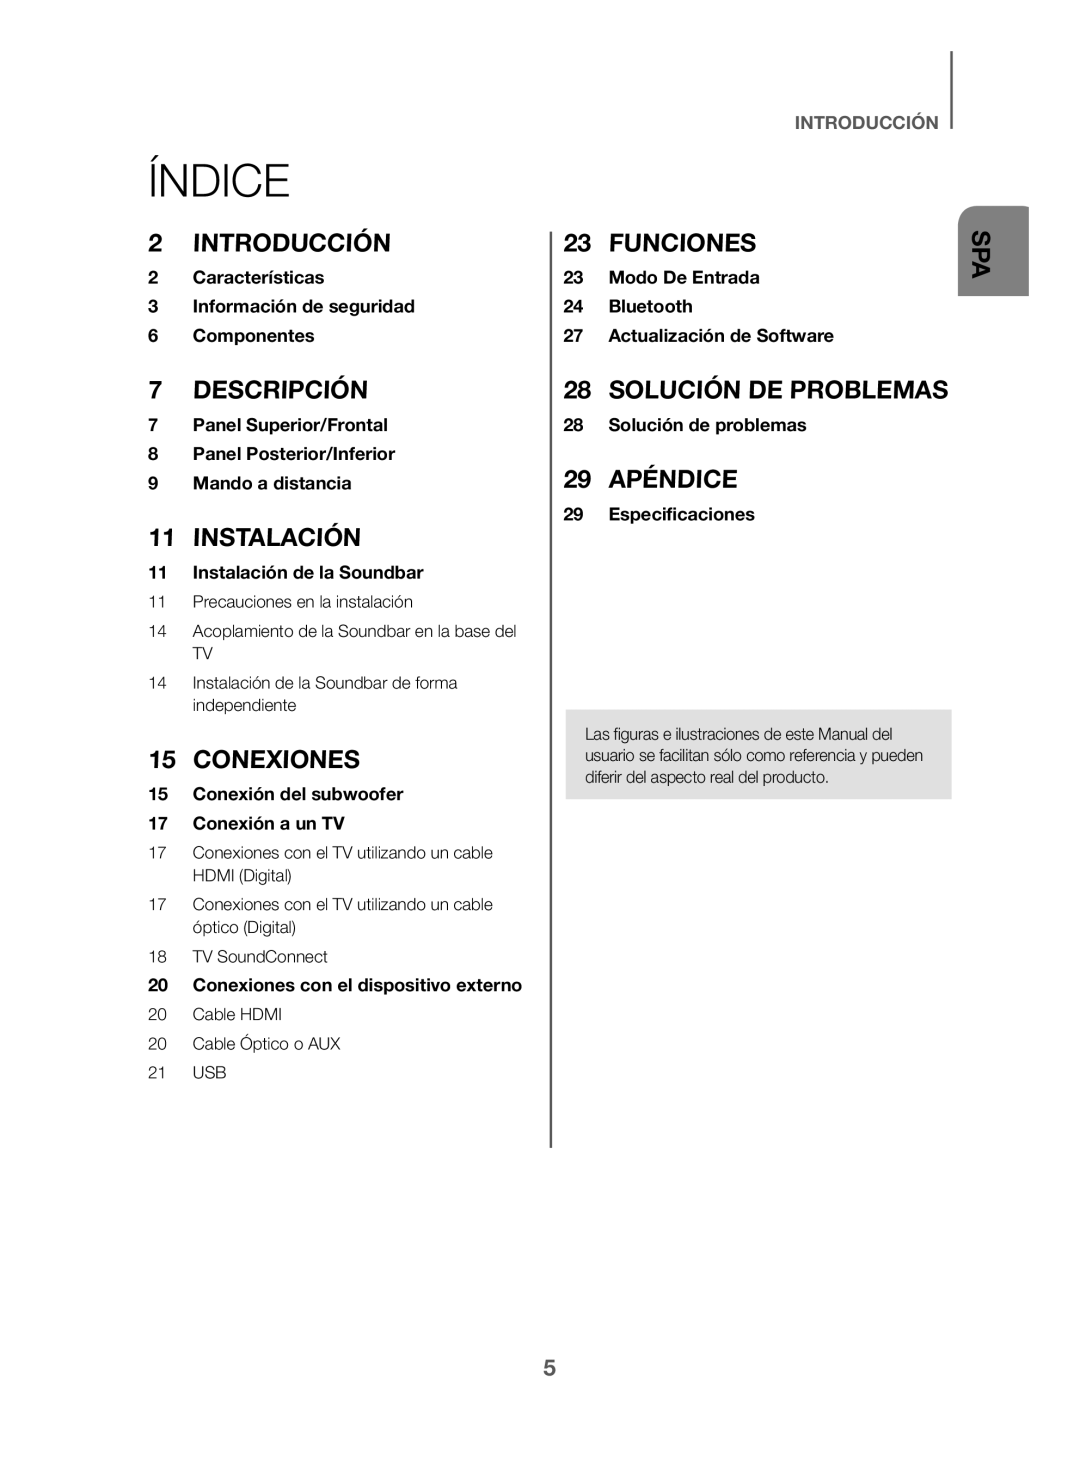 ÍNDICE
2Características
3Información de seguridad
6 Componentes
7Panel Superior/Frontal
8Panel Posterior/Inferior
9 Mando a distancia
11 Instalación de la Soundbar
15Conexión del subwoofer
17Conexión a un TV
20 Conexiones con el dispositivo externo
Modo De Entrada
27Actualización de Software
28Solución de problemas
29 Especificaciones
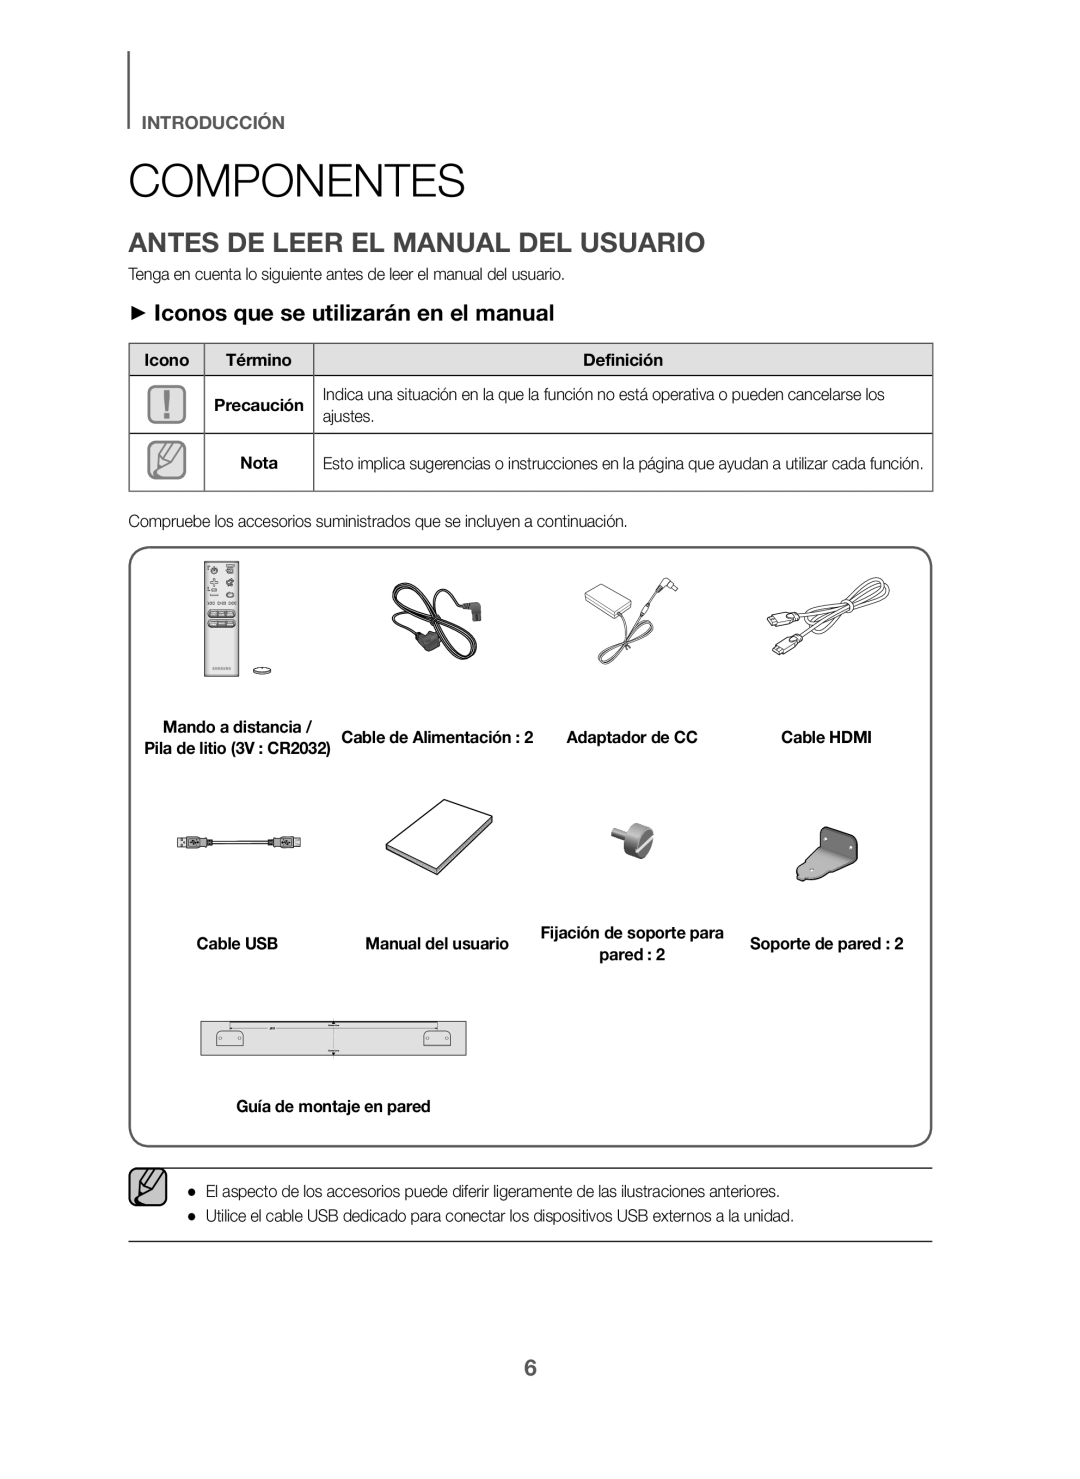 COMPONENTES
ANTES DE LEER EL MANUAL DEL USUARIO
+Iconos que se utilizarán en el manual
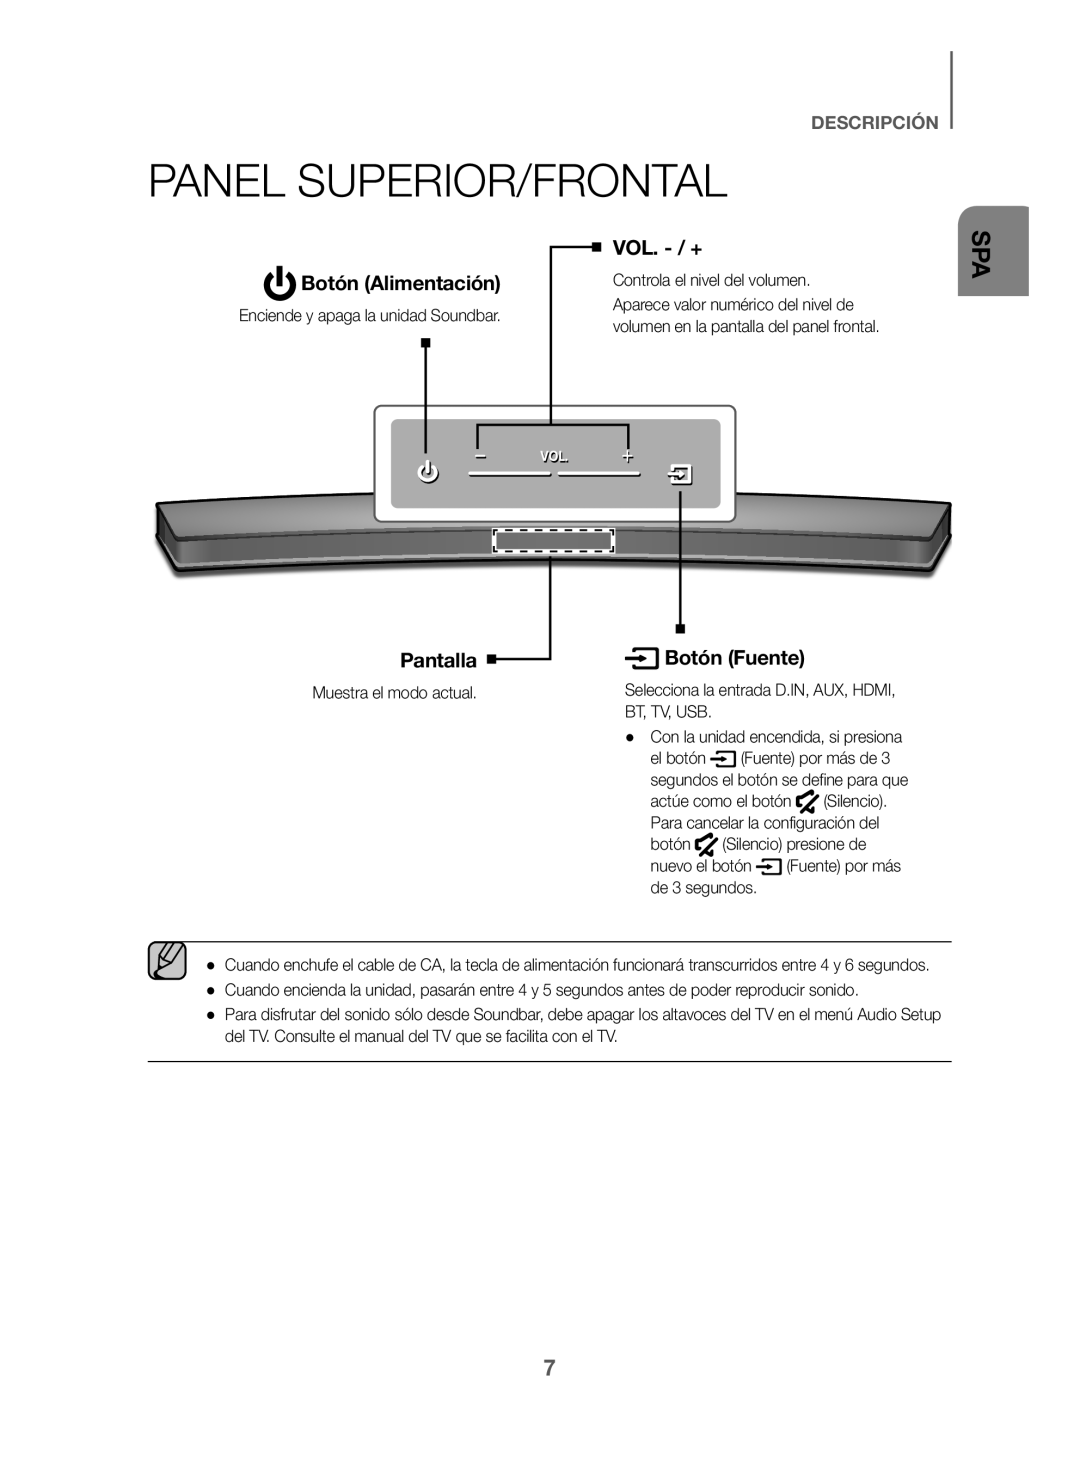 DESCRIPCIÓN
PANEL SUPERIOR/FRONTAL
Botón (Alimentación)
Pantalla
Botón (Fuente)
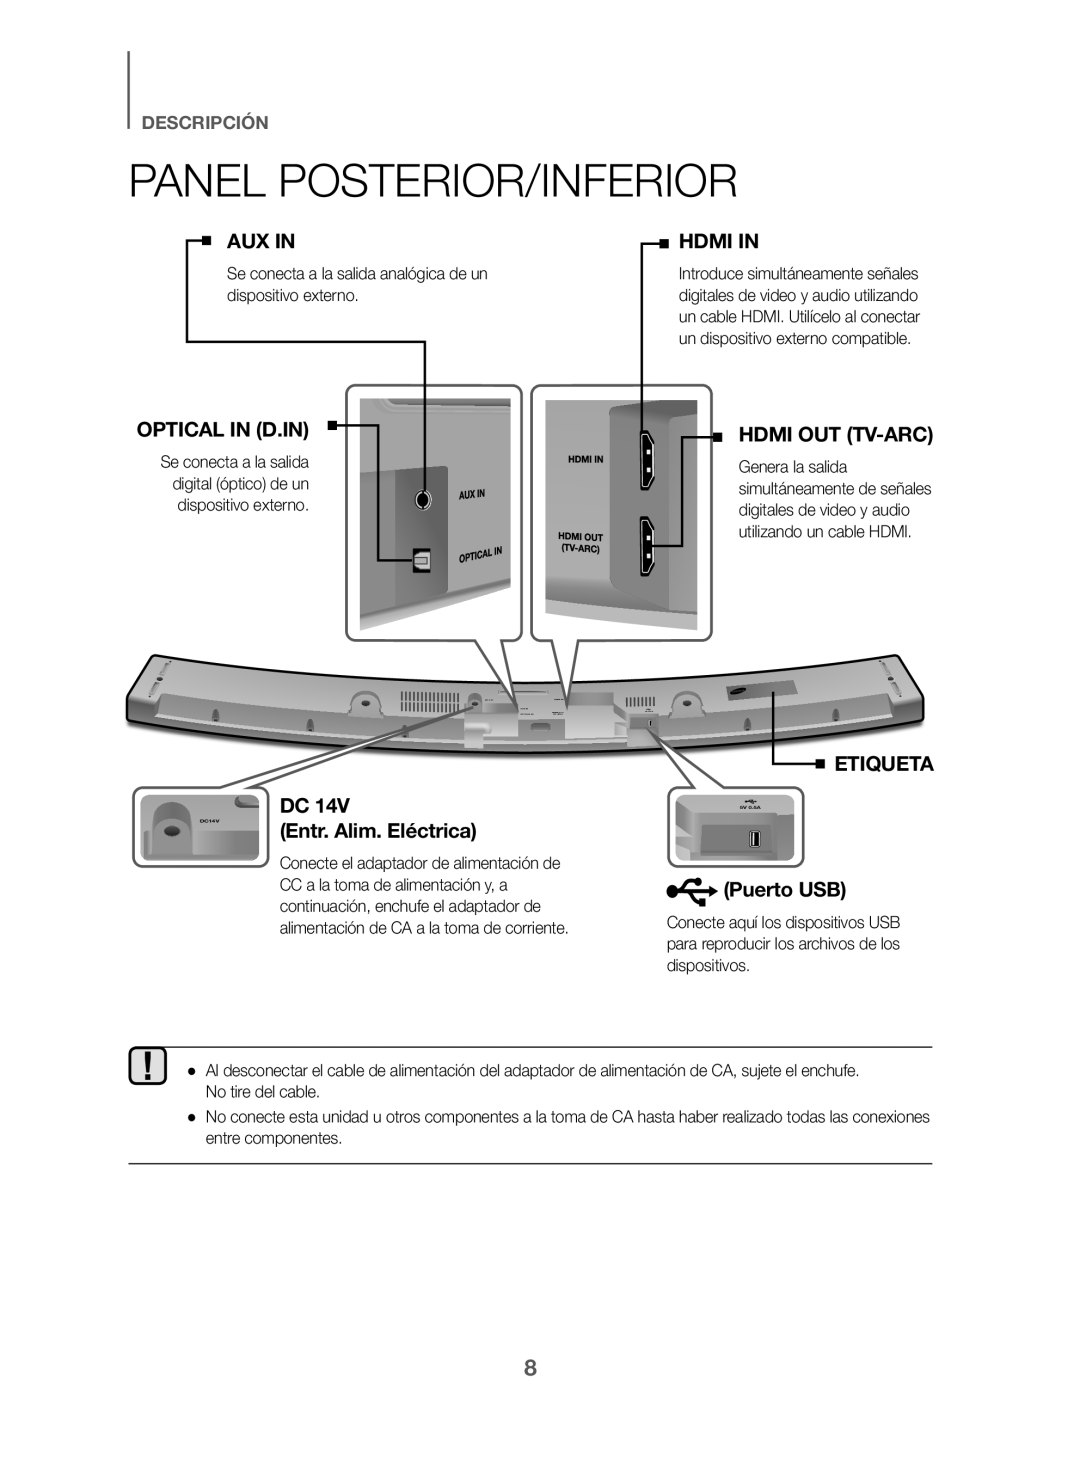 PANEL POSTERIOR/INFERIOR
(Entr. Alim. Eléctrica)
ETIQUETA
(Puerto USB)
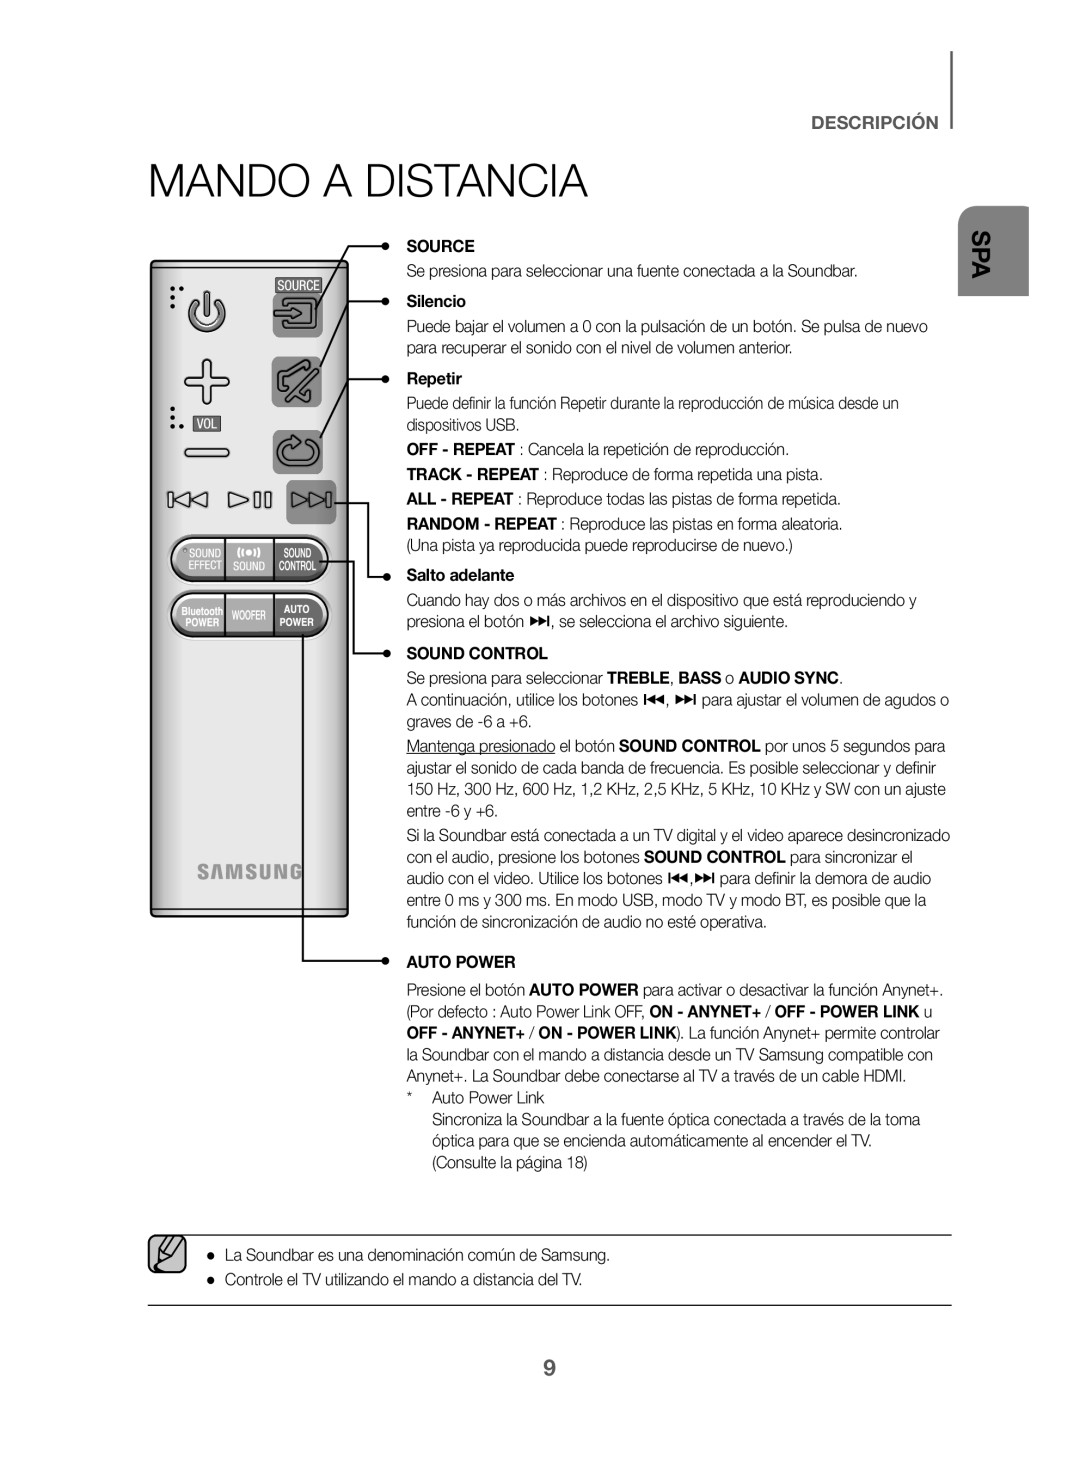 MANDO A DISTANCIA
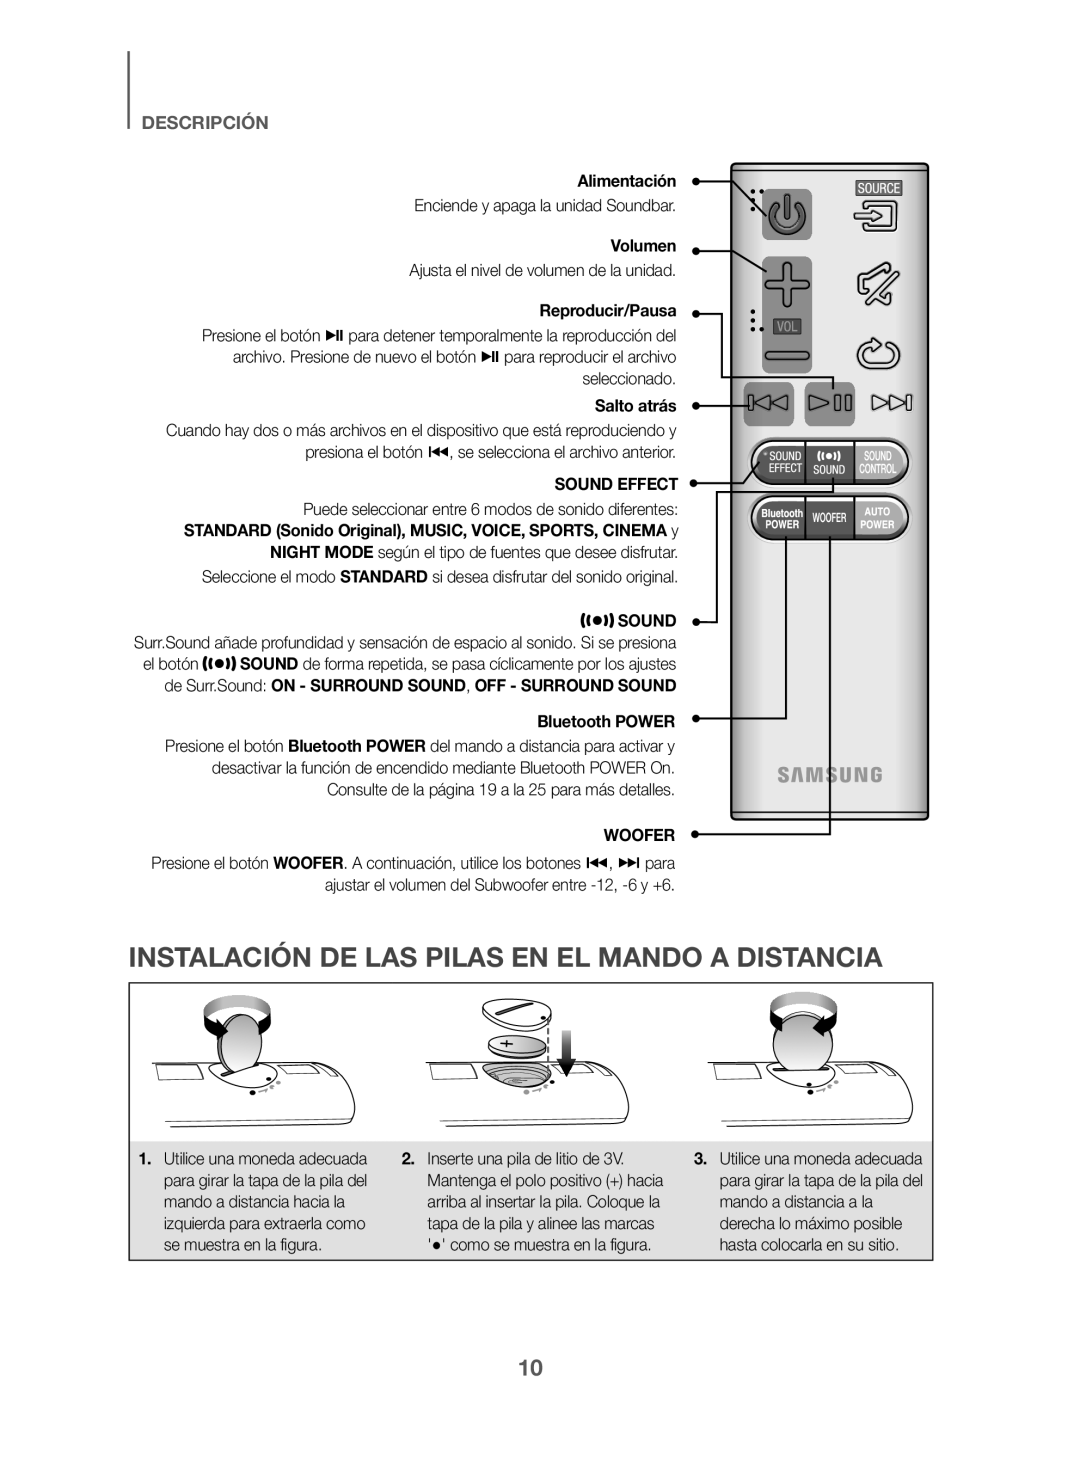 INSTALACIÓN DE LAS PILAS EN EL MANDO A DISTANCIA
 INSTALACIÓN
INSTALACIÓN DE LA SOUNDBAR
INSTALACIÓN DEL SOPORTE DE PARED
+Precauciones en la instalación
 INSTALACIÓN
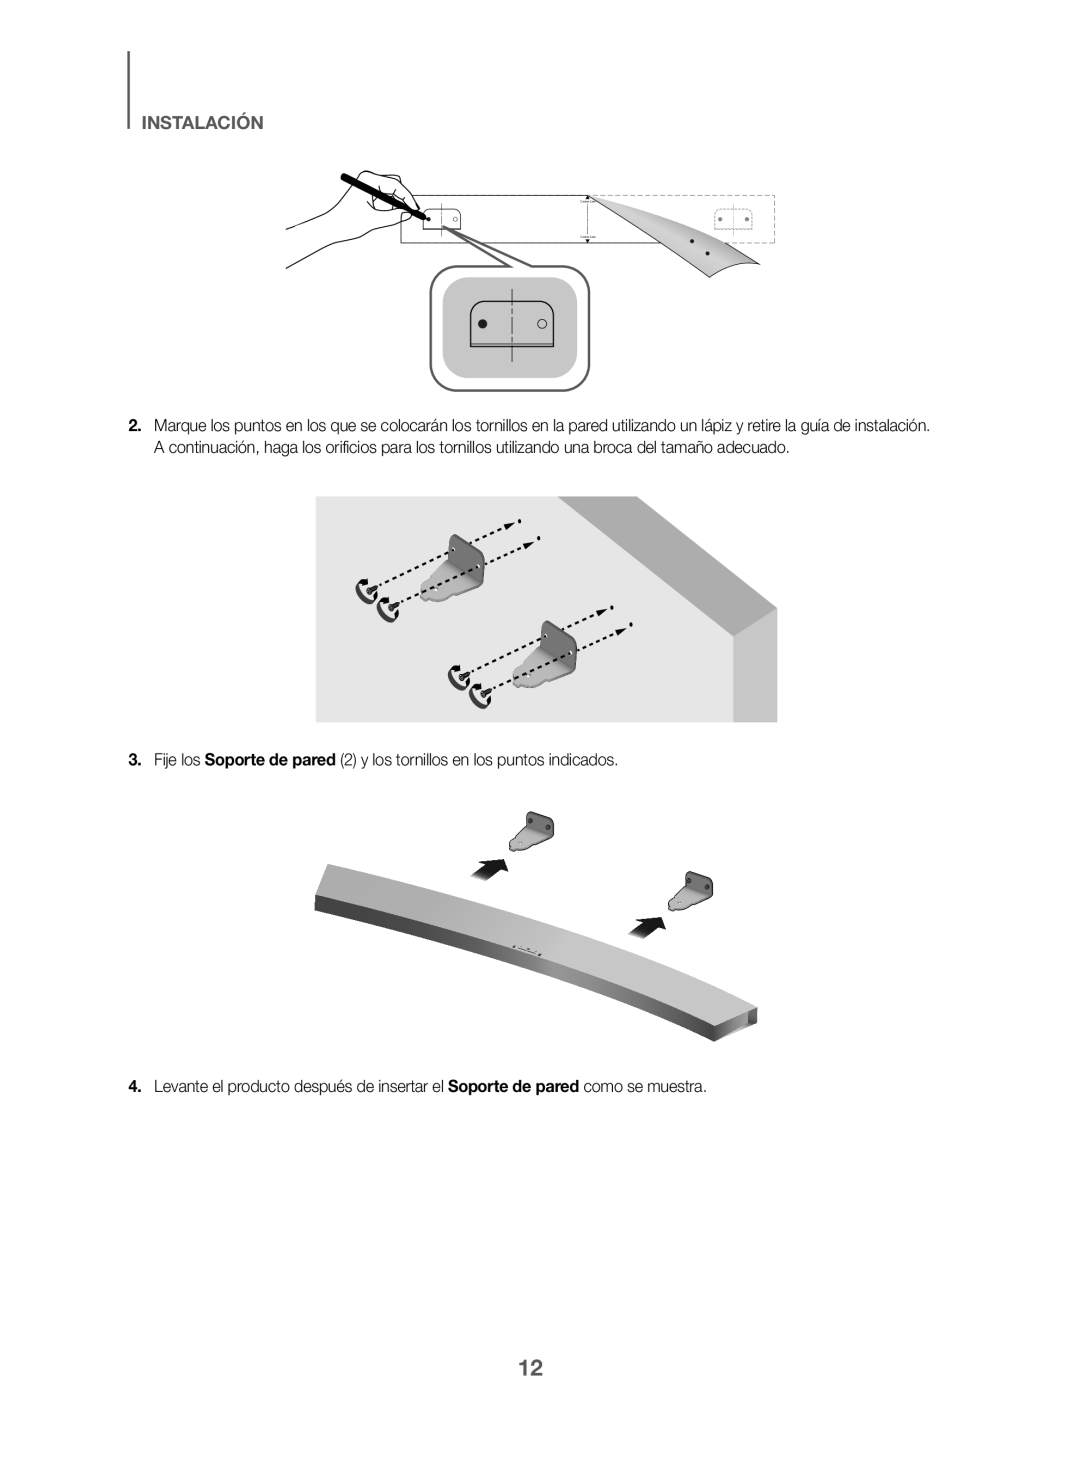
3.Fije los Soporte de pared (2) y los tornillos en los puntos indicados
Soporte de pared
4.Levante el producto después de insertar el Soporte de pared como se muestra
Soporte de pared
 INSTALACIÓN
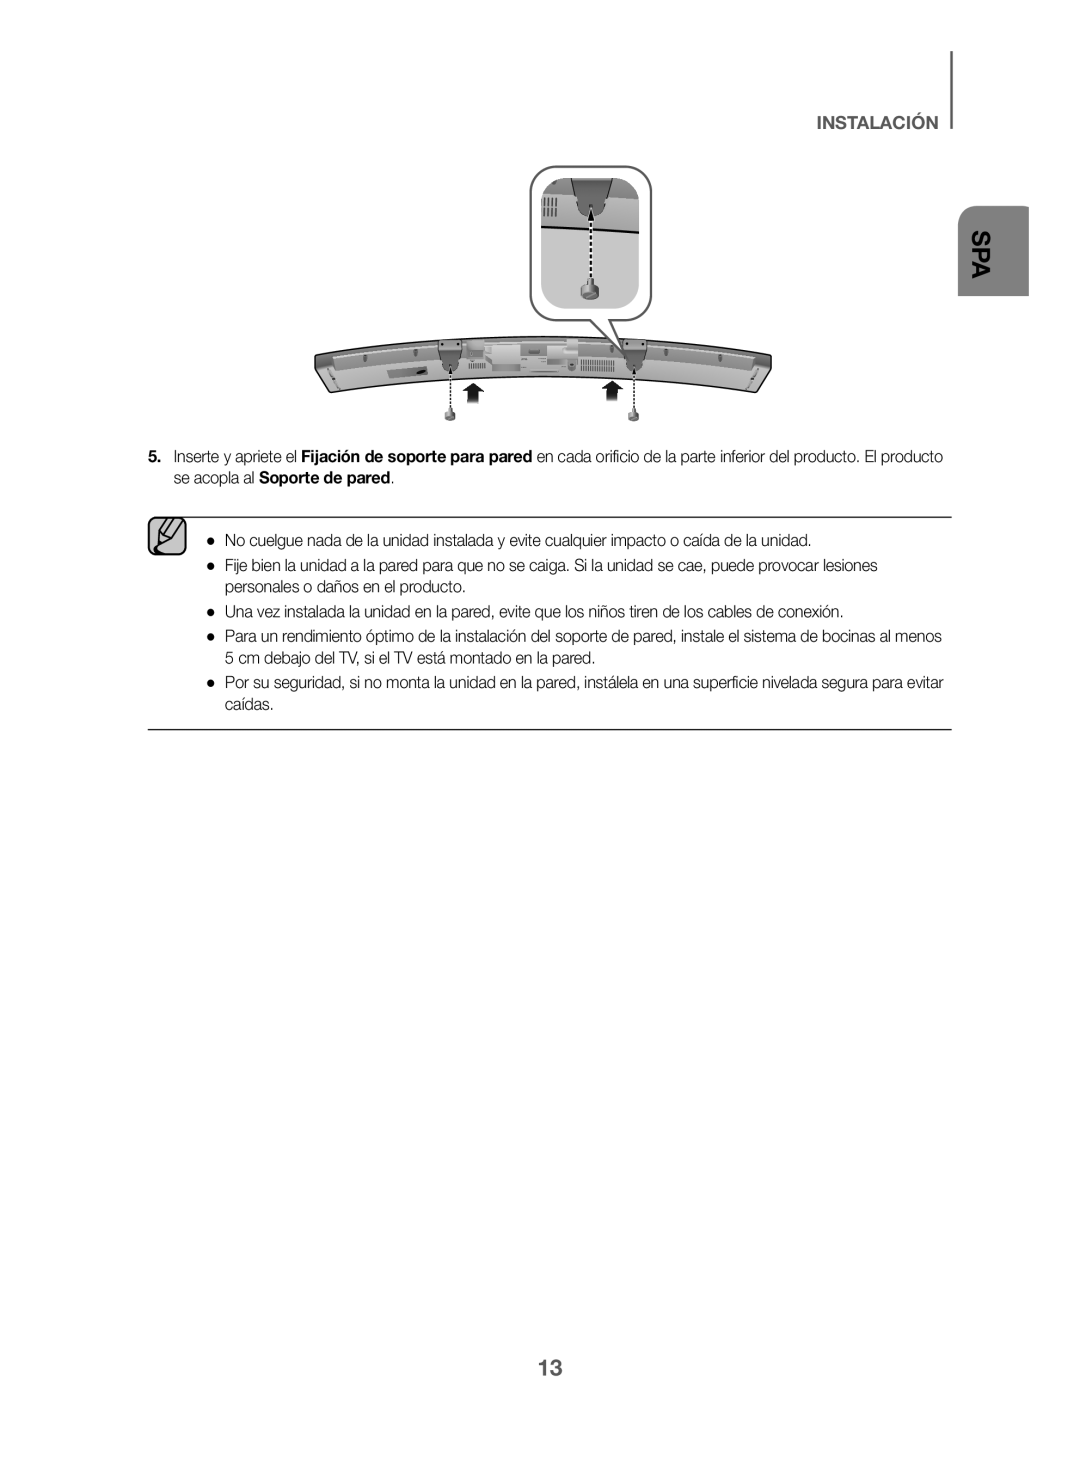
Fijación de soporte para pared
Soporte de pared
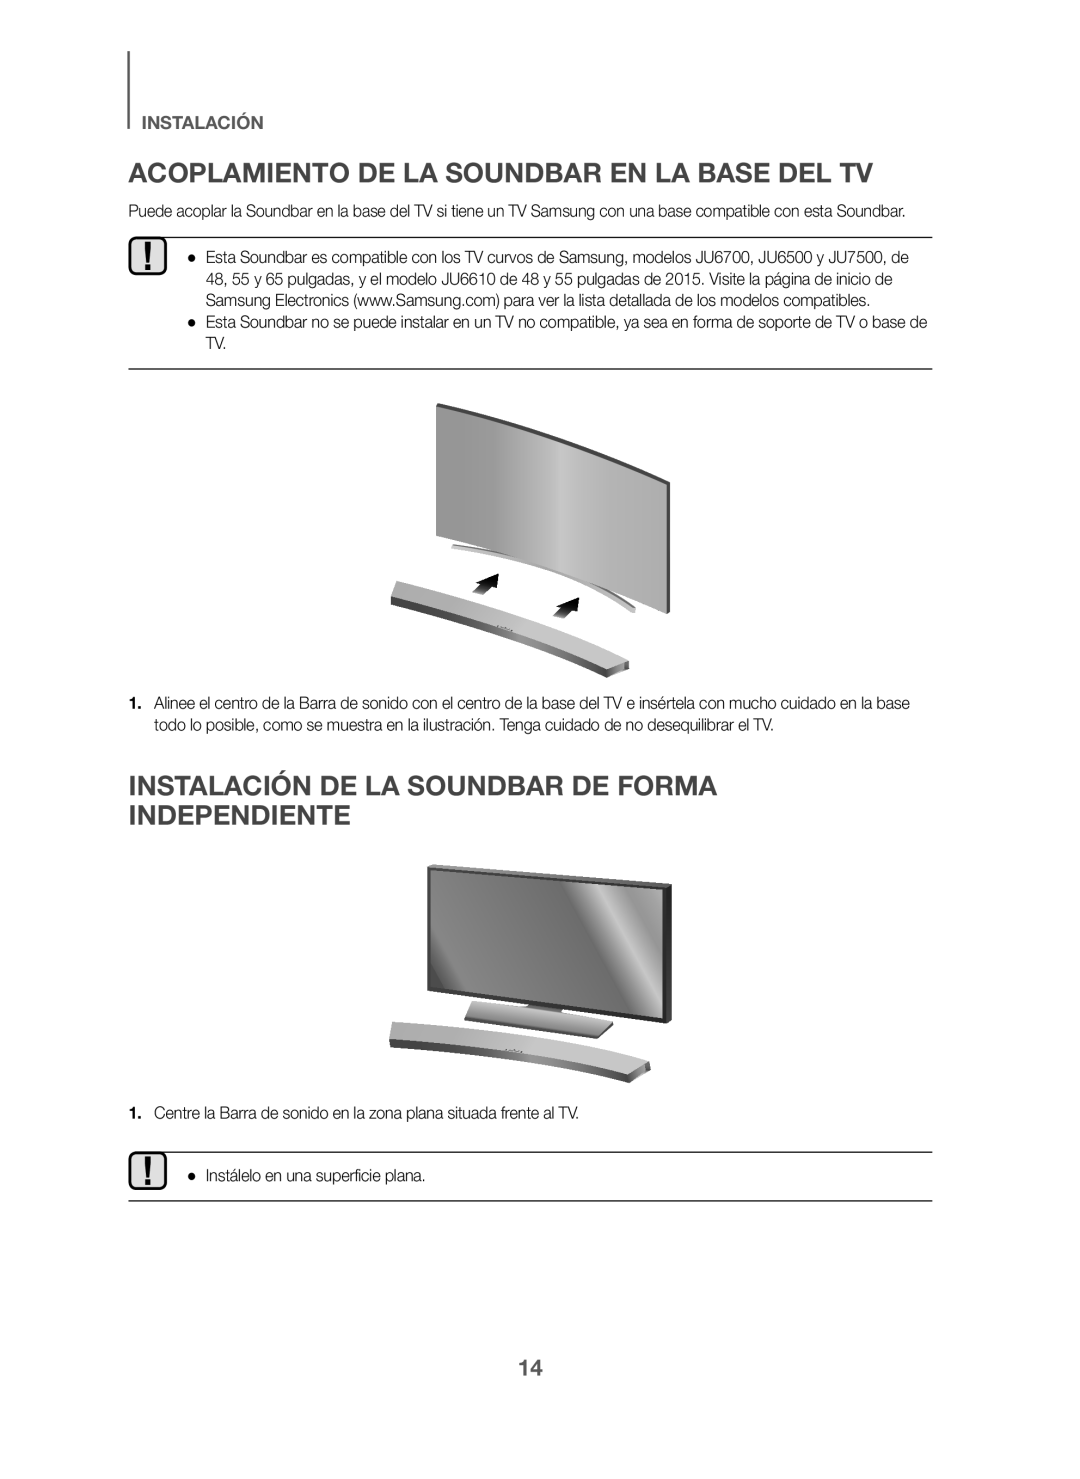 ACOPLAMIENTO DE LA SOUNDBAR EN LA BASE DEL TV
INSTALACIÓN DE LA SOUNDBAR DE FORMA
INDEPENDIENTE
 CONEXIONES
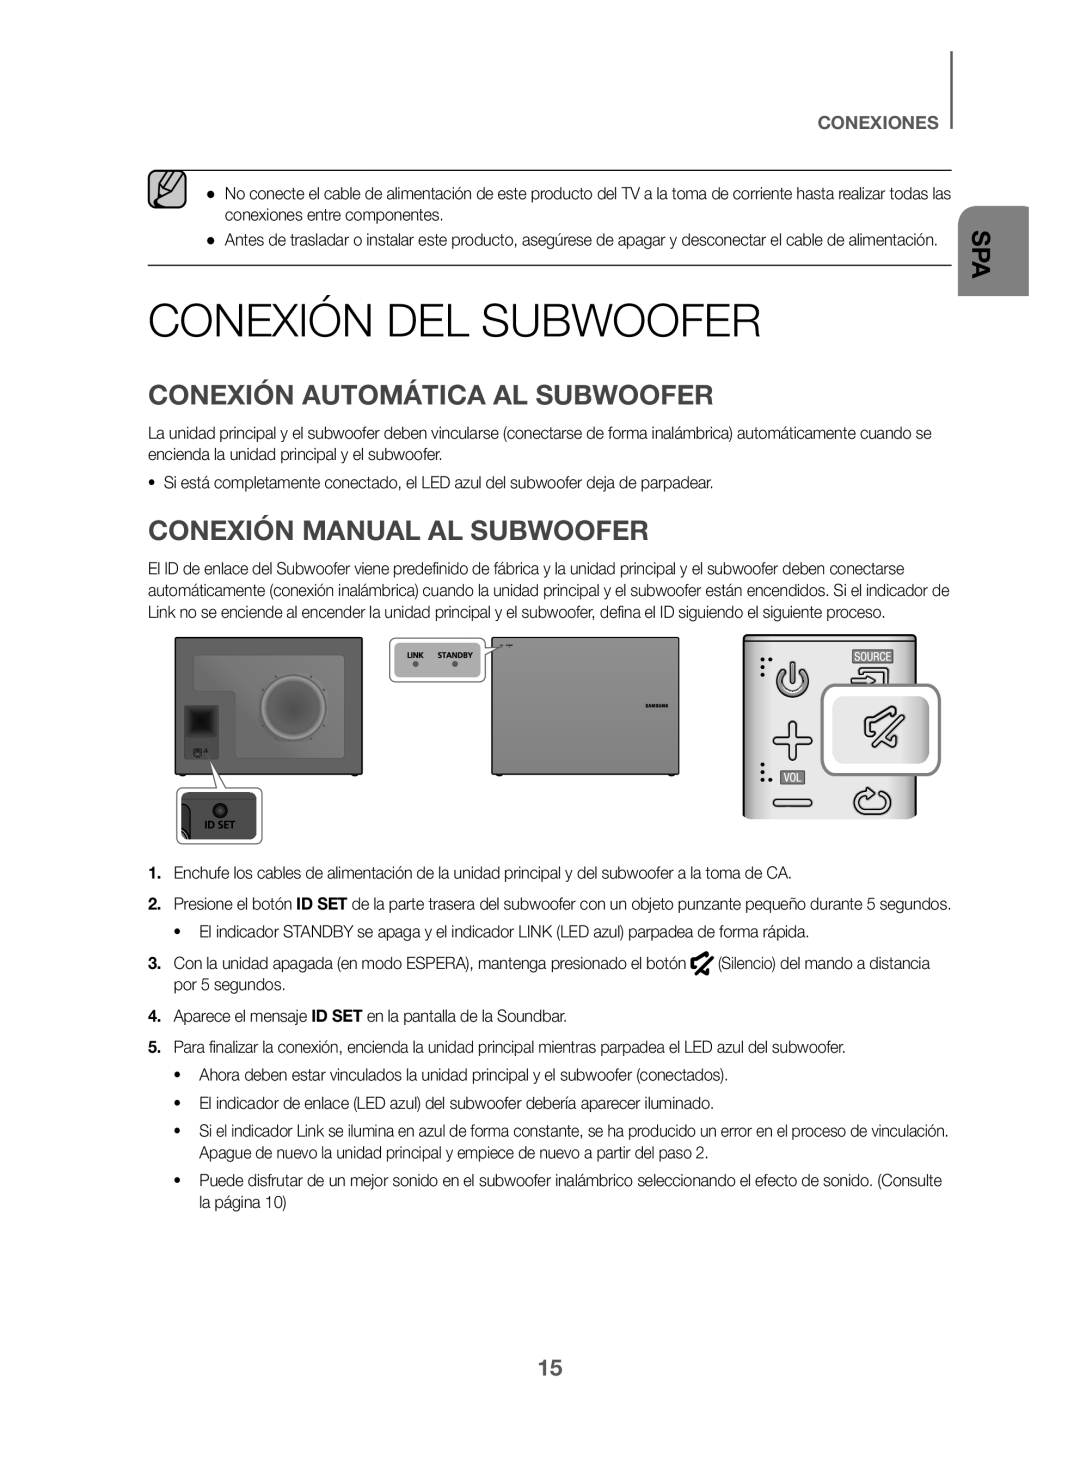
CONEXIÓN DEL SUBWOOFER
CONEXIÓN AUTOMÁTICA AL SUBWOOFER
CONEXIÓN MANUAL AL SUBWOOFER
 CONEXIONES
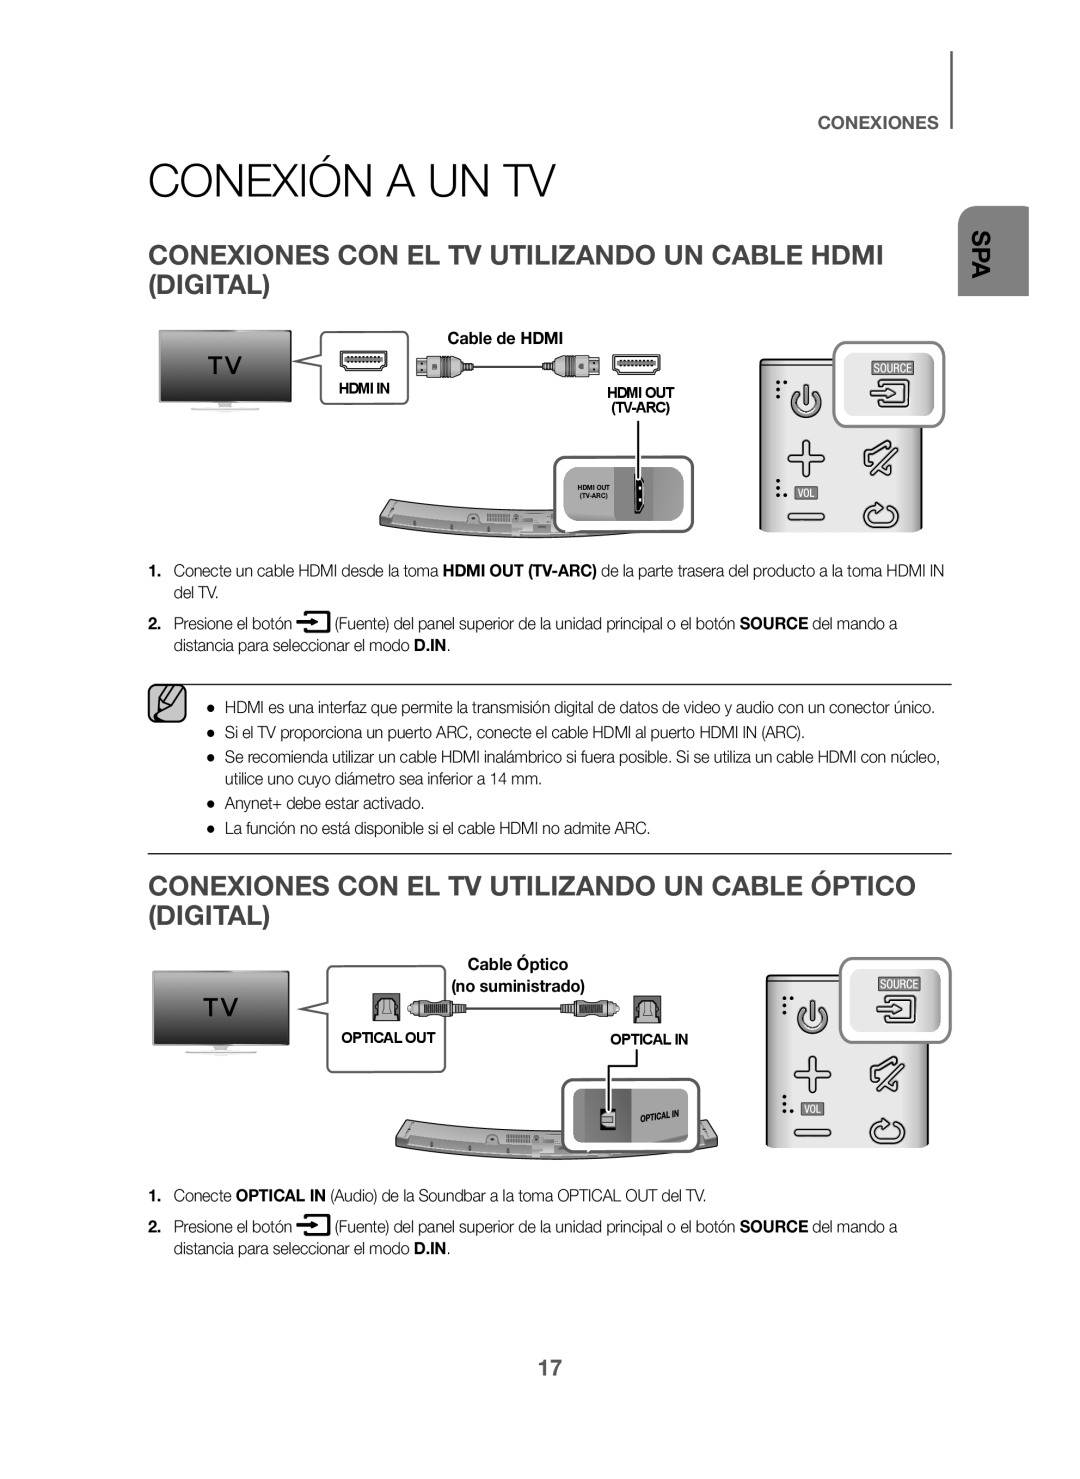 CONEXIÓN A UN TV
CONEXIONES CON EL TV UTILIZANDO UN CABLE HDMI (DIGITAL)
CONEXIONES CON EL TV UTILIZANDO UN CABLE ÓPTICO (DIGITAL)
 CONEXIONES
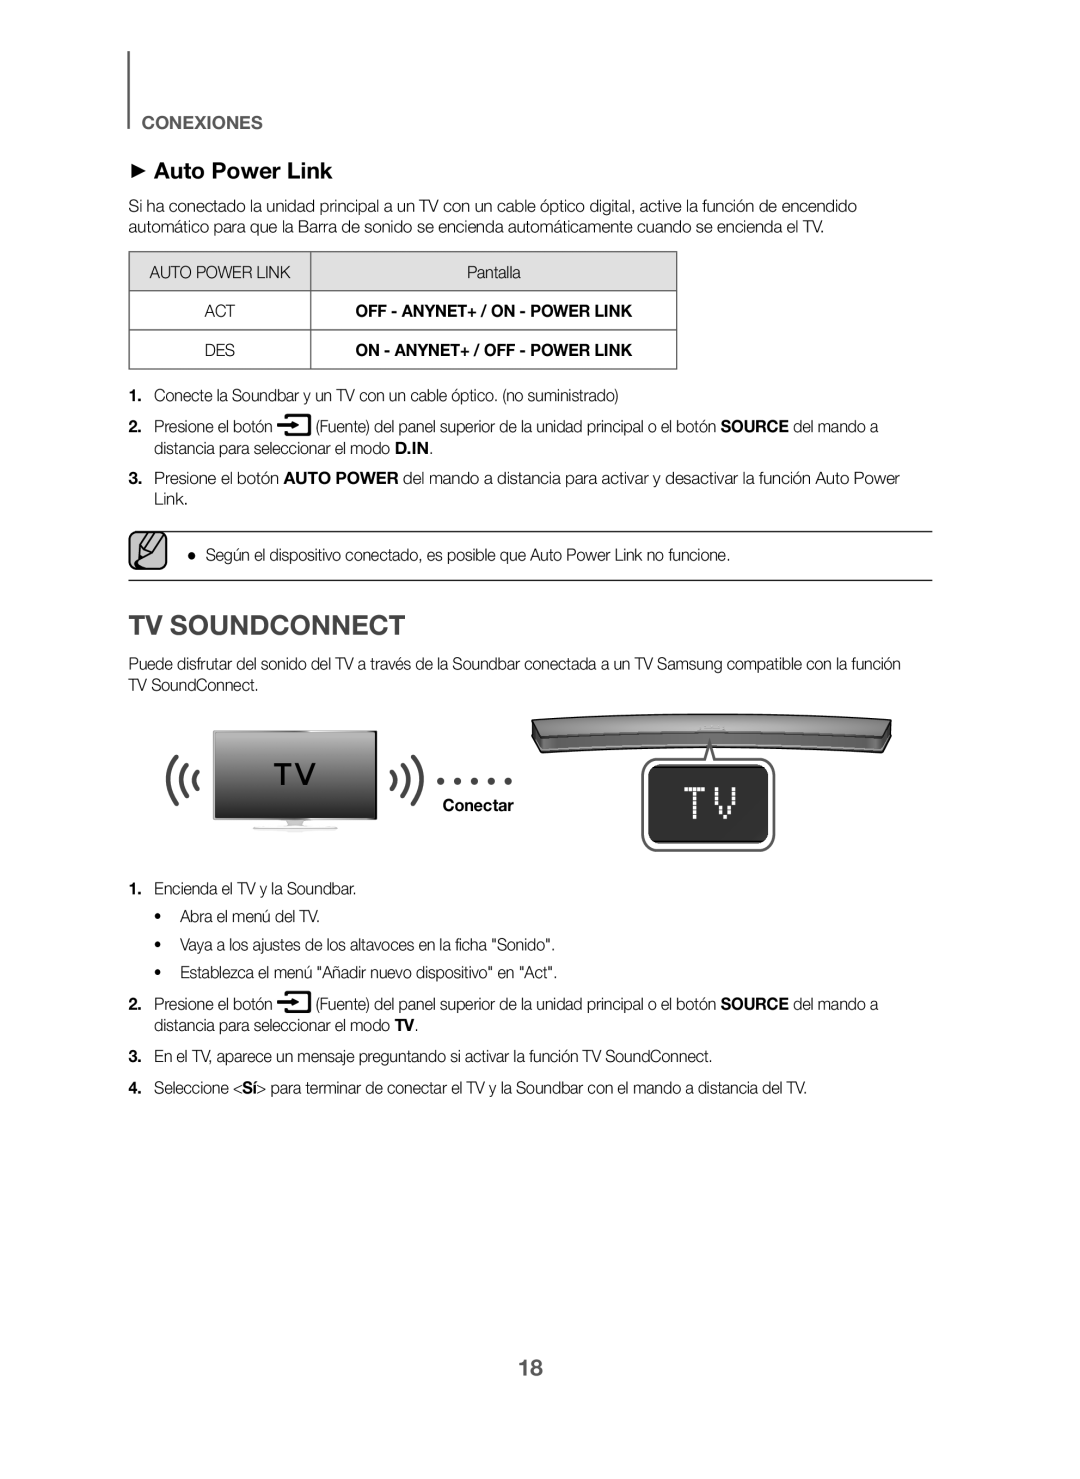
+Auto Power Link
AUTO POWER LINK
Pantalla
ACT
OFF - ANYNET+ / ON - POWER LINK
DES
ON - ANYNET+ / OFF - POWER LINK
1.Conecte la Soundbar y un TV con un cable óptico. (no suministrado)
Presione el botón
SOURCE
D.IN
Presione el botón
AUTO POWER
● Según el dispositivo conectado, es posible que Auto Power Link no funcione
TV SOUNDCONNECT
Conectar
1.Encienda el TV y la Soundbar
•Abra el menú del TV
•Vaya a los ajustes de los altavoces en la ficha "Sonido
•Establezca el menú "Añadir nuevo dispositivo" en "Act
Presione el botón
SOURCE
En el TV, aparece un mensaje preguntando si activar la función TV SoundConnect
Seleccione
 +Utilización de la función de Bluetooth POWER On
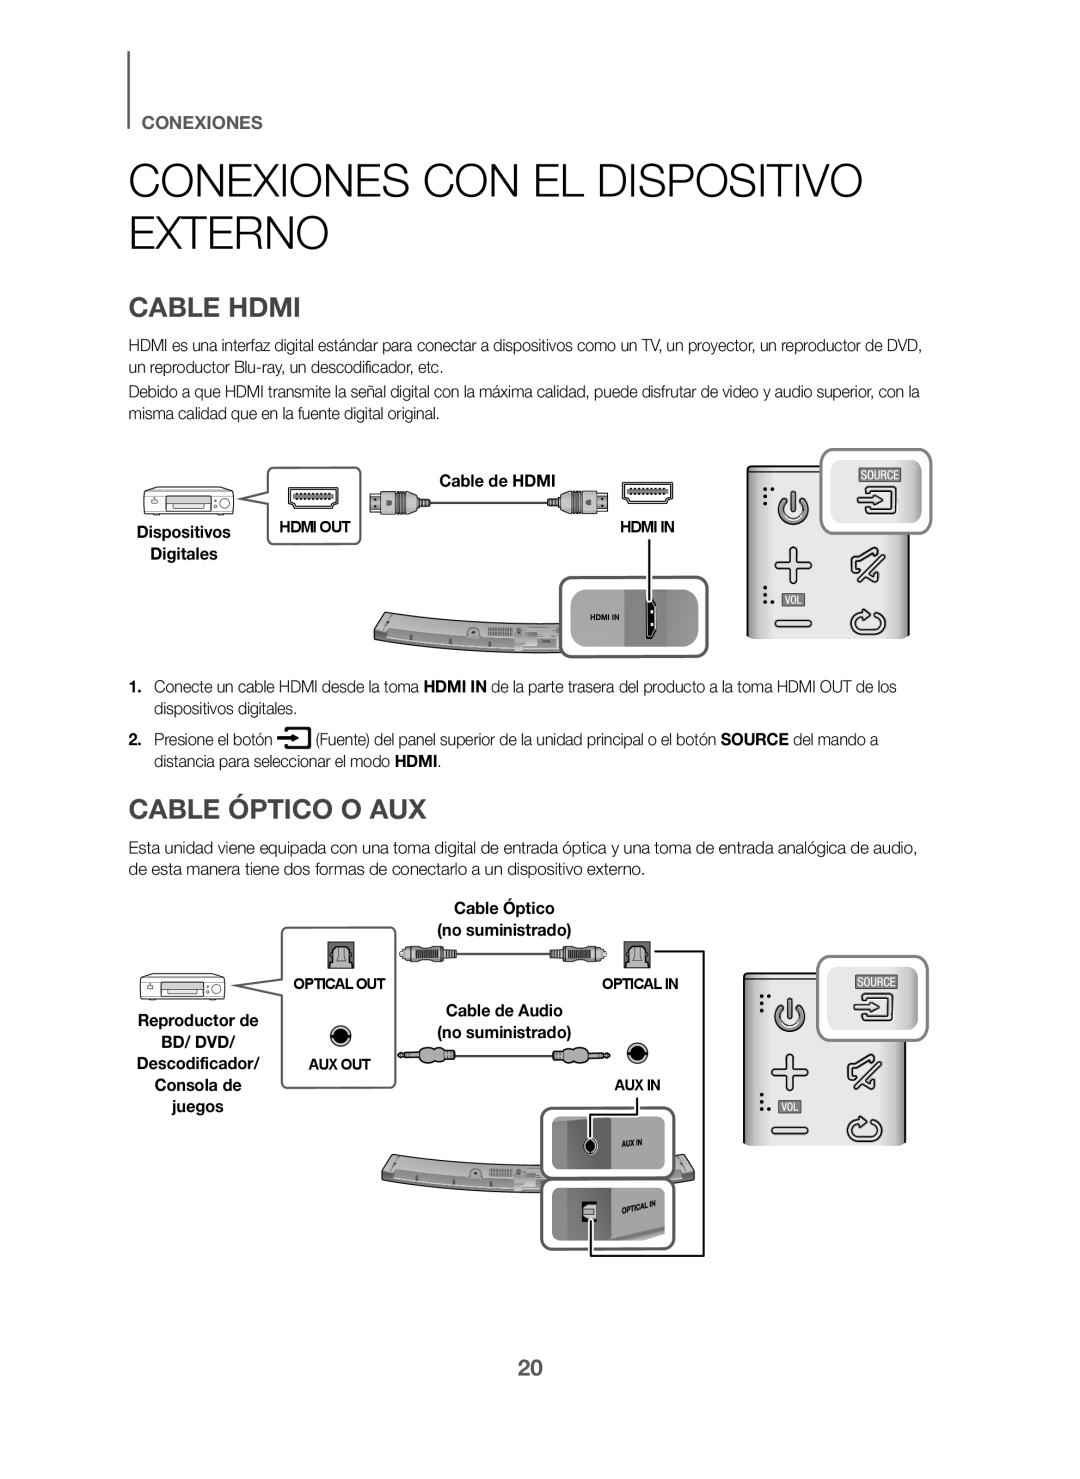 CONEXIONES CON EL DISPOSITIVO EXTERNO
CABLE HDMI
CABLE ÓPTICO O AUX
 +Cable AUX
+Cable Óptico
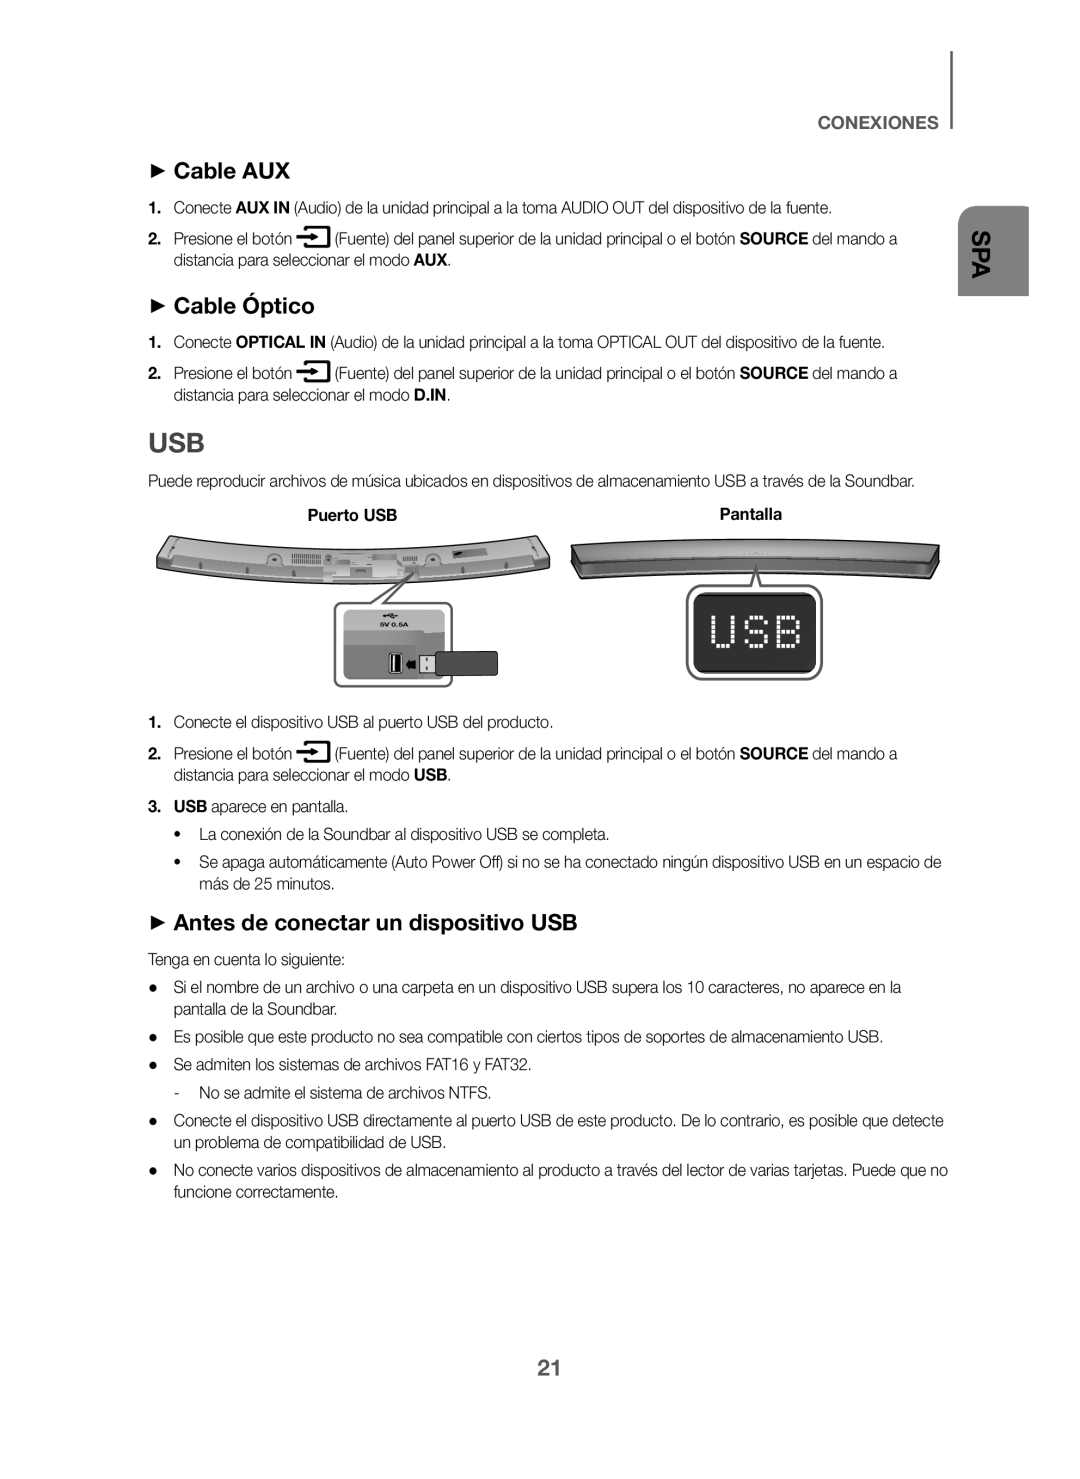
+Antes de conectar un dispositivo USB
 CONEXIONES
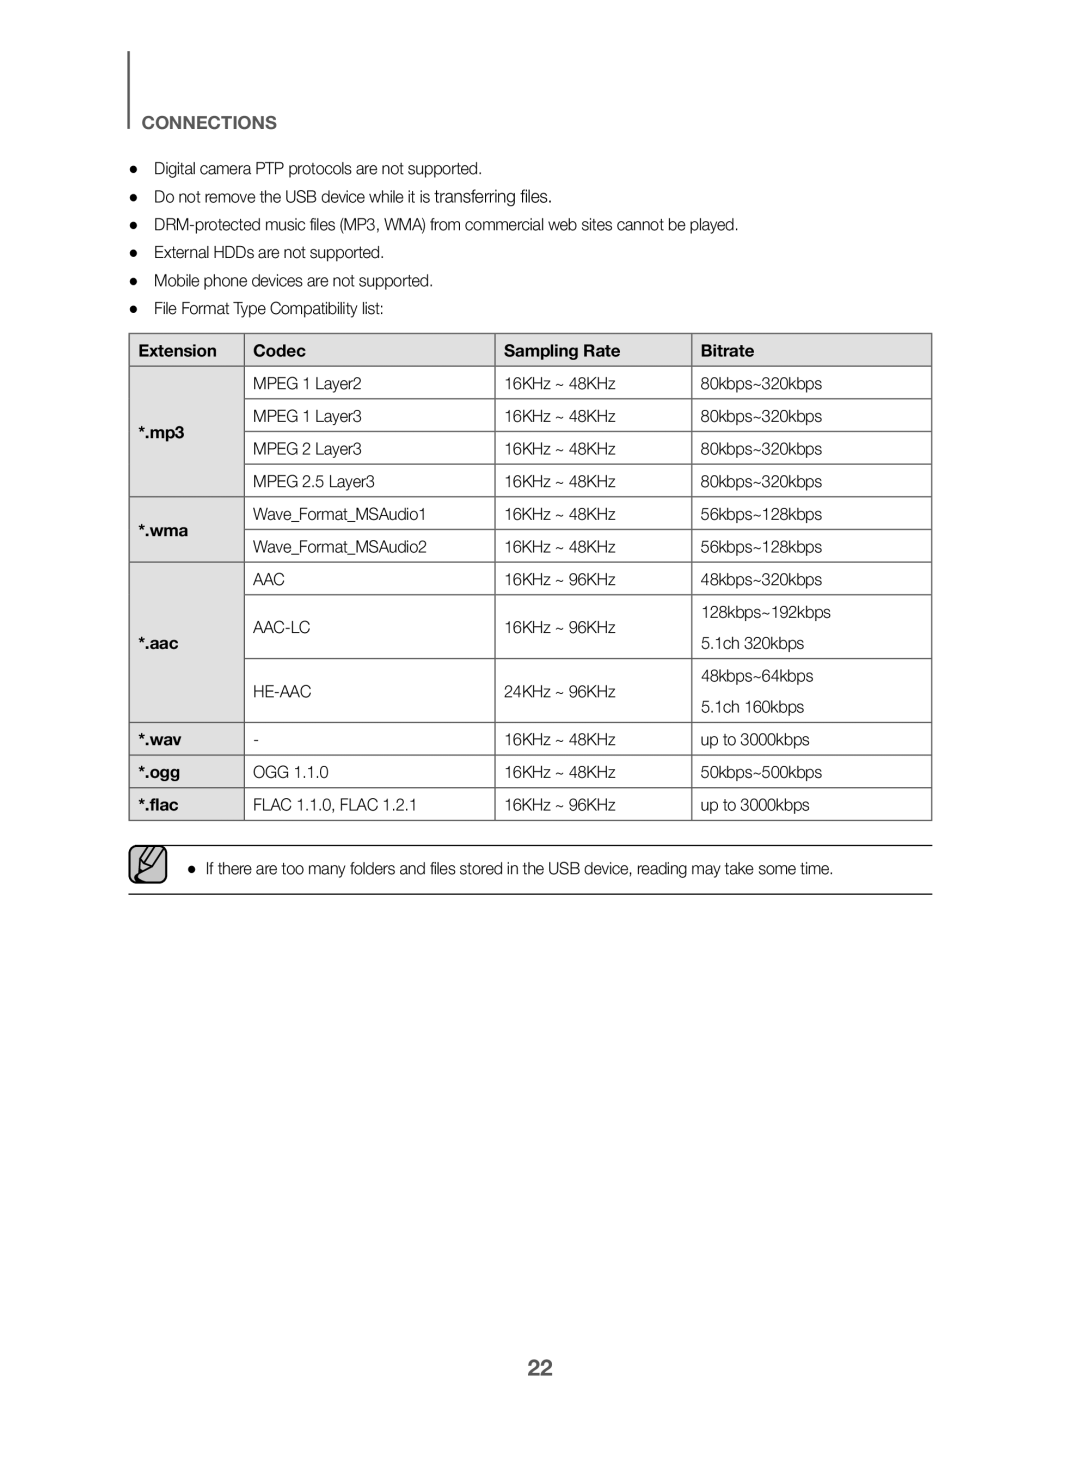
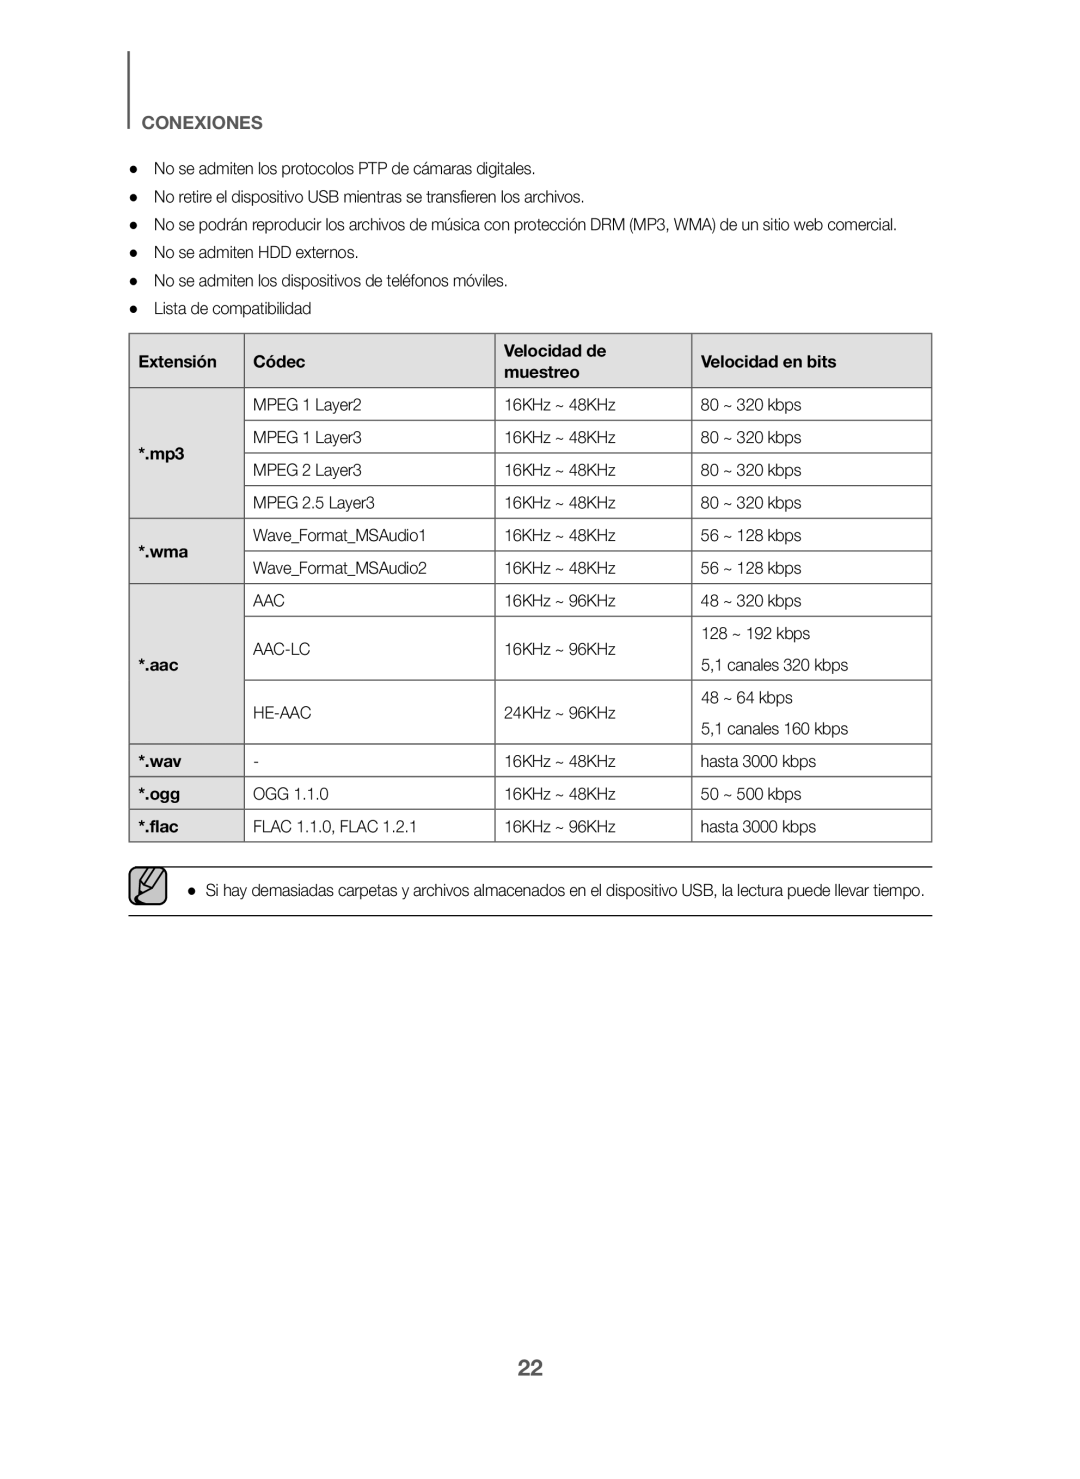
Extensión
Códec
Velocidad de
Velocidad en bits
muestreo
*.mp3
*.wma
*.aac
*.wav
*.ogg
*.flac
 FUNCIONES
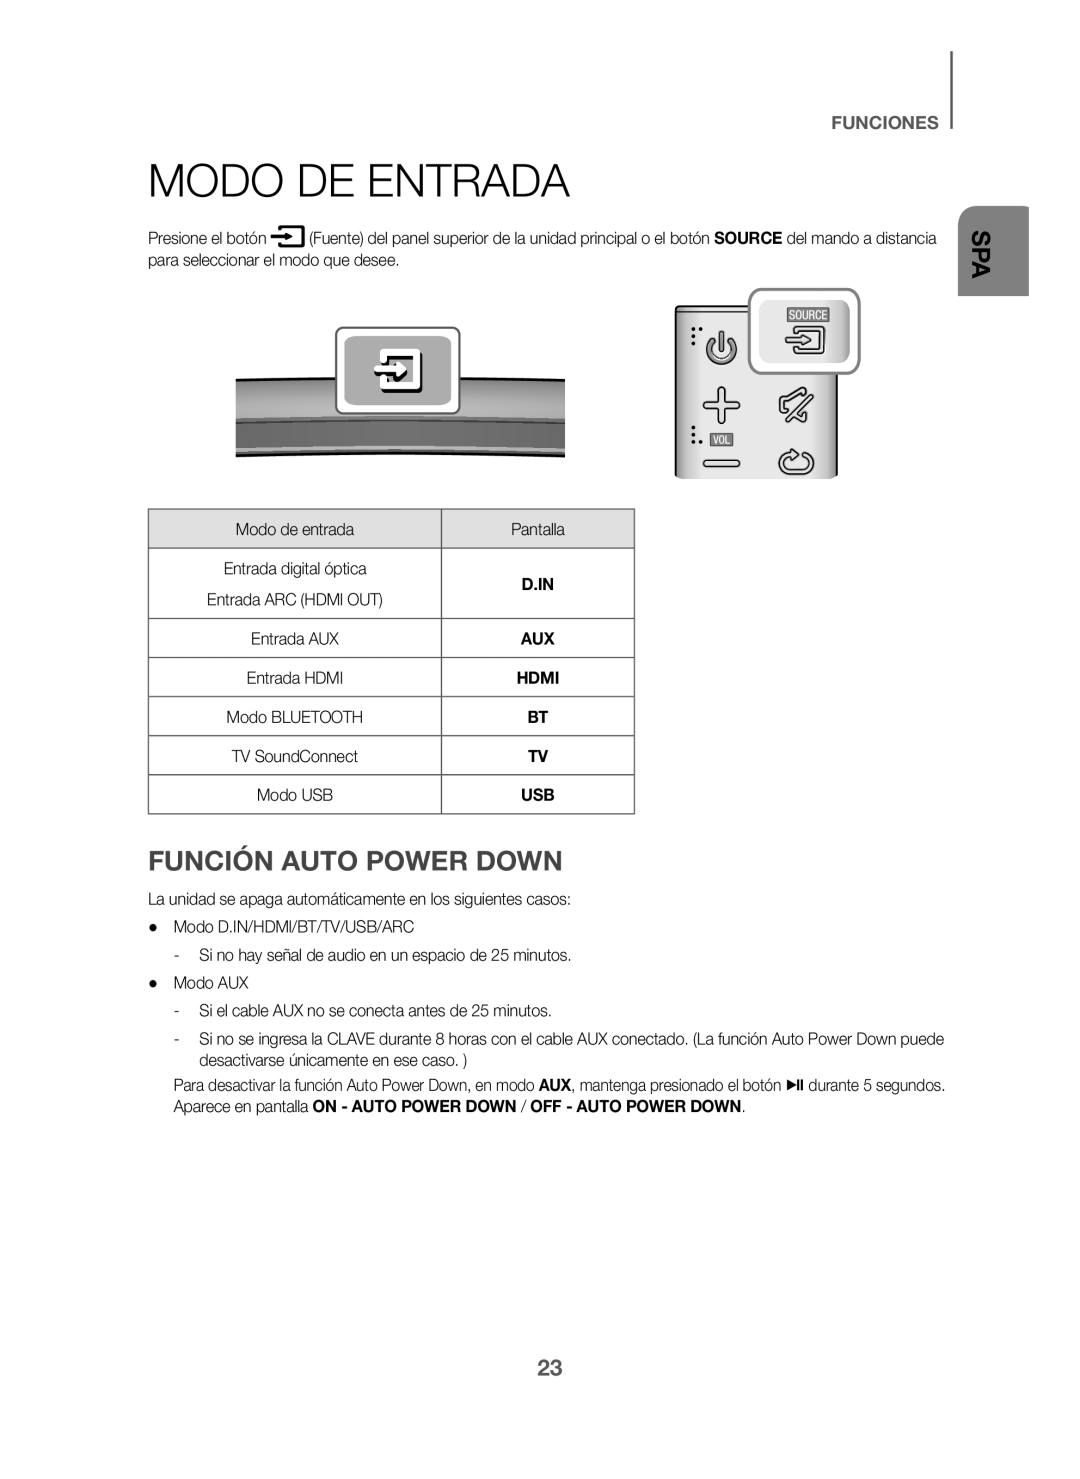
MODO DE ENTRADA
FUNCIÓN AUTO POWER DOWN
 PARA CONECTAR SOUNDBAR A UN DISPOSITIVO BLUETOOTH
 PARA DESCONECTAR EL DISPOSITIVO BLUETOOTH DE SOUNDBAR
PARA DESCONECTAR SOUNDBAR DEL DISPOSITIVO BLUETOOTH
 +Información adicional sobre Bluetooth
UTILIZACIÓN DE LA APP SAMSUNG AUDIO REMOTE
+Instalación de la AppSamsung Audio Remote
+Acceso a la App Samsung Audio Remote
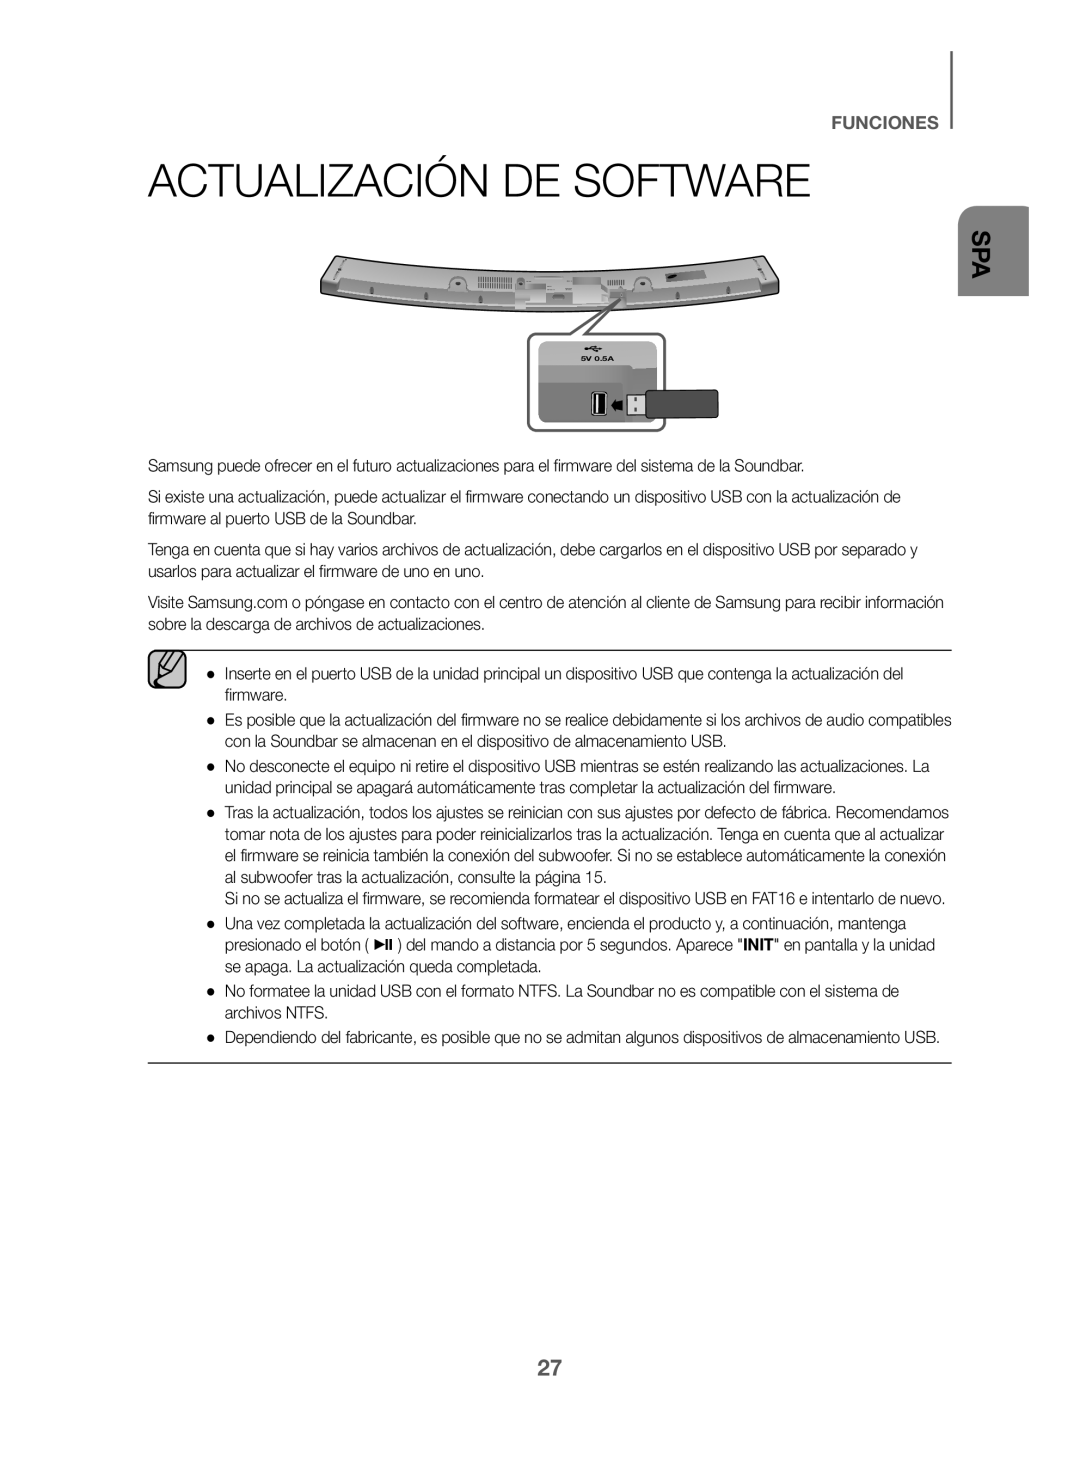 ACTUALIZACIÓN DE SOFTWARE
 SOLUCIÓN DE PROBLEMAS
SOLUCIÓN DE PROBLEMAS
 APÉNDICE
ESPECIFICACIONES
 Contact SAMSUNG WORLD WIDE
Contacte con SAMSUNG WORLD WIDE