HW-R47M
 SAFETY INFORMATION
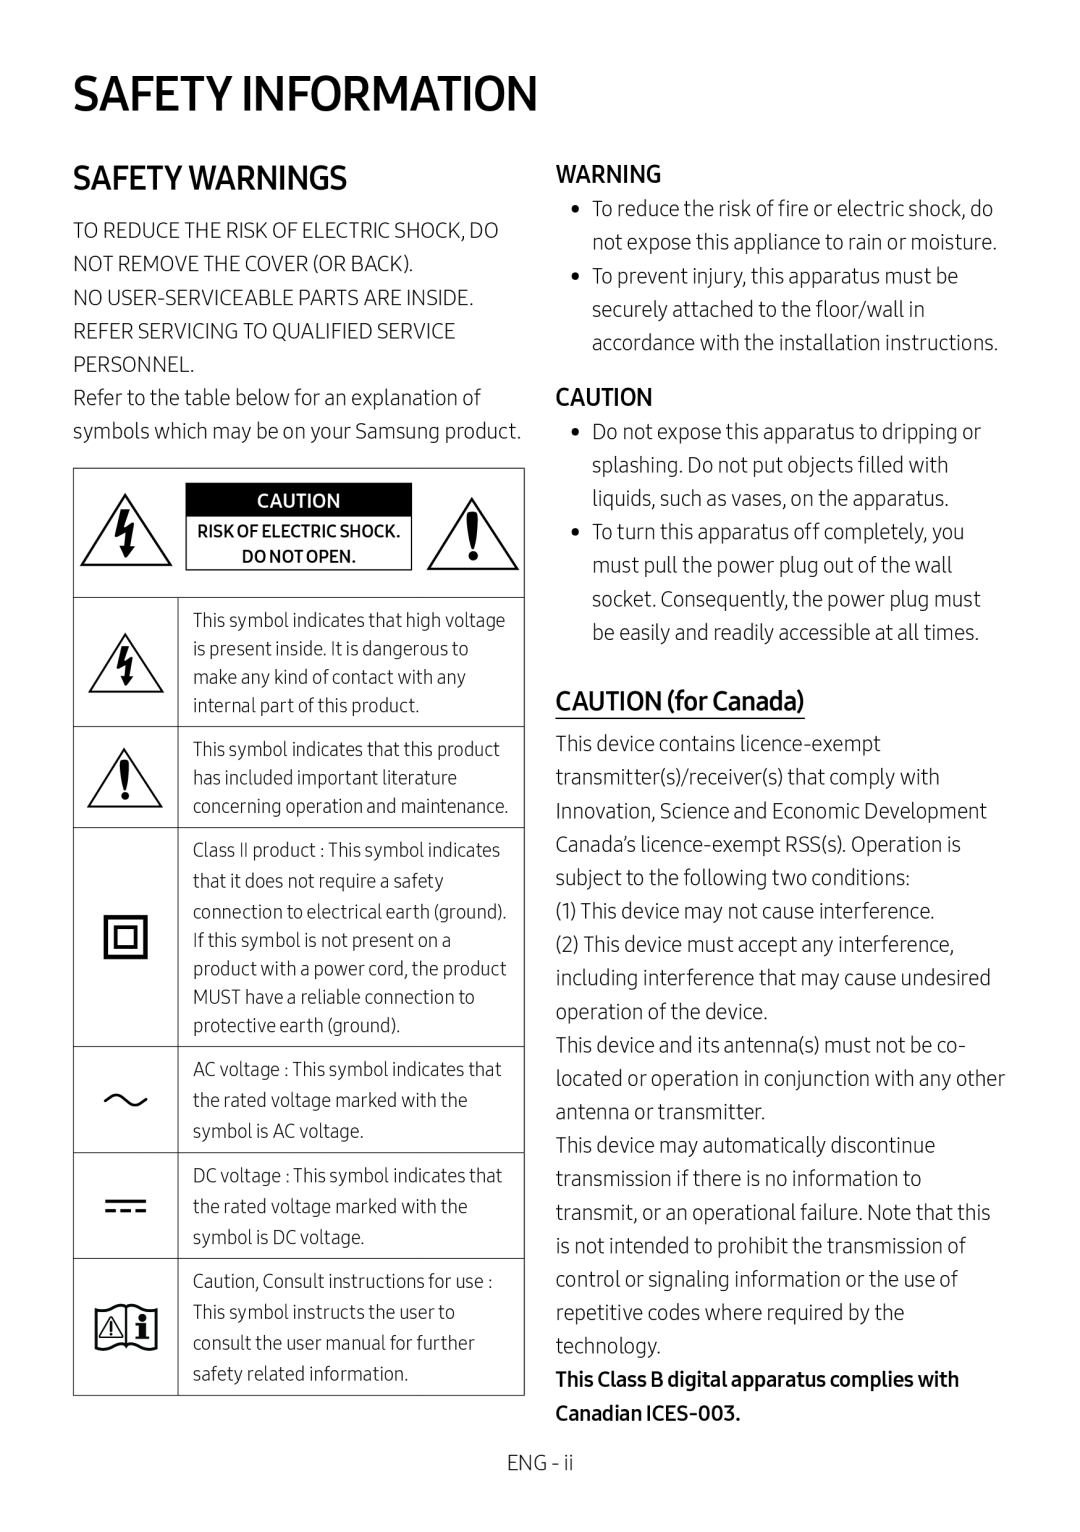
SAFETY WARNINGS
WARNING
CAUTION
CAUTION (for Canada)
 Important Safety Instructions
 PRECAUTIONS
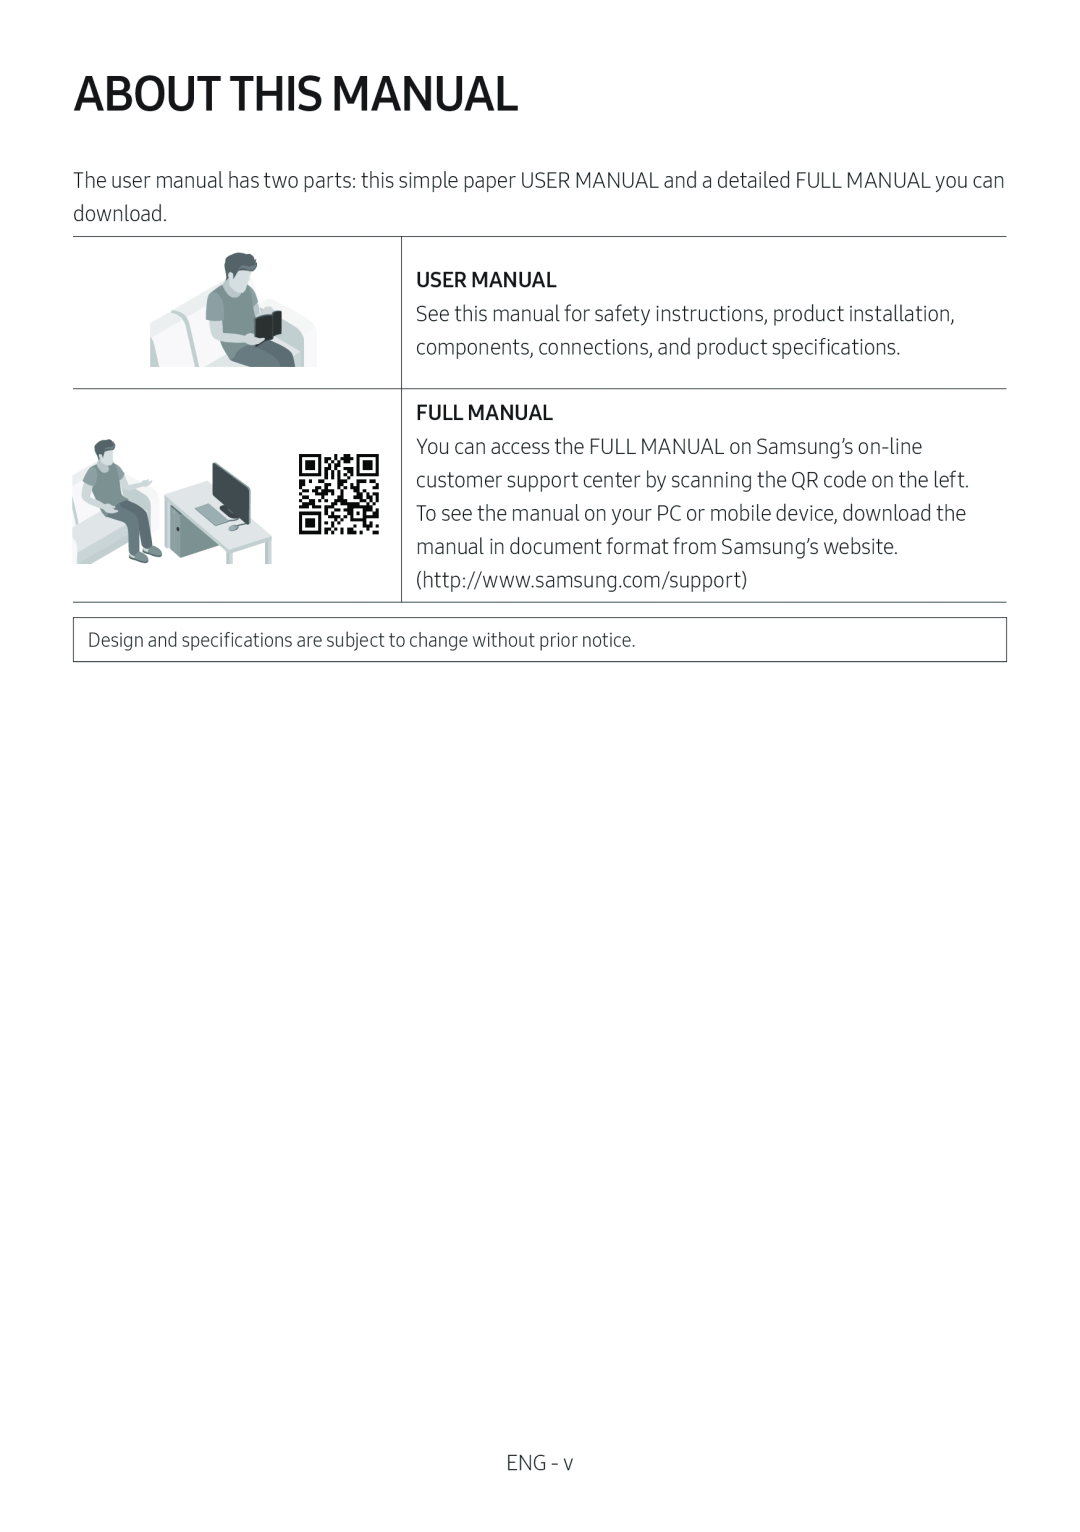 ABOUT THIS MANUAL
 CONTENTS
Checking the Components
Product Overview
Connecting the Soundbar
Connecting to your TV
Connecting an External Device
Connecting a USB Storage Device
 Connecting a Mobile Device
Using the Remote Control
Installing the Wall Mount
Software Update
Troubleshooting
License
Open Source License Notice
Important Notes About Service
Specifications and Guide
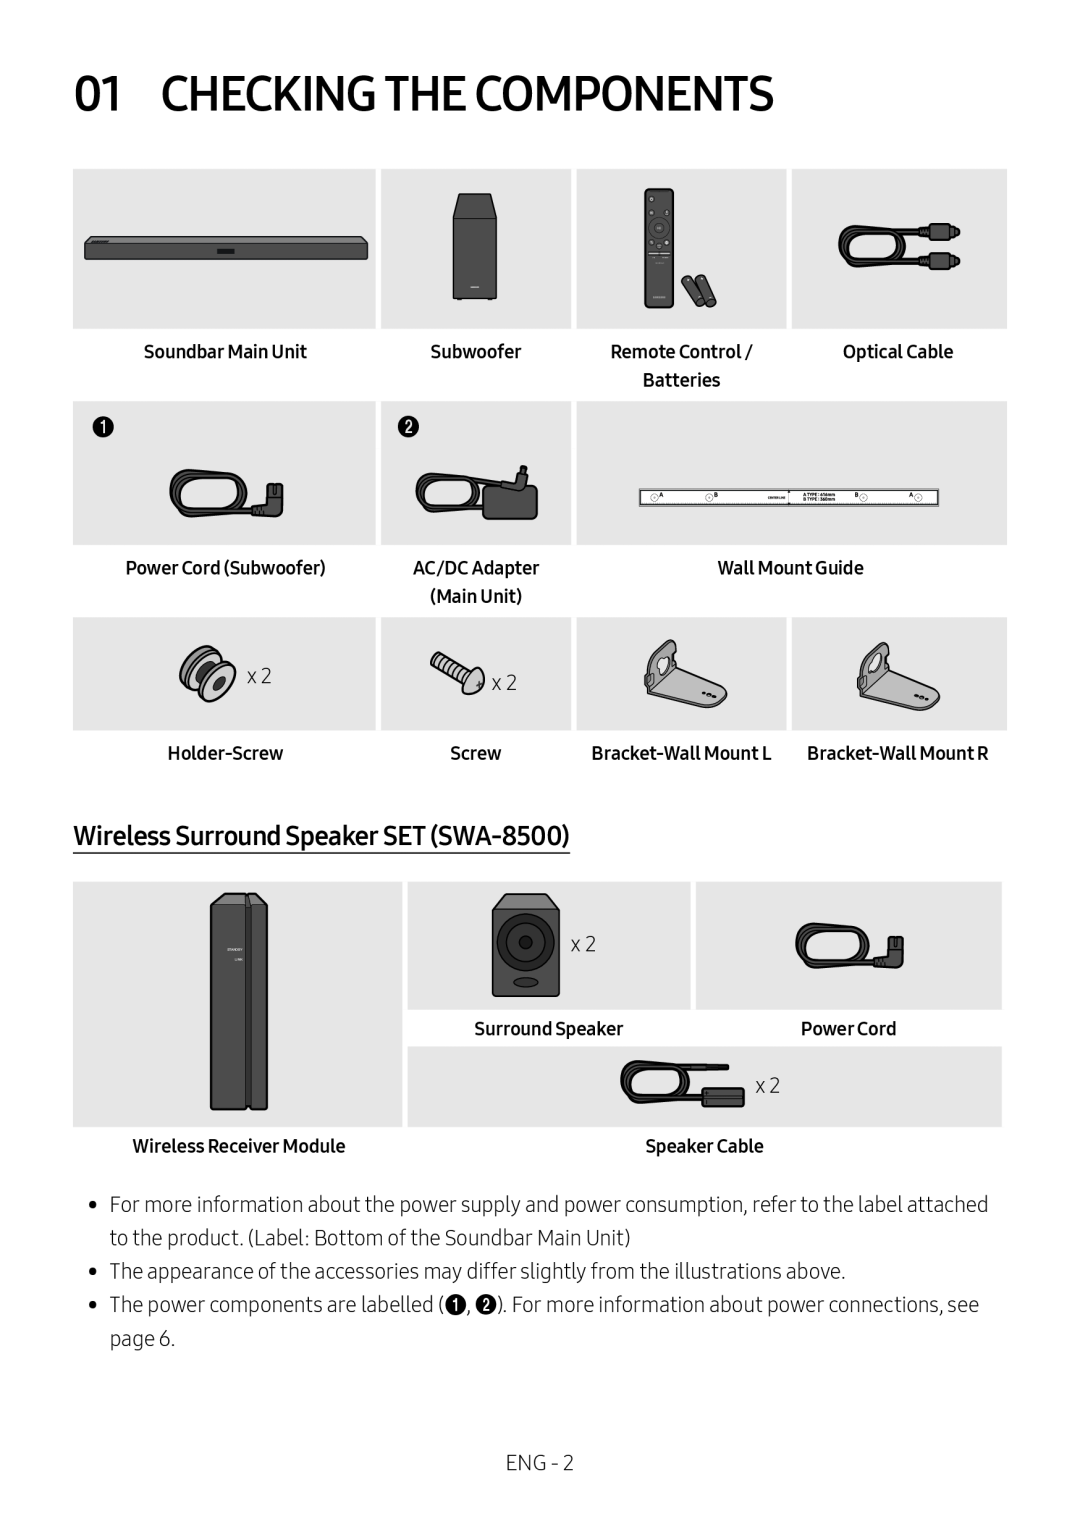 01 CHECKING THE COMPONENTS
Wireless Surround Speaker SET (SWA-8500)
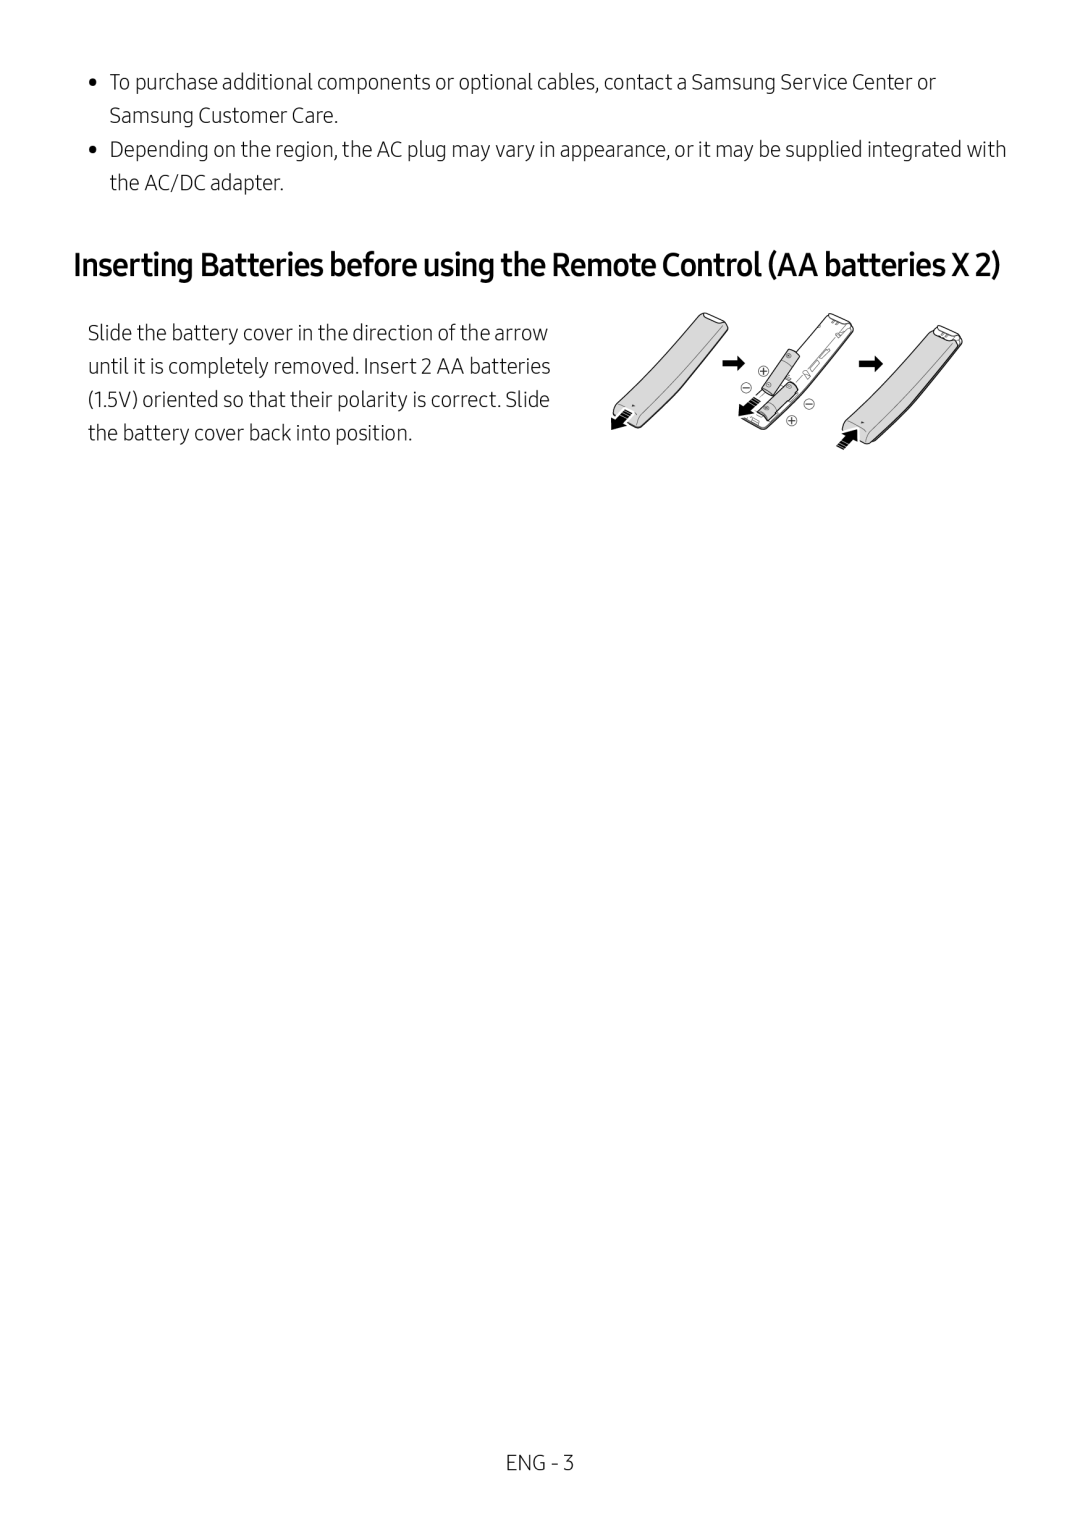 Inserting Batteries before using the Remote Control (AA batteries X 2)
 02 PRODUCT OVERVIEW
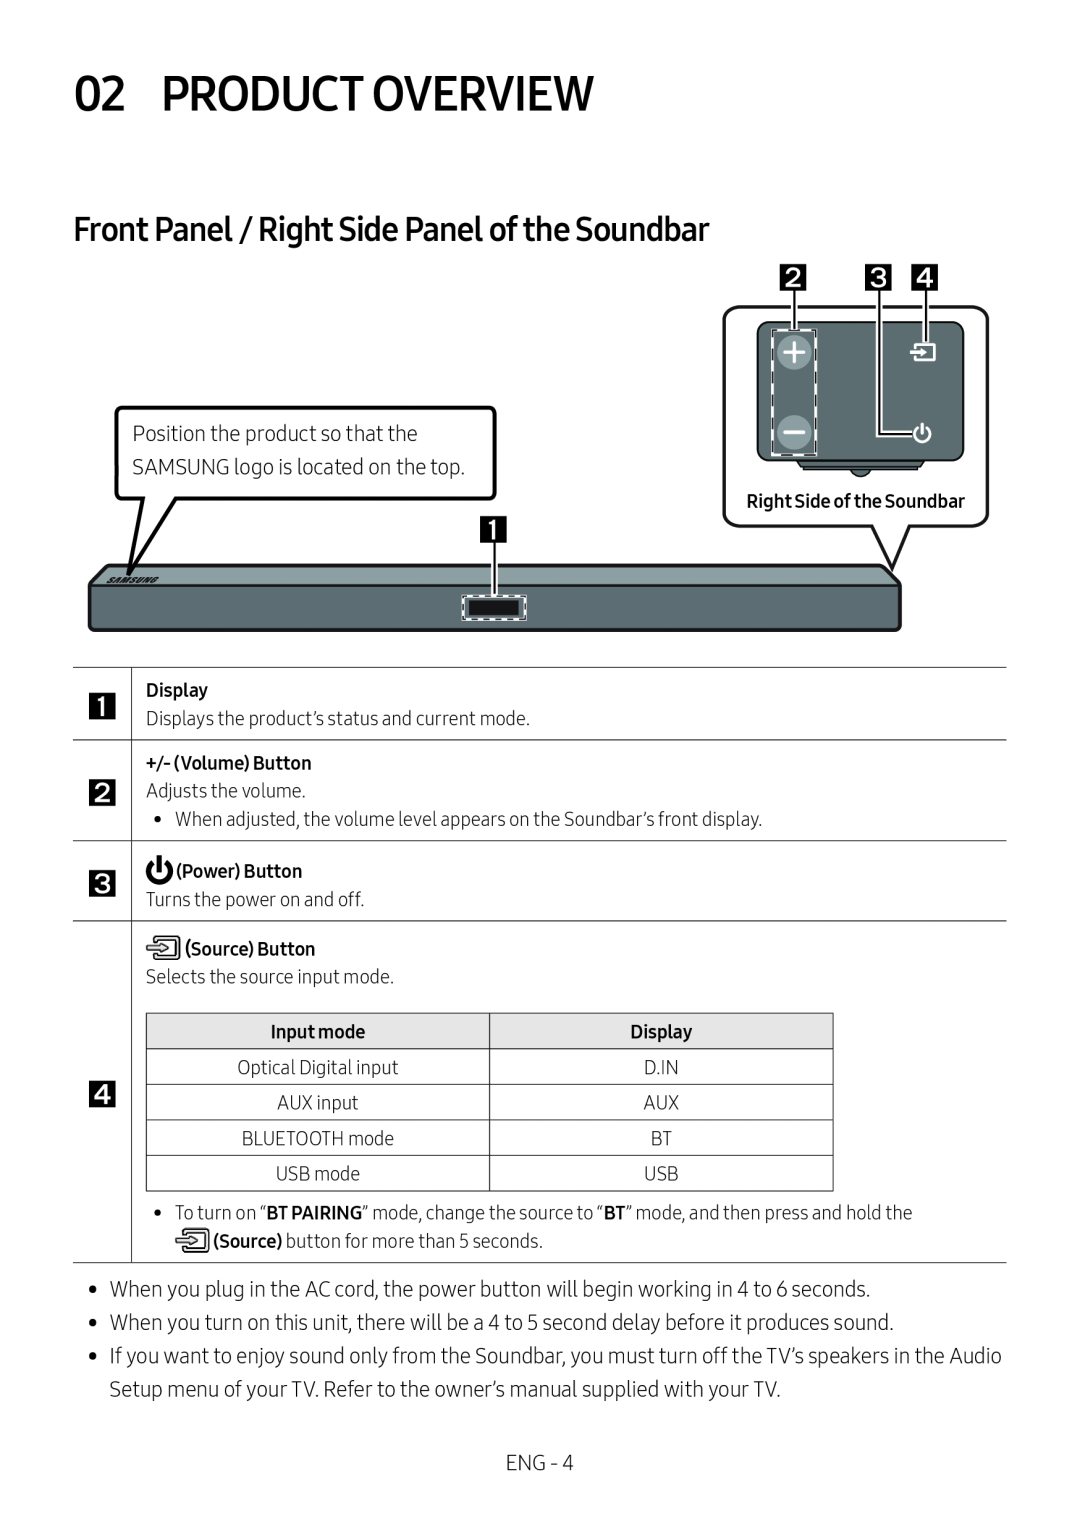
Front Panel / Right Side Panel of the Soundbar
 Bottom Panel of the Soundbar
 03 CONNECTING THE SOUNDBAR
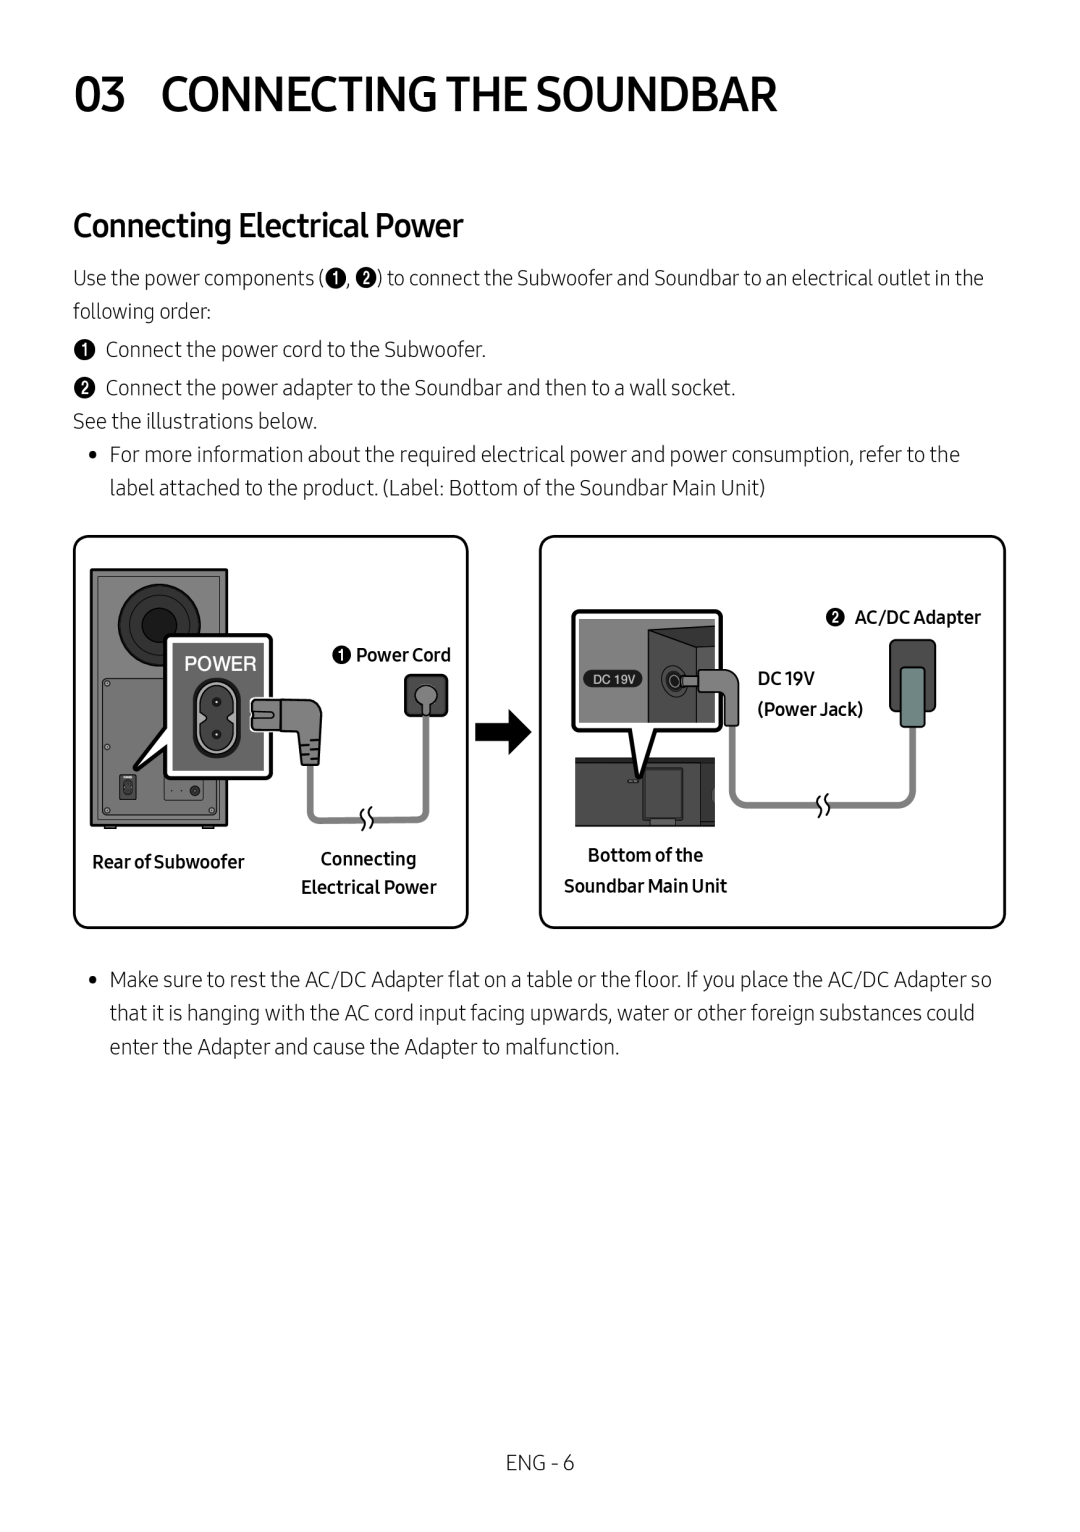
Connecting Electrical Power
 Connecting the Soundbar to the Subwoofer
Automatic connection between the Subwoofer and the Soundbar
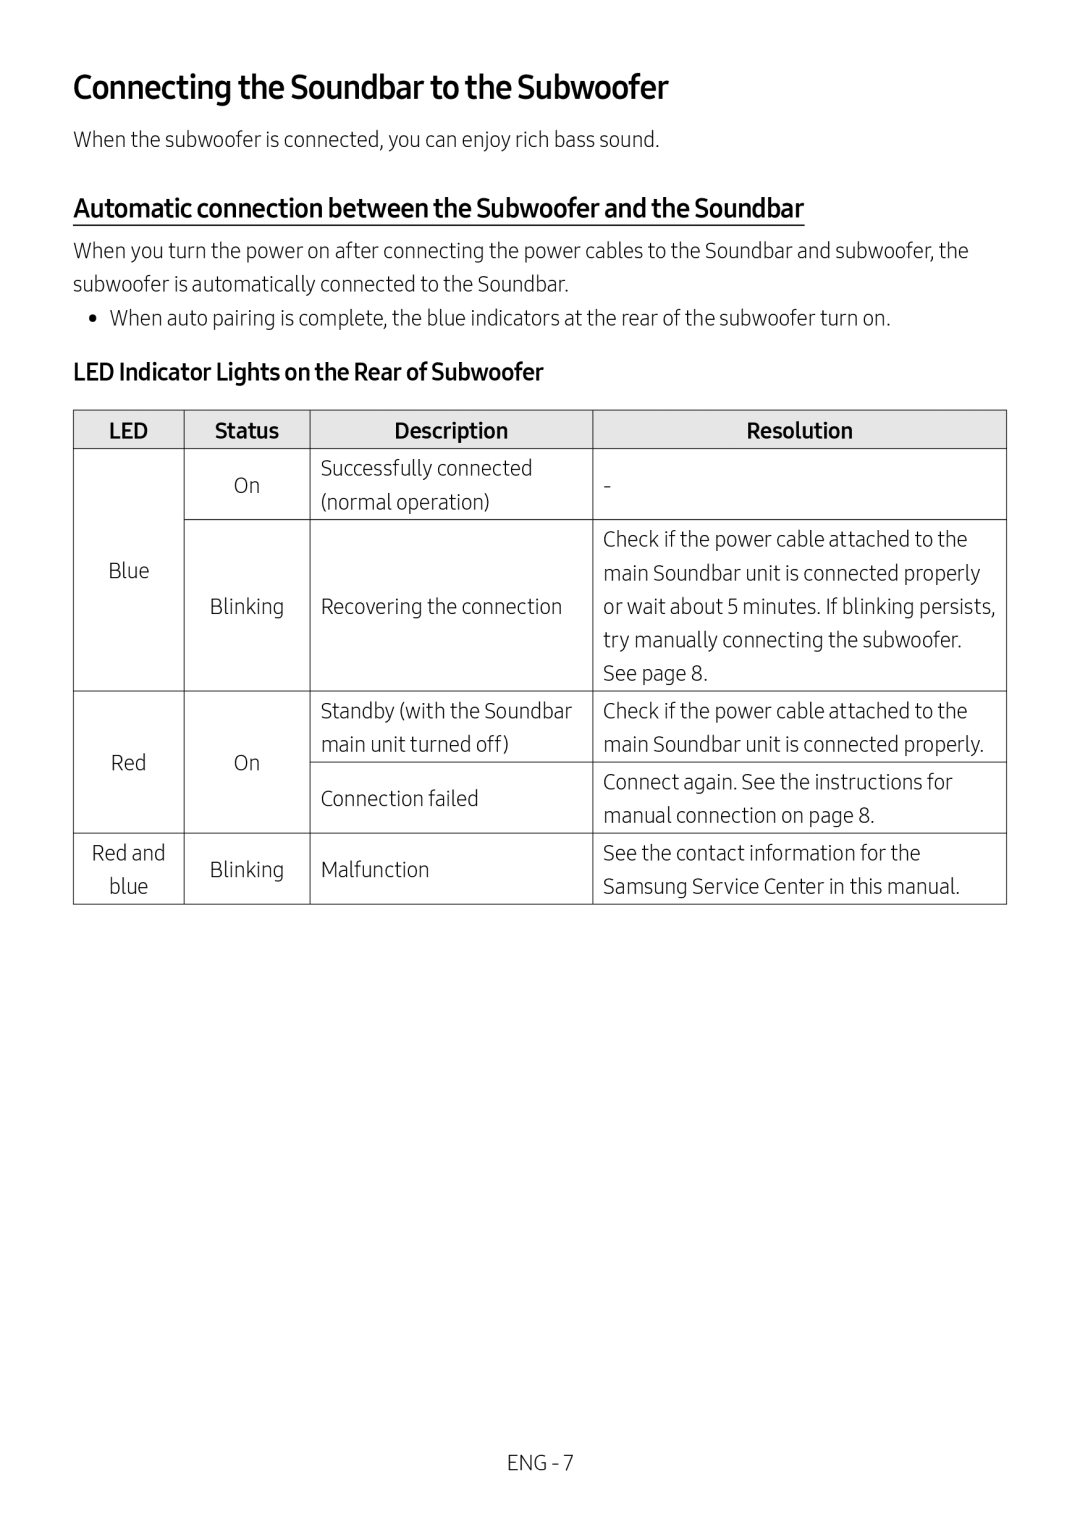
LED Indicator Lights on the Rear of Subwoofer
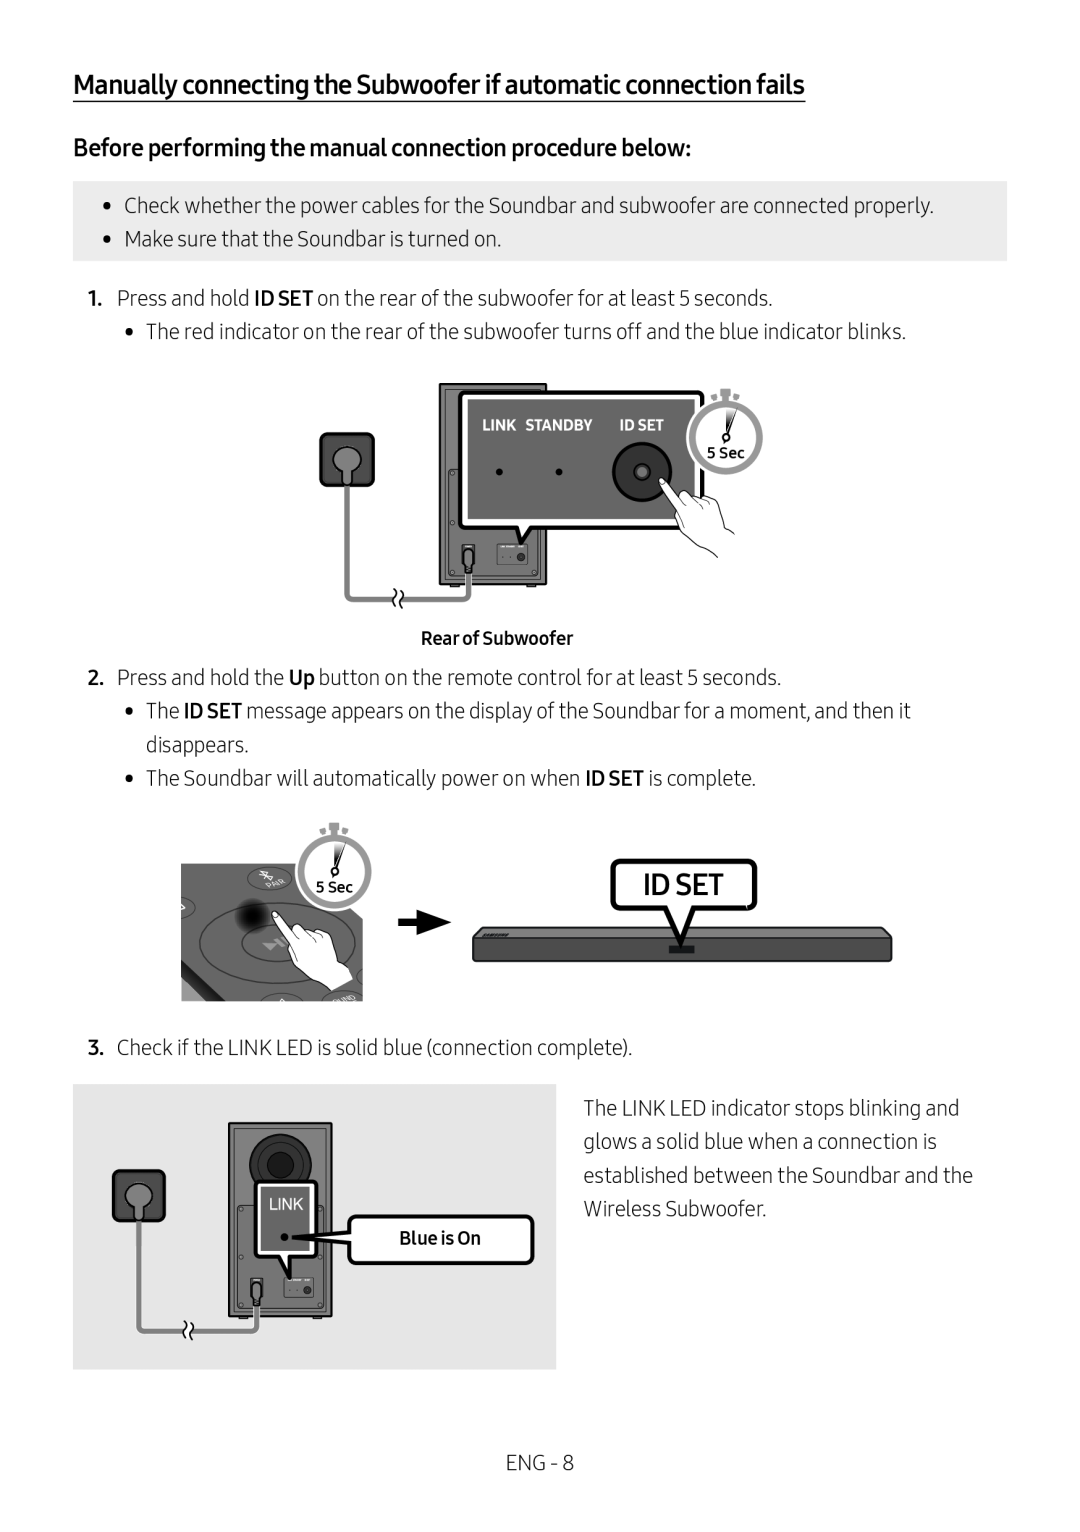 Manually connecting the Subwoofer if automatic connection fails
Before performing the manual connection procedure below:
 NOTES
NOTESPRECAUTIONS
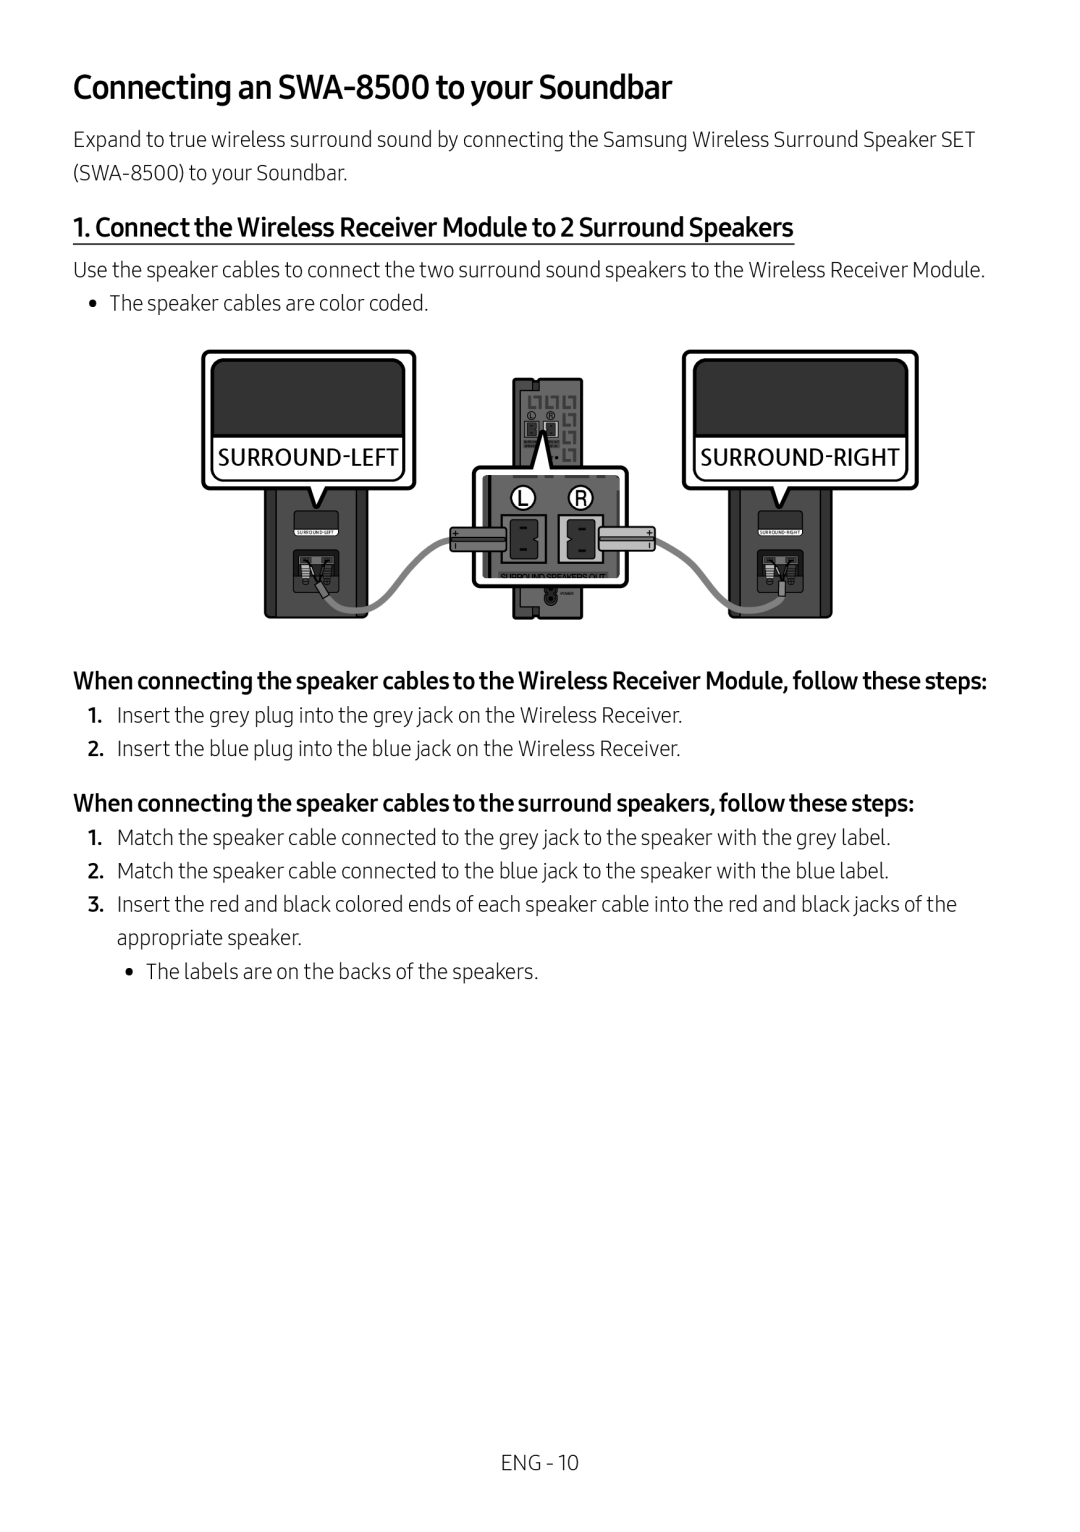 Connecting an SWA-8500to your Soundbar
1. Connect the Wireless Receiver Module to 2 Surround Speakers
 2. Check the standby status after plugging into an electrical outlet
3. Configure “ID SET” using the Soundbar’s remote control
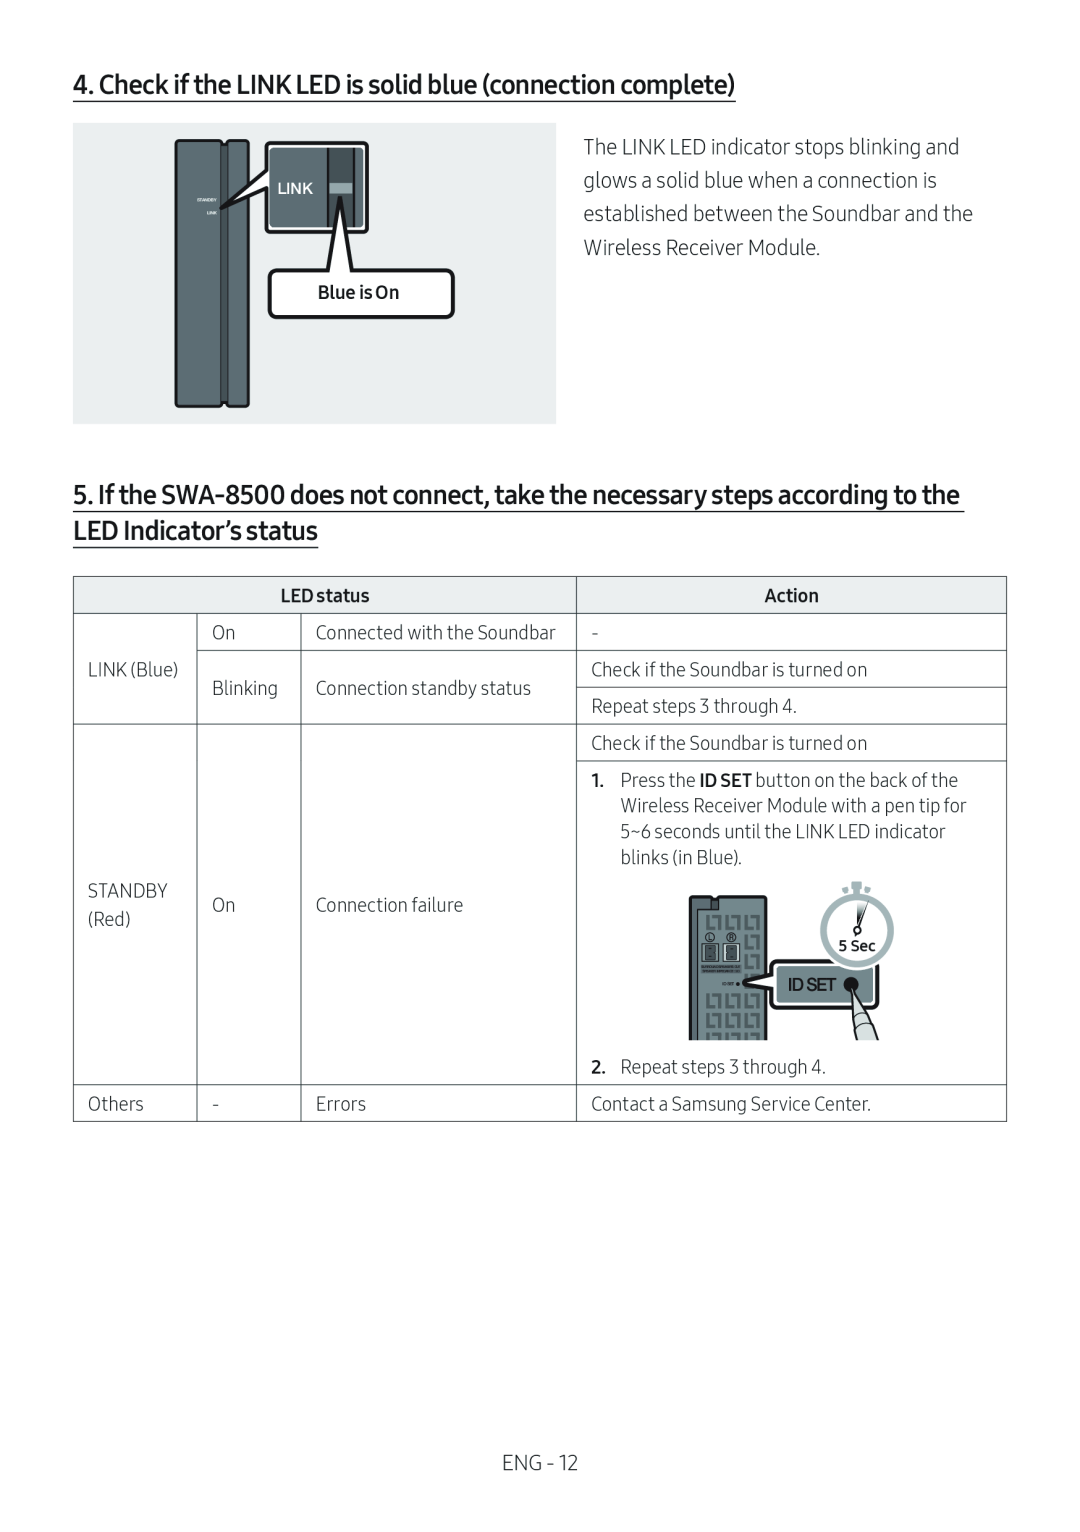 4. Check if the LINK LED is solid blue (connection complete)
5.If the SWA-8500does not connect, take the necessary steps according to the
LED Indicator’s status
 04 CONNECTING TO YOUR TV
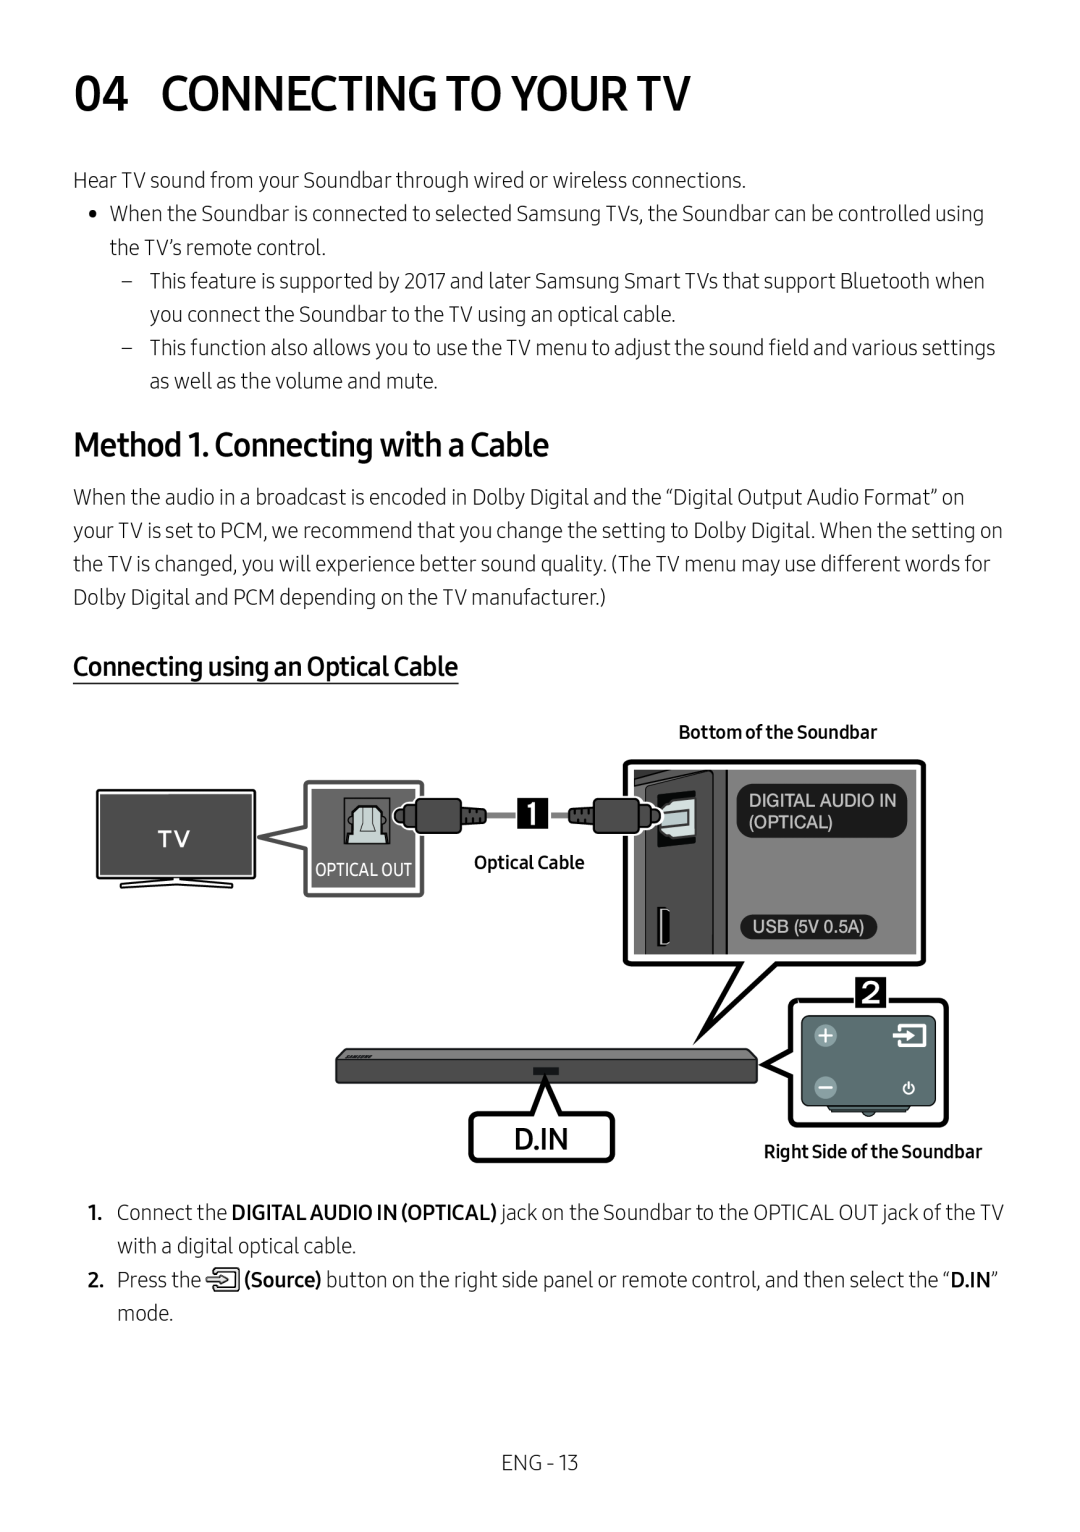
Method 1. Connecting with a Cable
Connecting using an Optical Cable
 Auto Power Link
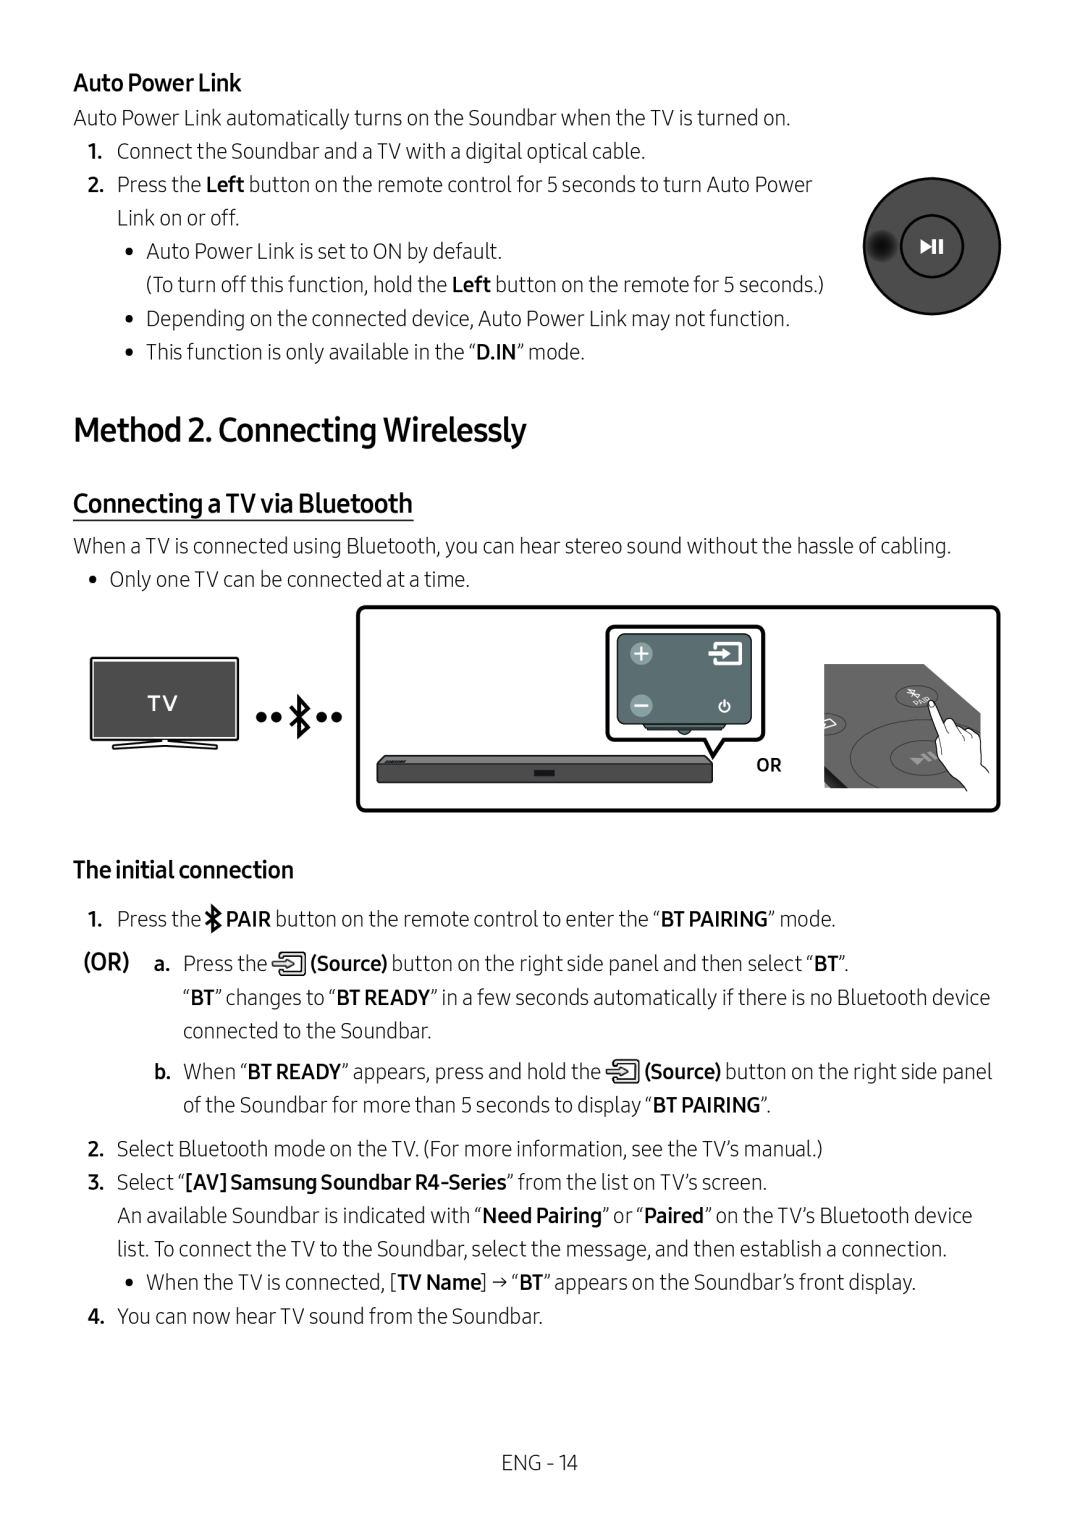
Method 2. Connecting Wirelessly
Connecting a TV via Bluetooth
The initial connection
(OR)
 If the device fails to connect
Disconnecting the Soundbar from the TV
What is the difference between BT READY and BT PAIRING
 05 CONNECTING AN EXTERNAL DEVICE
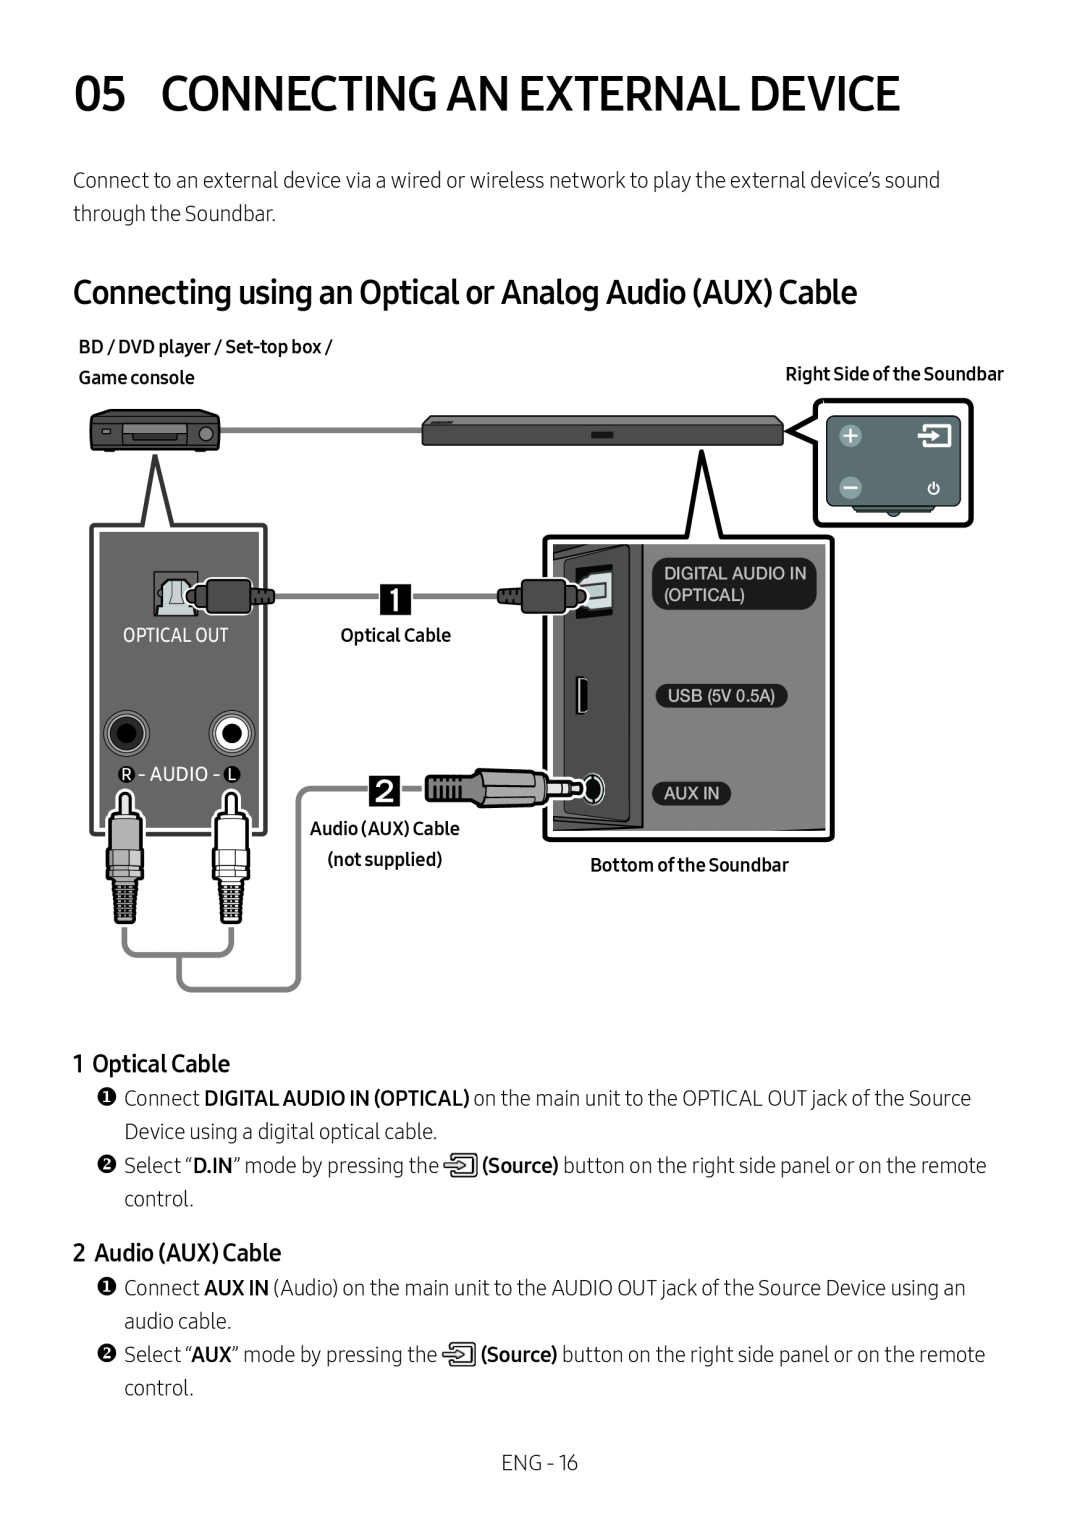
Connecting using an Optical or Analog Audio (AUX) Cable
1 Optical Cable
2Audio (AUX) Cable
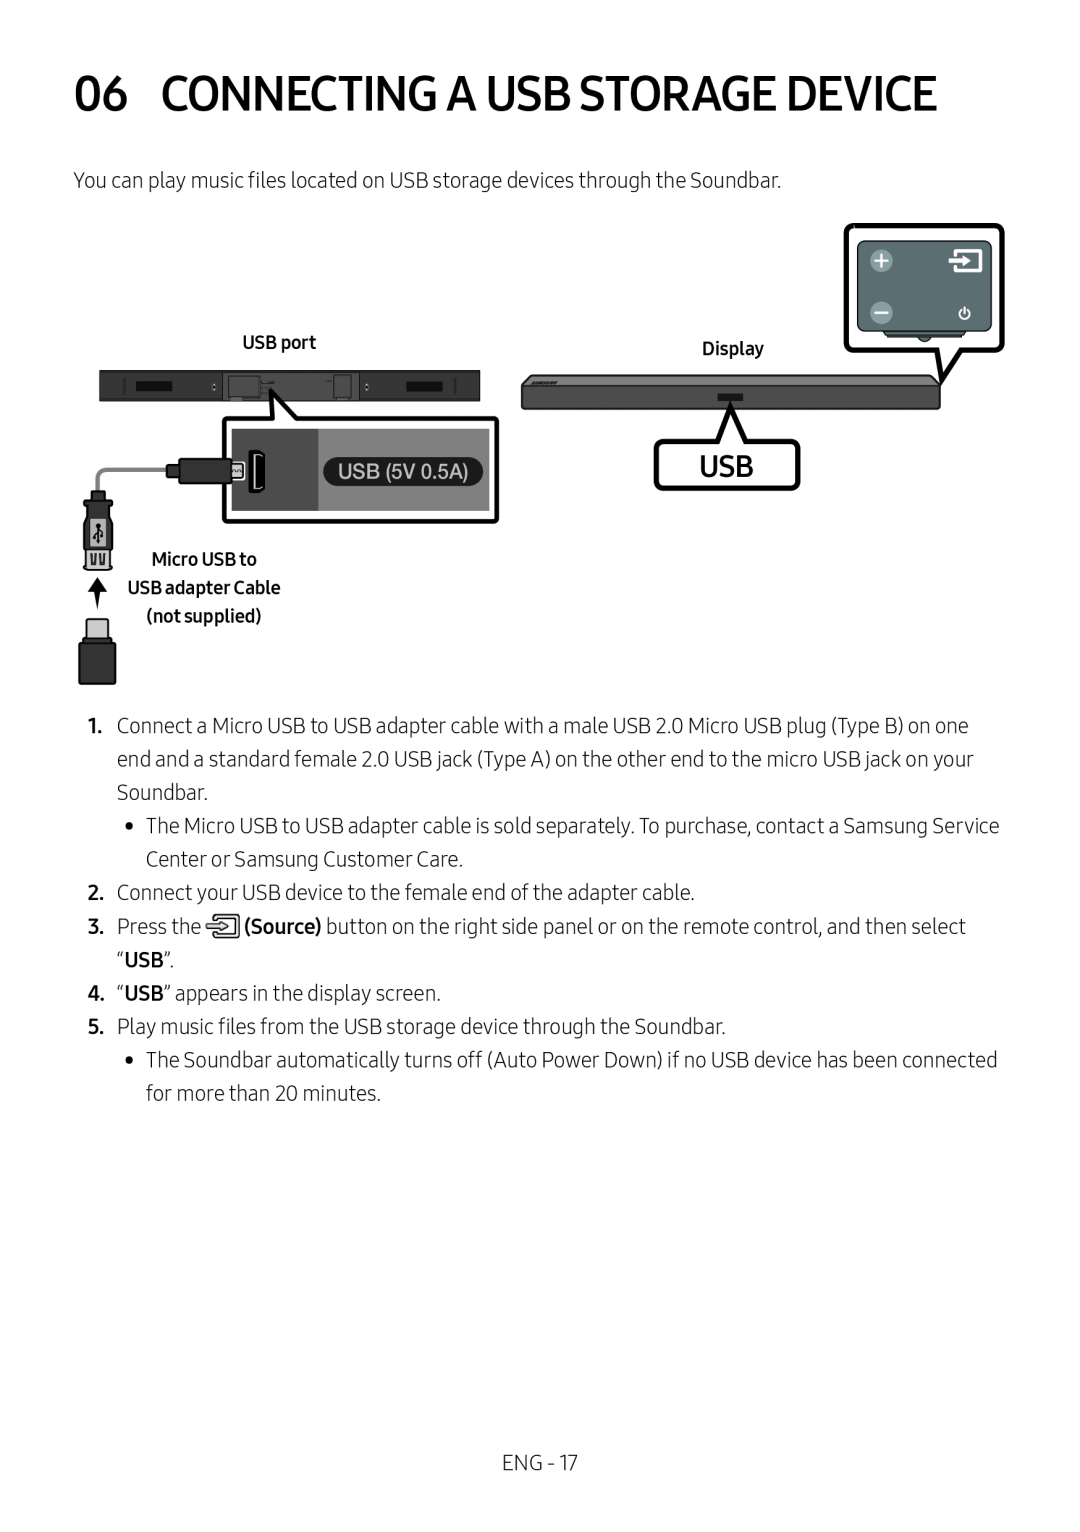 06 CONNECTING A USB STORAGE DEVICE
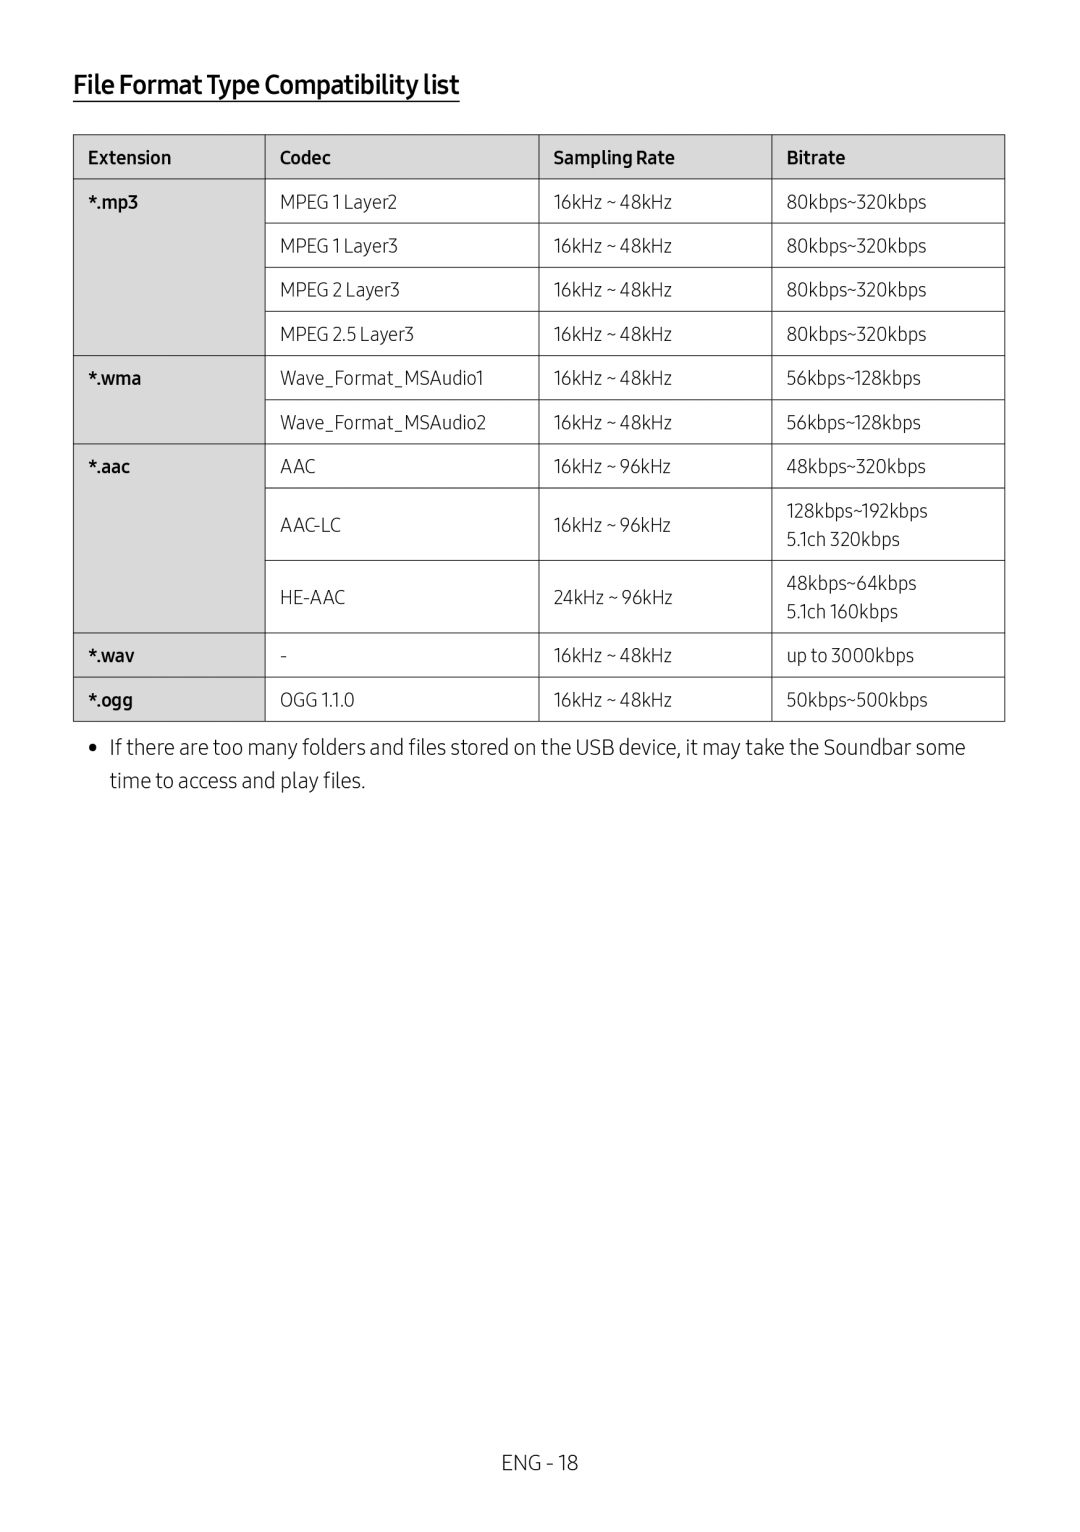 File Format Type Compatibility list
 07 CONNECTING A MOBILE DEVICE
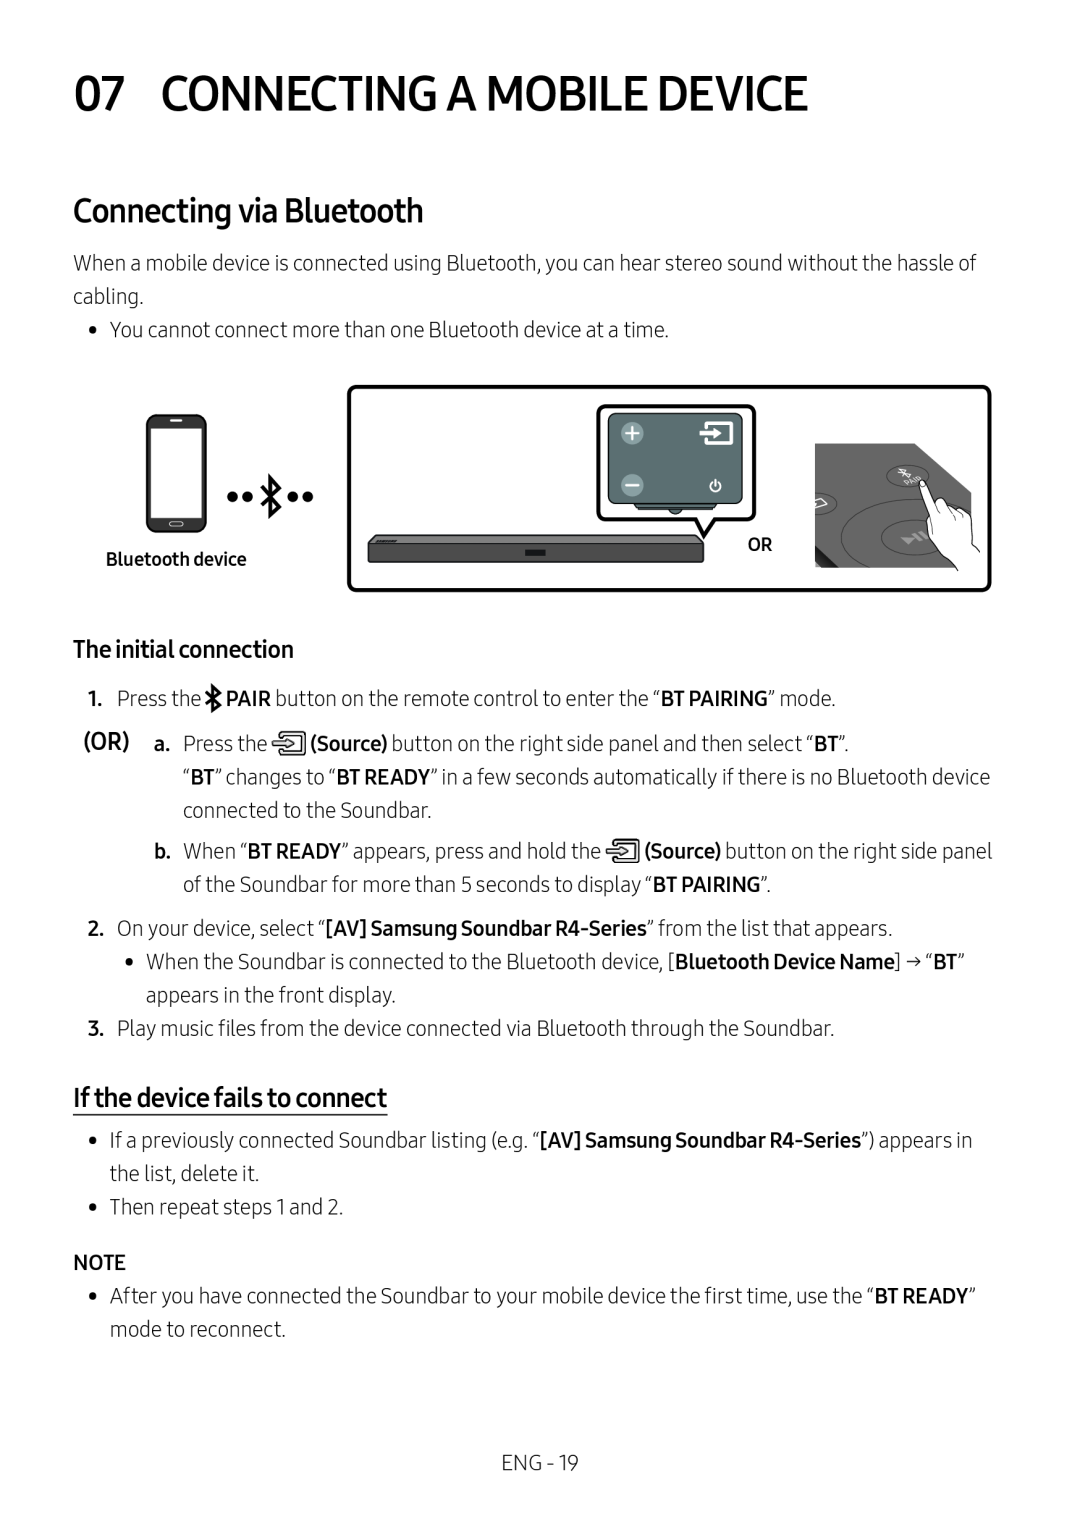
Connecting via Bluetooth
If the device fails to connect
 Bluetooth Power On (SOUND MODE)
 Disconnecting the Bluetooth device from a Soundbar
Disconnecting the Soundbar from the Bluetooth device
More About Bluetooth
 Using the Samsung Audio Remote App
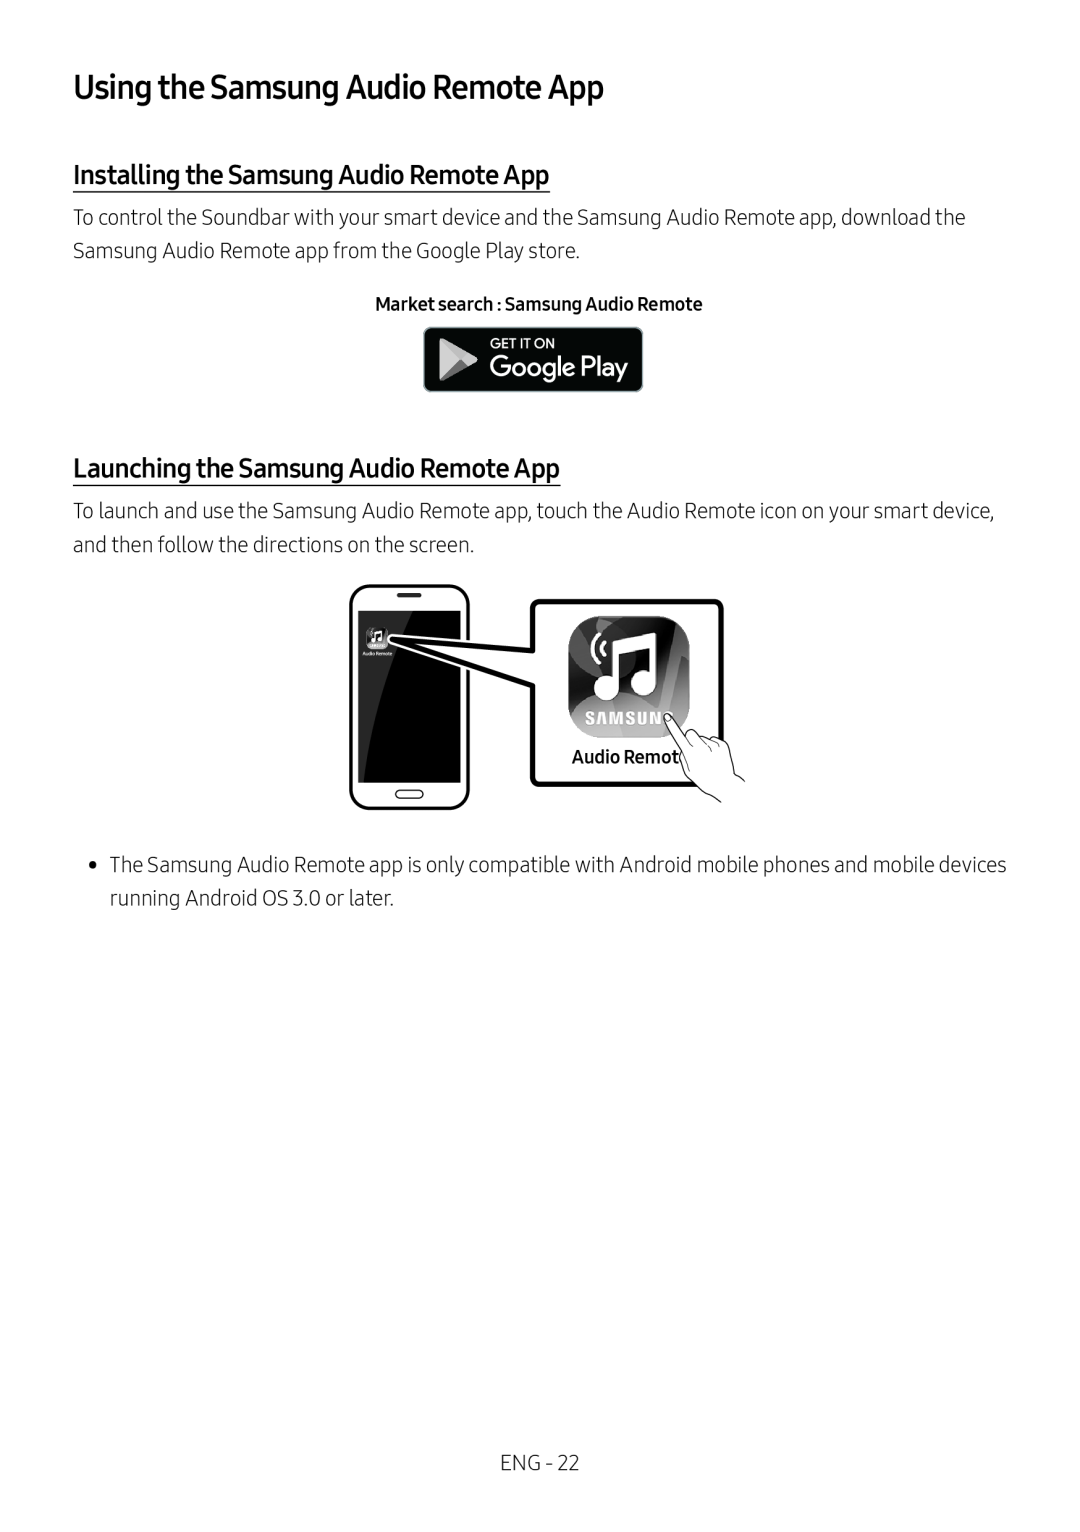
Installing the Samsung Audio Remote App
Launching the Samsung Audio Remote App
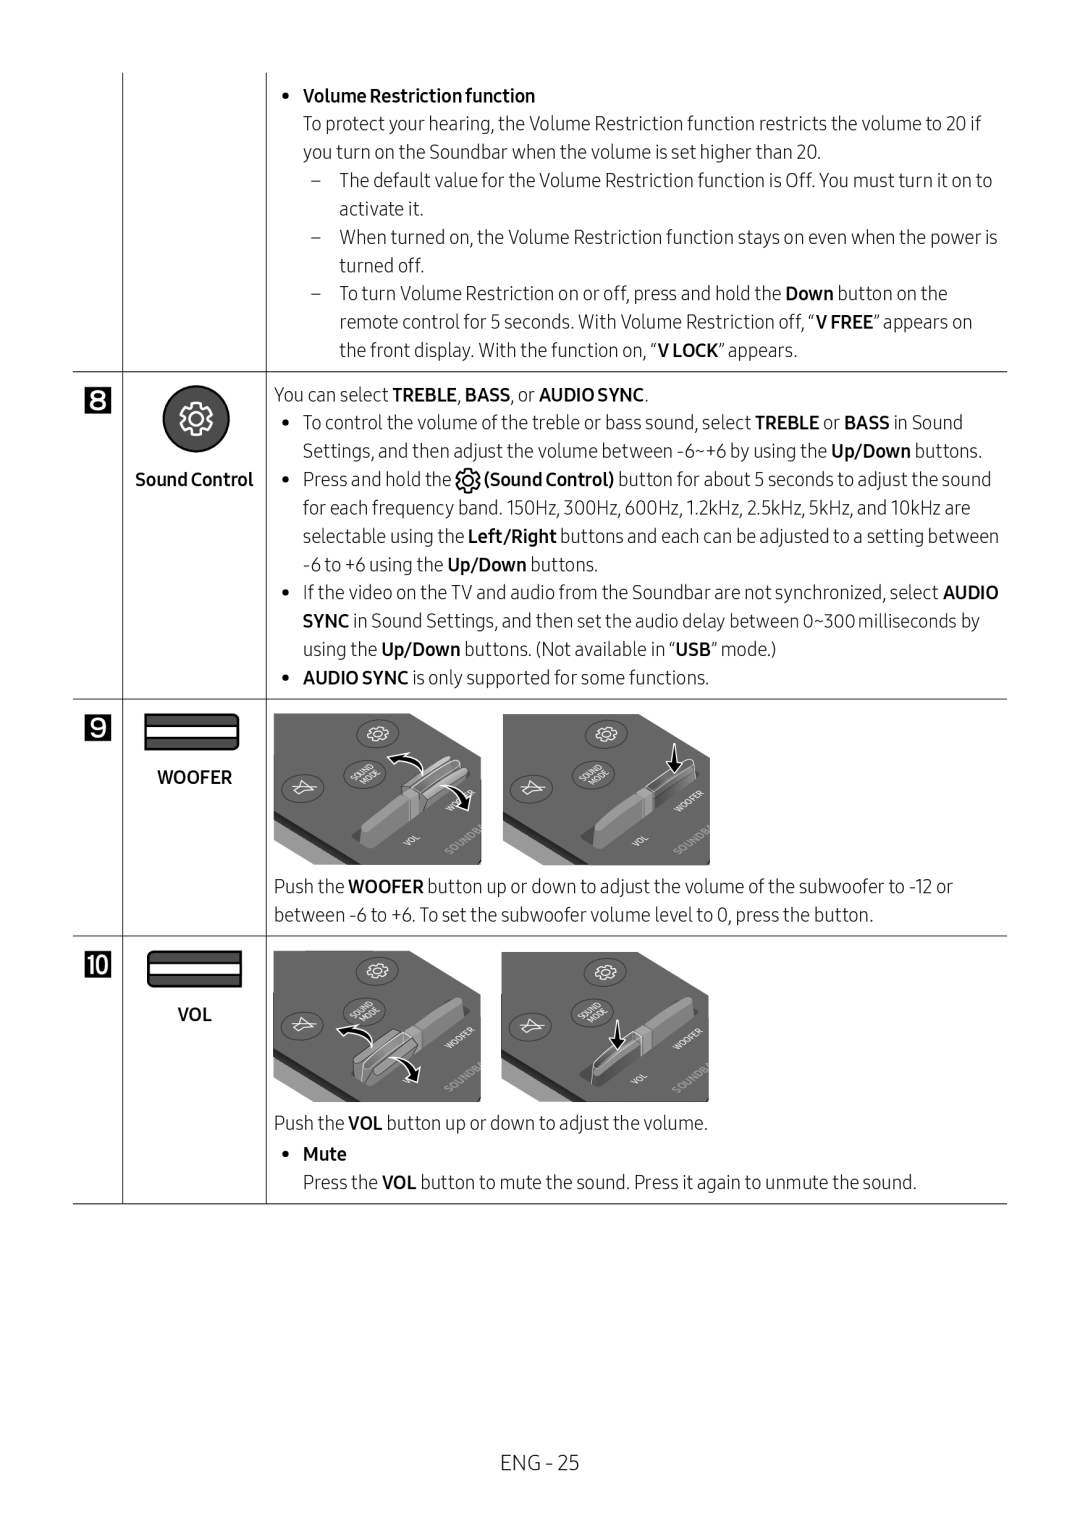
 08 USING THE REMOTE CONTROL
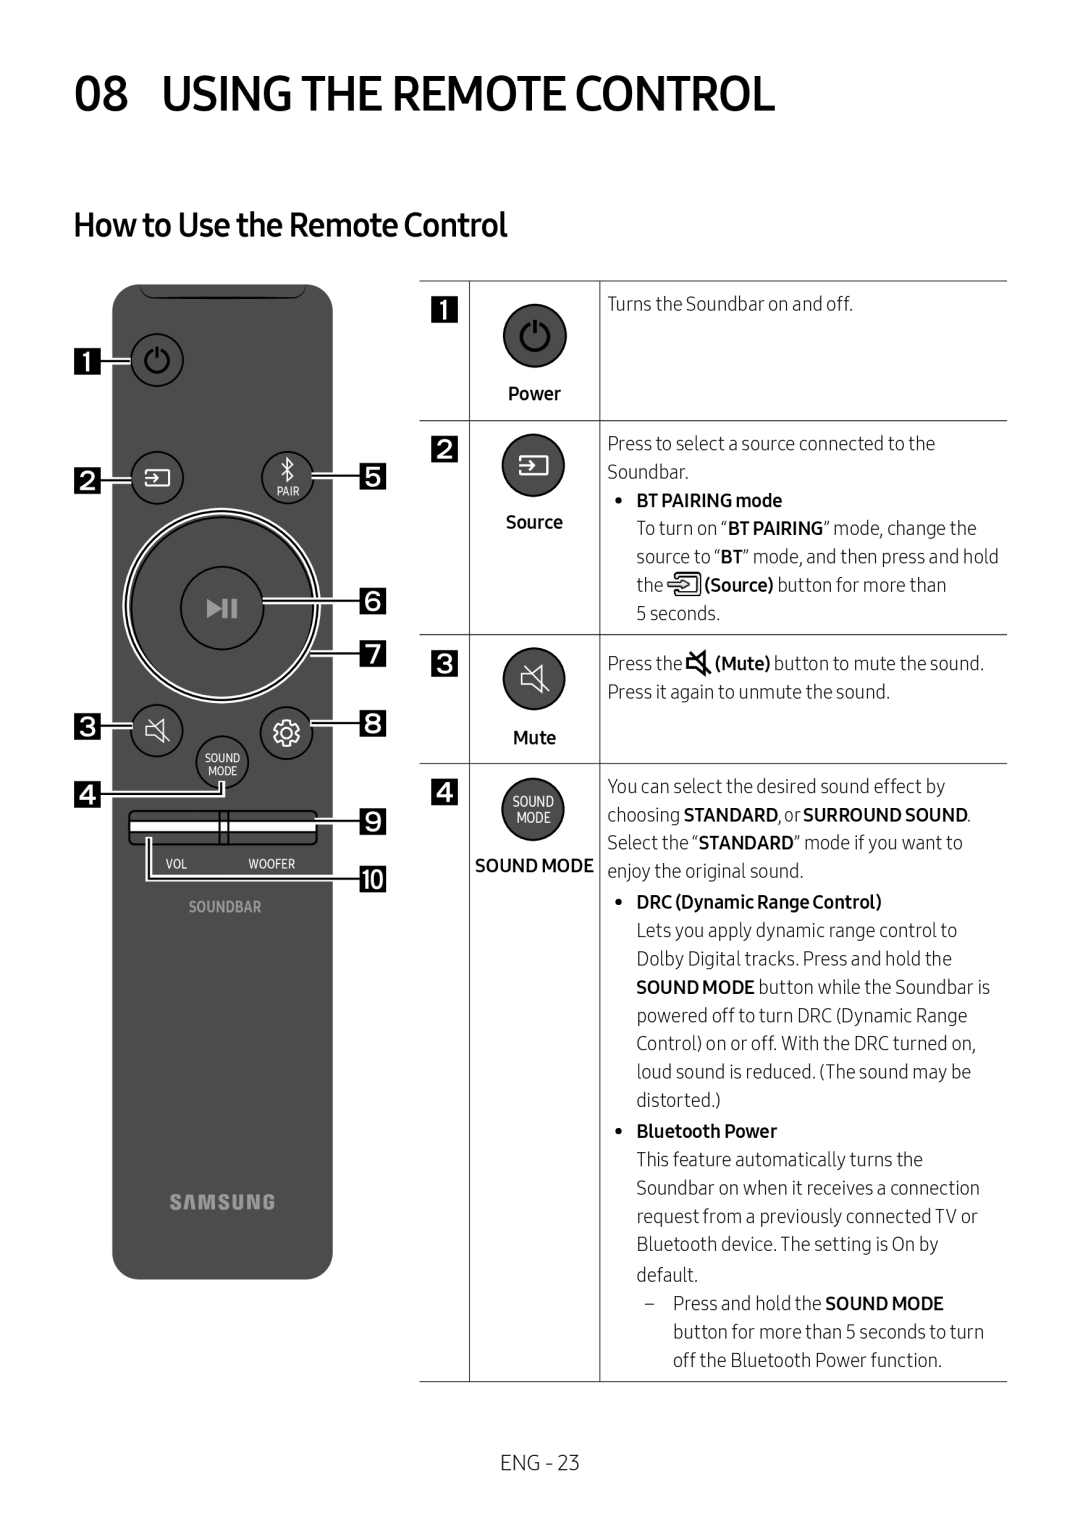
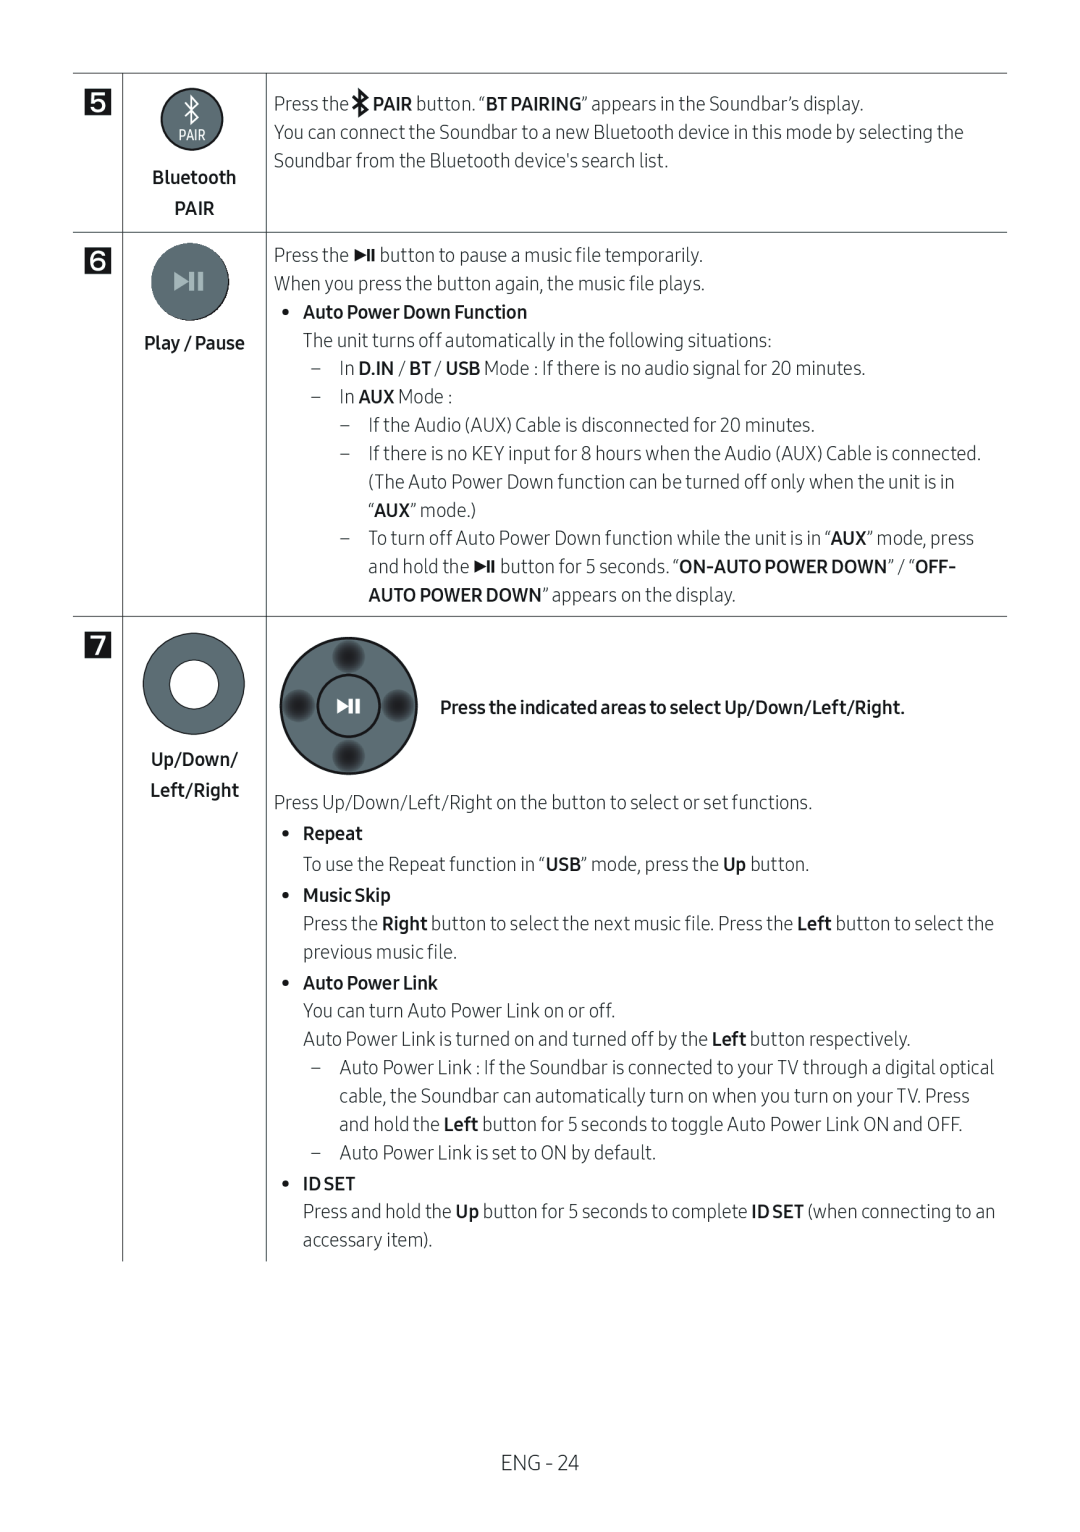
How to Use the Remote Control
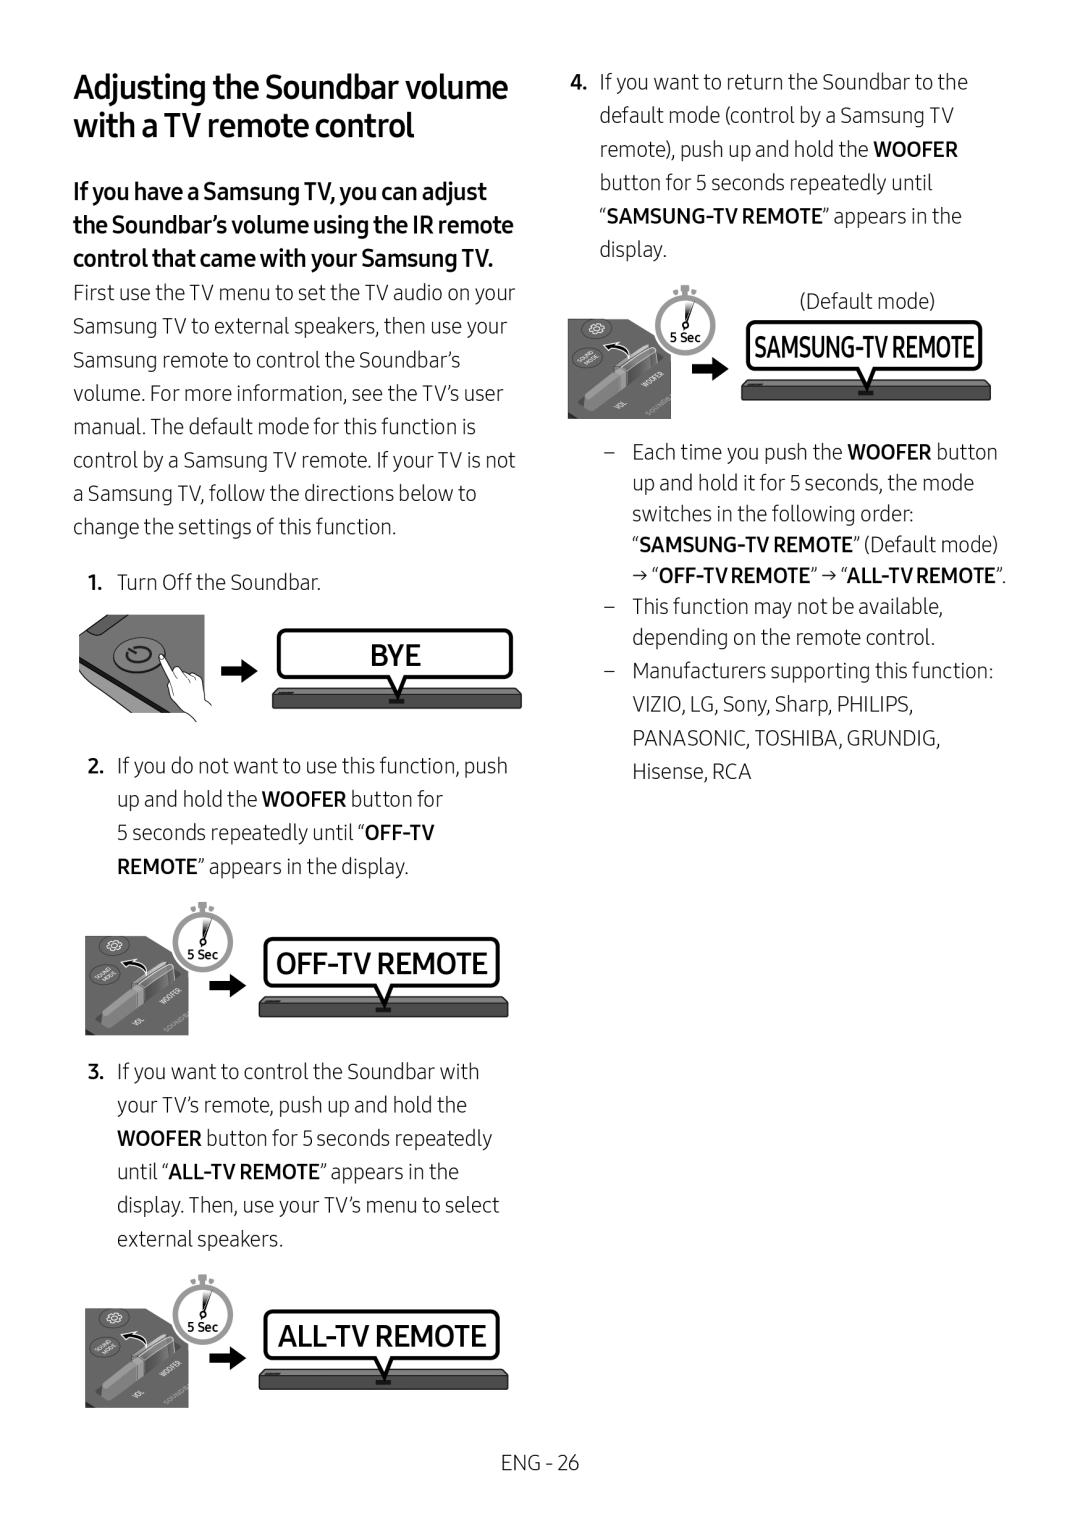 Adjusting the Soundbar volume with a TV remote control
 Using the Hidden Buttons (Buttons with more than one function)
Output specifications for the different sound effect modes
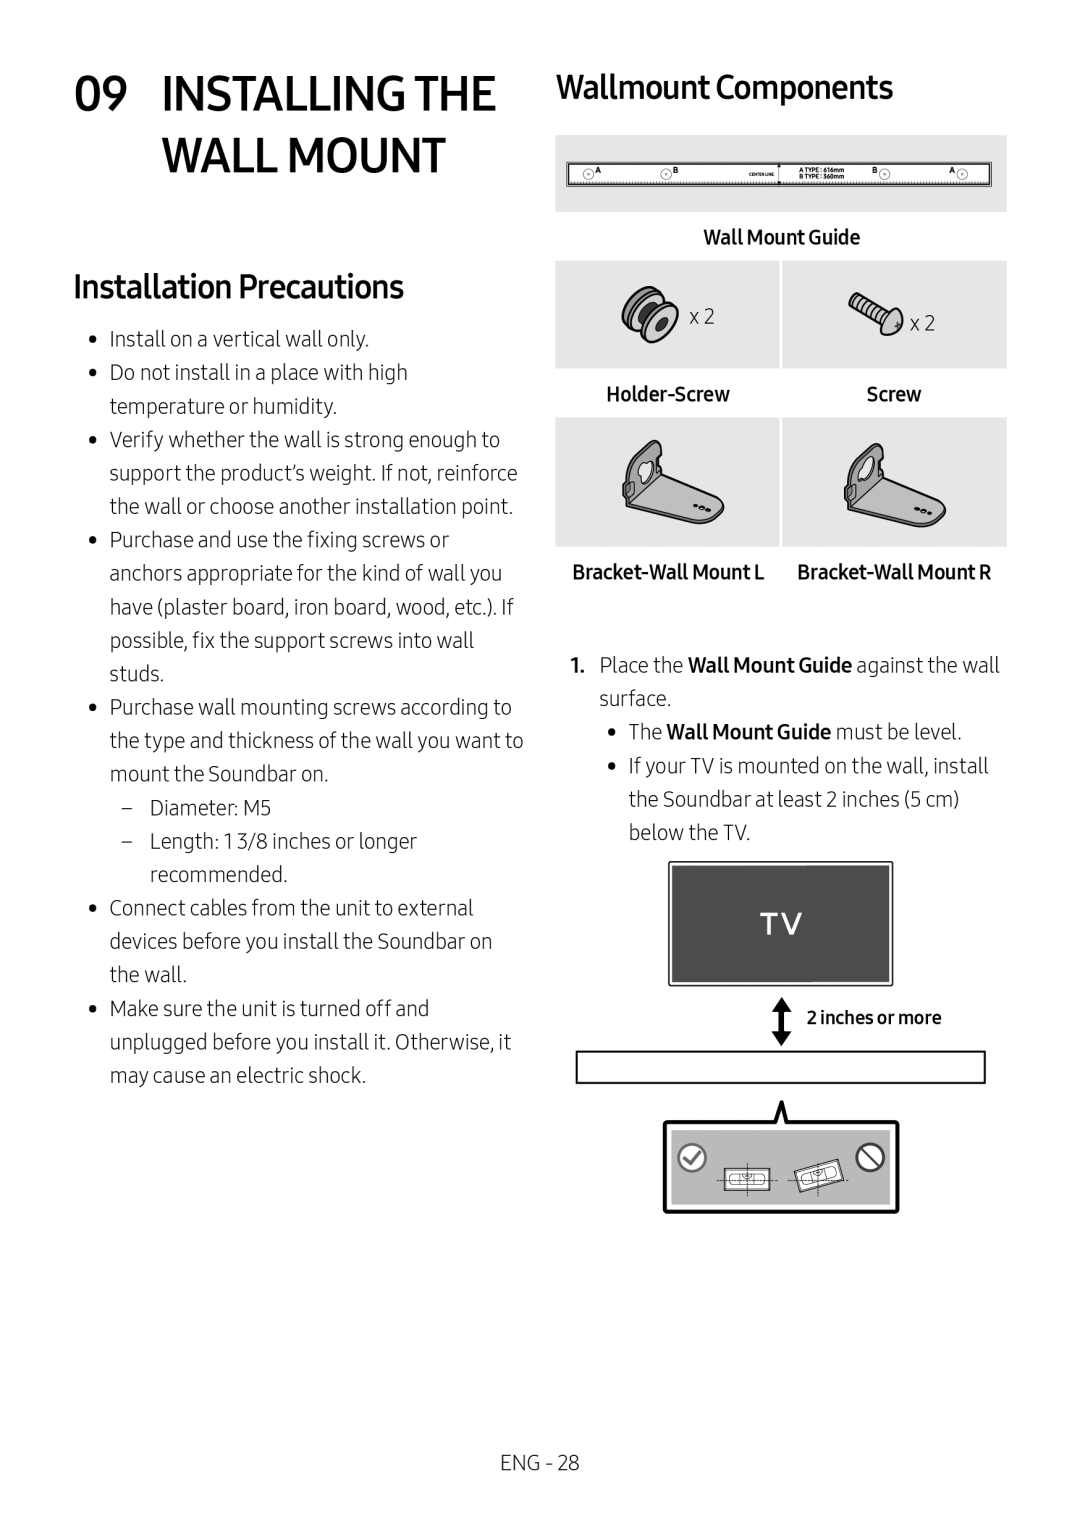 09INSTALLING THE WALL MOUNT
Installation Precautions
Wallmount Components
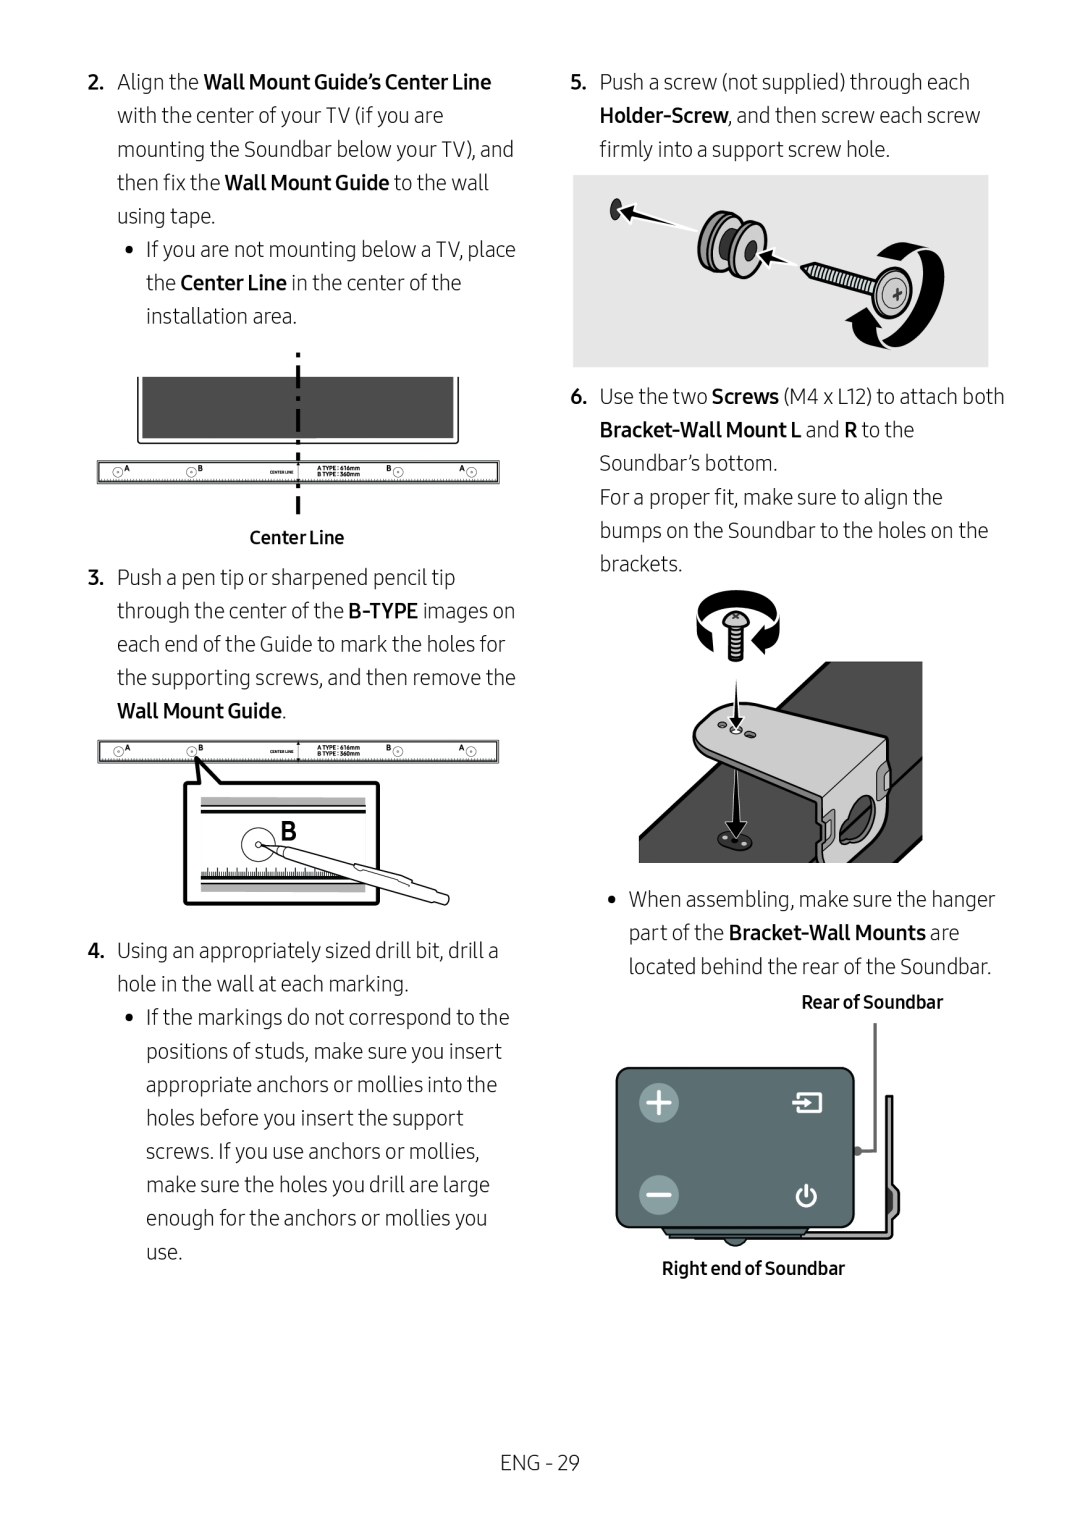 Center Line
B-TYPE
Wall Mount Guide
Holder-Screw
Screws
Bracket-Wall
Mount L
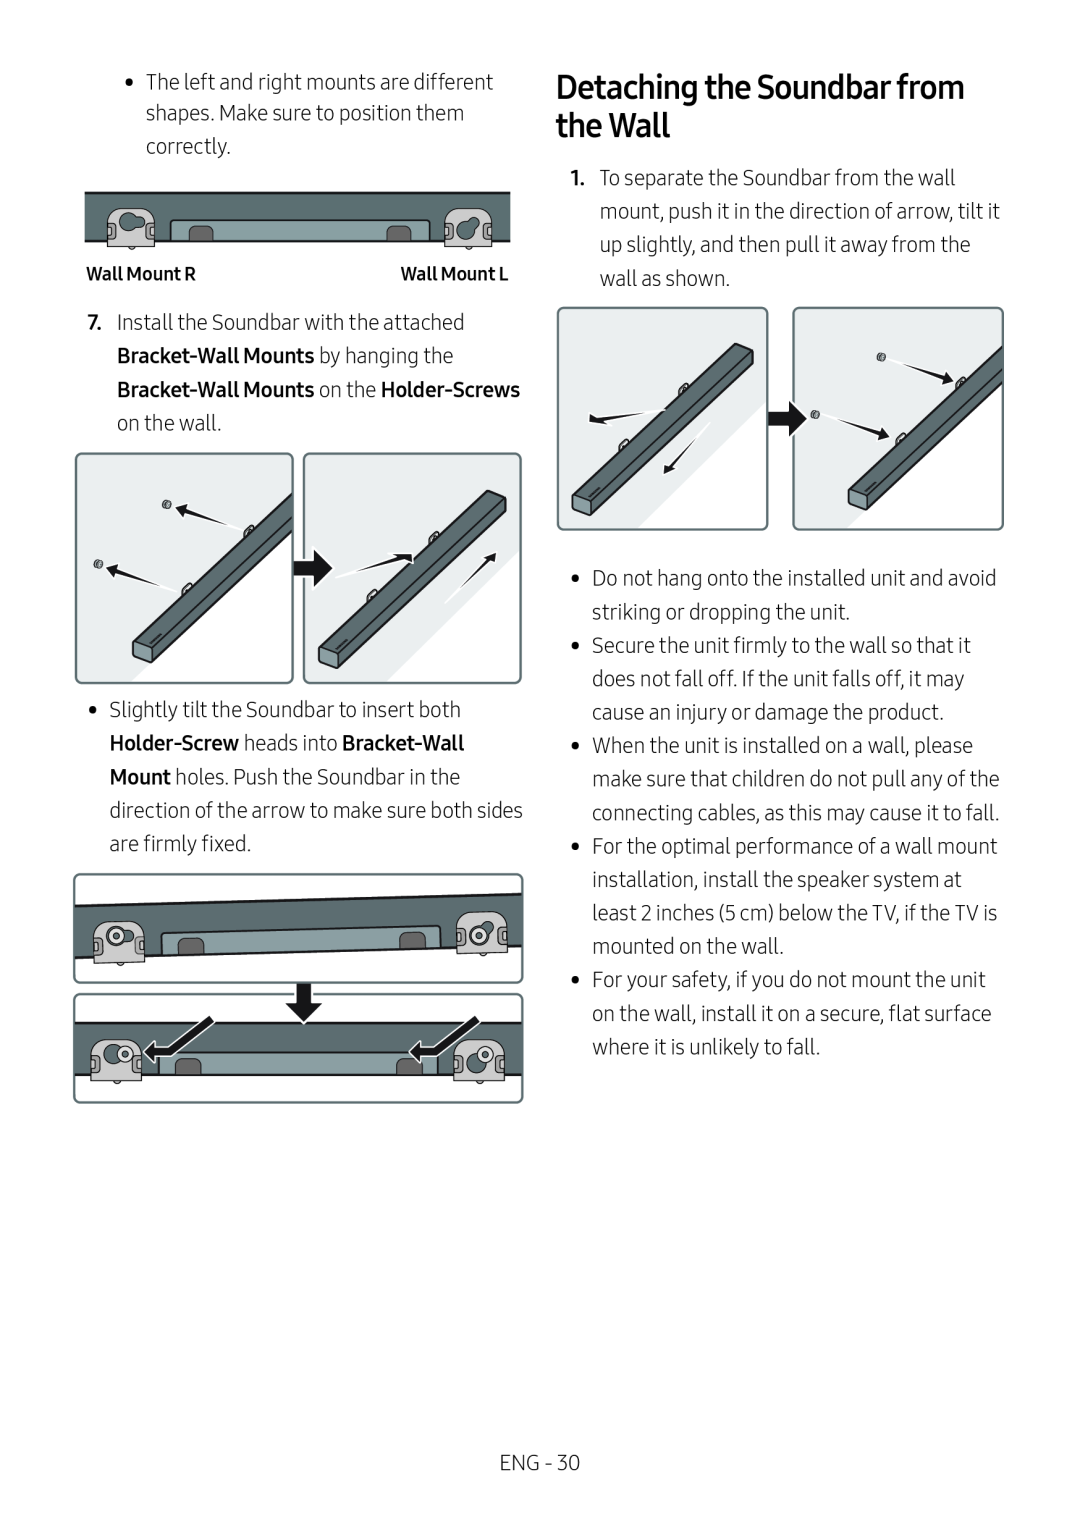 Detaching the Soundbar from the Wall
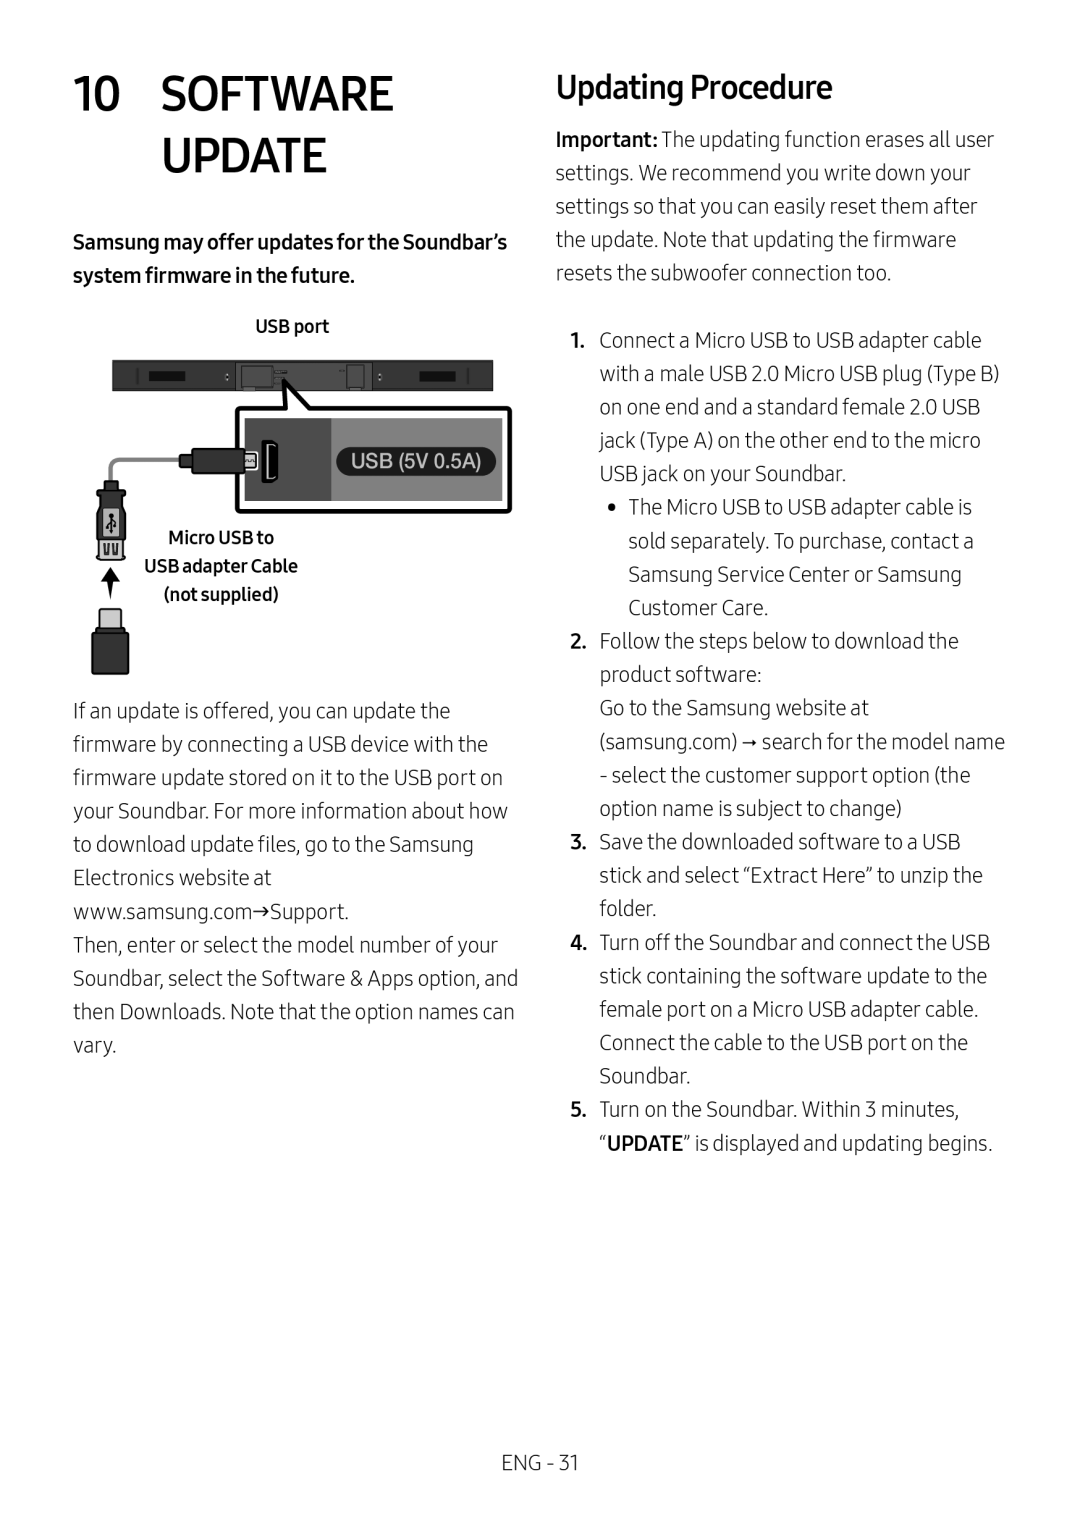 Updating Procedure
 If UPDATE is not displayed
 11 TROUBLESHOOTING
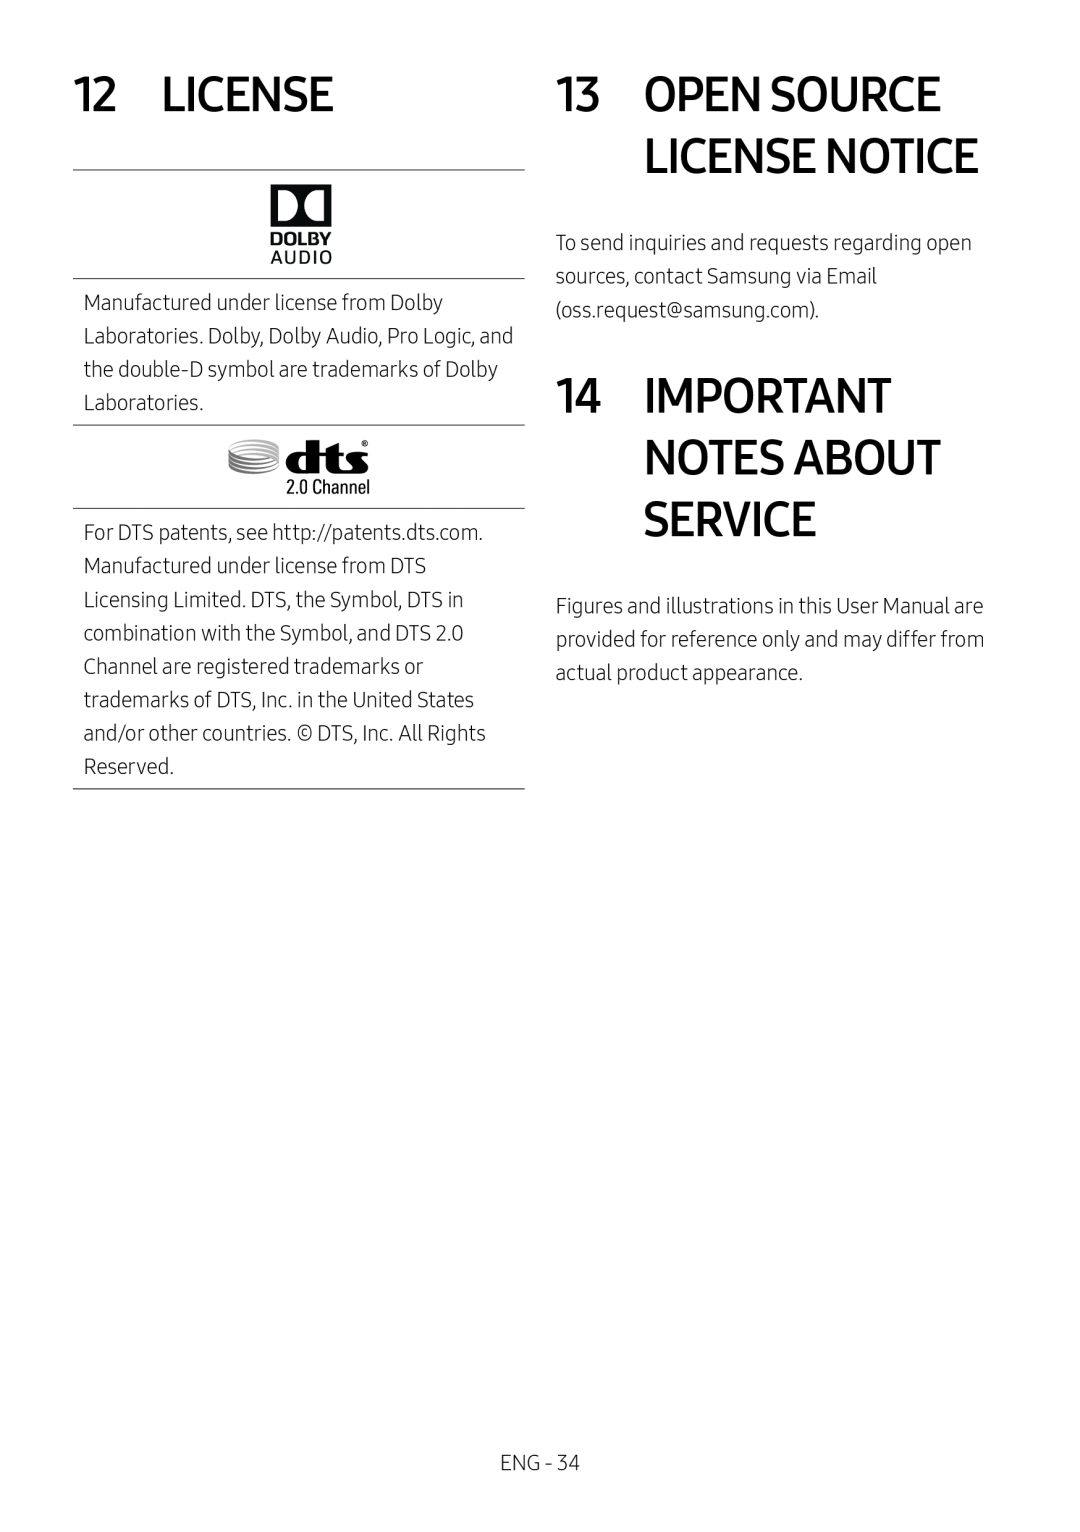 12 LICENSE
13OPEN SOURCE LICENSE NOTICE
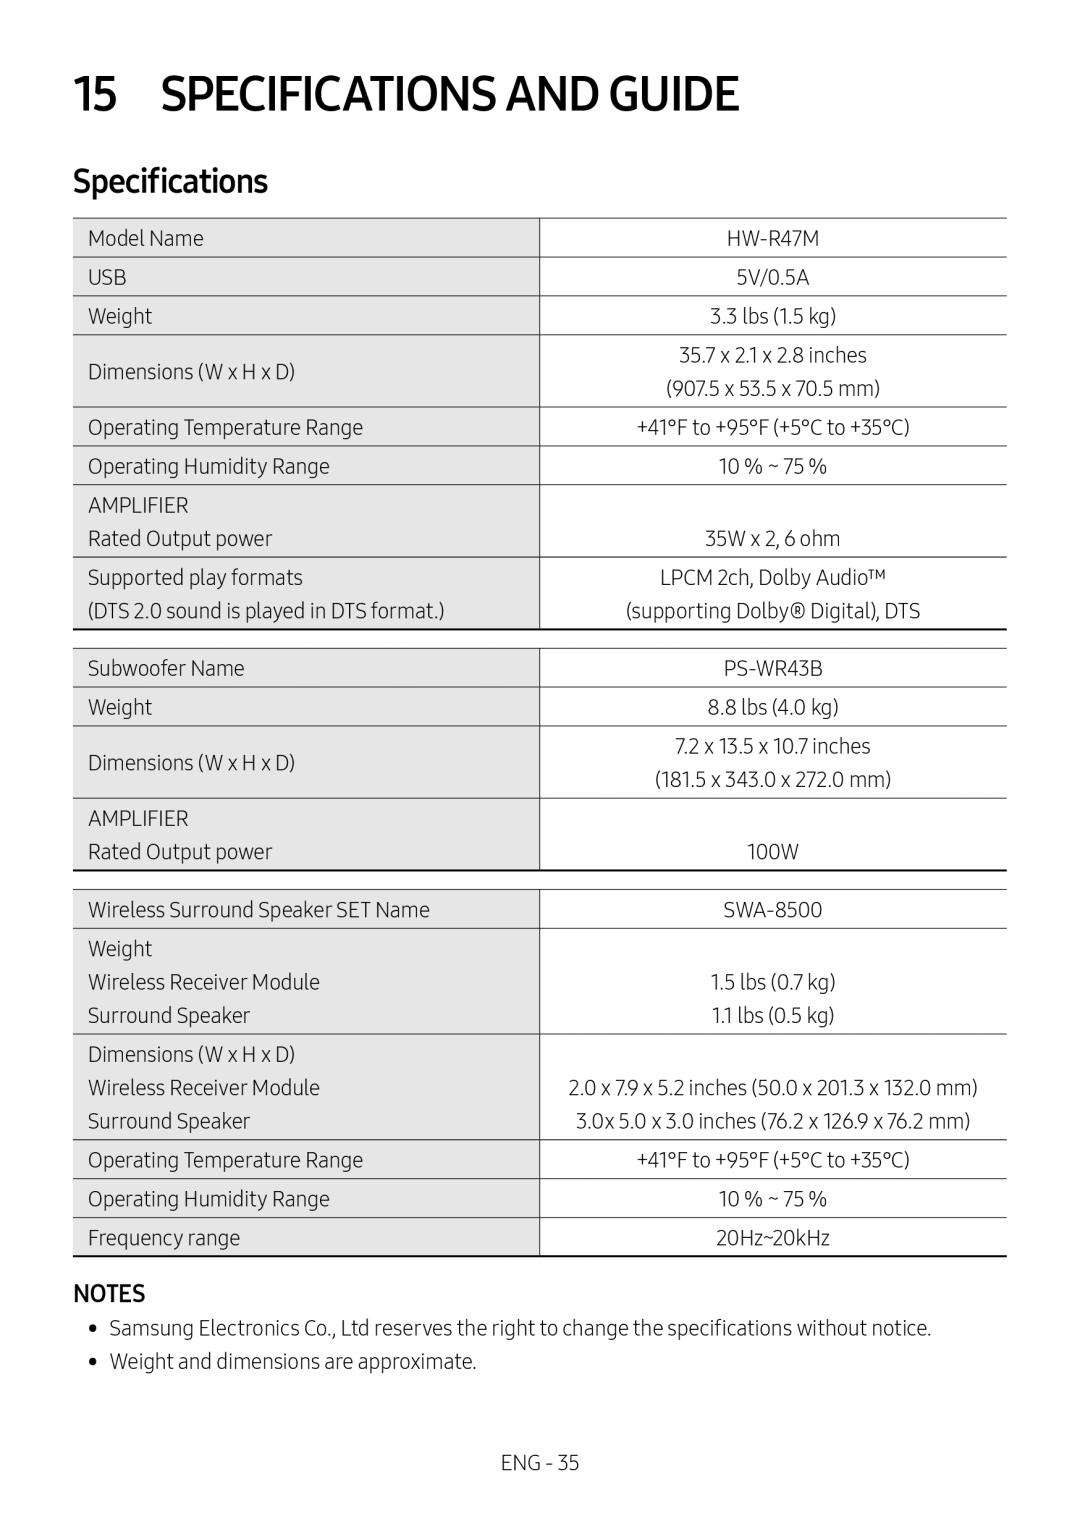 SPECIFICATIONS AND GUIDE
Specifications
NOTES
 LIMITED WARRANTY TO ORIGINAL PURCHASER
EXCLUSIONS (WHAT IS NOT COVERED)
Samsung Electronics Canada Inc
2050 Derry Rd West
Mississauga, On. L5N 0B9
Tel: 1-800-SAMSUNG (726-7864)
Fax: (905) 542
Website: www.samsung.com/ca

 AVERTISSEMENTS
AVERTISSEMENT
MISE EN GARDE
ATTENTION (Pour le Canada)
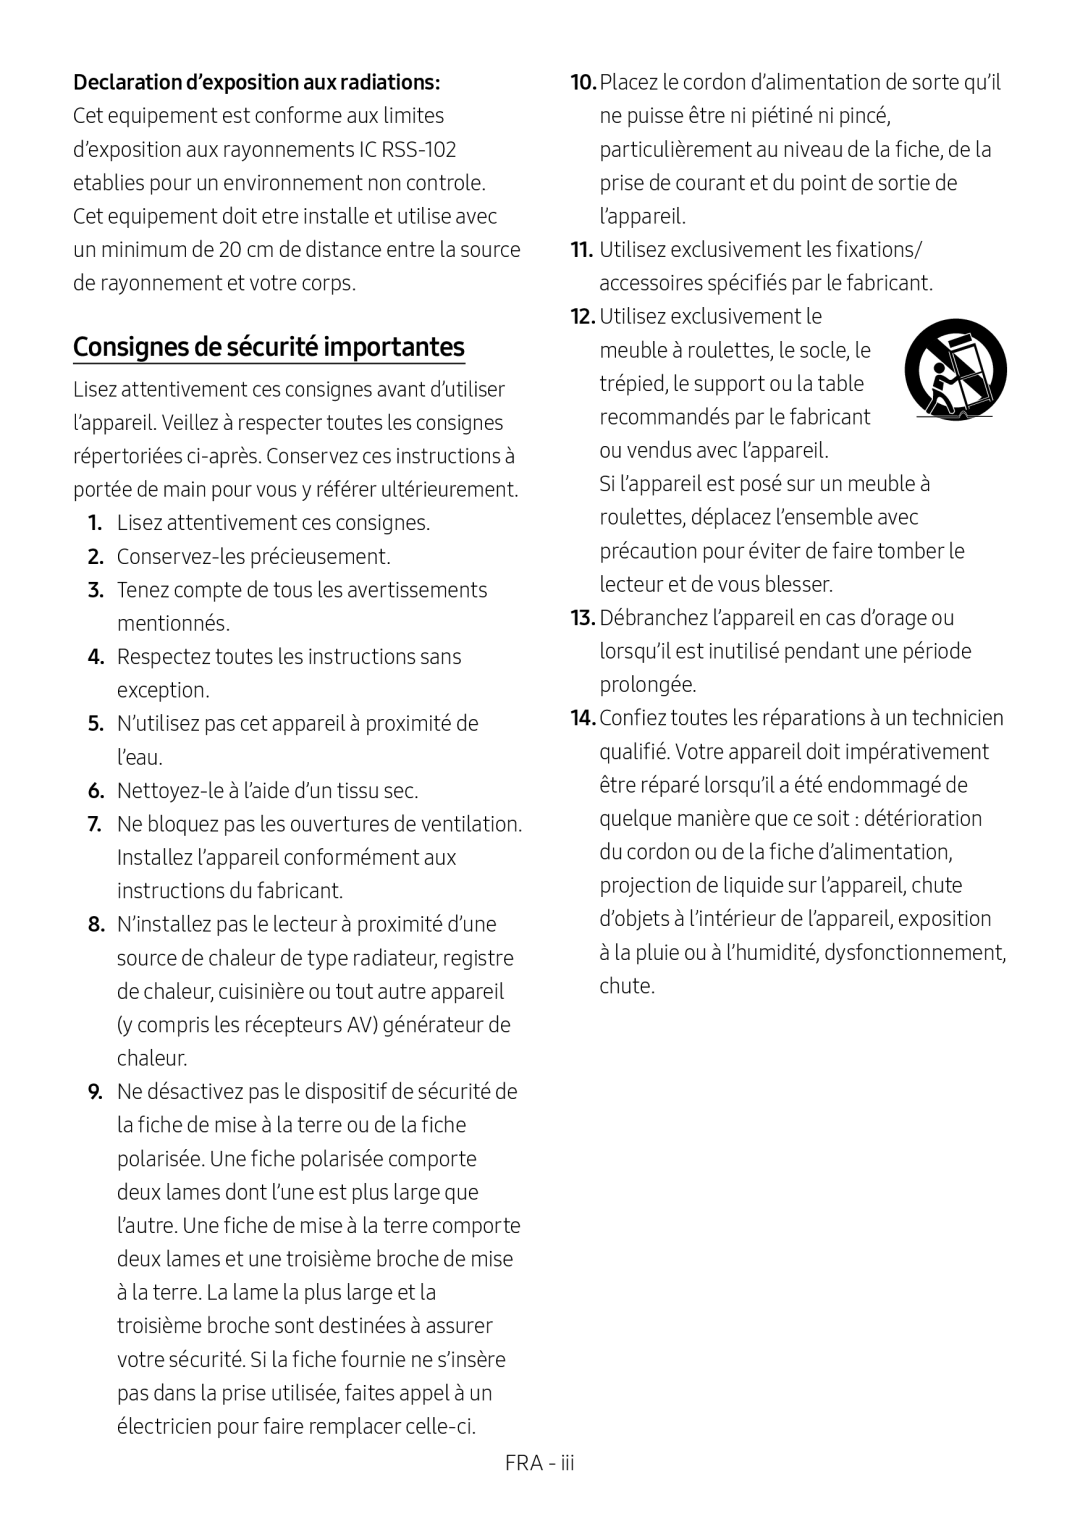 Consignes de sécurité importantes
 PRÉCAUTIONS
 À PROPOS DE CE MANUEL
 SOMMAIRE
Vérification des Composants
Présentation du Produit
Branchement du Soundbar
Branchement à votre Téléviseur
Branchement d’un Périphérique Externe
Connexion à un périphérique de stockage USB
 Branchement d’un Appareil Mobile
Utlisation de la Télécommande
Installation du Support Mural
Mise à jour Logicielle
Dépannage
Licence
Avis de Licences Libres
Caractéristiques et Guide
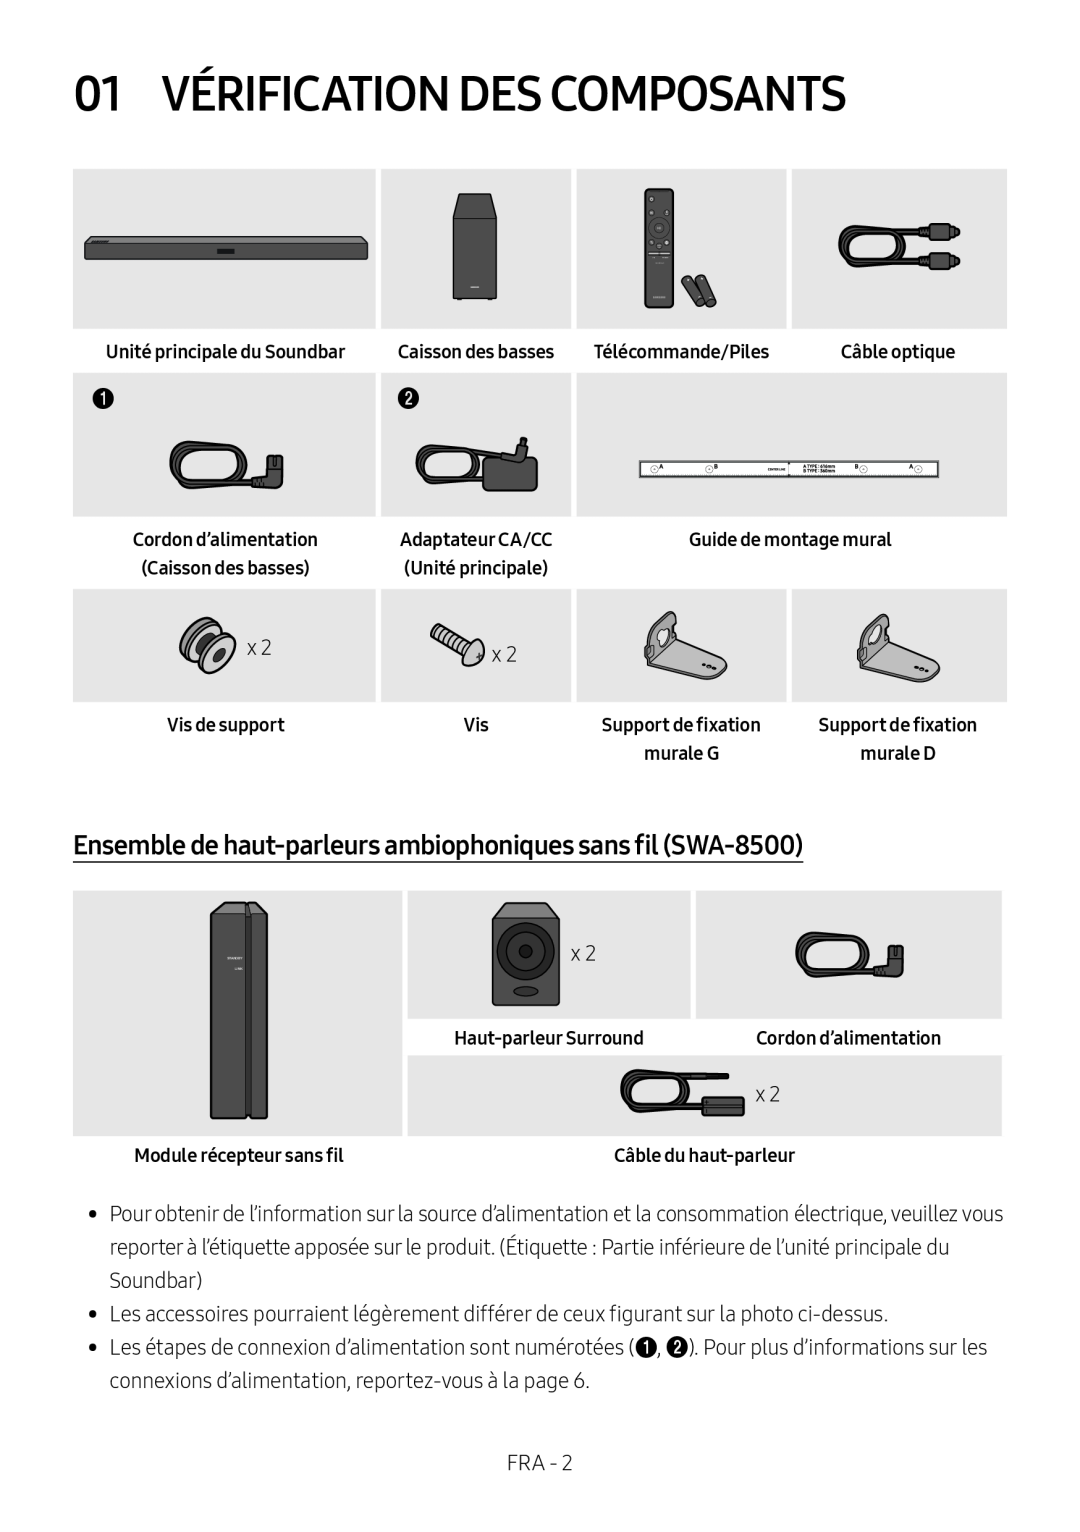 01 VÉRIFICATION DES COMPOSANTS
Ensemble de haut-parleursambiophoniques sans fil (SWA-8500)
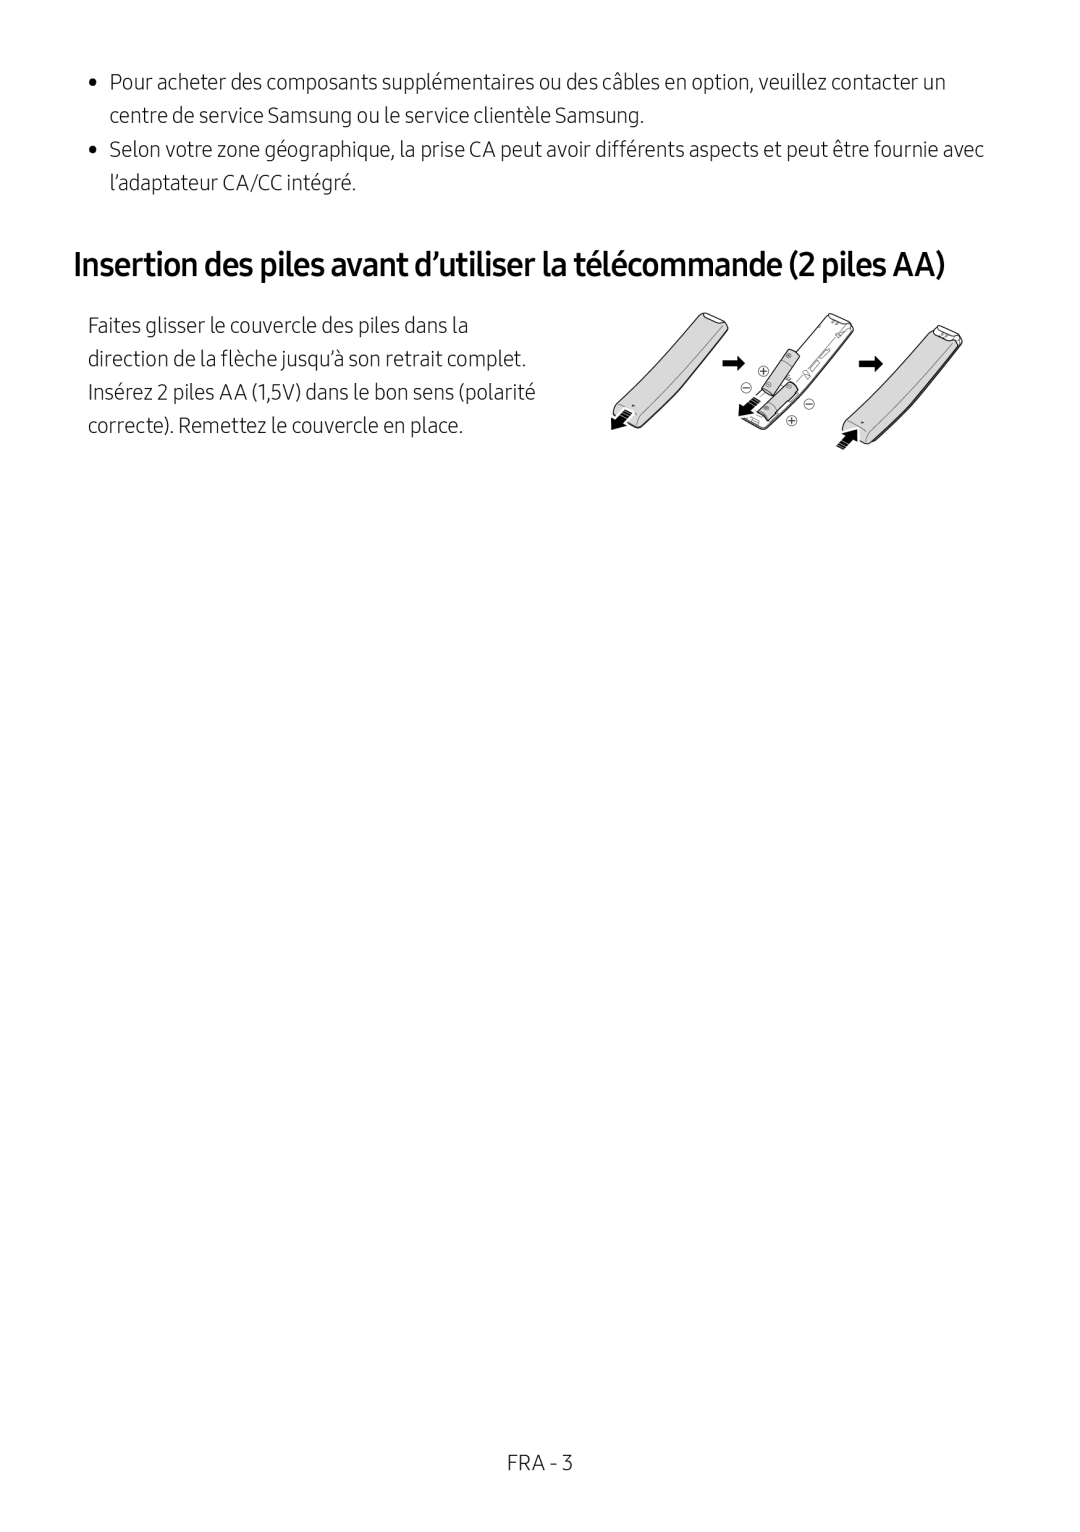 Insertion des piles avant d’utiliser la télécommande (2 piles AA)
 02 PRÉSENTATION DU PRODUIT
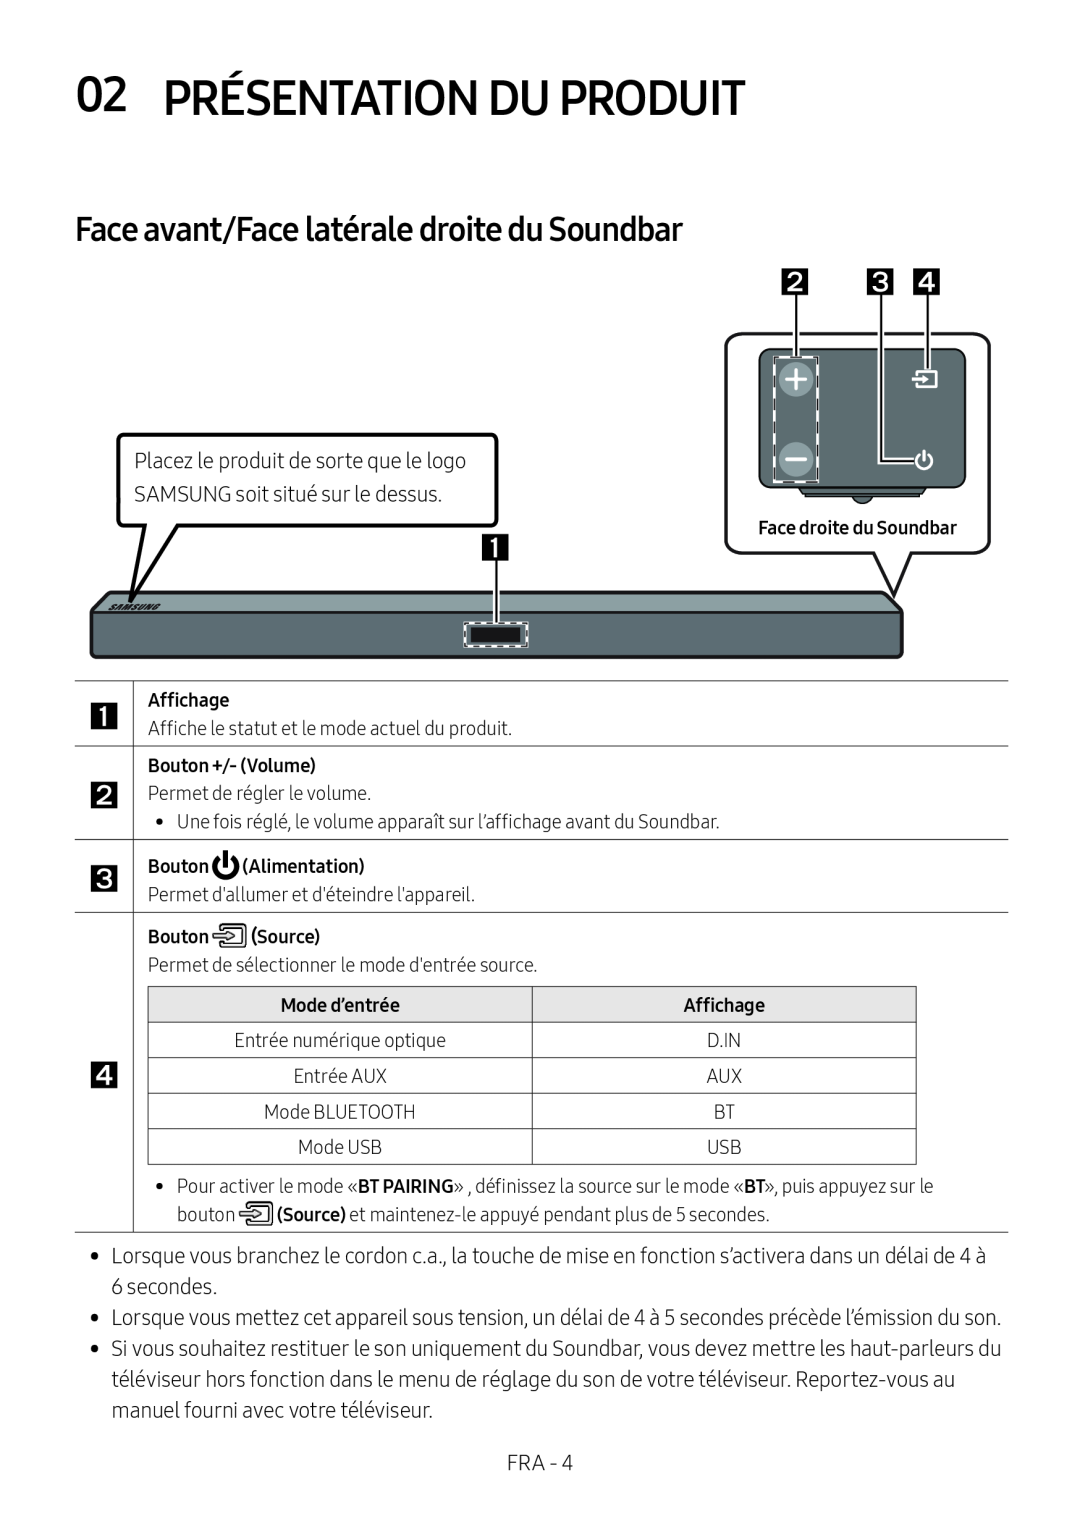
Face avant/Face latérale droite du Soundbar
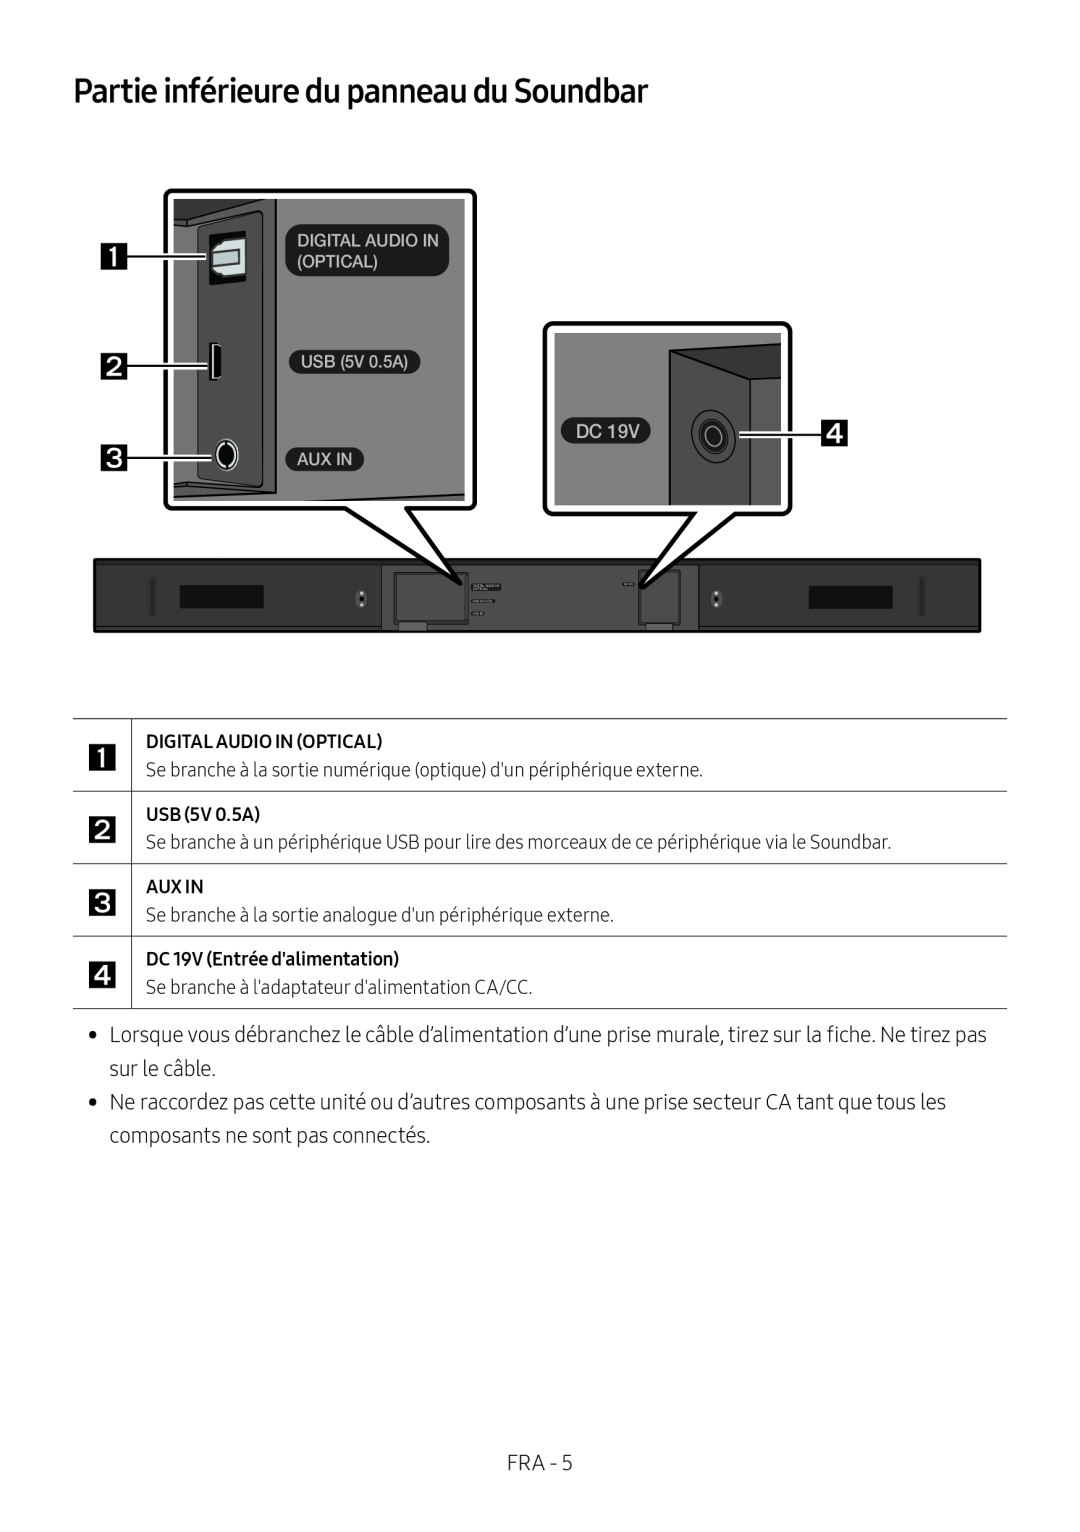 Partie inférieure du panneau du Soundbar
 03 BRANCHEMENT DU SOUNDBAR
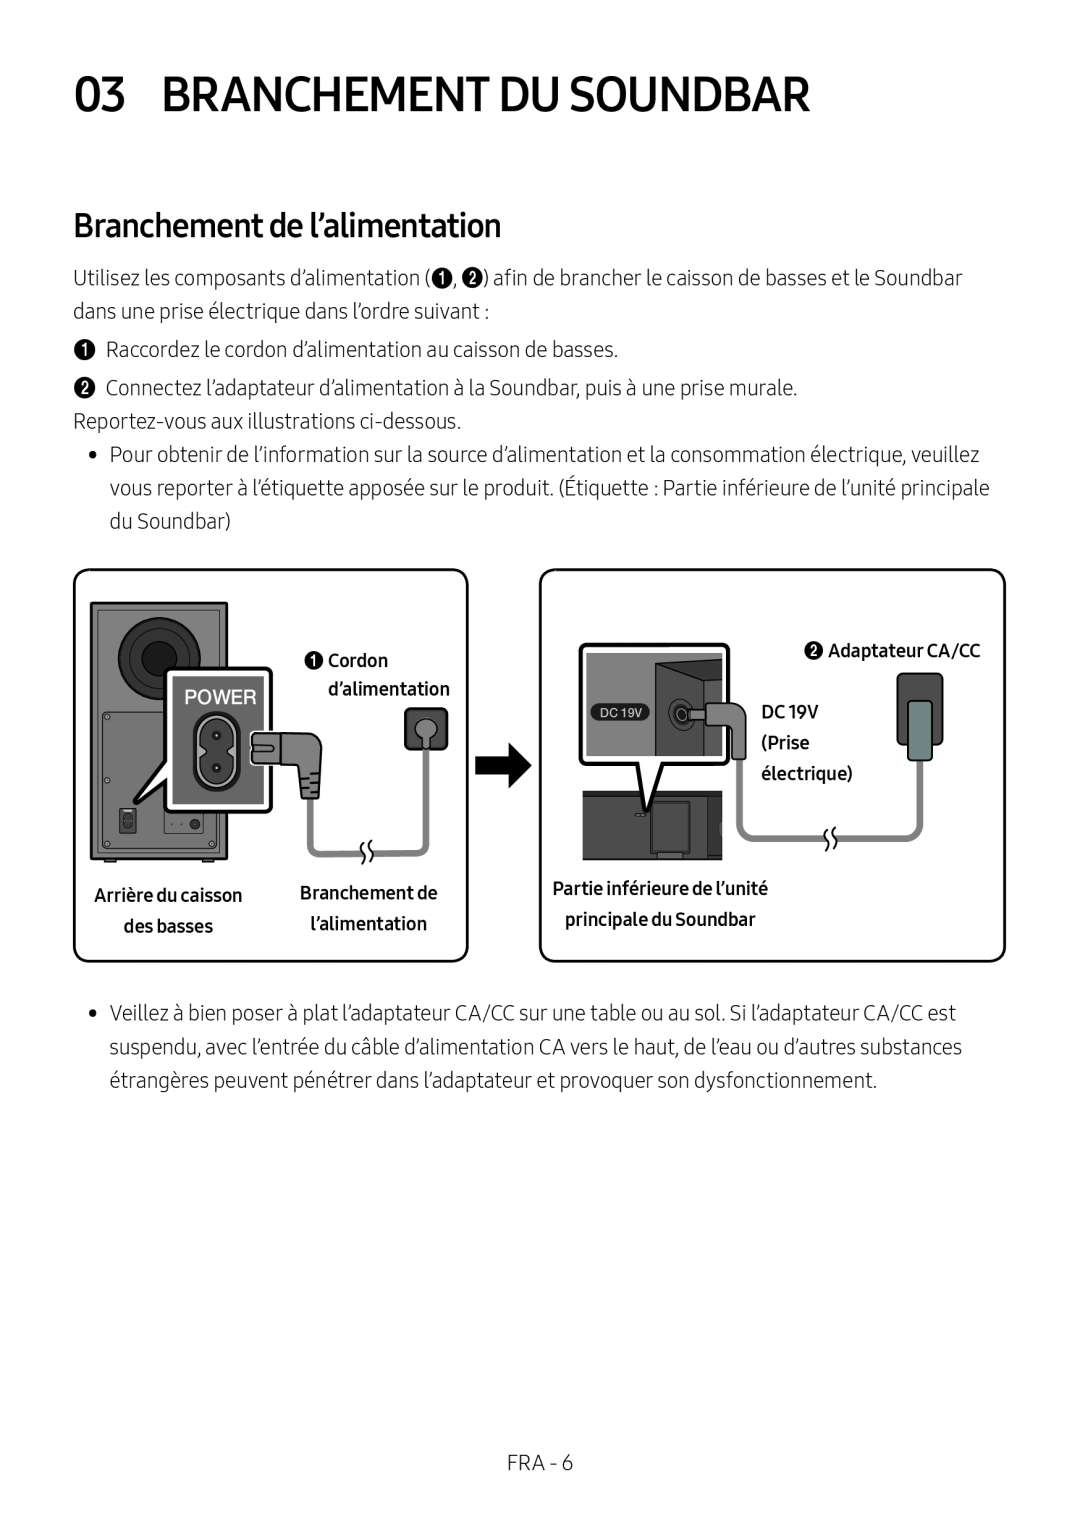
Branchement de l’alimentation
 Raccordement du Soundbar au caisson de basses
Raccordement automatique du caisson des basses et du Soundbar
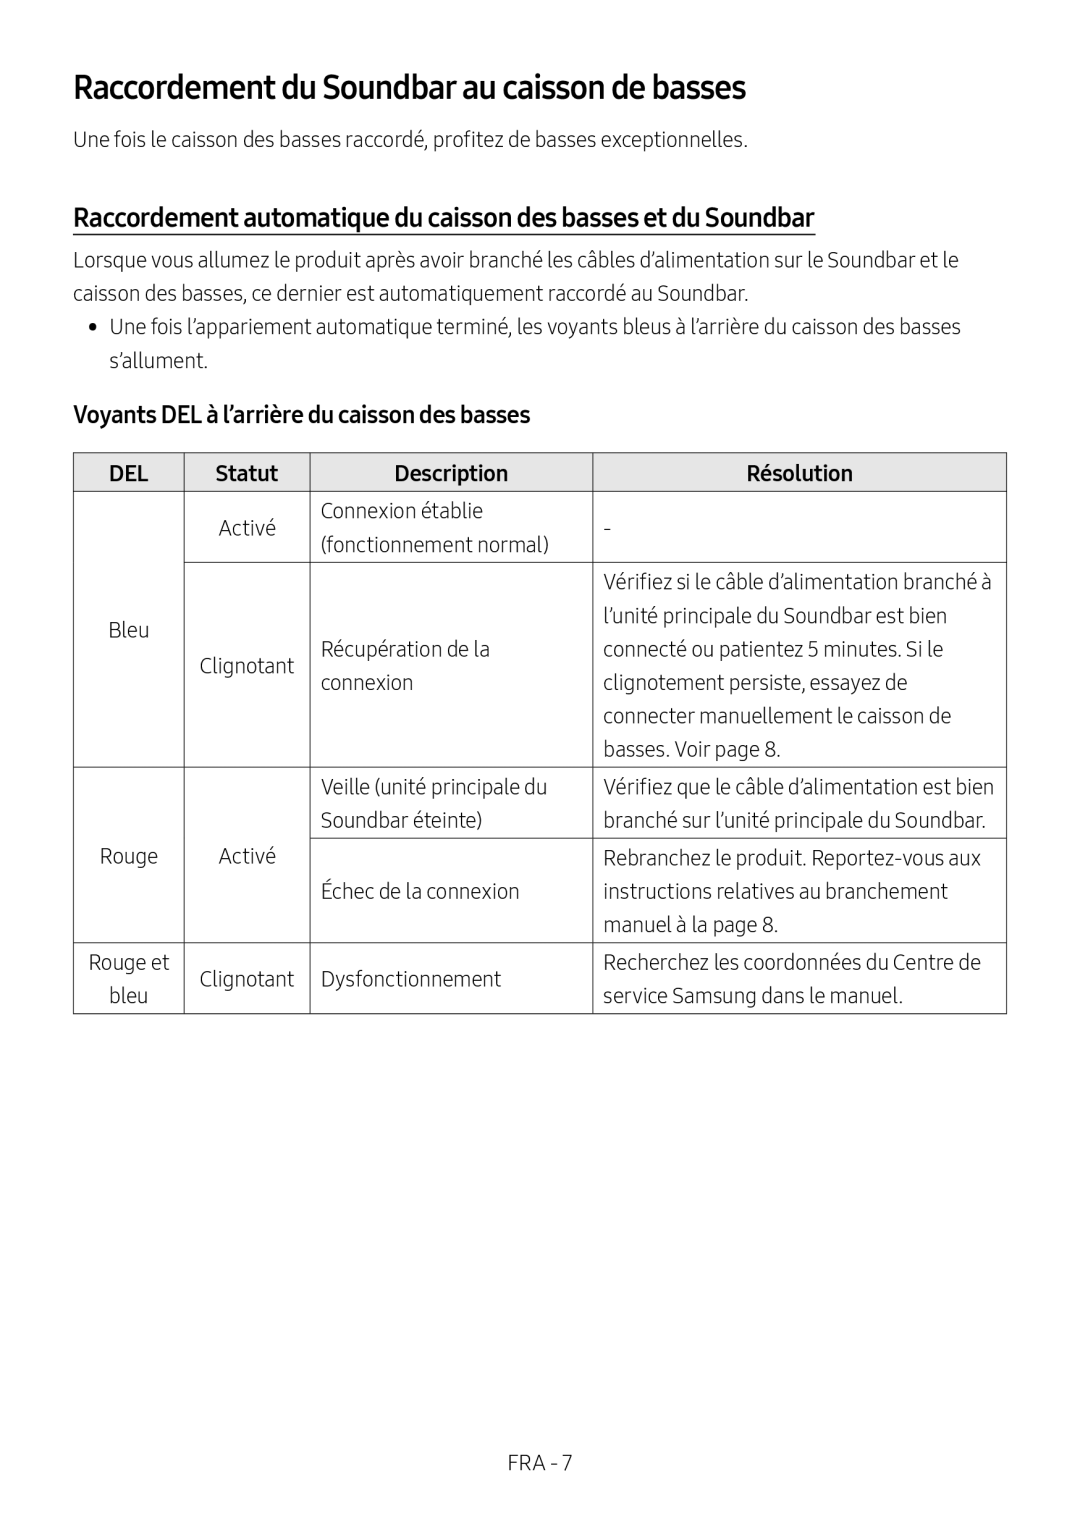
Voyants DEL à l’arrière du caisson des basses
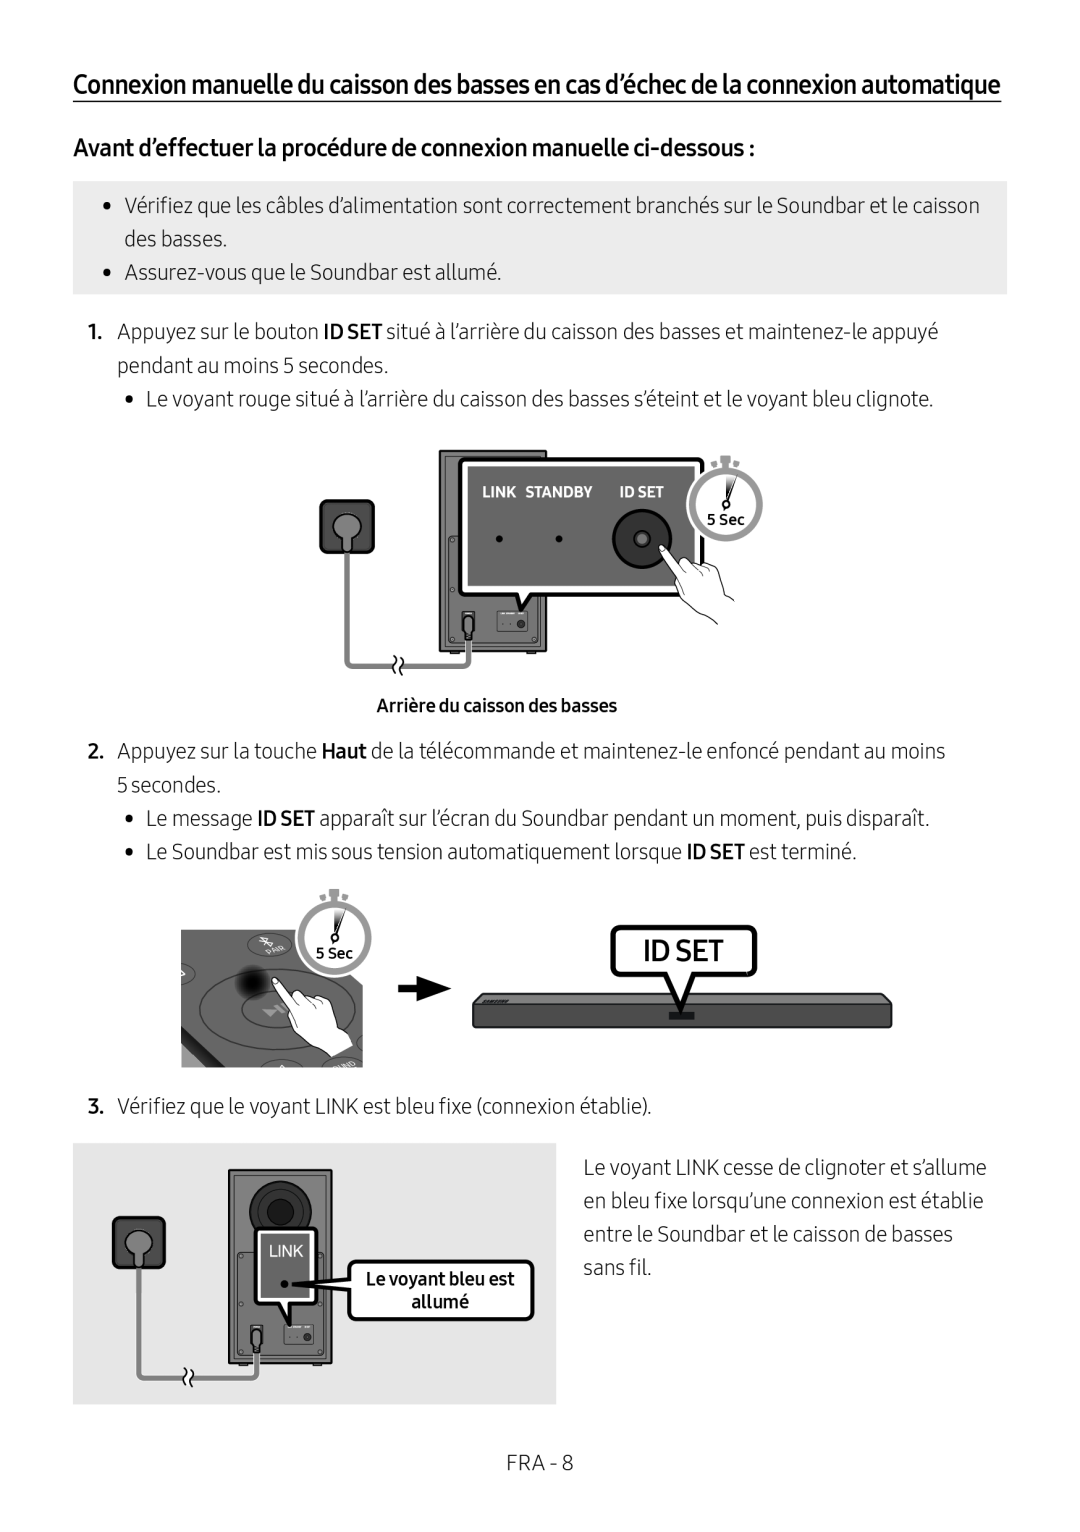 Avant d’effectuer la procédure de connexion manuelle ci-dessous :
 REMARQUES
PRÉCAUTIONS
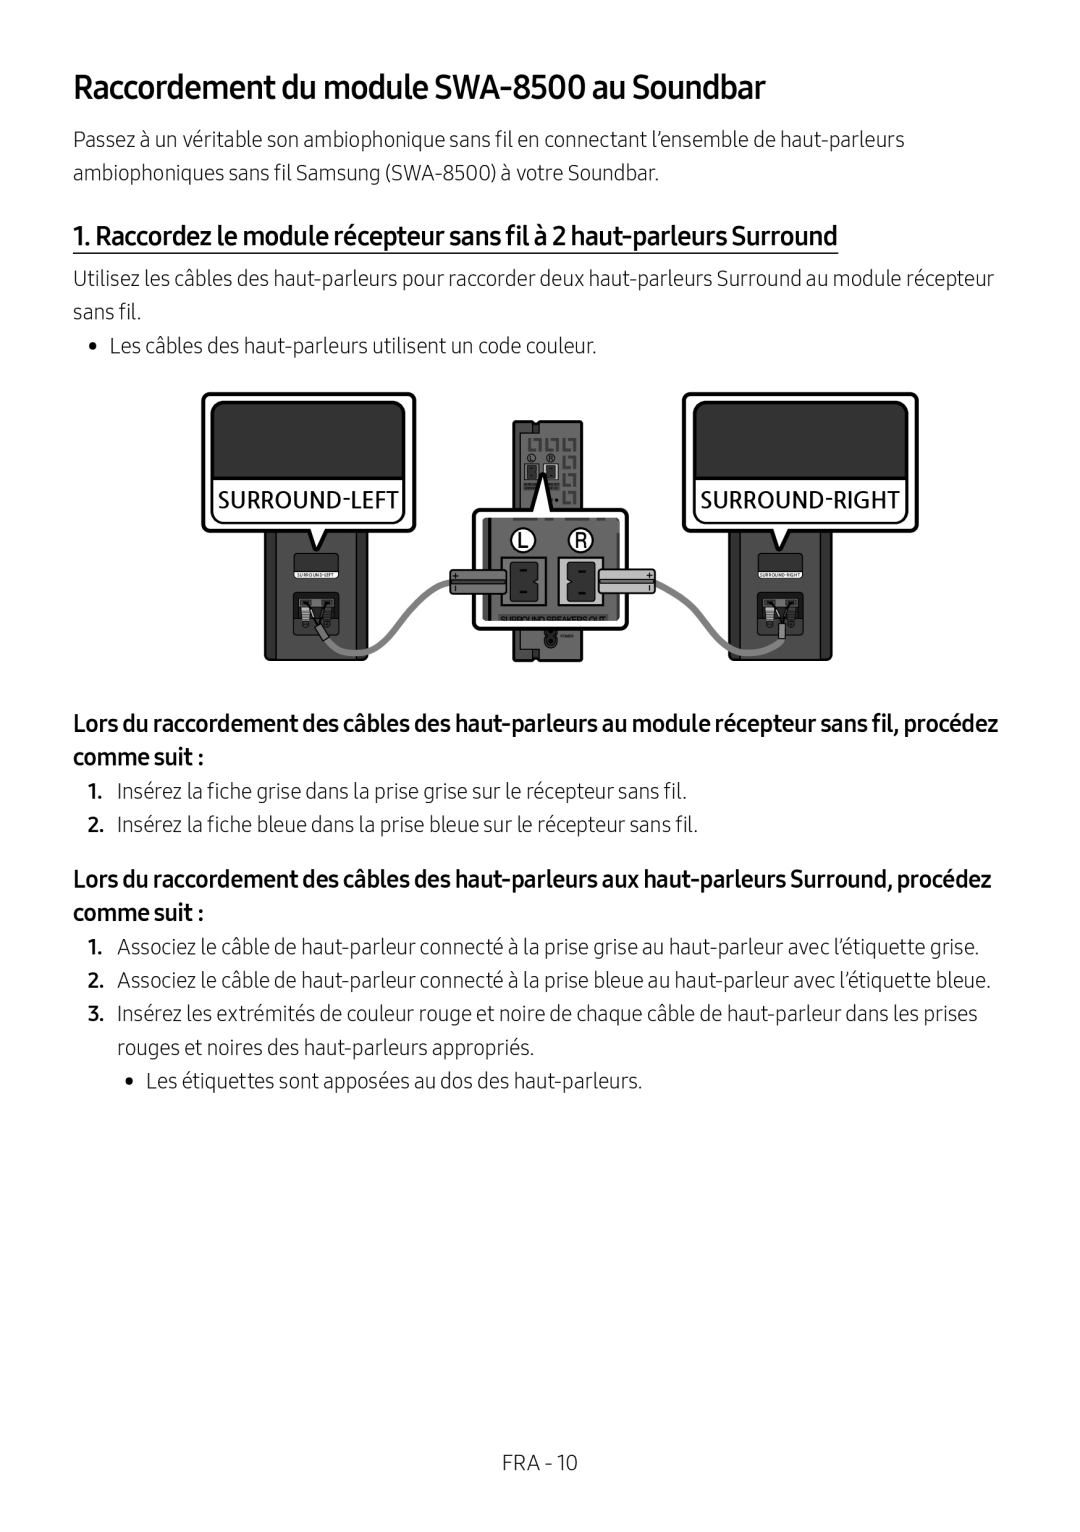 Raccordement du module SWA-8500au Soundbar
1. Raccordez le module récepteur sans fil à 2 haut-parleursSurround
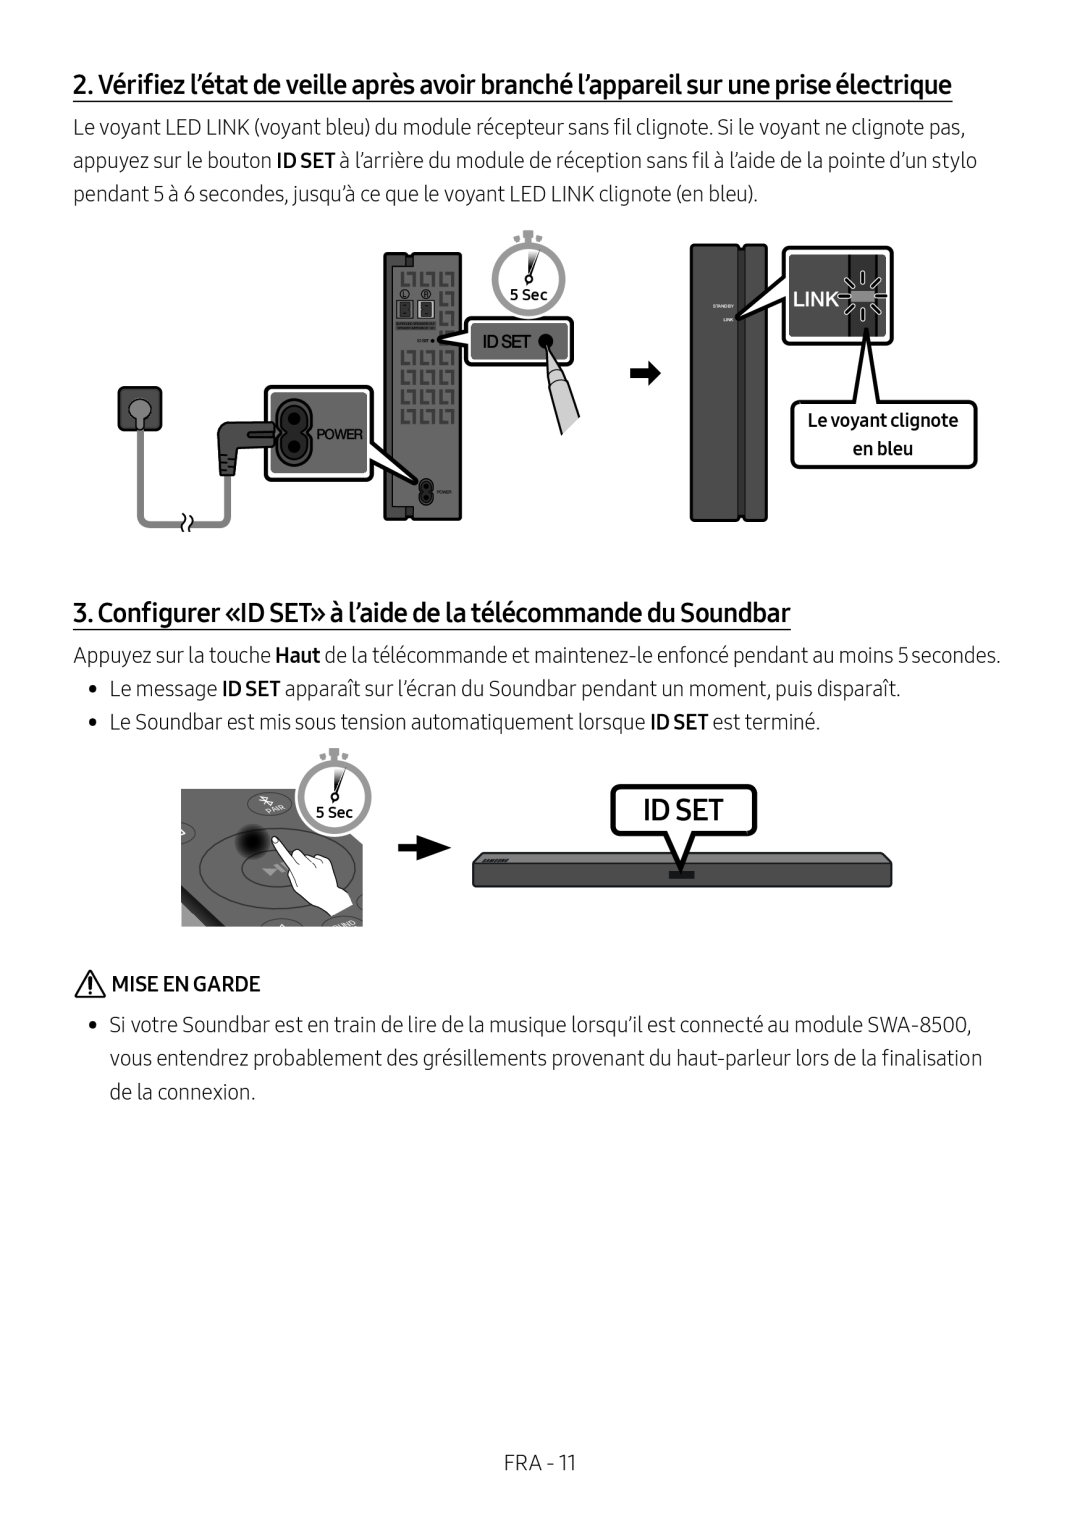 3. Configurer «ID SET» à l’aide de la télécommande du Soundbar
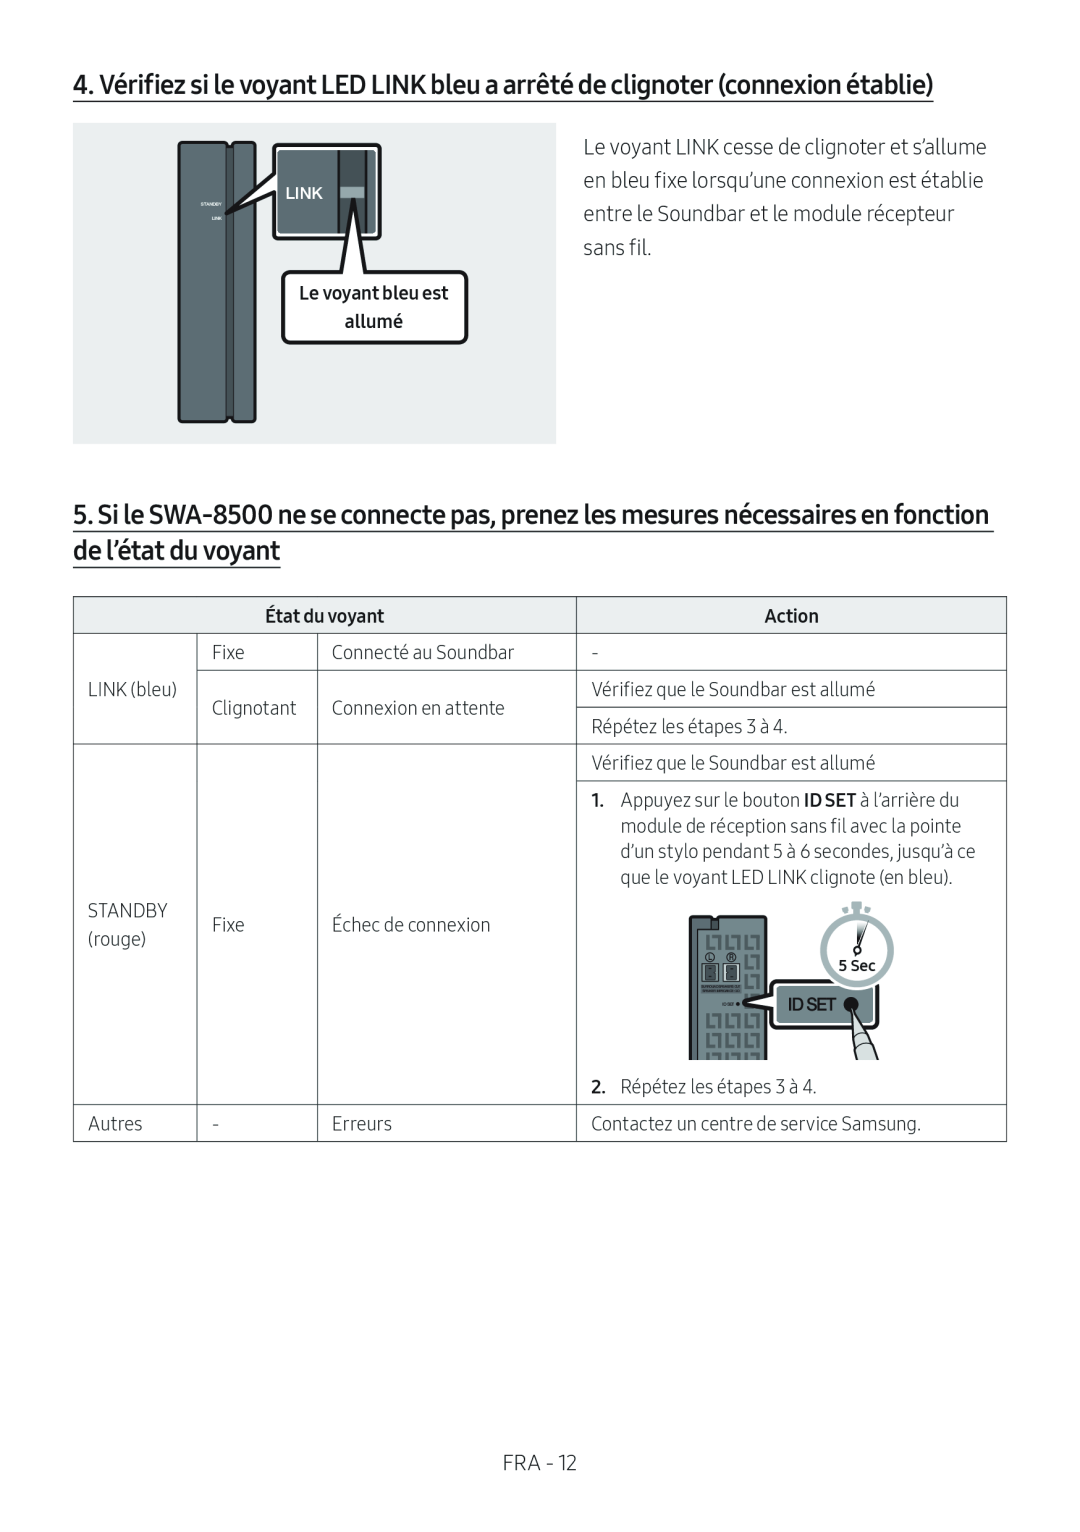 Si le
Si le
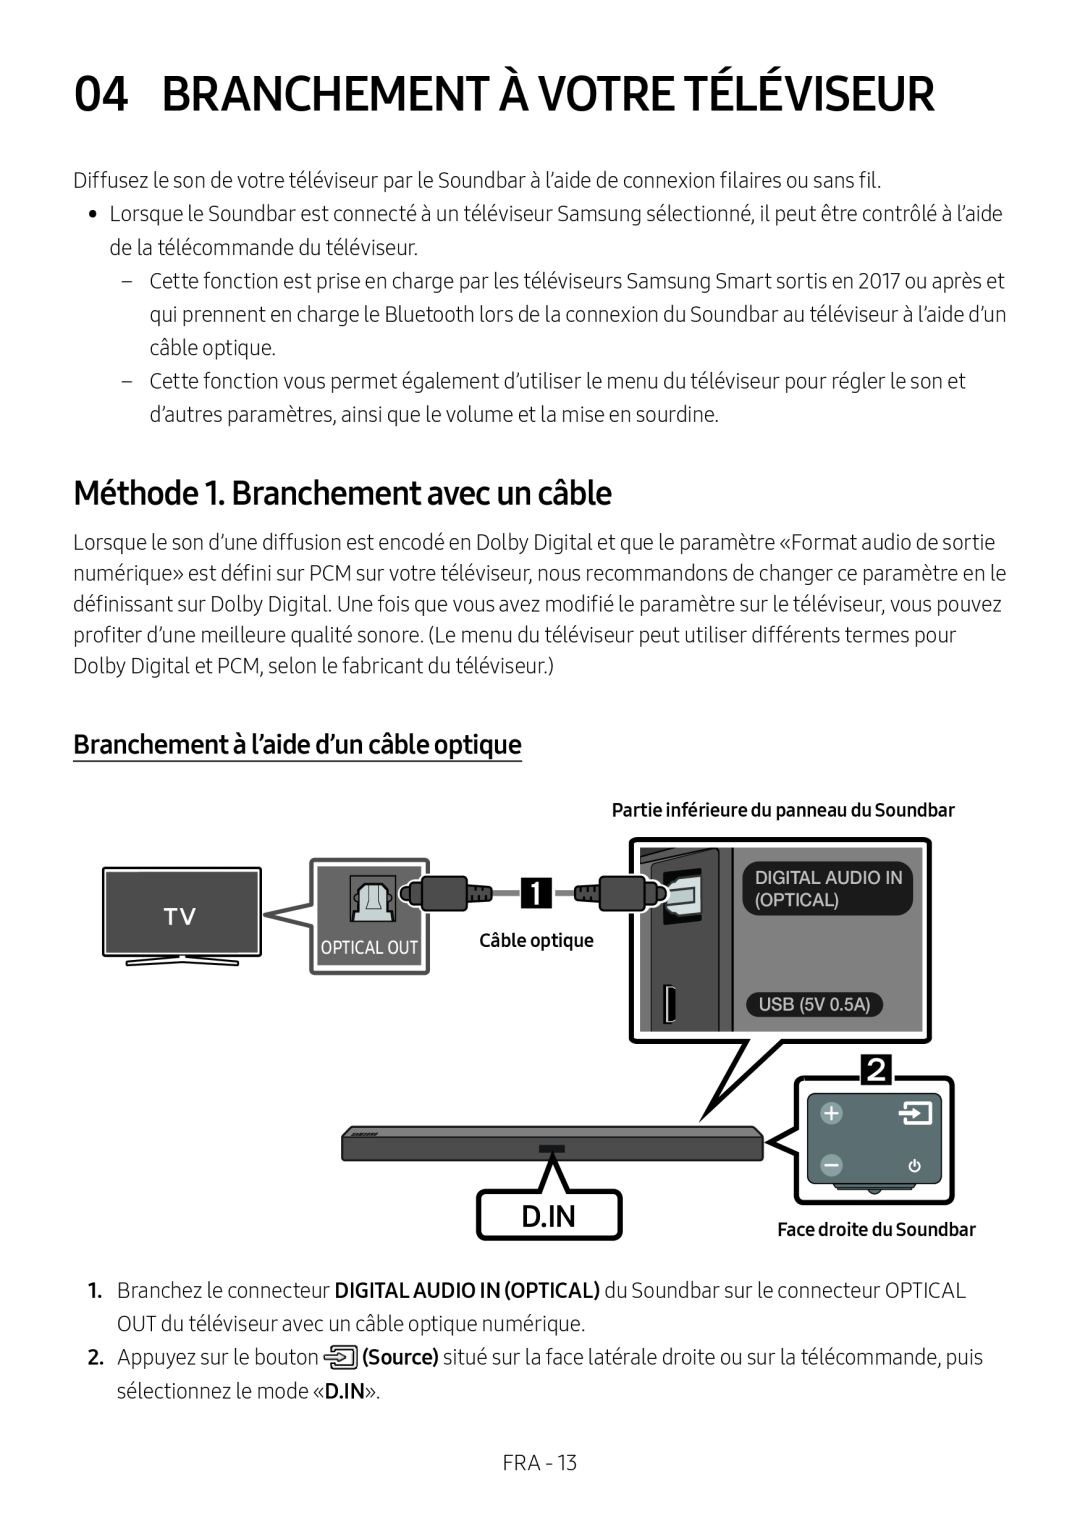 04 BRANCHEMENT À VOTRE TÉLÉVISEUR
Méthode 1. Branchement avec un câble
Branchement à l’aide d’un câble optique
 Méthode 2. Connexion sans fil
Connexion d’un téléviseur par Bluetooth
Connexion initiale
(OU)
 En cas d’échec de la connexion du périphérique
Déconnexion du Soundbar du téléviseur
Quelle est la différence entre BT READY et BT PAIRING
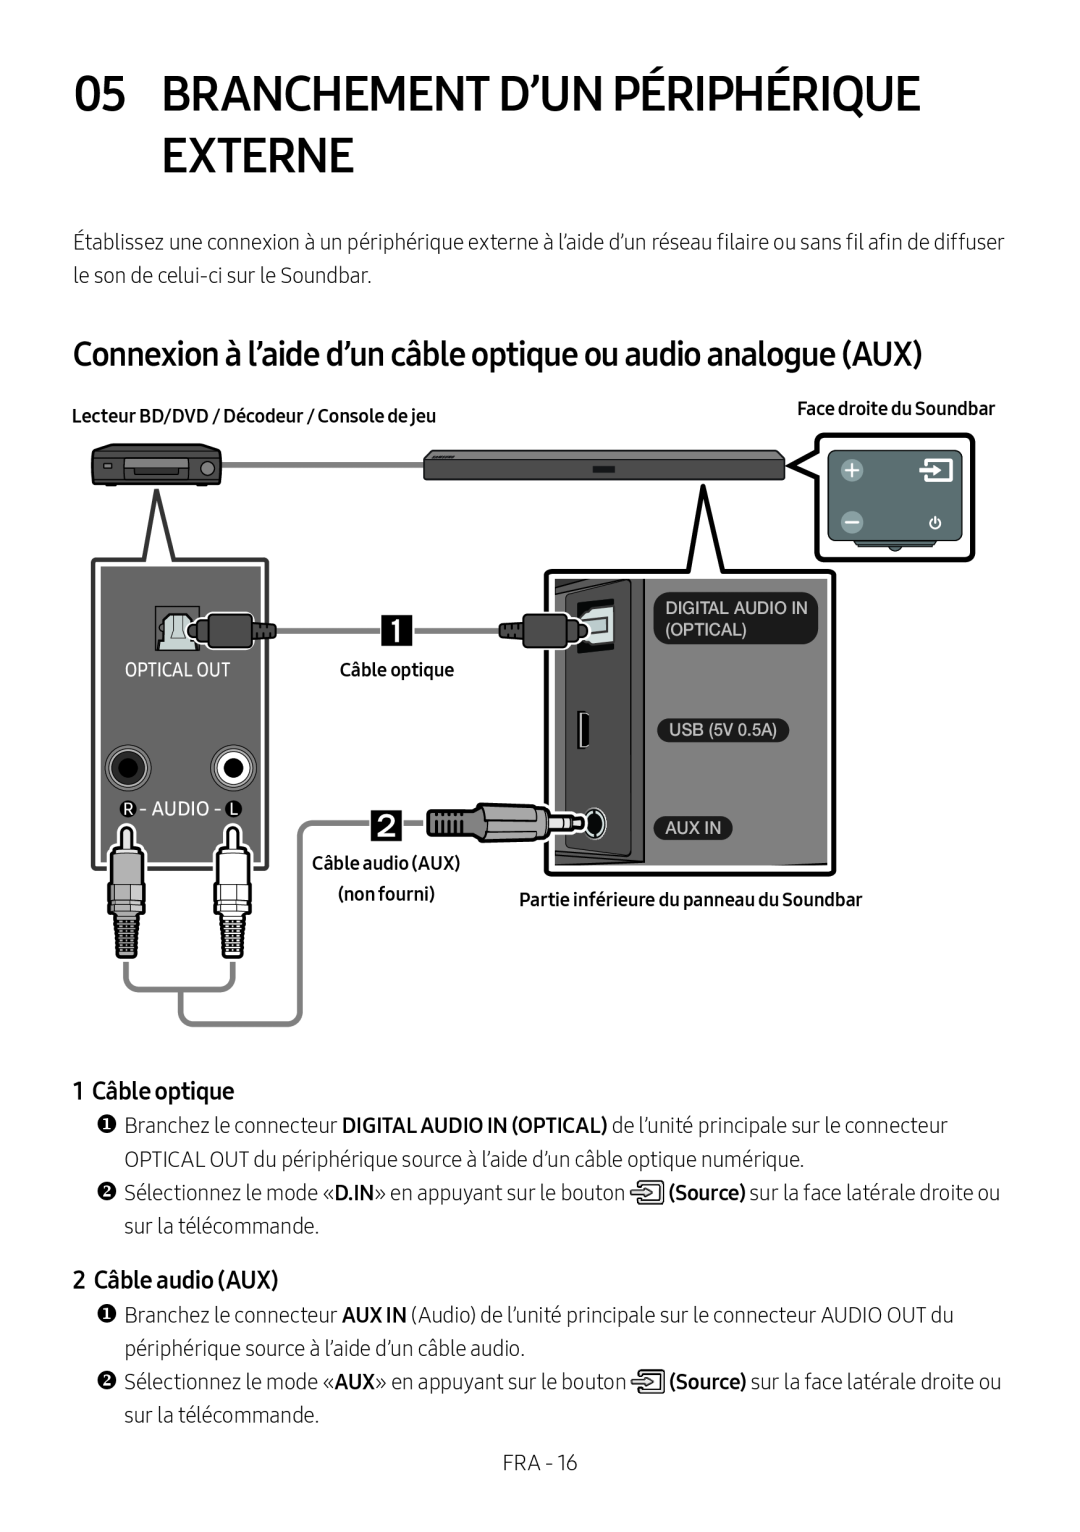 05BRANCHEMENT D’UN PÉRIPHÉRIQUE EXTERNE
Connexion à l’aide d’un câble optique ou audio analogue (AUX)
1 Câble optique
2Câble audio (AUX)
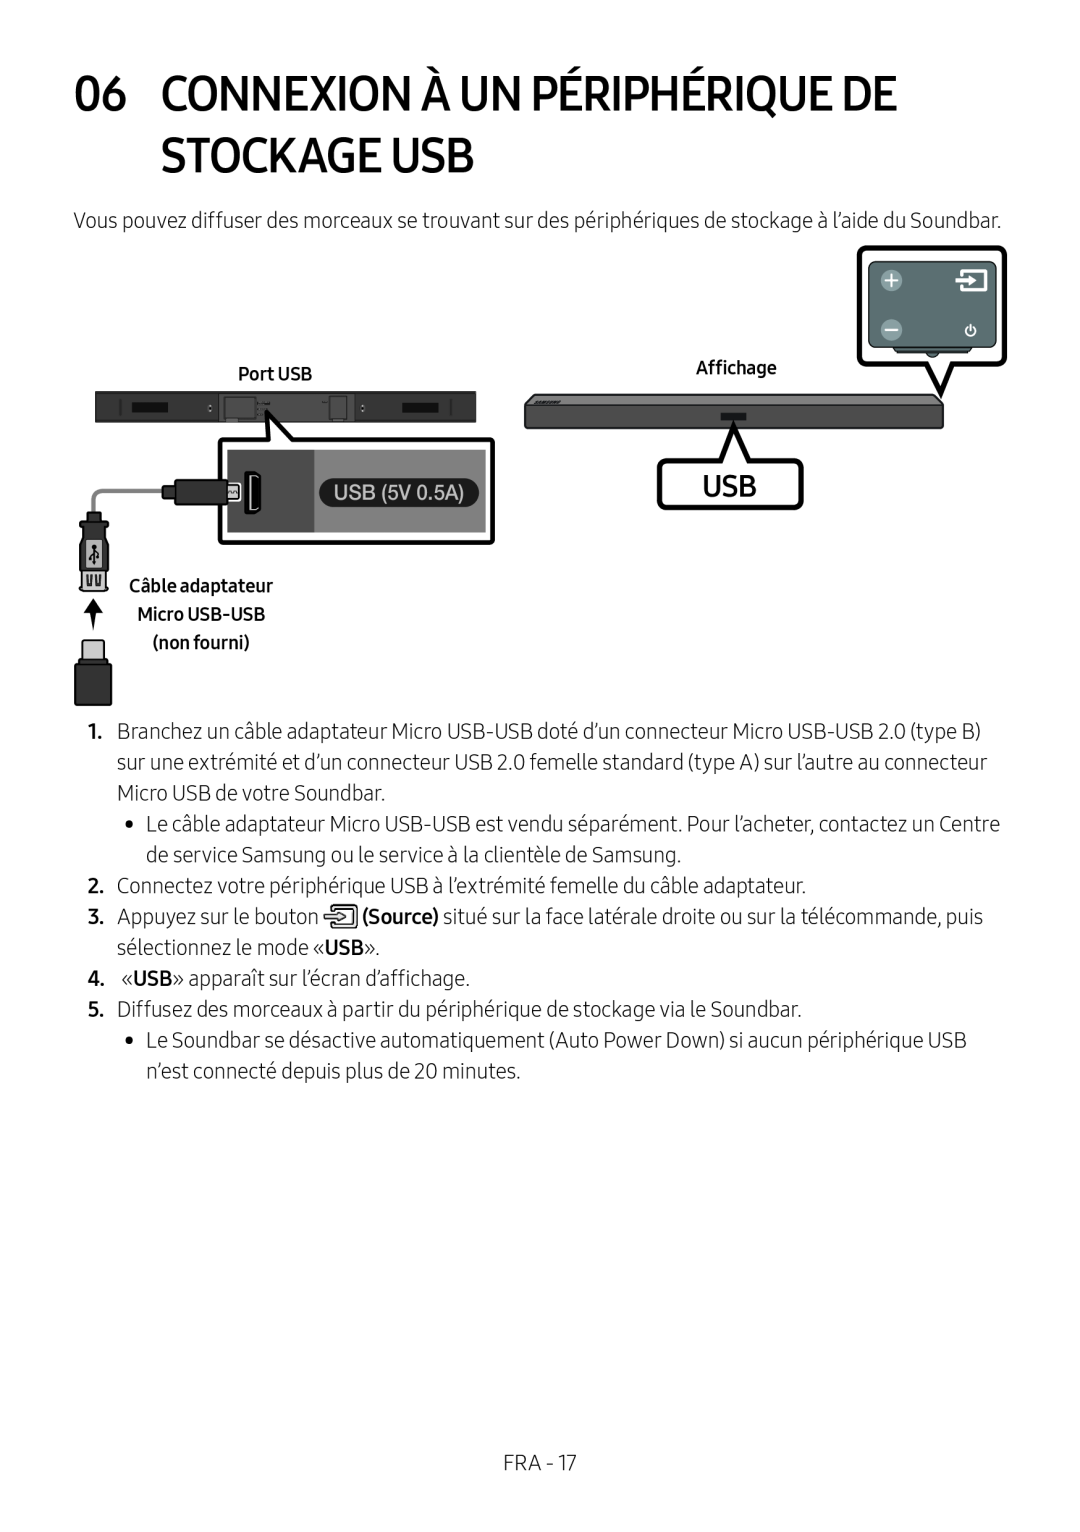 06 CONNEXION À UN PÉRIPHÉRIQUE DE STOCKAGE USB
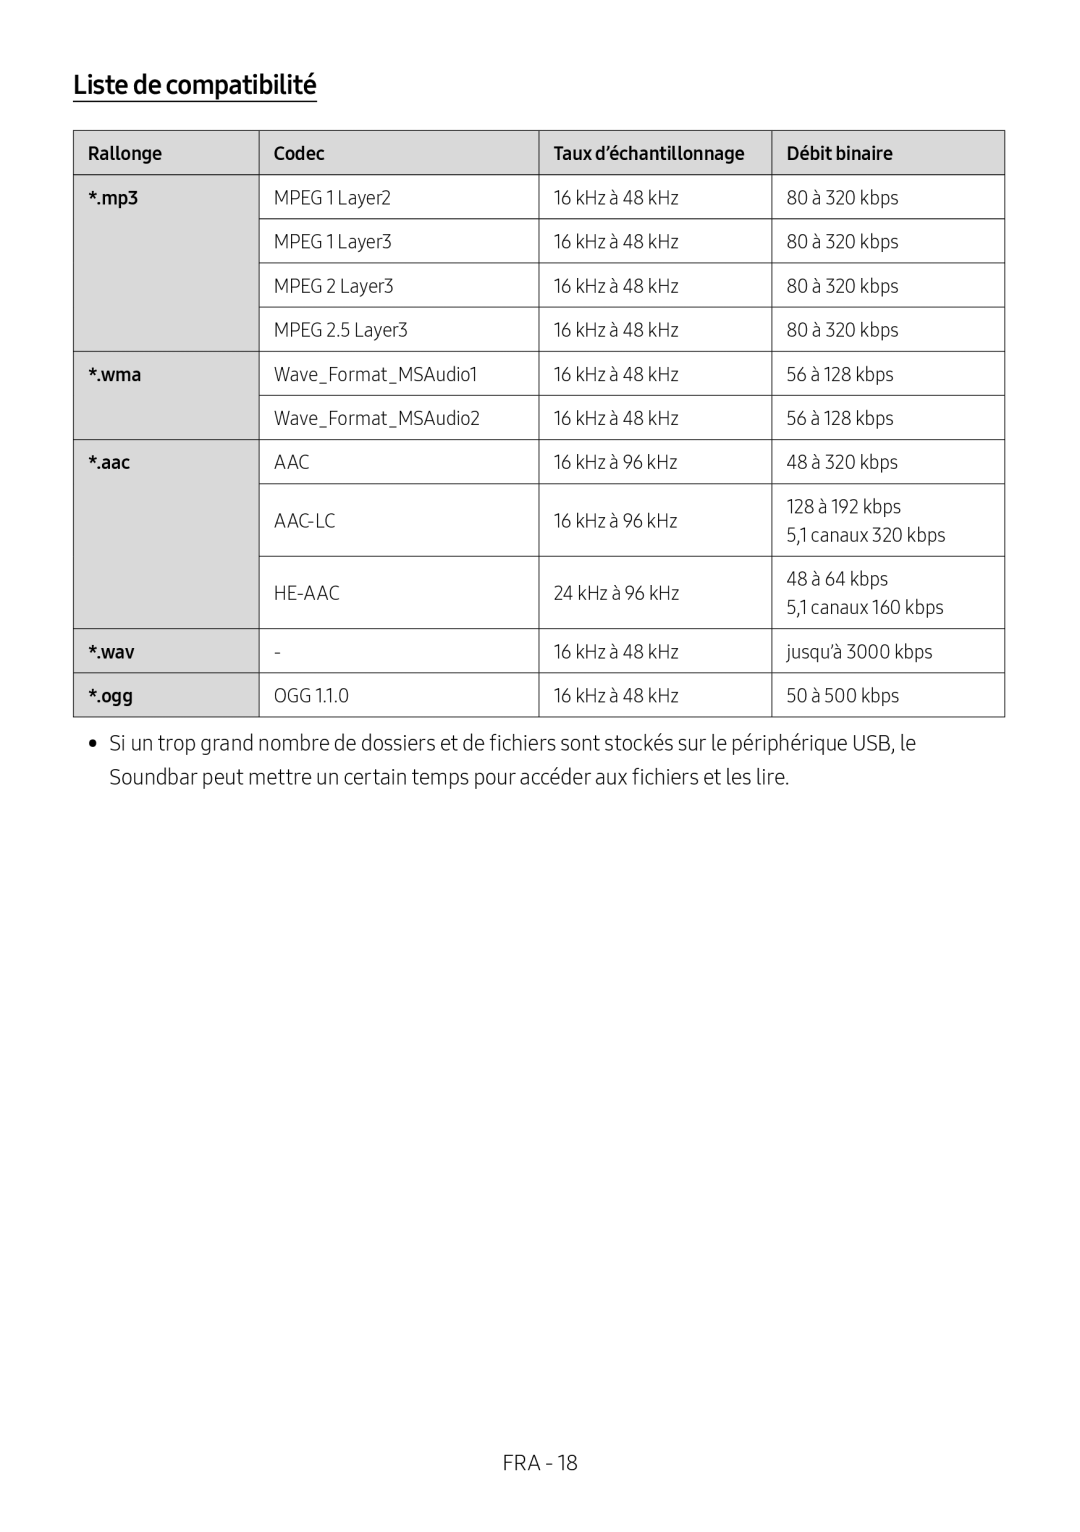 Liste de compatibilité
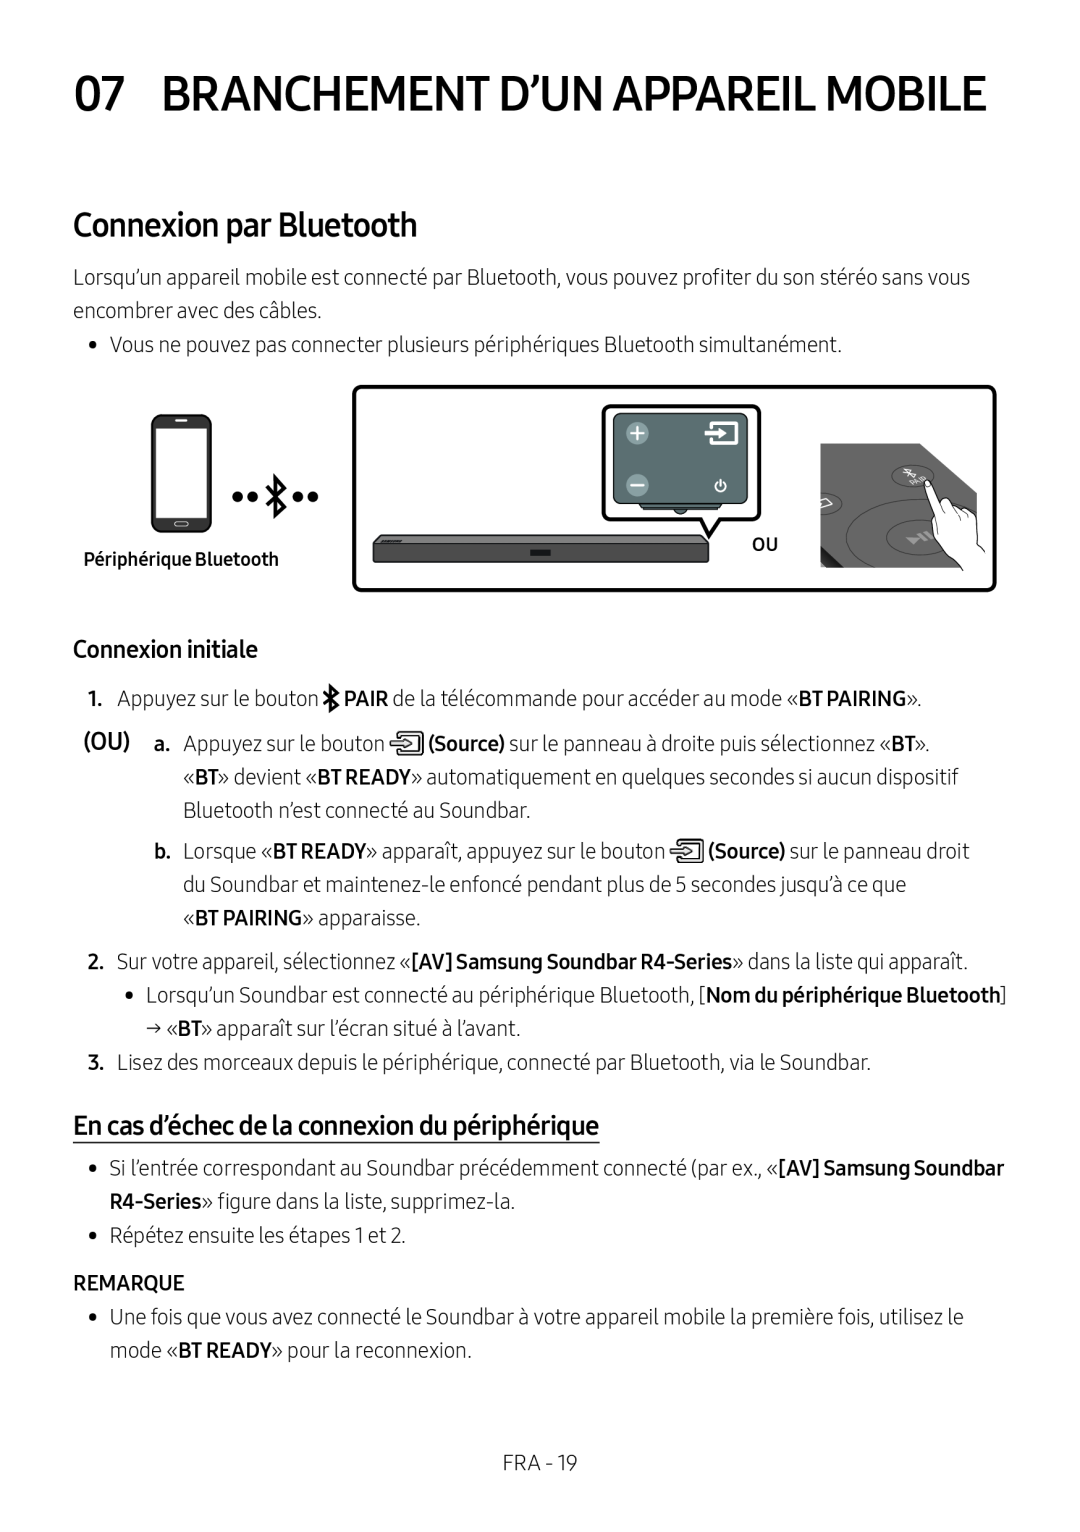 Connexion par Bluetooth
En cas d’échec de la connexion du périphérique
 Activation du Bluetooth Power (SOUND MODE)
 Déconnexion d’un périphérique Bluetooth d’un Soundbar
Déconnexion du Soundbar du périphérique Bluetooth
Davantage d’information sur la technologie Bluetooth
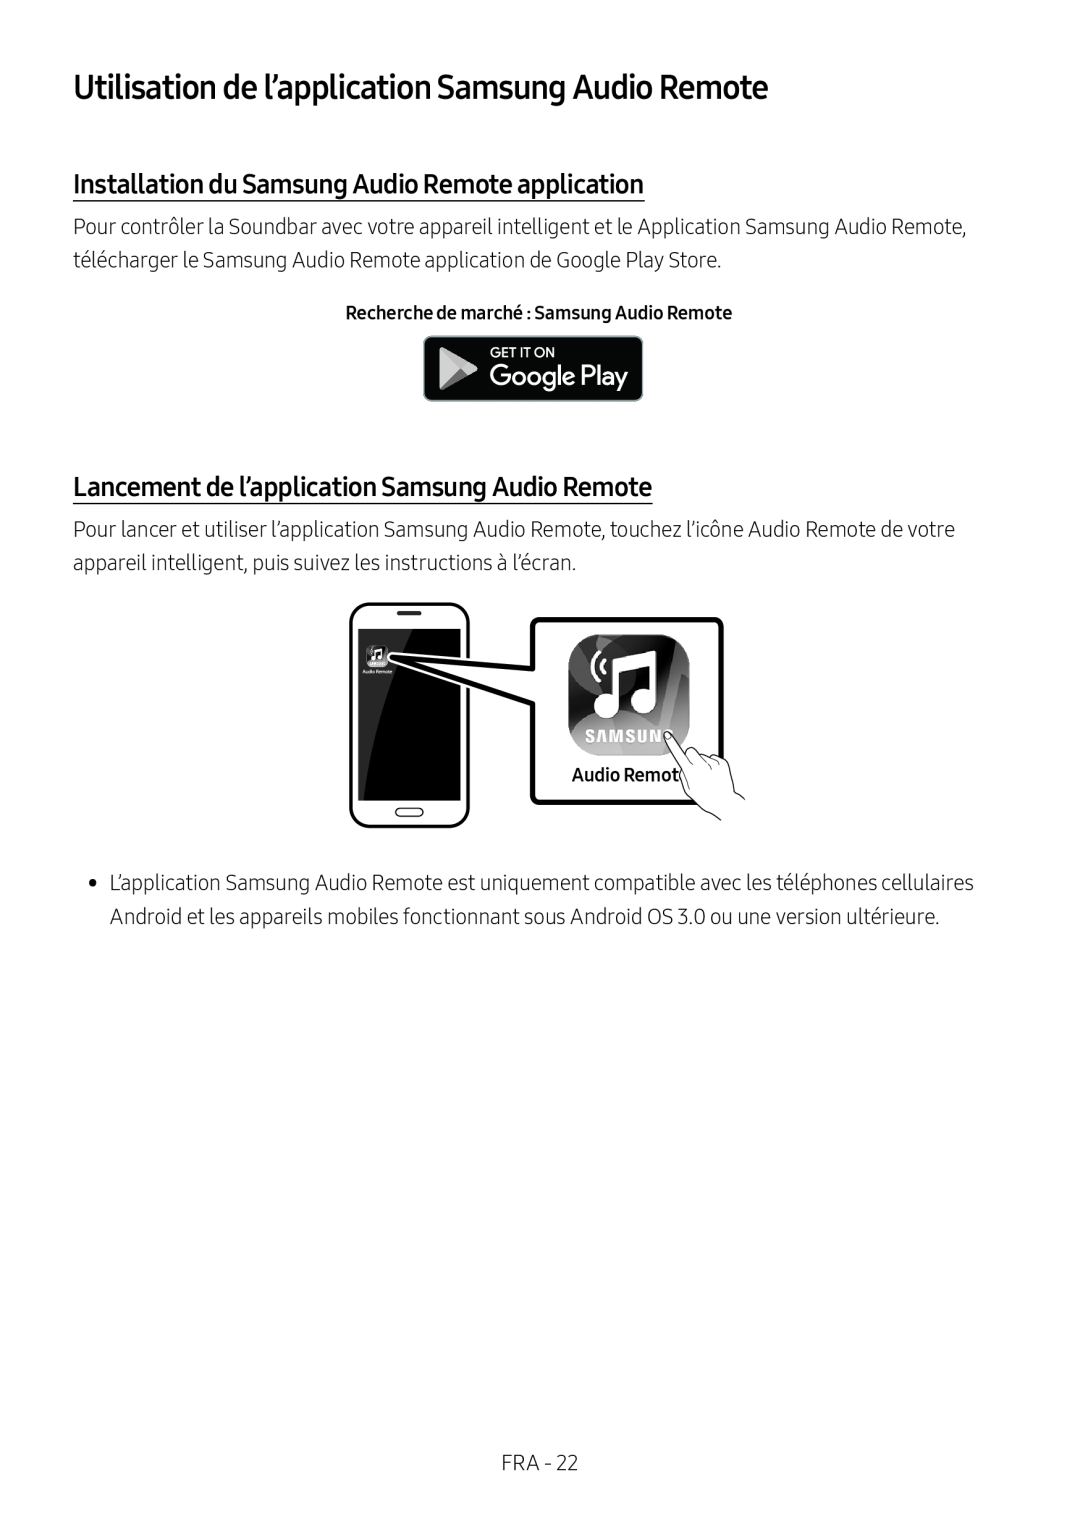 Utilisation de l’application Samsung Audio Remote
Installation du Samsung Audio Remote application
Lancement de l’application Samsung Audio Remote
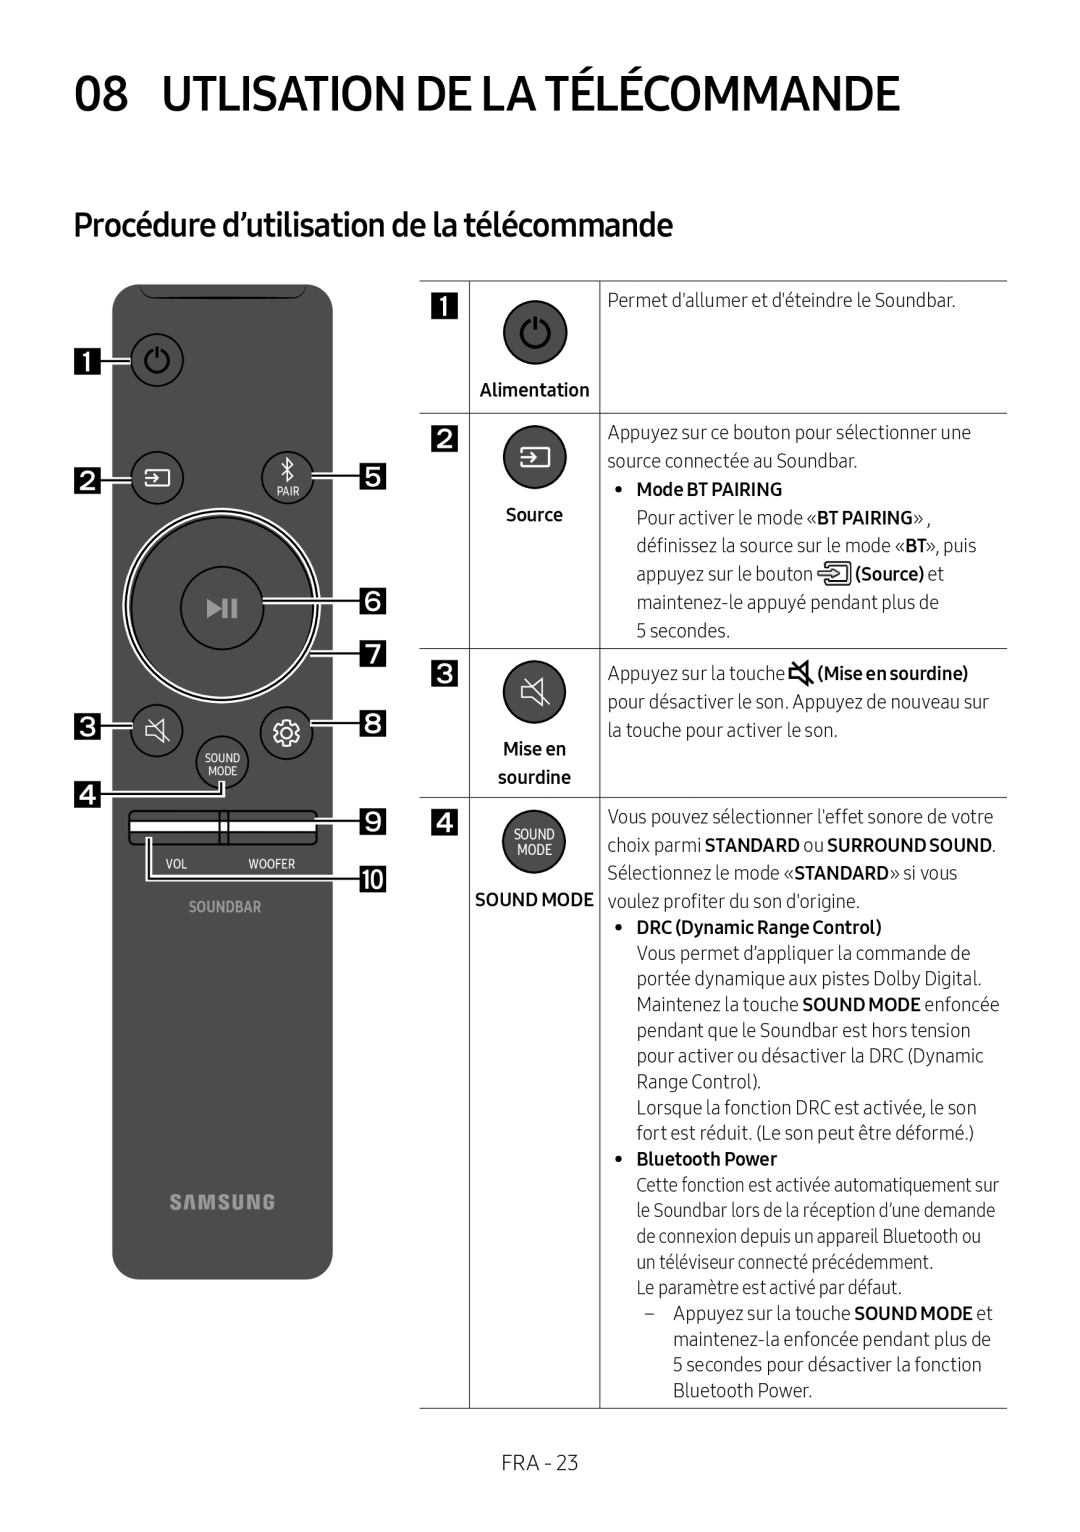 08 UTLISATION DE LA TÉLÉCOMMANDE
Procédure d’utilisation de la télécommande

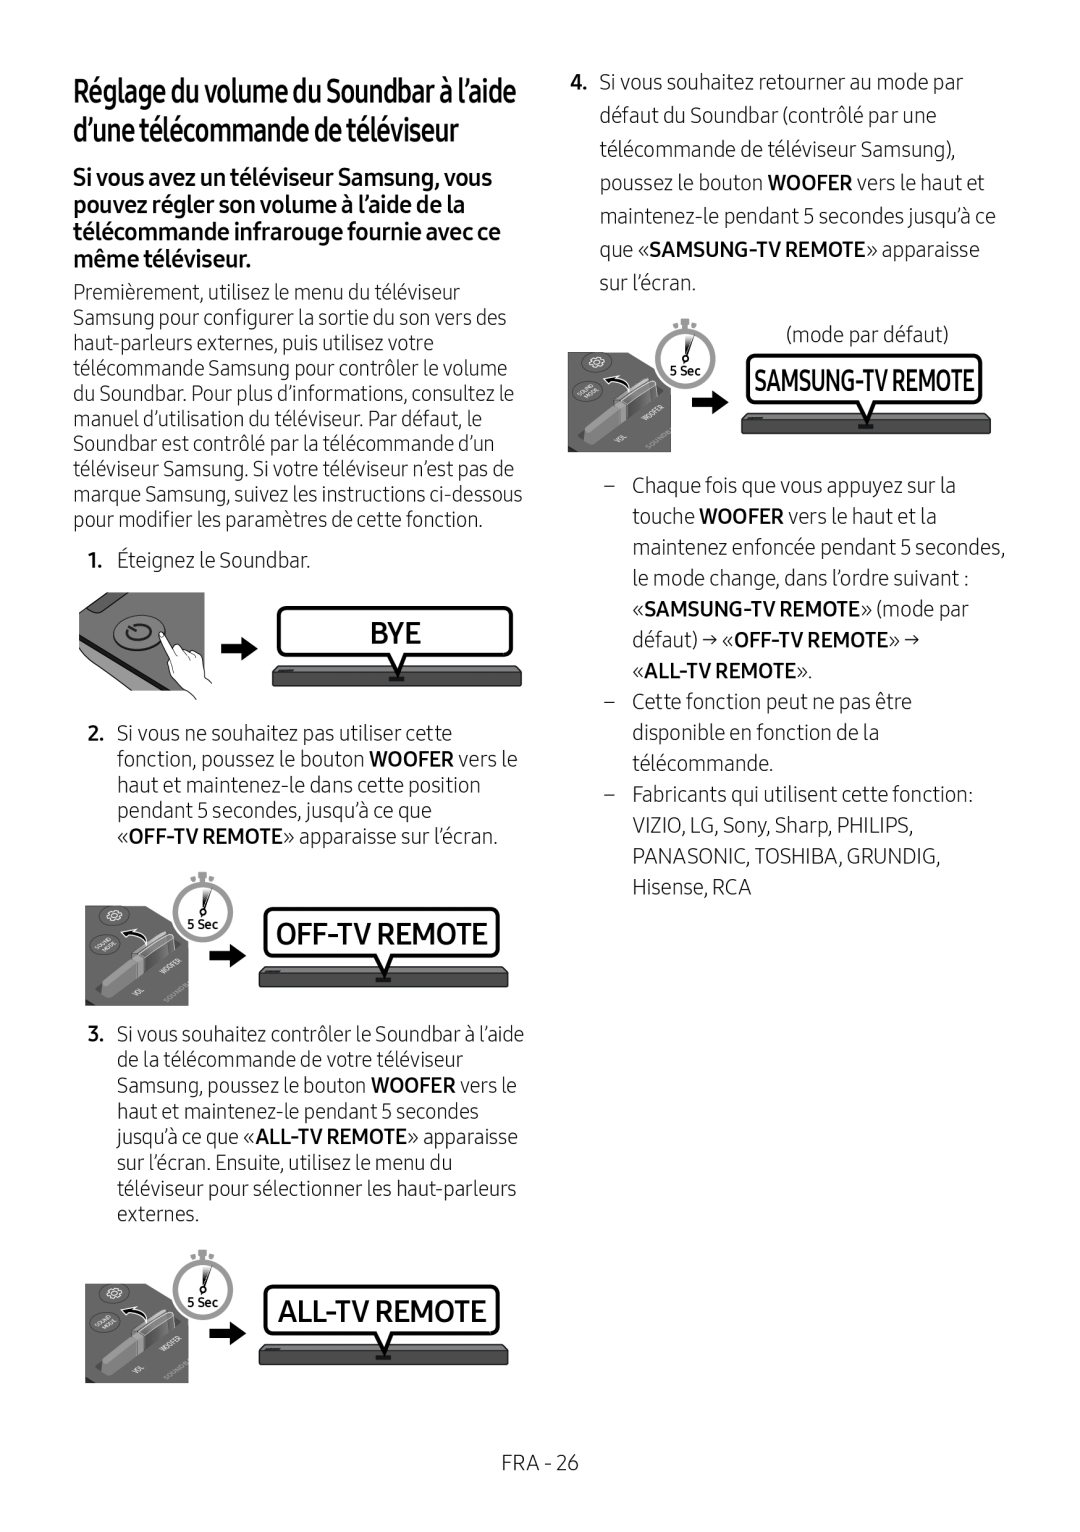 Réglage du volume du Soundbar à l’aide d’une télécommande de téléviseur
WOOFER
ALL-TV
REMOTE
WOOFER
SAMSUNG-TV
REMOTE
«SAMSUNG-TVREMOTE» (mode par défaut) → «OFF-TVREMOTE» → «ALL-TVREMOTE»
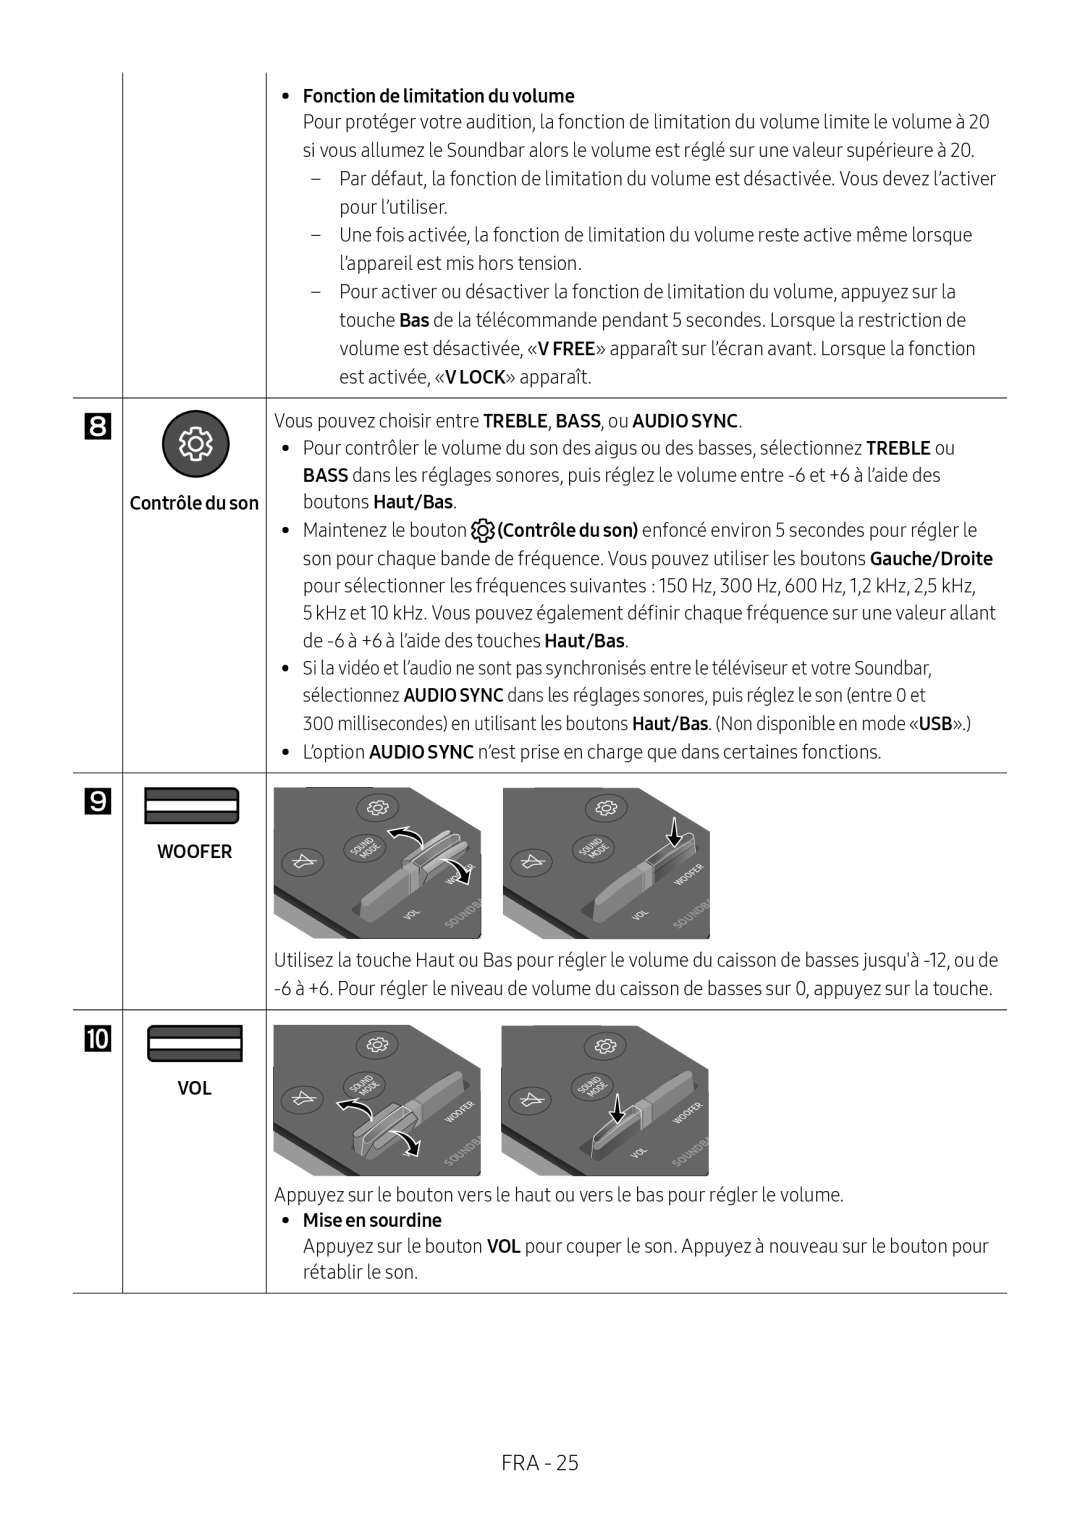
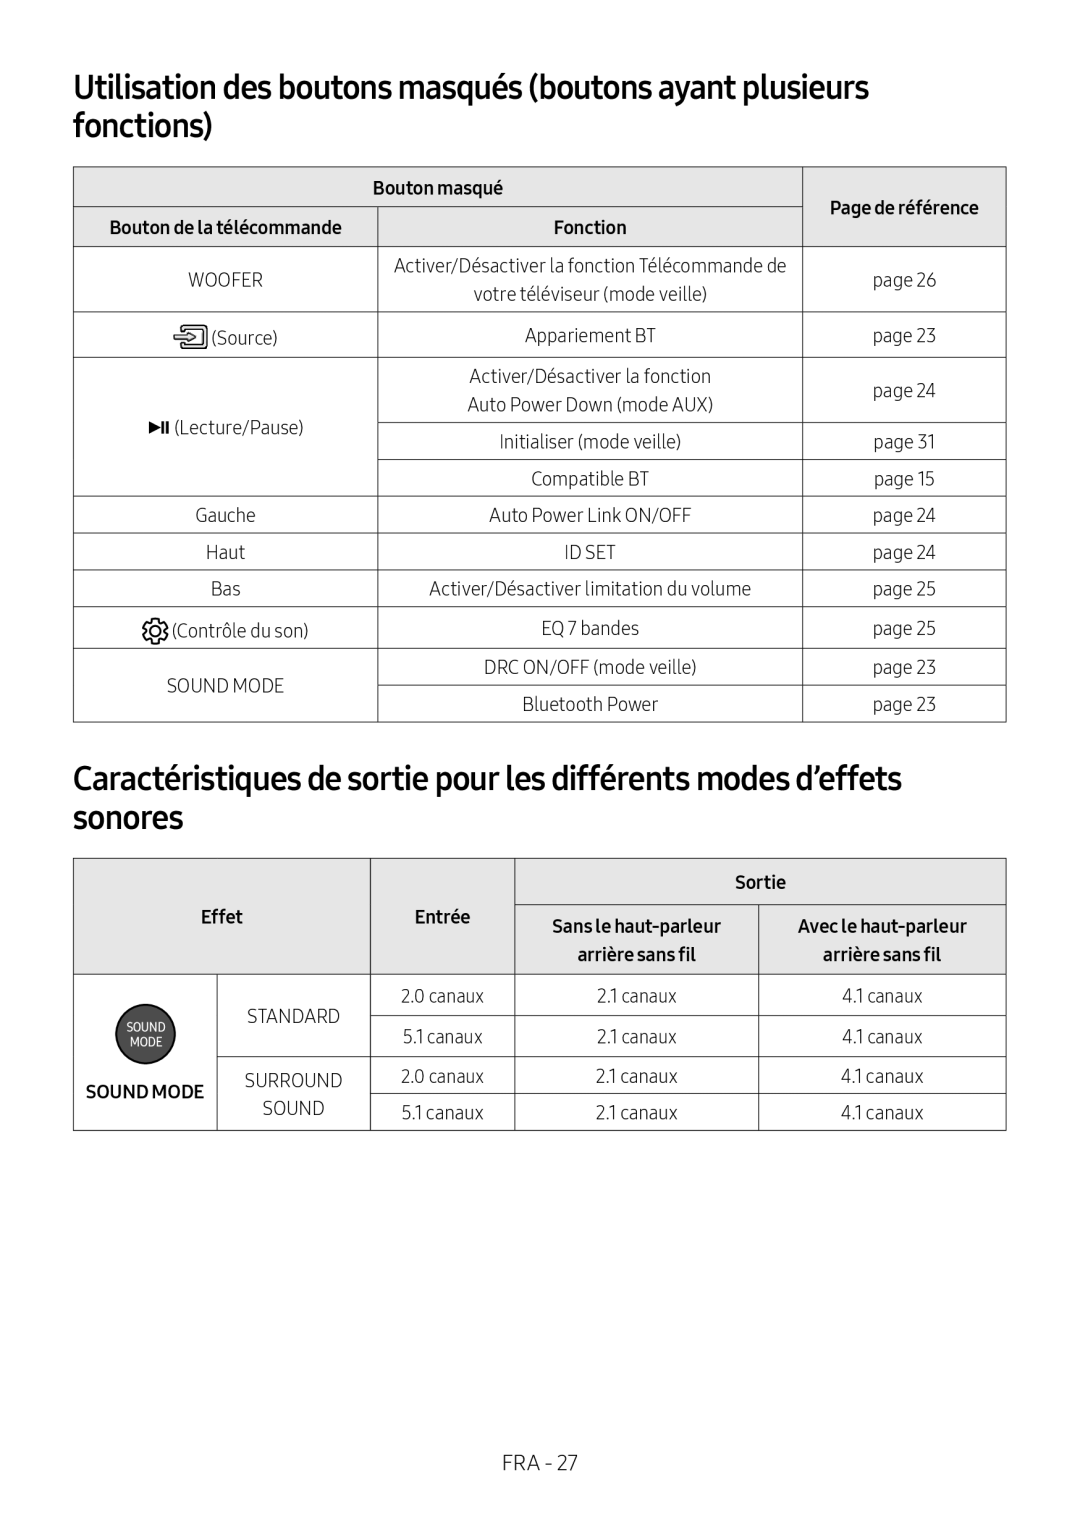 Utilisation des boutons masqués (boutons ayant plusieurs fonctions)
Caractéristiques de sortie pour les différents modes d’effets sonores
 09INSTALLATION DU SUPPORT MURAL
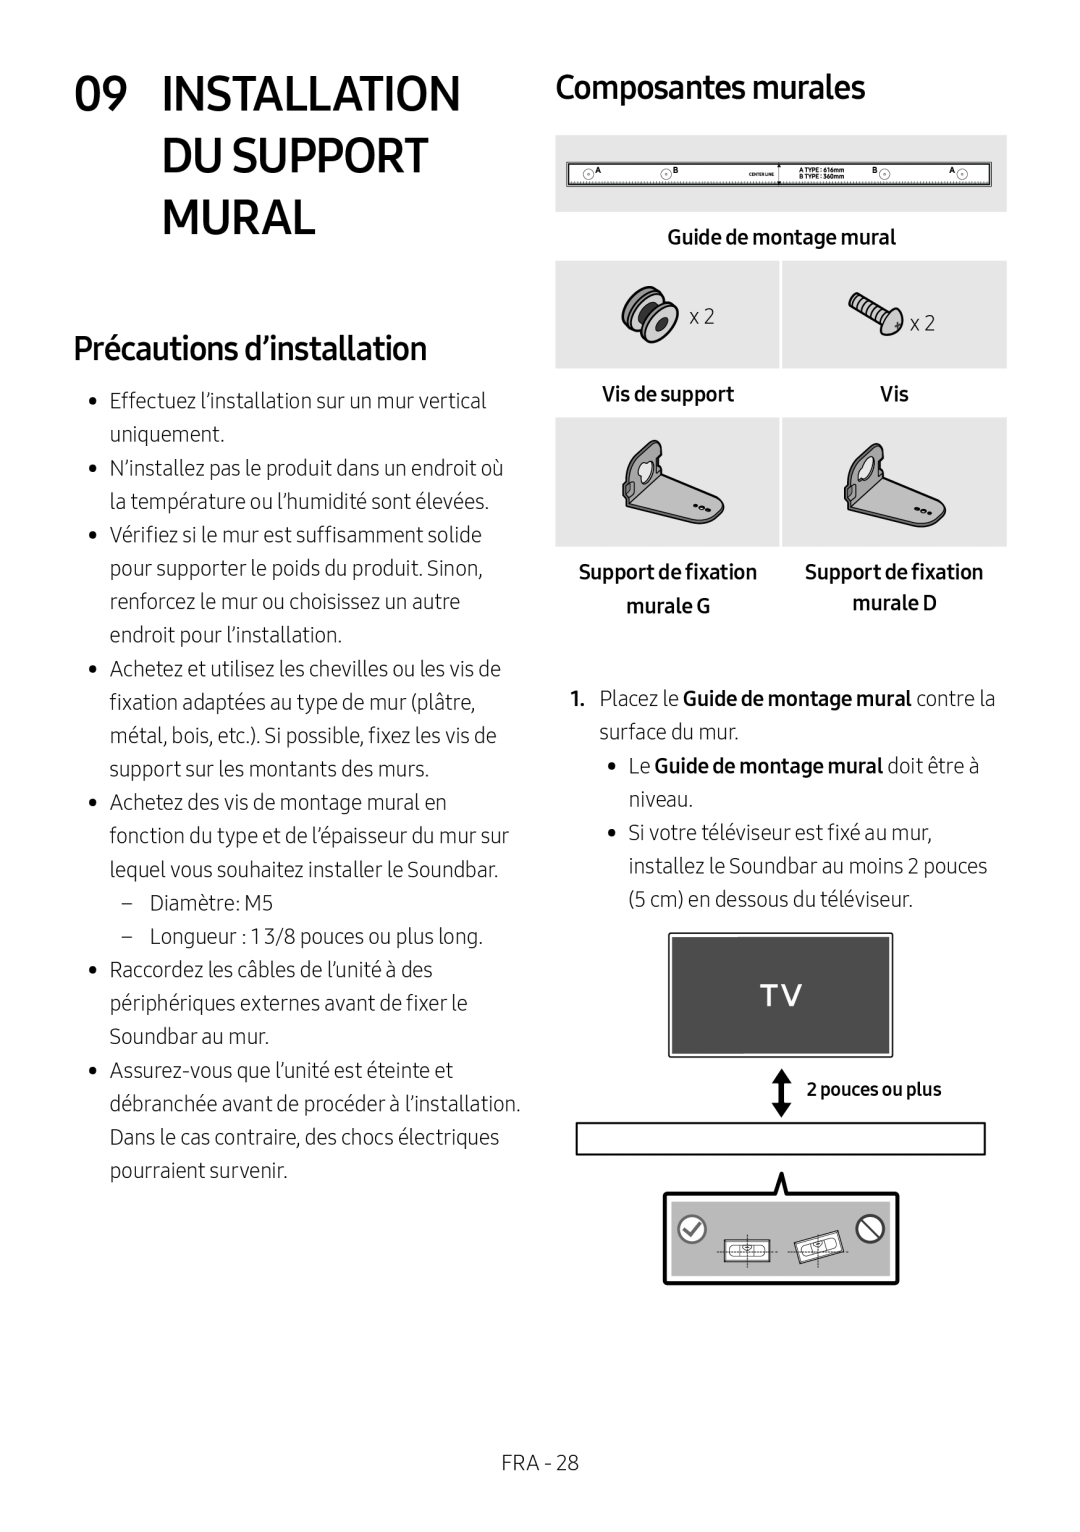
Précautions d’installation
Composantes murales
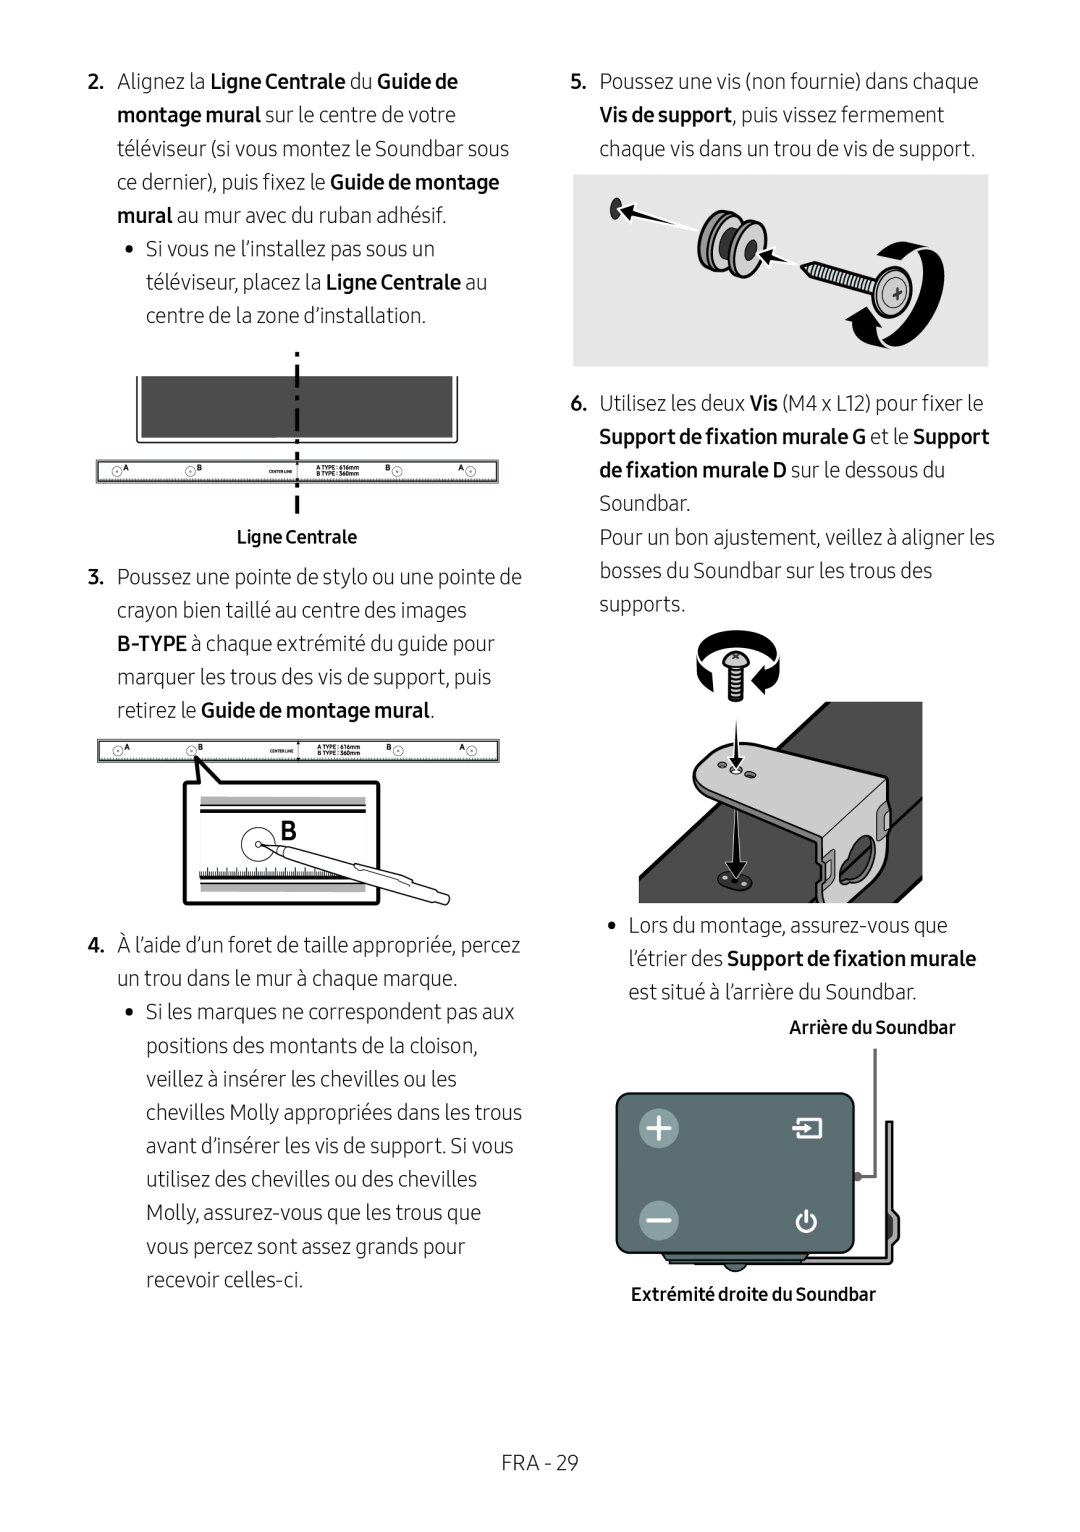 Ligne Centrale
B-TYPE
Guide de montage mural
Vis
Support de fixation murale G
Support de fixation murale D
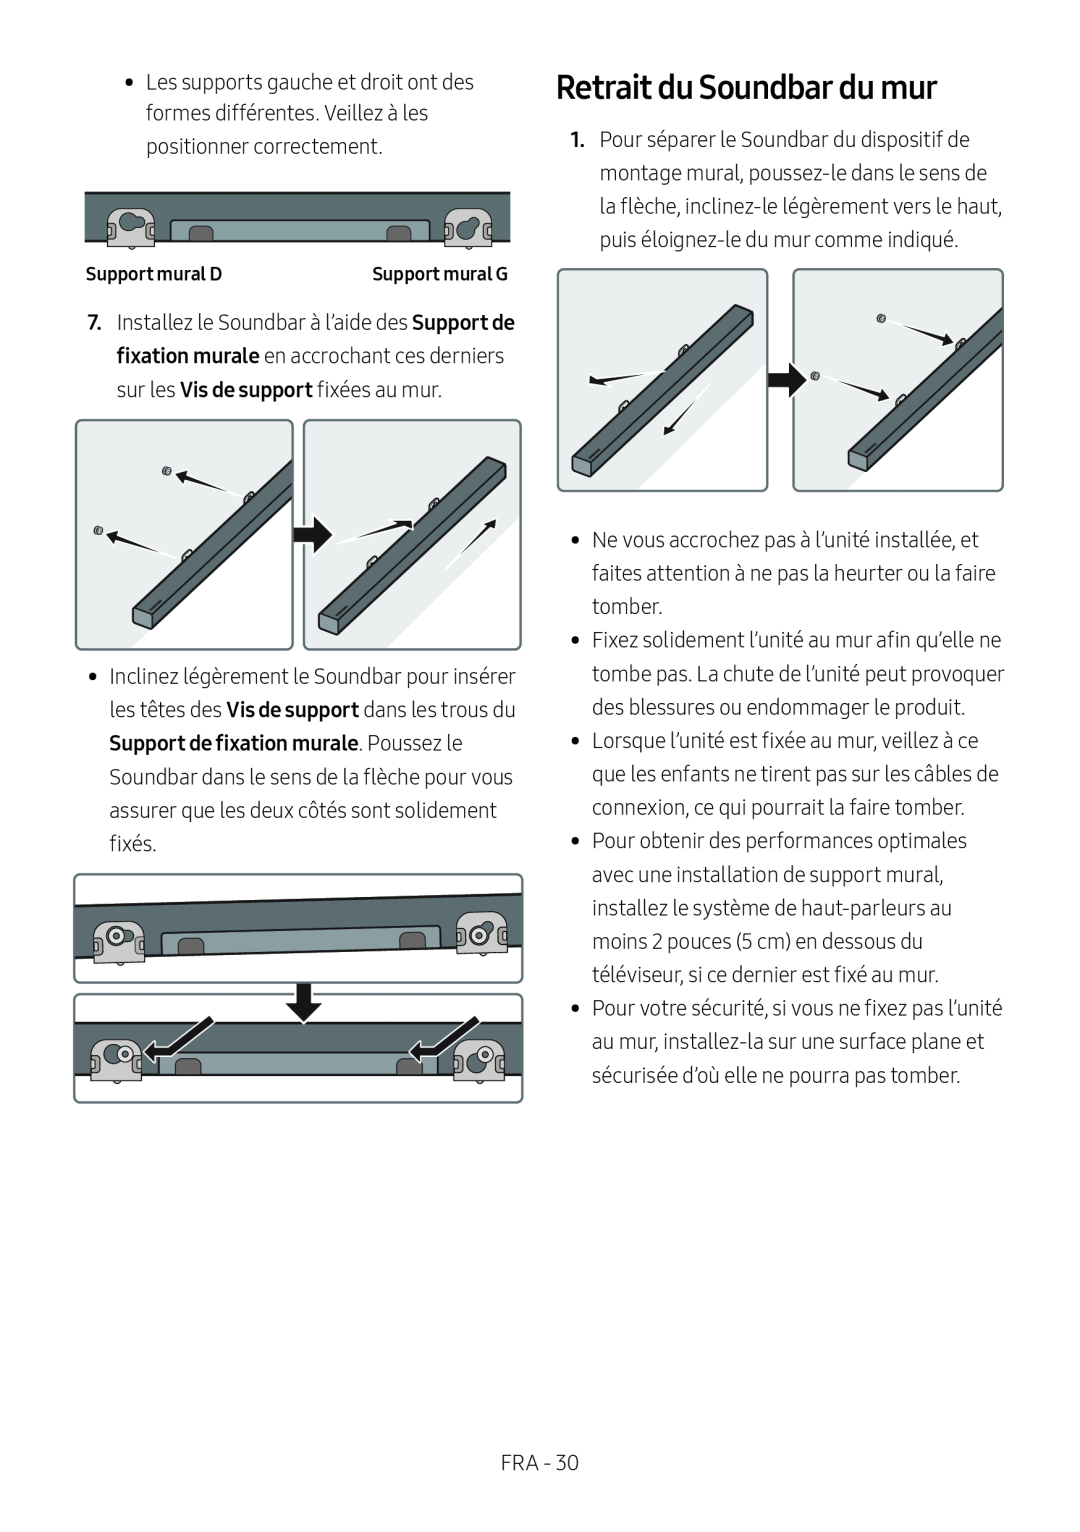 Retrait du Soundbar du mur
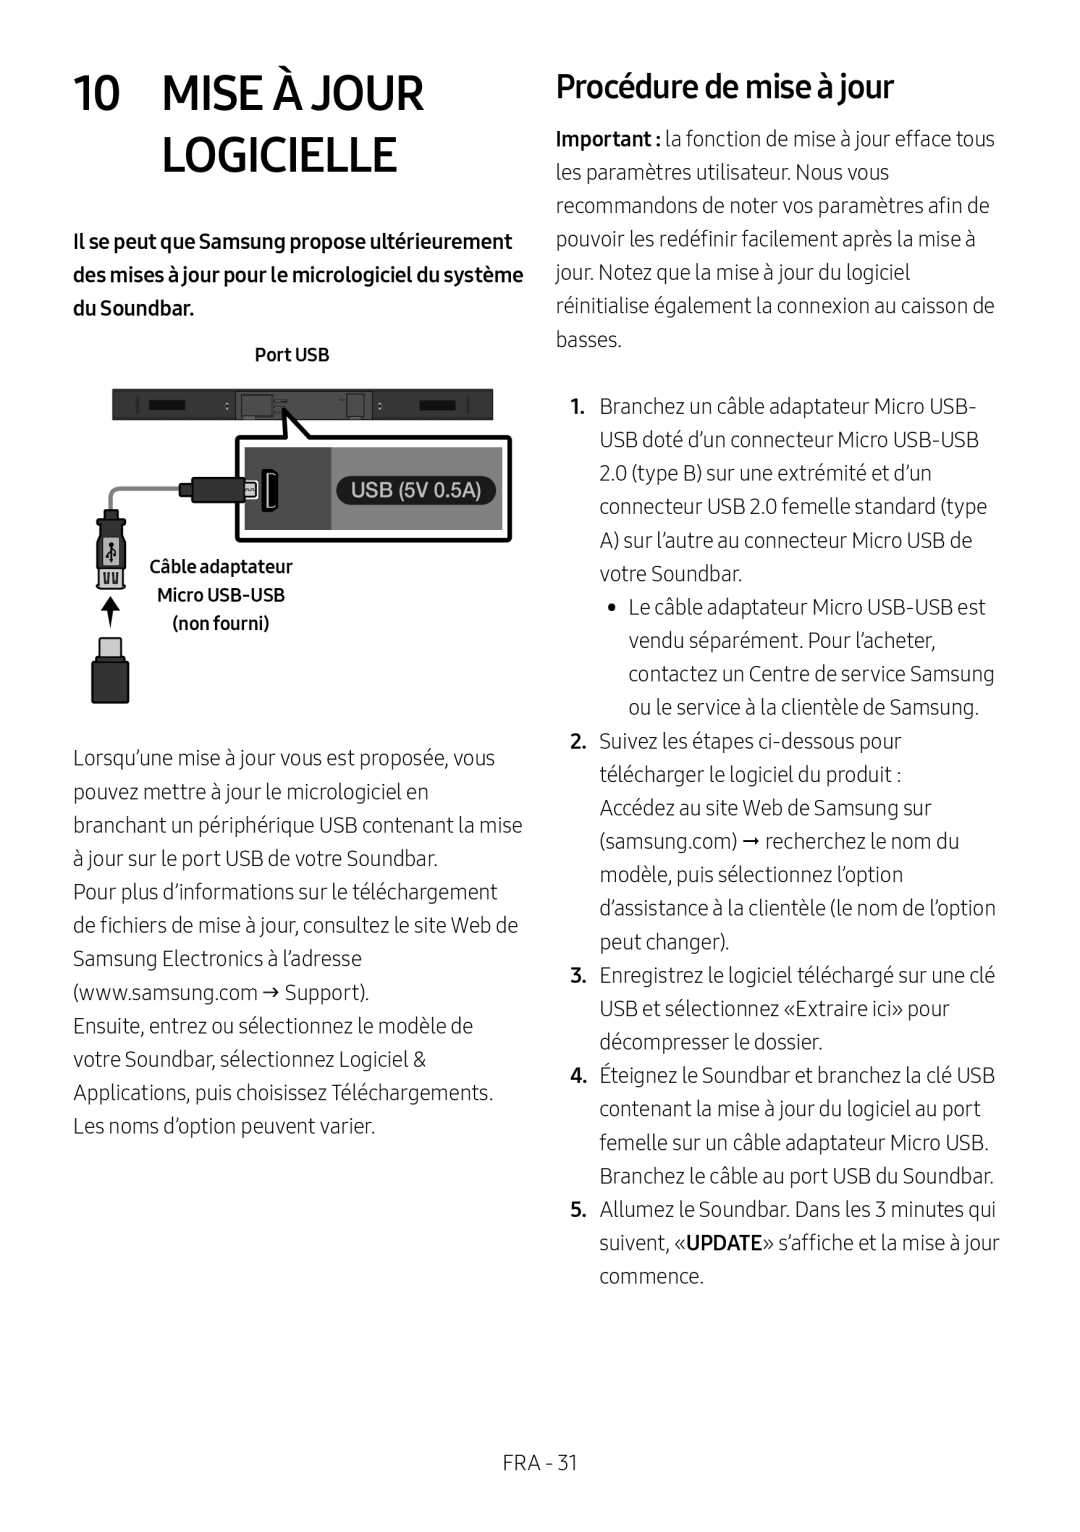 10MISE À JOUR LOGICIELLE
Procédure de mise à jour
 Si UPDATE ne s’affiche pas
 11 DÉPANNAGE
 12 LICENCE
13AVIS DE LICENCES LIBRES
14REMARQUE IMPORTANTE CONCERNANT LE SERVICE
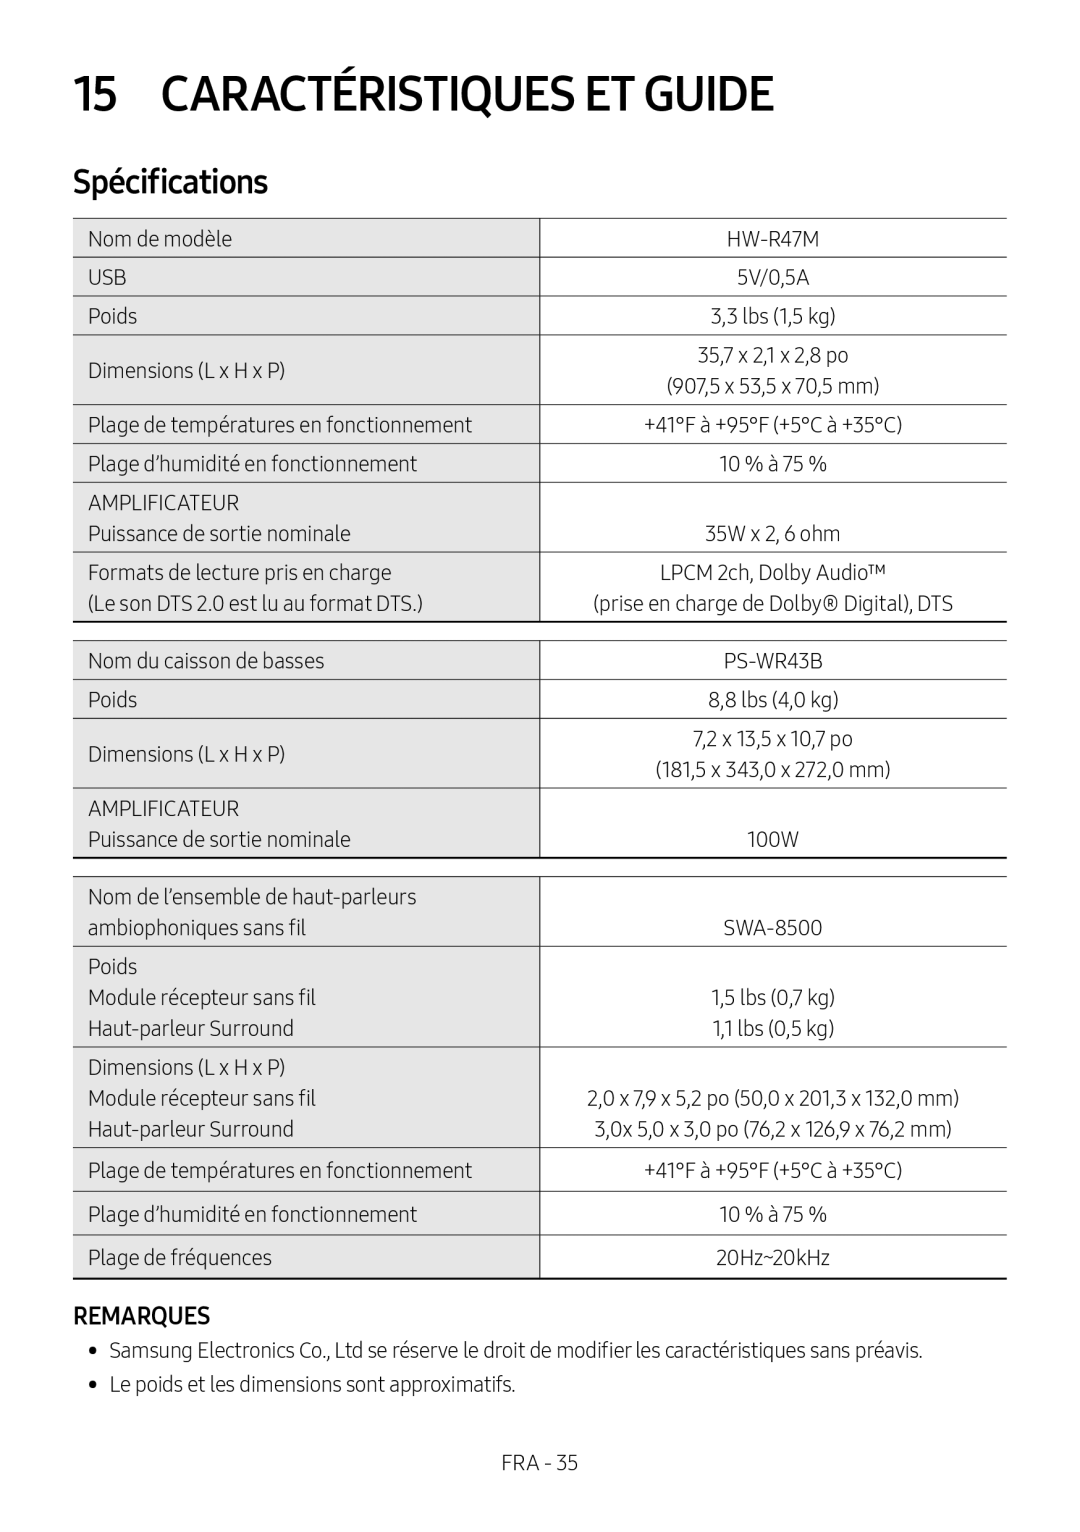 15 CARACTÉRISTIQUES ET GUIDE
Spécifications
REMARQUES
 GARANTIE LIMITÉE À L’ACHETEUR INITIAL
EXCLUSIONS (CE QUI N’EST PAS COUVERT)
Samsung Electronics Canada Inc
2050 Derry Rd West
Mississauga, On. L5N 0B9
Tel: 1-800-SAMSUNG (726-7864)
Fax: (905) 542
Website: http://www.samsung.com/ca_fr