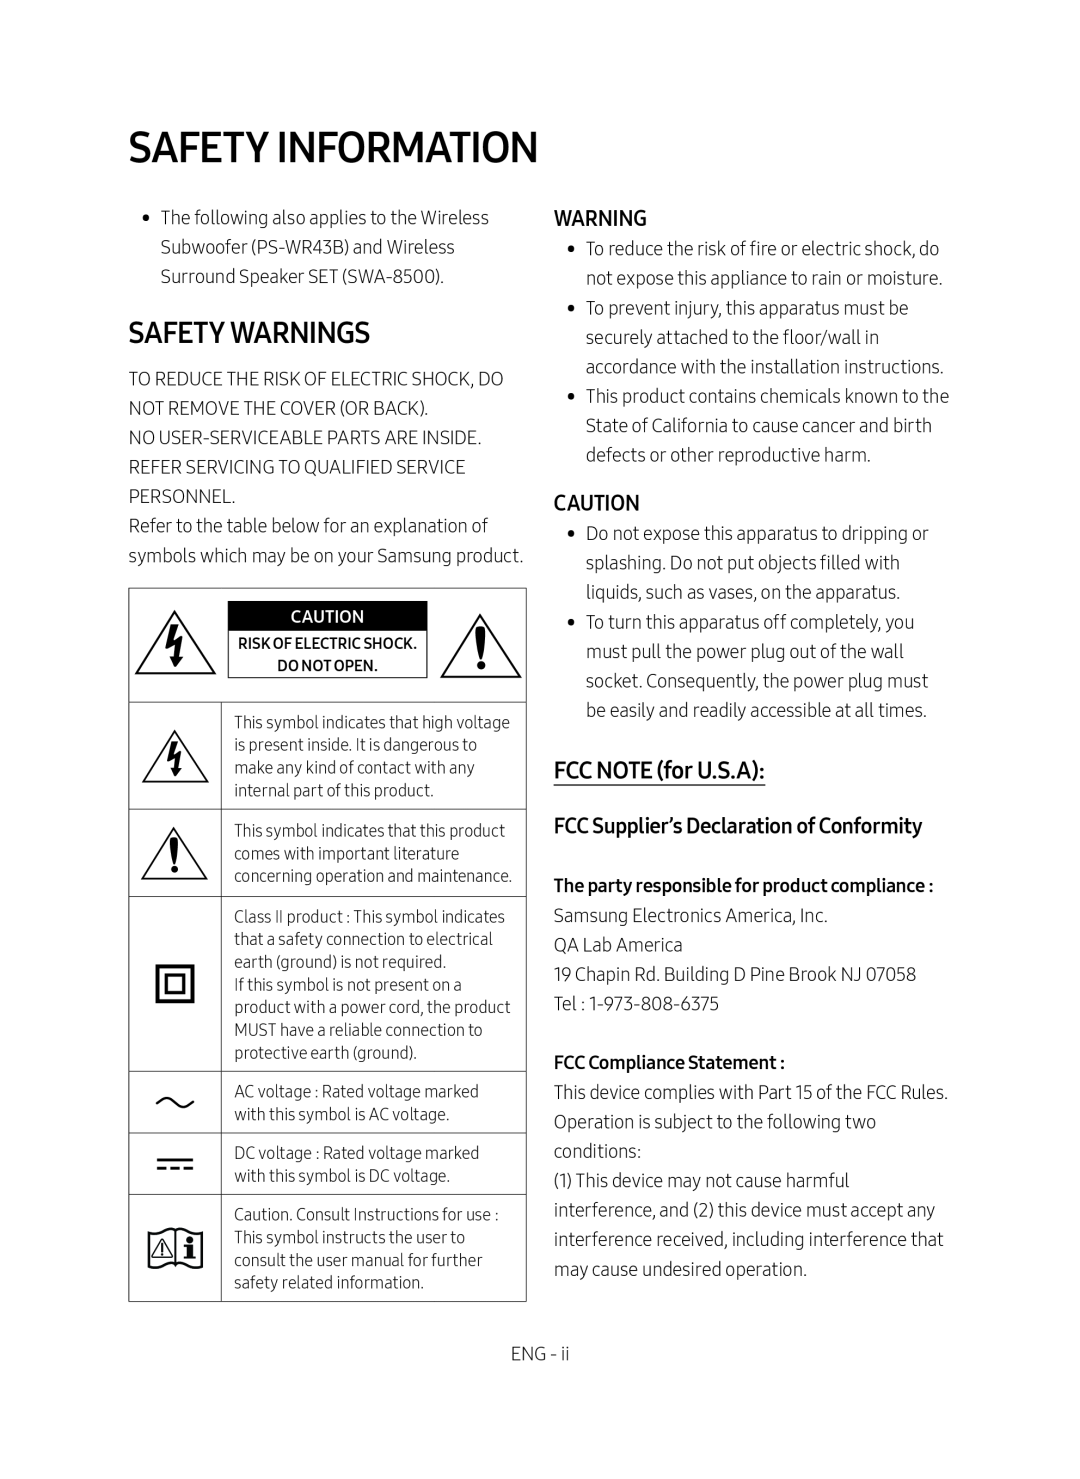
 SAFETY INFORMATION
SAFETY WARNINGS
WARNING
CAUTION
FCC NOTE (for U.S.A):
FCC Supplier’s Declaration of Conformity
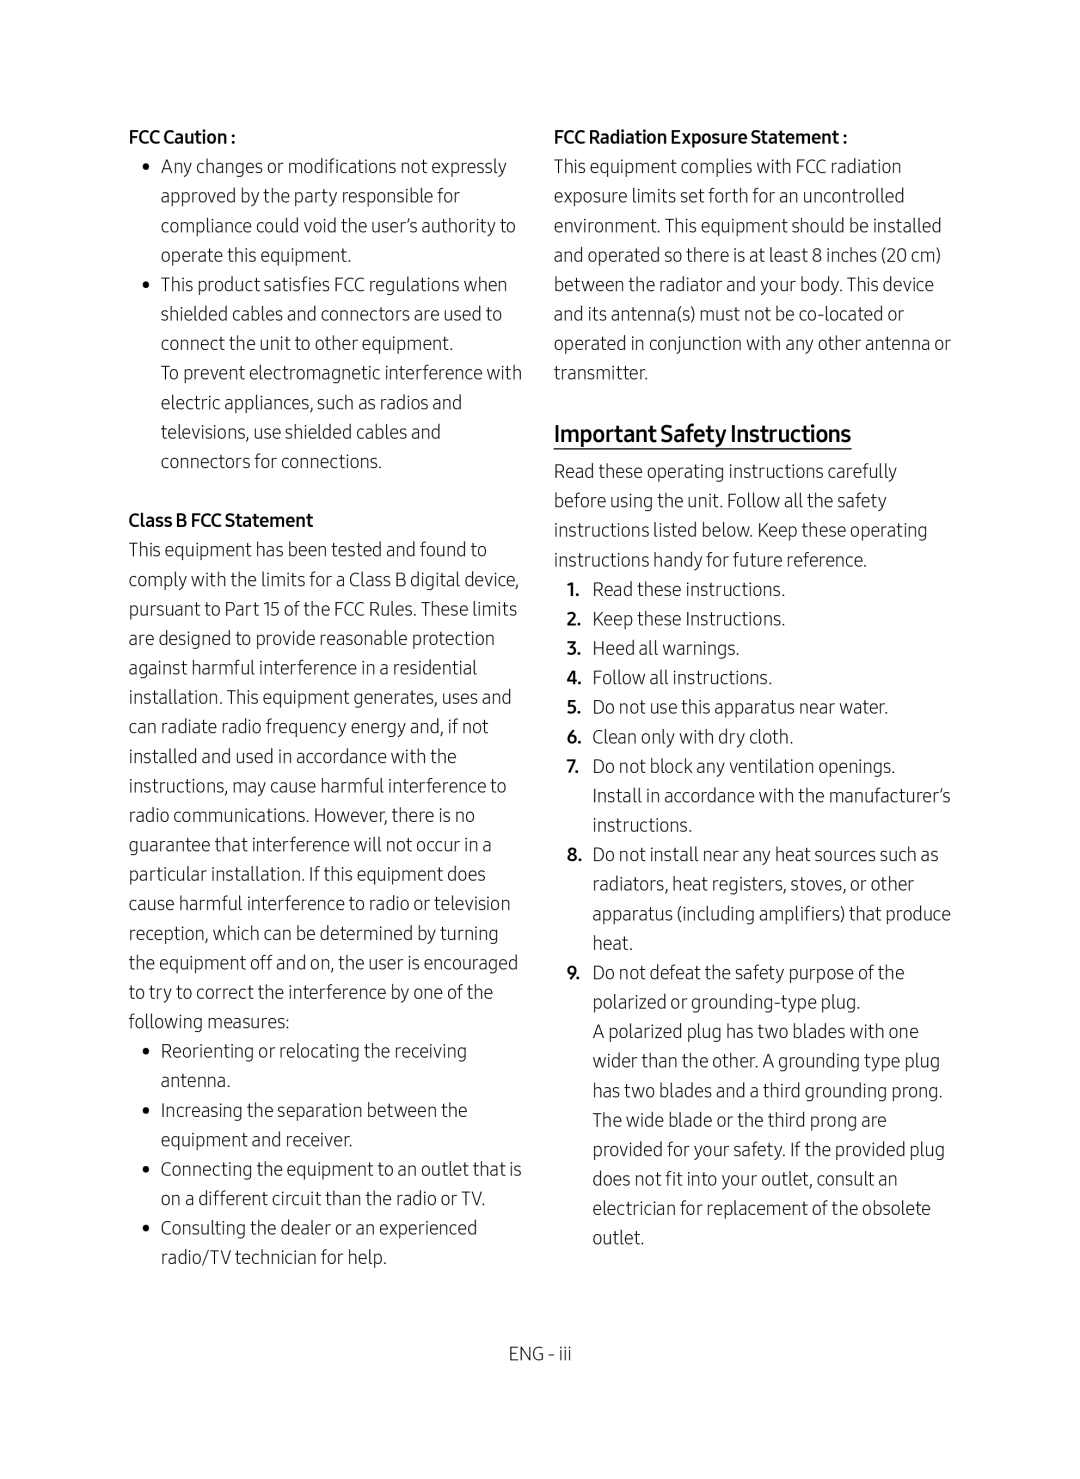 Important Safety Instructions
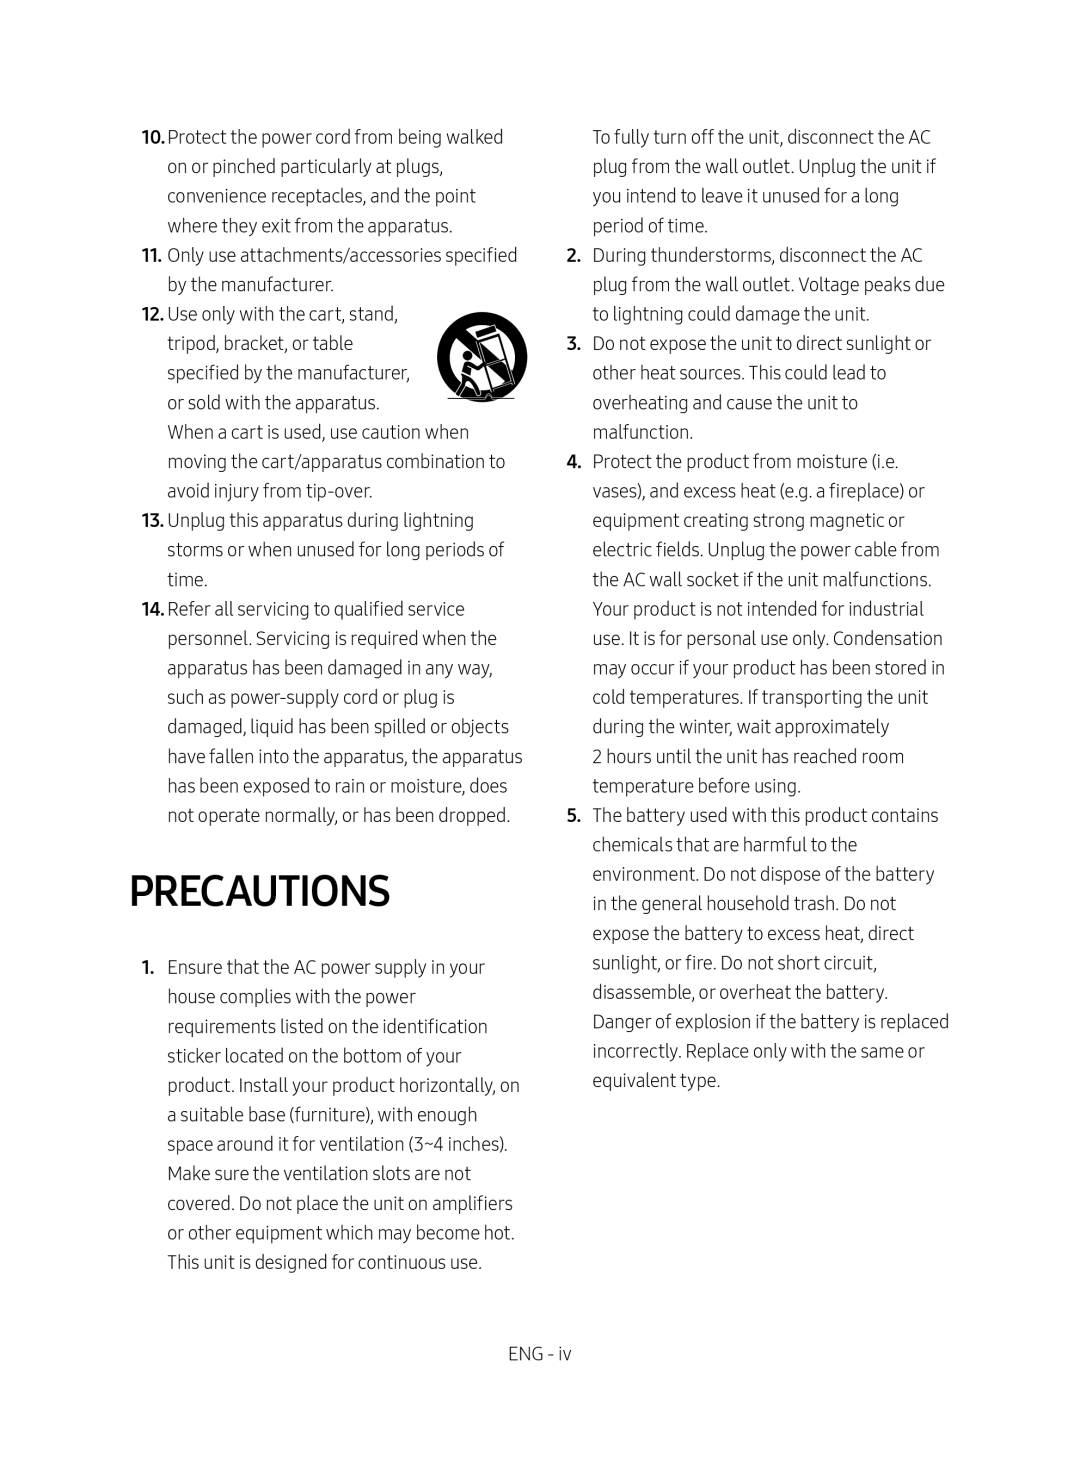 PRECAUTIONS
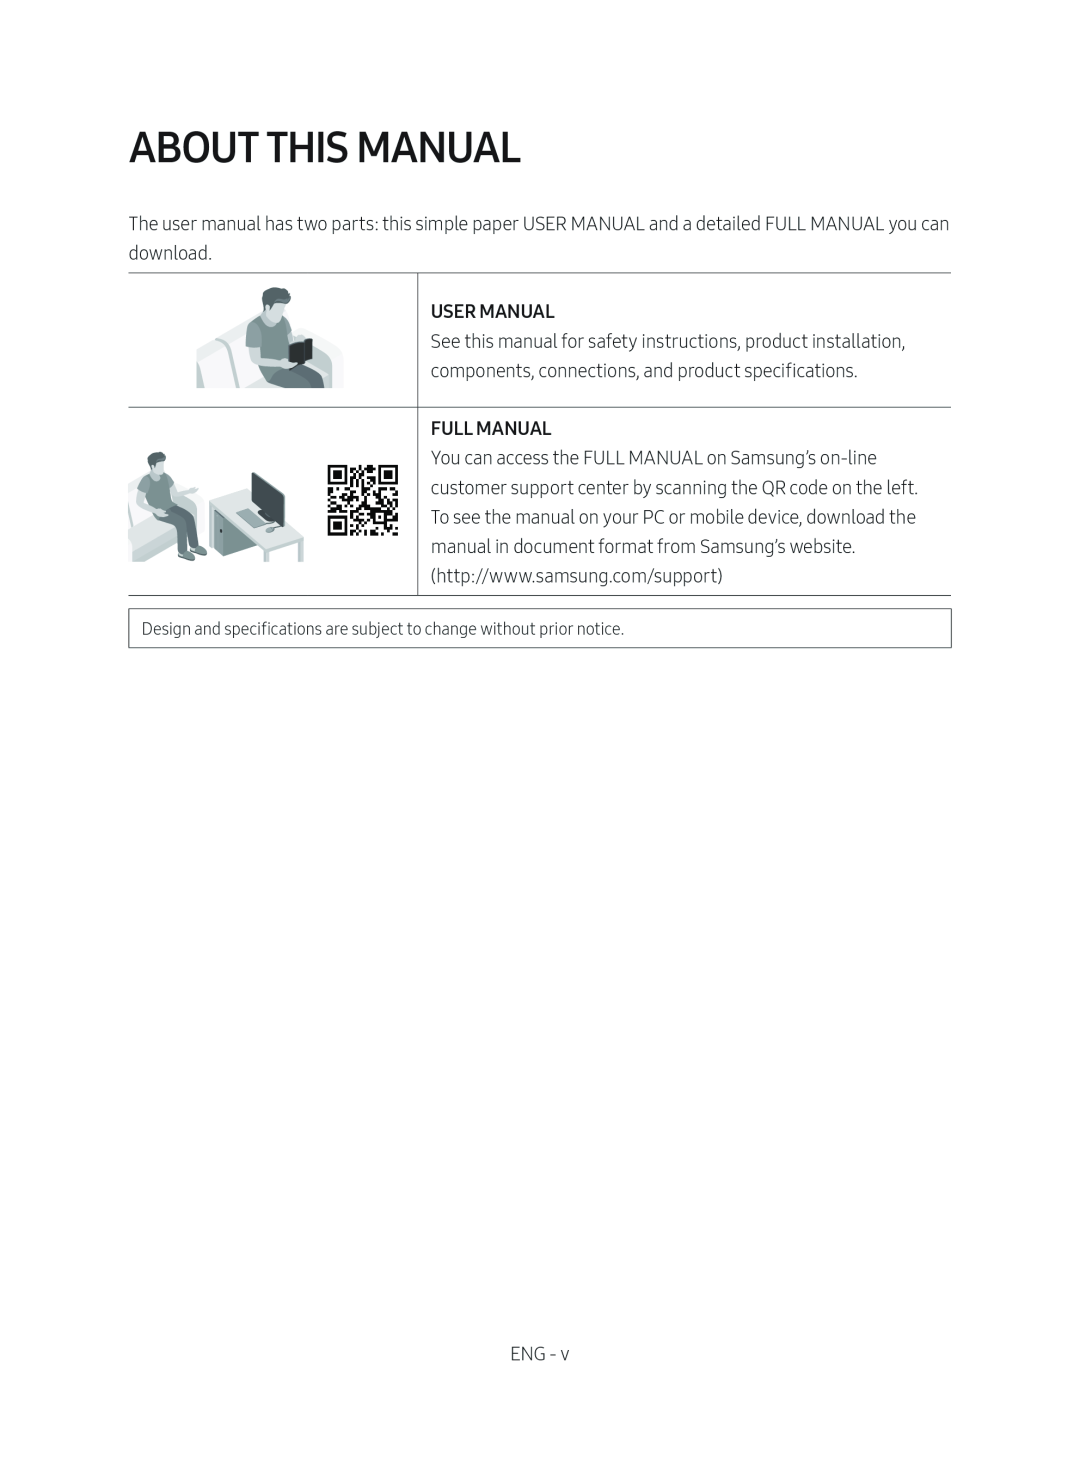 ABOUT THIS MANUAL
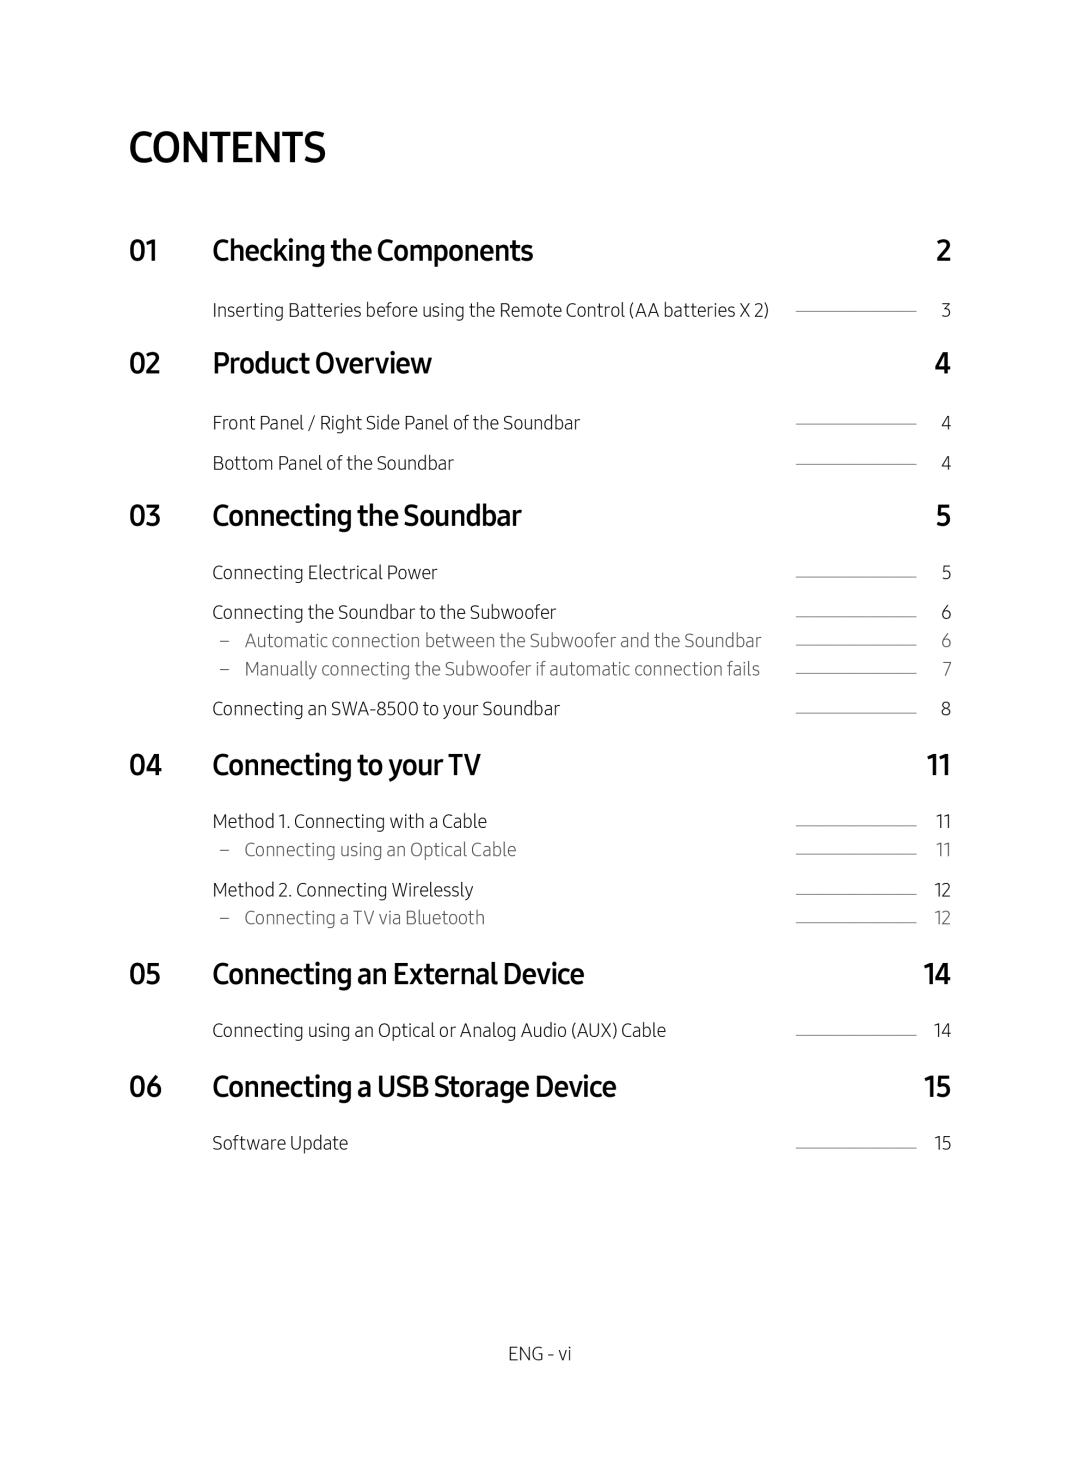 CONTENTS
Checking the Components
Product Overview
Connecting the Soundbar
Connecting to your TV
Connecting an External Device
Connecting a USB Storage Device
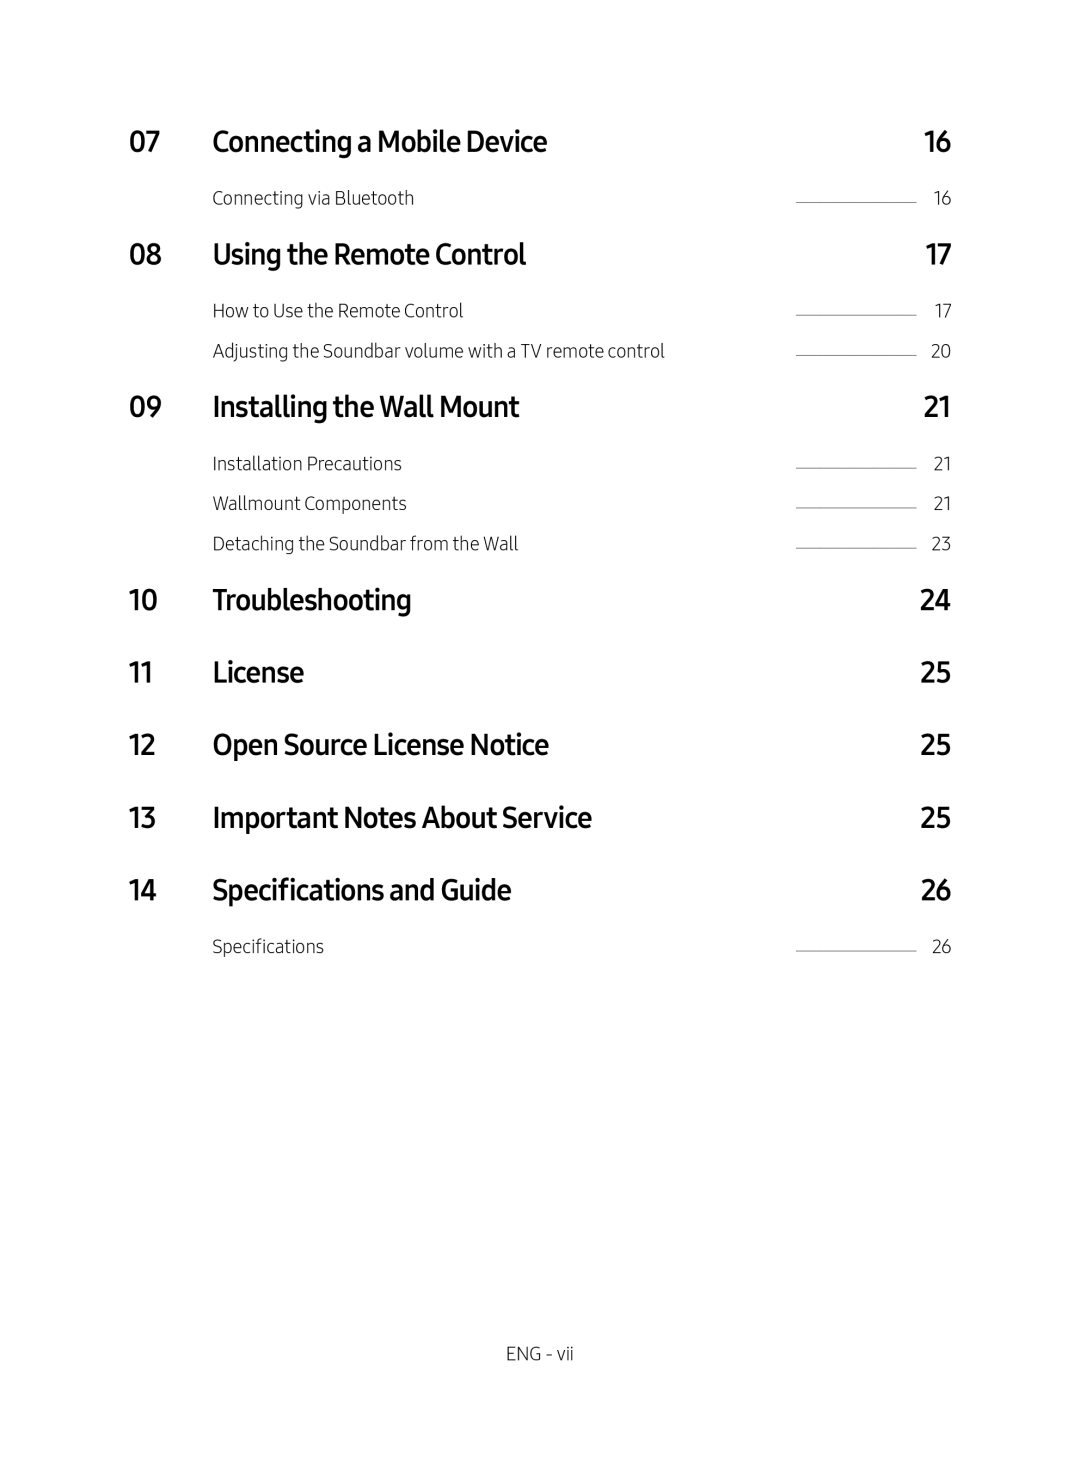 Connecting a Mobile Device
Using the Remote Control
Installing the Wall Mount
Troubleshooting
License
Open Source License Notice
Important Notes About Service
Specifications and Guide
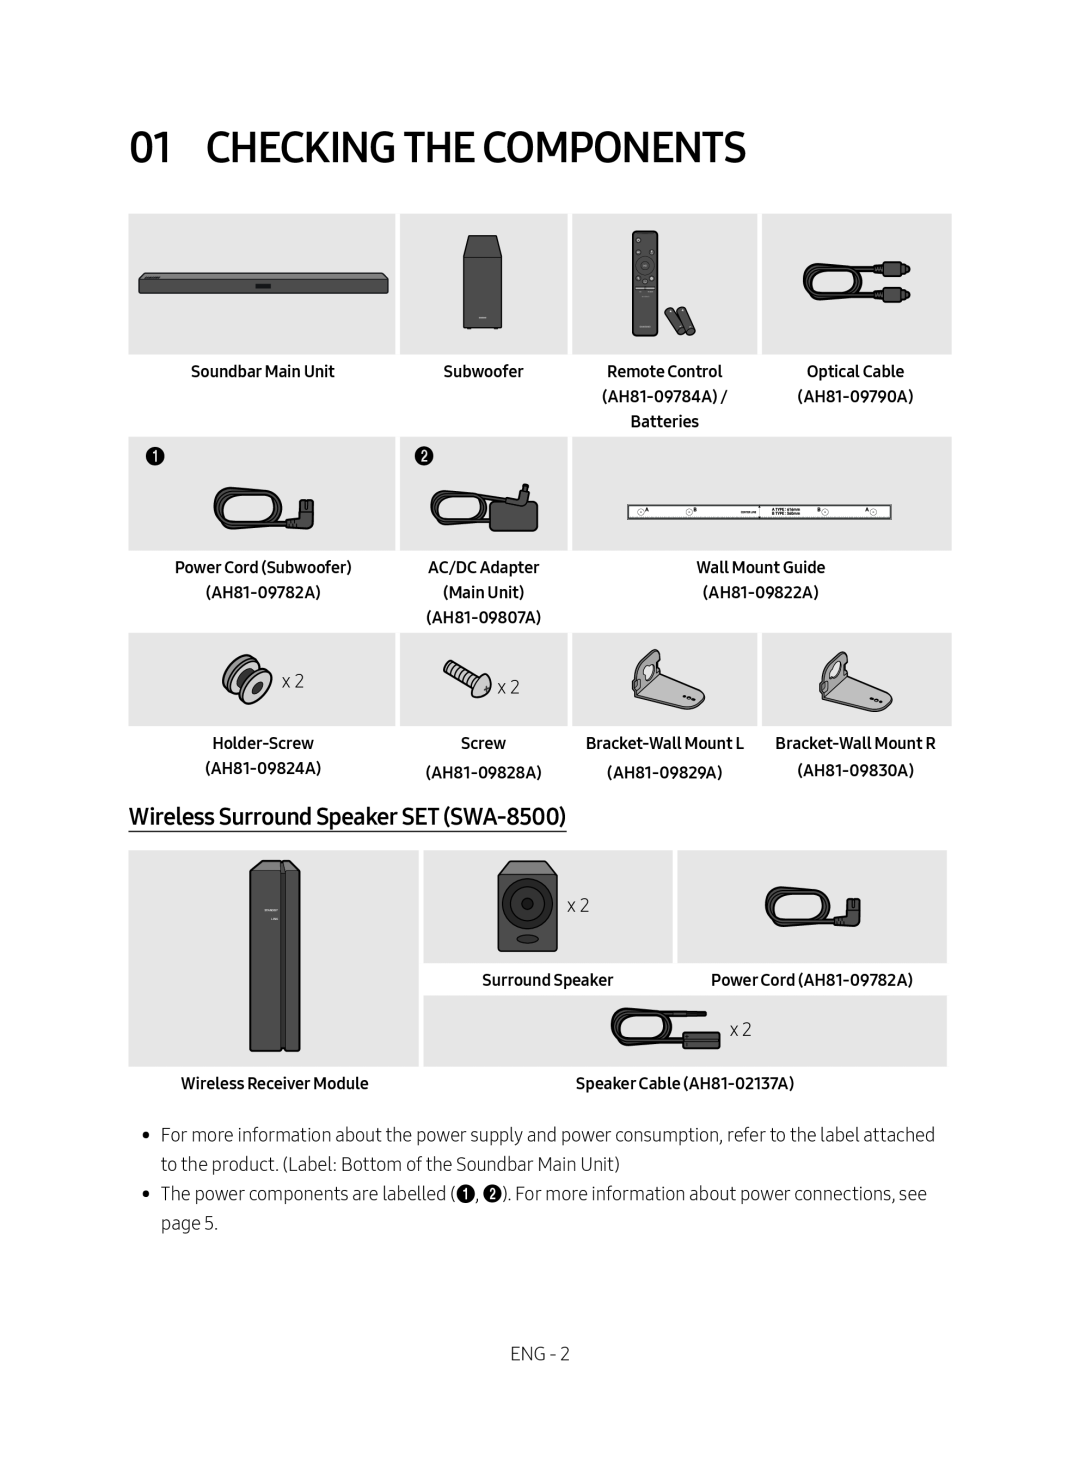 01 CHECKING THE COMPONENTS
Wireless Surround Speaker SET (SWA-8500)
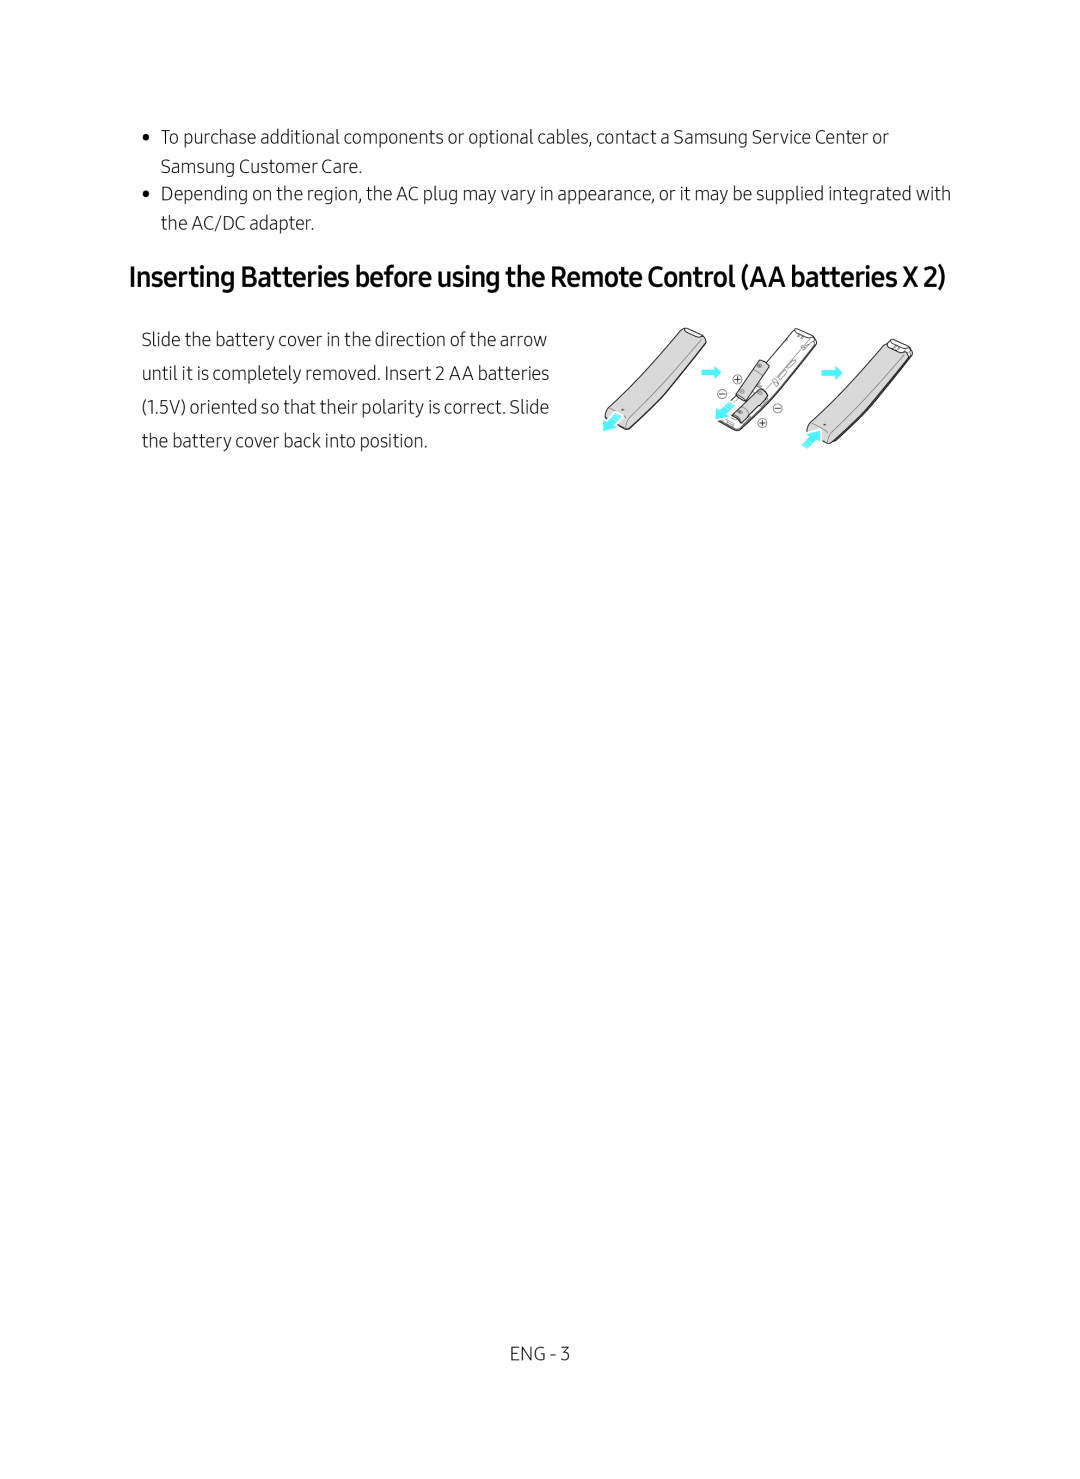 Inserting Batteries before using the Remote Control (AA batteries X 2)
 02 PRODUCT OVERVIEW
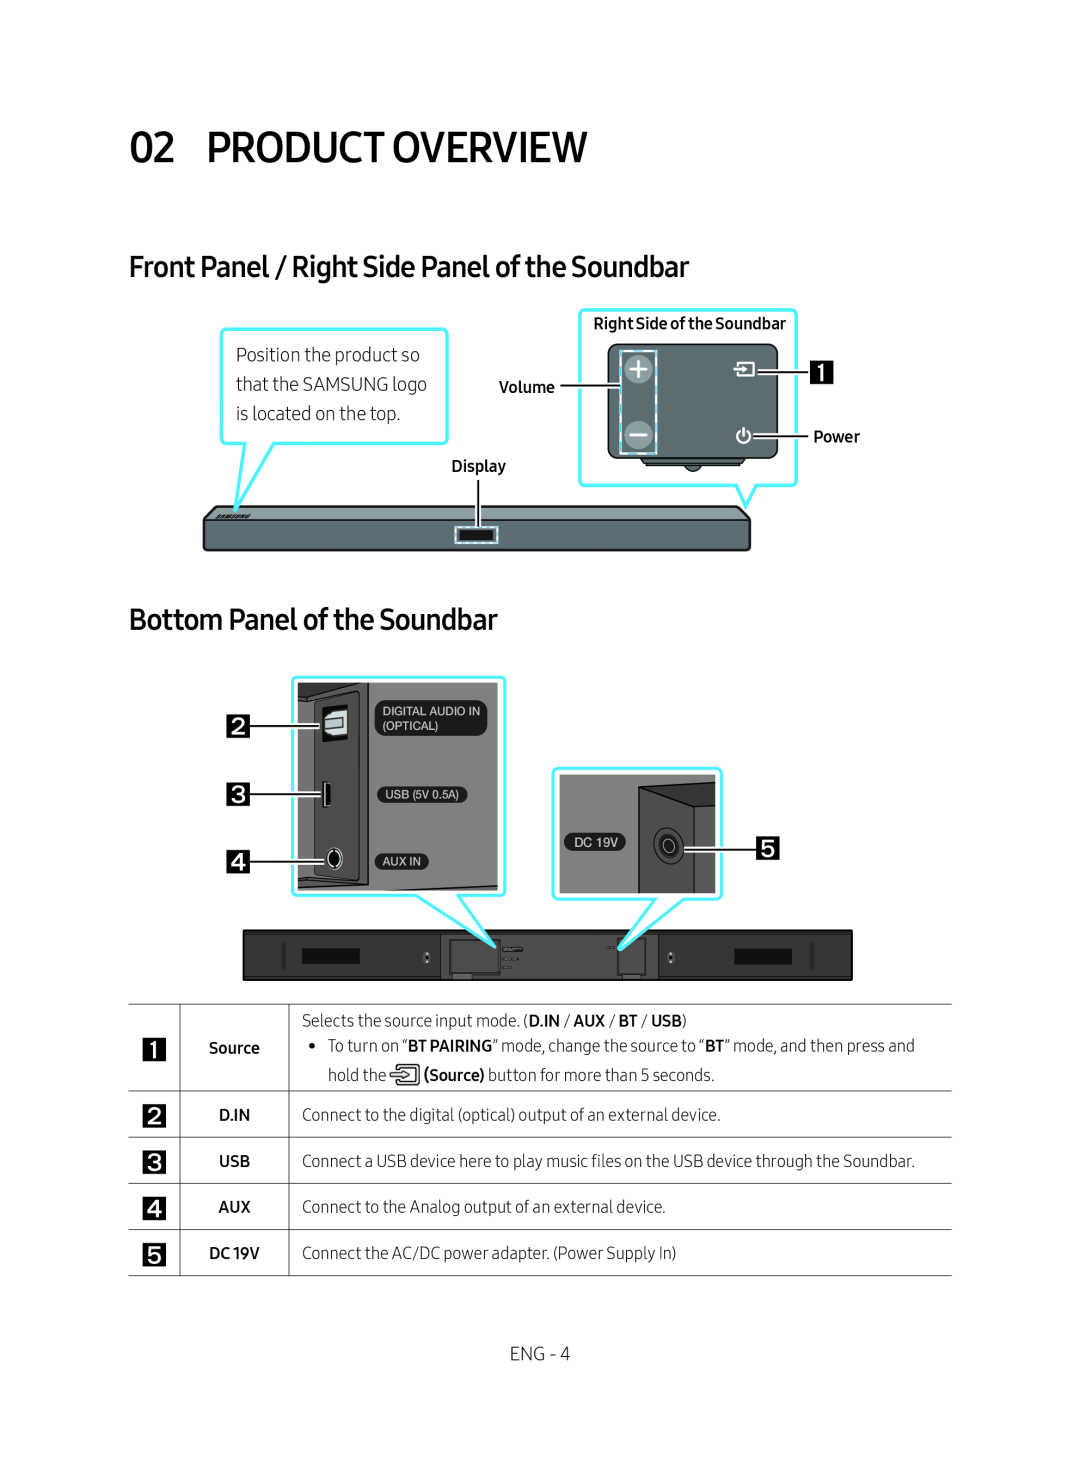
Front Panel / Right Side Panel of the Soundbar
Bottom Panel of the Soundbar
 03 CONNECTING THE SOUNDBAR
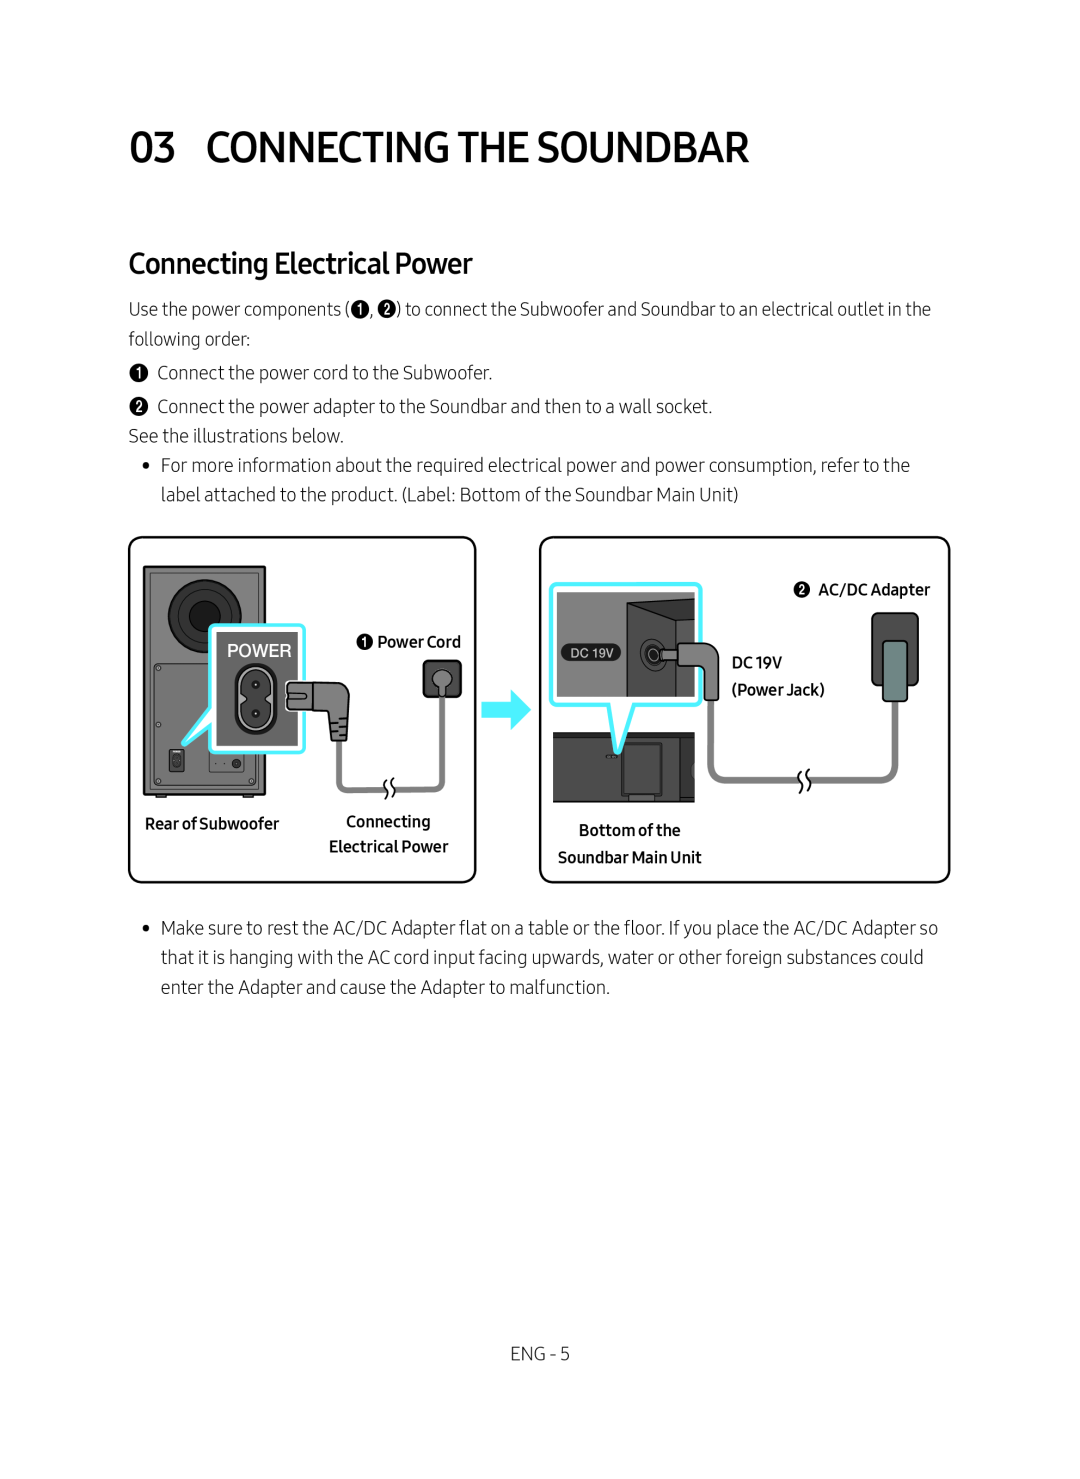
Connecting Electrical Power
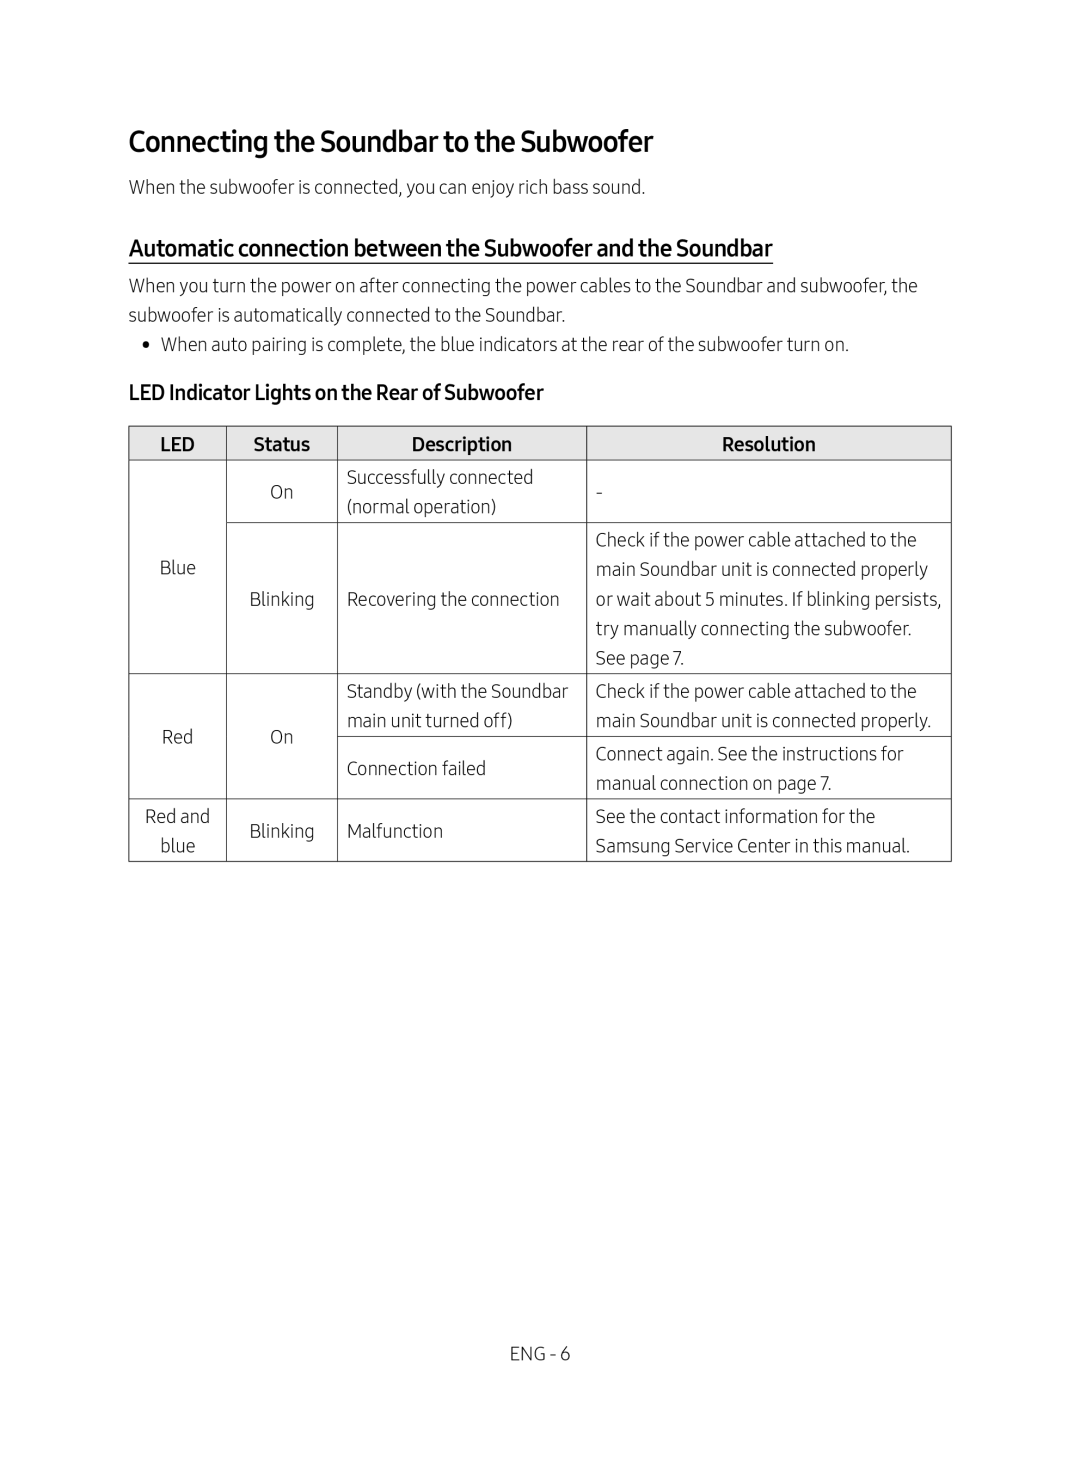 Connecting the Soundbar to the Subwoofer
Automatic connection between the Subwoofer and the Soundbar
LED Indicator Lights on the Rear of Subwoofer
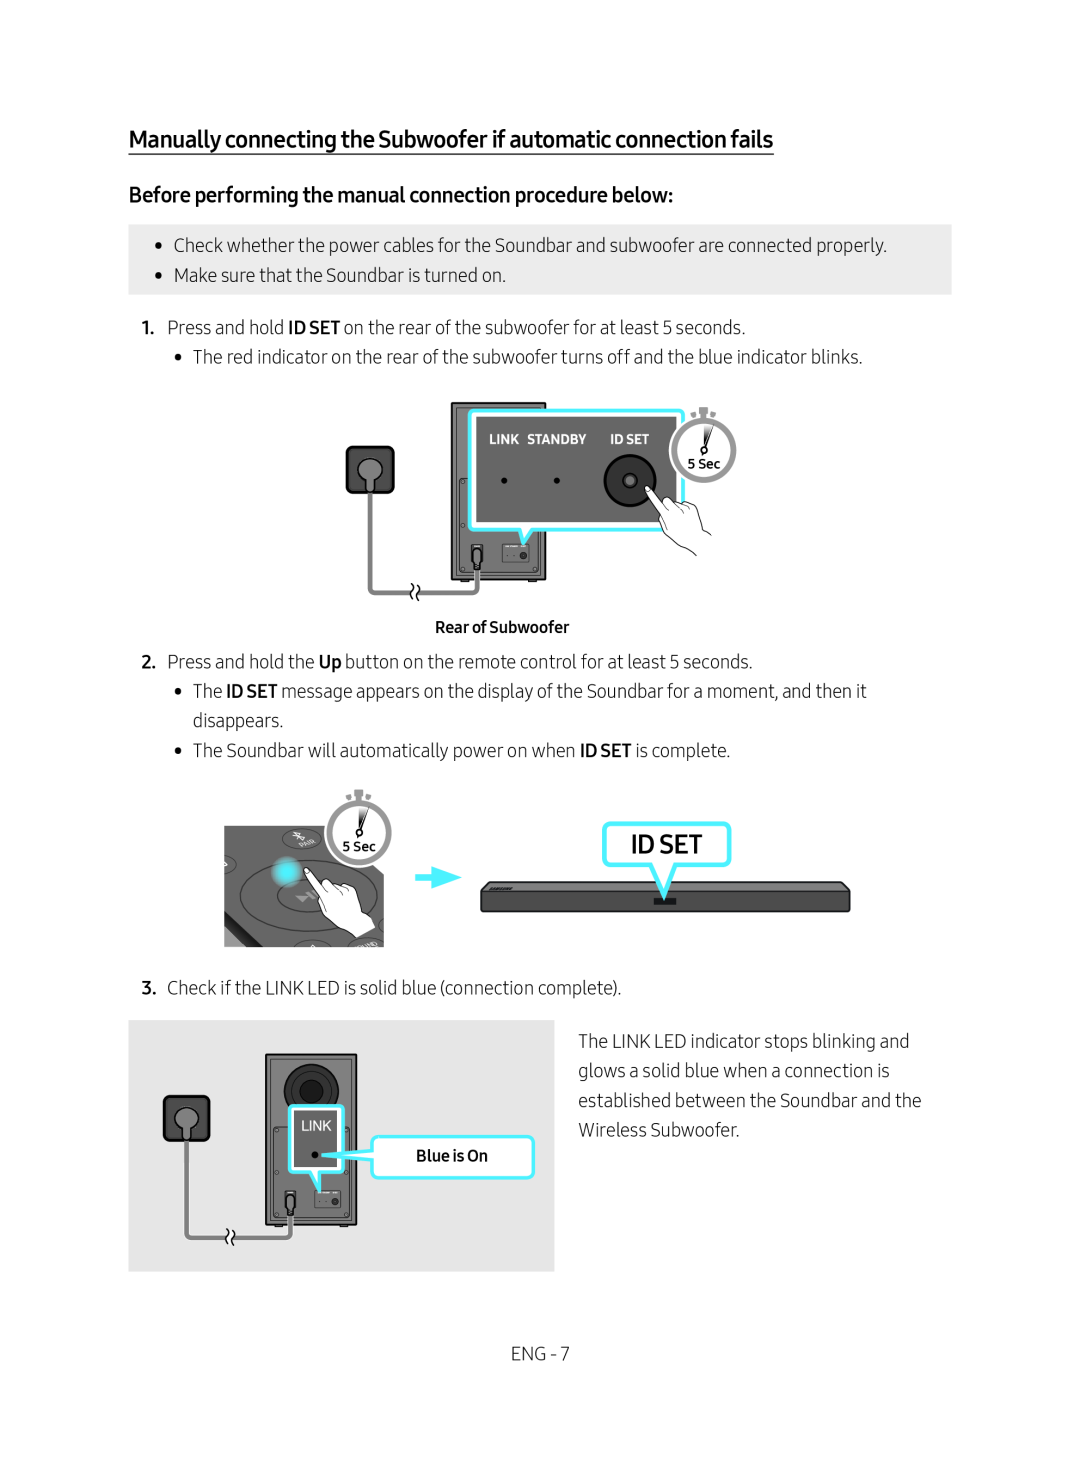 Manually connecting the Subwoofer if automatic connection fails
Before performing the manual connection procedure below:
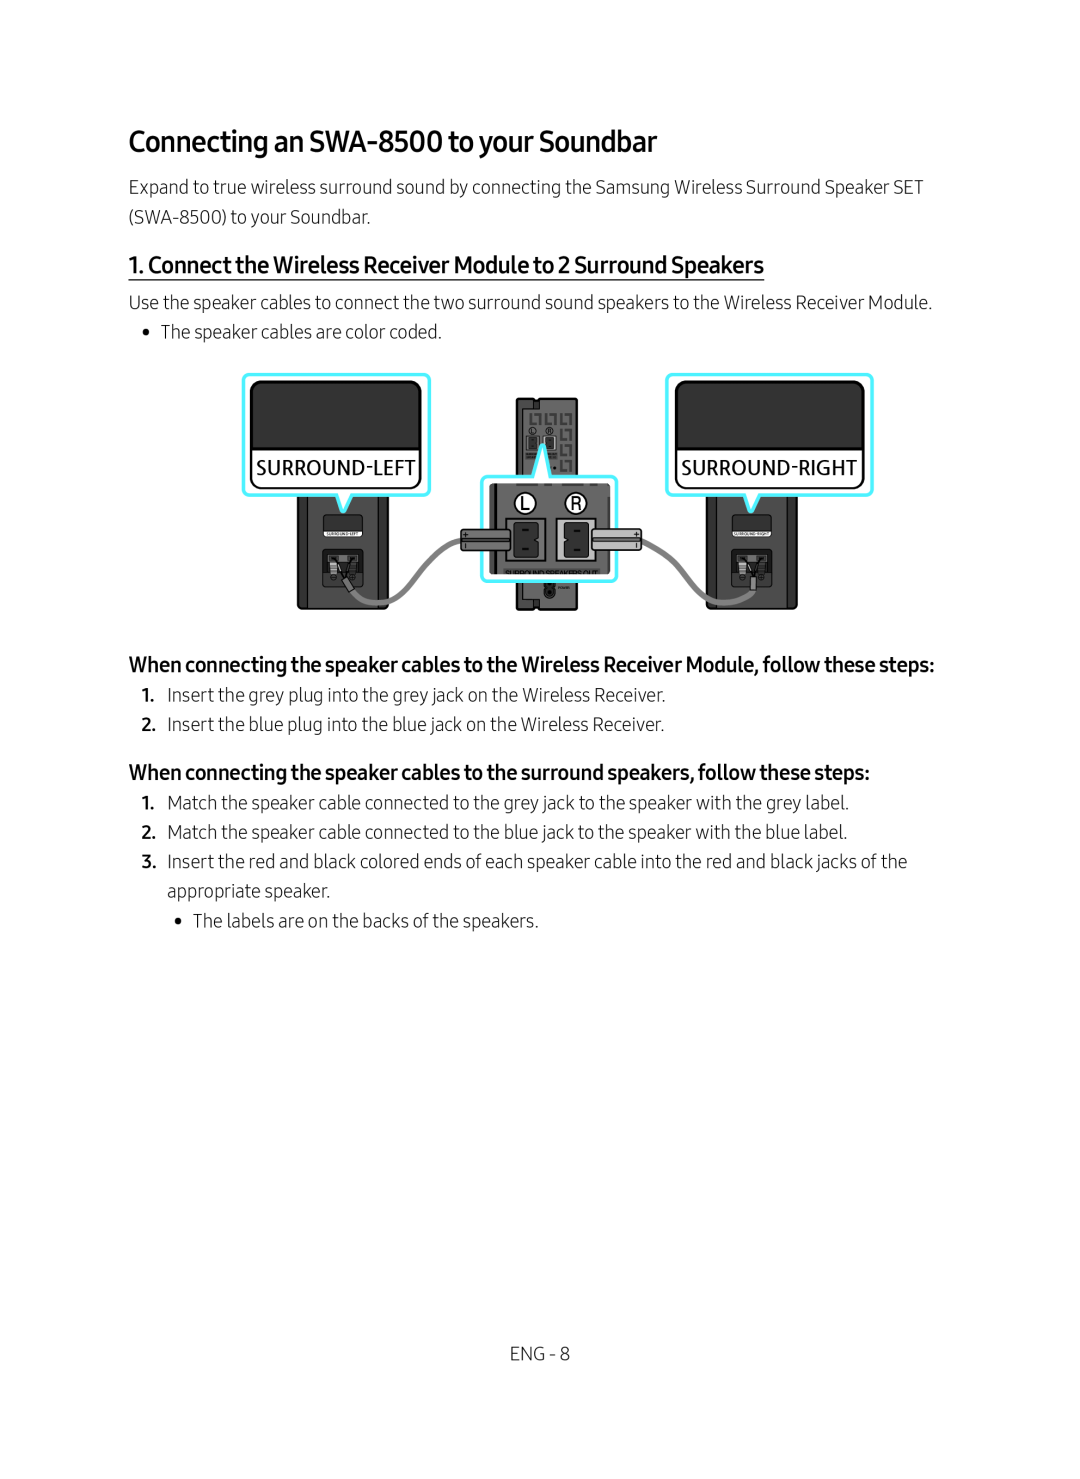 Connecting an SWA-8500to your Soundbar
1. Connect the Wireless Receiver Module to 2 Surround Speakers
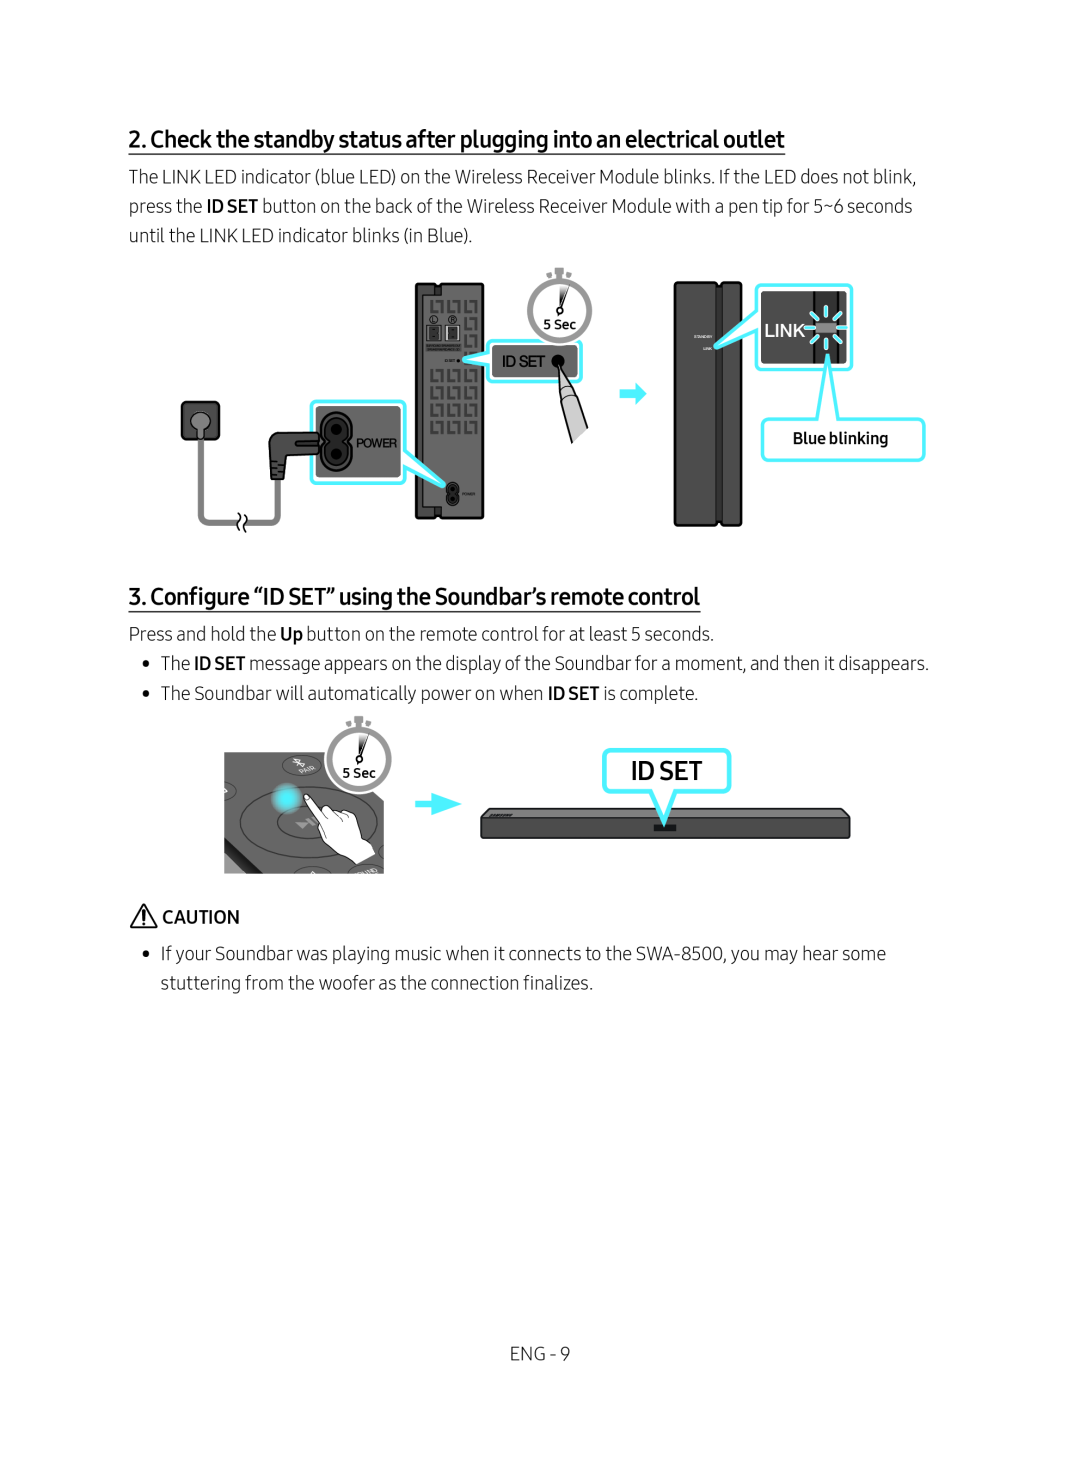 2. Check the standby status after plugging into an electrical outlet
3. Configure “ID SET” using the Soundbar’s remote control
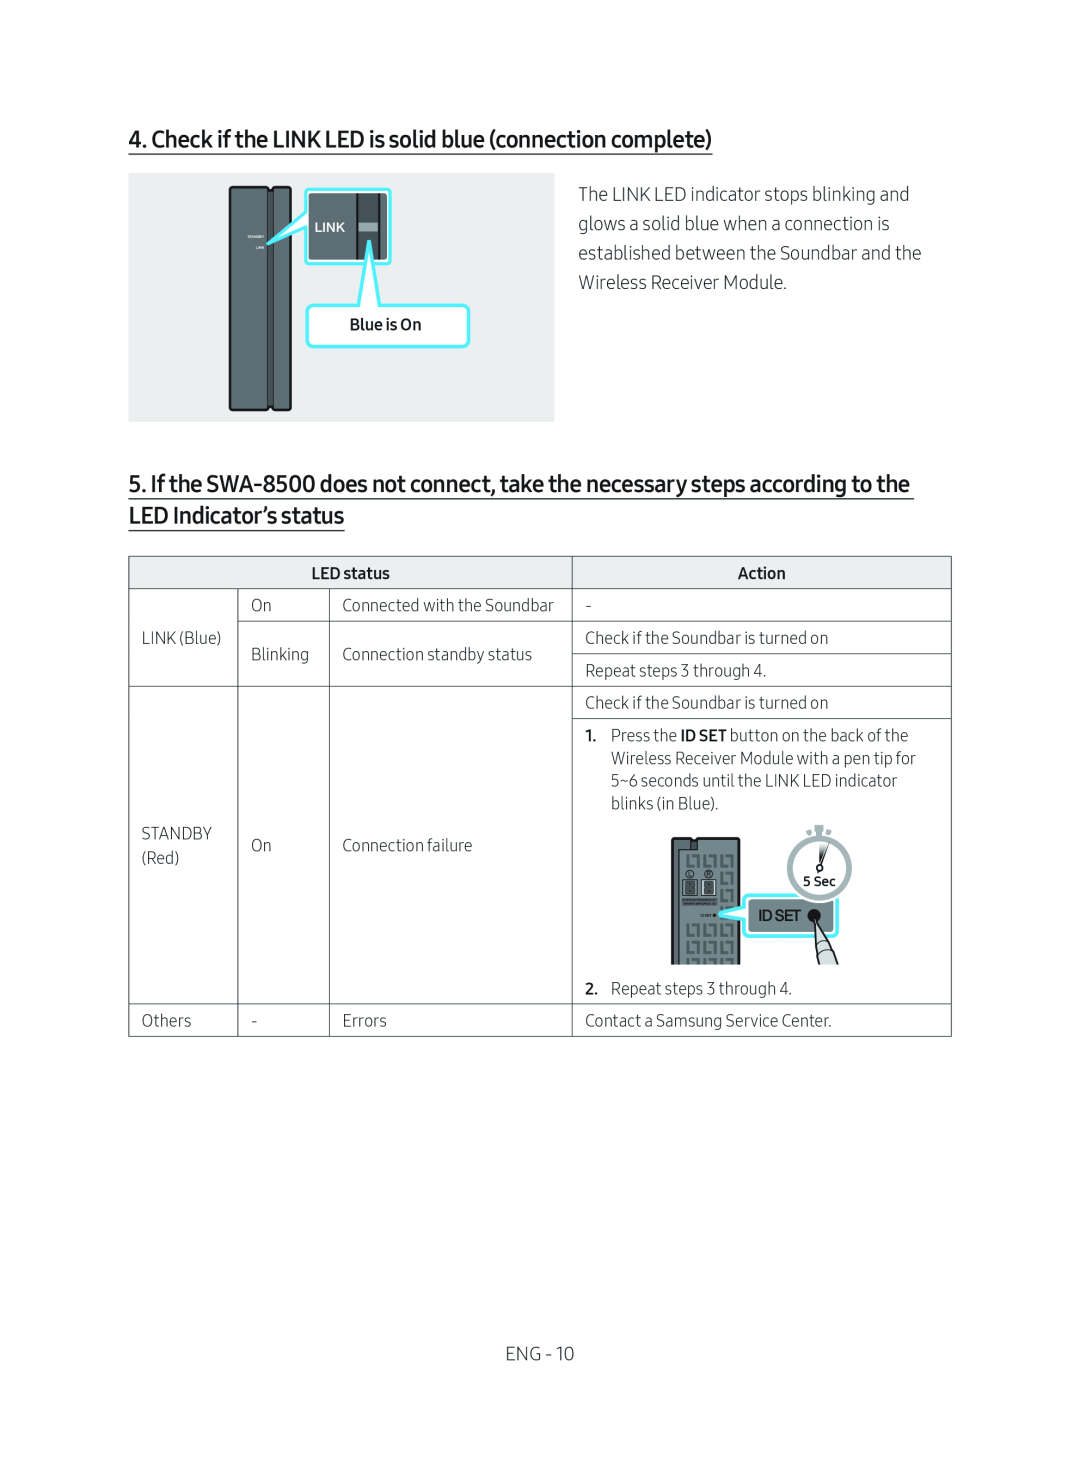 4. Check if the LINK LED is solid blue (connection complete)
If the
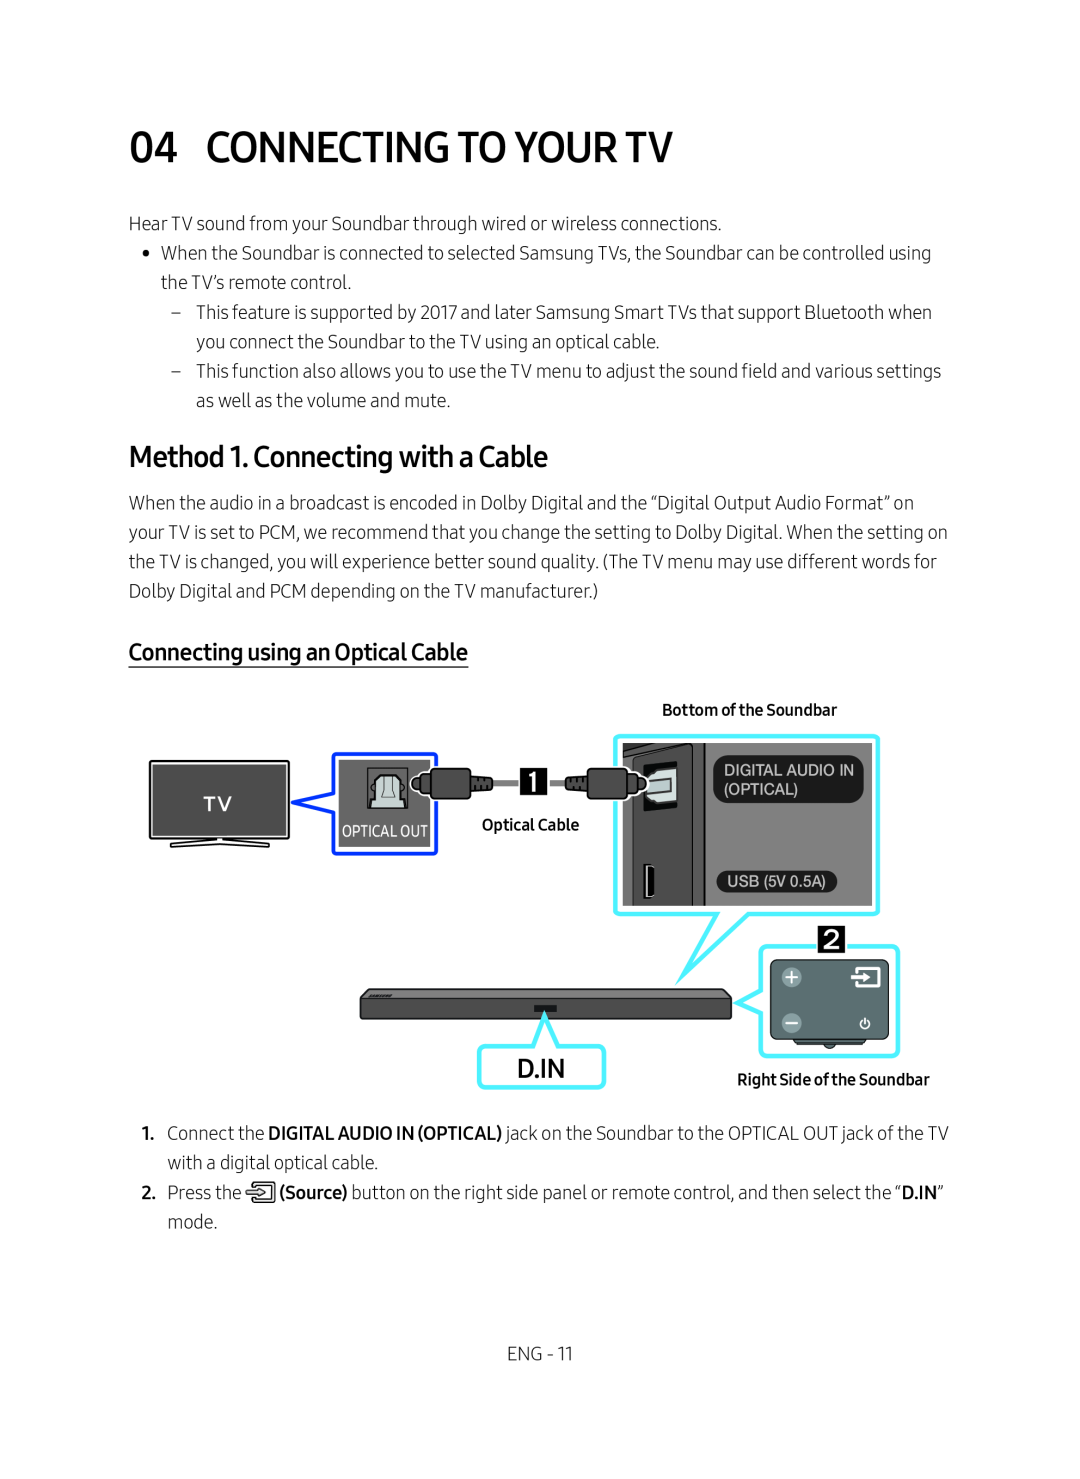 04 CONNECTING TO YOUR TV
Method 1. Connecting with a Cable
Connecting using an Optical Cable
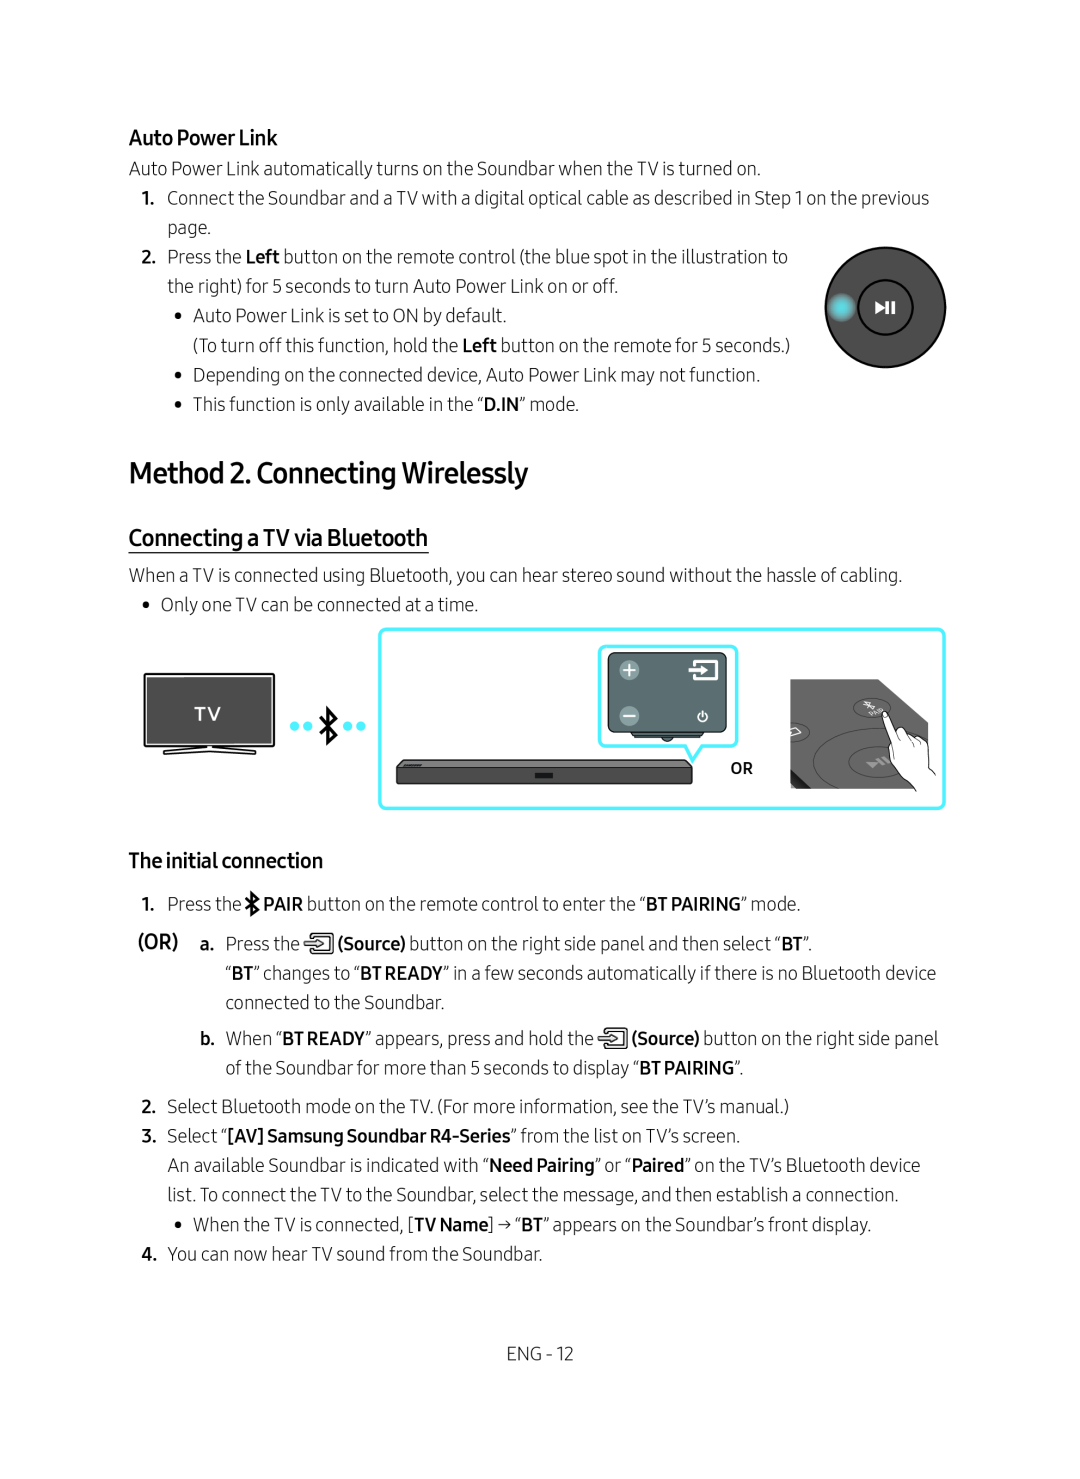 Auto Power Link
Method 2. Connecting Wirelessly
Connecting a TV via Bluetooth
The initial connection
(OR)
 If the device fails to connect
Disconnecting the Soundbar from the TV
What is the difference between BT READY and BT PAIRING
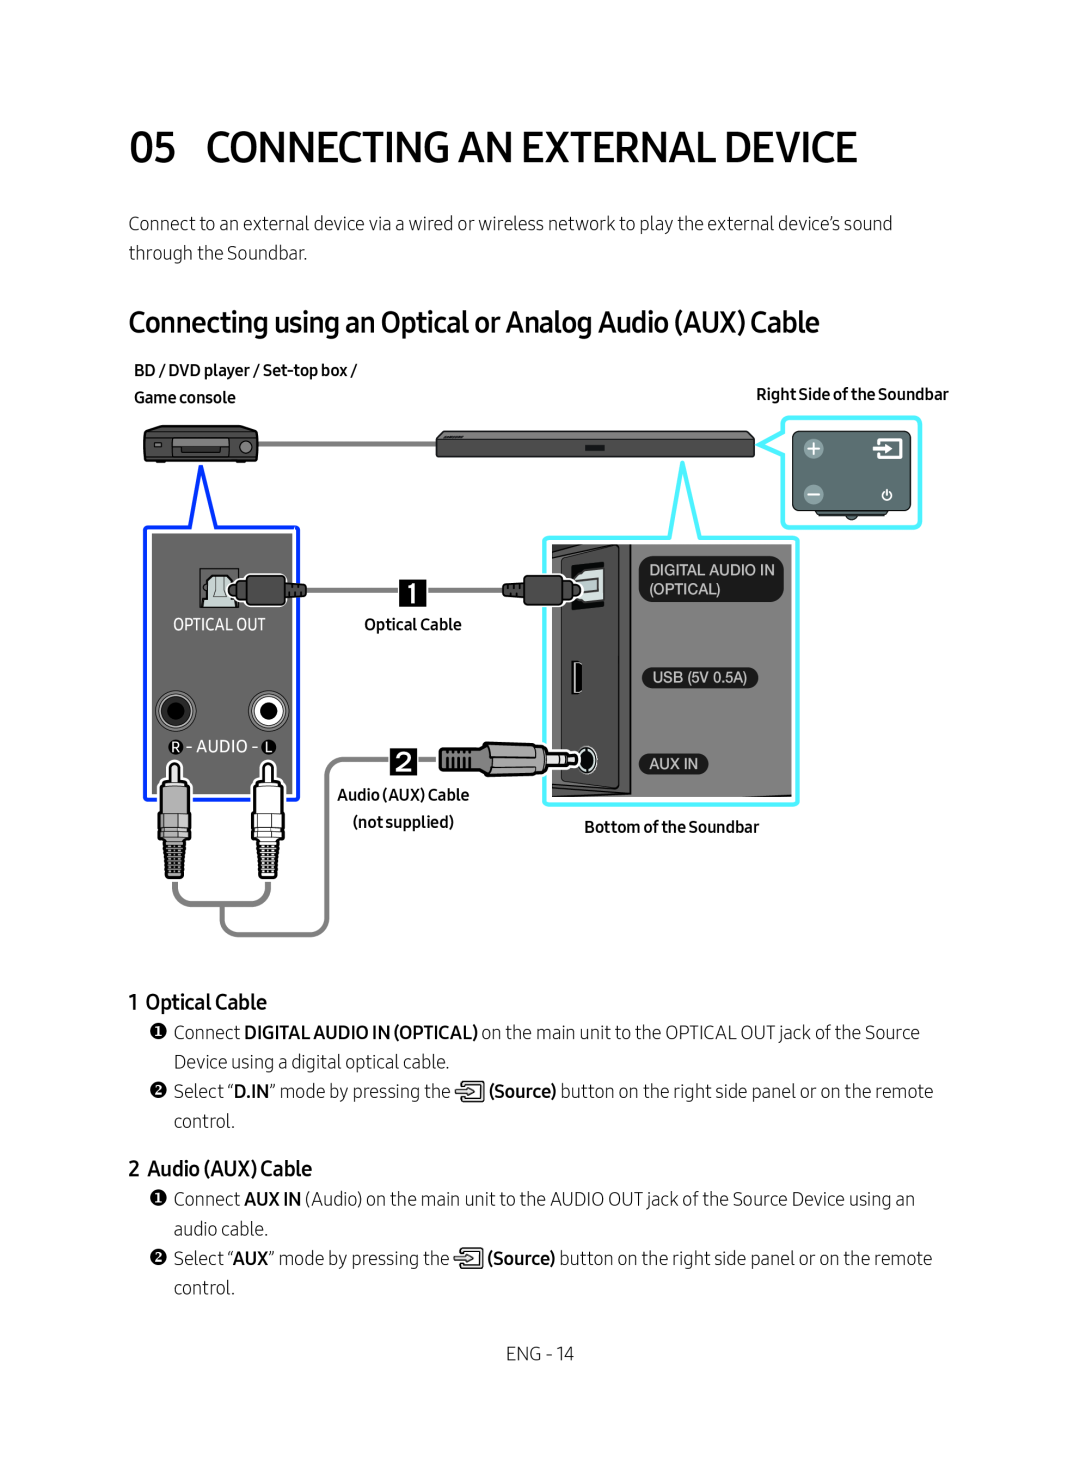 05 CONNECTING AN EXTERNAL DEVICE
Connecting using an Optical or Analog Audio (AUX) Cable
1 Optical Cable
2Audio (AUX) Cable
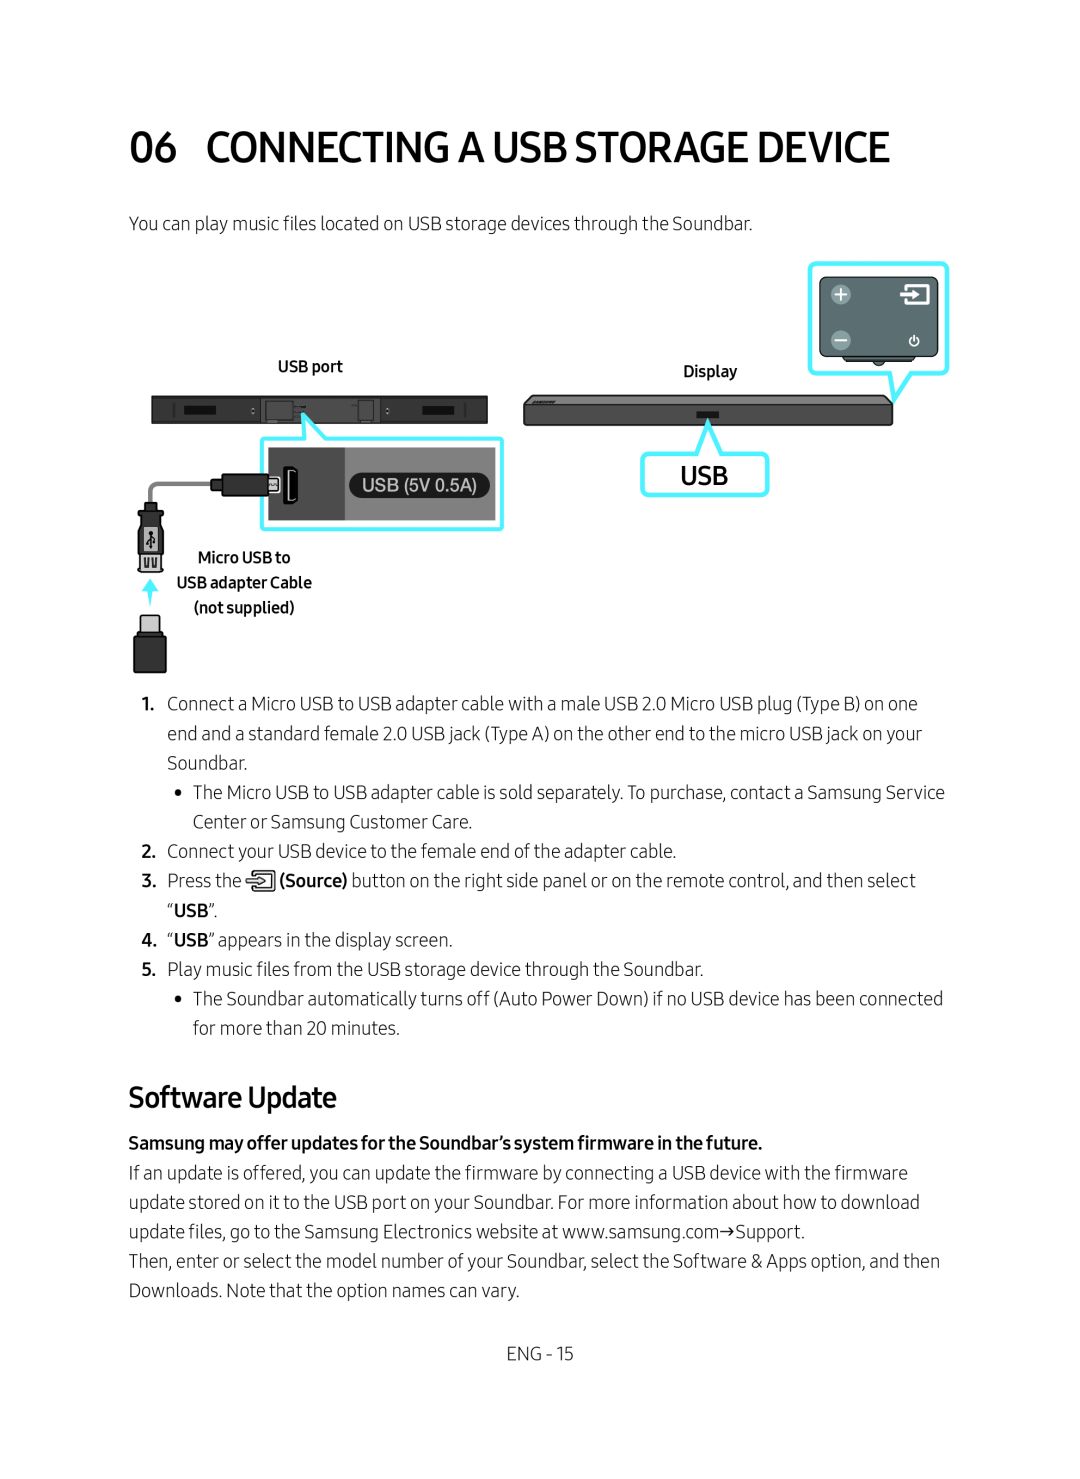 06 CONNECTING A USB STORAGE DEVICE
Software Update
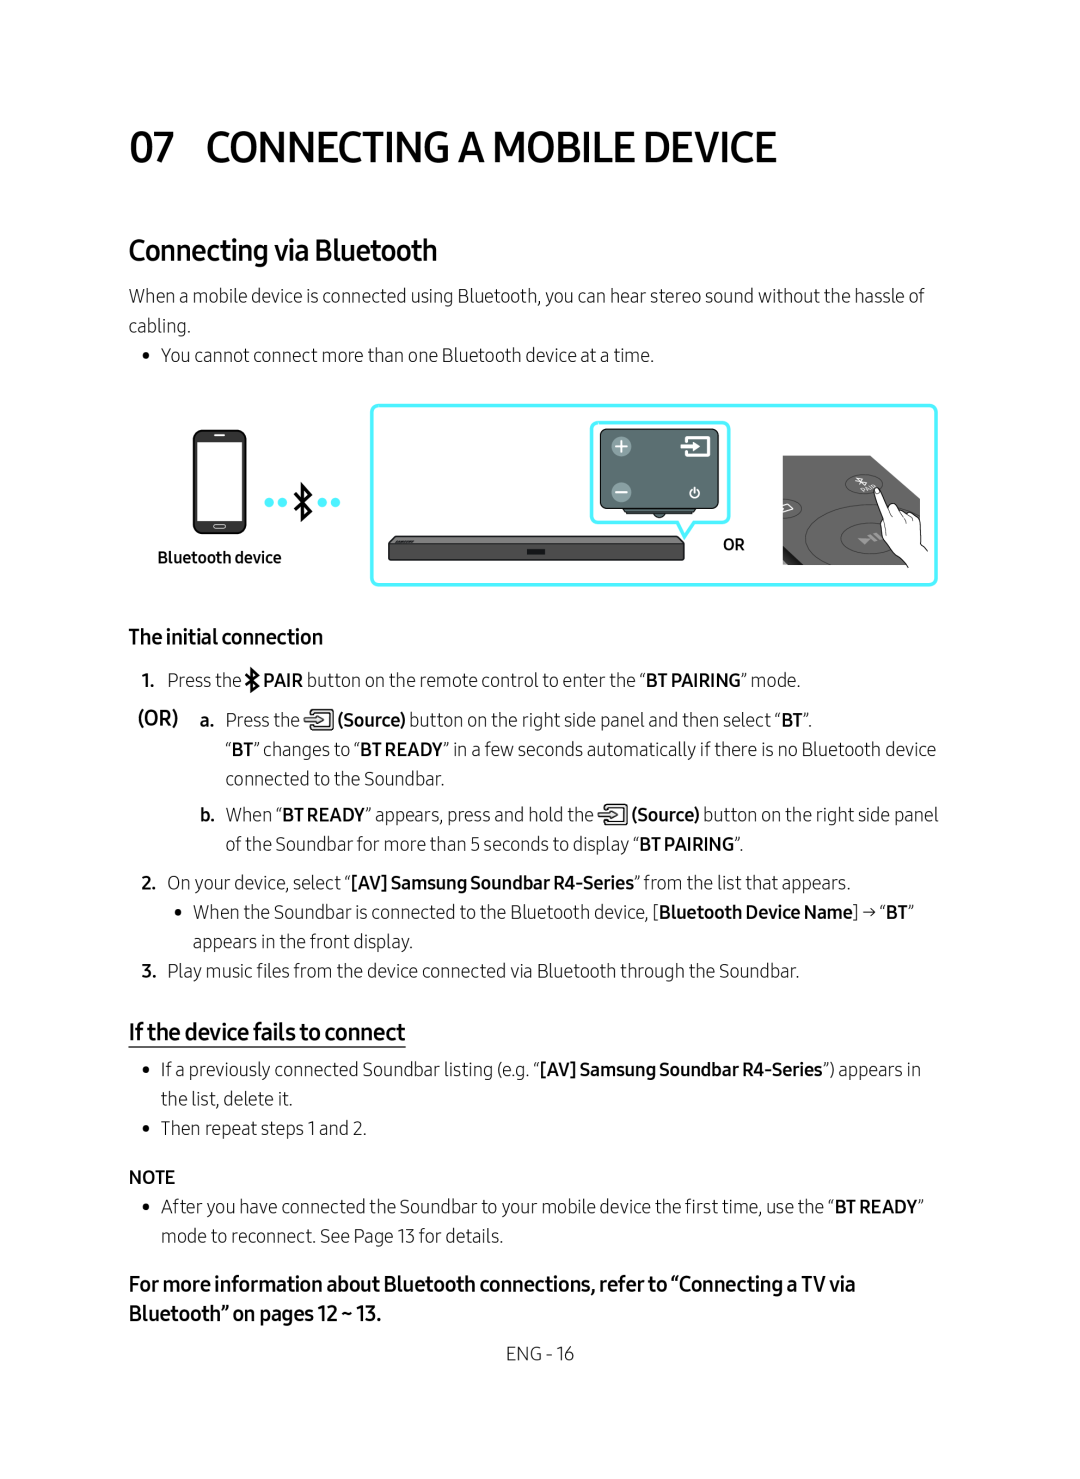 07 CONNECTING A MOBILE DEVICE
Connecting via Bluetooth
If the device fails to connect
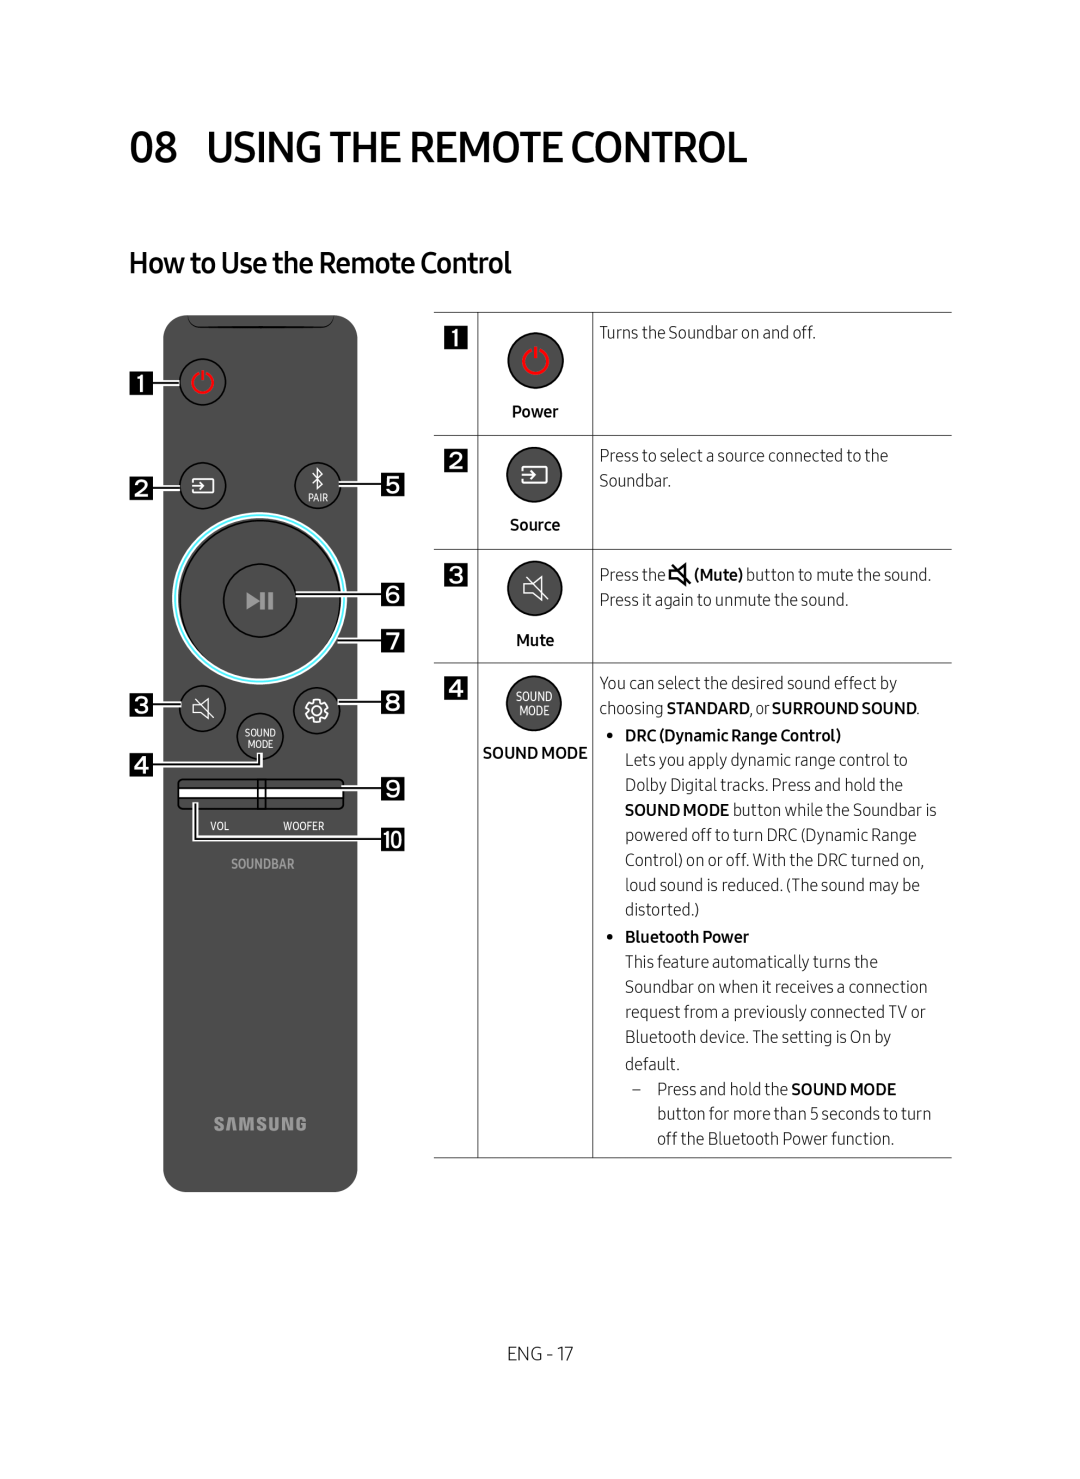 08 USING THE REMOTE CONTROL
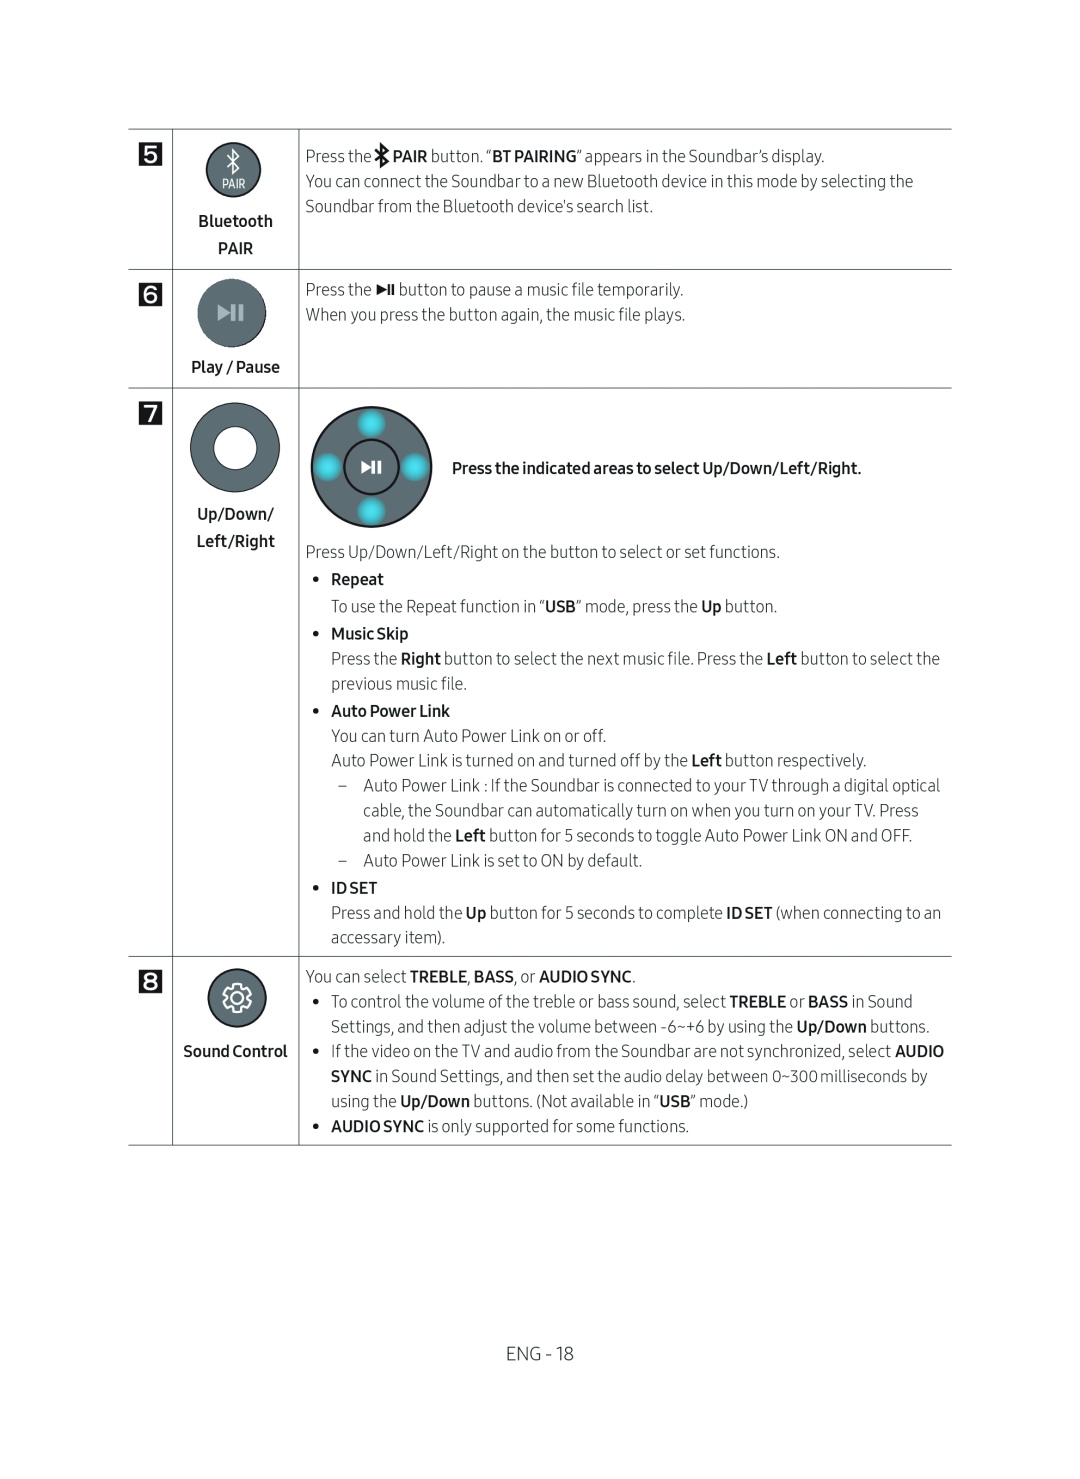
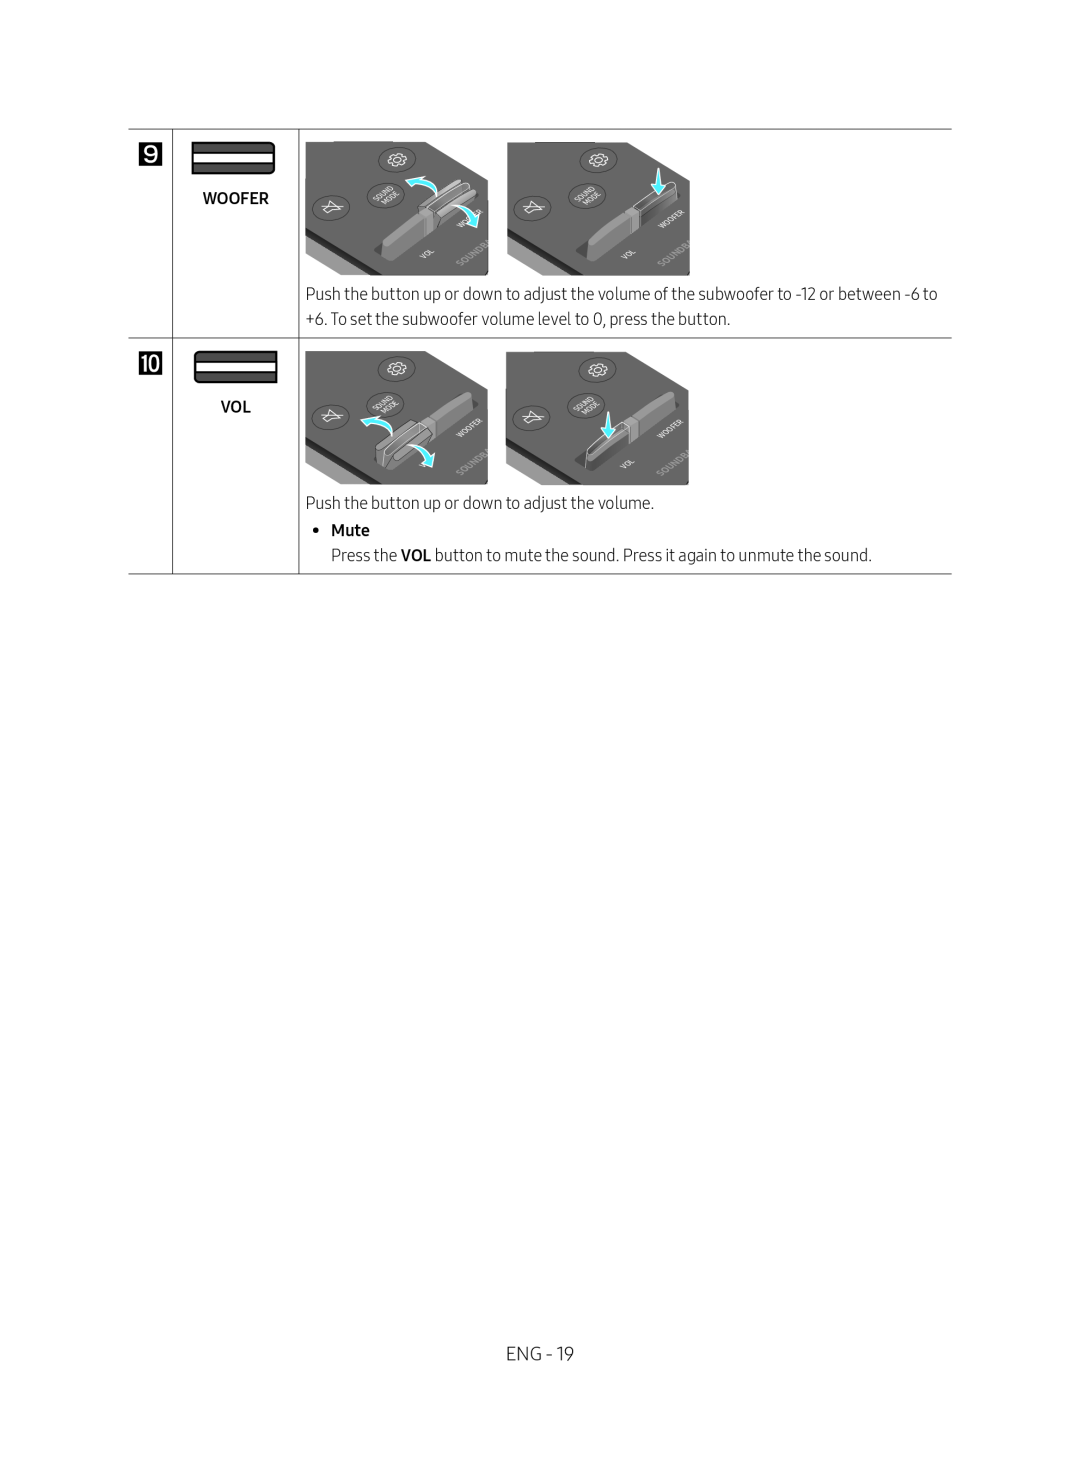
How to Use the Remote Control
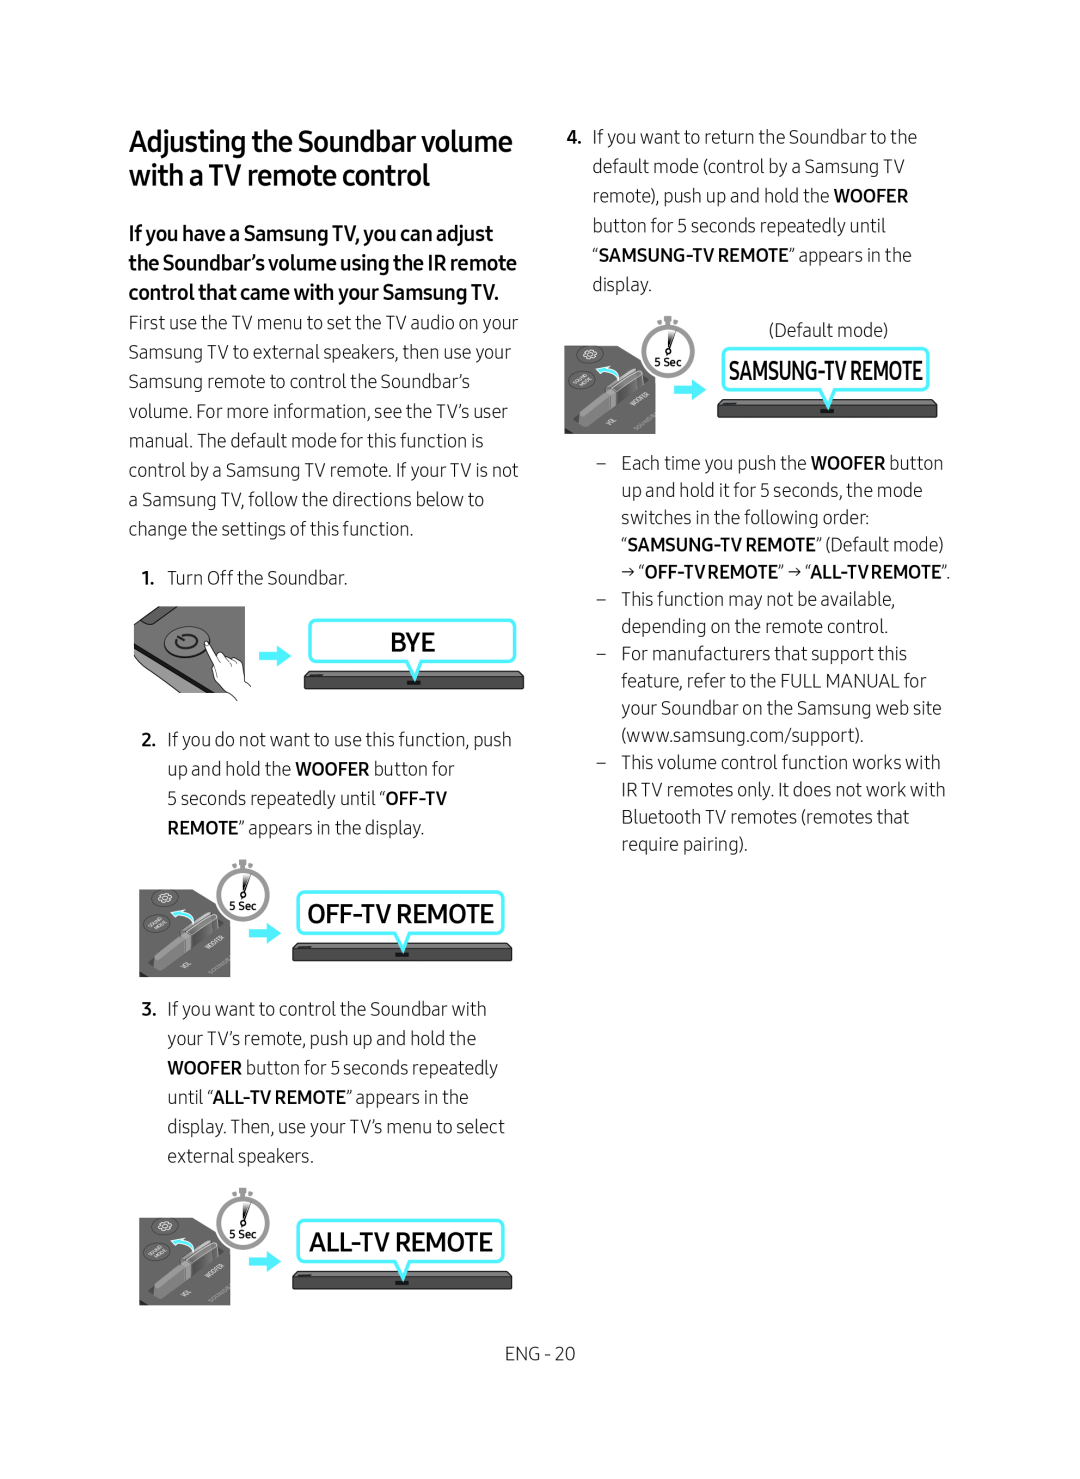 Adjusting the Soundbar volume with a TV remote control
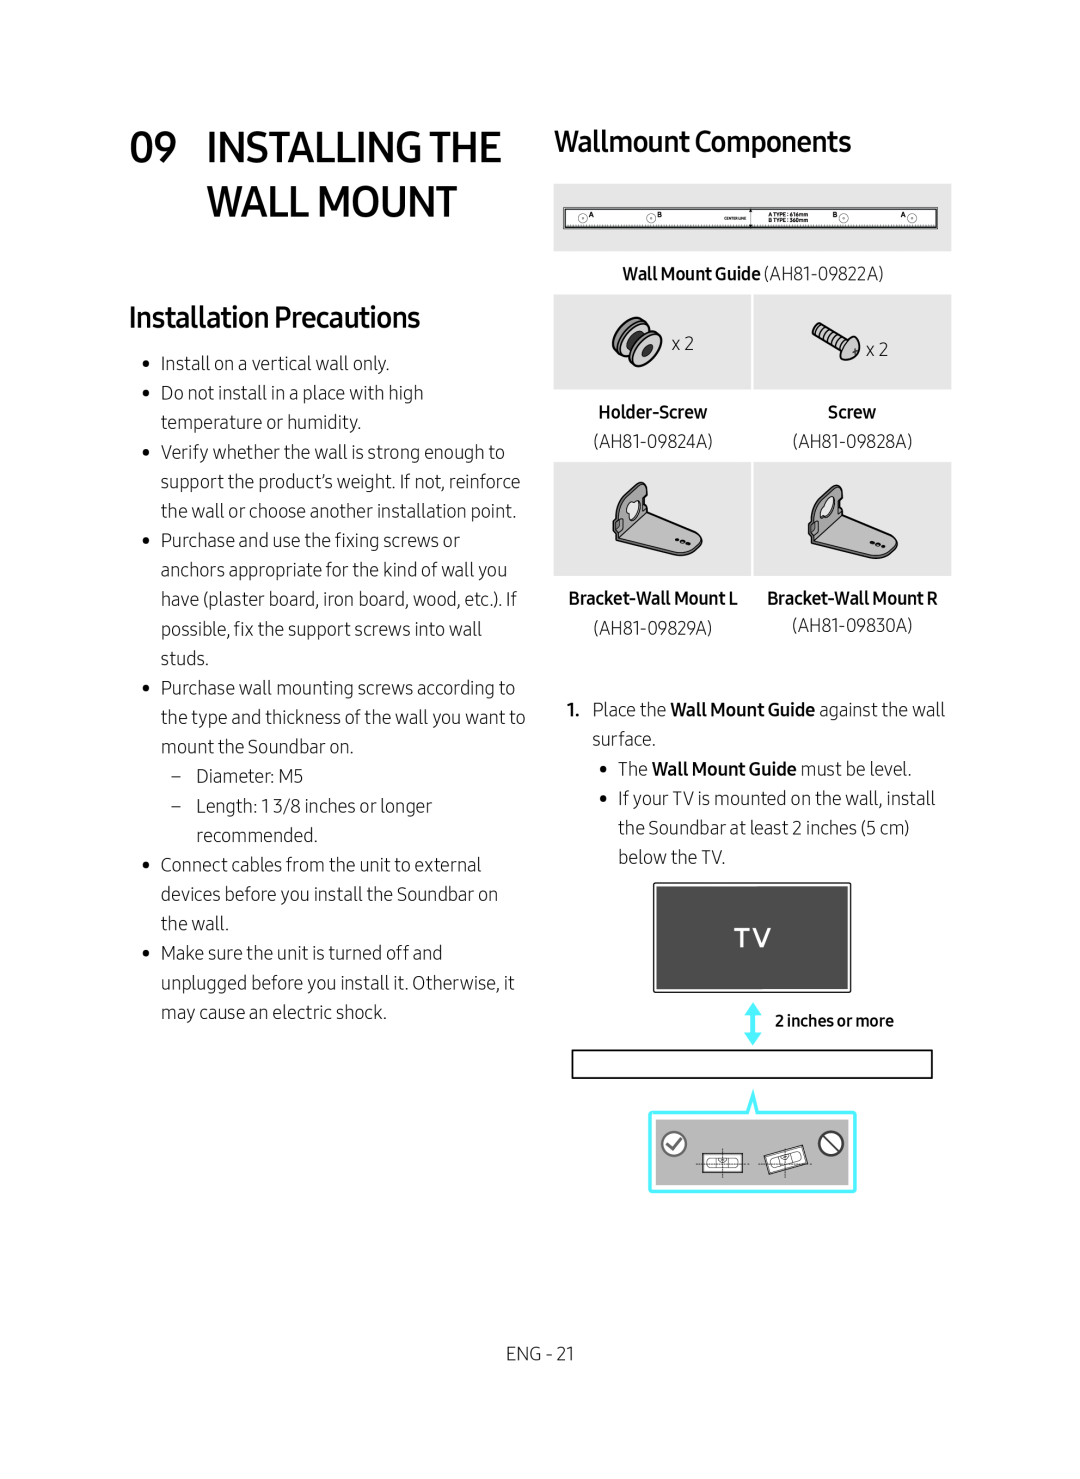 Installation Precautions
Wallmount Components
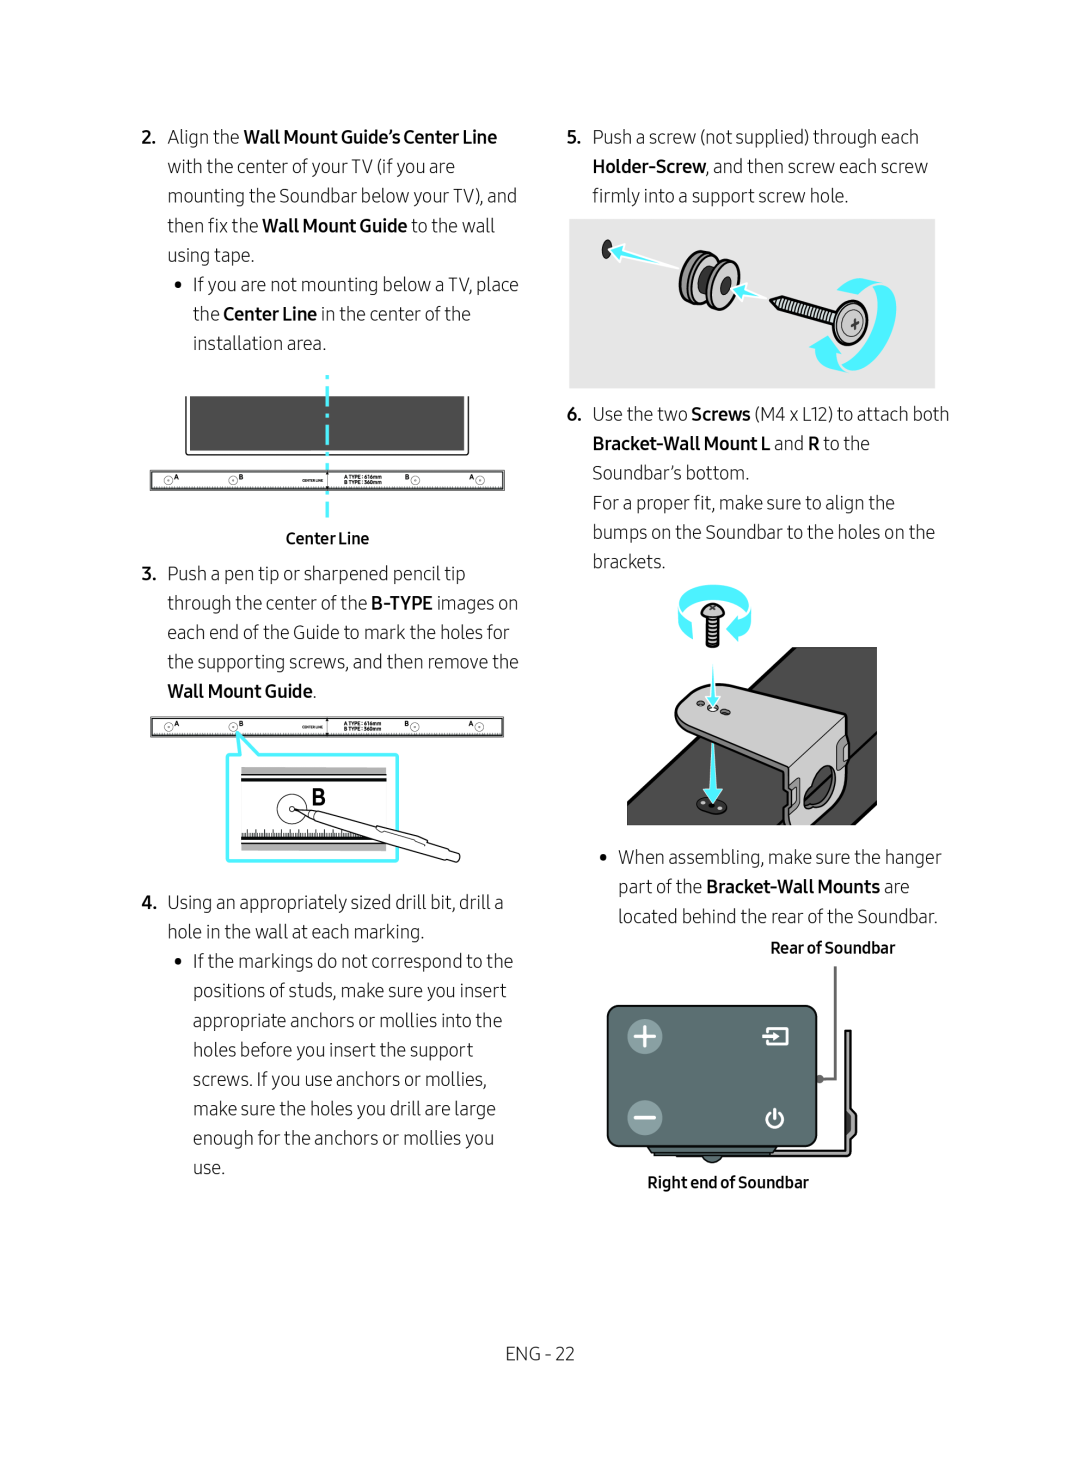 Center Line
B-TYPE
Wall Mount Guide
Holder-Screw
Screws
Bracket-Wall
Mount L
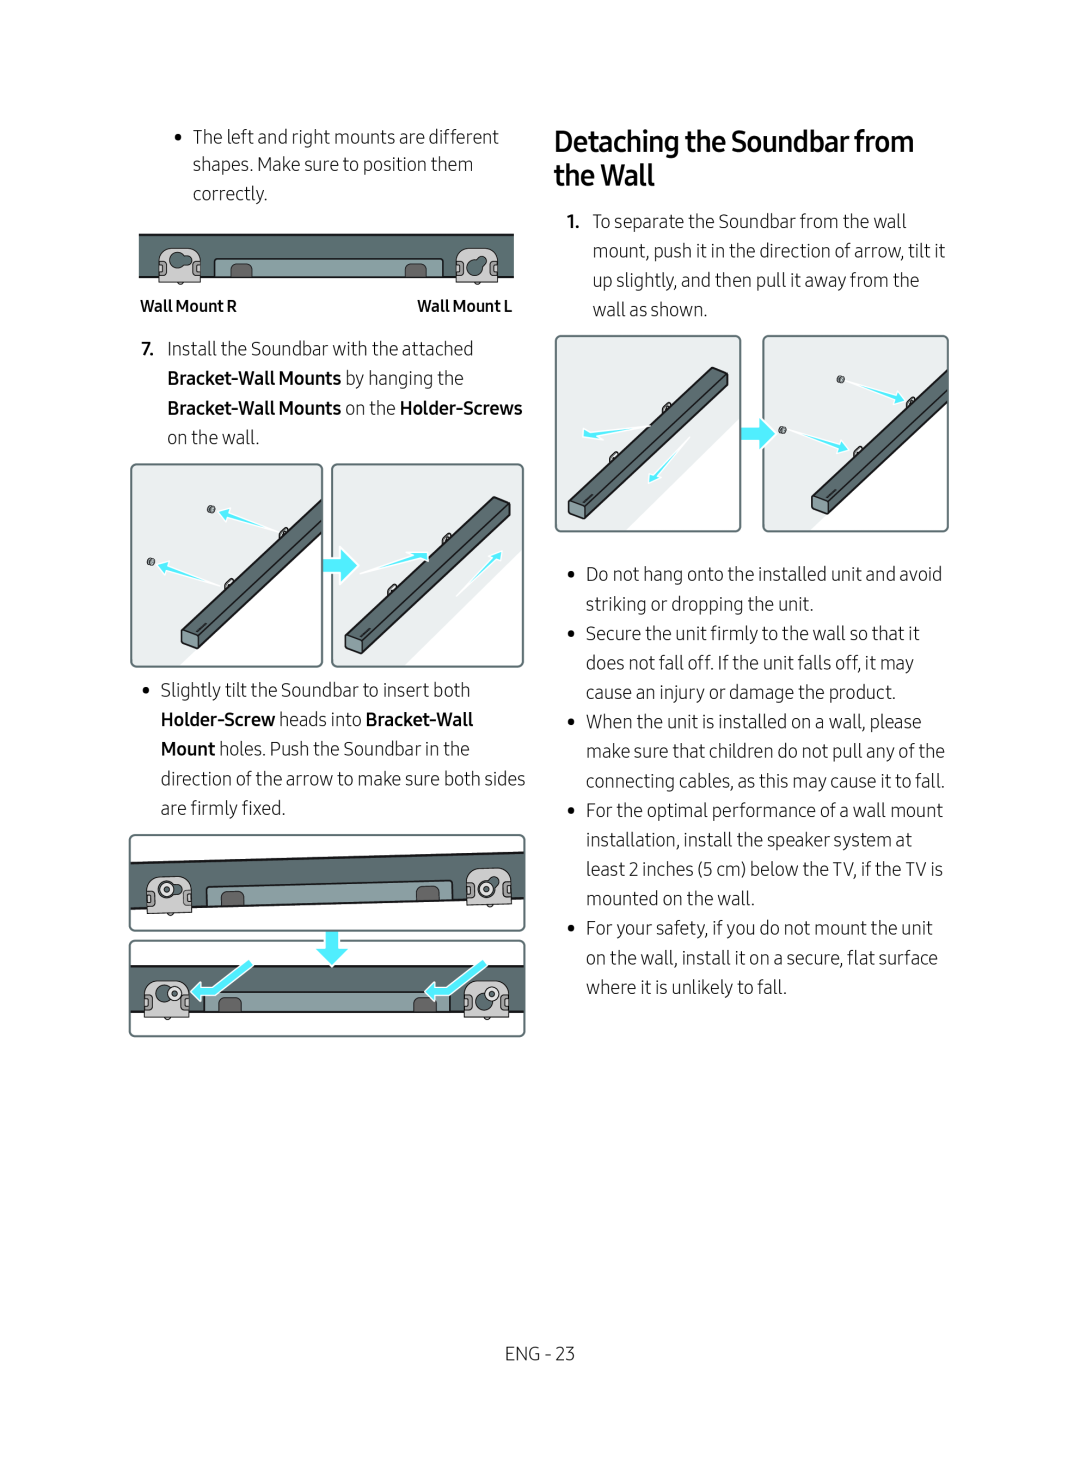 Detaching the Soundbar from the Wall
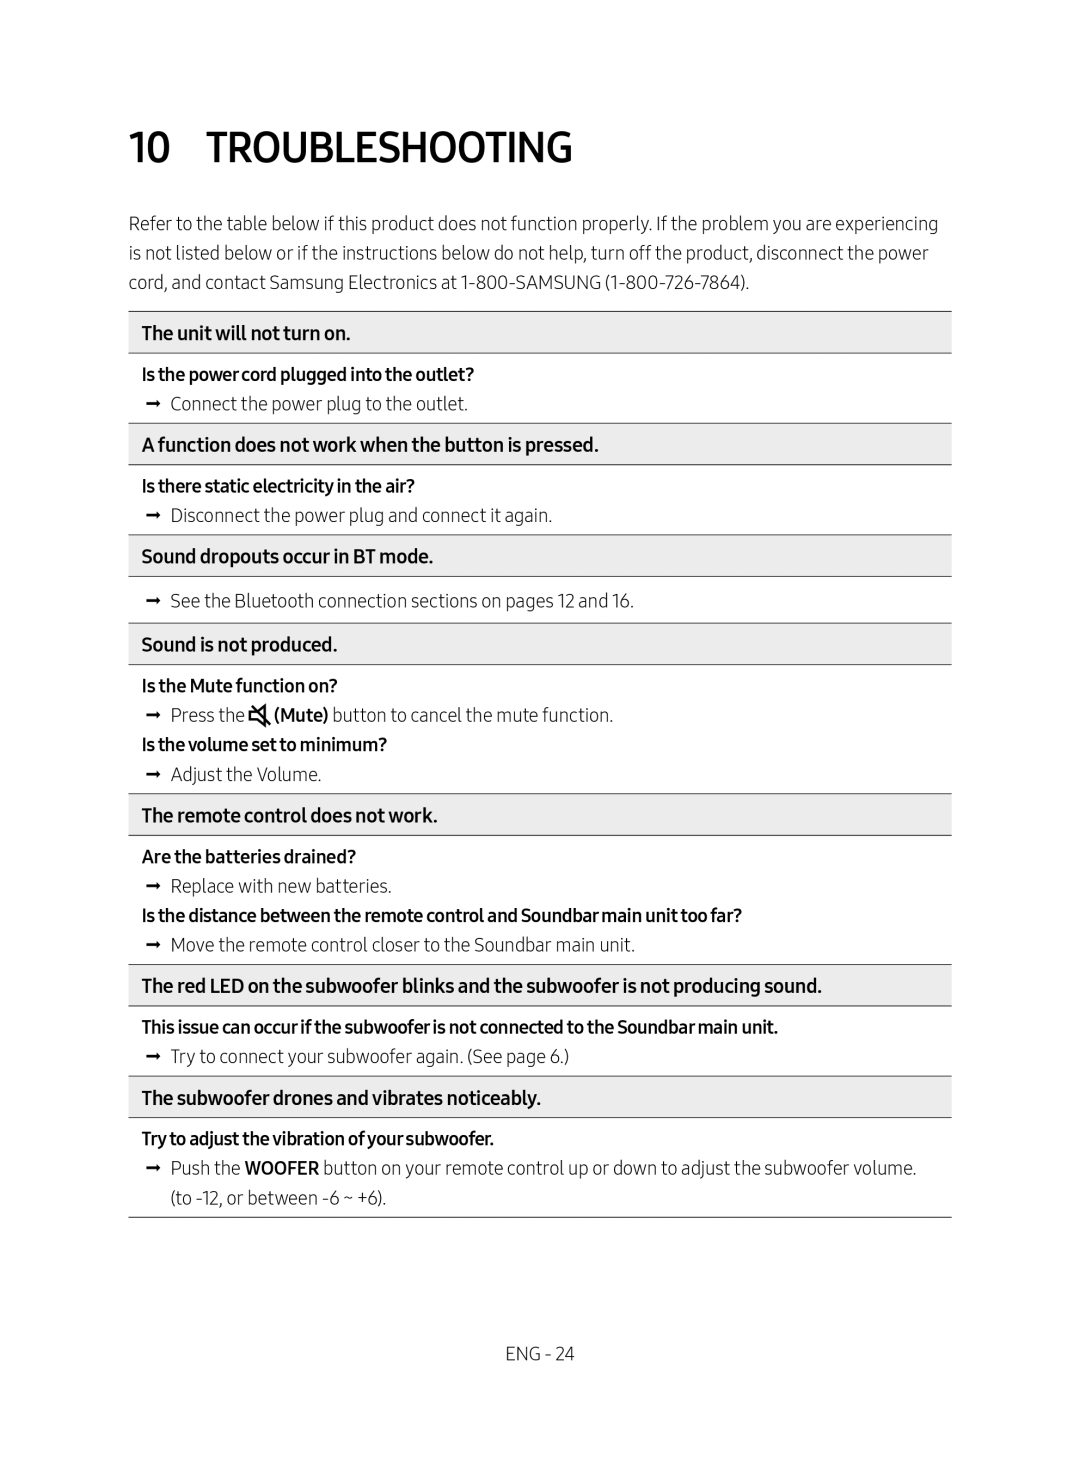 10 TROUBLESHOOTING
 11 LICENSE
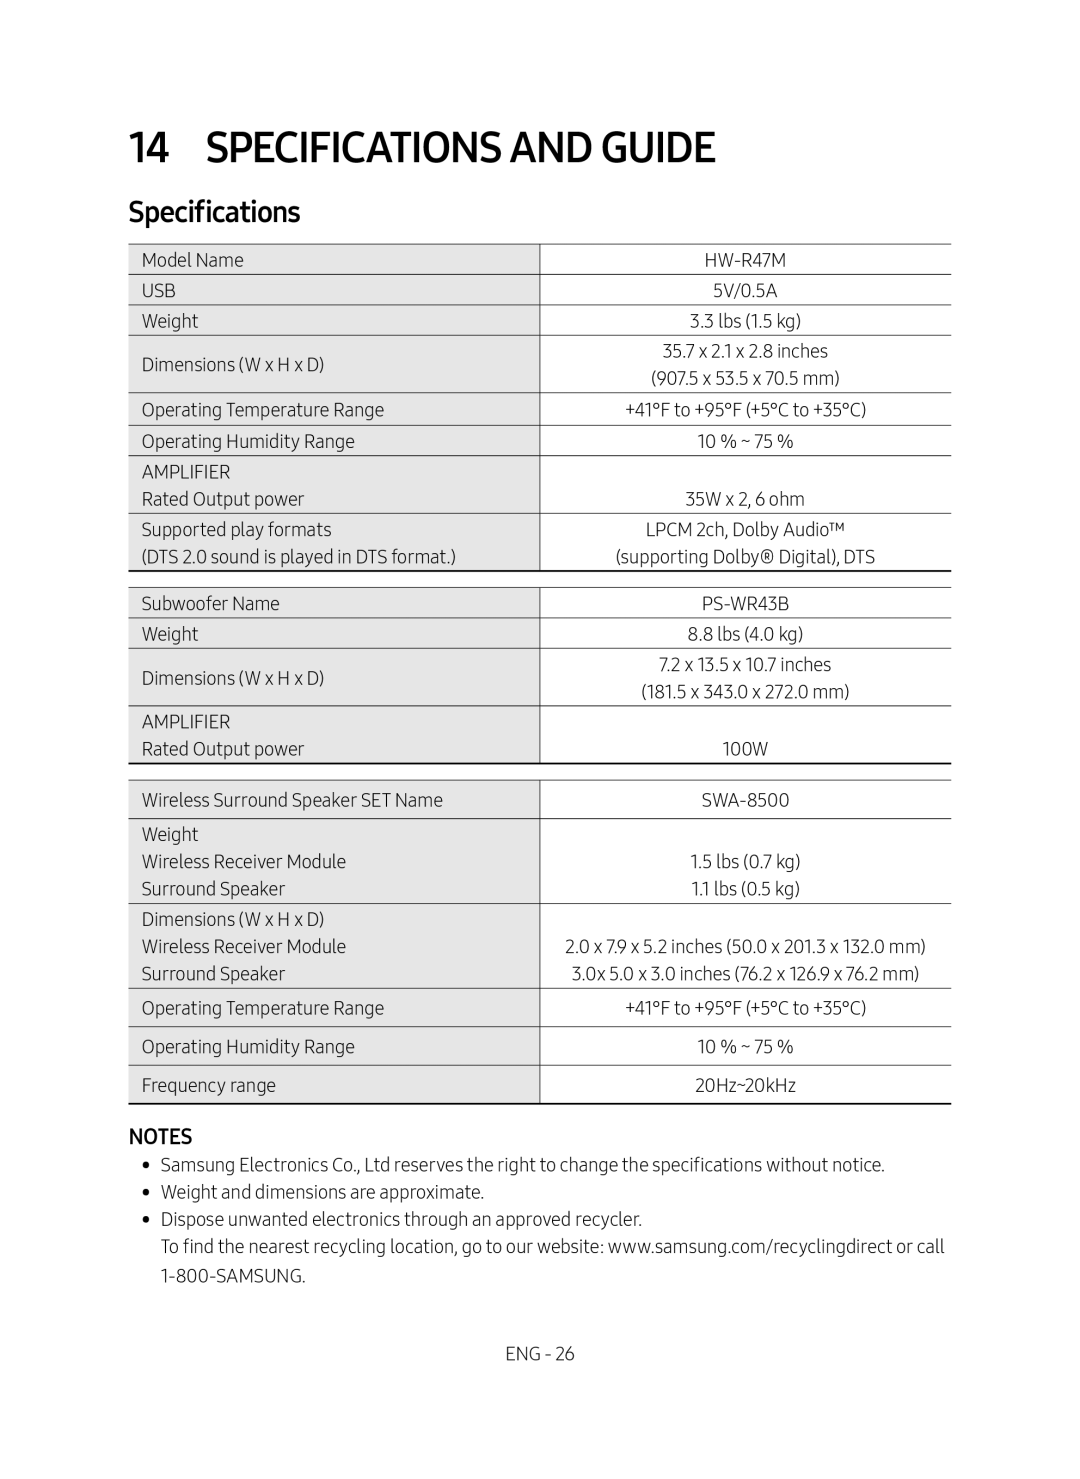 14 SPECIFICATIONS AND GUIDE
Specifications
NOTES
 LIMITED WARRANTY TO ORIGINAL PURCHASER
