 Thank you for purchasing this Samsung product
To receive more complete service, please register your product at
 GETTING STARTED
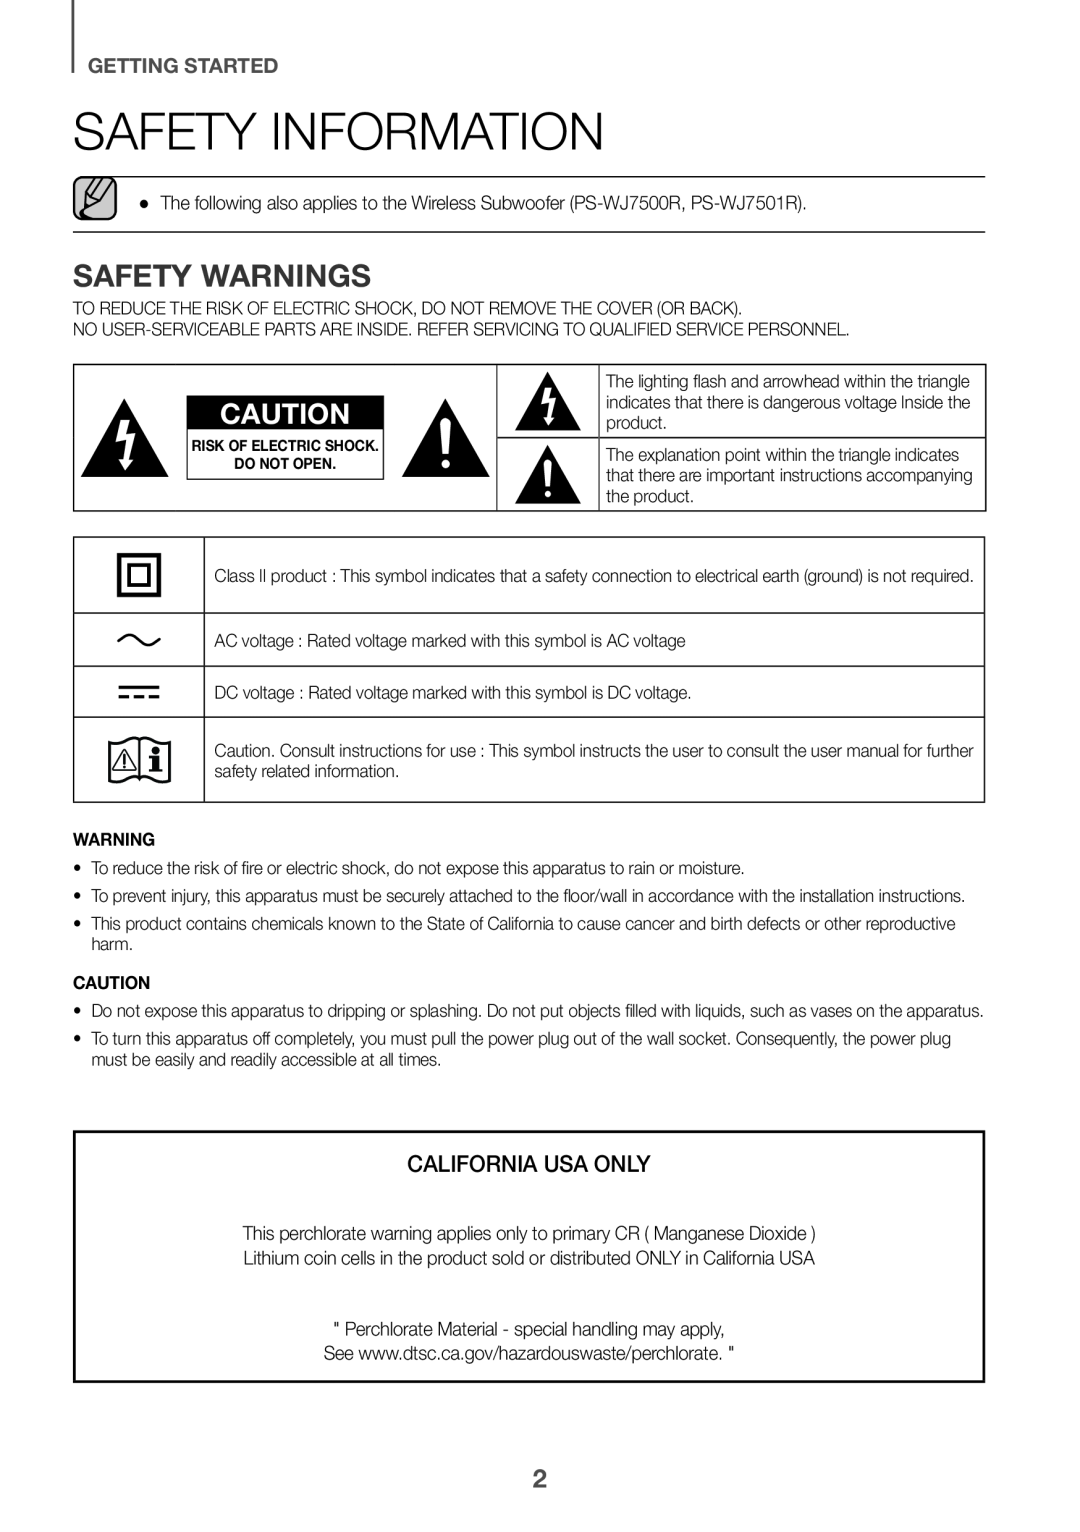
SAFETY INFORMATION
SAFETY WARNINGS
 LICENSES
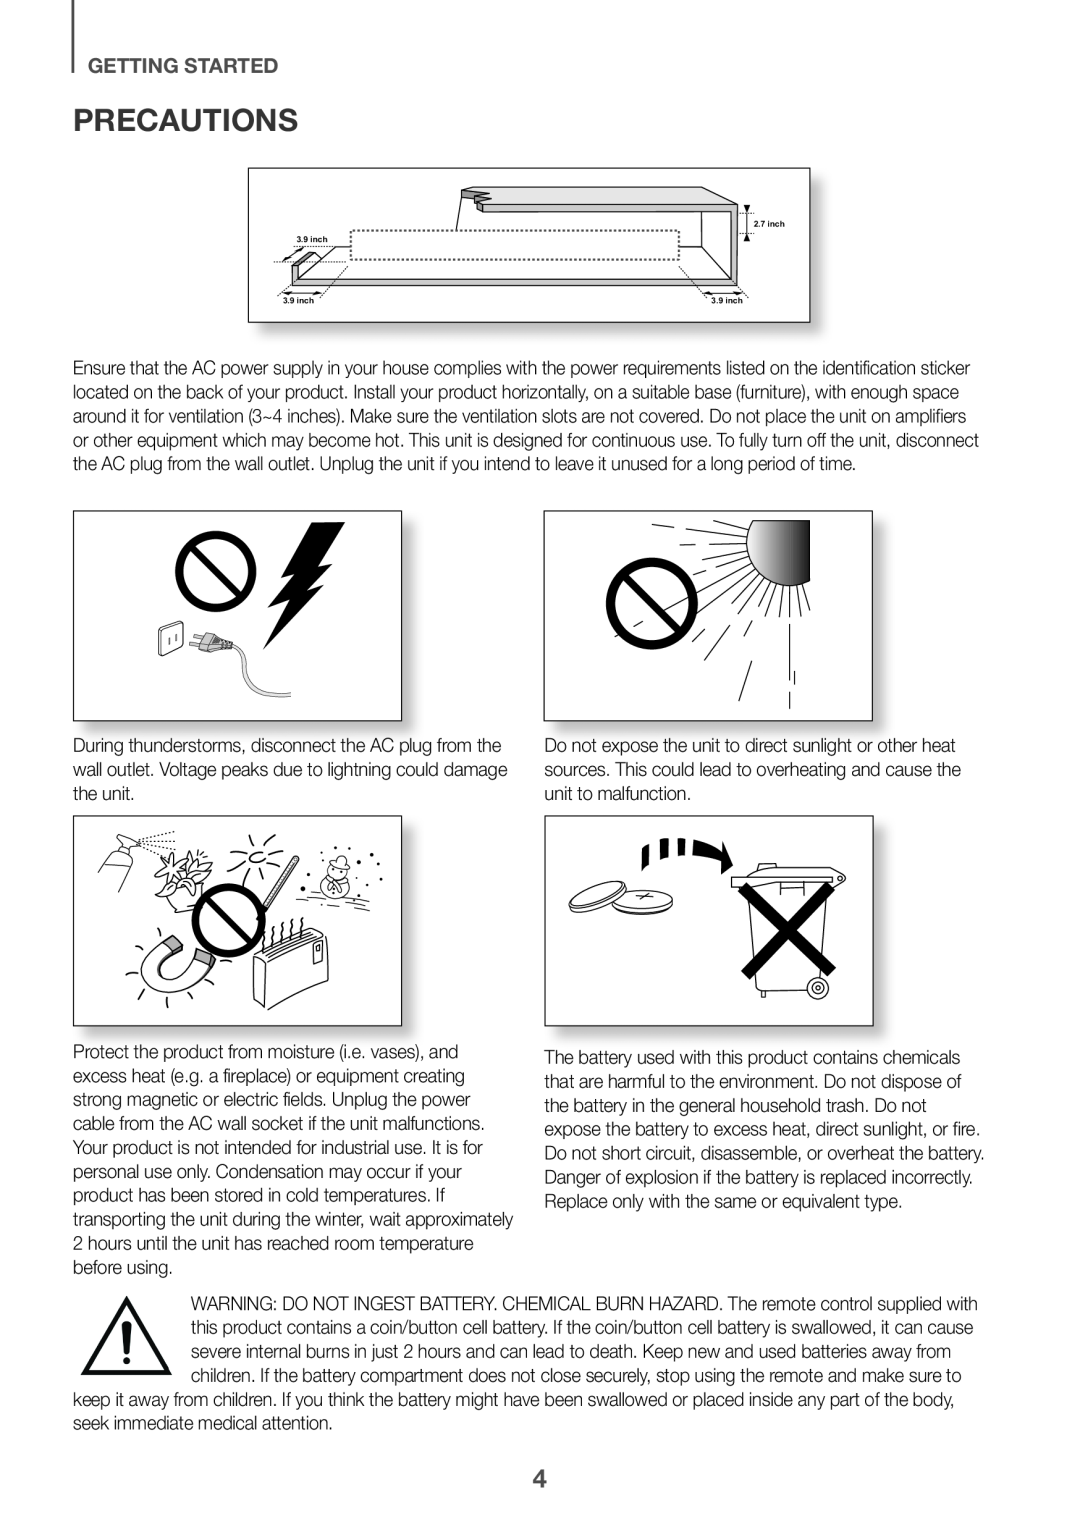 PRECAUTIONS
 CONTENTS
2Safety Information
6What’s Included
7Top / Front Panel
8Rear / Bottom Panel
9Remote Control
11Installing the Soundbar
17Assembling the Clamp-Wire
18Connecting the Subwoofer
20Connecting to a TV
22Connecting to External Devices
Input Mode
Bluetooth
27 Using the Multiroom App
29Using the Network Standby On Function
30Software Update
32Troubleshooting
33Specifications
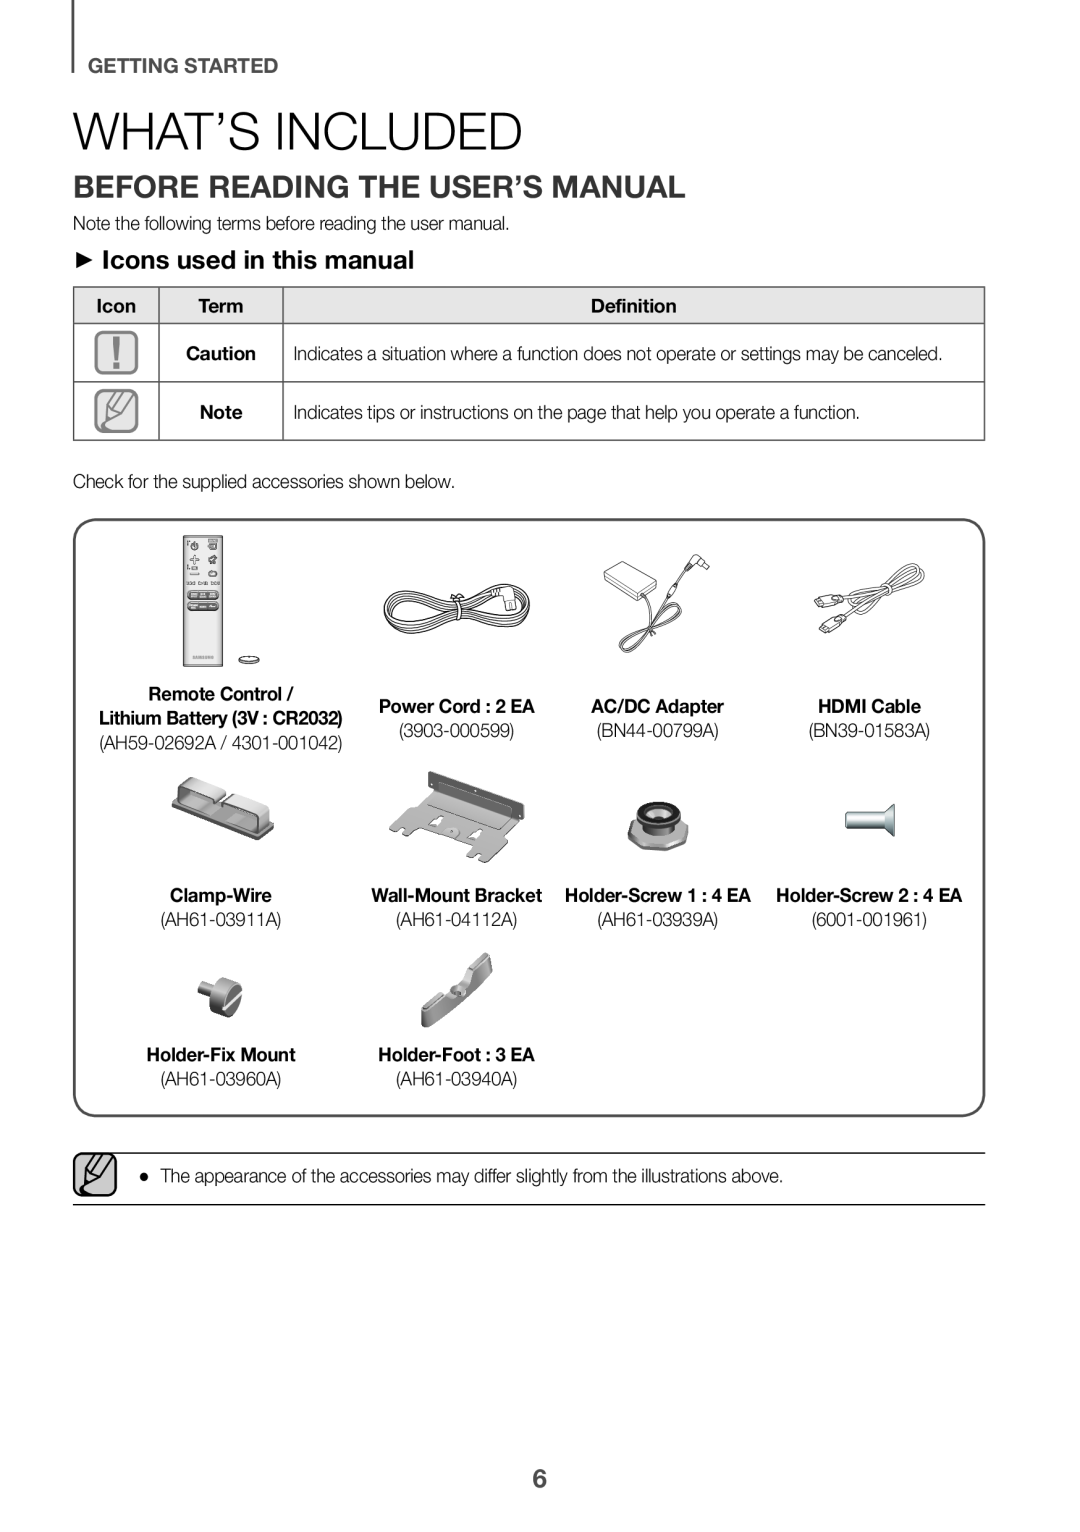 WHAT’S INCLUDED
BEFORE READING THE USER’S MANUAL
++Icons used in this manual
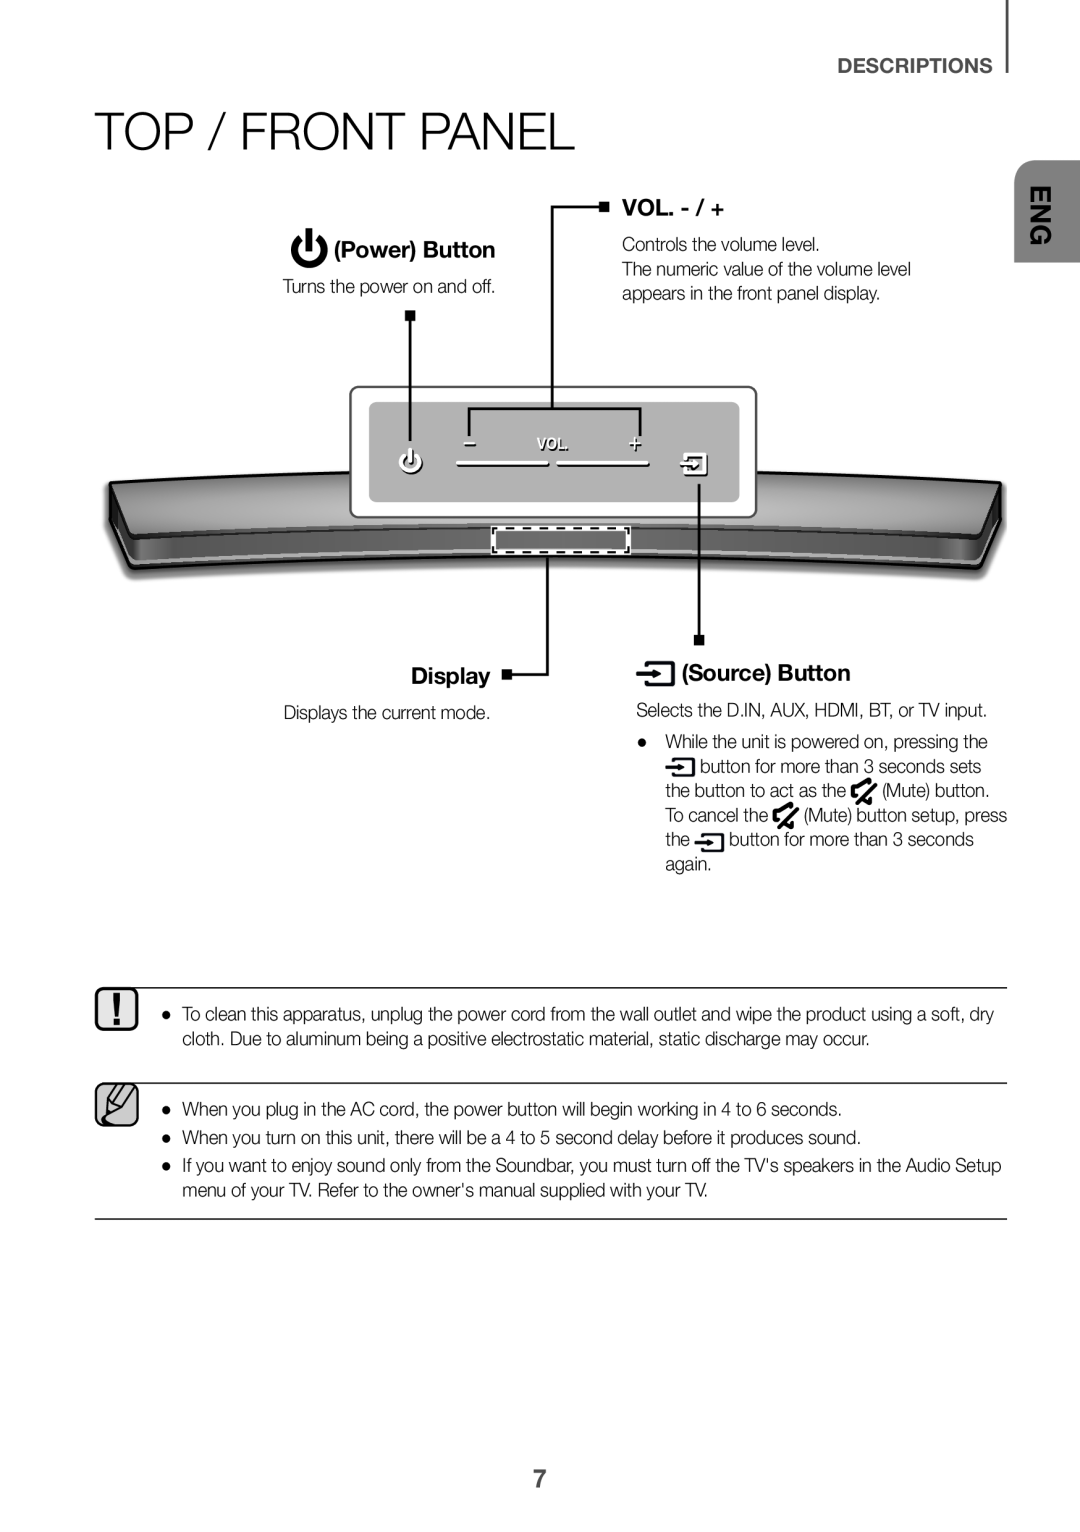 DESCRIPTIONS
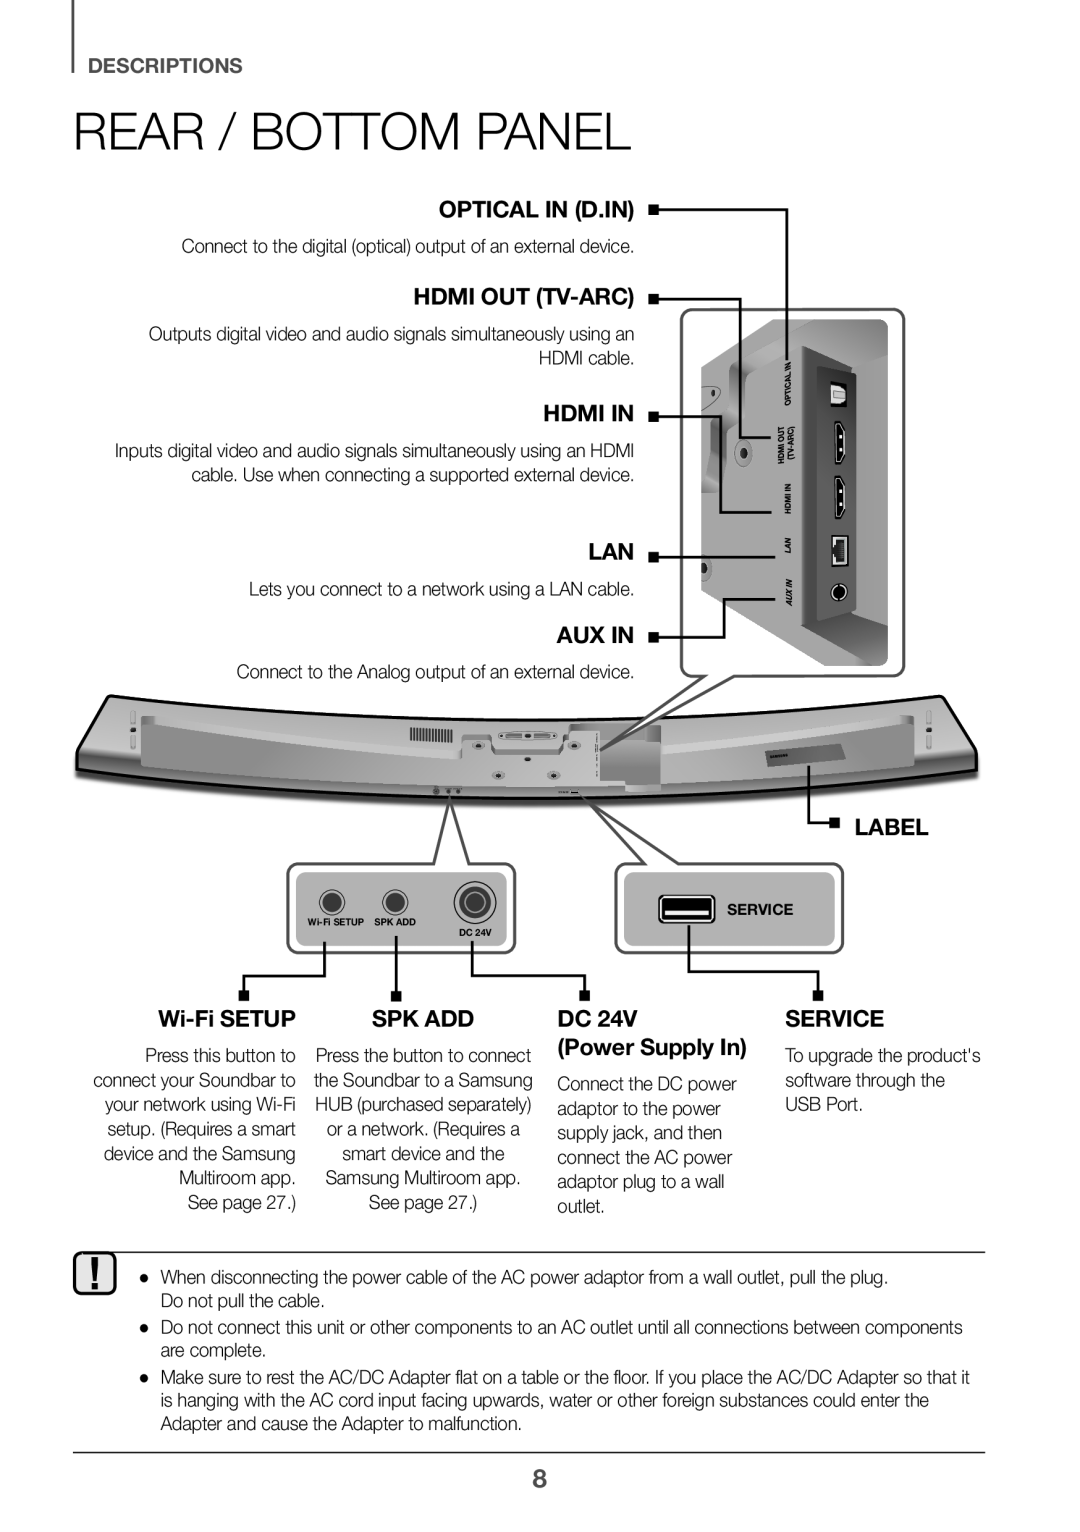 REAR / BOTTOM PANEL
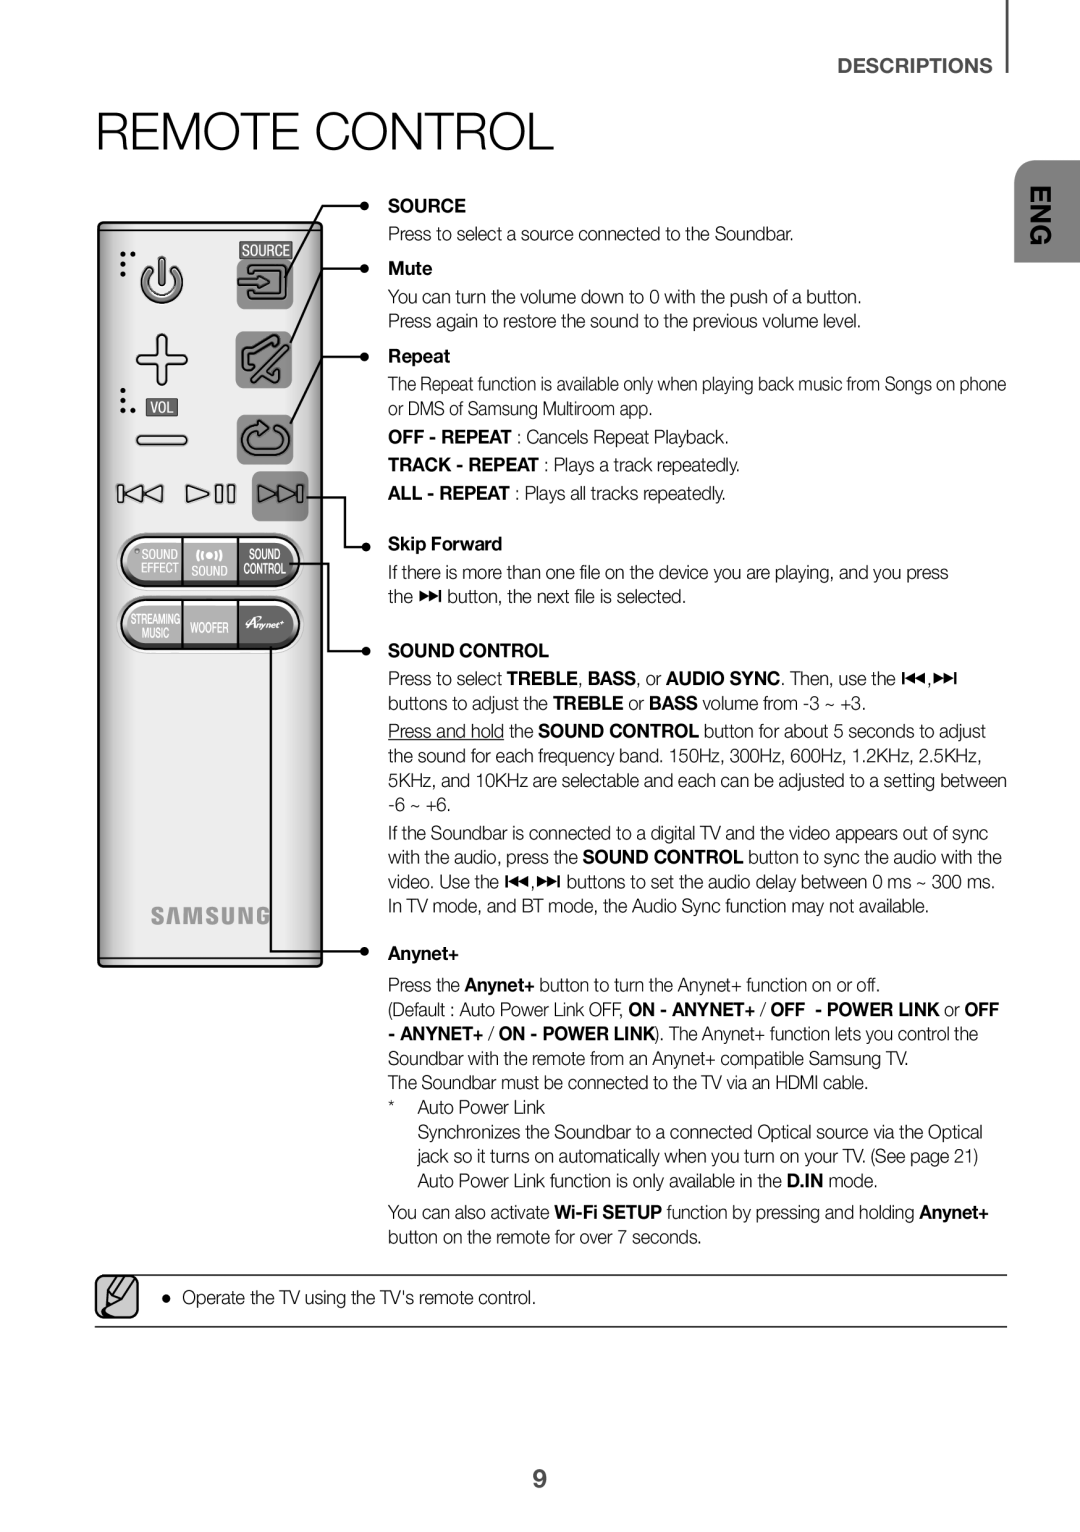 REMOTE CONTROL
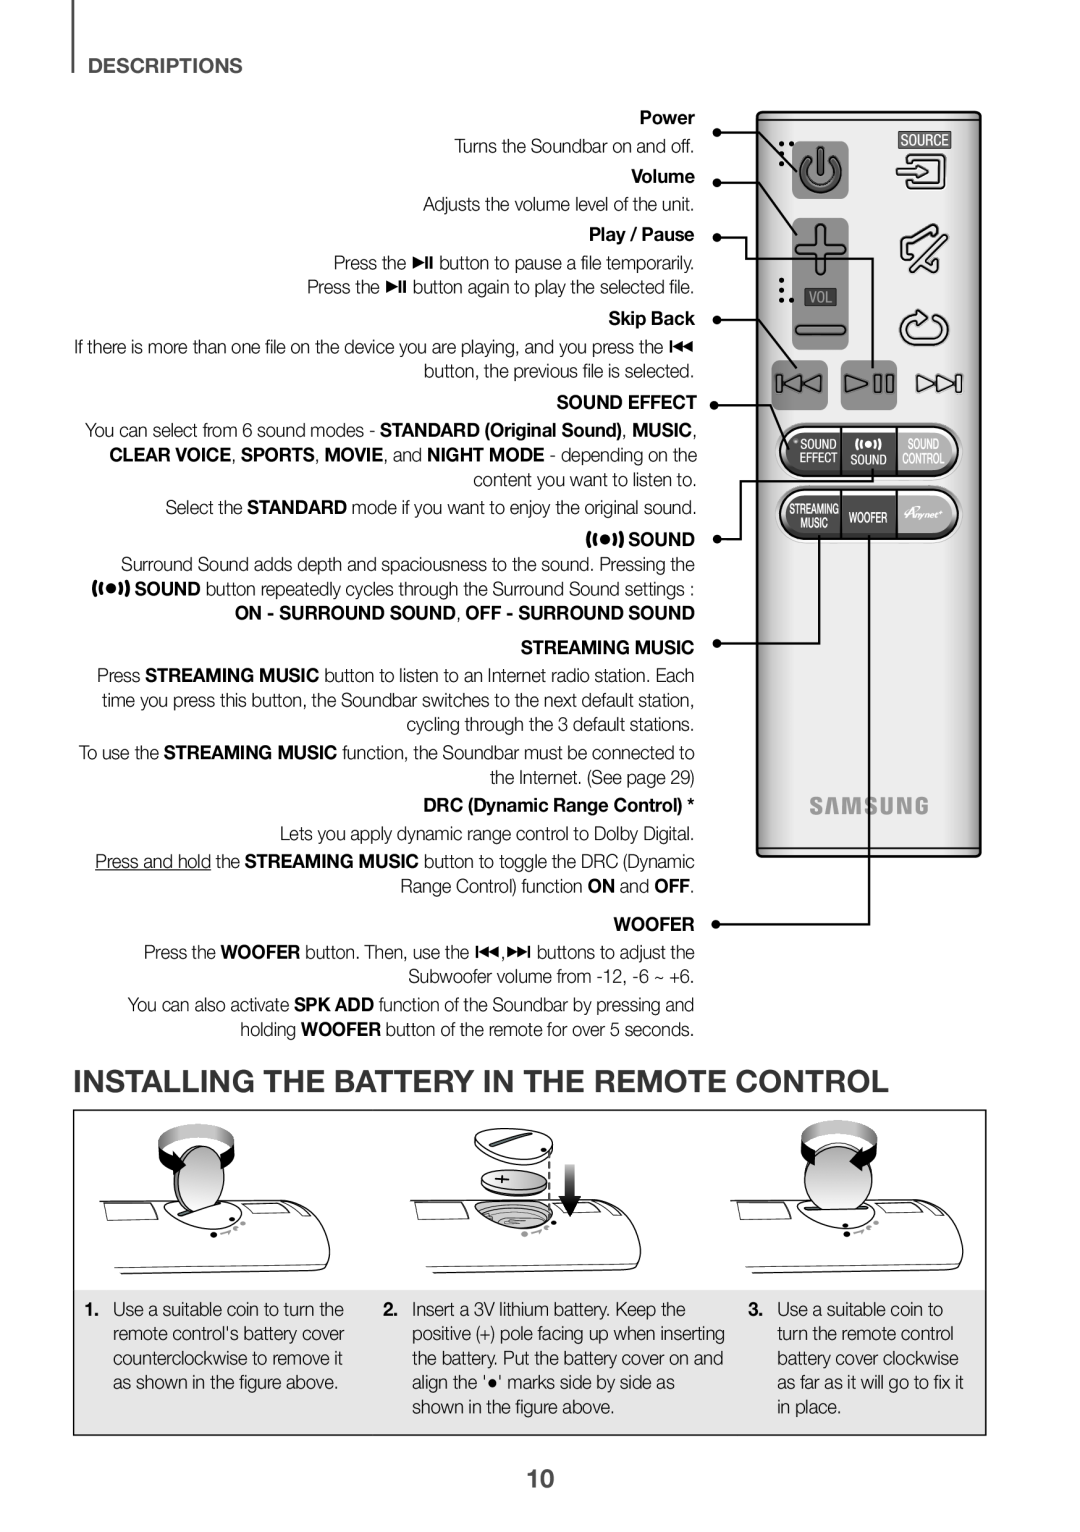 INSTALLING THE BATTERY IN THE REMOTE CONTROL
 INSTALLATION
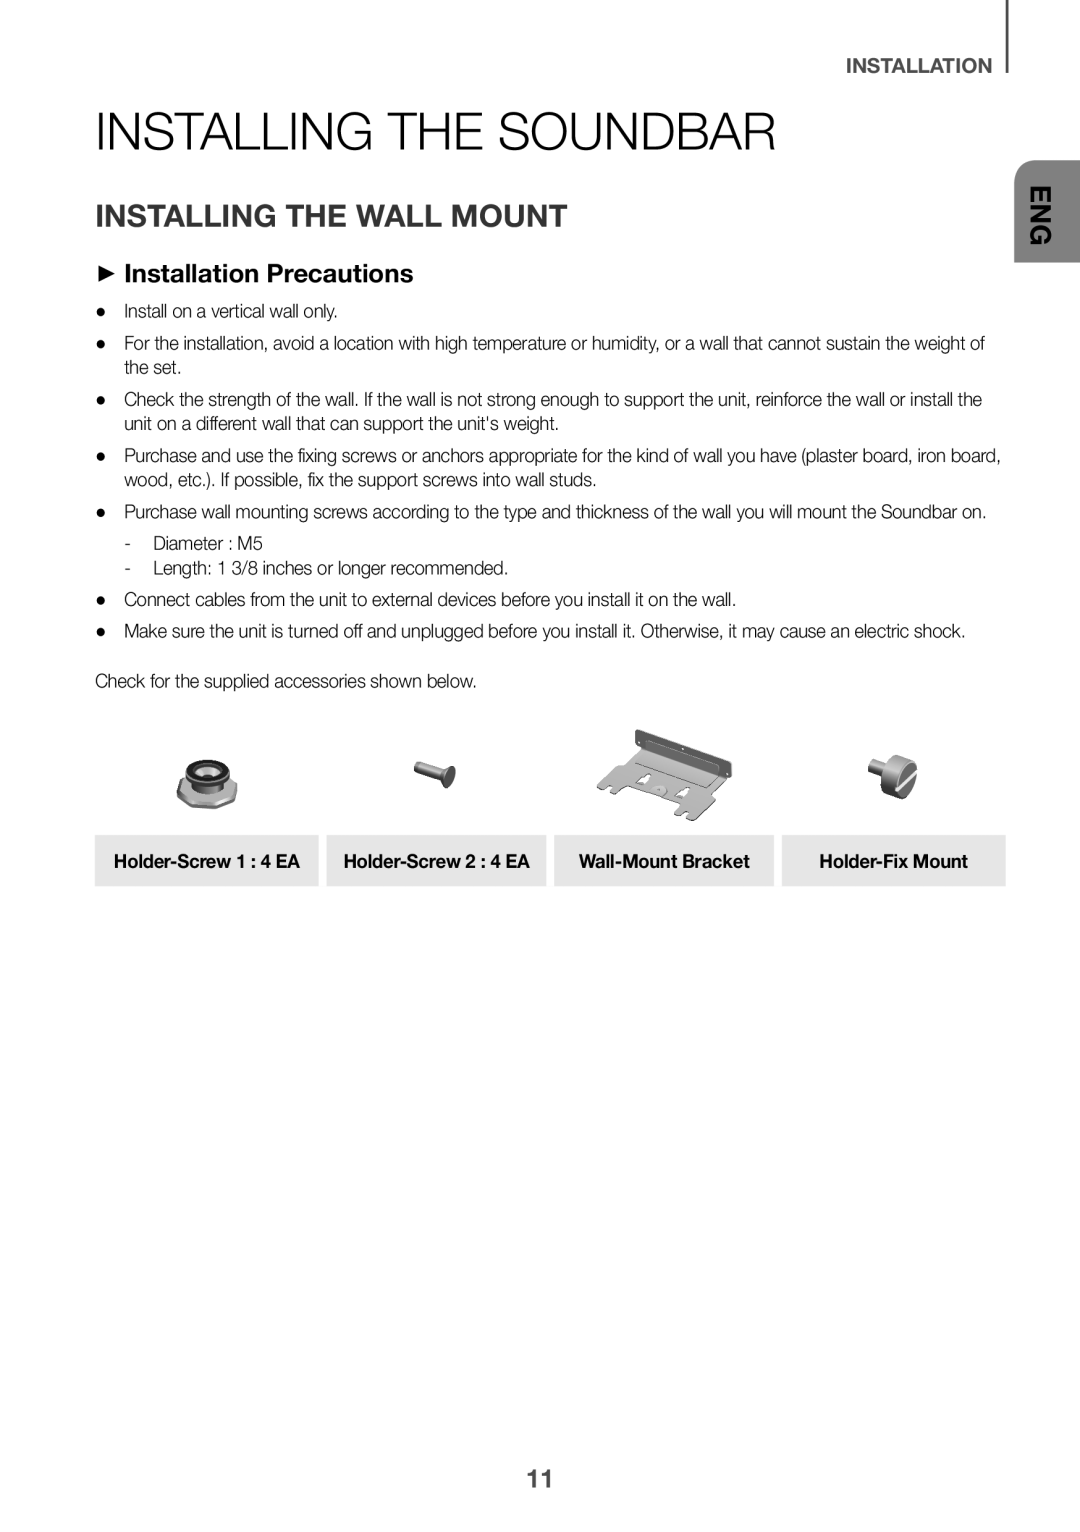
INSTALLING THE SOUNDBAR
INSTALLING THE WALL MOUNT
++Installation Precautions
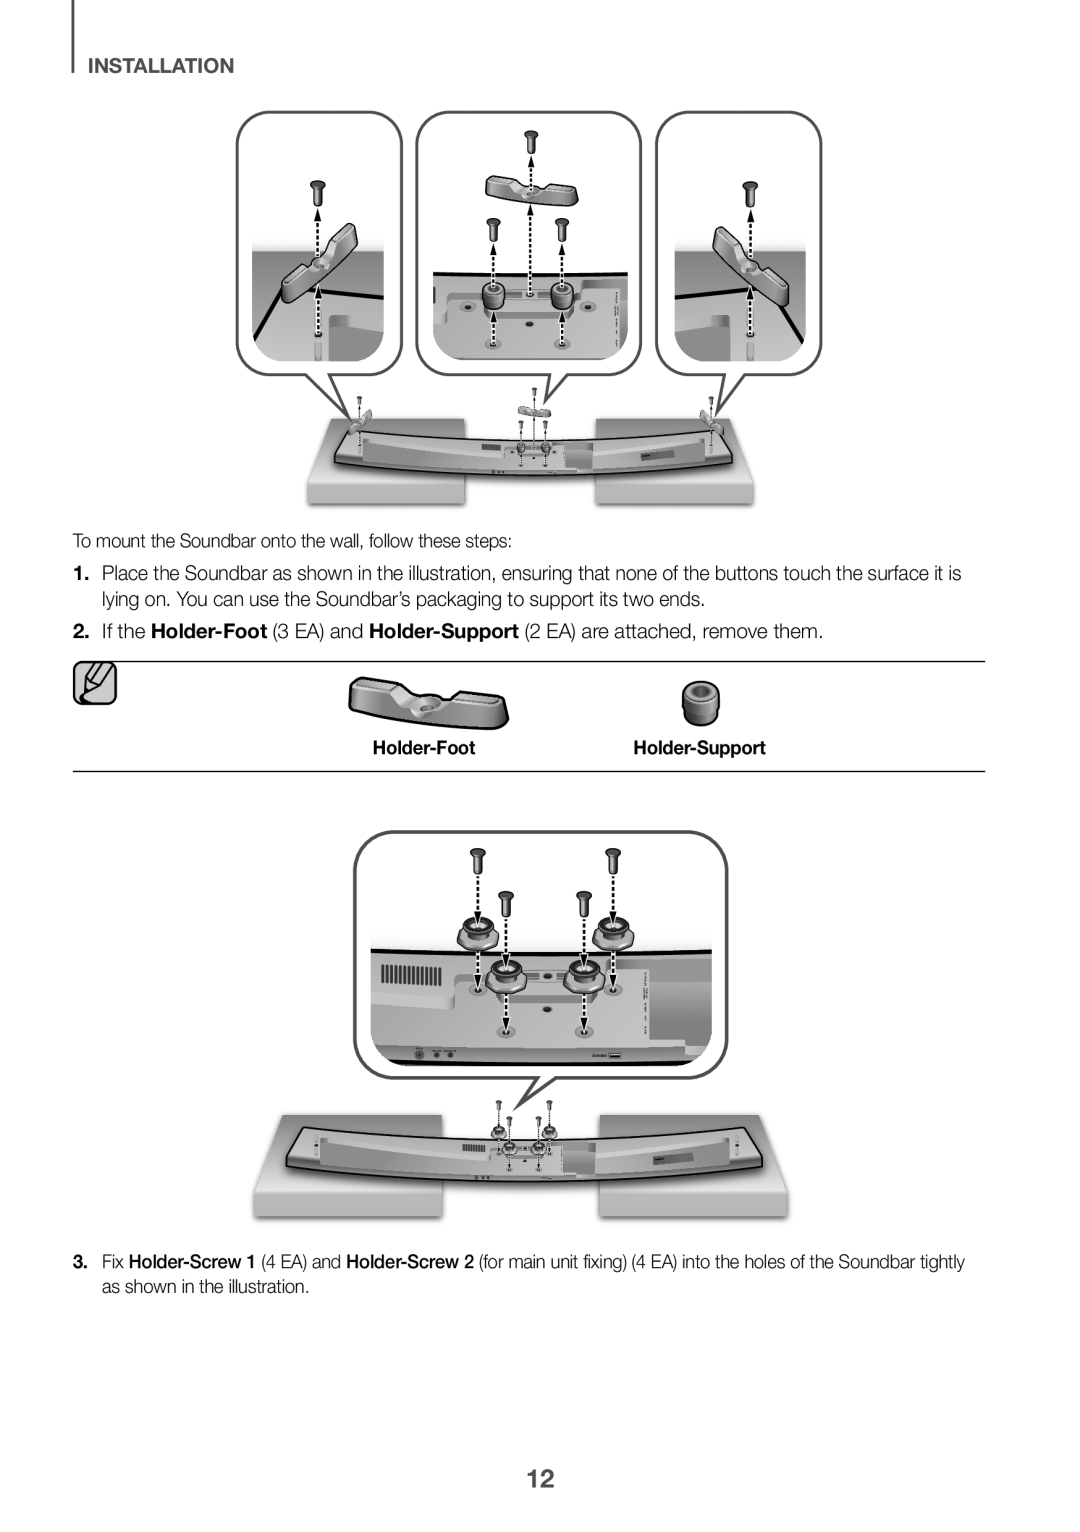 If the
Holder-Foot
Holder-Support
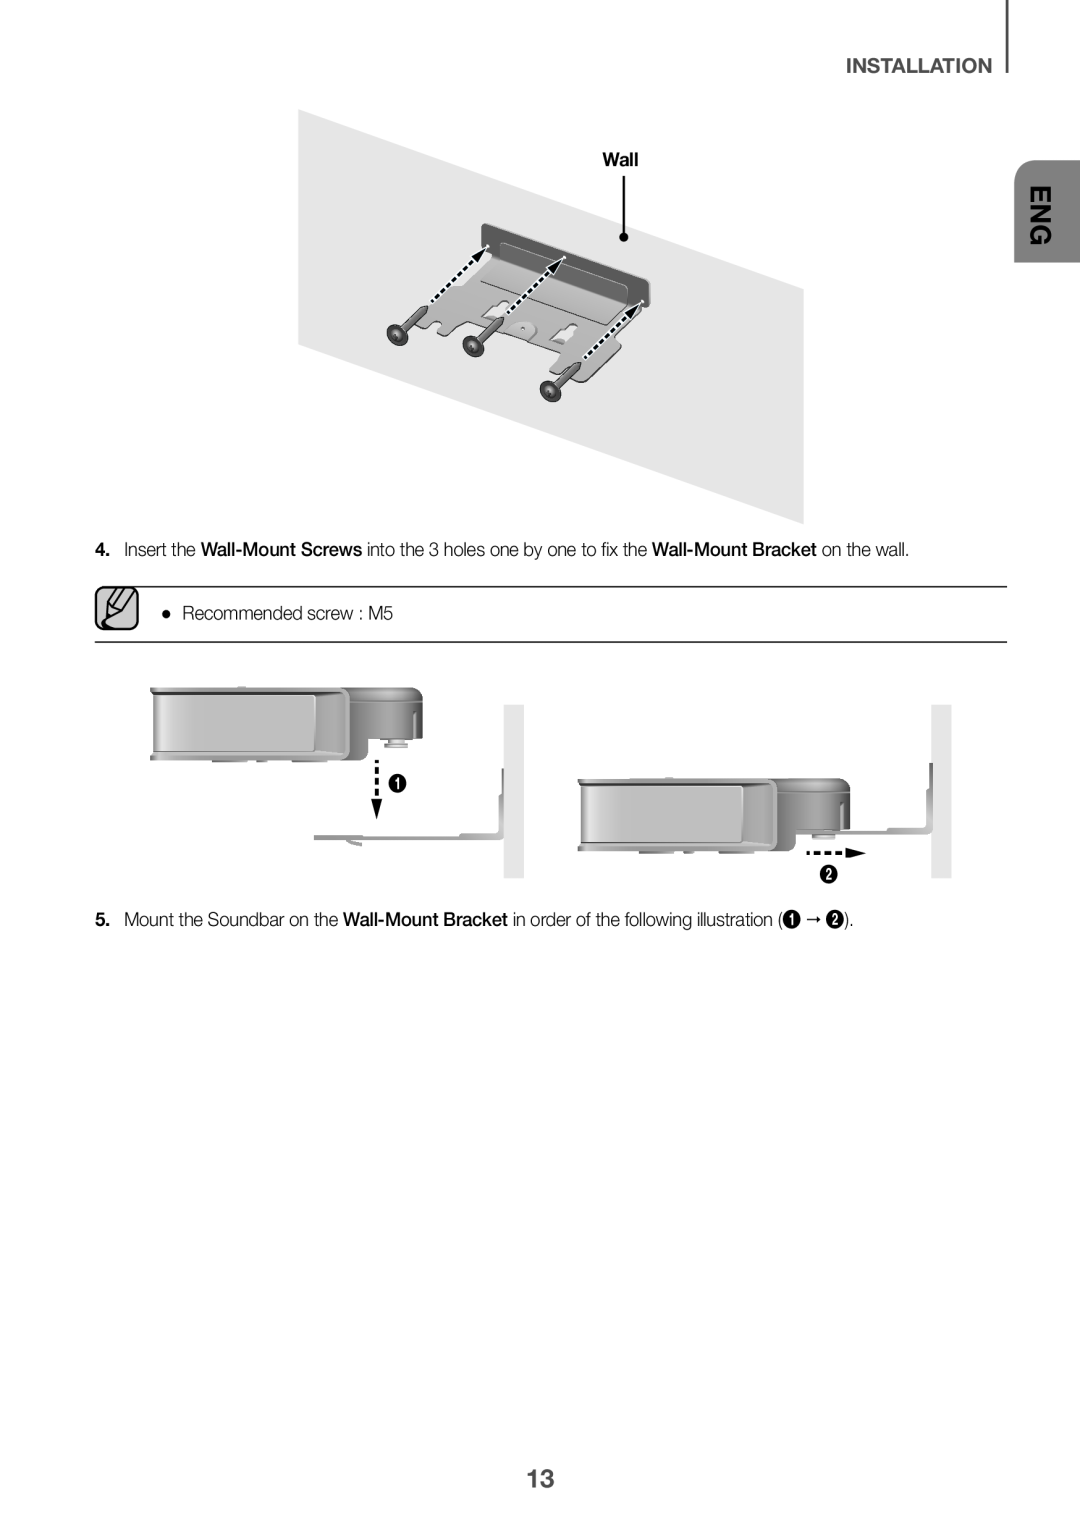 INSTALLATION
Wall
 INSTALLATION
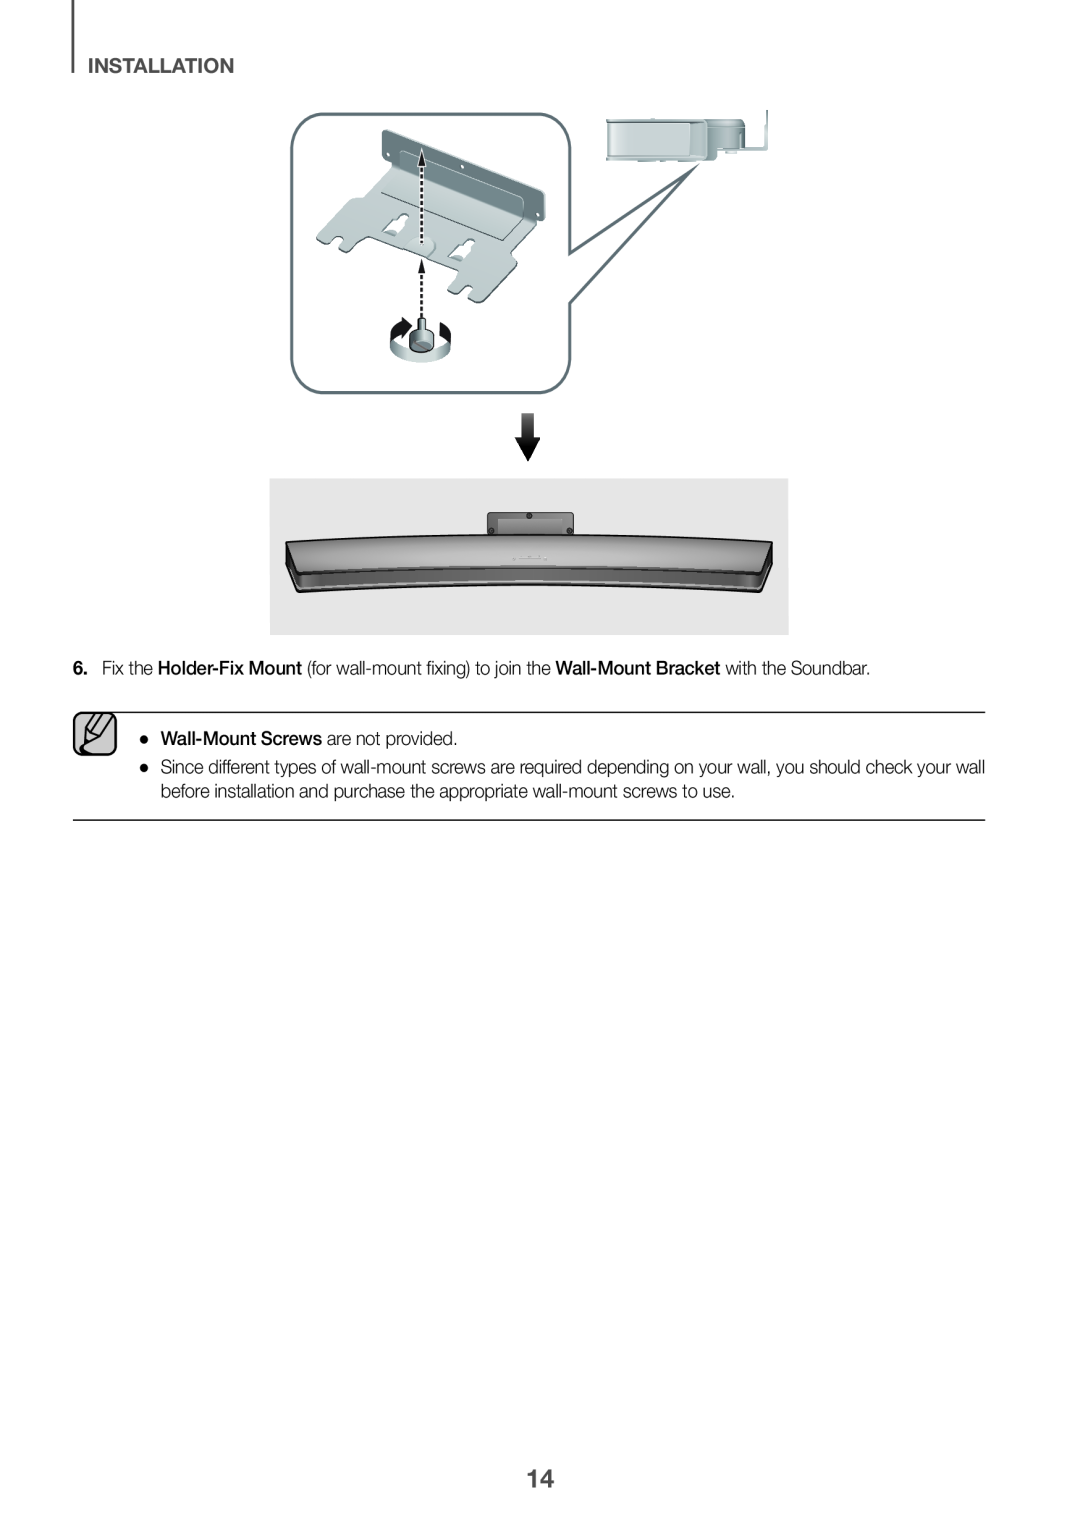
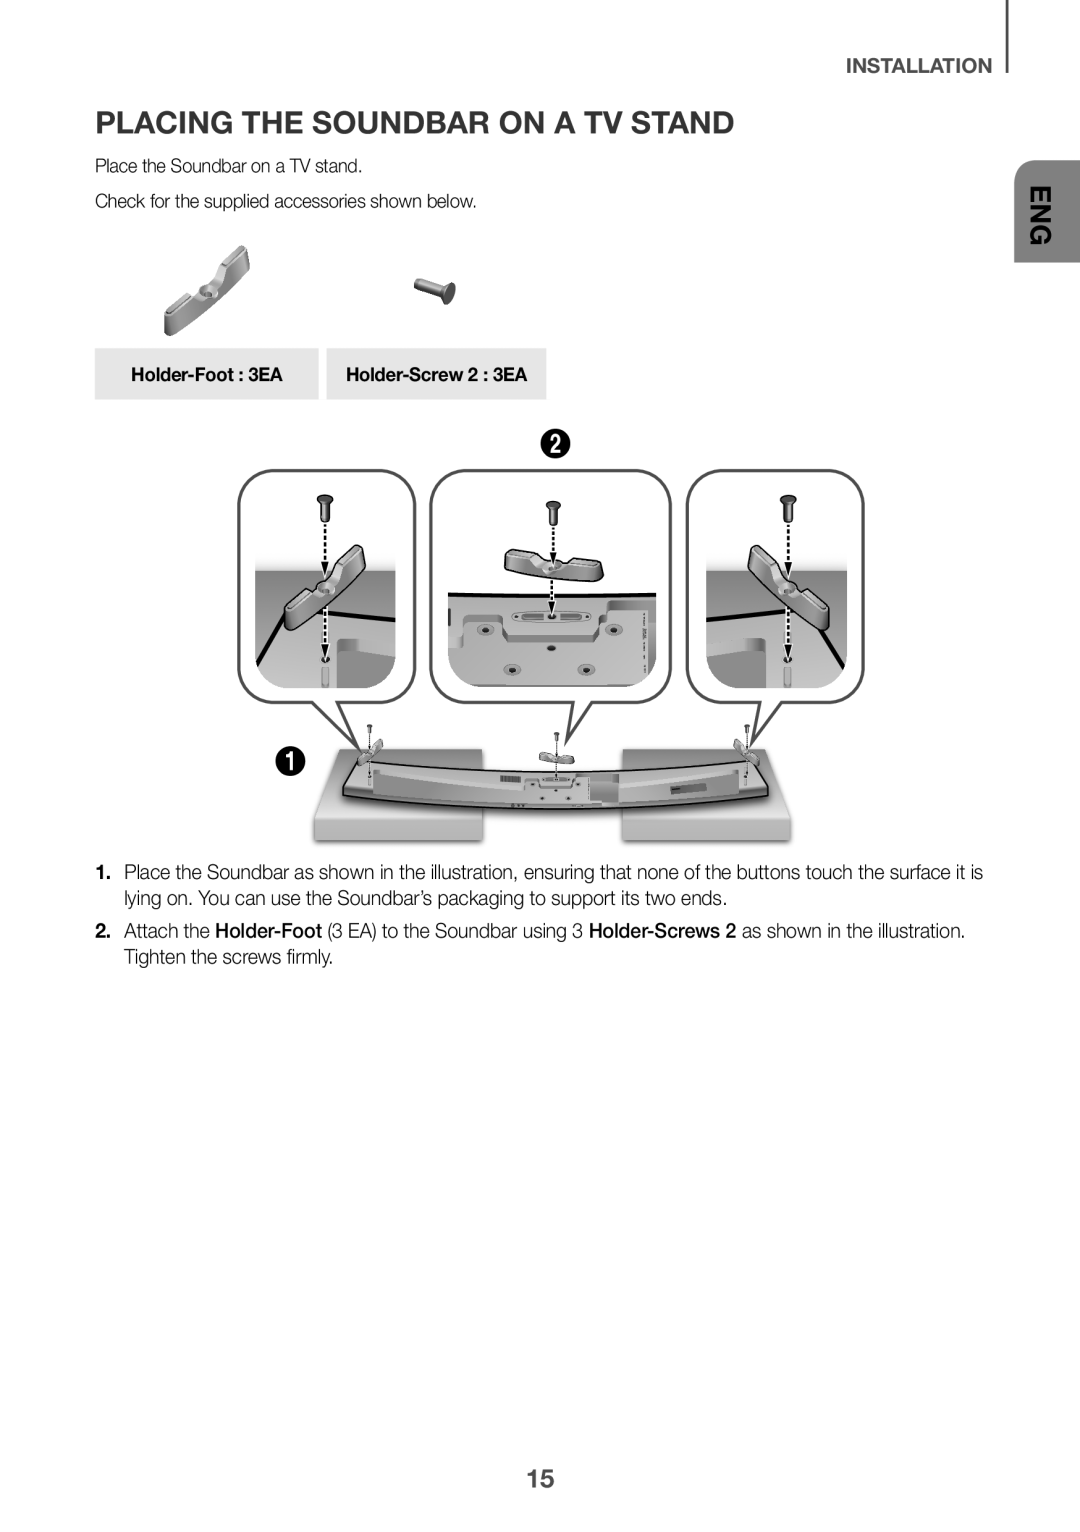 PLACING THE SOUNDBAR ON A TV STAND
Attach the
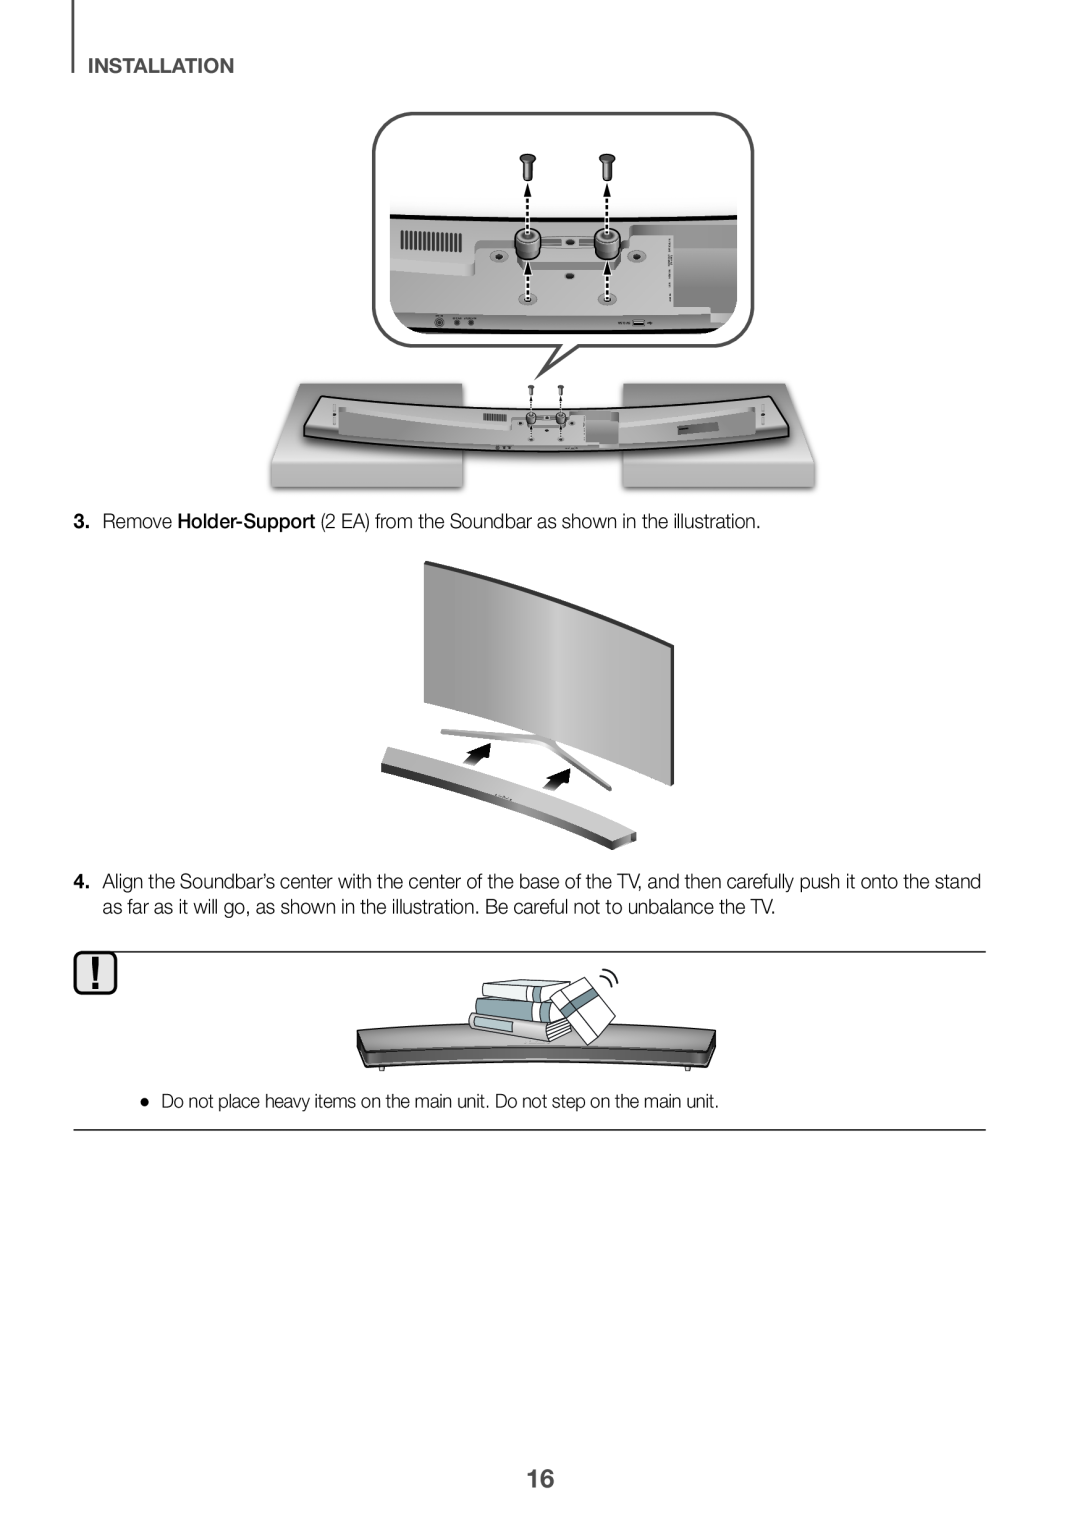 3.Remove Holder-Support(2 EA) from the Soundbar as shown in the illustration
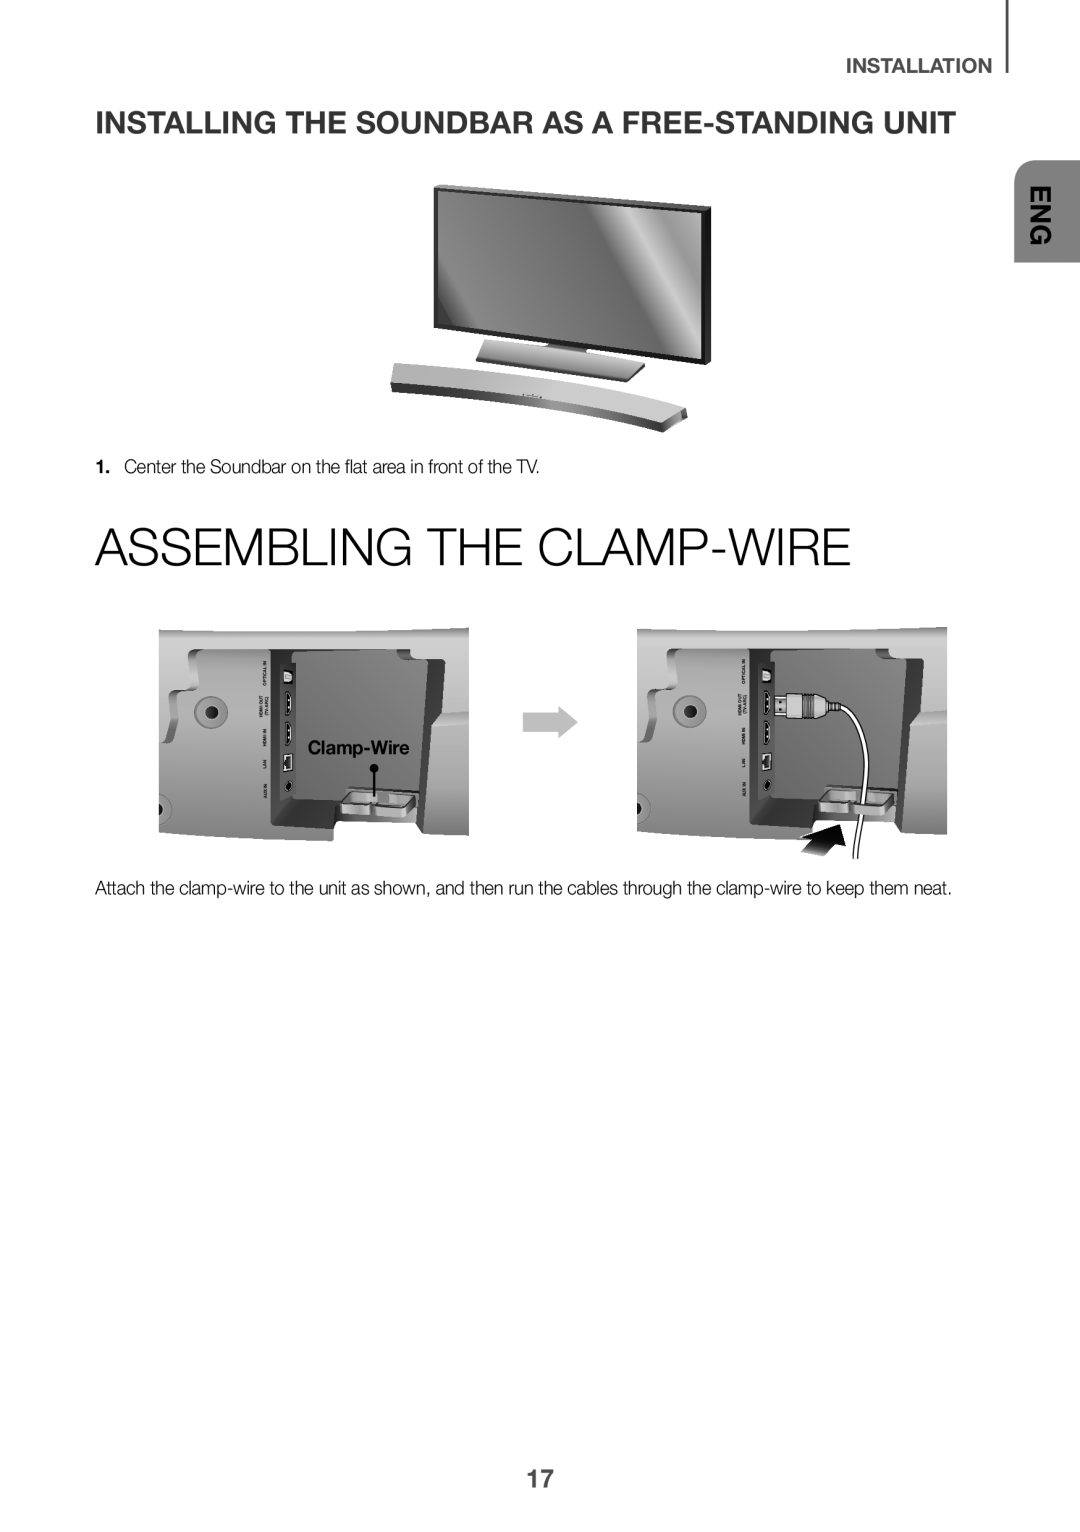 INSTALLING THE SOUNDBAR AS A FREE-STANDINGUNIT
ASSEMBLING THE CLAMP-WIRE
 CONNECTIONS
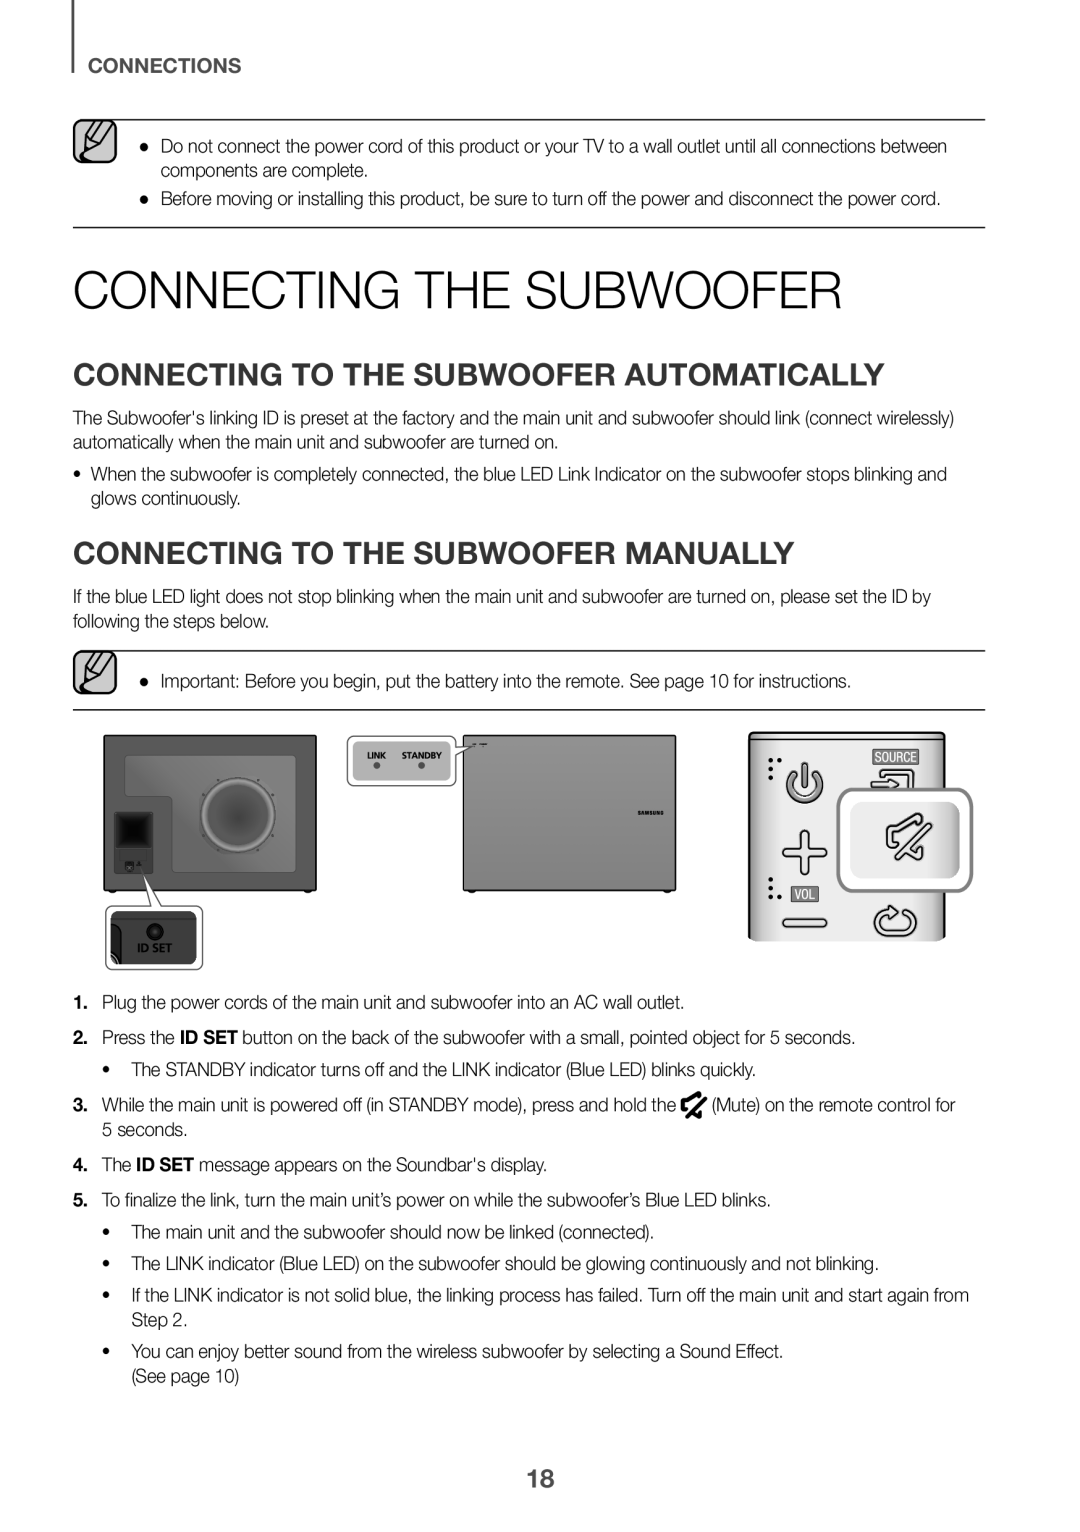
CONNECTING THE SUBWOOFER
CONNECTING TO THE SUBWOOFER AUTOMATICALLY
CONNECTING TO THE SUBWOOFER MANUALLY
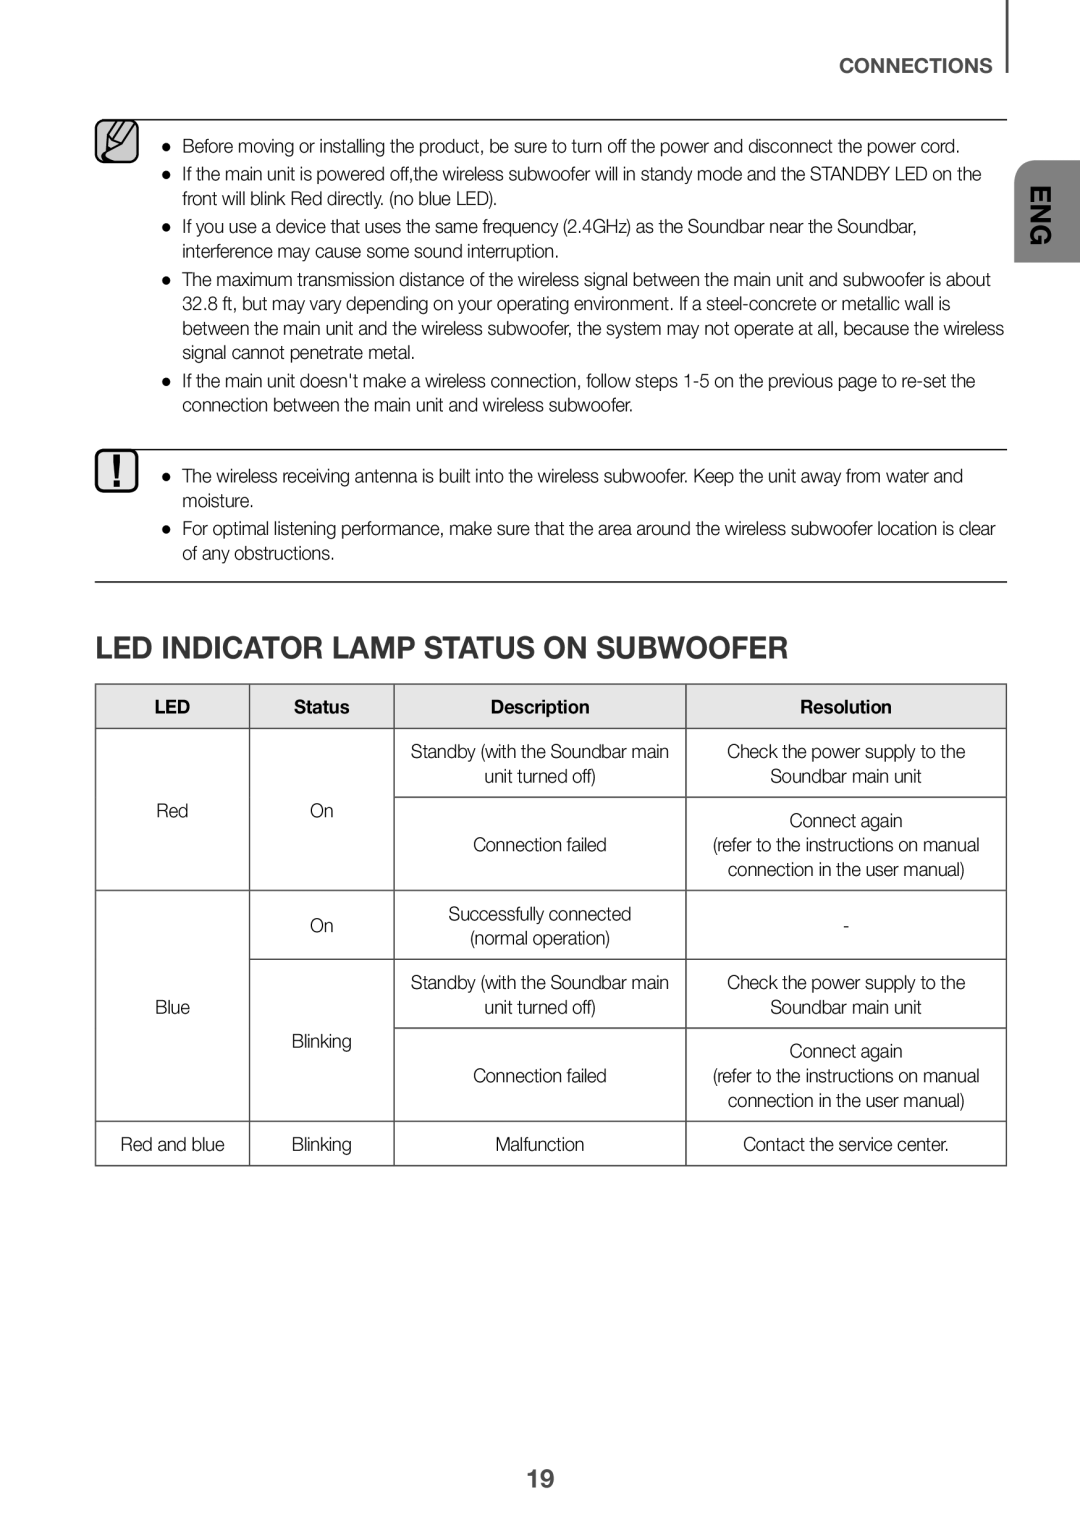 LED INDICATOR LAMP STATUS ON SUBWOOFER
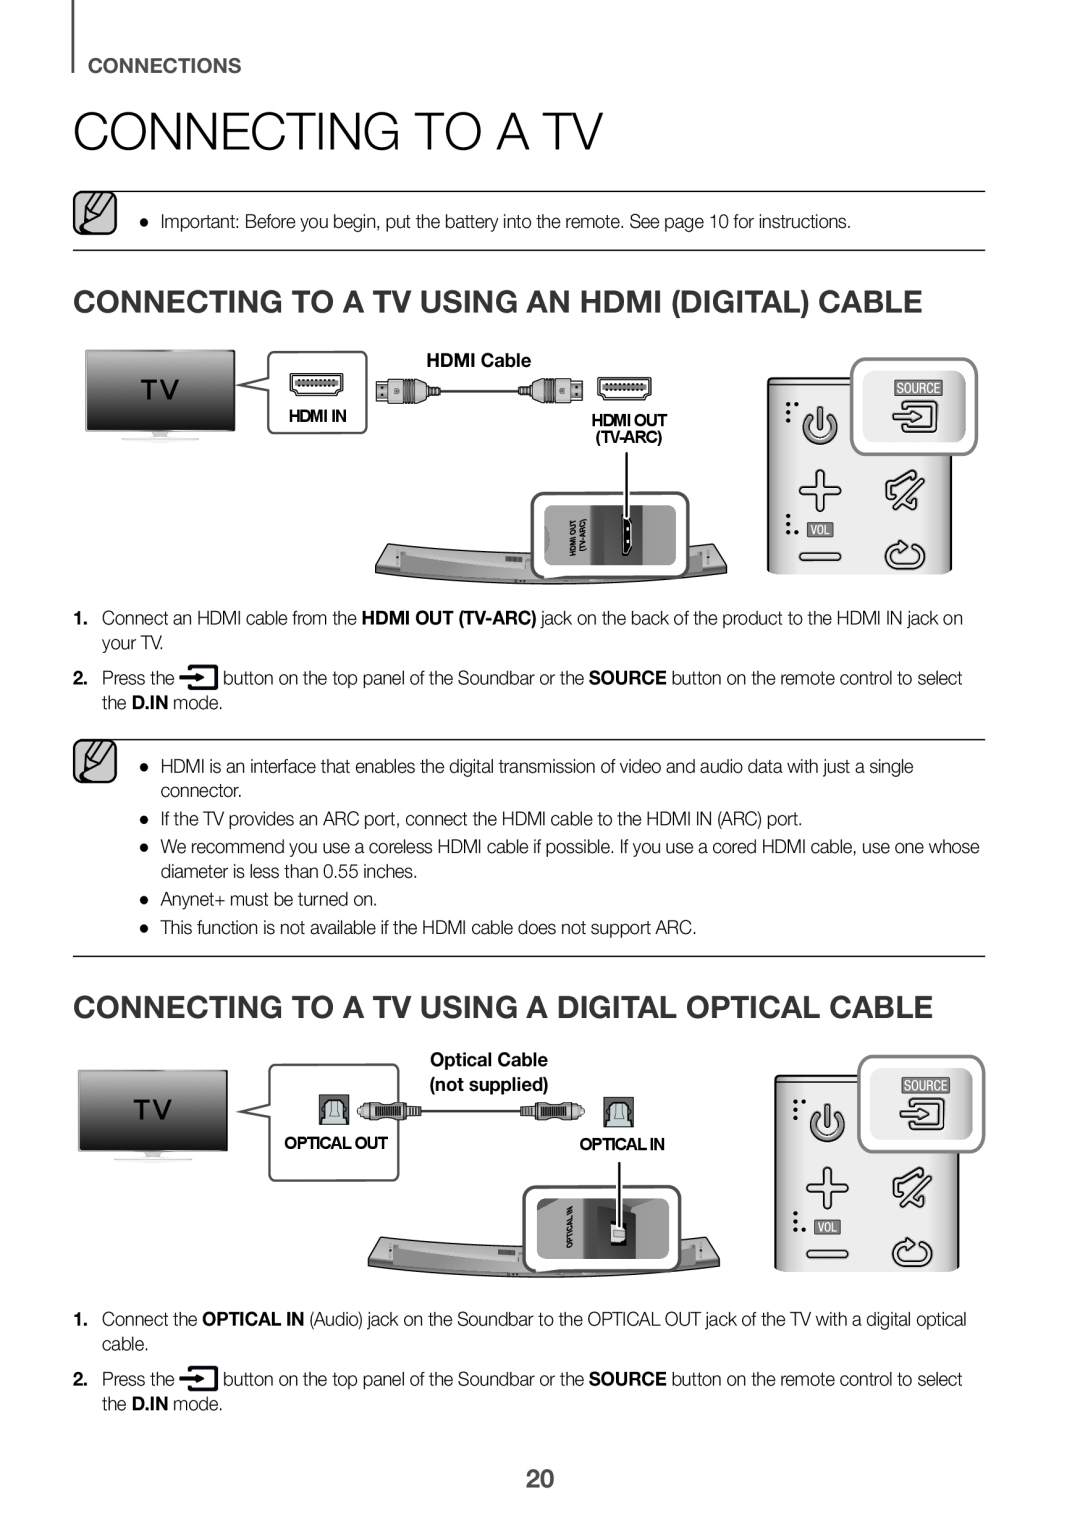 CONNECTING TO A TV
CONNECTING TO A TV USING AN HDMI (DIGITAL) CABLE
CONNECTING TO A TV USING A DIGITAL OPTICAL CABLE
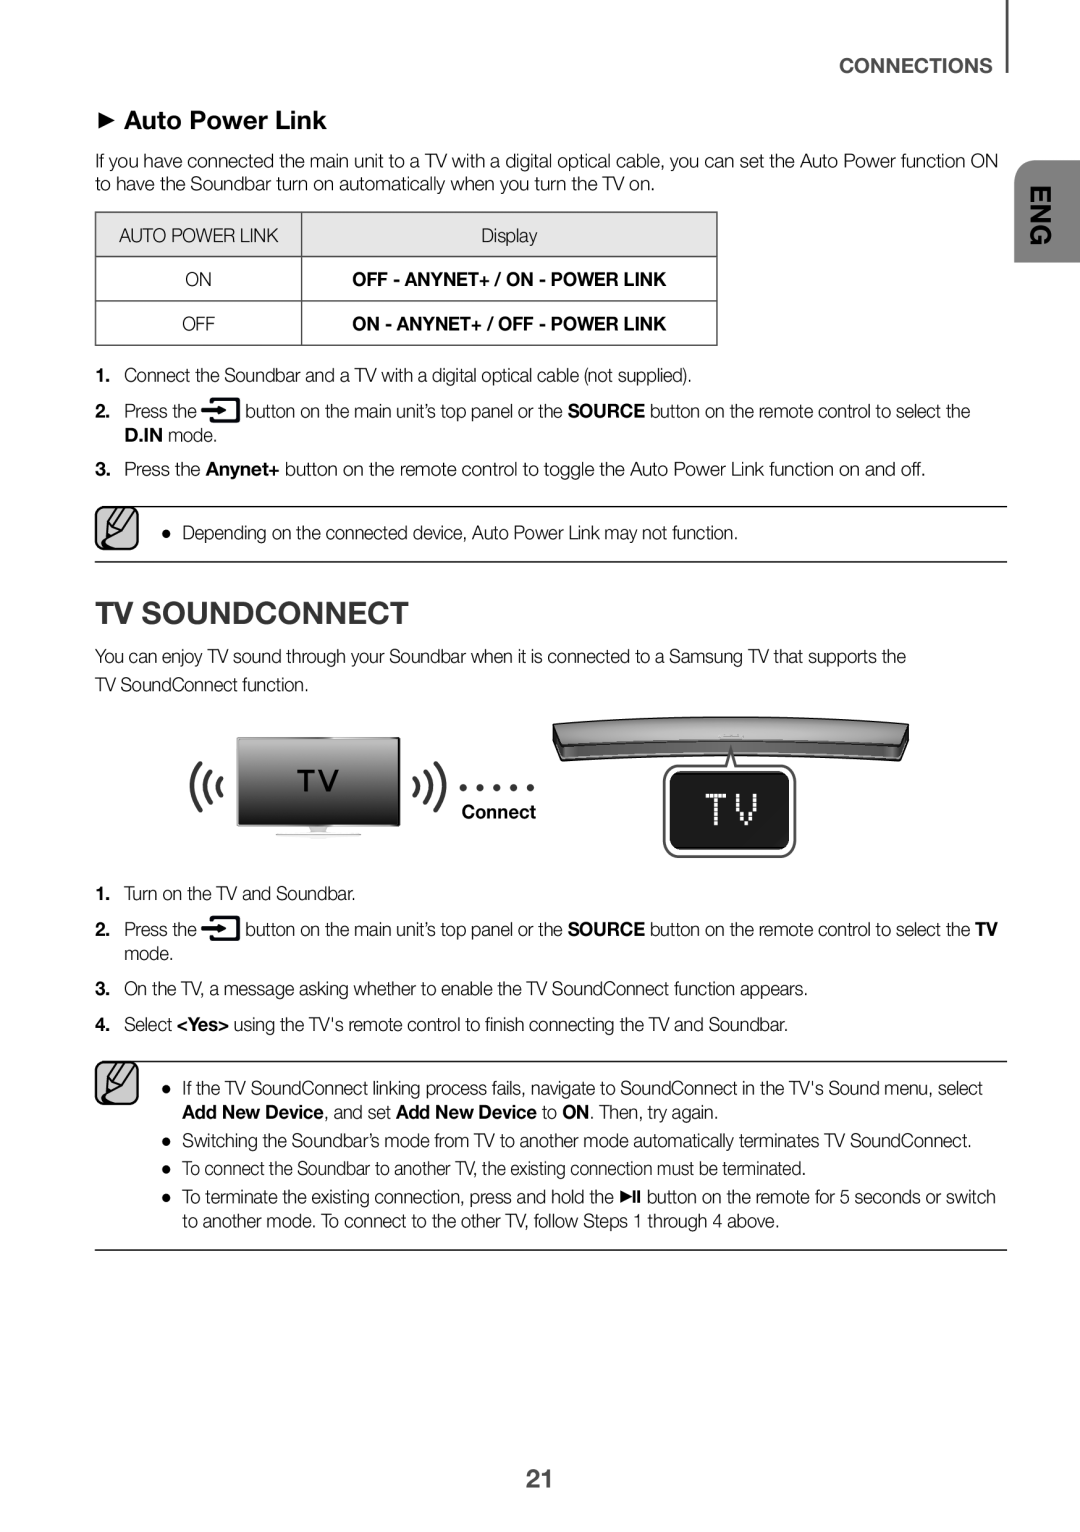 ++Auto Power Link
TV SOUNDCONNECT
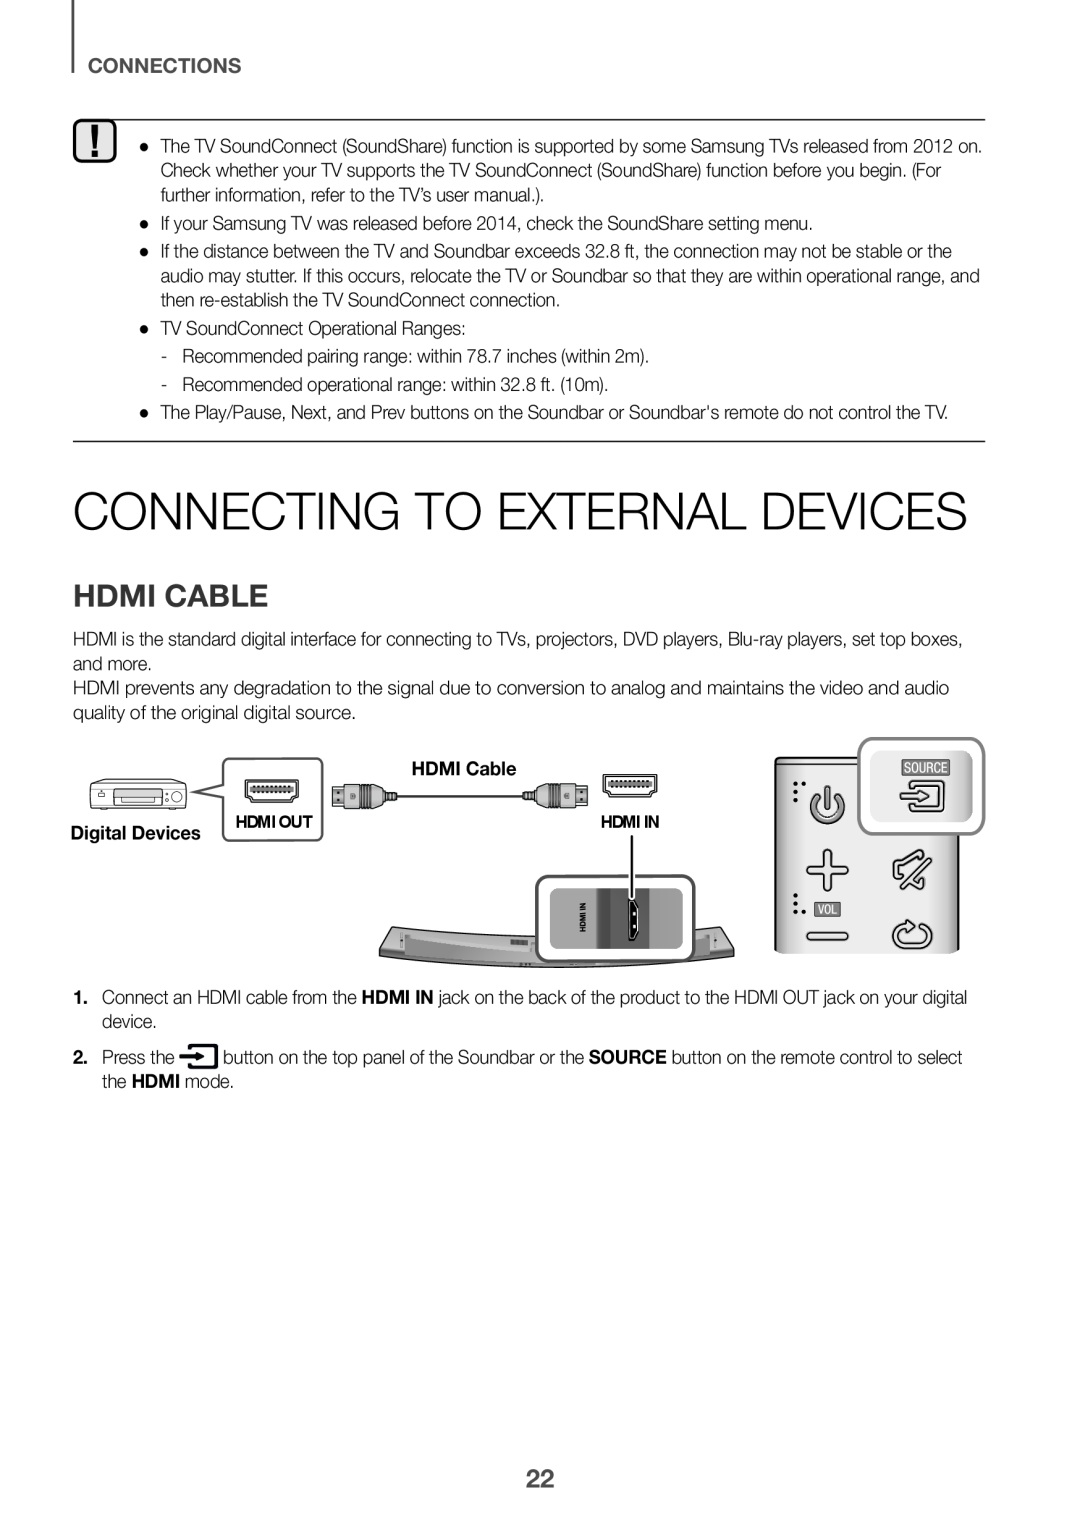 CONNECTING TO EXTERNAL DEVICES
HDMI CABLE
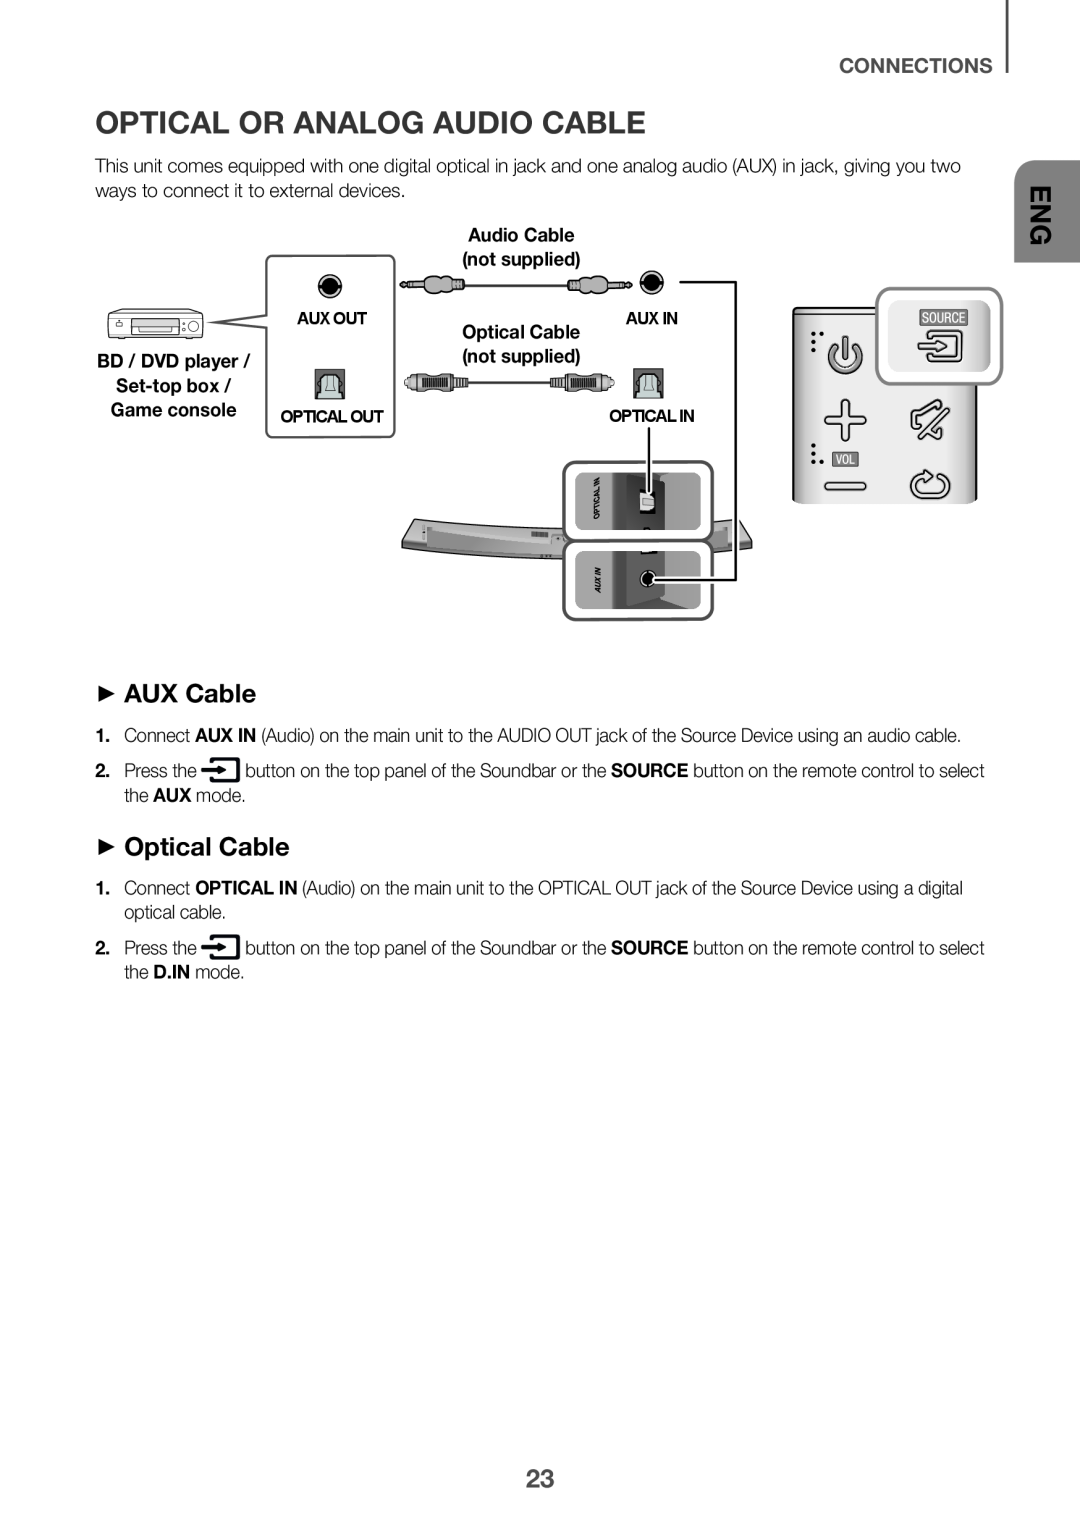 OPTICAL OR ANALOG AUDIO CABLE
++AUX Cable
++Optical Cable
 FUNCTIONS
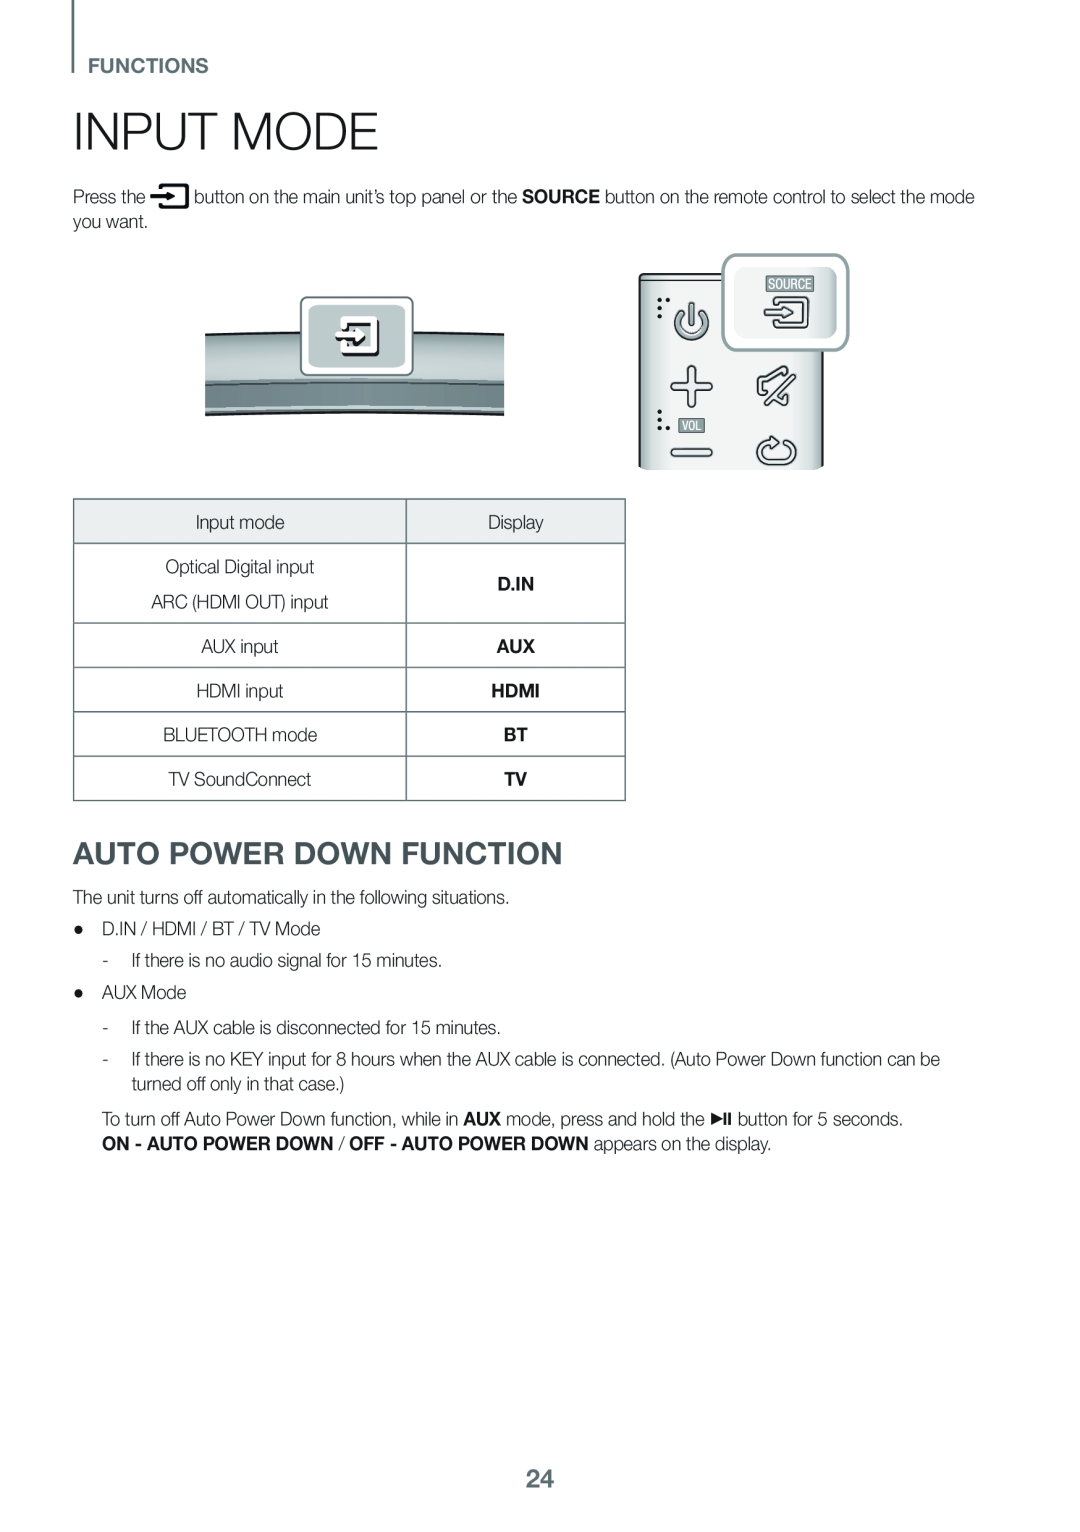
INPUT MODE
AUTO POWER DOWN FUNCTION
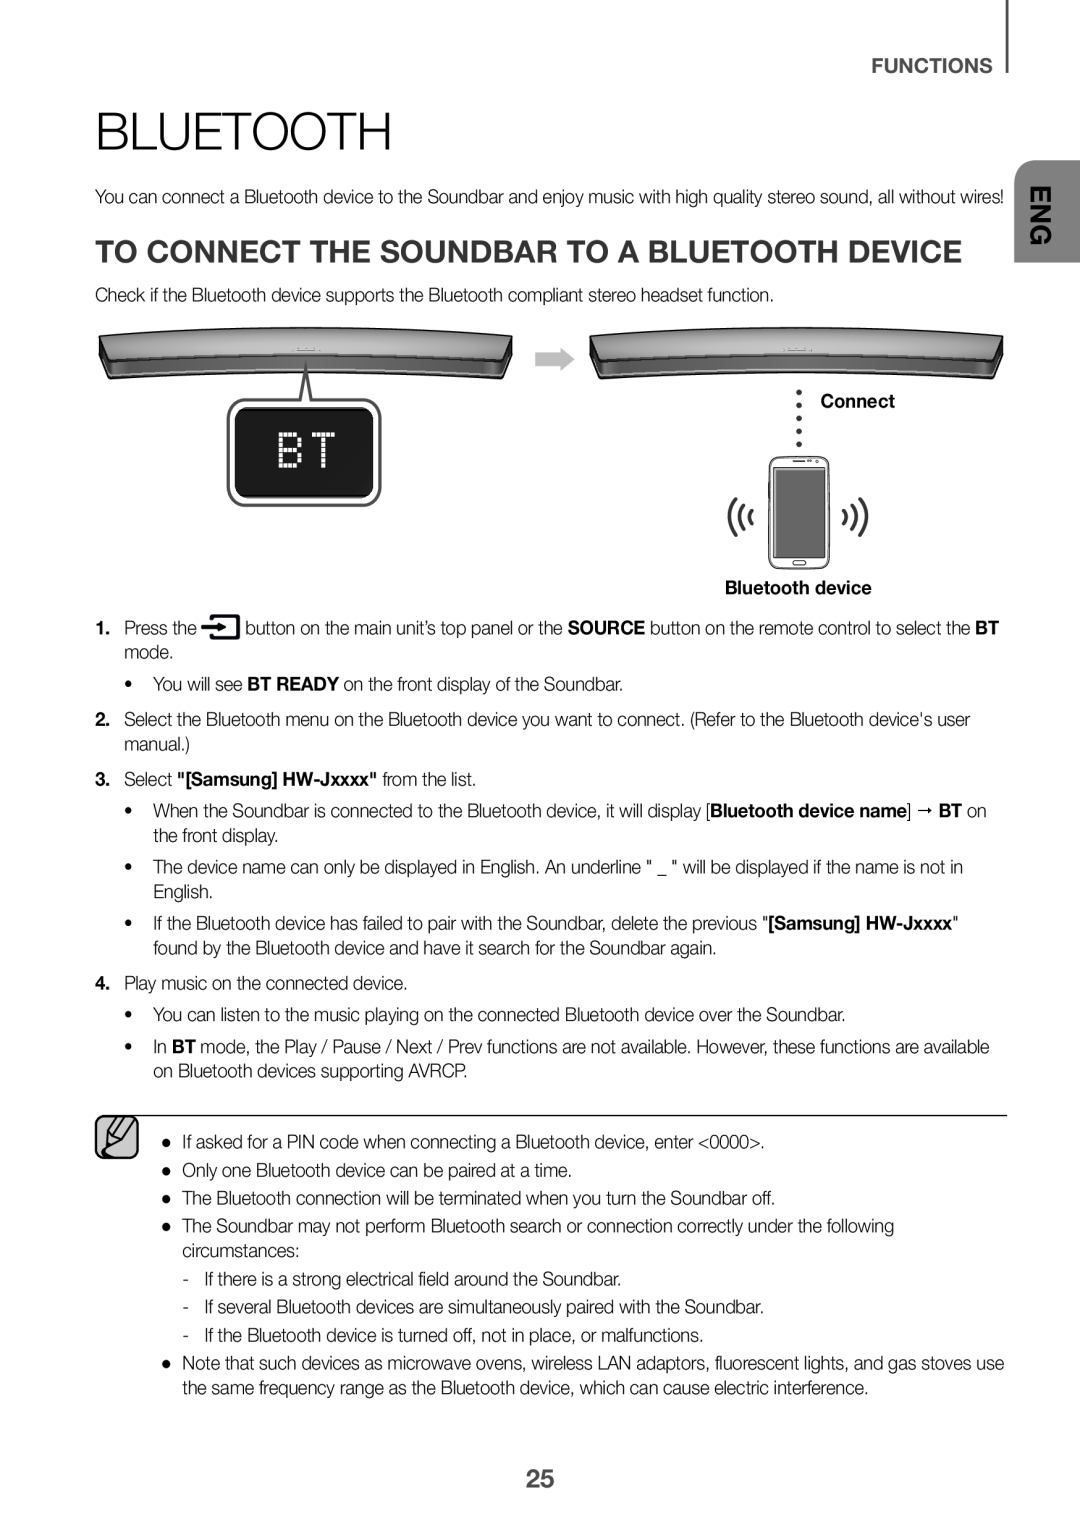 BLUETOOTH
TO CONNECT THE SOUNDBAR TO A BLUETOOTH DEVICE
 TO DISCONNECT THE BLUETOOTH DEVICE FROM A SOUNDBAR
TO DISCONNECT THE SOUNDBAR FROM A BLUETOOTH DEVICE
++More About Bluetooth
 USING THE MULTIROOM APP
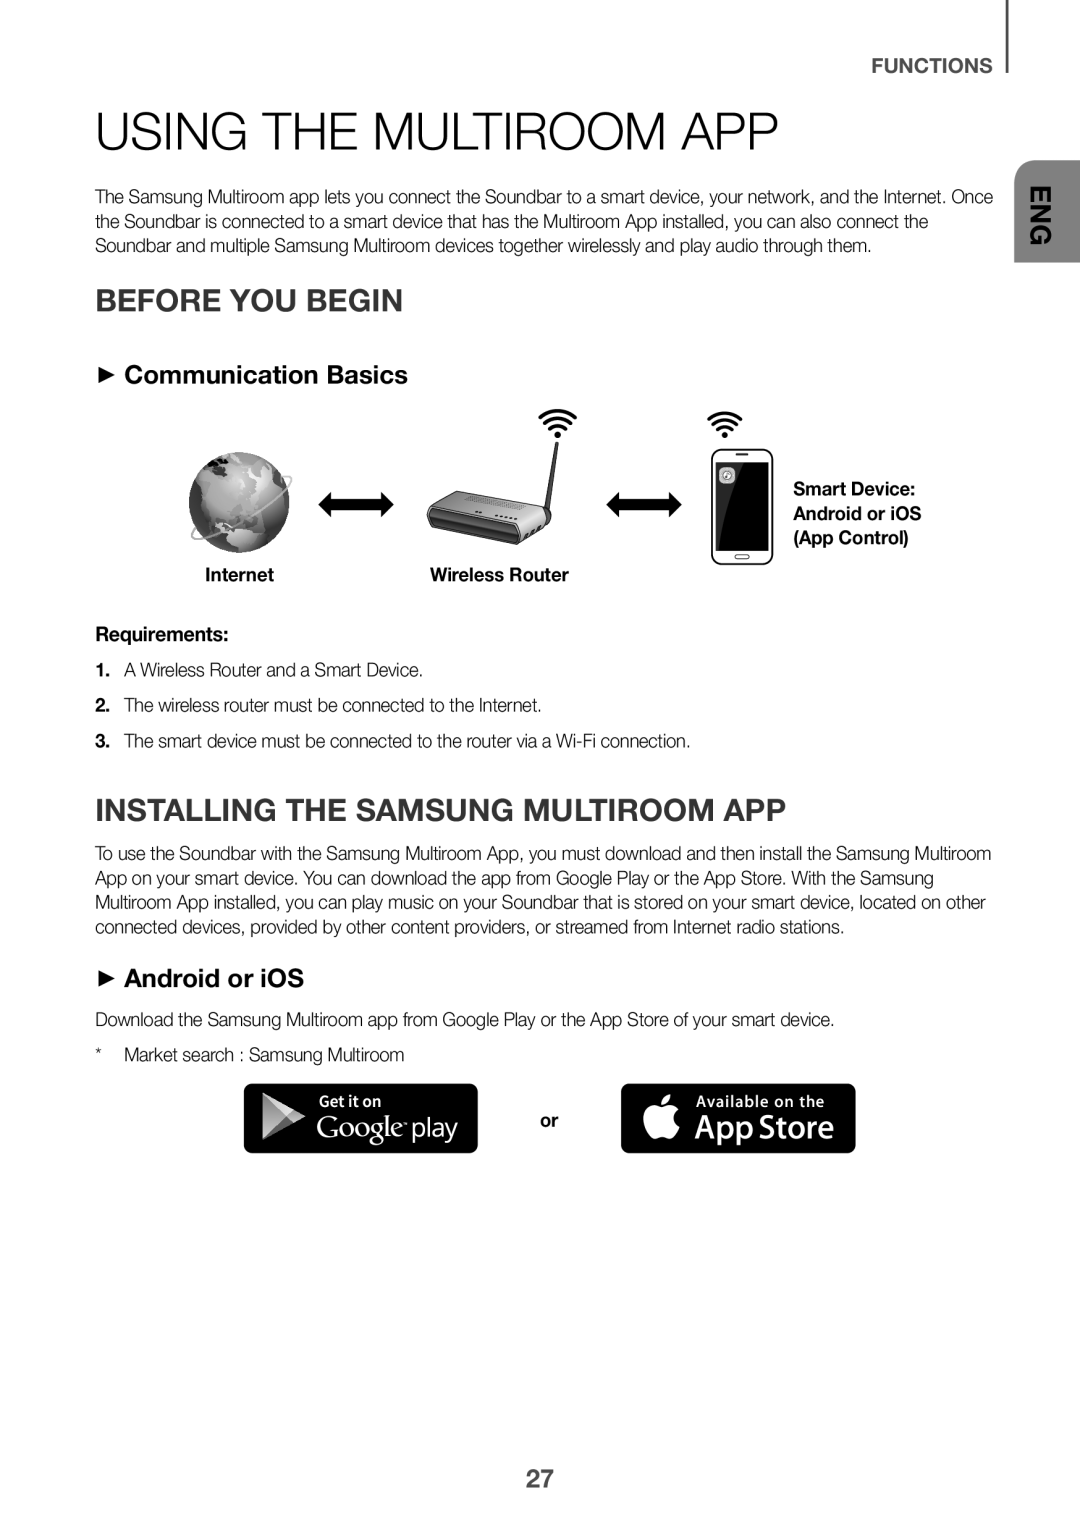
BEFORE YOU BEGIN
++Communication Basics
Requirements:
INSTALLING THE SAMSUNG MULTIROOM APP
++Android or iOS
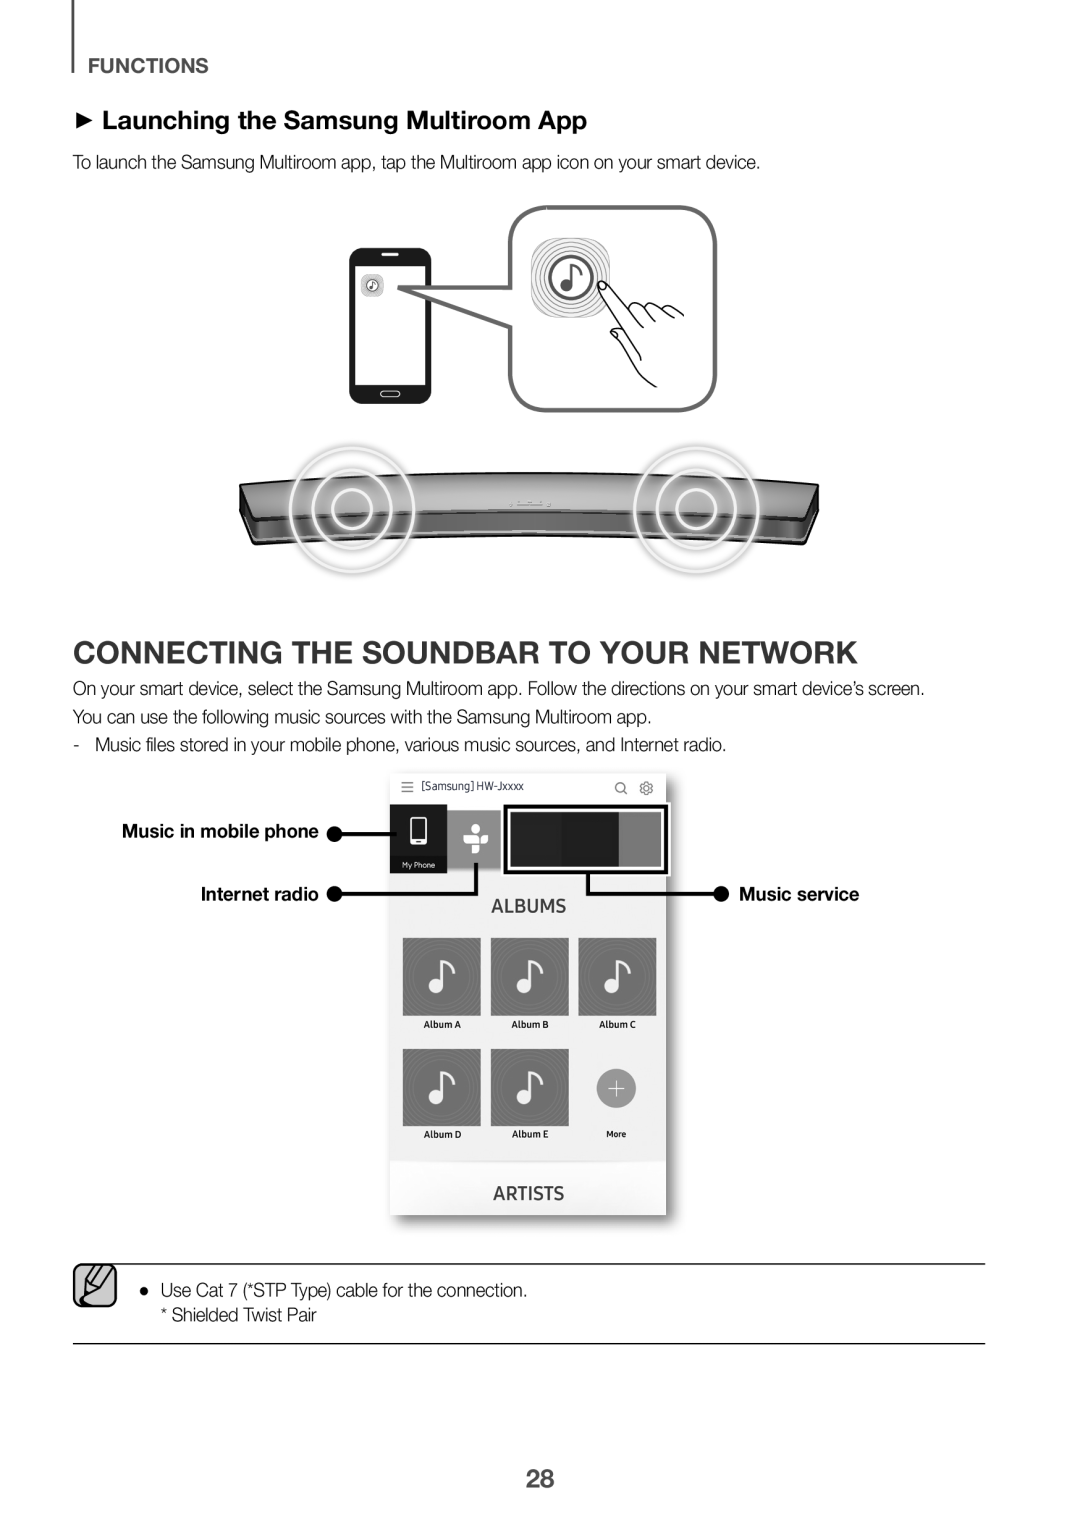 ++Launching the Samsung Multiroom App
CONNECTING THE SOUNDBAR TO YOUR NETWORK
 USING THE NETWORK STANDBY ON FUNCTION
 SOFTWARE UPDATE
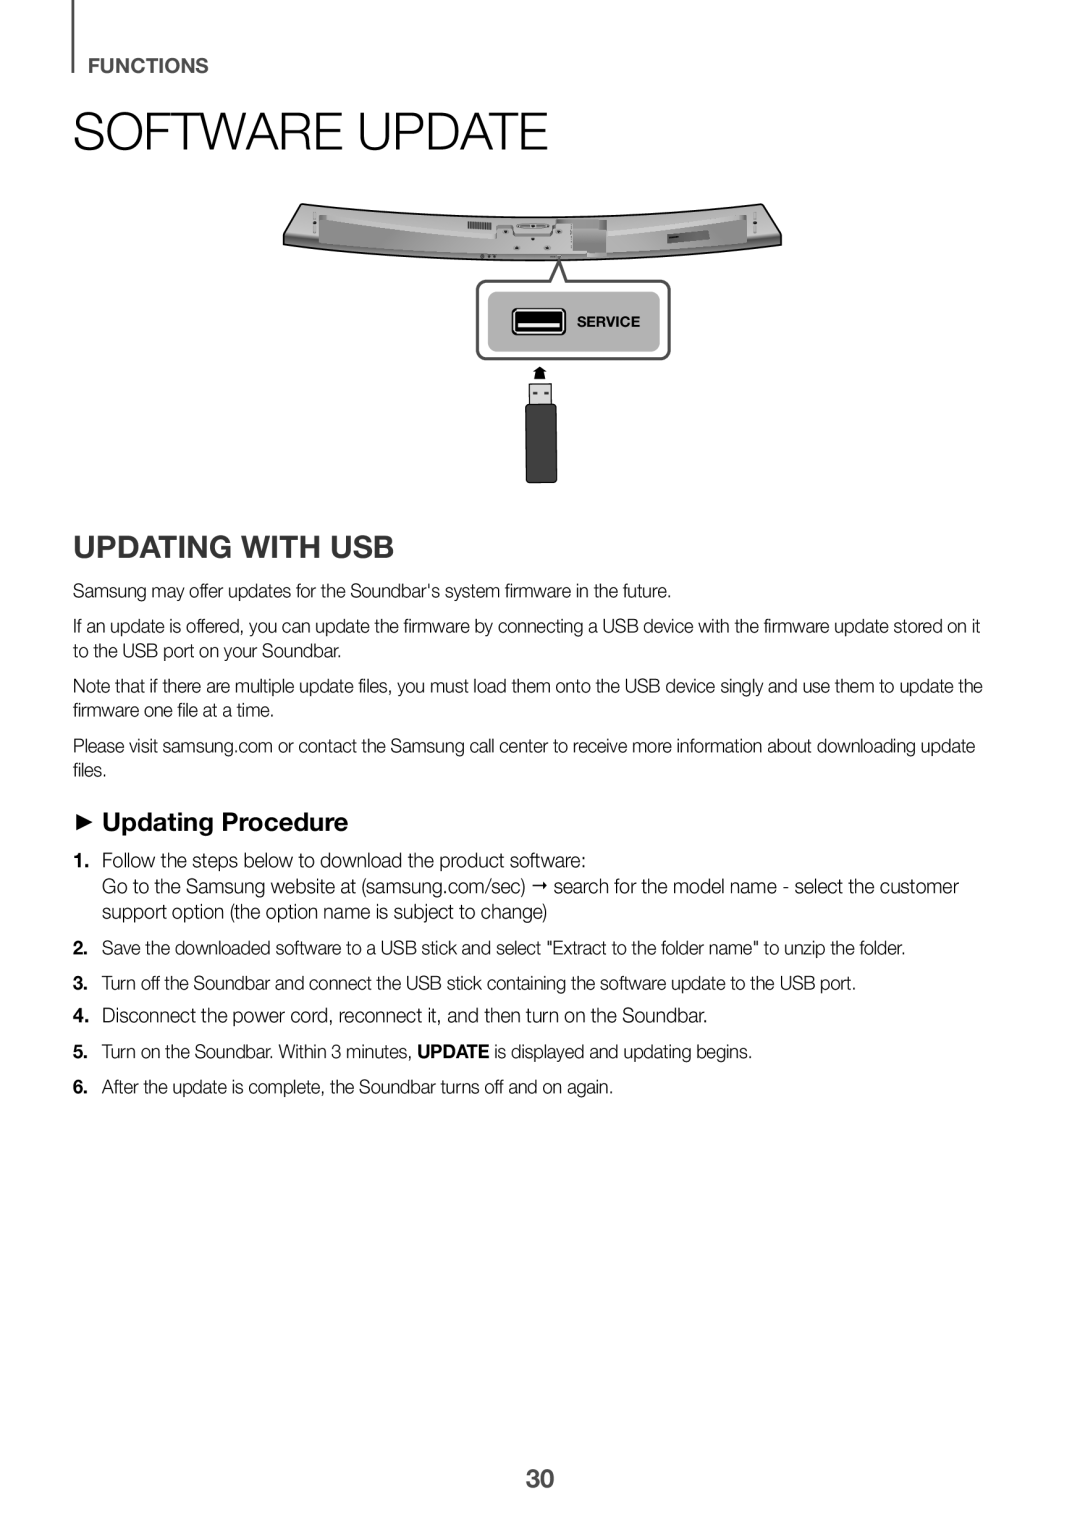
UPDATING WITH USB
++Updating Procedure
1.Follow the steps below to download the product software:
4.Disconnect the power cord, reconnect it, and then turn on the Soundbar
 ++If UPDATE was not displayed
AUTO UPDATE
 TROUBLESHOOTING
TROUBLESHOOTING
 APPENDIX
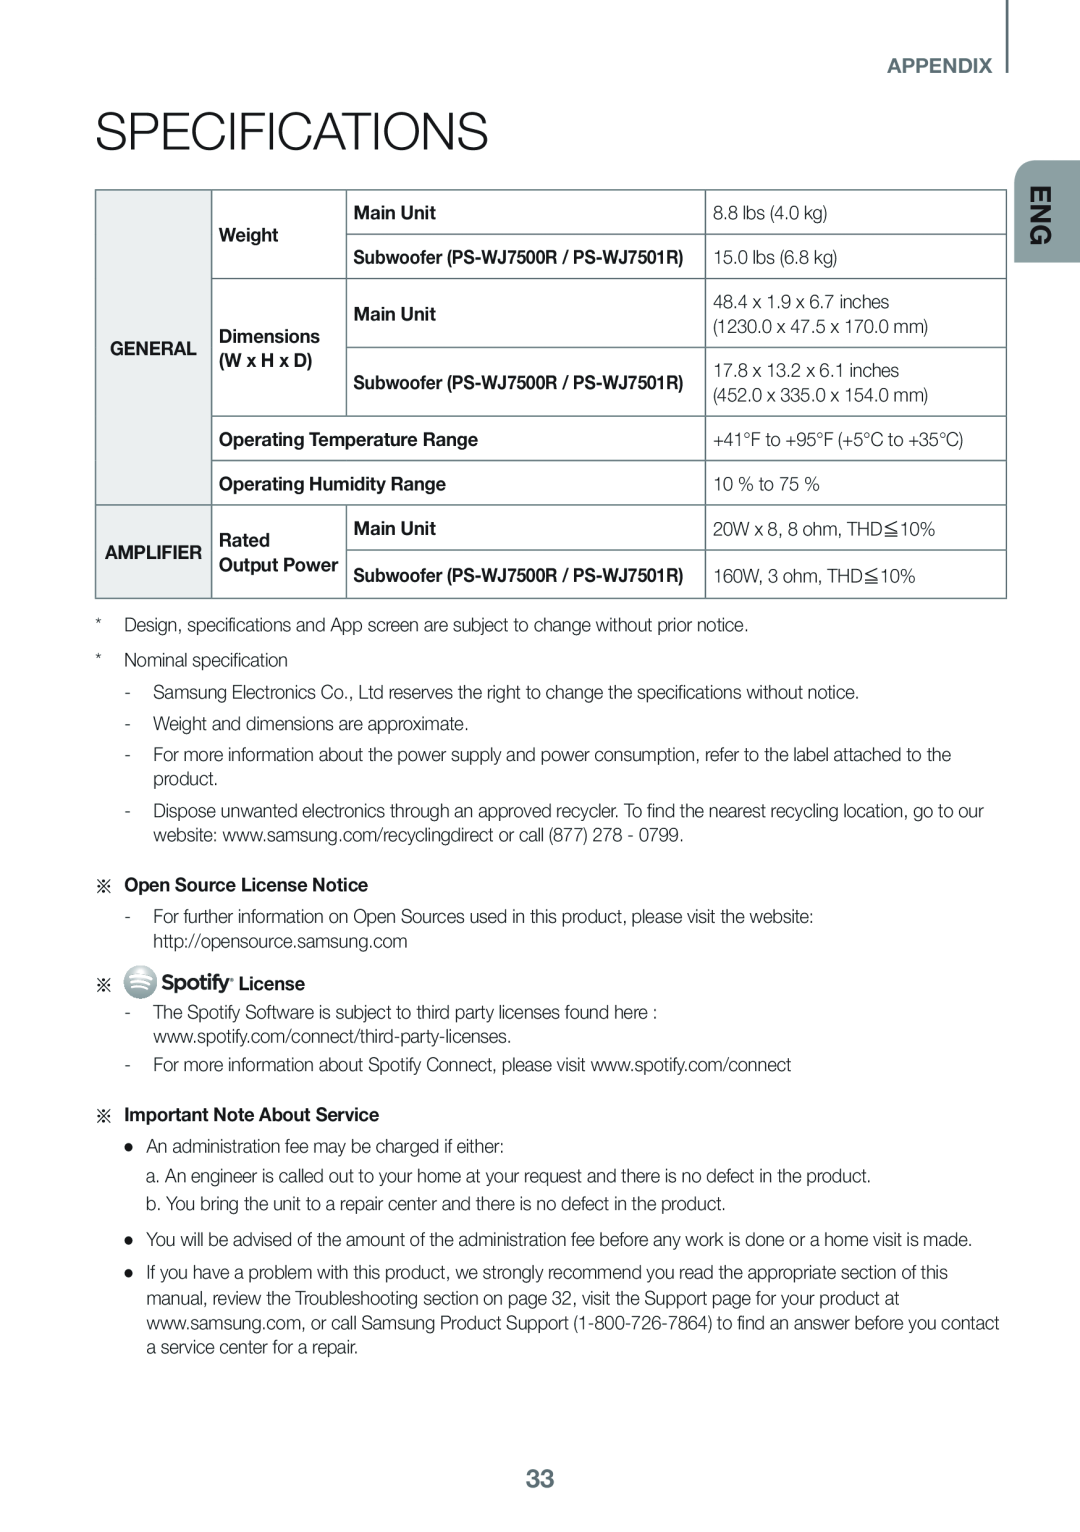
SPECIFICATIONS
 WARRANTY
LIMITED WARRANTY TO ORIGINAL PURCHASER
 QUESTIONS OR COMMENTS
COUNTRY
CALL
OR VISIT US ONLINE AT
WRITE