 Thank you for purchasing this Samsung product
To receive more complete service, please register your product at
 CAUTION
GETTING STARTED
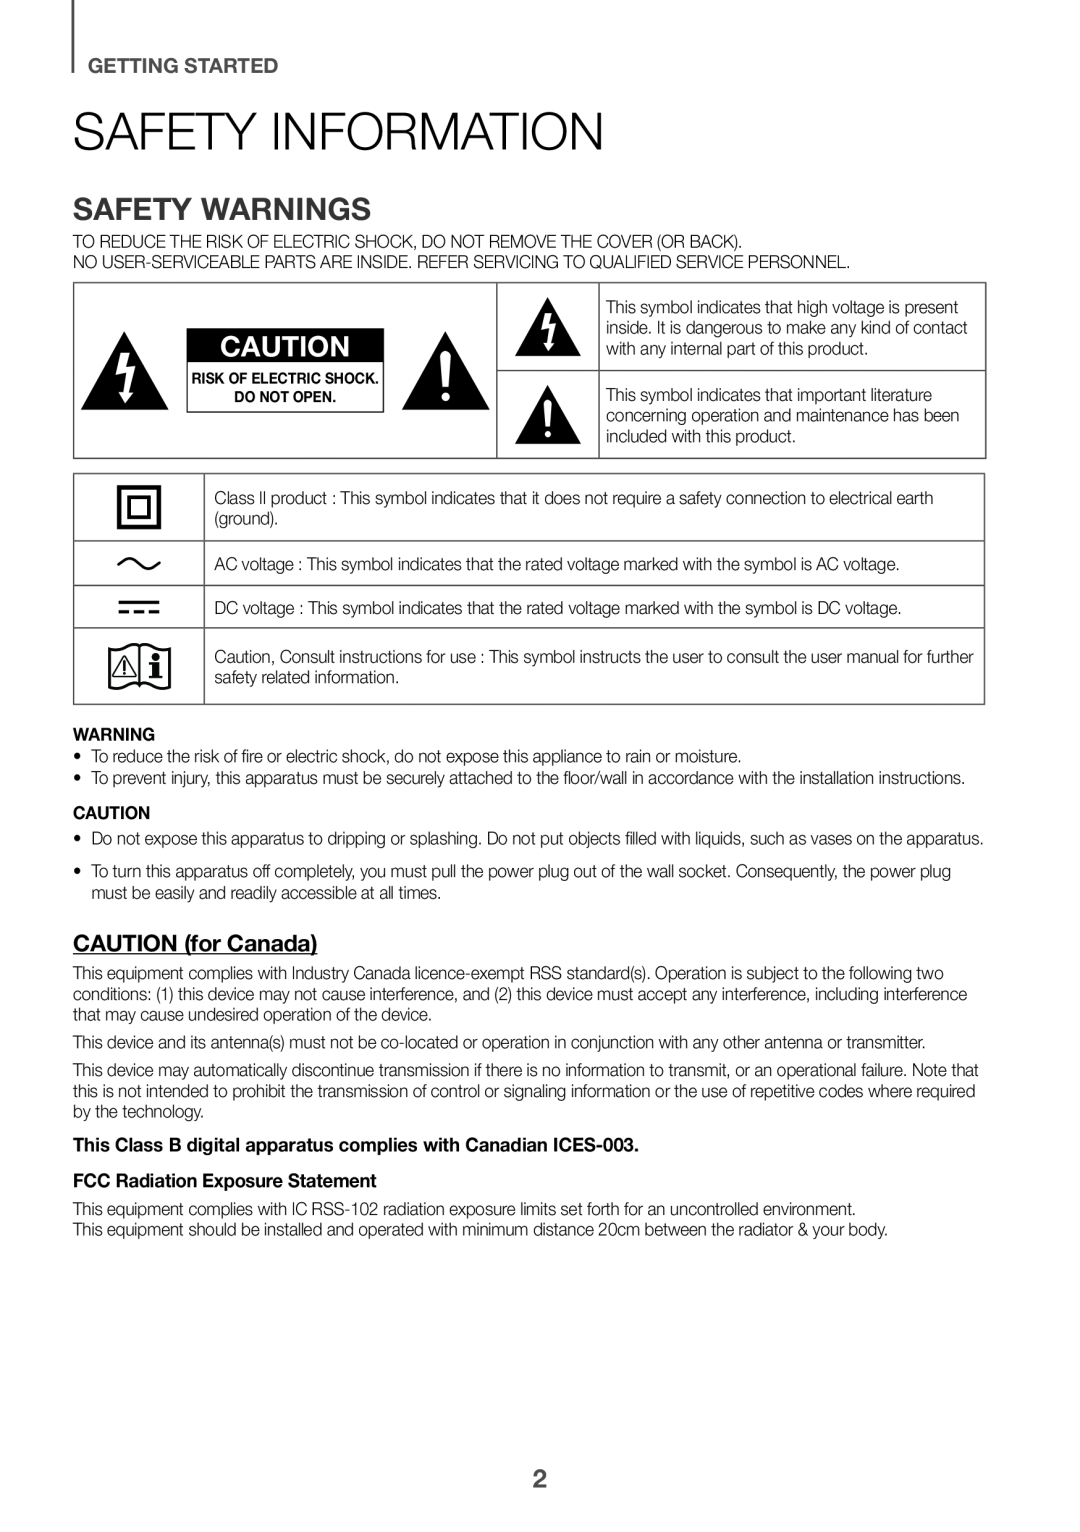
Safety Information
Safety Warnings
CAUTION (for Canada)
 Important Safety Instructions
Licenses
ENG
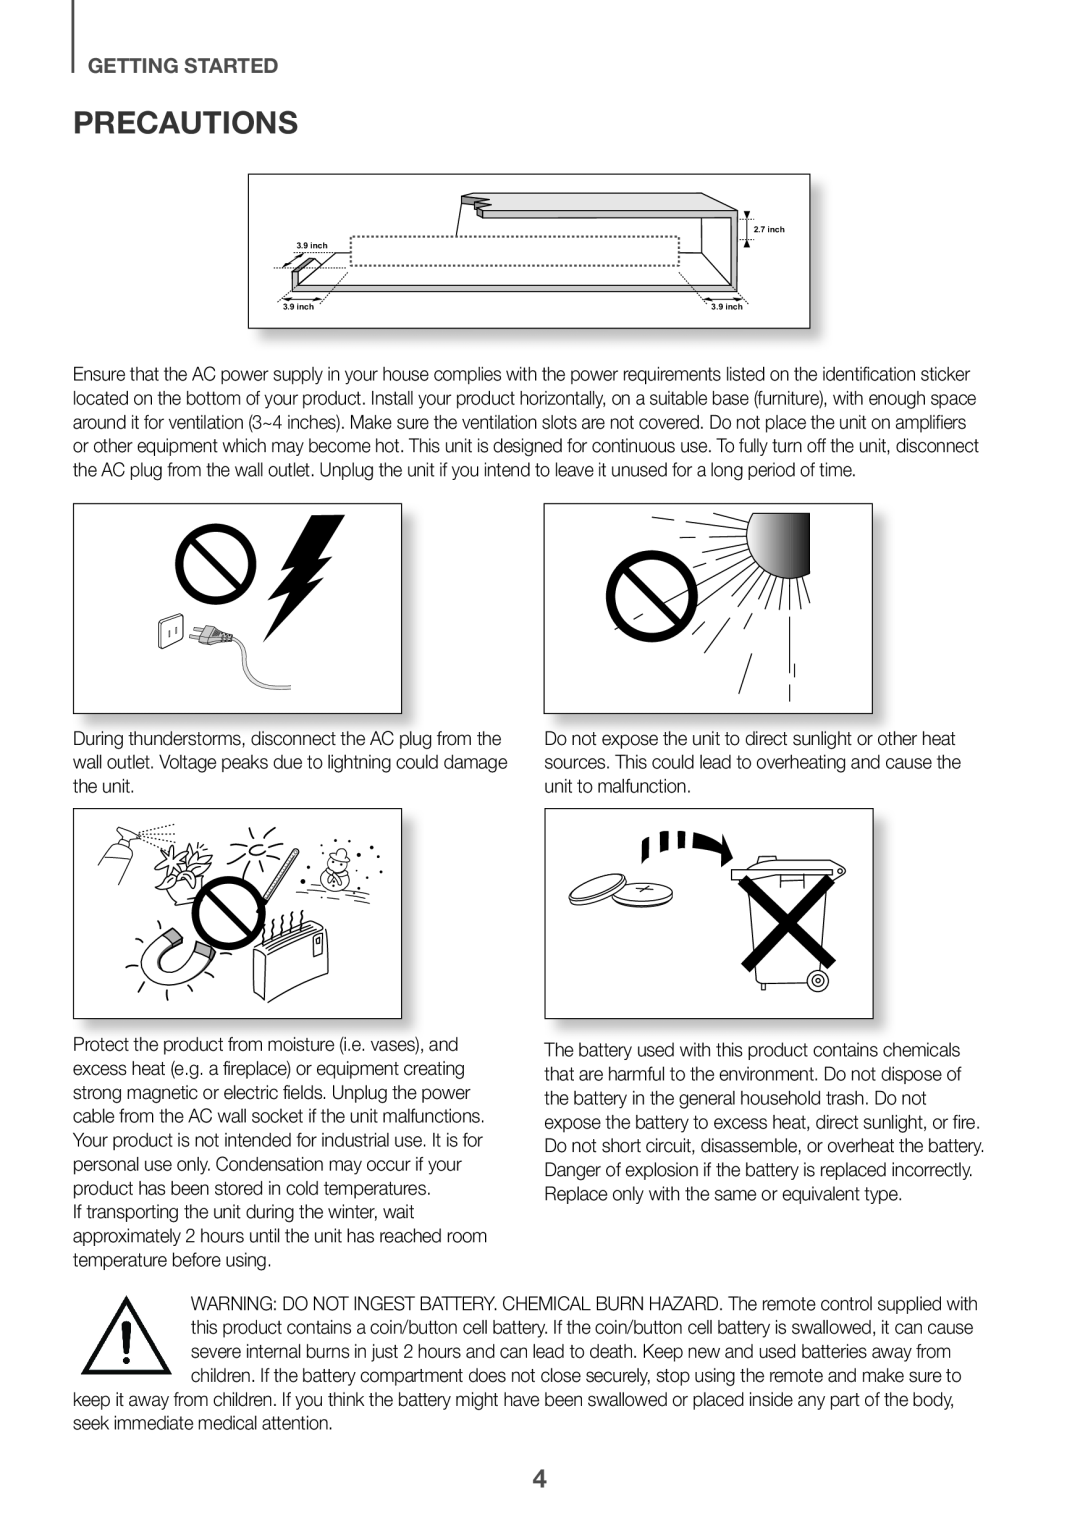 Precautions
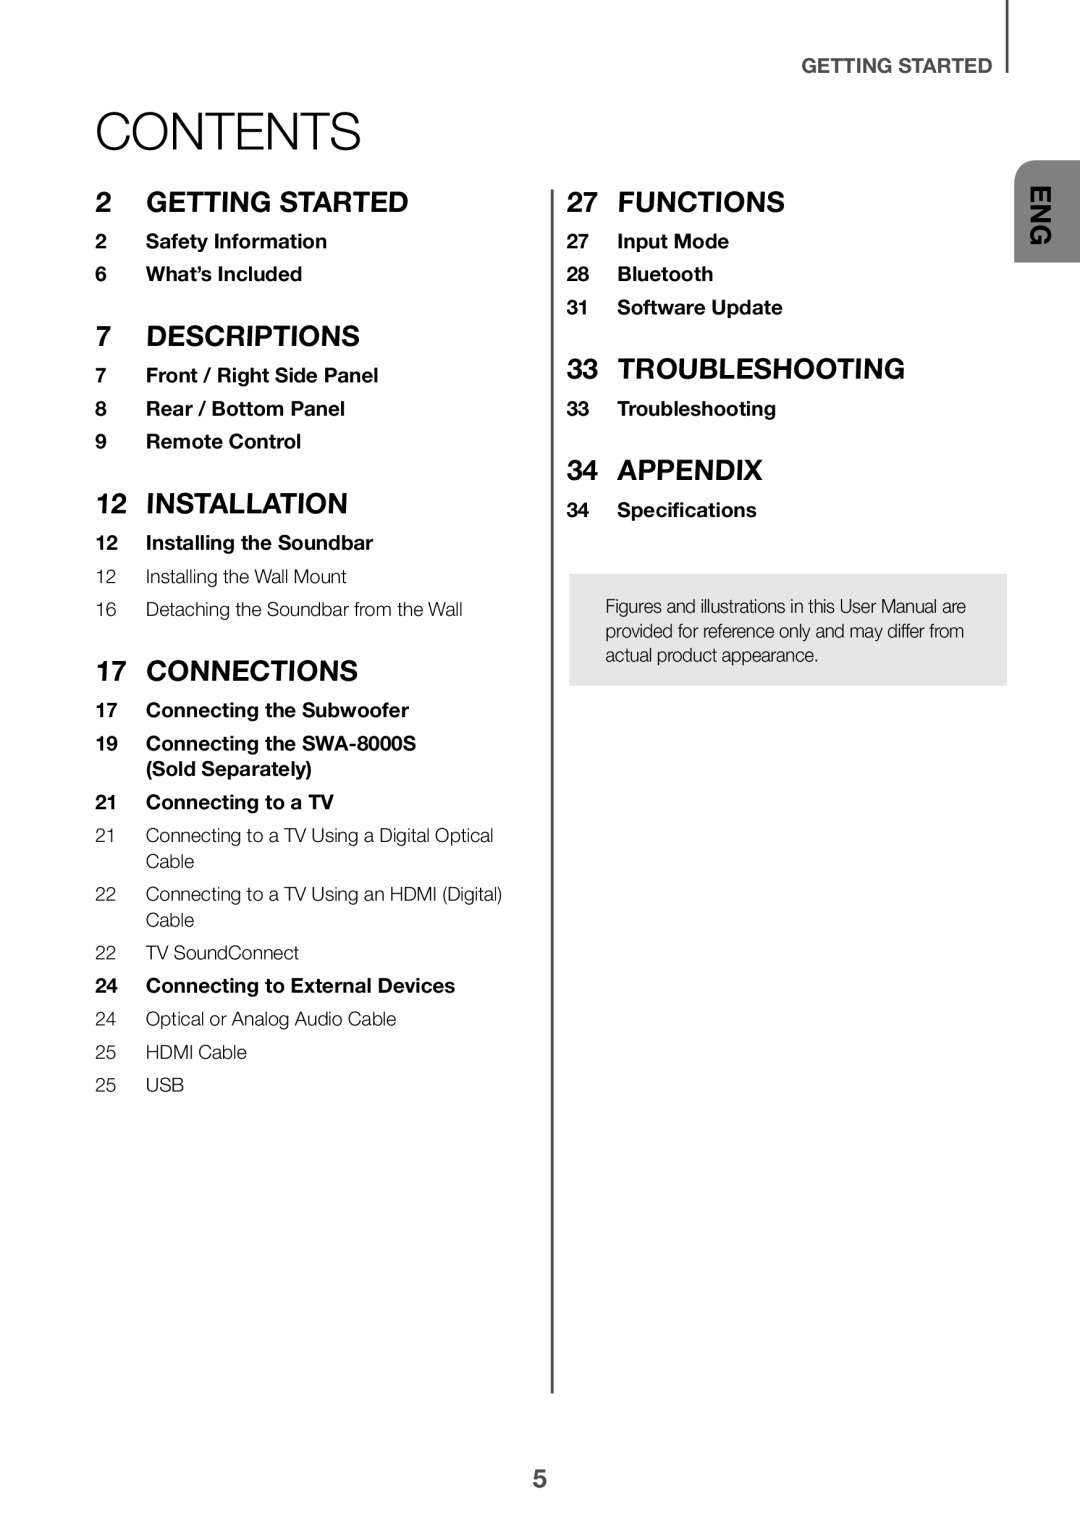 CONTENTS
2Safety Information
6What’s Included
7Front / Right Side Panel
8Rear / Bottom Panel
9Remote Control
12Installing the Soundbar
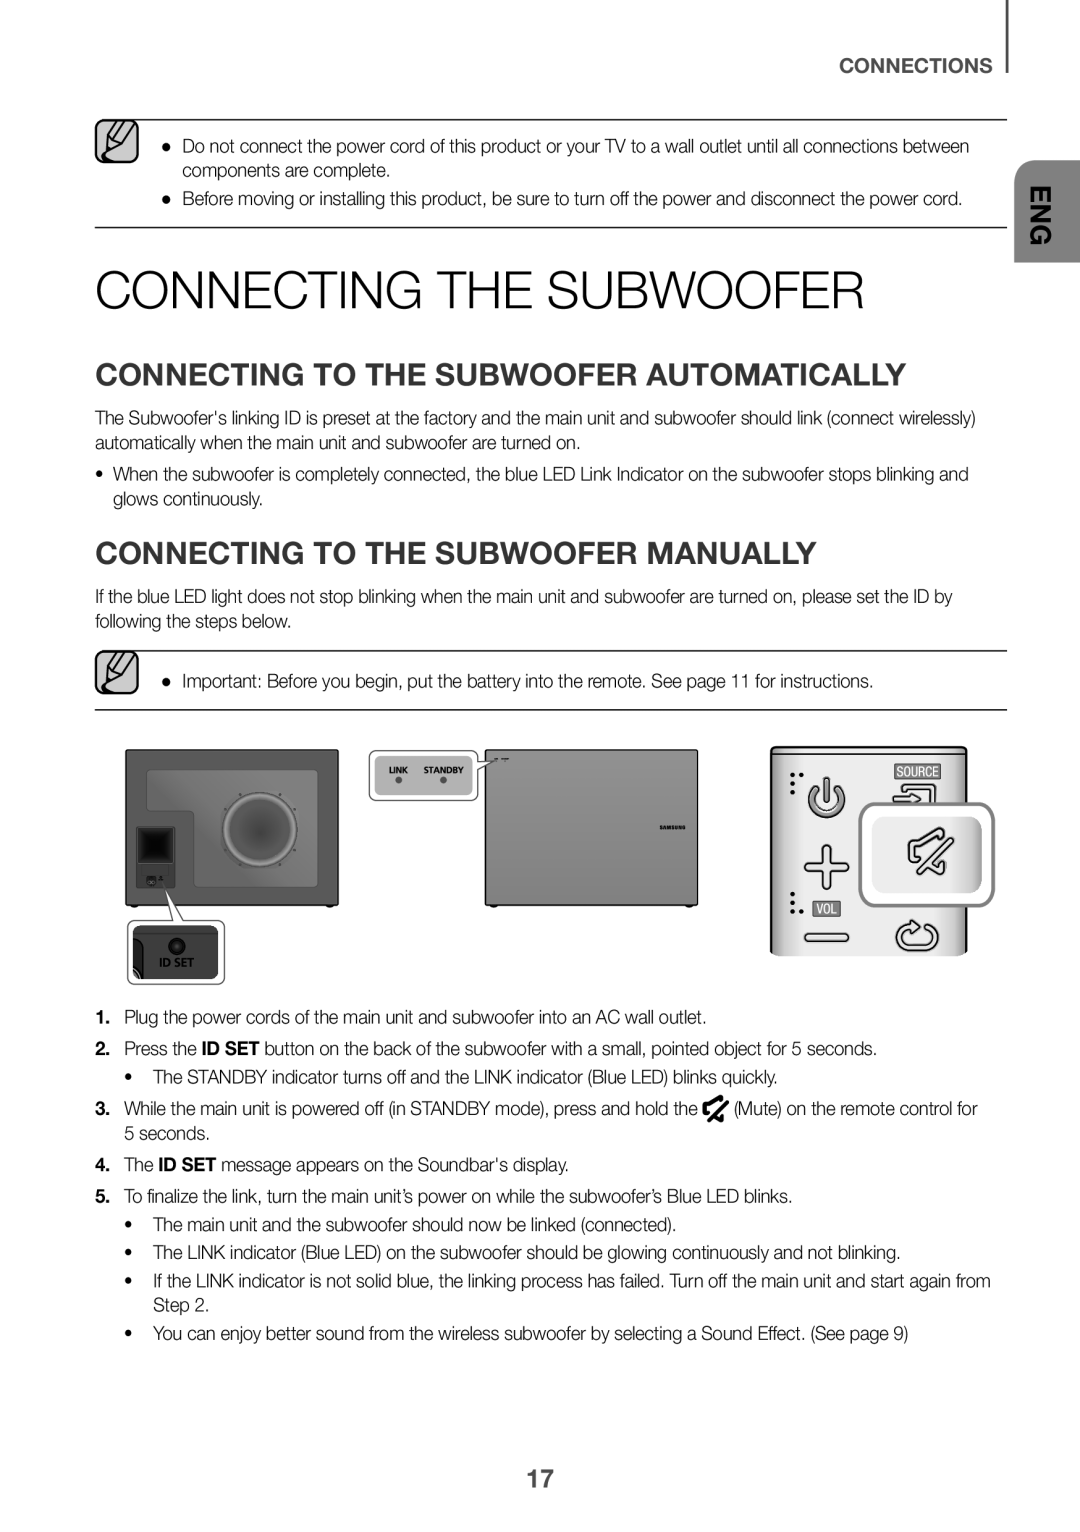
17 Connecting the Subwoofer
19Connecting the SWA-8000S(Sold Separately)
21 Connecting to a TV
24Connecting to External Devices
Input Mode
Bluetooth
Software Update
33Troubleshooting
34Specifications
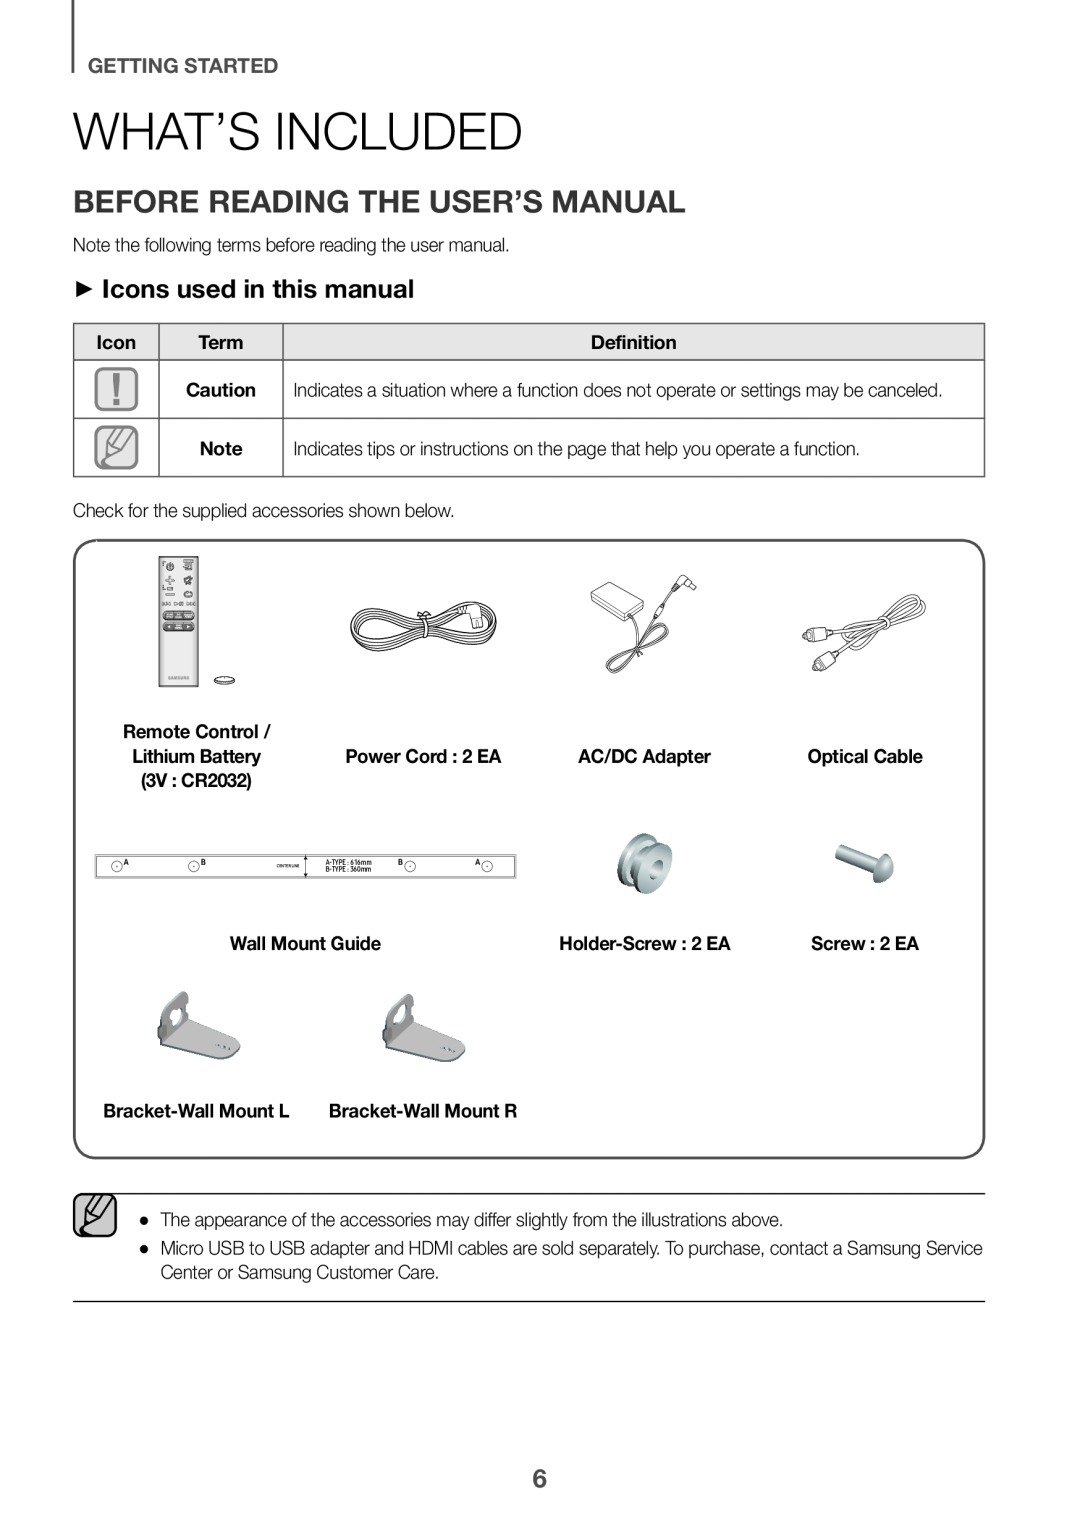 What’s Included
Before reading the User’s Manual
++Icons used in this manual
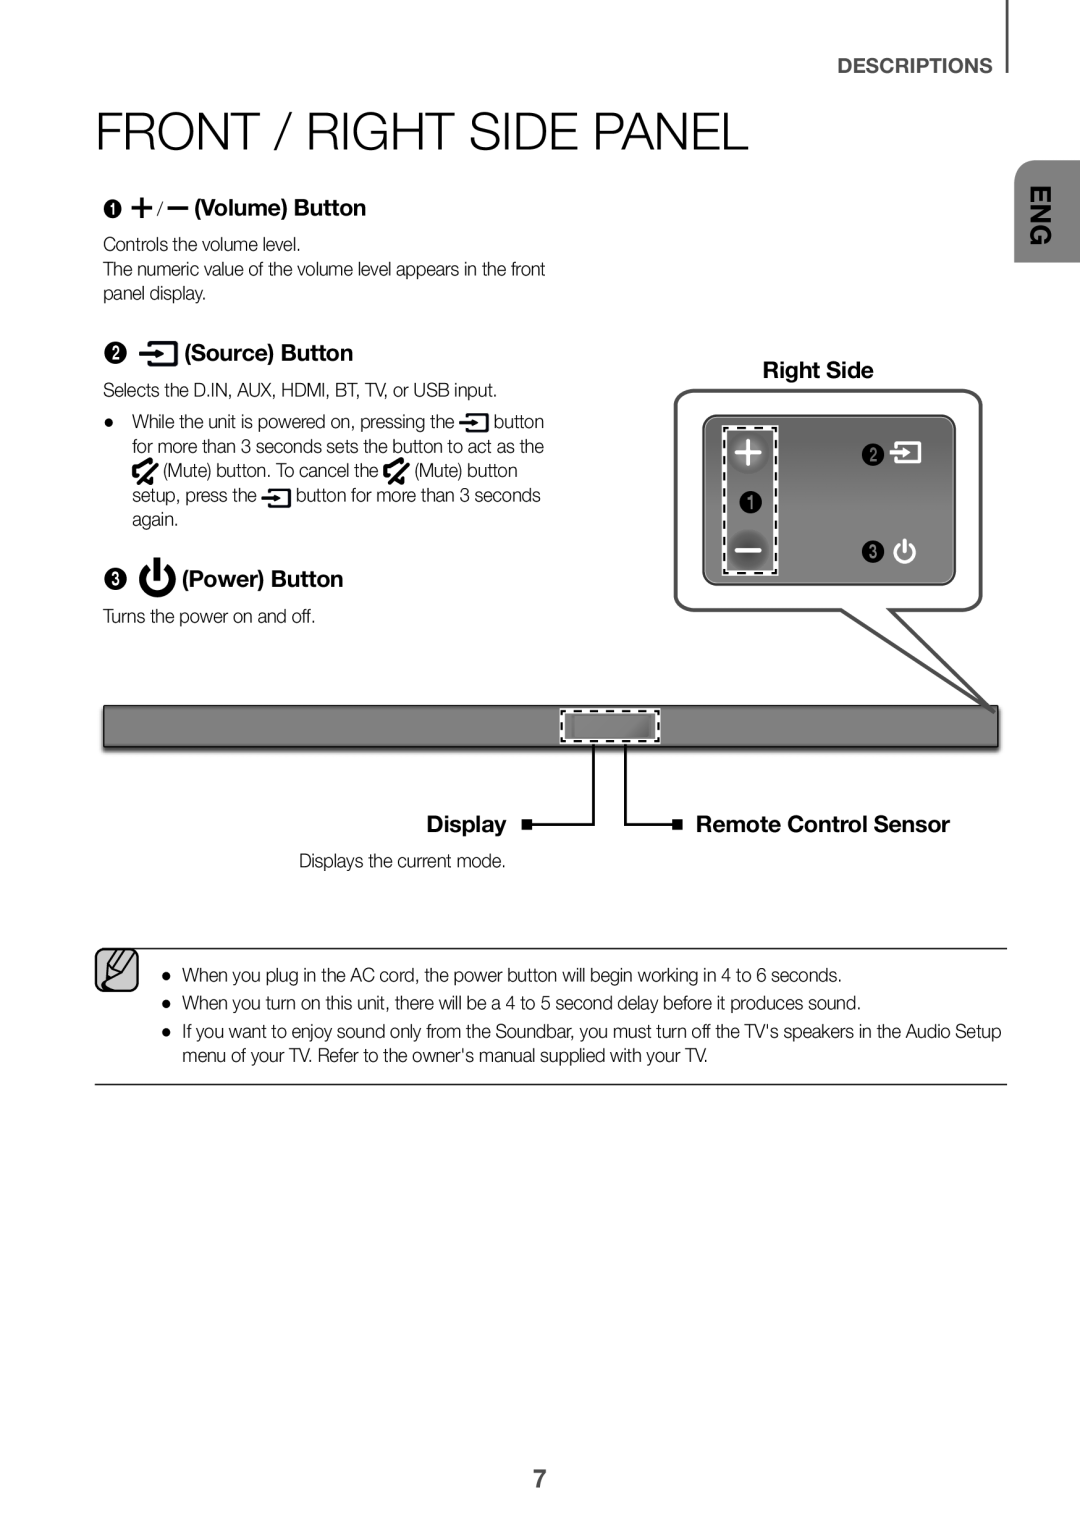 DESCRIPTIONS
Front / Right Side Panel
1 / (Volume) Button
2(Source) Button
3(Power) Button
Right Side
Display
Remote Control Sensor
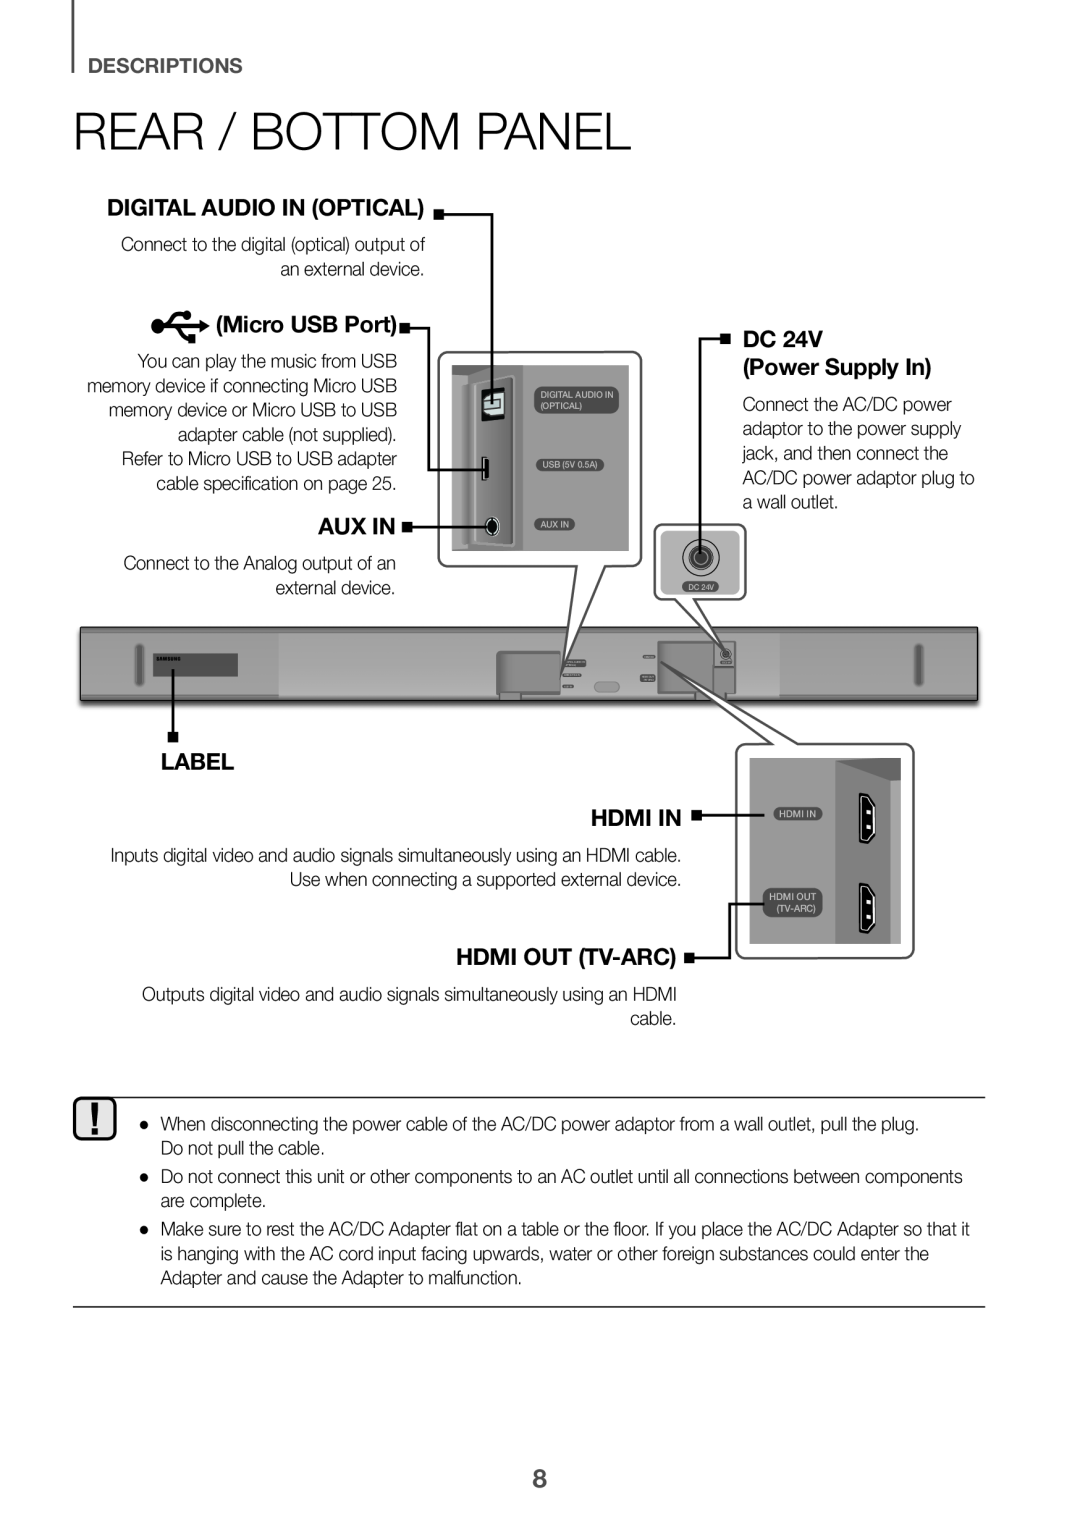 Rear / Bottom Panel
(Micro USB Port)
(Power Supply In)
LABEL
HDMI IN HDMI IN
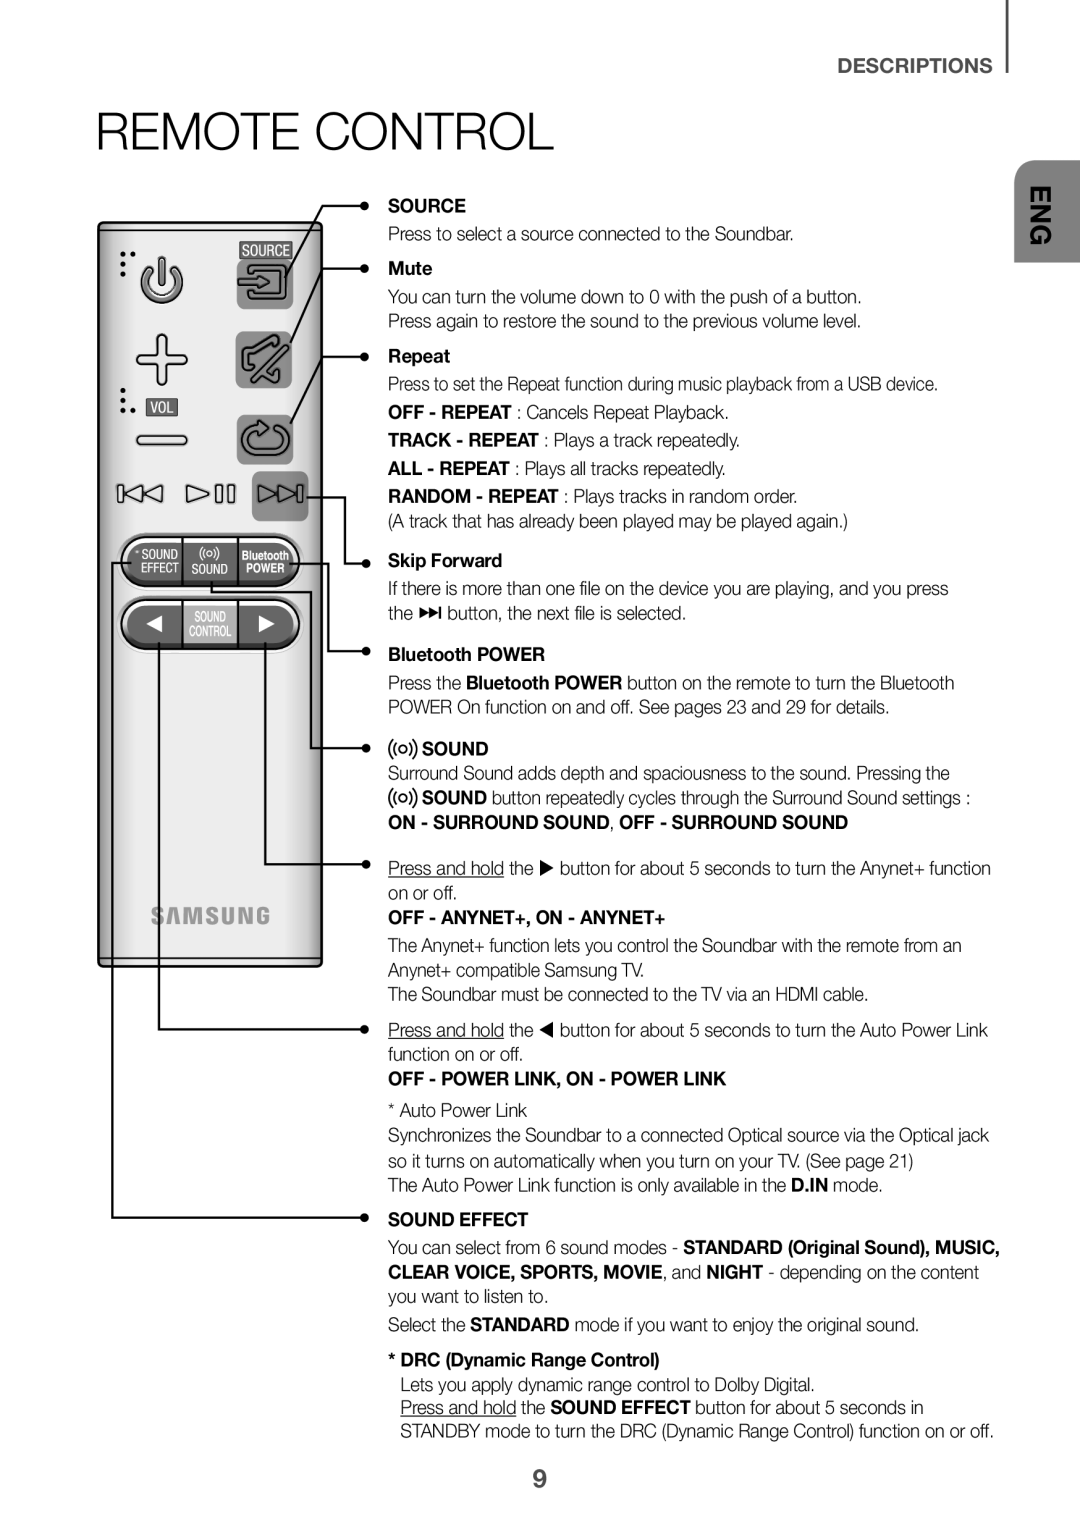 Remote Control
 DESCRIPTIONS
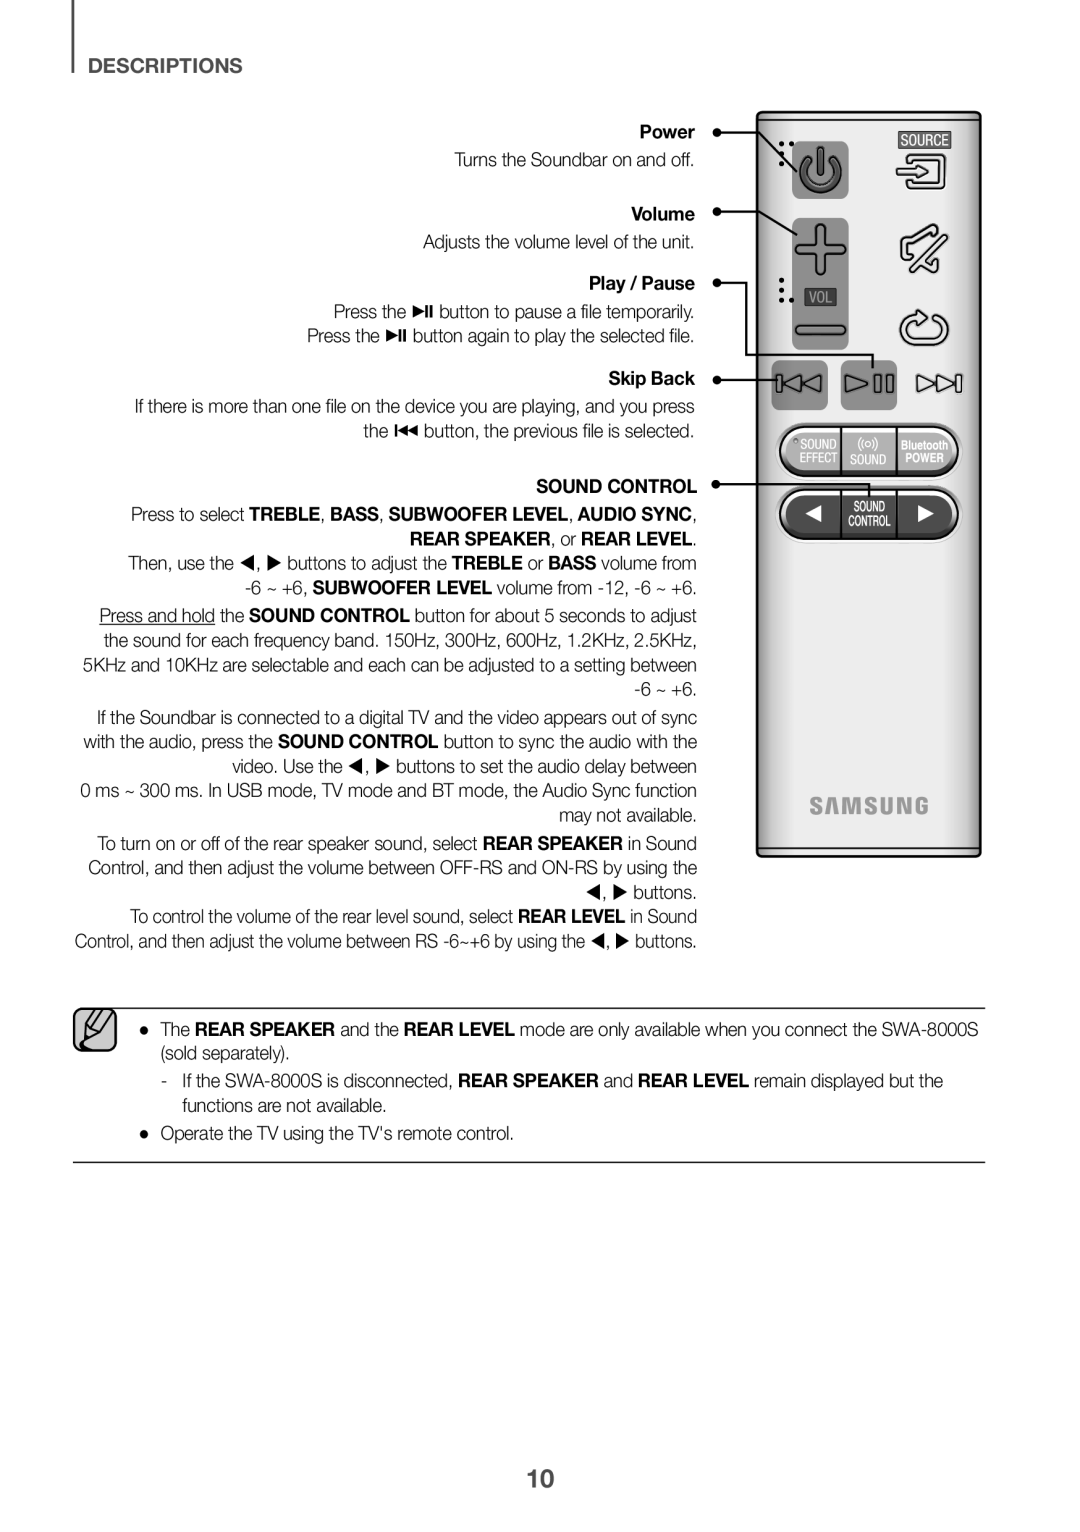
Power
Turns the Soundbar on and off
Volume
Adjusts the volume level of the unit
Play / Pause Press the p button to pause a file temporarily
Press the p button again to play the selected file
Skip Back
SOUND CONTROL
Press to select TREBLE, BASS, SUBWOOFER LEVEL, AUDIO SYNC
REAR SPEAKER, or REAR LEVEL
TREBLE
BASS
SUBWOOFER LEVEL
Press and hold
SOUND CONTROL
SOUND CONTROL
REAR SPEAKER
To control the volume of the rear level sound, select REAR LEVEL in Sound
REAR LEVEL
Control, and then adjust the volume between RS -6~+6by using the , buttons
REAR SPEAKER
REAR LEVEL
REAR SPEAKER
REAR LEVEL
●● Operate the TV using the TV's remote control
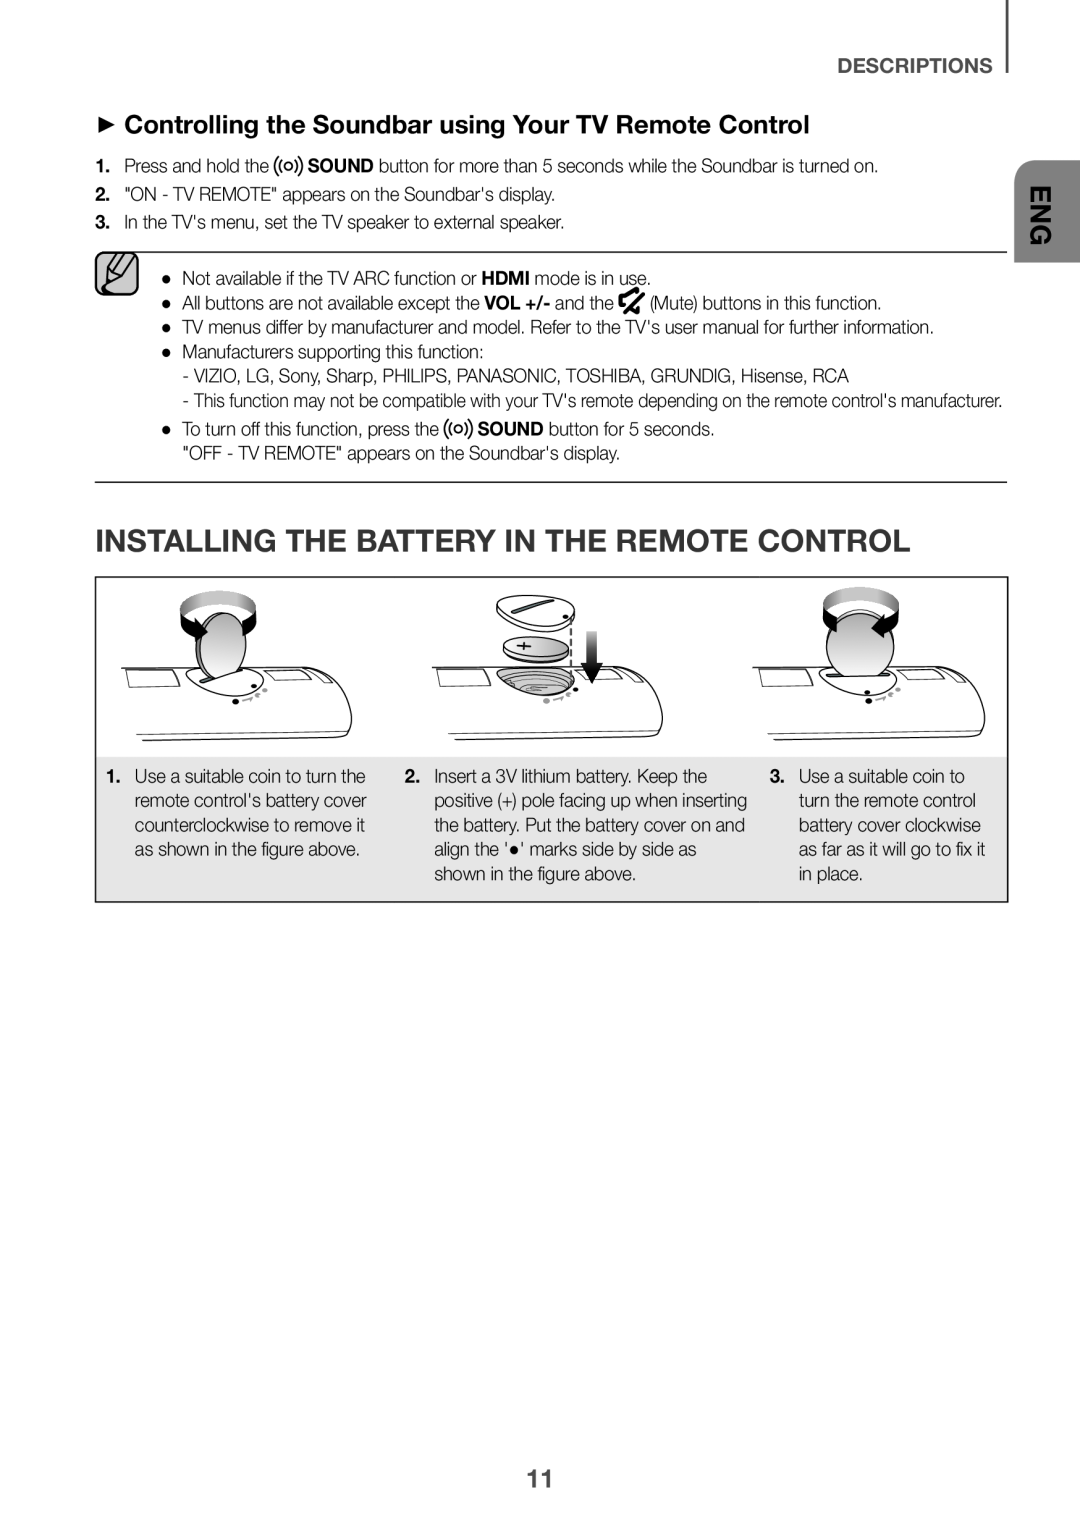 ++Controlling the Soundbar using Your TV Remote Control
Installing the Battery in the Remote Control
 INSTALLATION
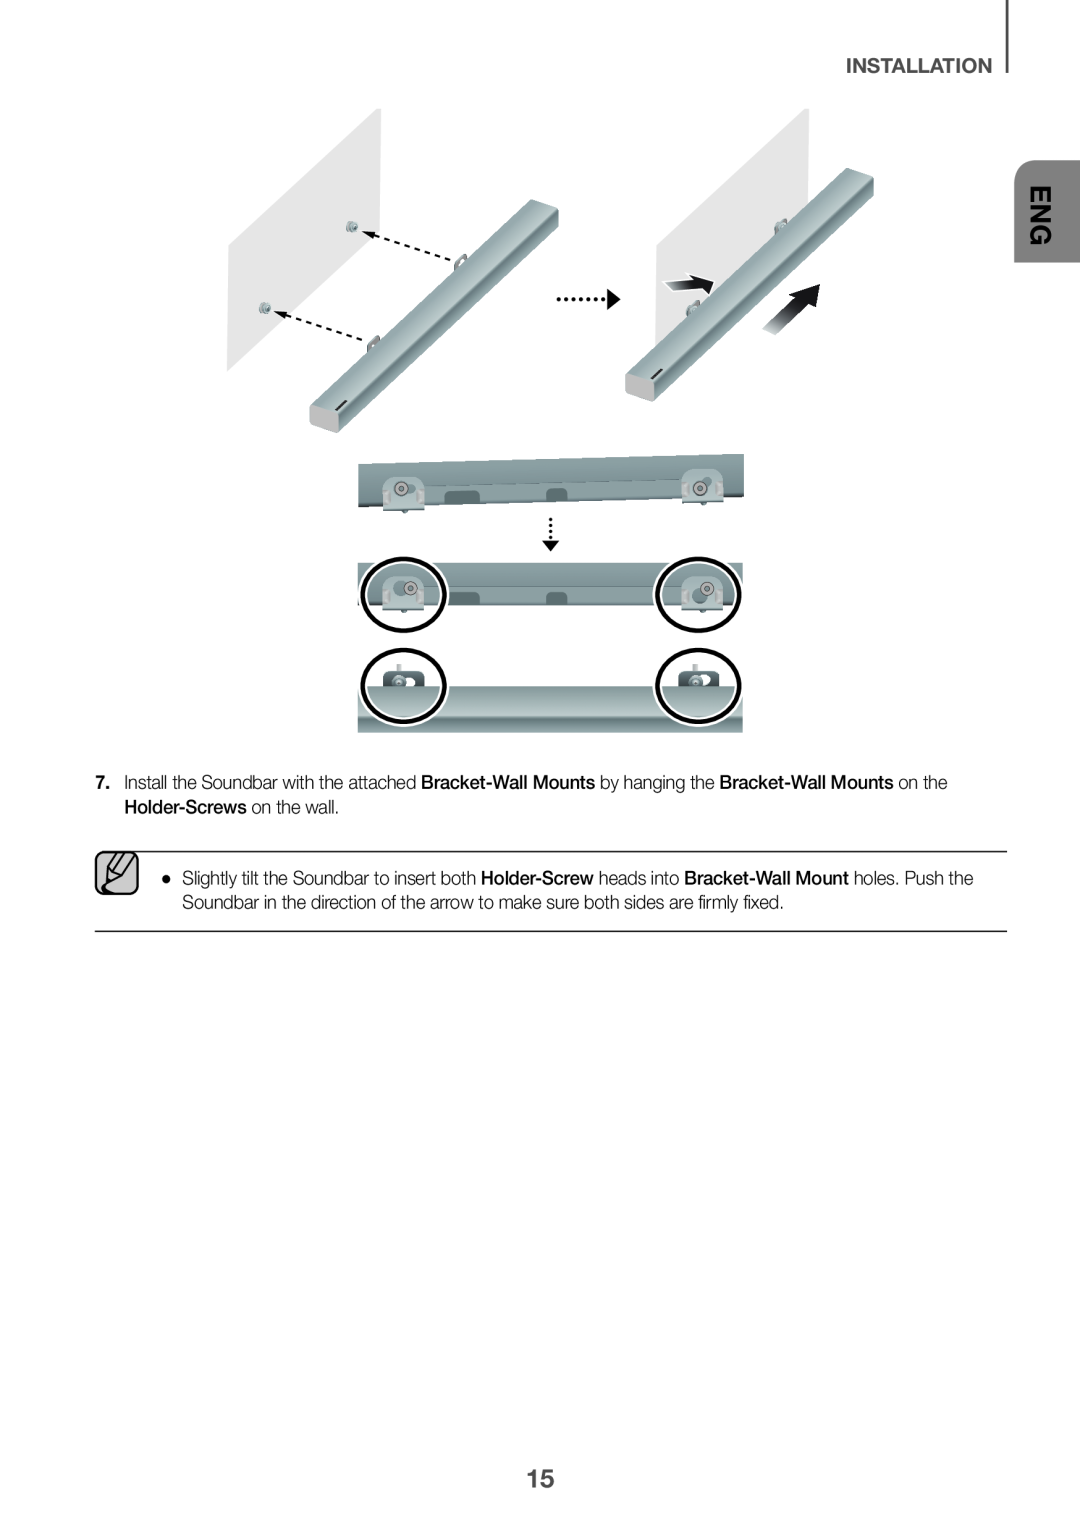
Installing the Soundbar
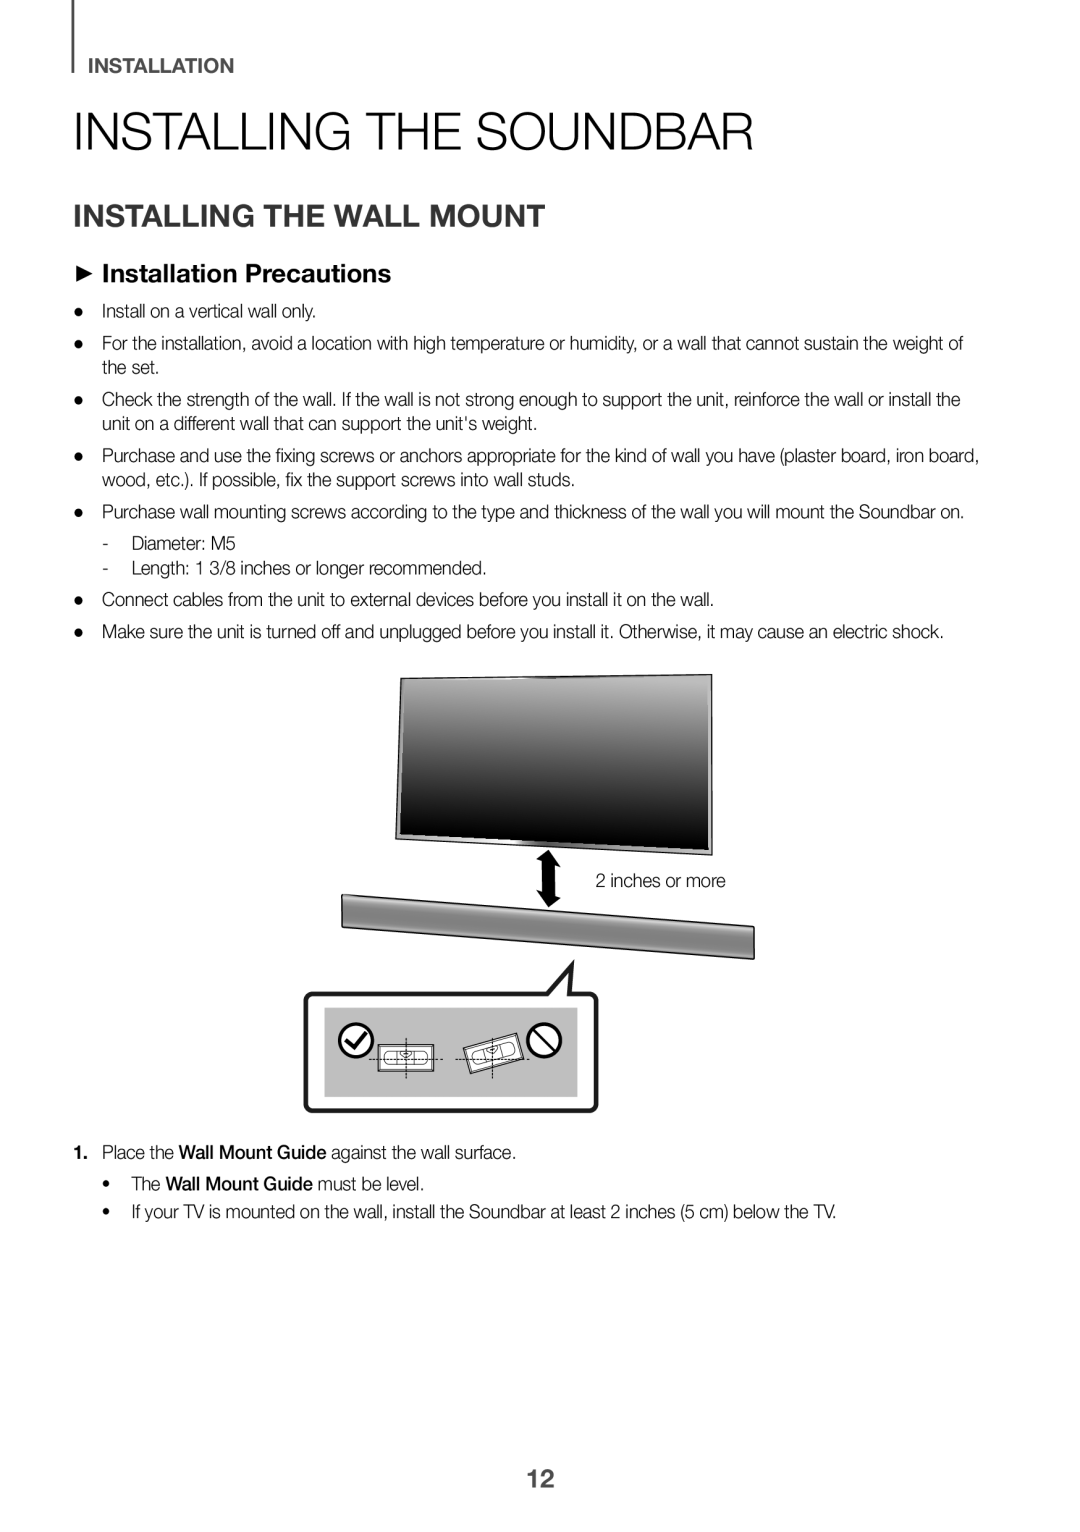
Installing the Wall Mount
++Installation Precautions
 INSTALLATION
ENG
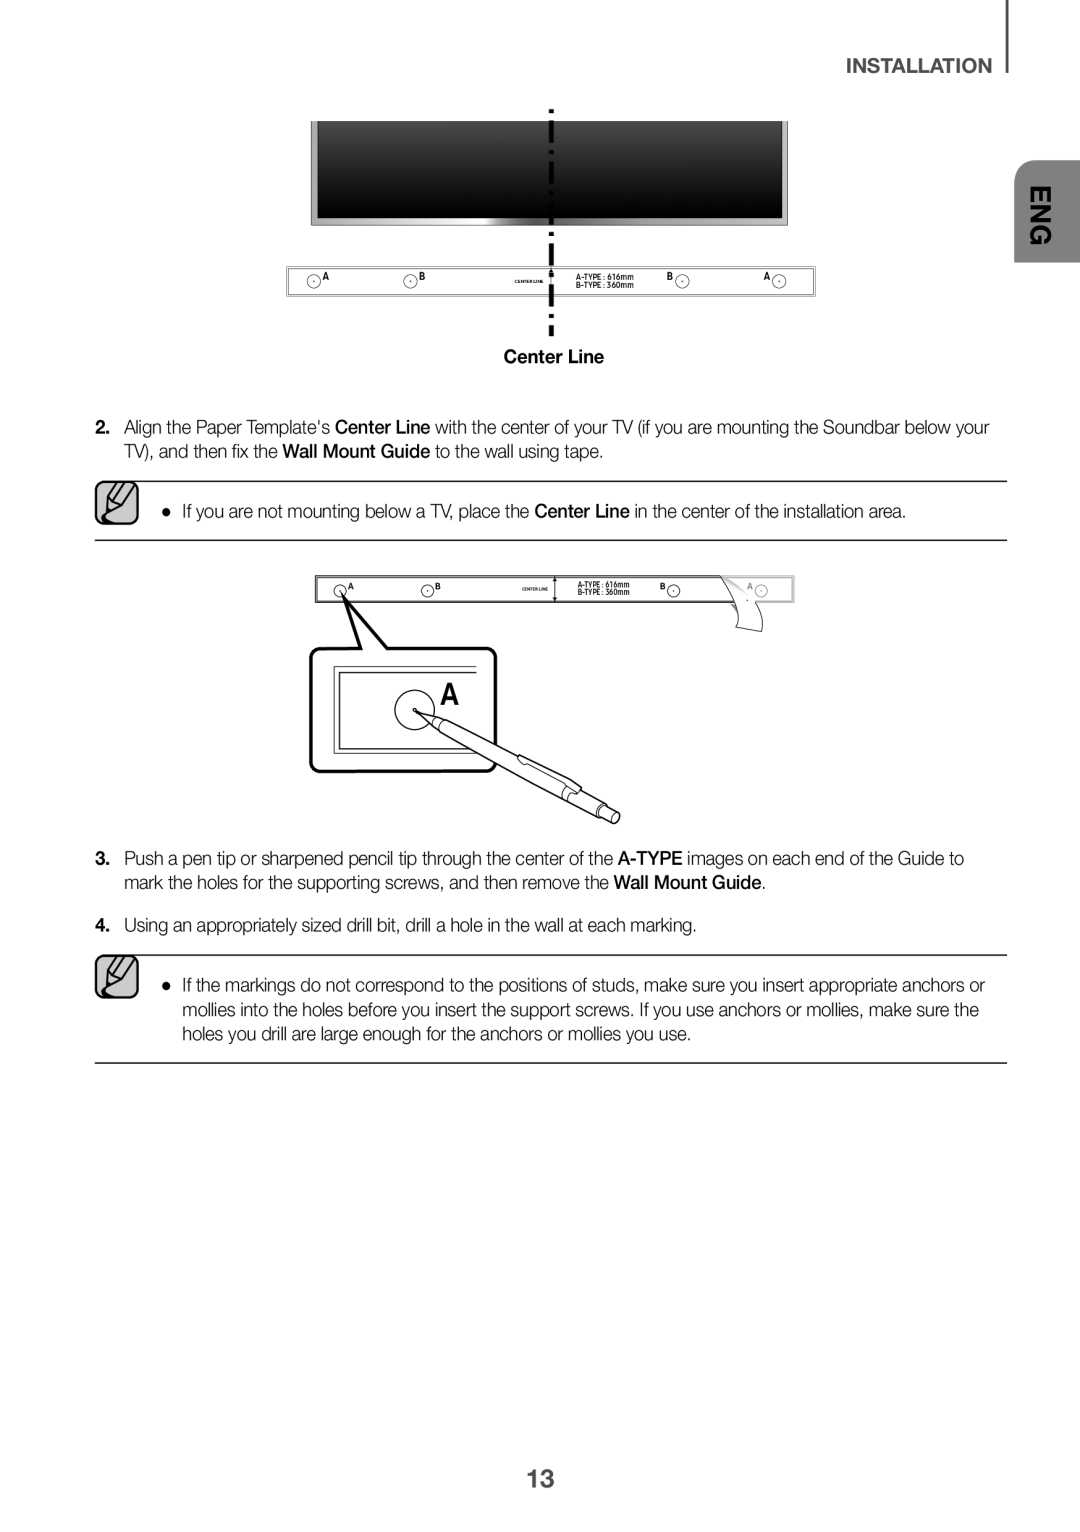
Center Line
Push a pen tip or sharpened pencil tip through the center of the
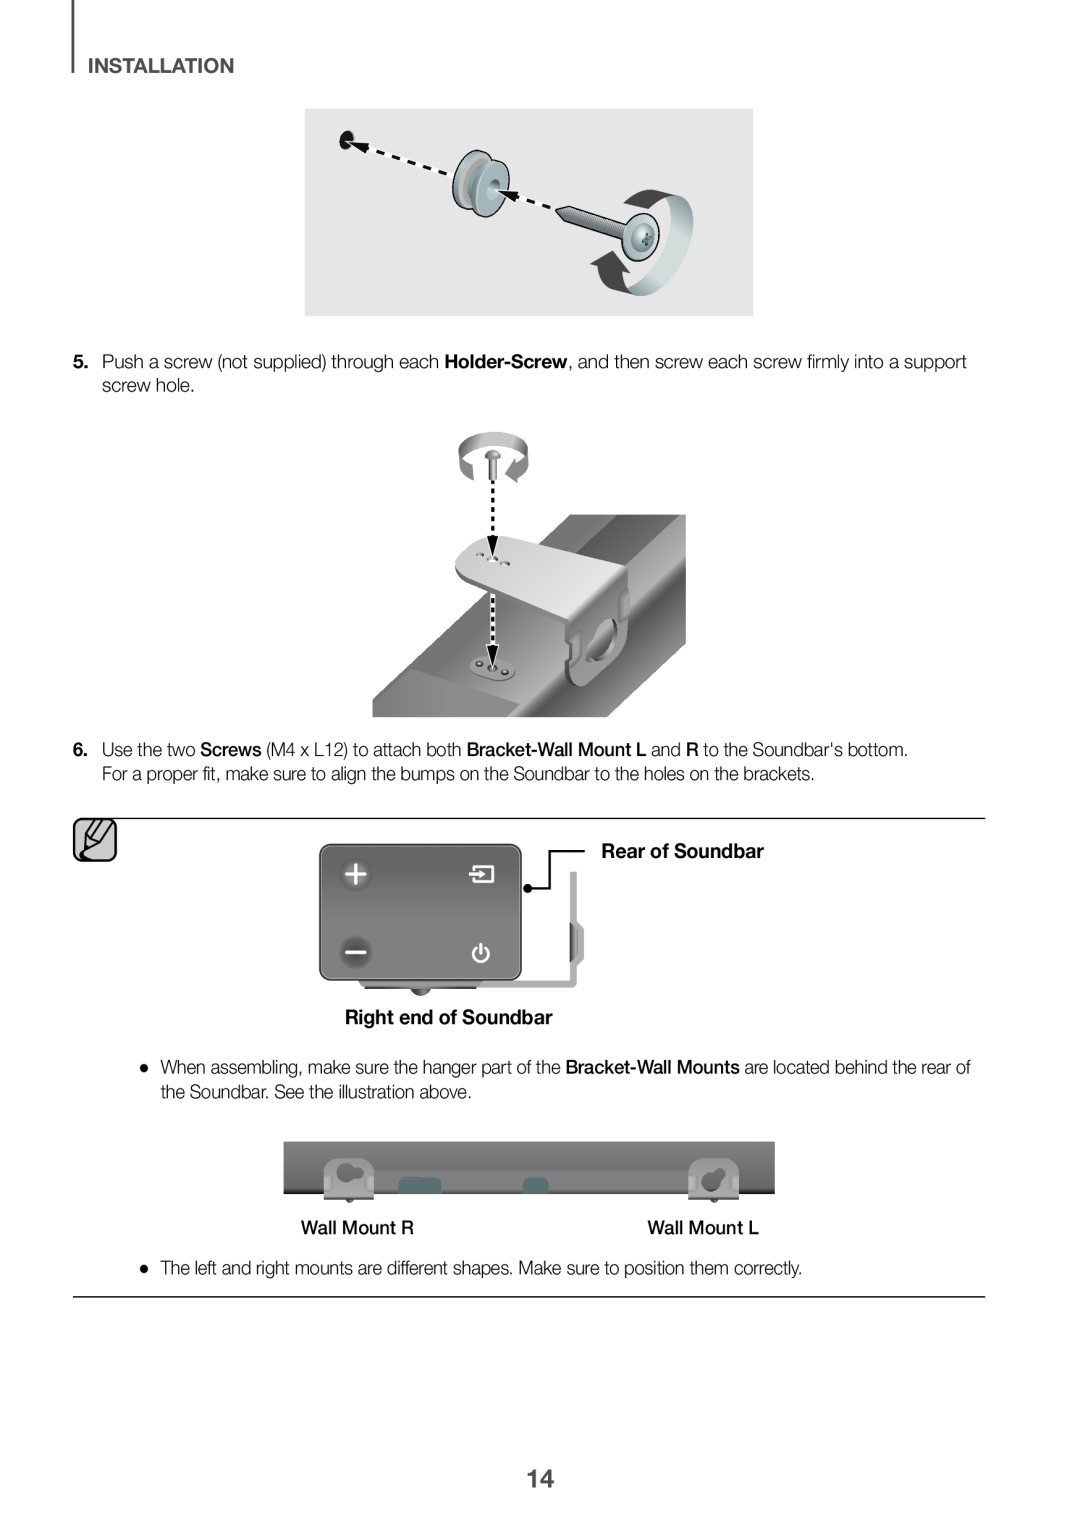 Rear of Soundbar
Right end of Soundbar
 INSTALLATION
ENG
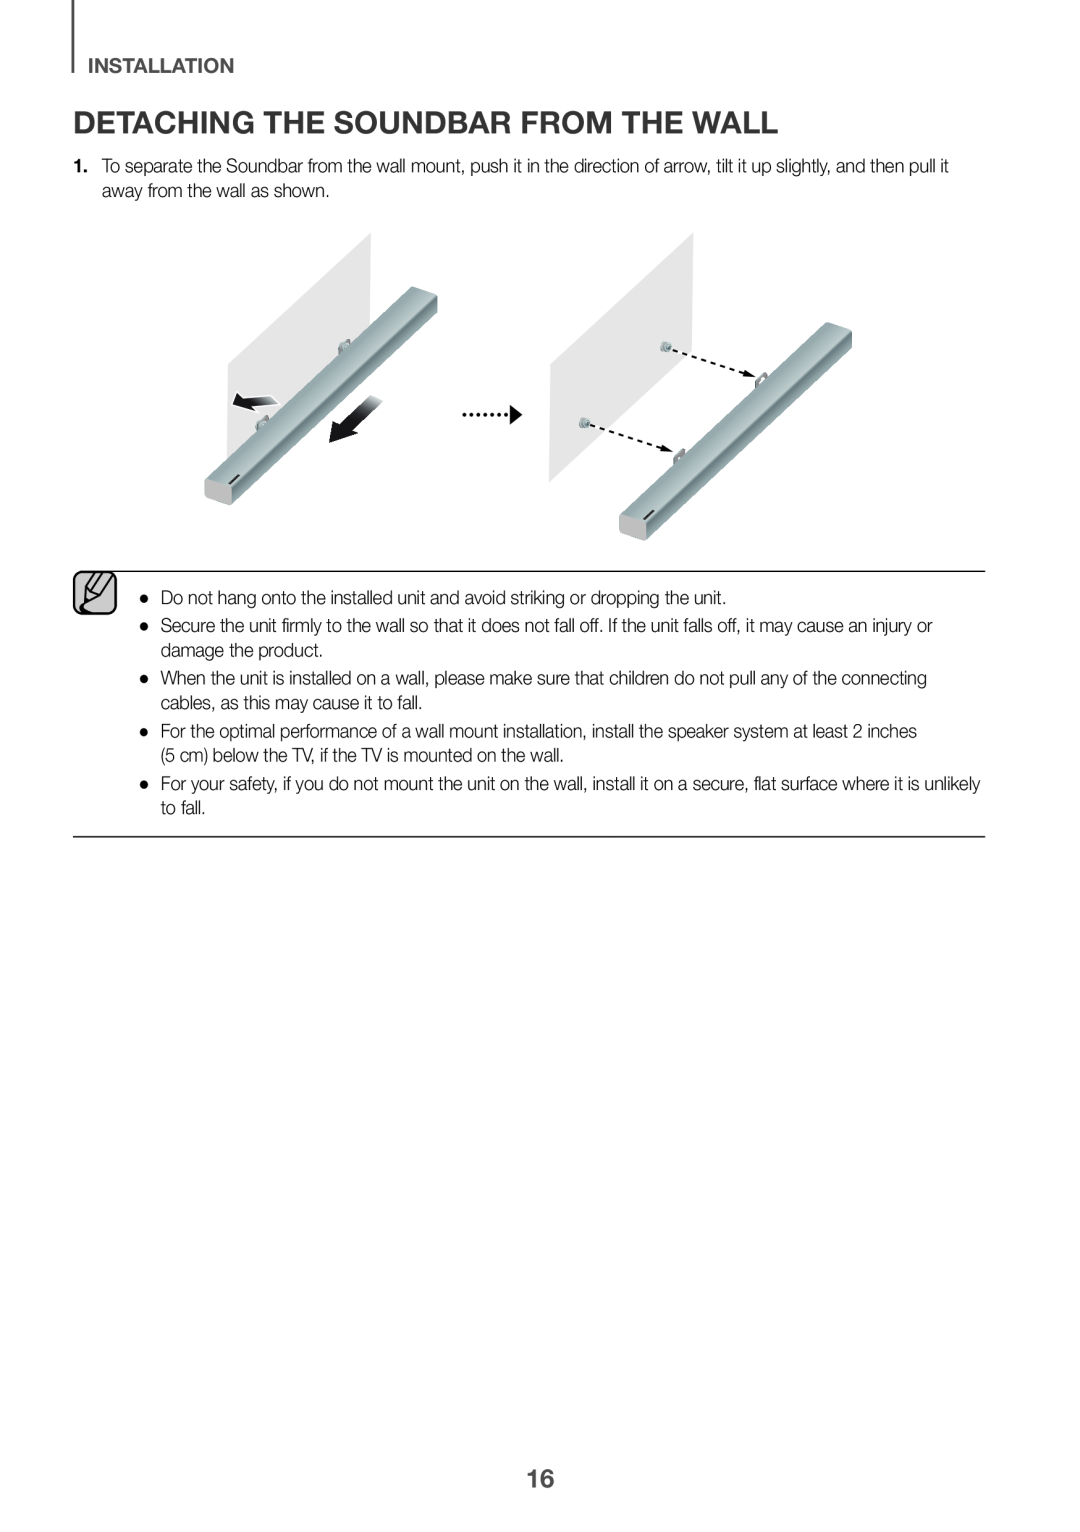 Detaching the Soundbar from the Wall
 CONNECTIONS
Connecting the Subwoofer
Connecting to the Subwoofer Automatically
Connecting to the Subwoofer Manually
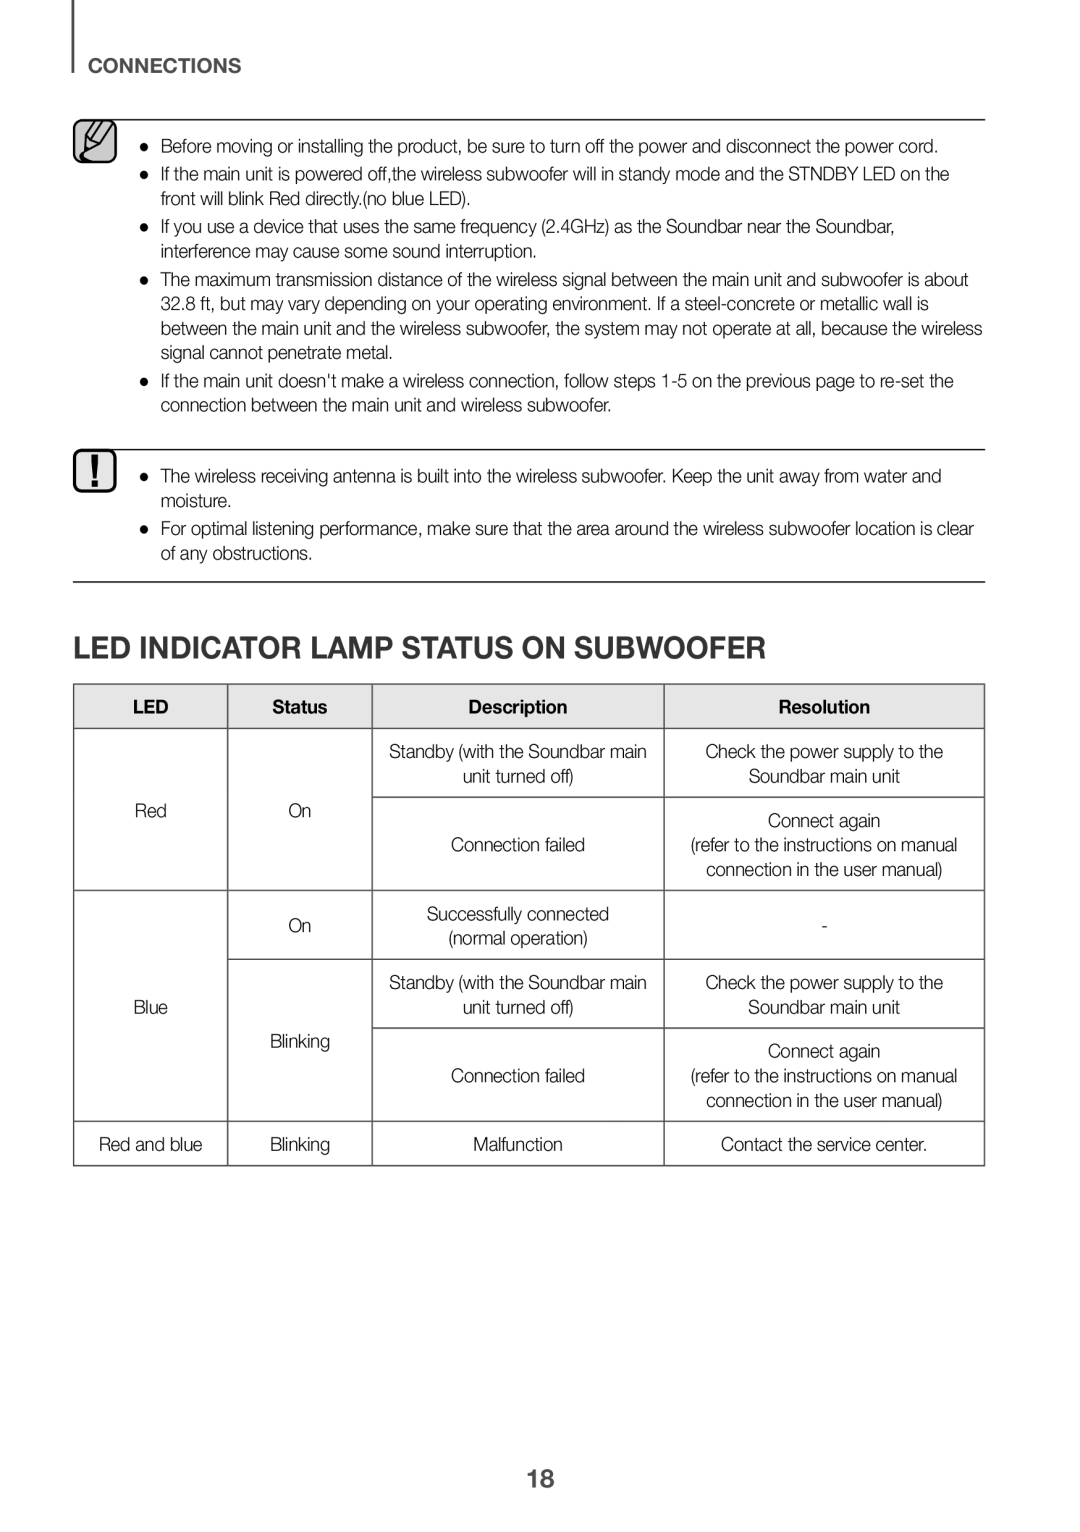 LED indicator lamp status on subwoofer
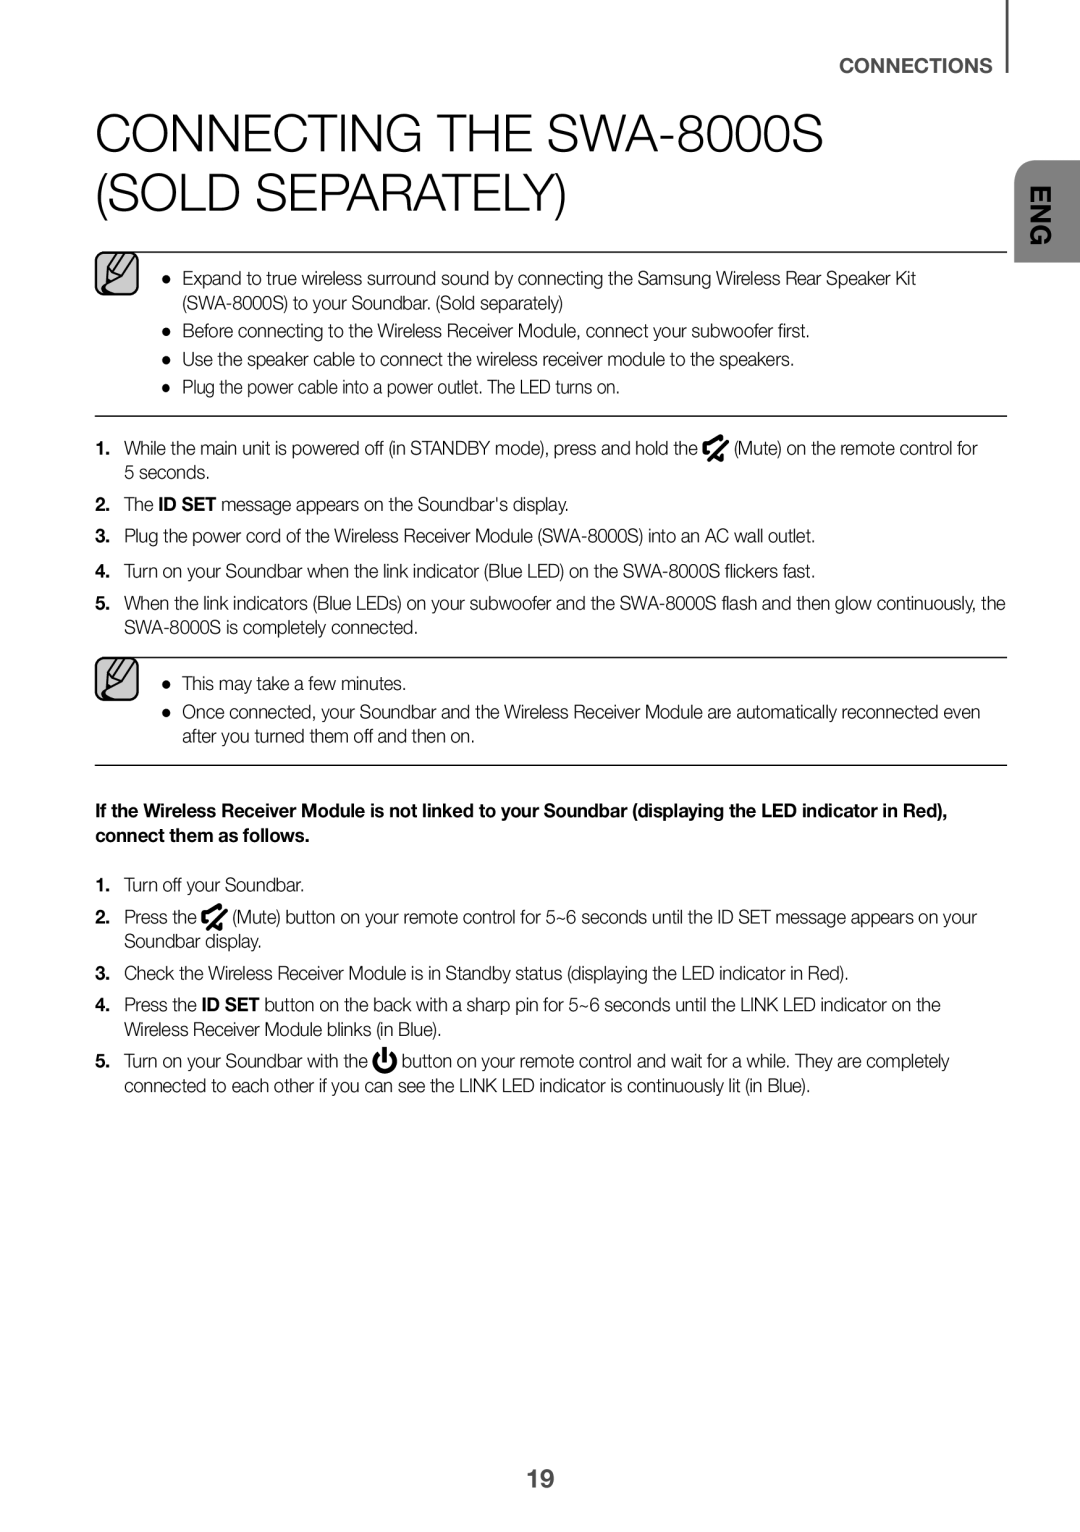 Connecting the SWA-8000S(Sold Separately)
 Connecting the Surround Speakers (Sold Separately)
 Connecting to a TV
Connecting to a TV Using a Digital Optical Cable
++Auto Power Link
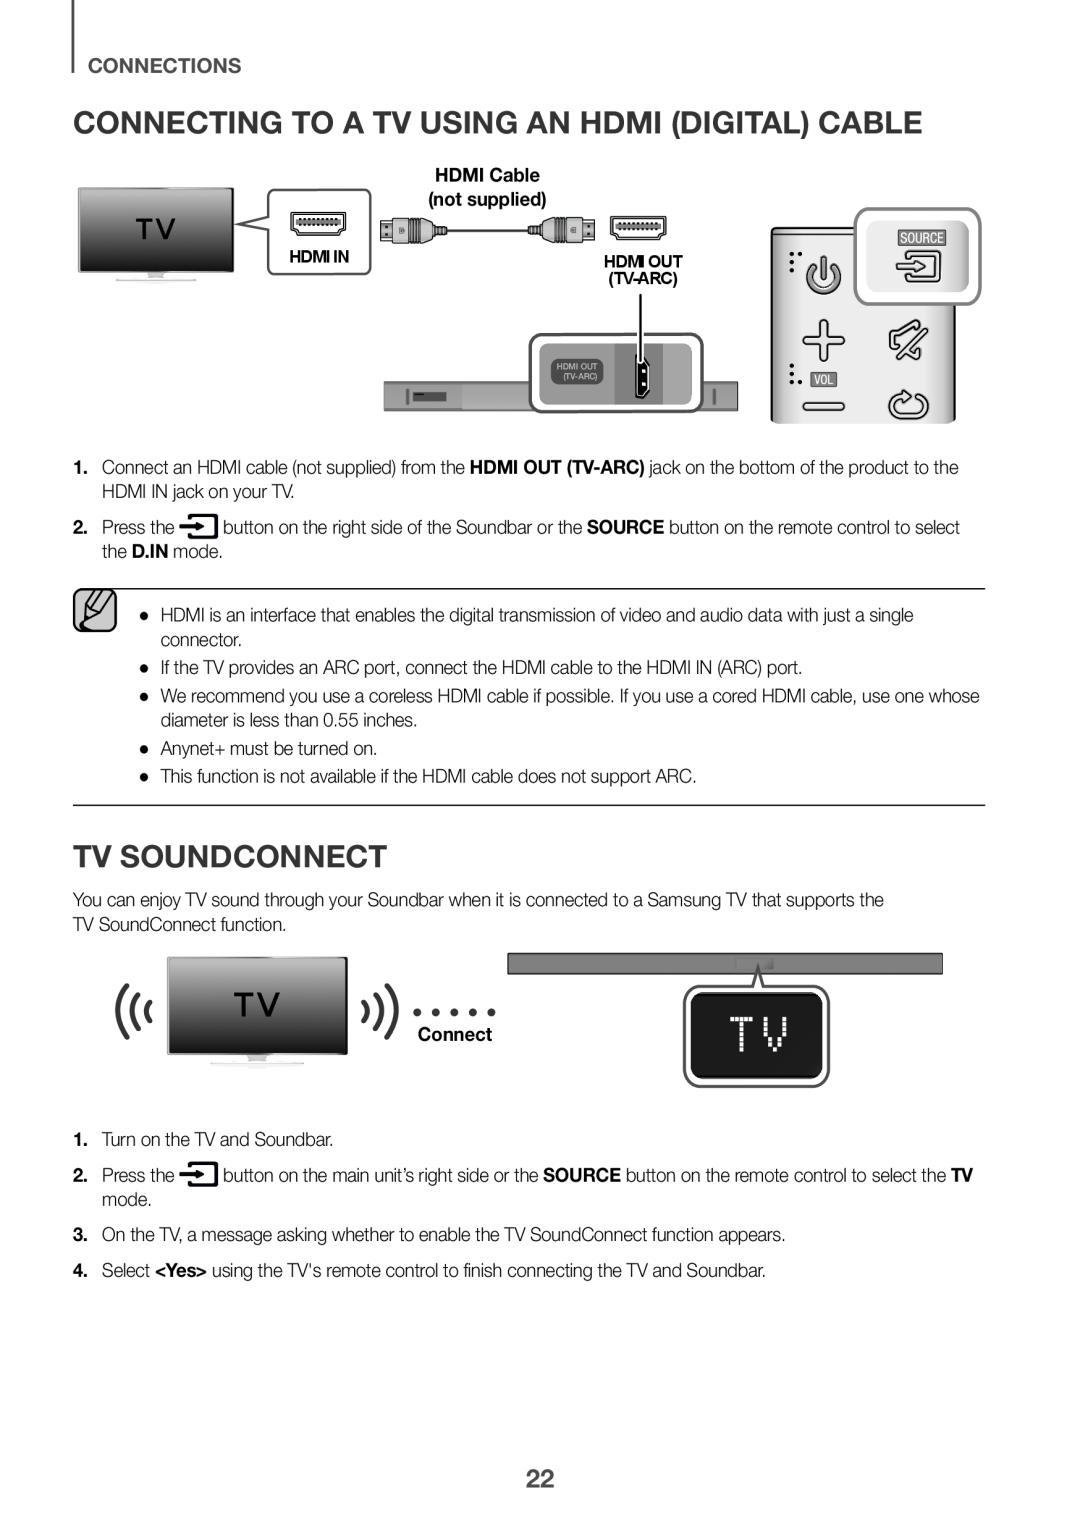 Connecting to a TV Using an HDMI (Digital) Cable
 ++Using the Bluetooth POWER On function
 Connecting to External Devices
Optical or Analog Audio Cable
++AUX Cable
++Optical Cable
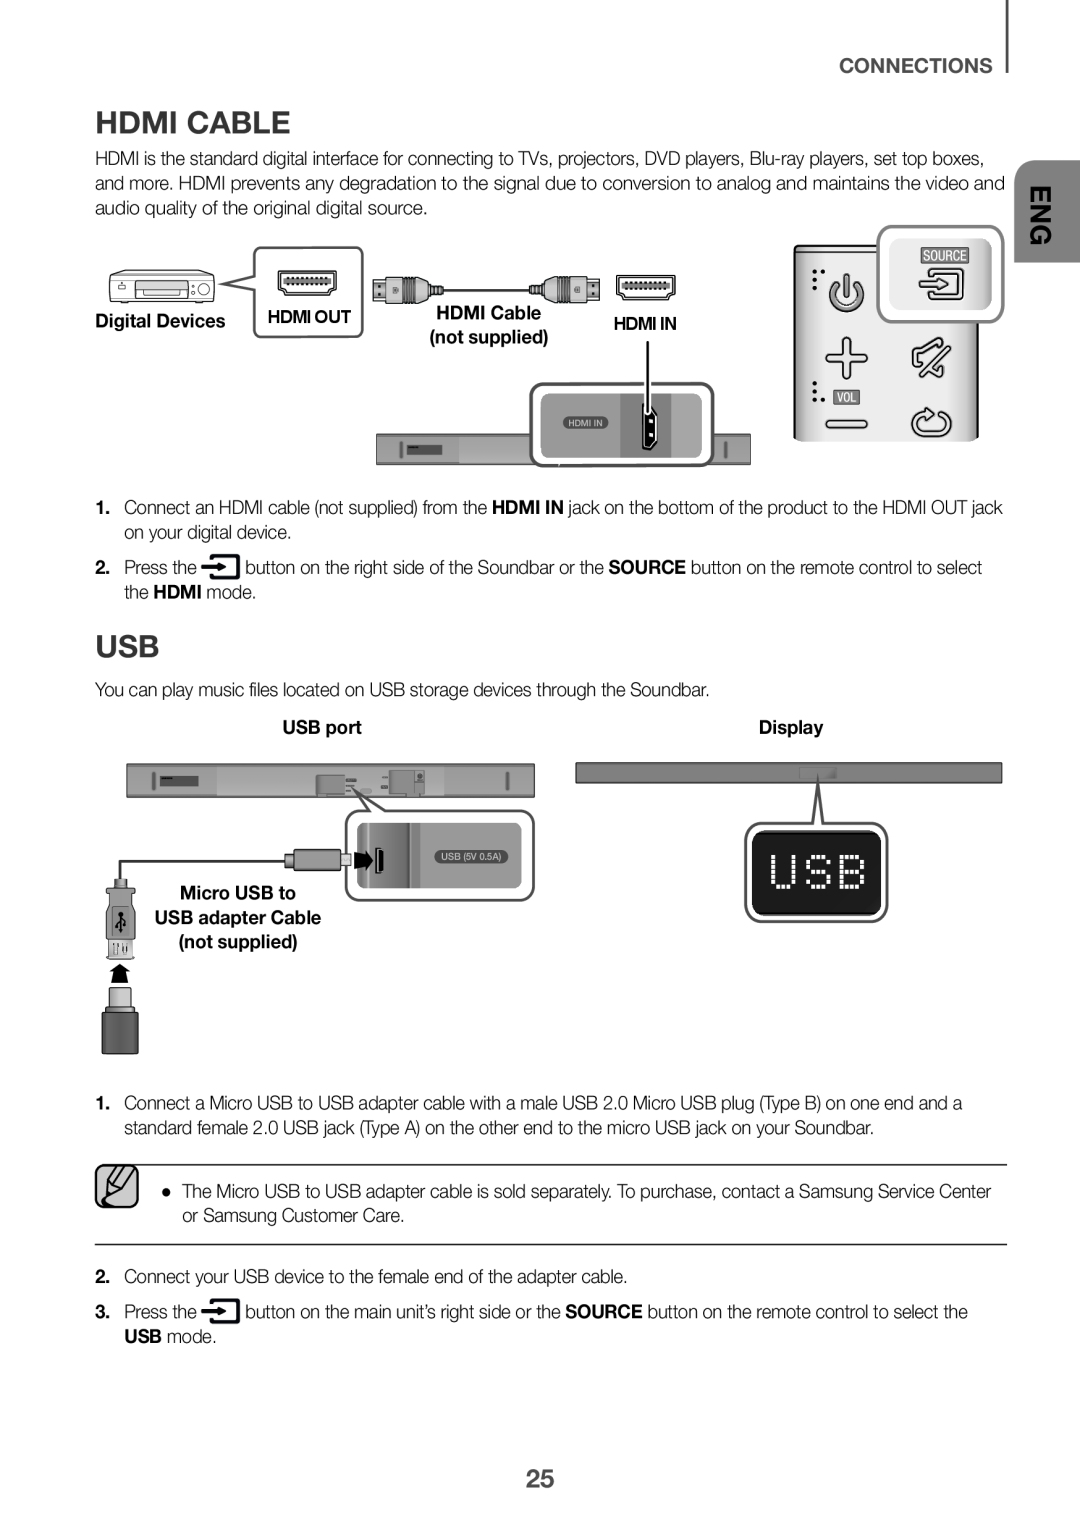 HDMI Cable
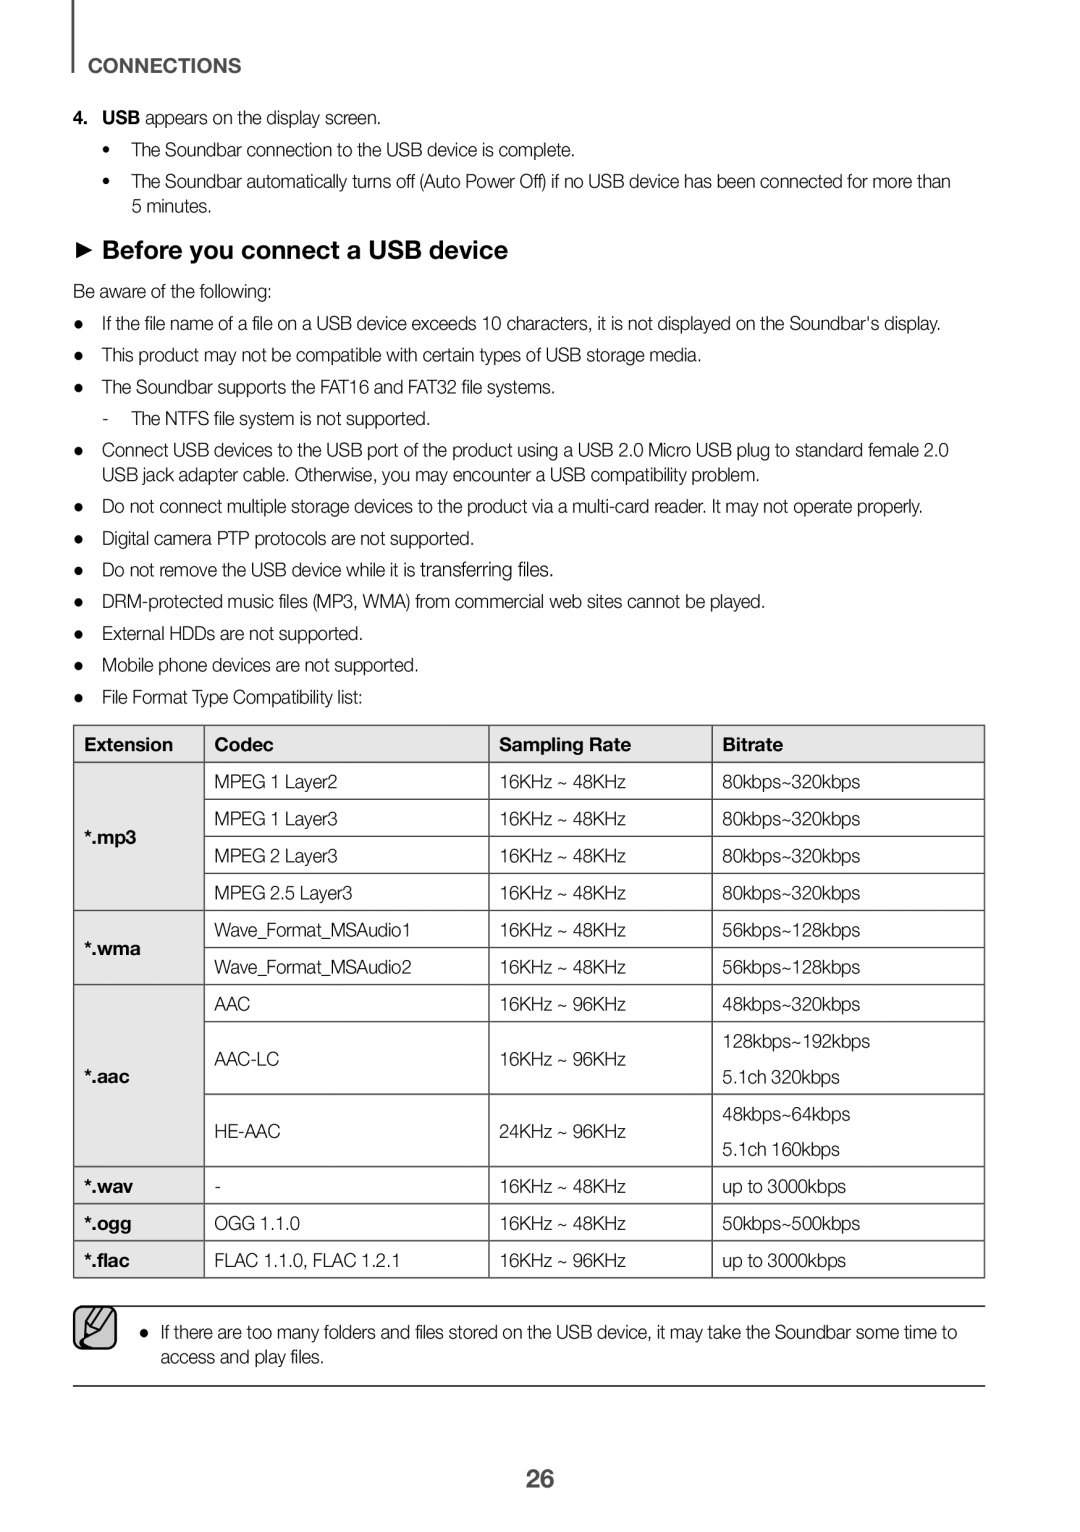 ++Before you connect a USB device
transferring files
 FUNCTIONS
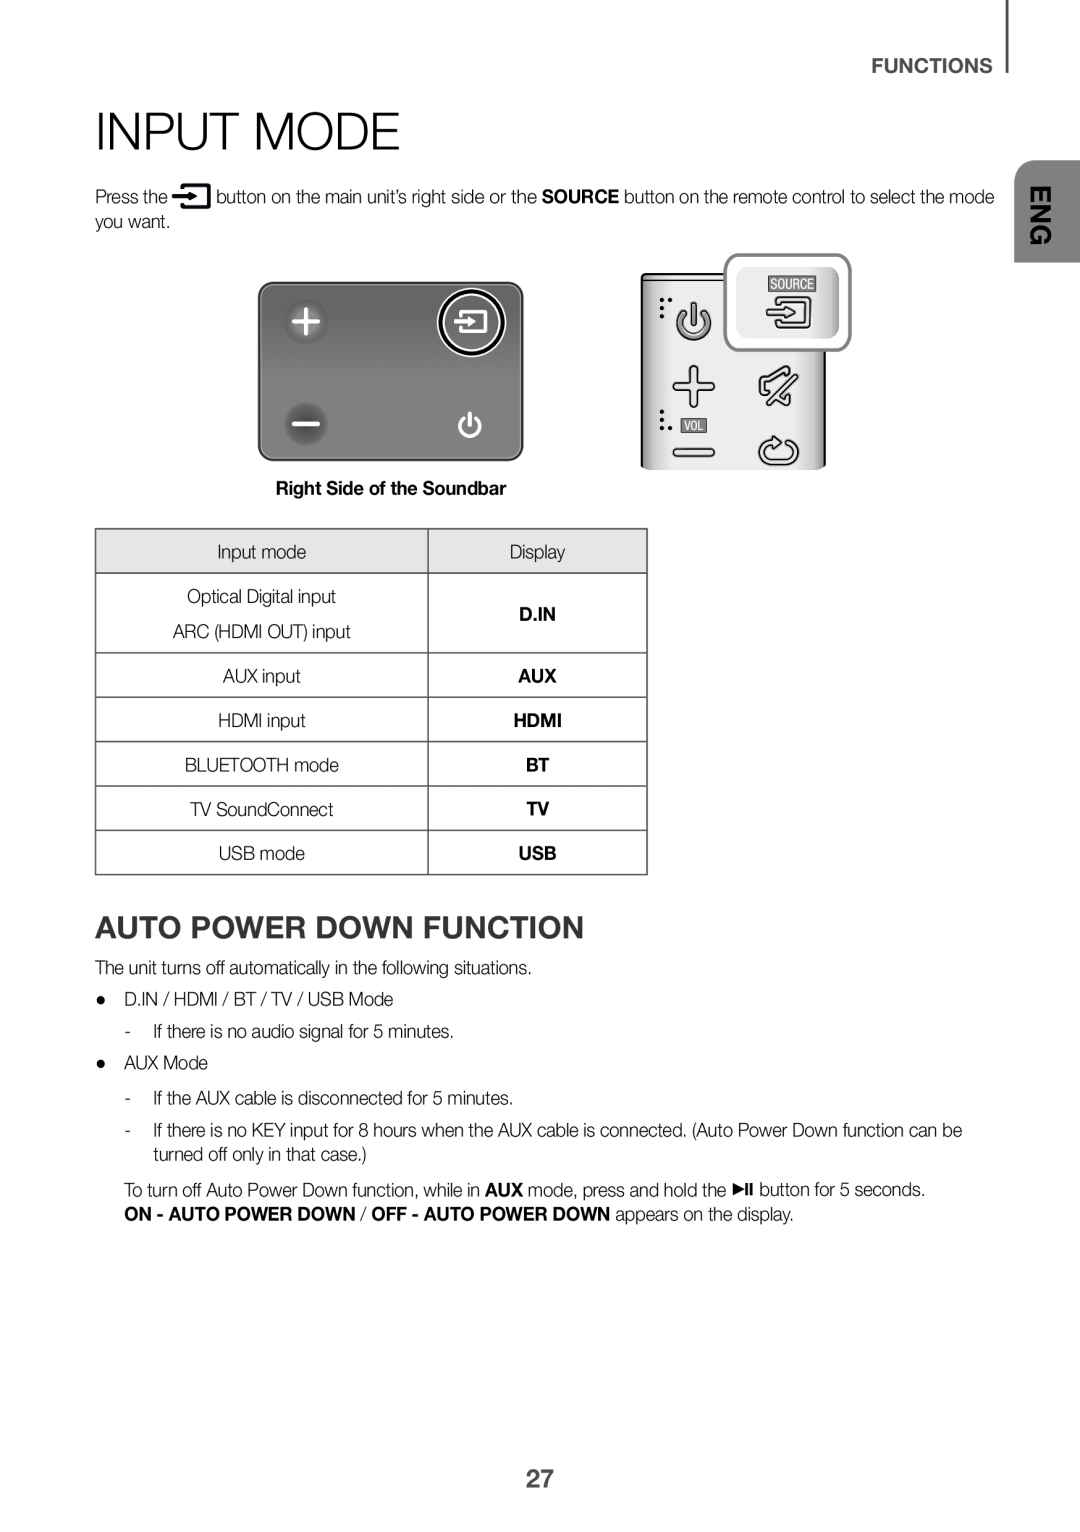
INPUT MODE
AUTO POWER DOWN FUNCTION
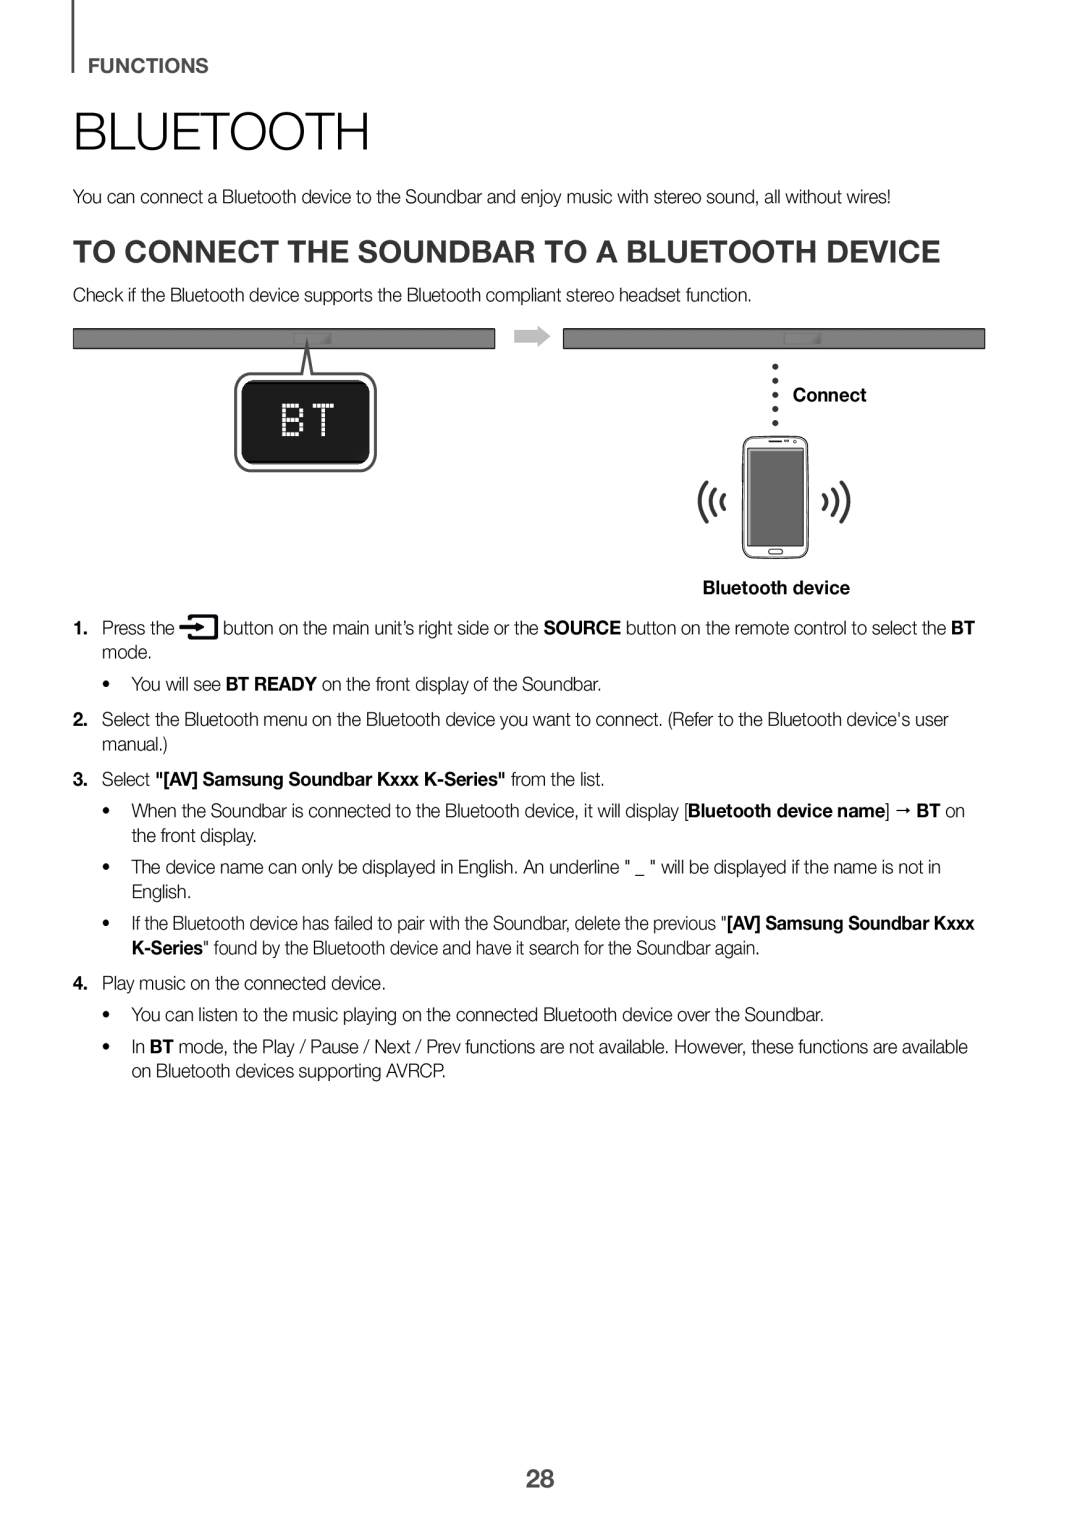 To connect the Soundbar to a Bluetooth device
 Bluetooth POWER On (Bluetooth POWER)
To disconnect the Bluetooth device from A Soundbar
To disconnect the Soundbar from A Bluetooth device
 ++More About Bluetooth
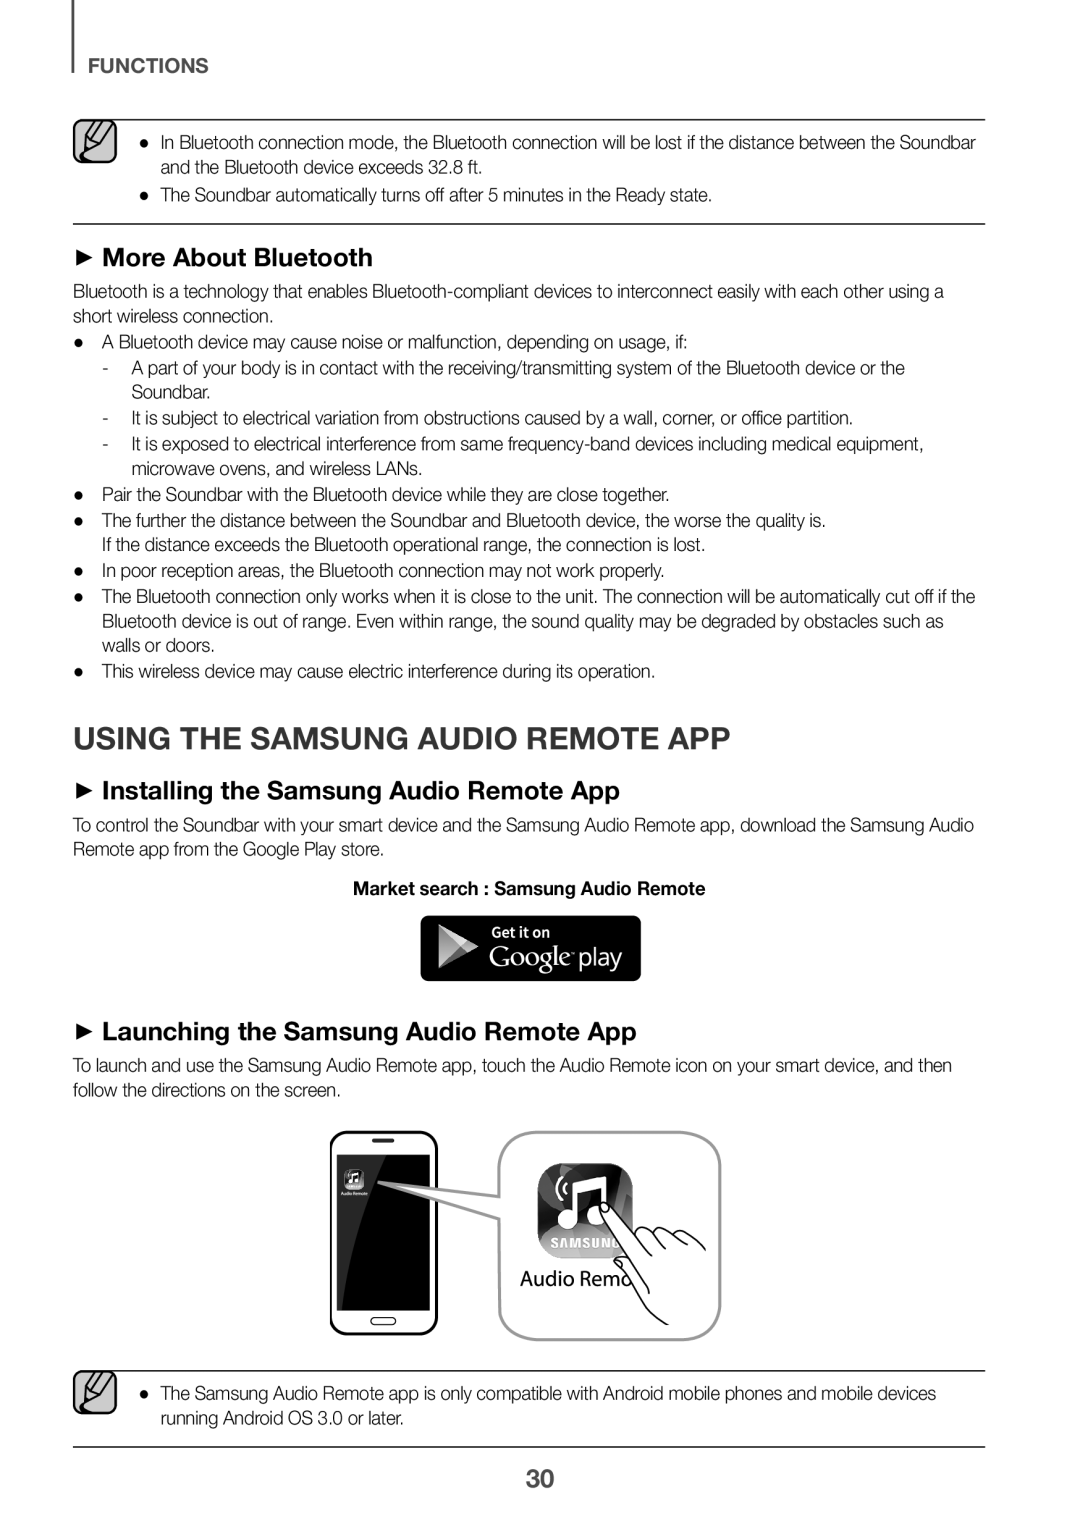
Using the Samsung Audio Remote App ++Installing the Samsung Audio Remote App
++Launching the Samsung Audio Remote App
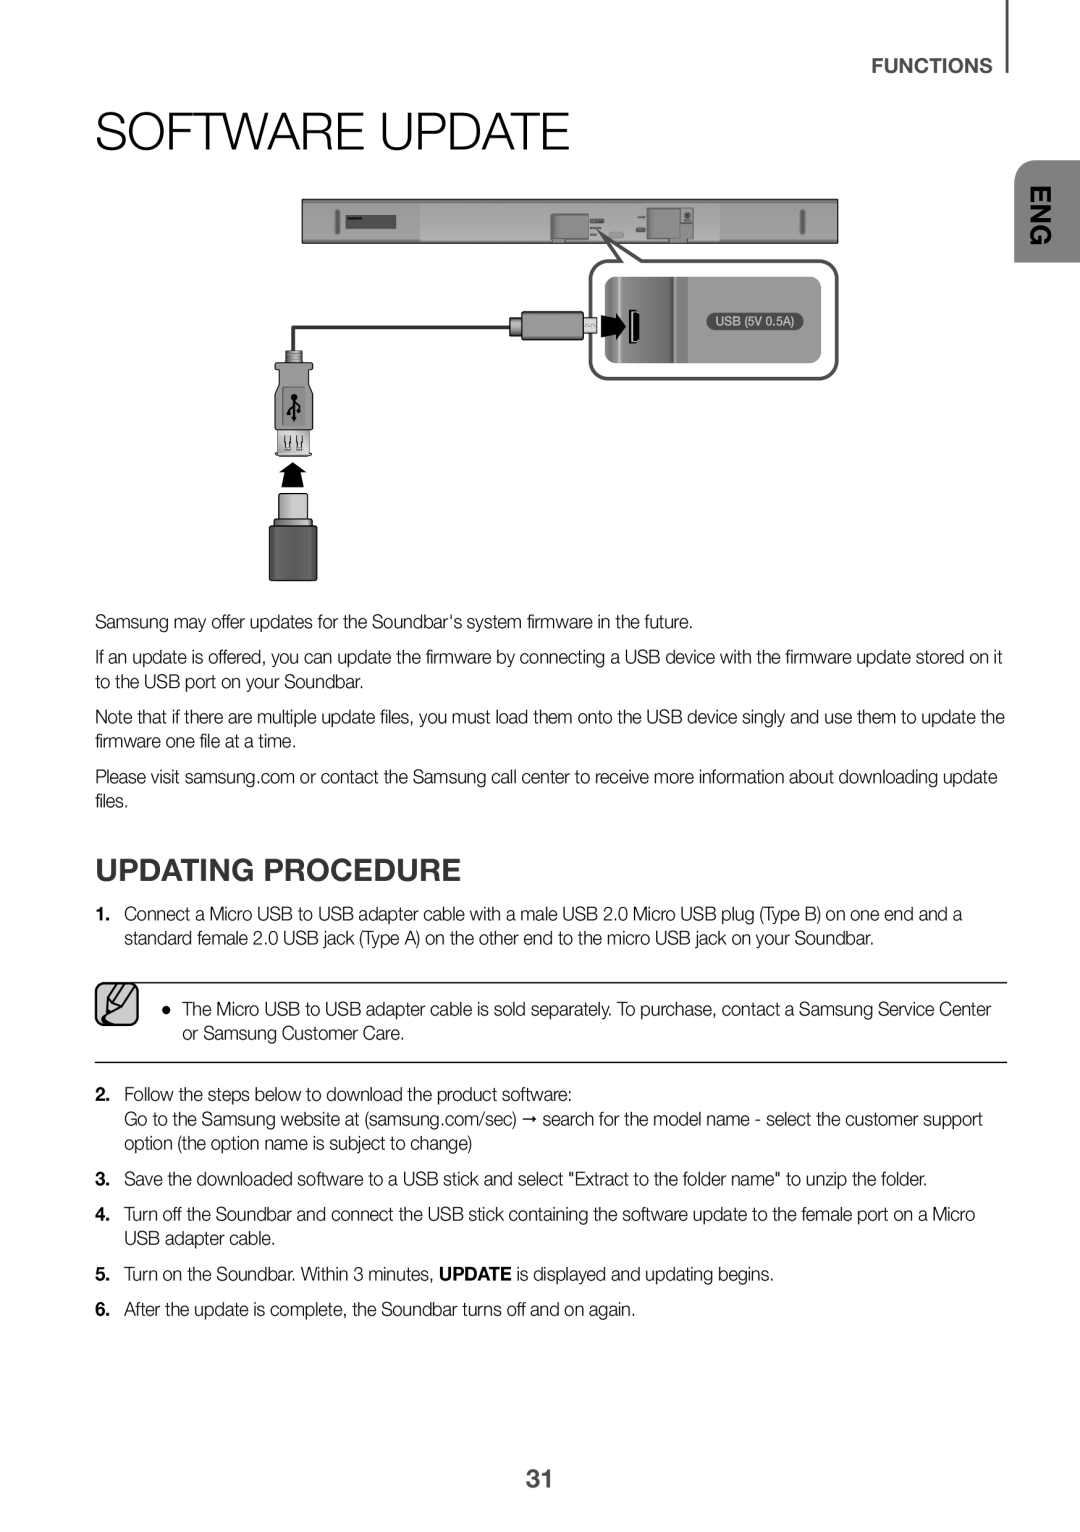 Software Update
Updating Procedure
 If UPDATE is not displayed
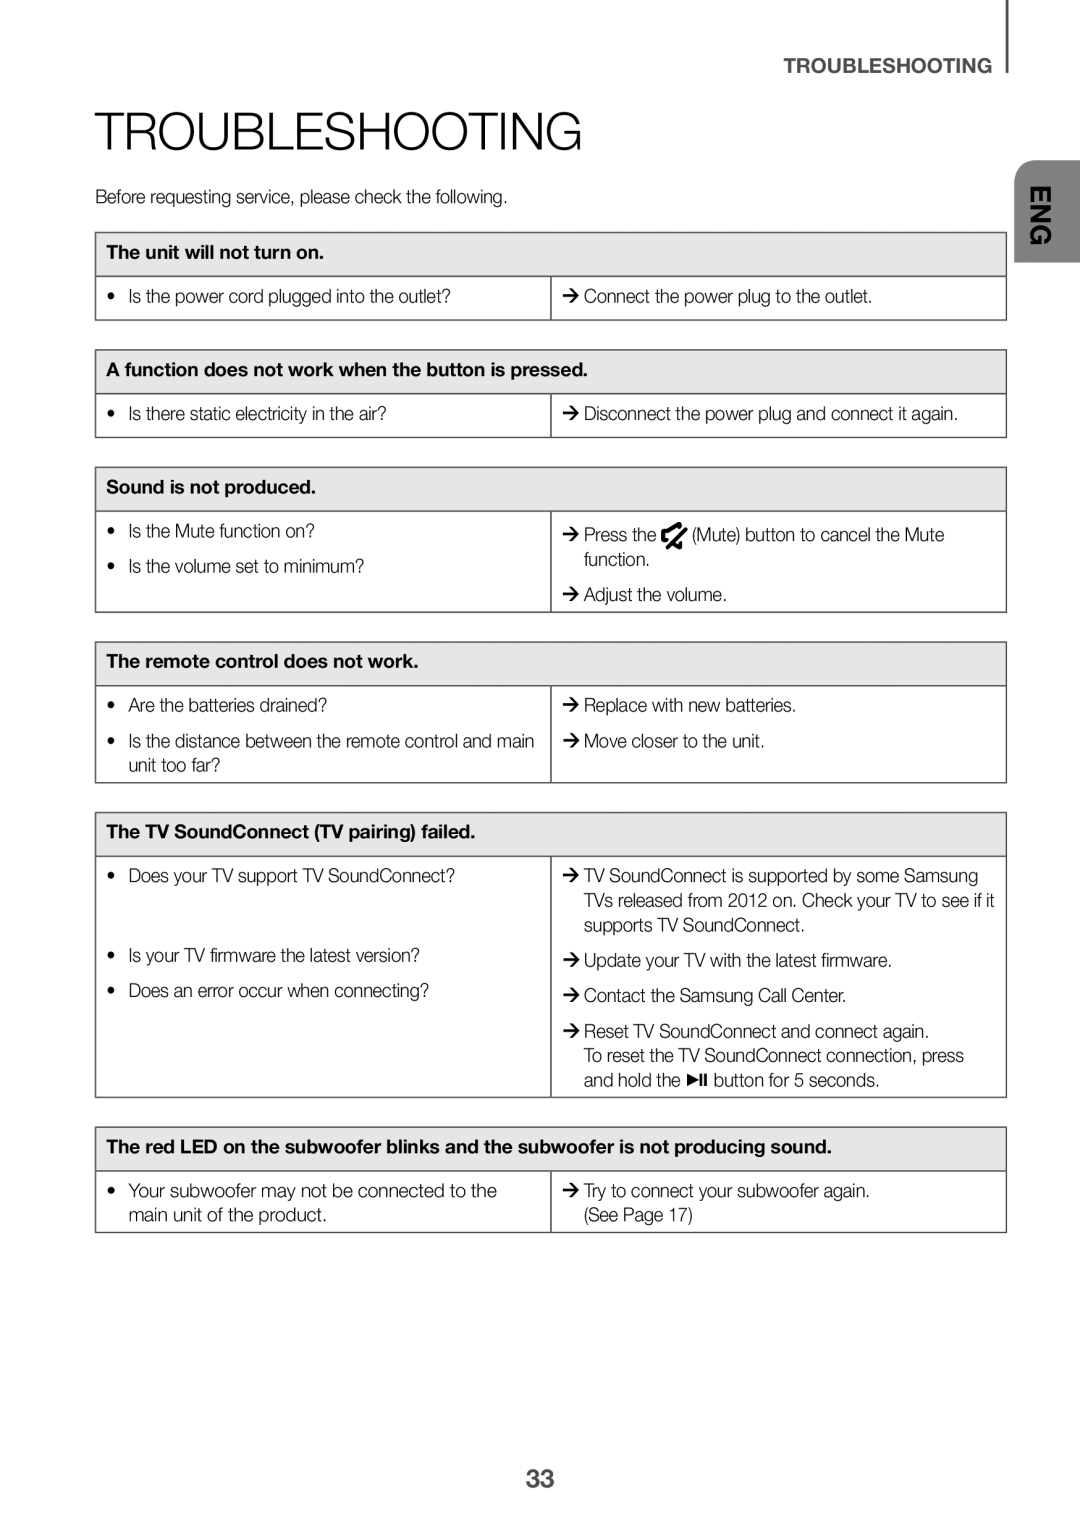 TROUBLESHOOTING
Troubleshooting
 APPENDIX
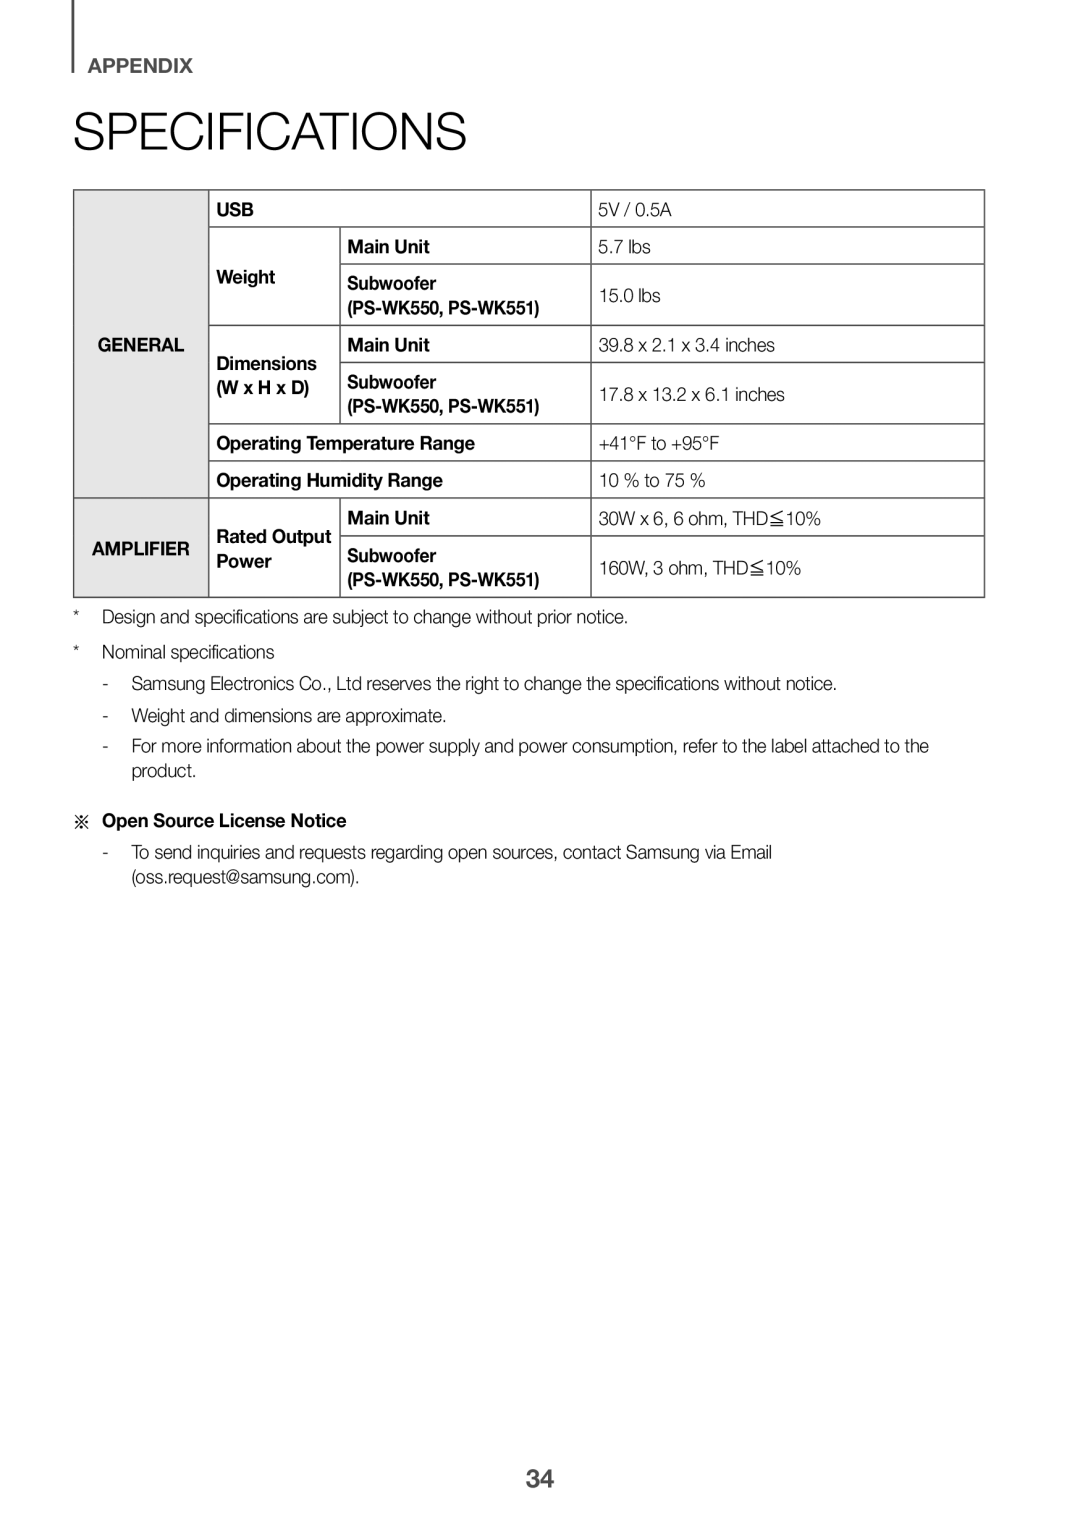
Specifications
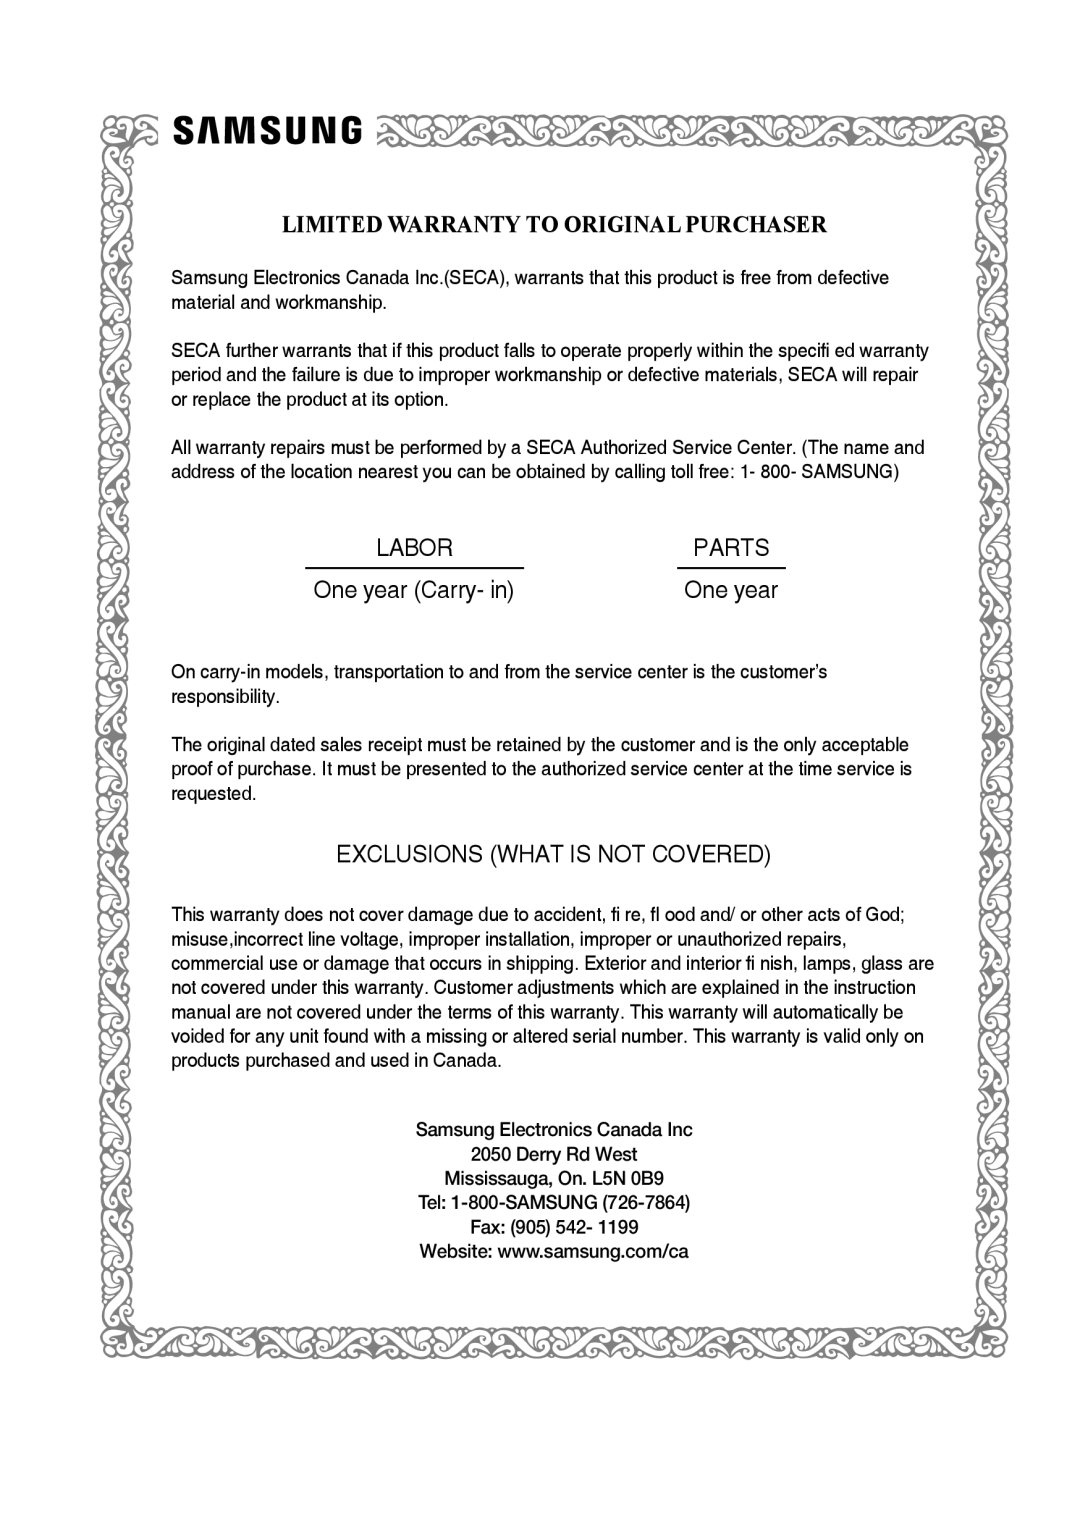 LIMITED WARRANTY TO ORIGINAL PURCHASER
LABOR
PARTS
One year (Carry- in)
One year
EXCLUSIONS (WHAT IS NOT COVERED)
Samsung Electronics Canada Inc
2050 Derry Rd West
Mississauga, On. L5N 0B9
Tel: 1-800-SAMSUNG (726-7864)
Fax: (905) 542
Website: www.samsung.com/ca
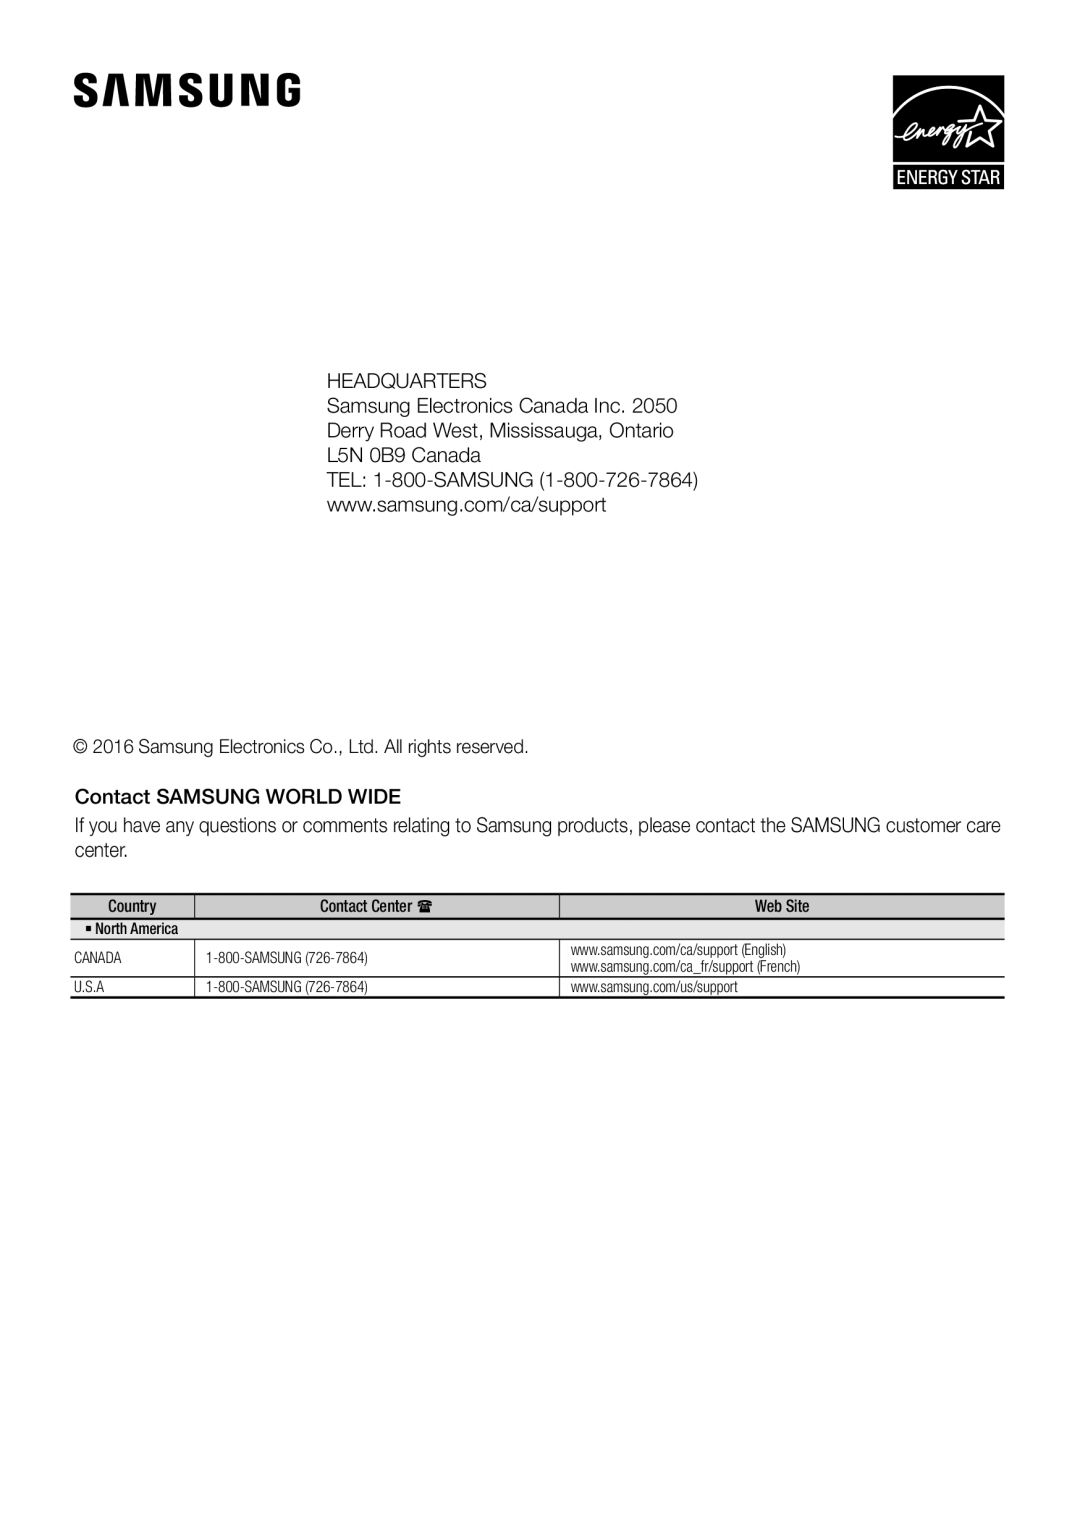 HEADQUARTERS
Samsung Electronics Canada Inc
Derry Road West, Mississauga, Ontario
L5N 0B9 Canada
TEL: 1-800-SAMSUNG (1-800-726-7864)
www.samsung.com/ca/support
Contact SAMSUNG WORLD WIDE
 Merci d’avoir choisi un appareil Samsung
 démarrage
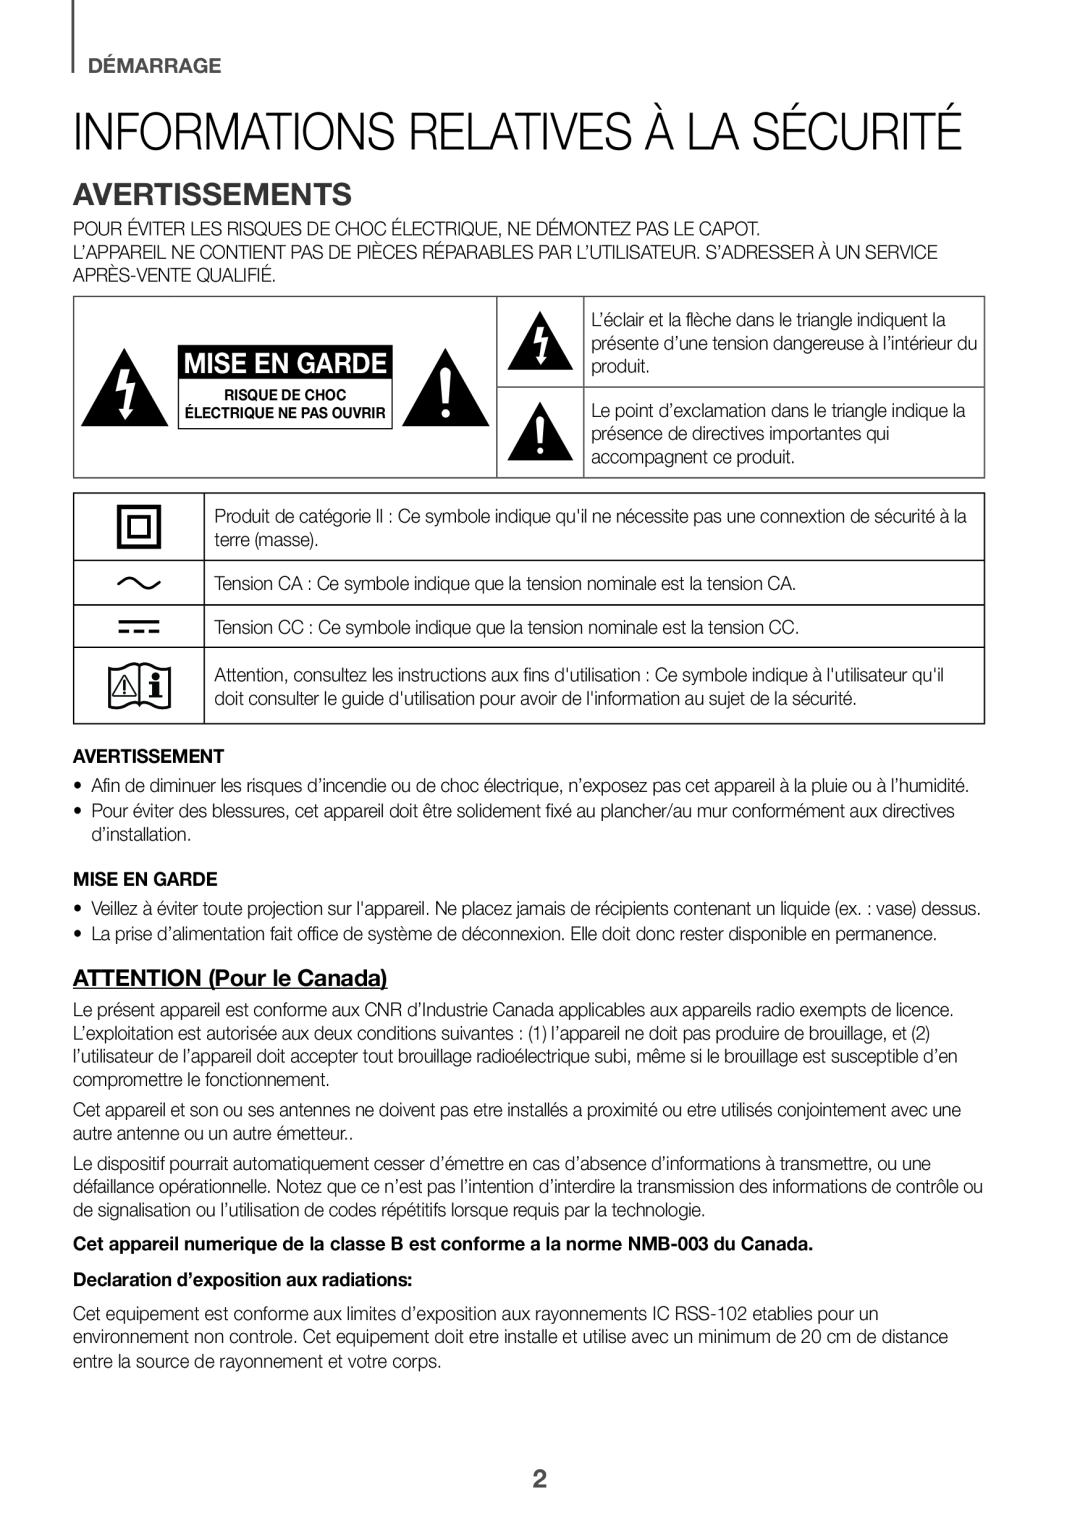
Informations relatives à la sécurité
Avertissements
MISE EN GARDE
ATTENTION (Pour le Canada)
 Consignes de sécurité importantes
Licence
FRA
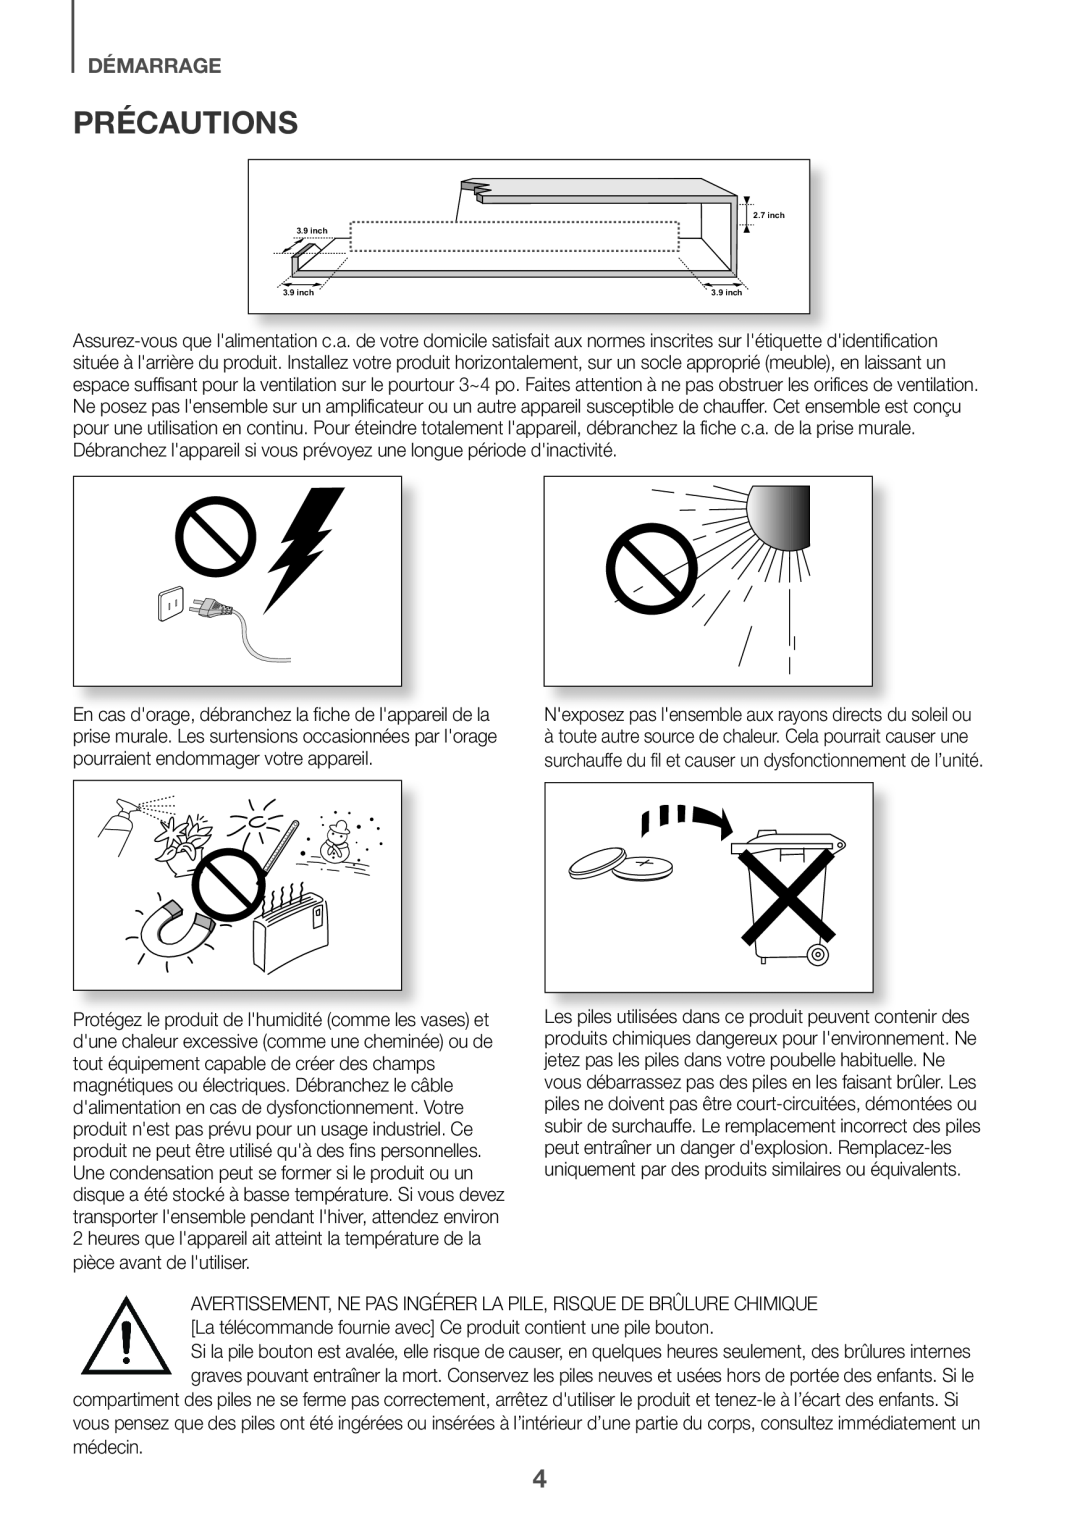 Précautions
 sommaire
2Informations relatives à la sécurité
6Contenu
7Façade avant/droite
8Face arrière/Inférieure
9Télécommande
12Installation du Soundbar
17Connexion du caisson d’extrêmes basses
21 Connexion à un téléviseur
24Connexion avec un périphérique externe
Mode entrée
Mise à jour du logiciel
33Dépannage
34Spécifications
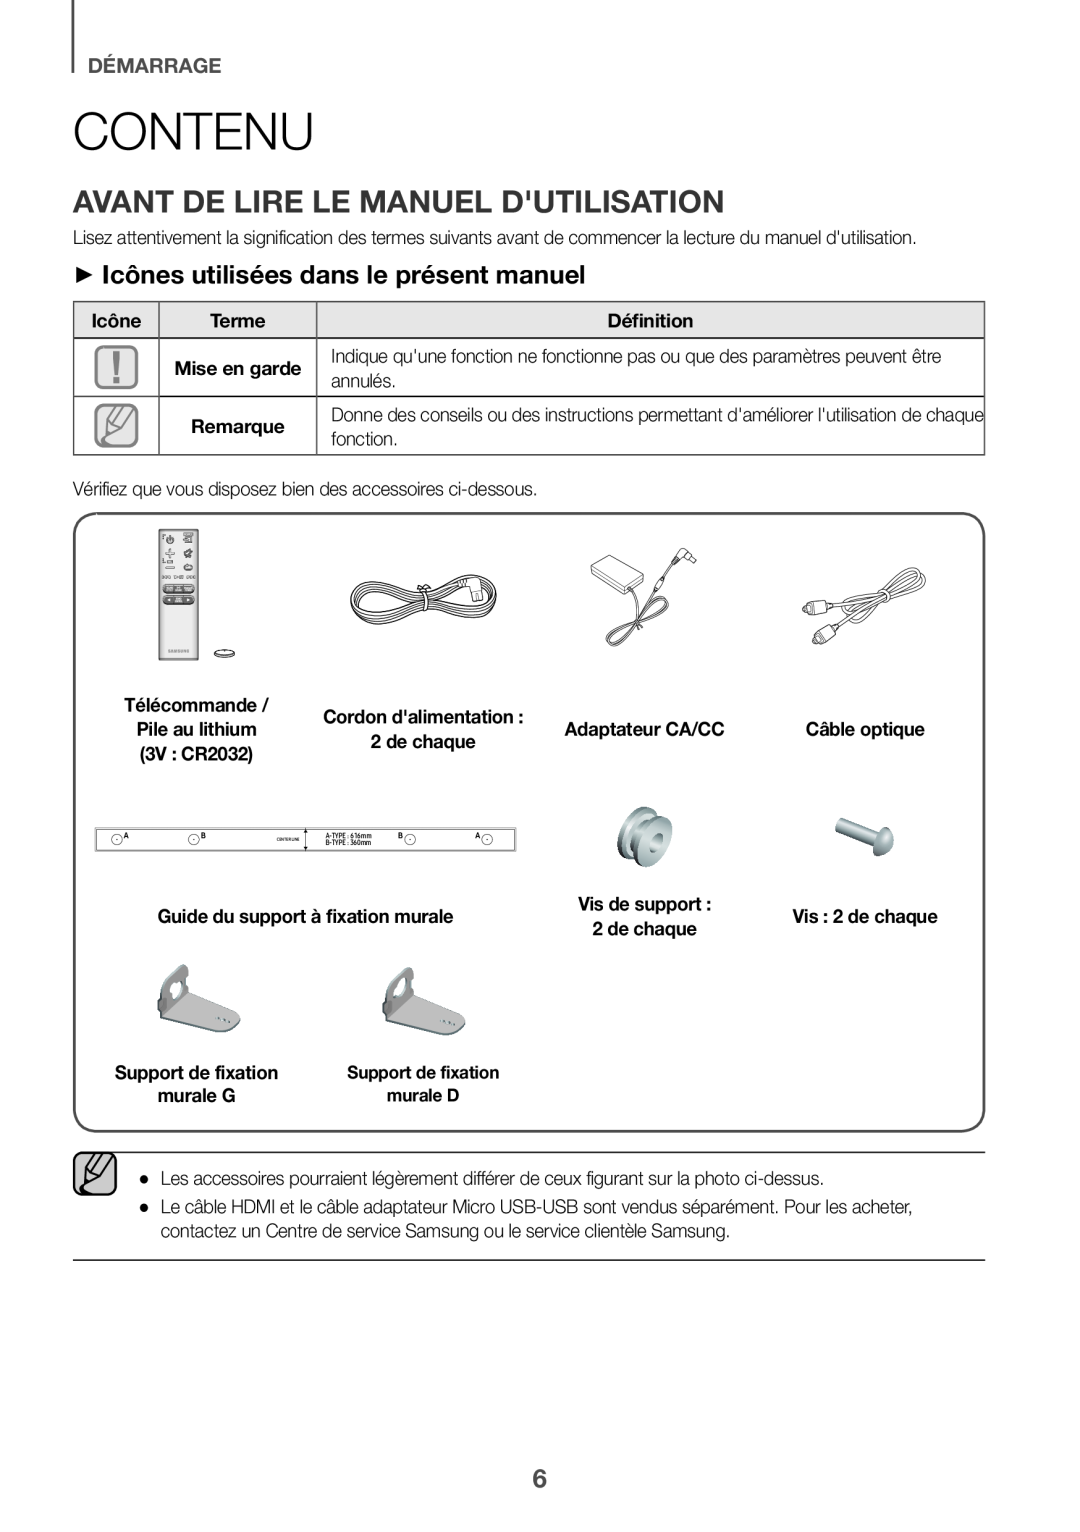 Contenu
Avant de lire le manuel d'utilisation
++Icônes utilisées dans le présent manuel
 descriptions
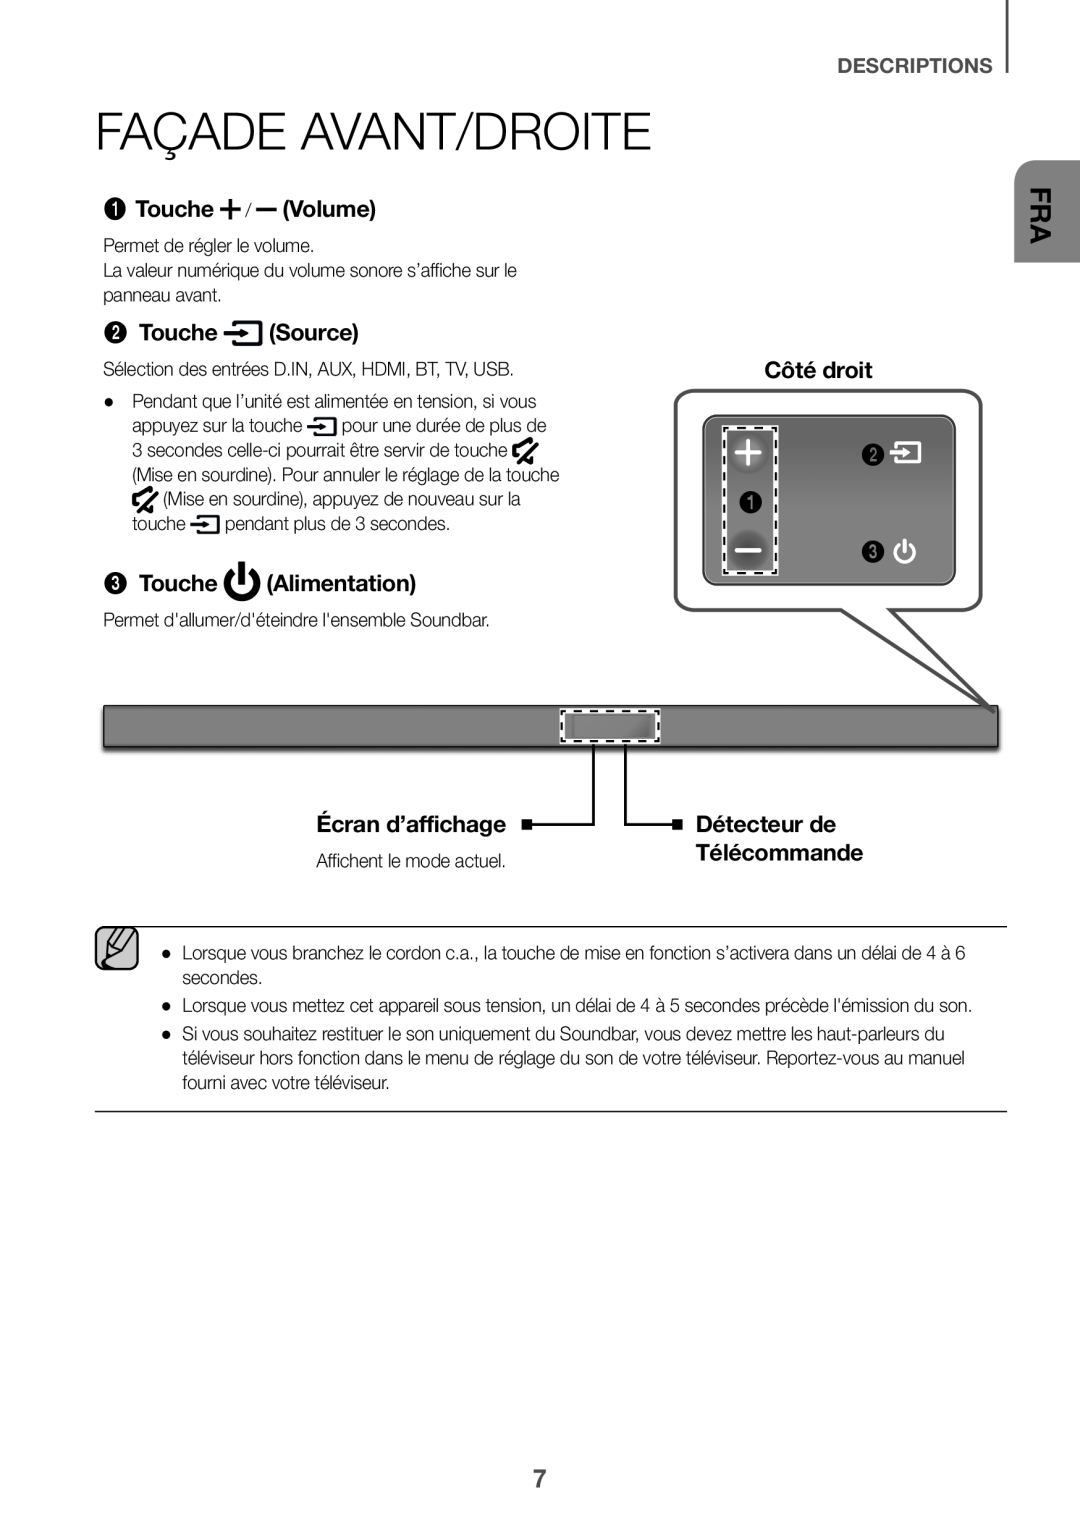
Façade avant/droite
1 Touche / (Volume)
2Touche (Source)
3 Touche (Alimentation)
Écran d’affichage
Côté droit
Détecteur de
Télécommande
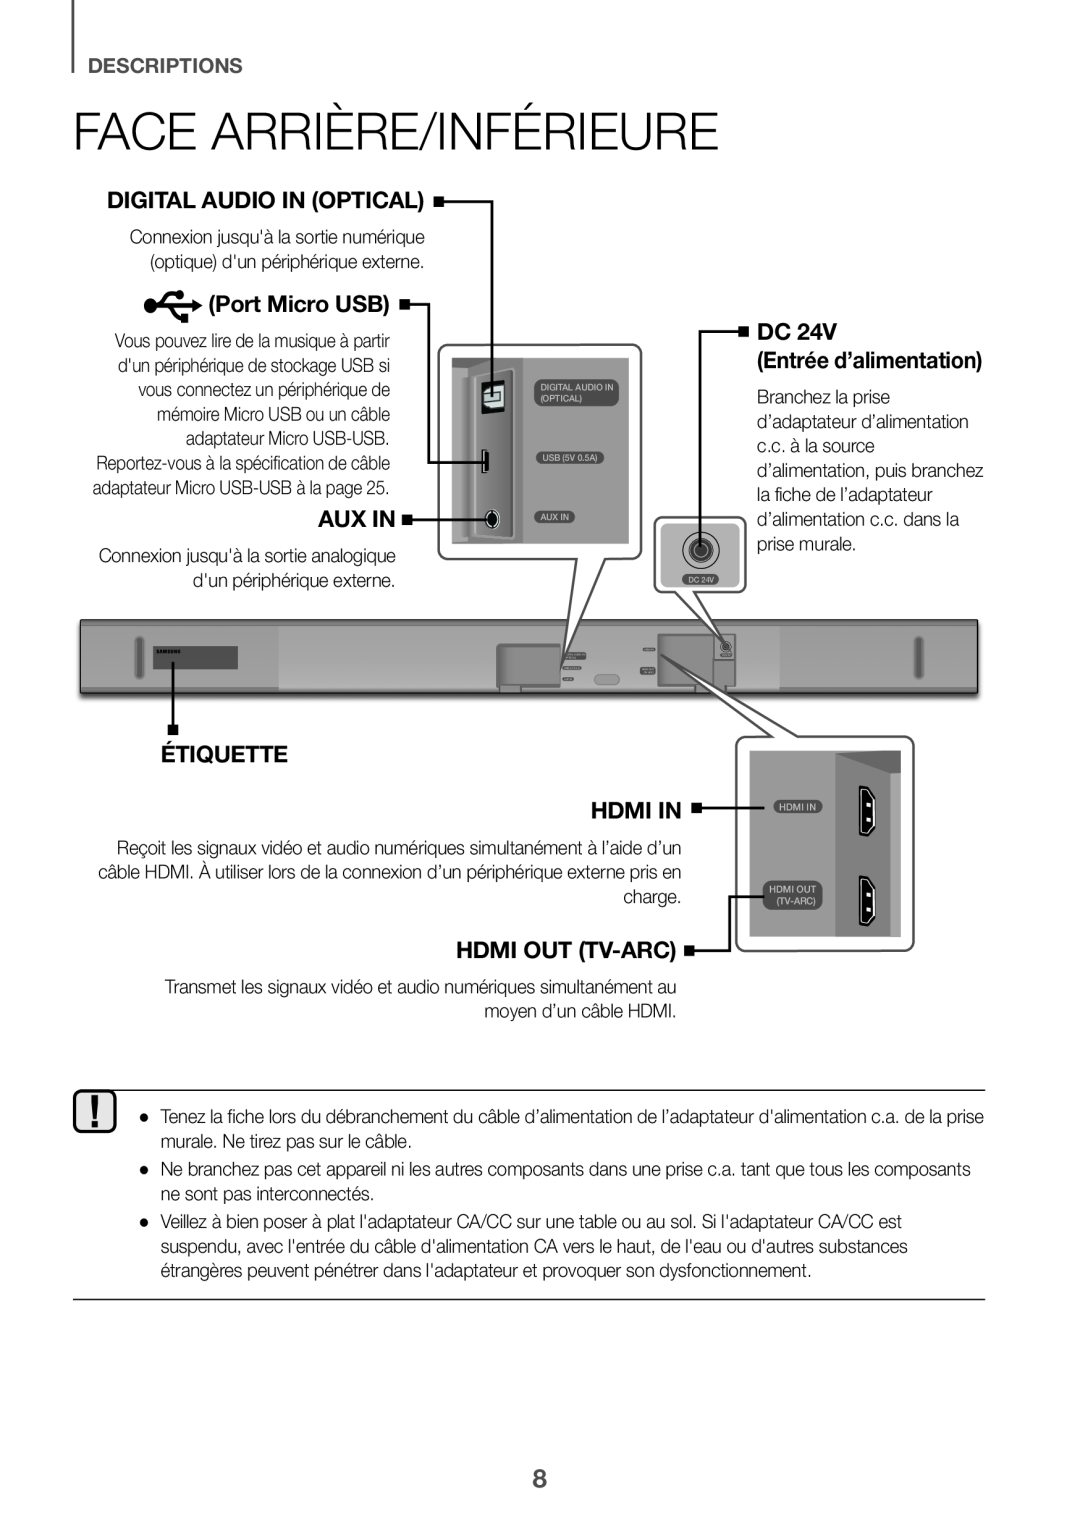 Face arrière/Inférieure
(Port Micro USB)
(Entrée d’alimentation)
ÉTIQUETTE
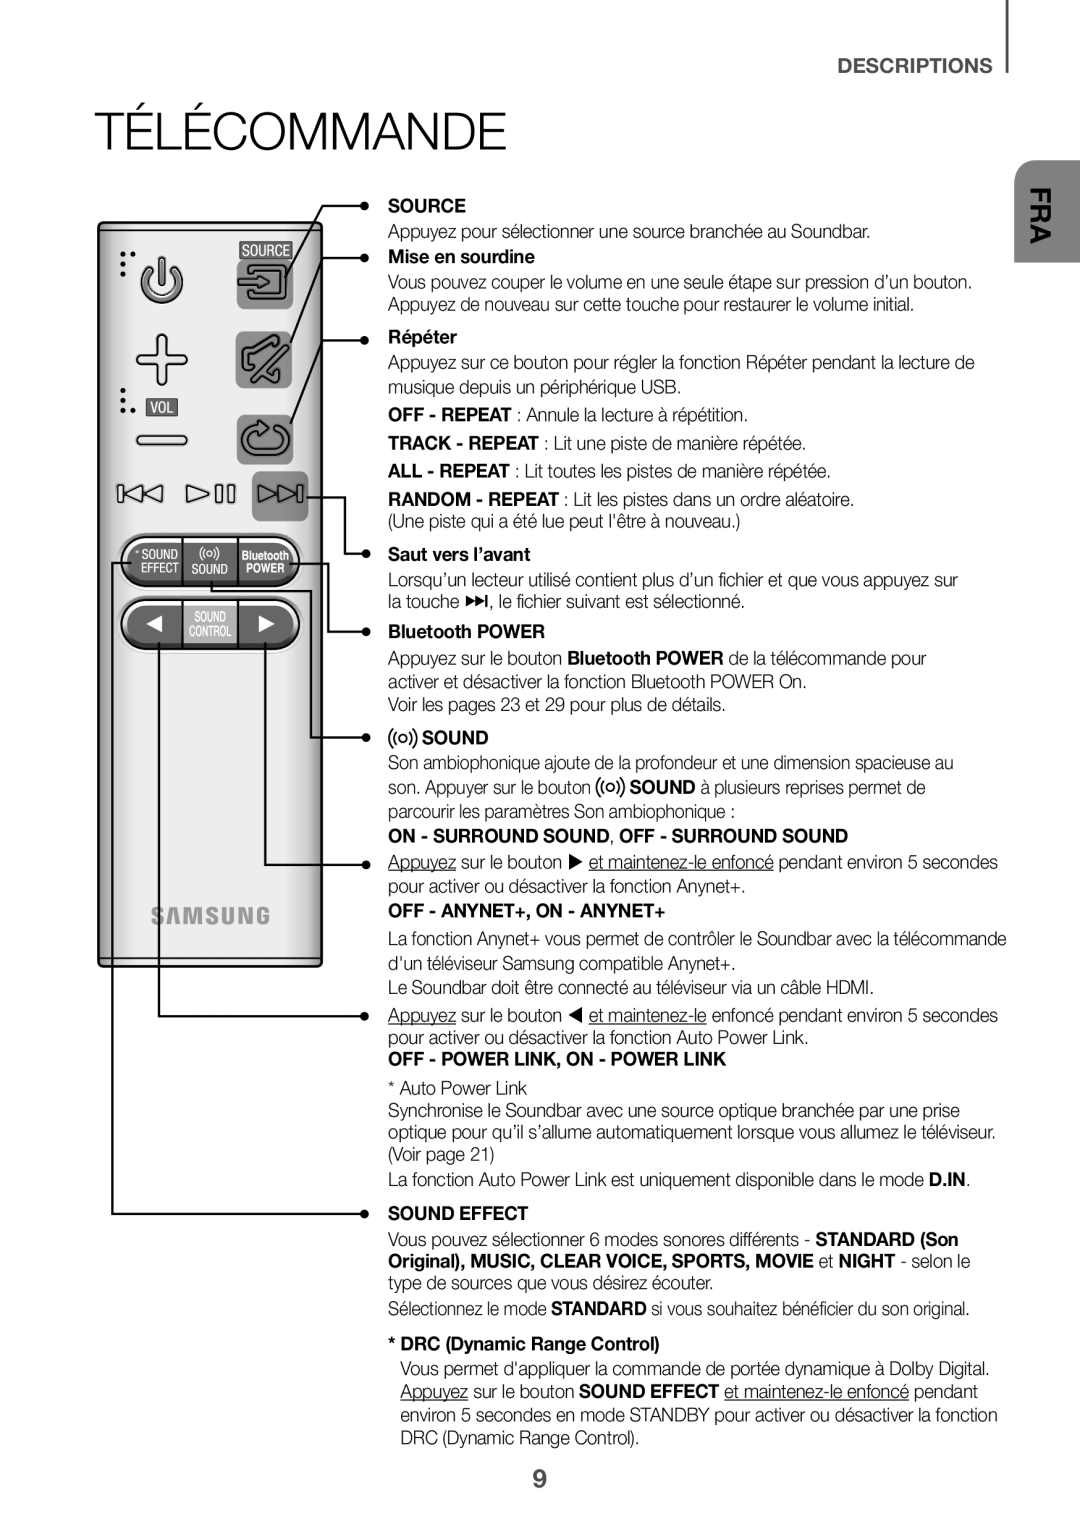 Télécommande
 descriptions
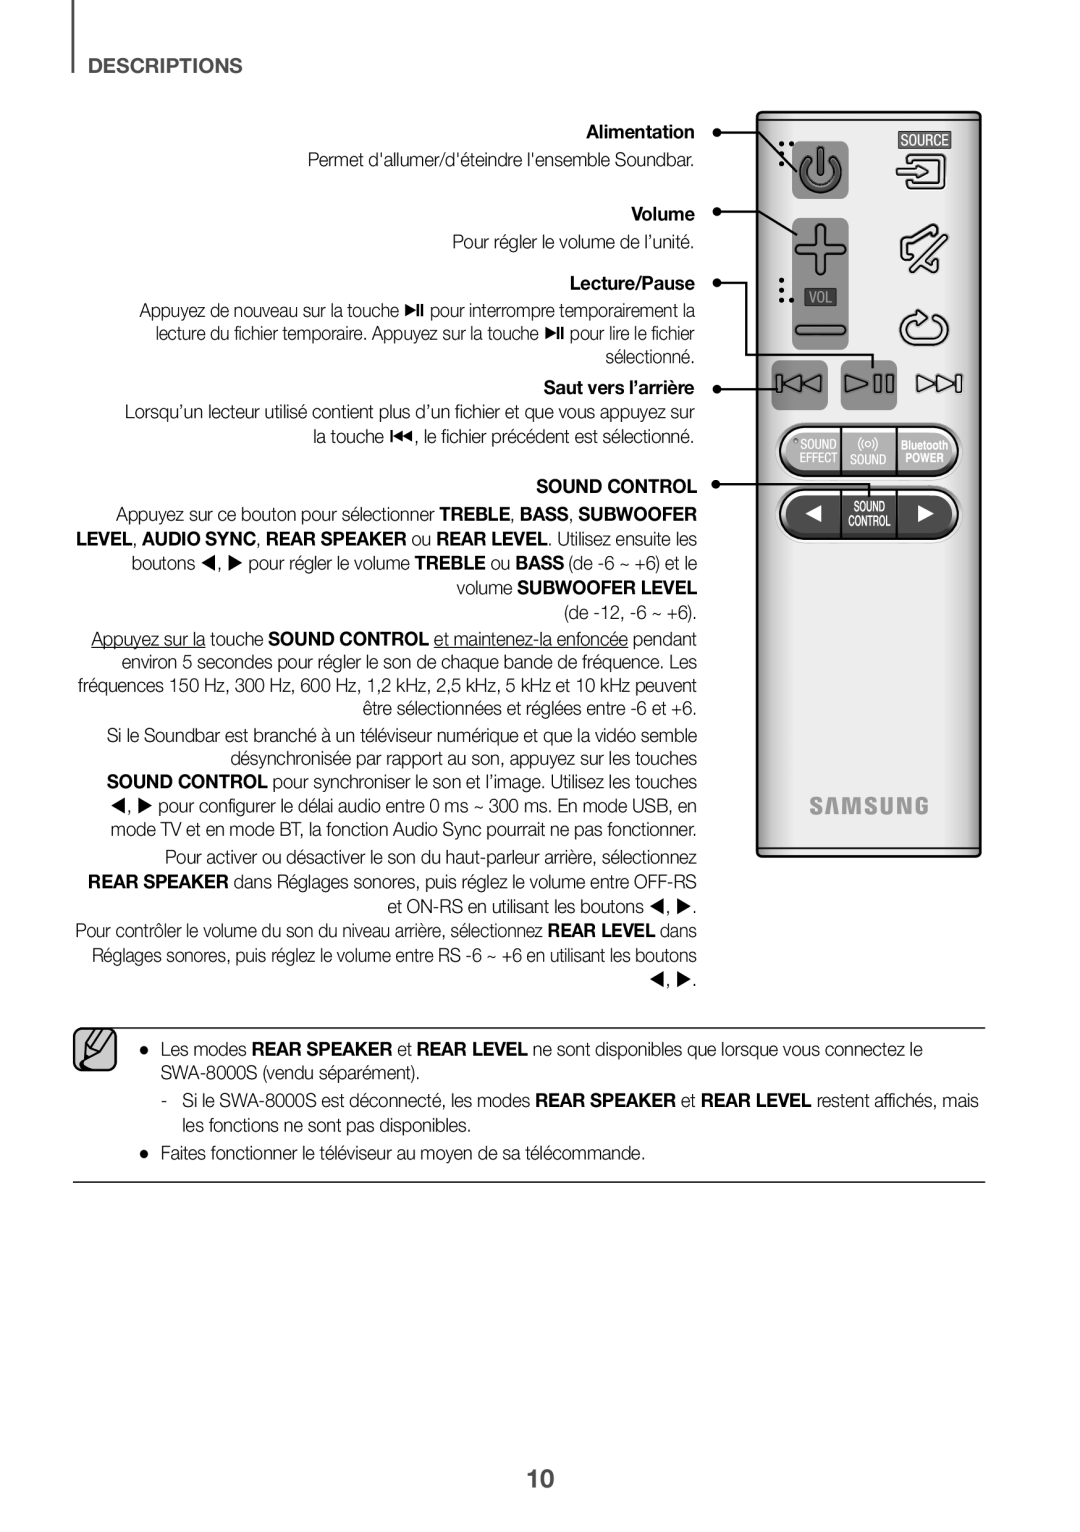
Alimentation
Permet d'allumer/d'éteindre l'ensemble Soundbar
Volume Pour régler le volume de l’unité
Lecture/Pause
Saut vers l’arrière
SOUND CONTROL
Appuyez sur ce bouton pour sélectionner TREBLE, BASS, SUBWOOFER
TREBLE
BASS
SUBWOOFER
LEVEL, AUDIO SYNC, REAR SPEAKER ou REAR LEVEL. Utilisez ensuite les
TREBLE
BASS
SUBWOOFER LEVEL
Appuyez sur la
SOUND CONTROL
maintenez-la
enfoncée
SOUND CONTROL
REAR SPEAKER
REAR LEVEL
REAR SPEAKER
REAR LEVEL
REAR SPEAKER
REAR LEVEL
●● Faites fonctionner le téléviseur au moyen de sa télécommande
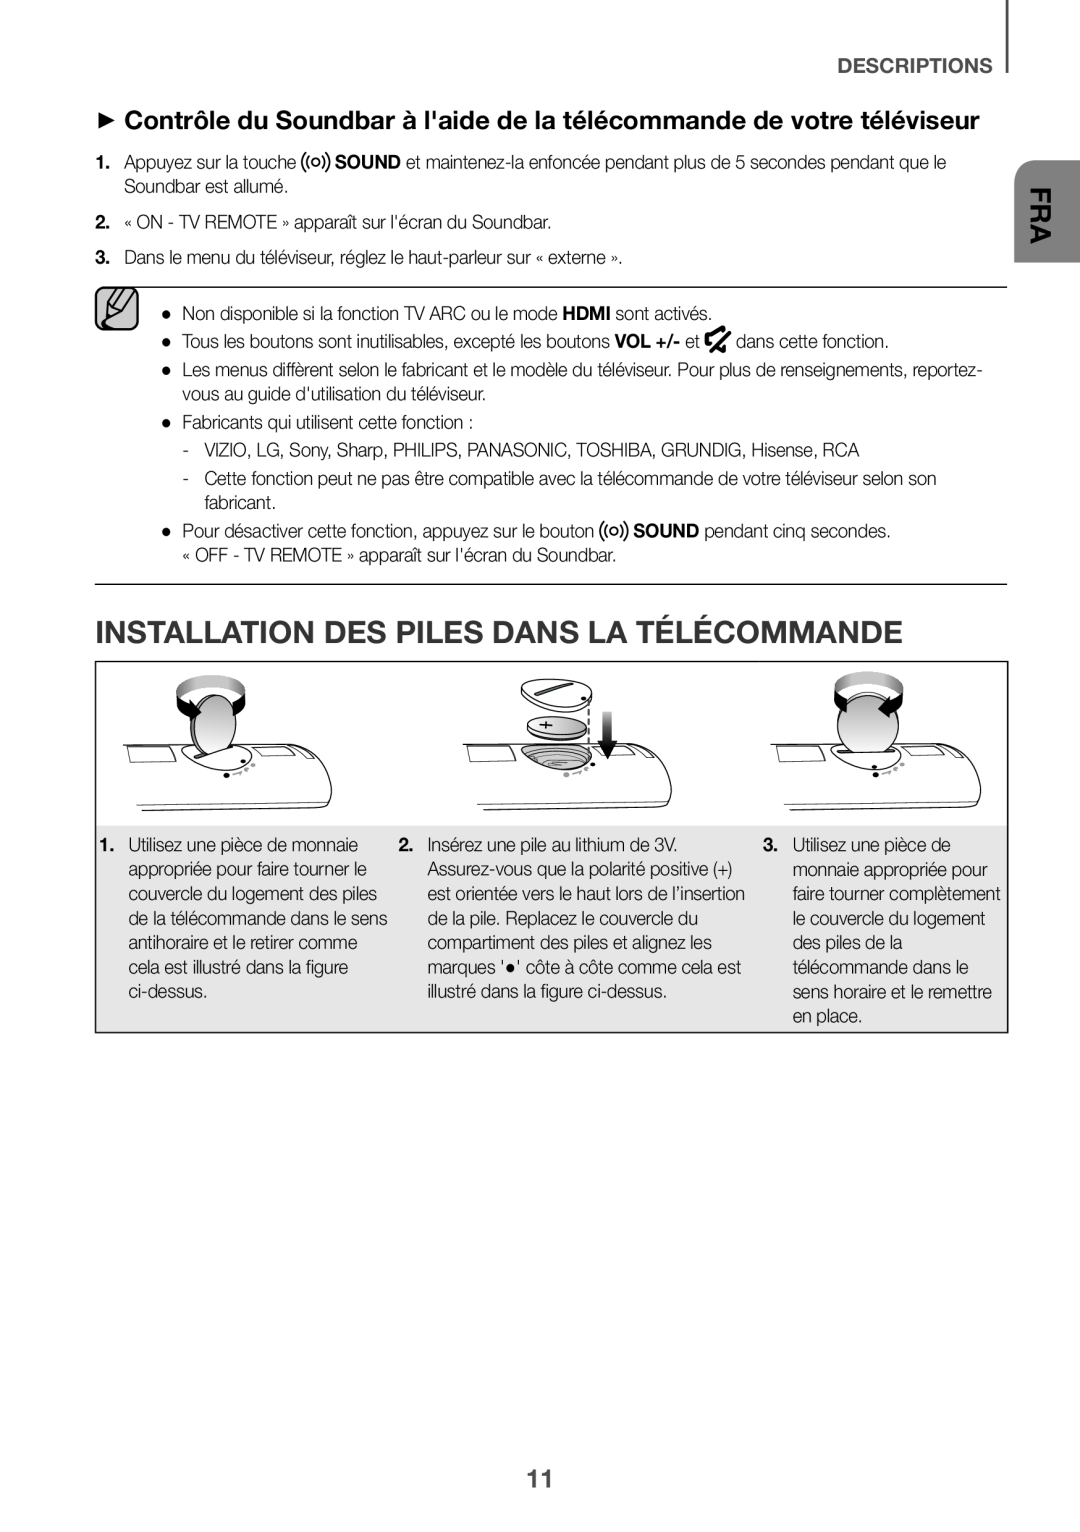 ++Contrôle du Soundbar à l'aide de la télécommande de votre téléviseur
Installation des piles dans la télécommande
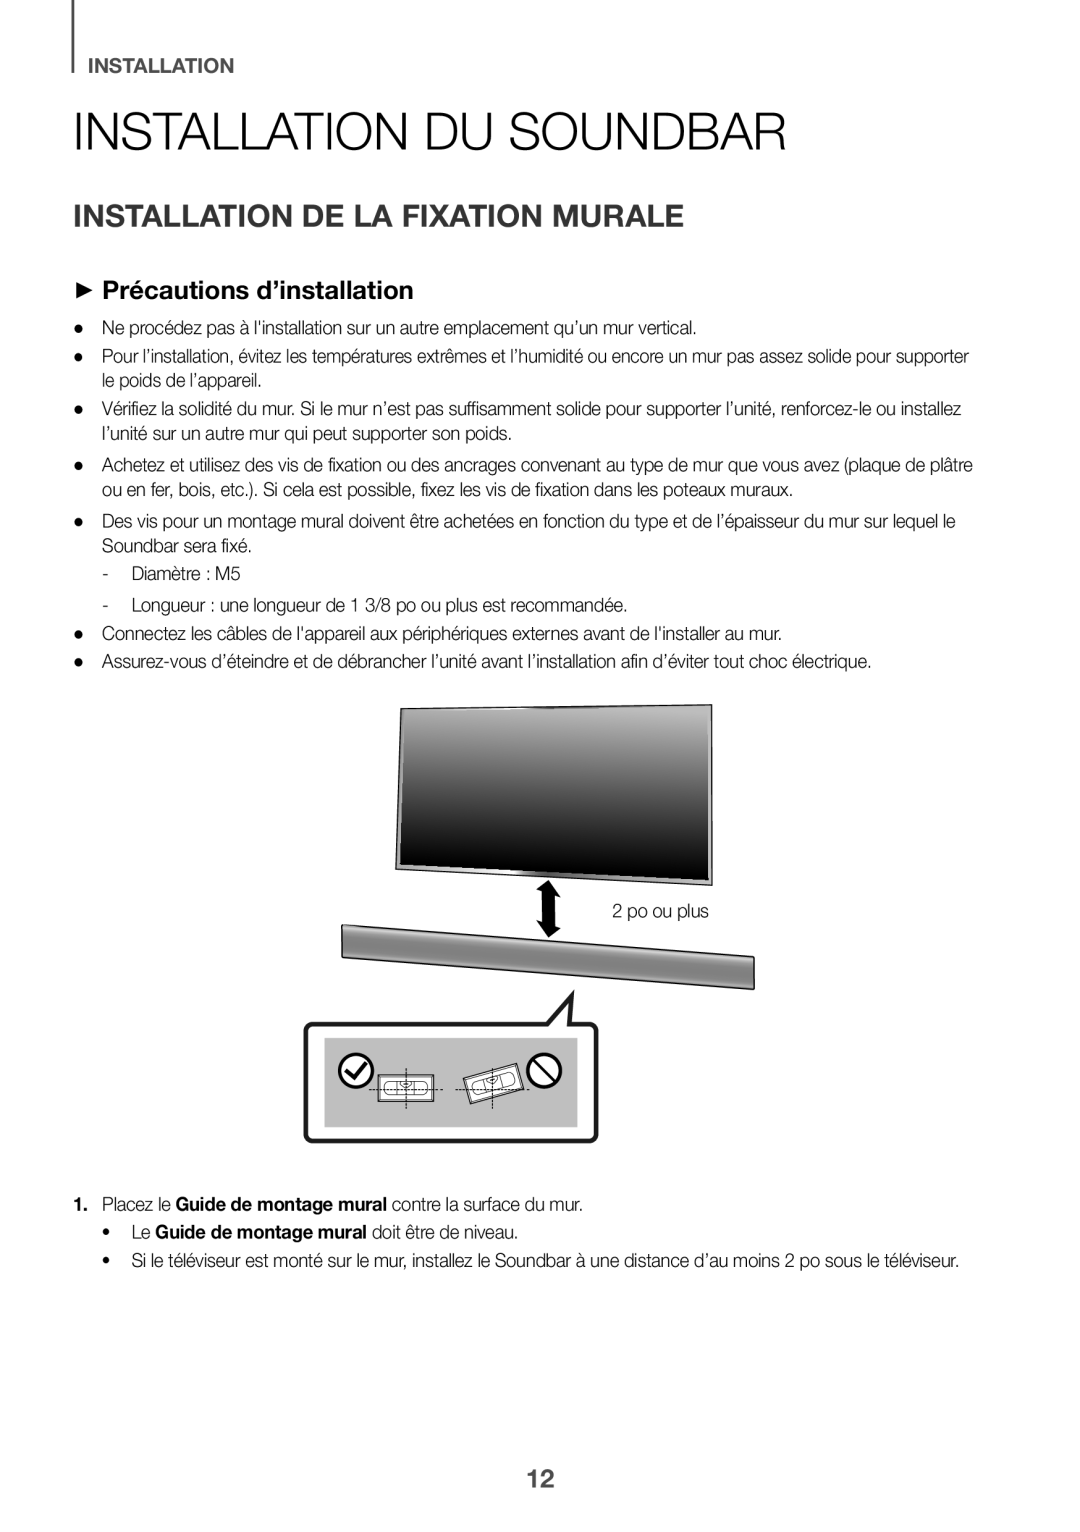 Installation du Soundbar
Installation de la fixation murale
++Précautions d’installation
 INSTALLATION
FRA
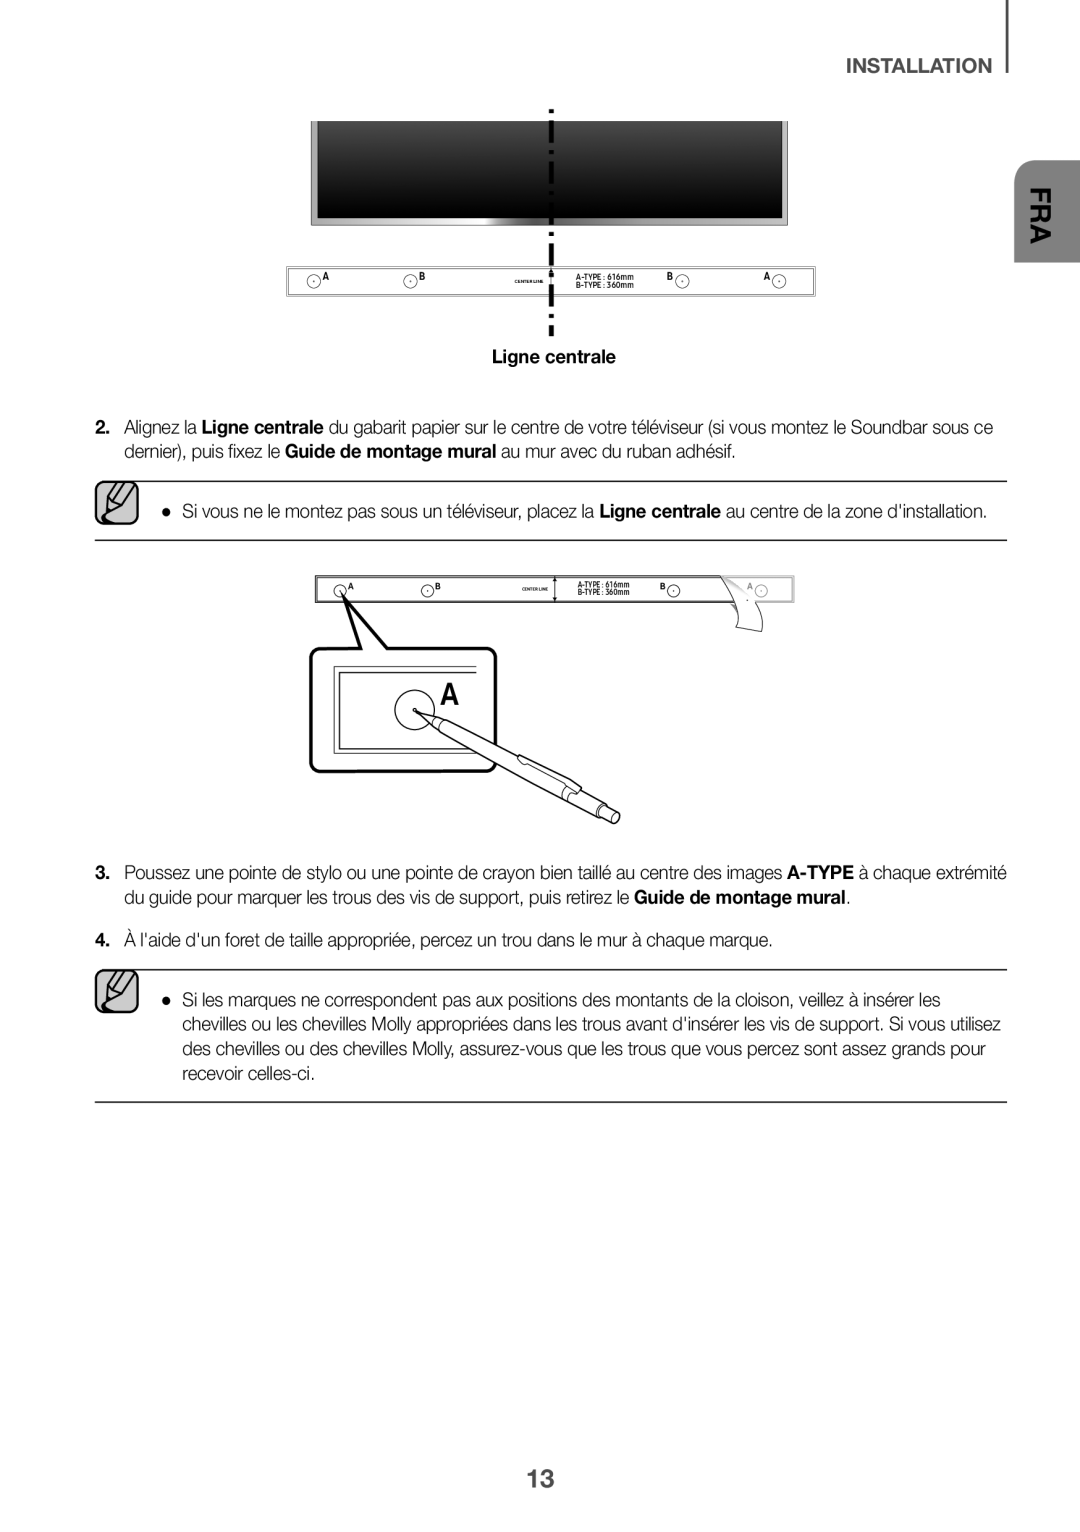
Ligne centrale
Alignez la
Ligne centrale
Guide de montage mural
Ligne centrale
A-TYPE
Guide de montage mural
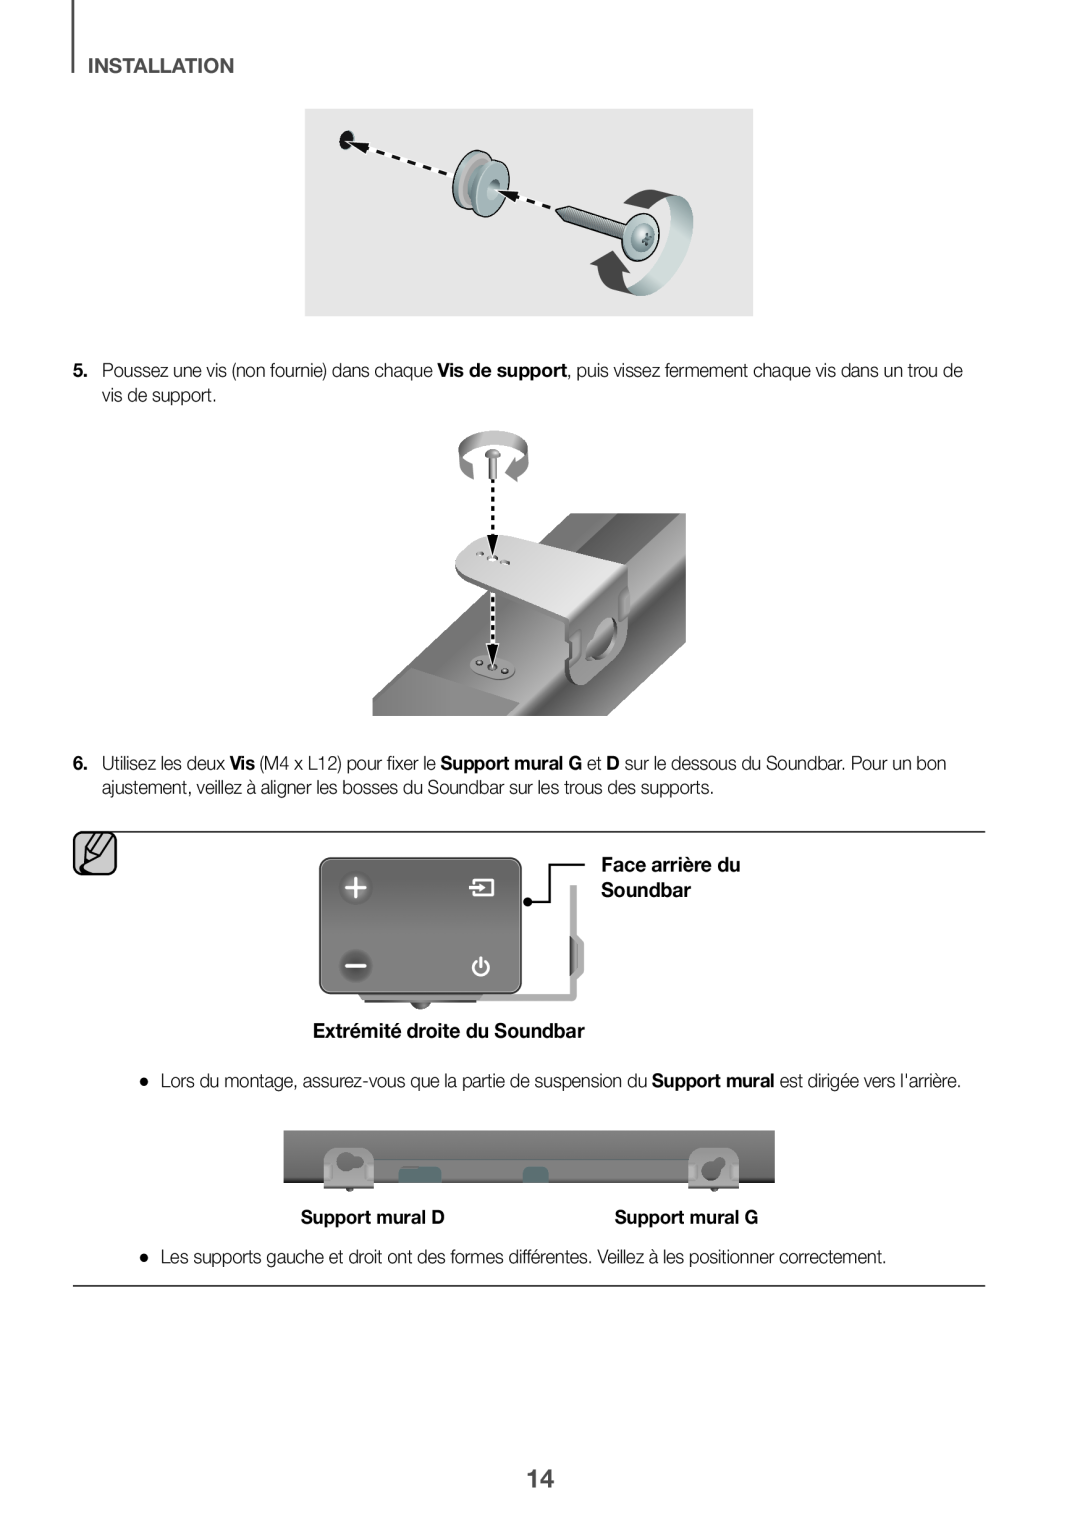 Face arrière du
Soundbar
Extrémité droite du Soundbar
 INSTALLATION
FRA
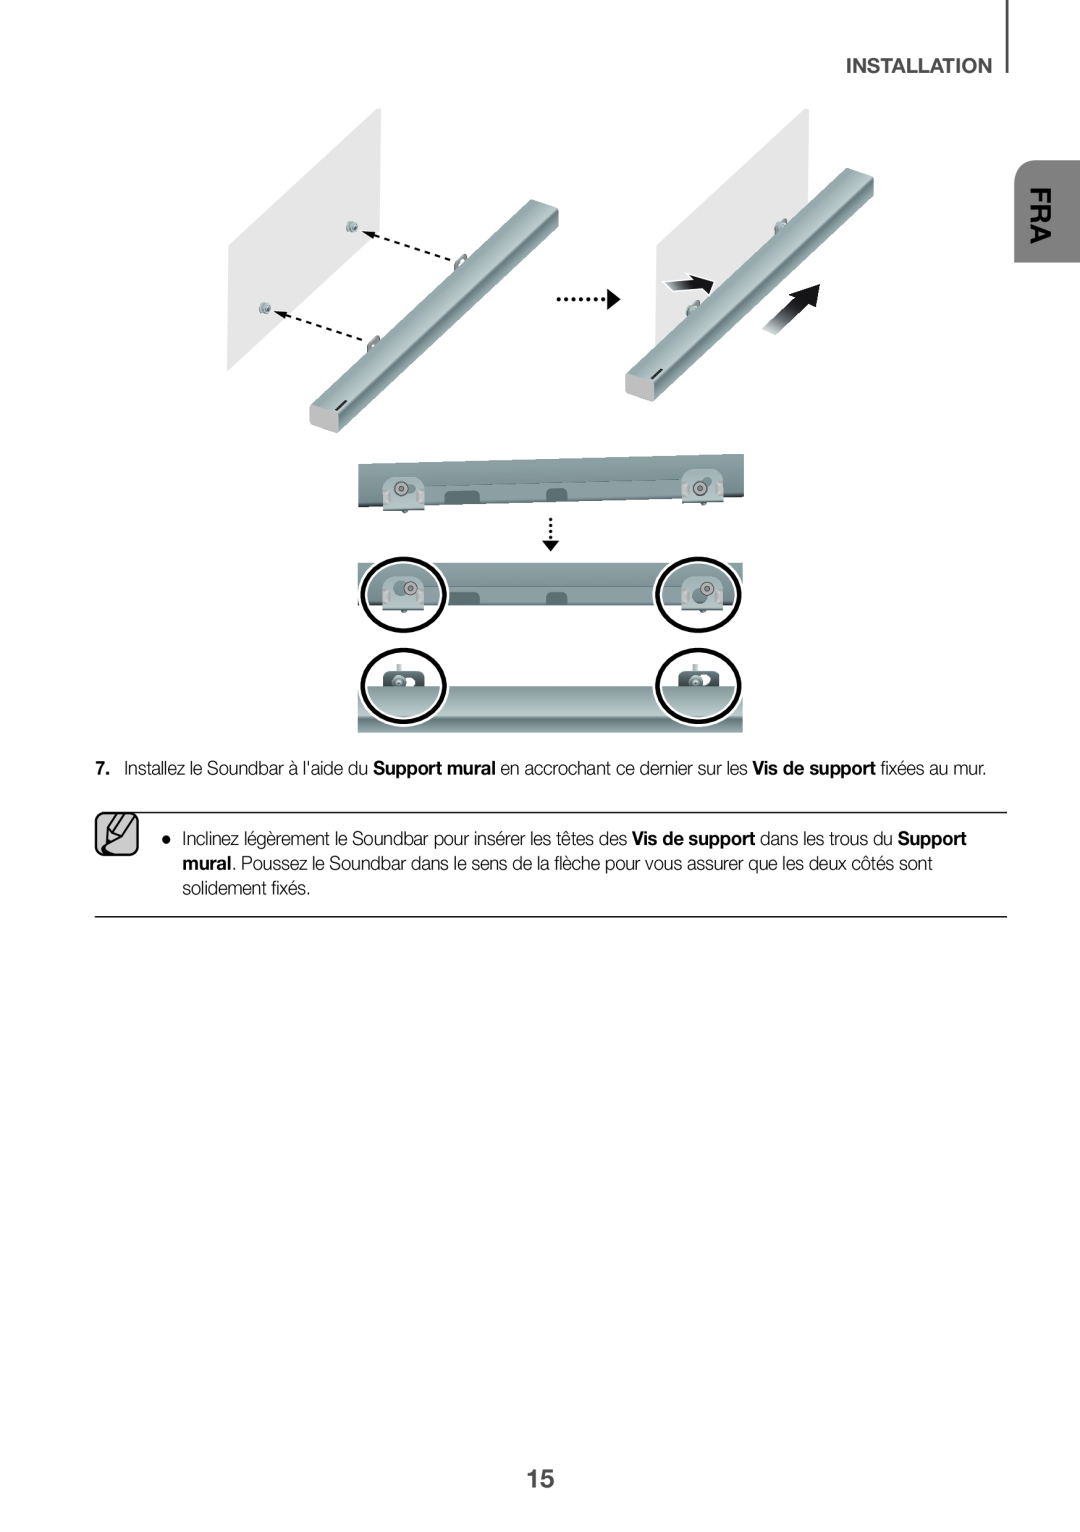
Support mural
Vis de support
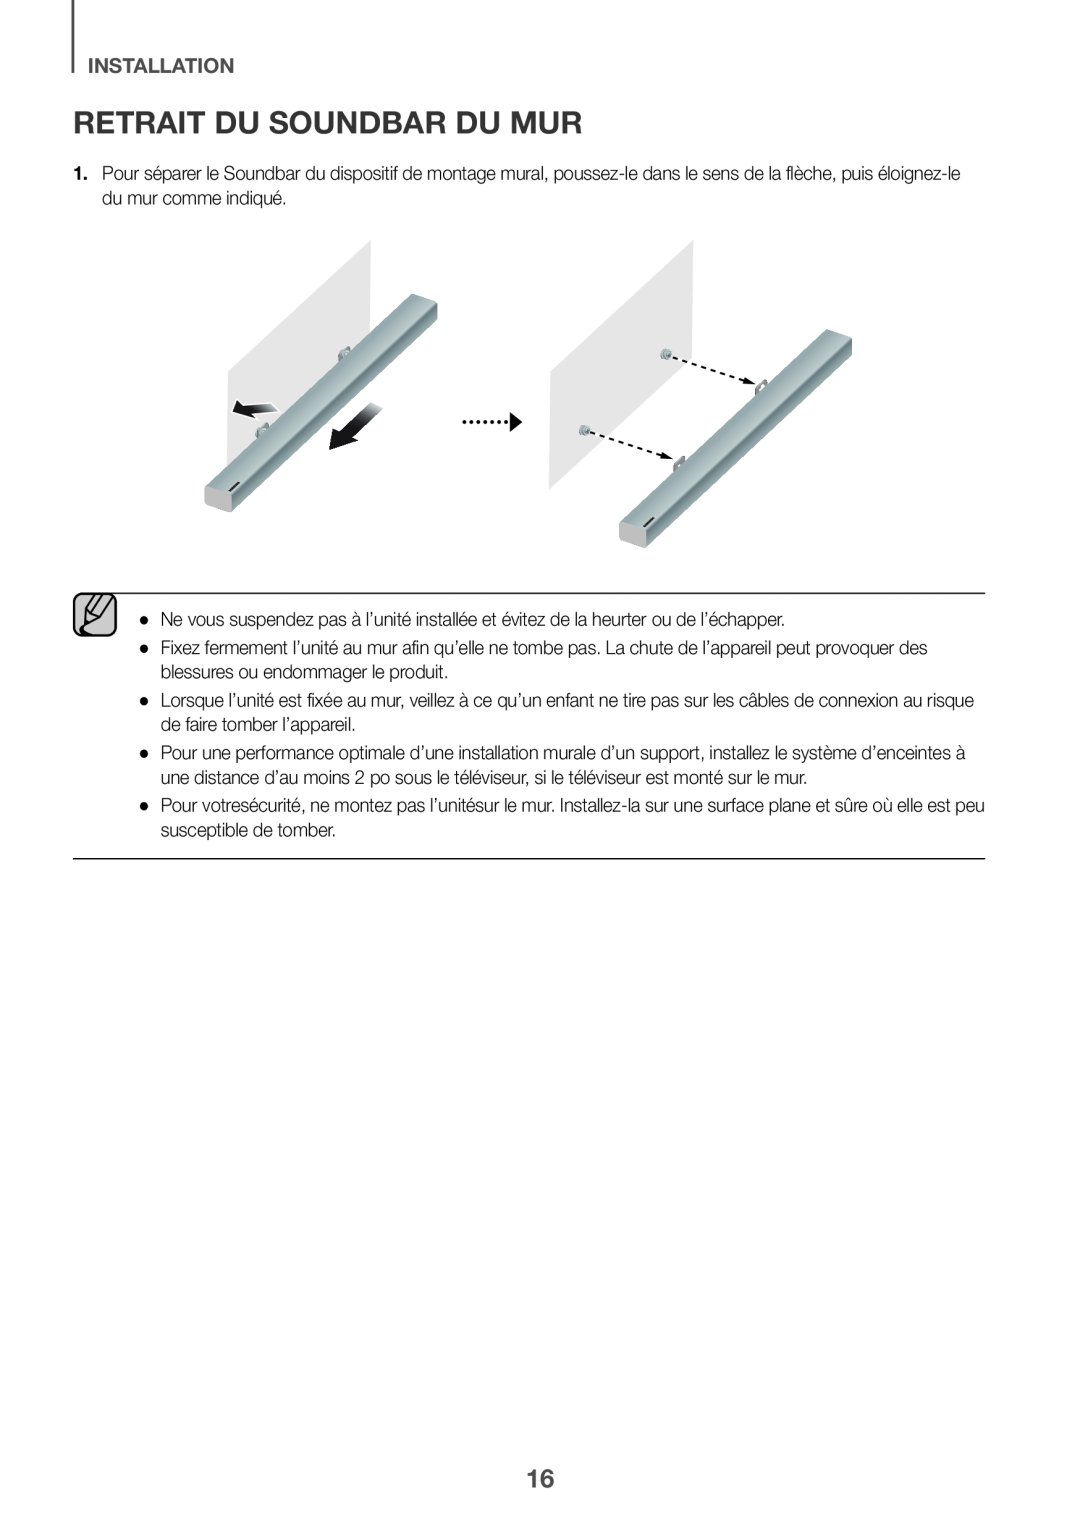 Retrait du Soundbar du mur
 branchements
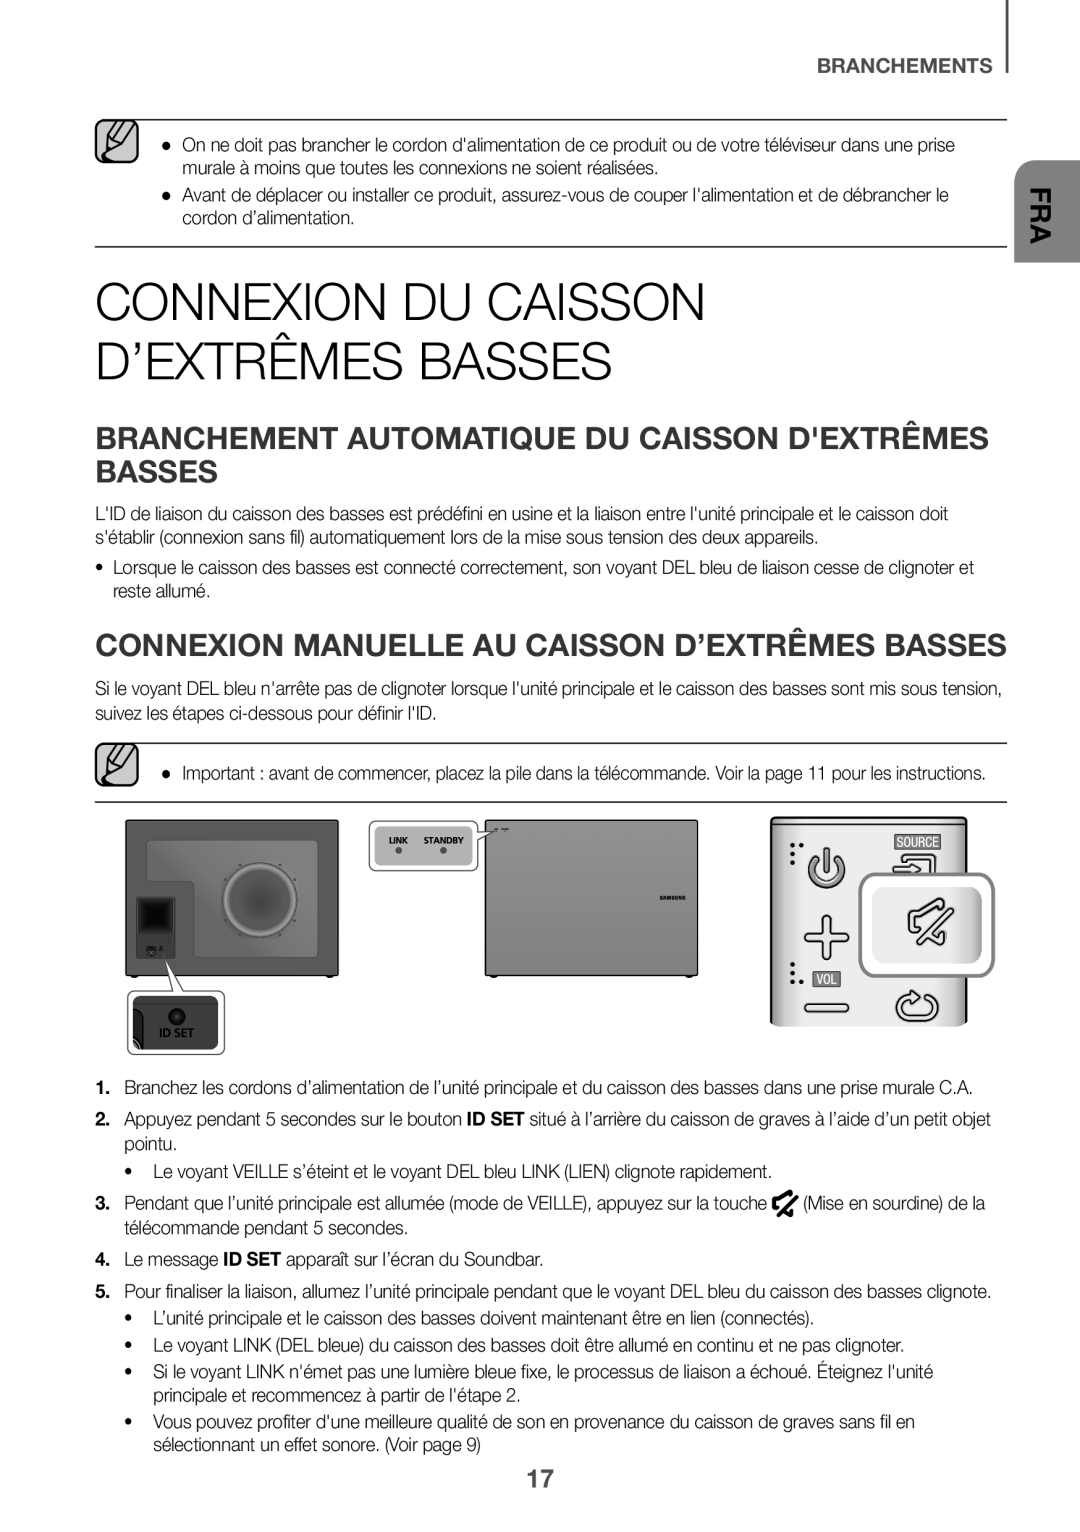
Connexion du caisson d’extrêmes basses
Branchement automatique du caisson d'extrêmes basses
Connexion manuelle au caisson d’extrêmes basses
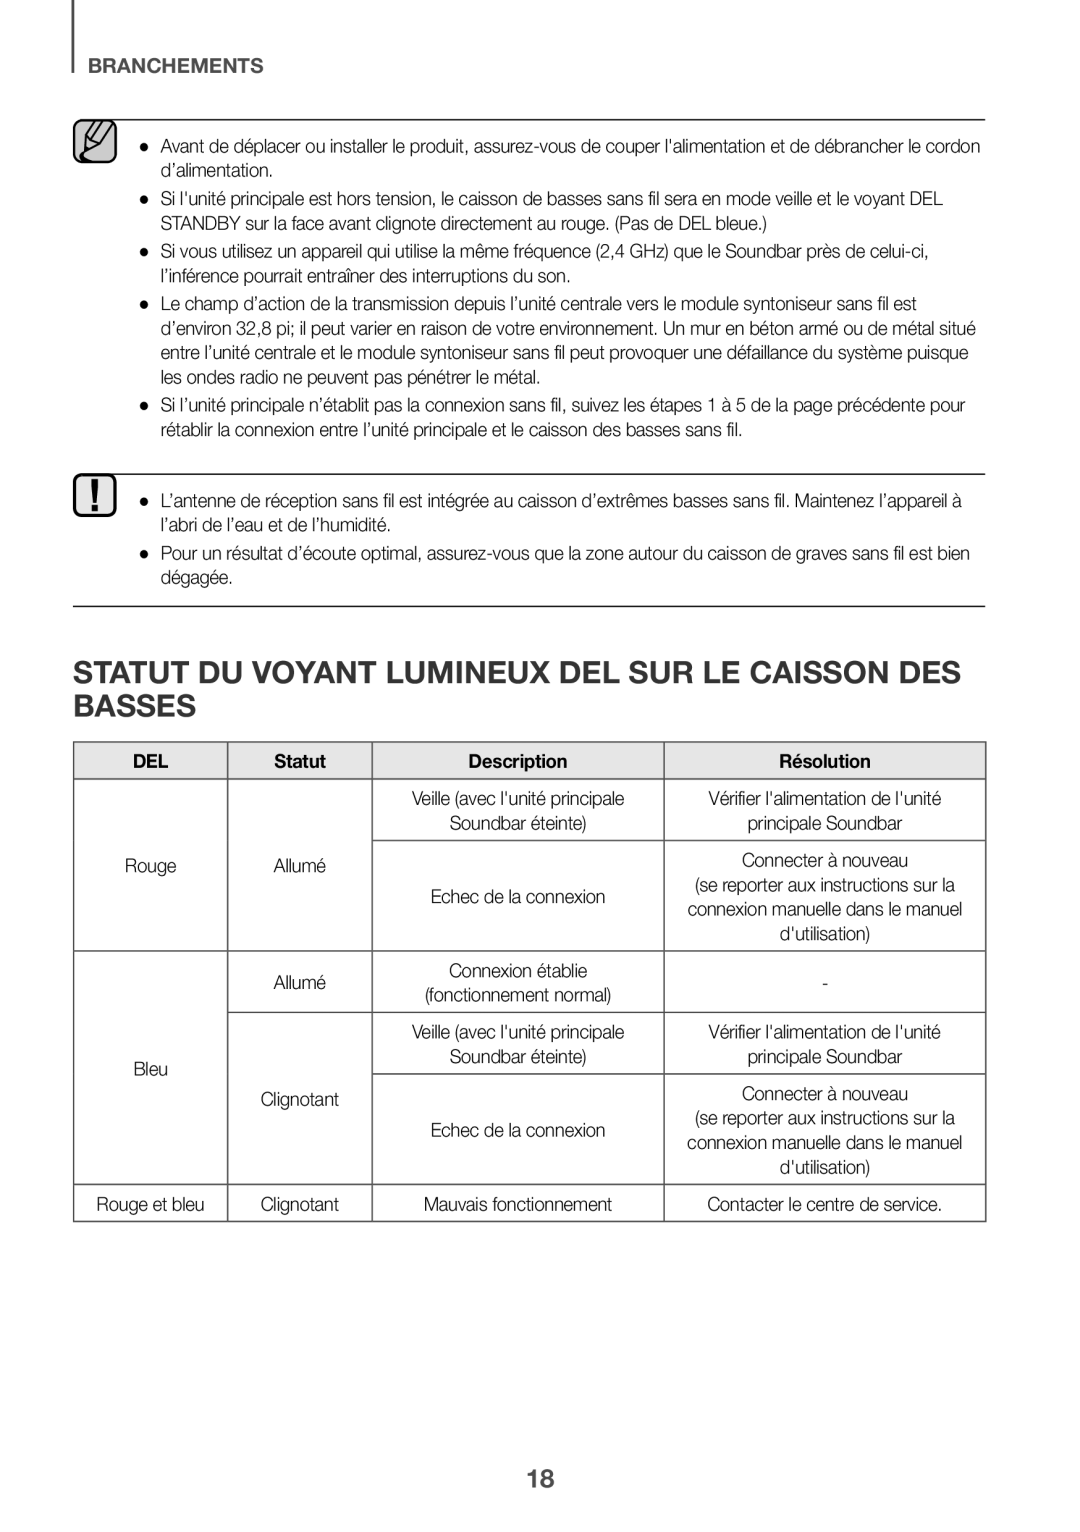 Statut du voyant lumineux DEL sur le caisson des basses
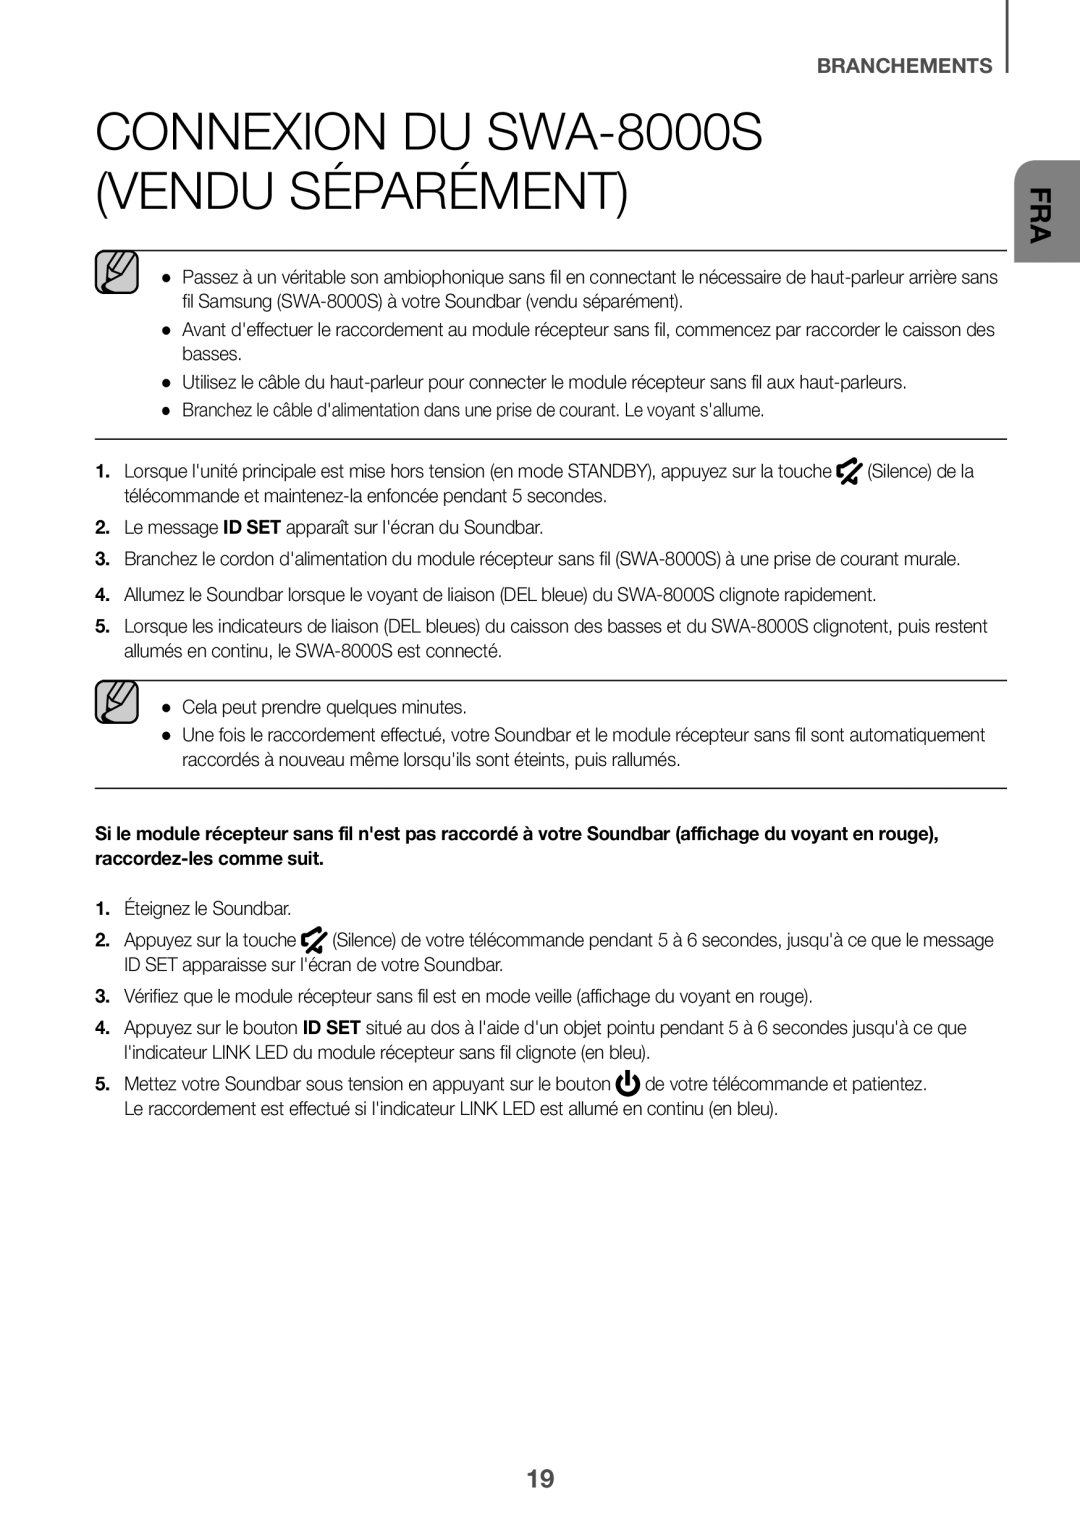 Connexion du SWA-8000S(vendu séparément)
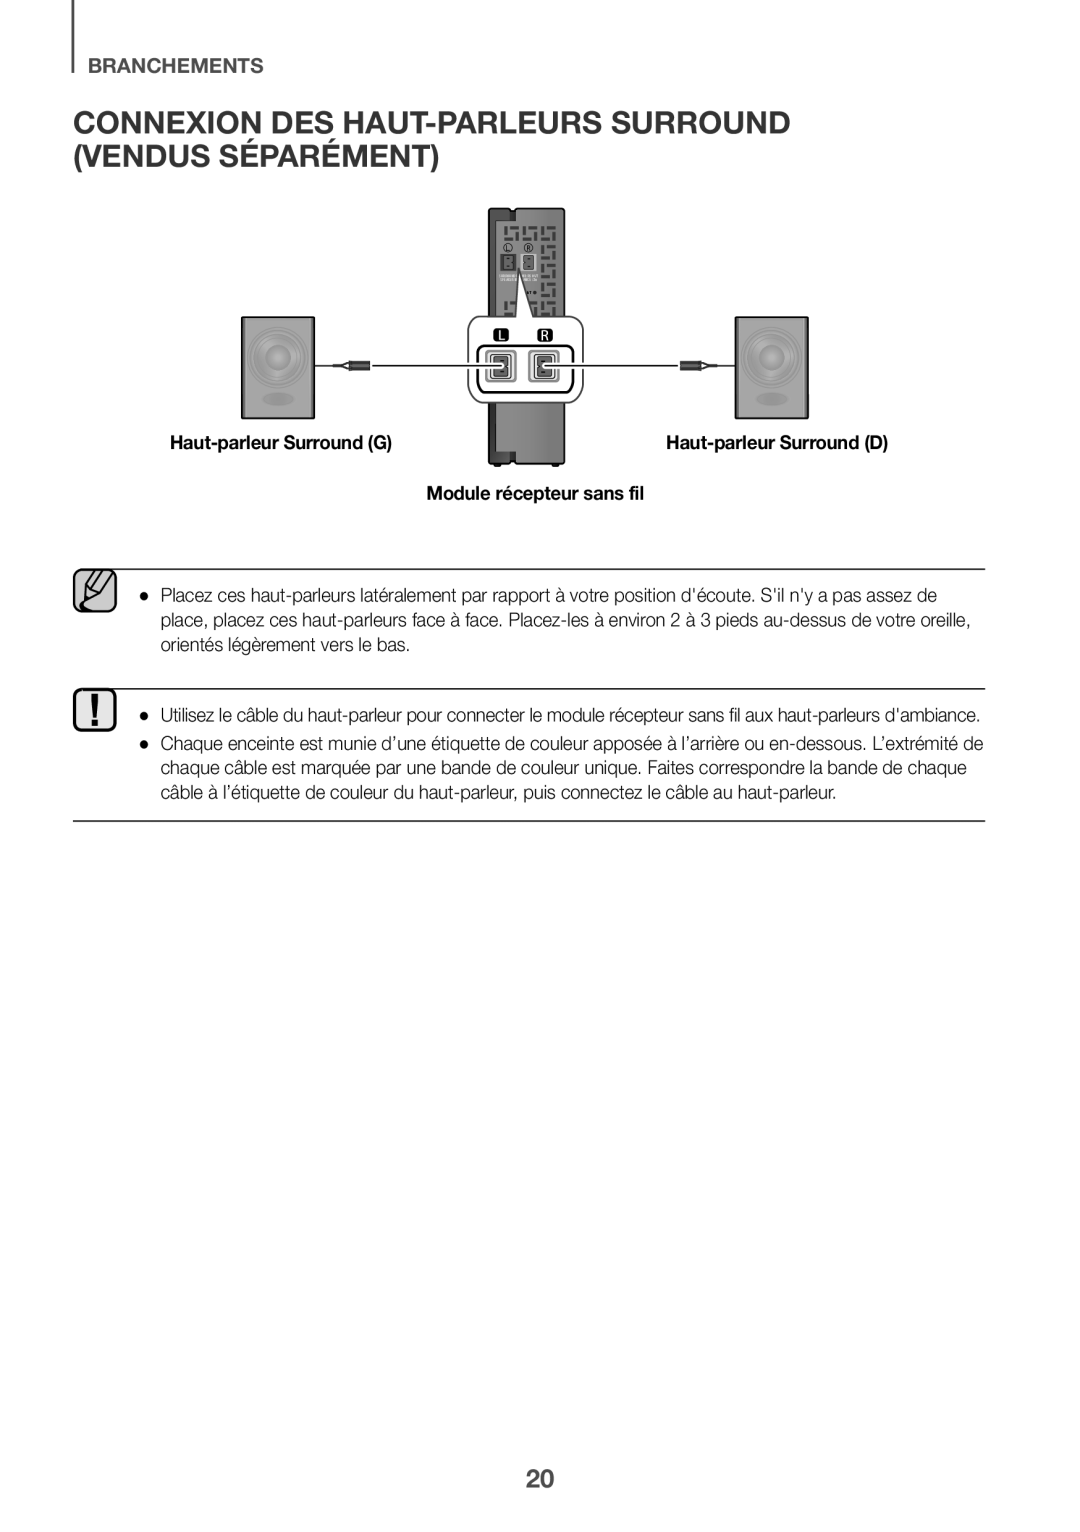 Connexion des haut-parleursSurround (vendus séparément)
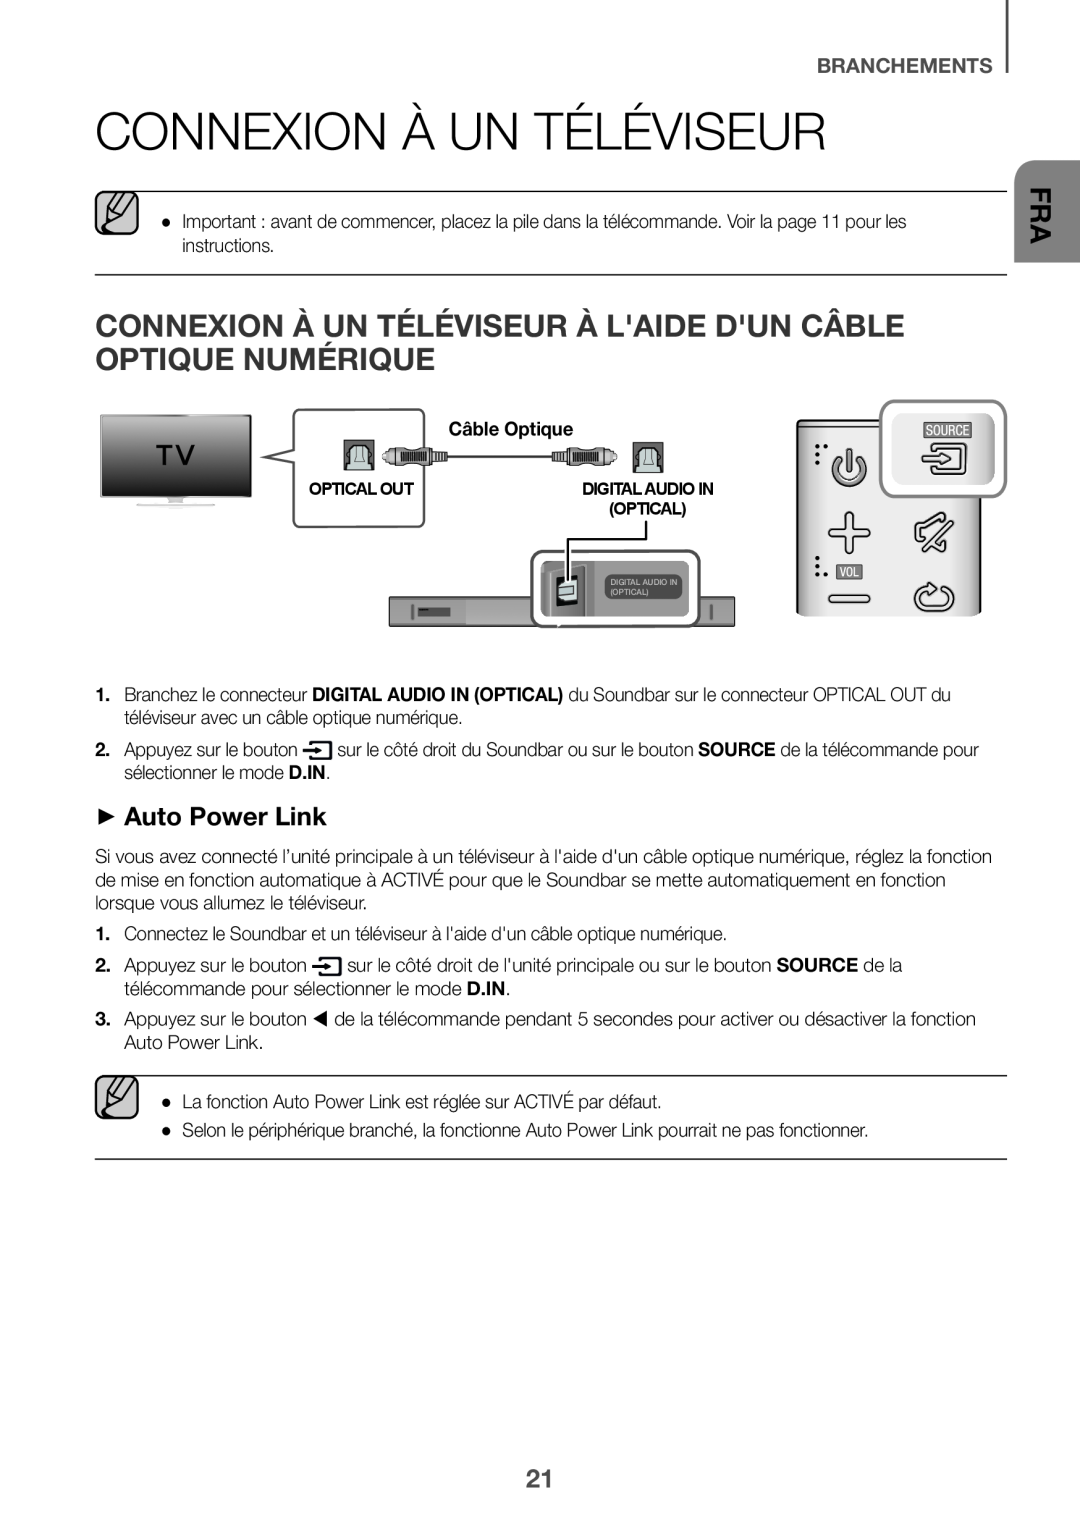 Connexion à un téléviseur
Connexion à un téléviseur à l'aide d'un câble optique numérique
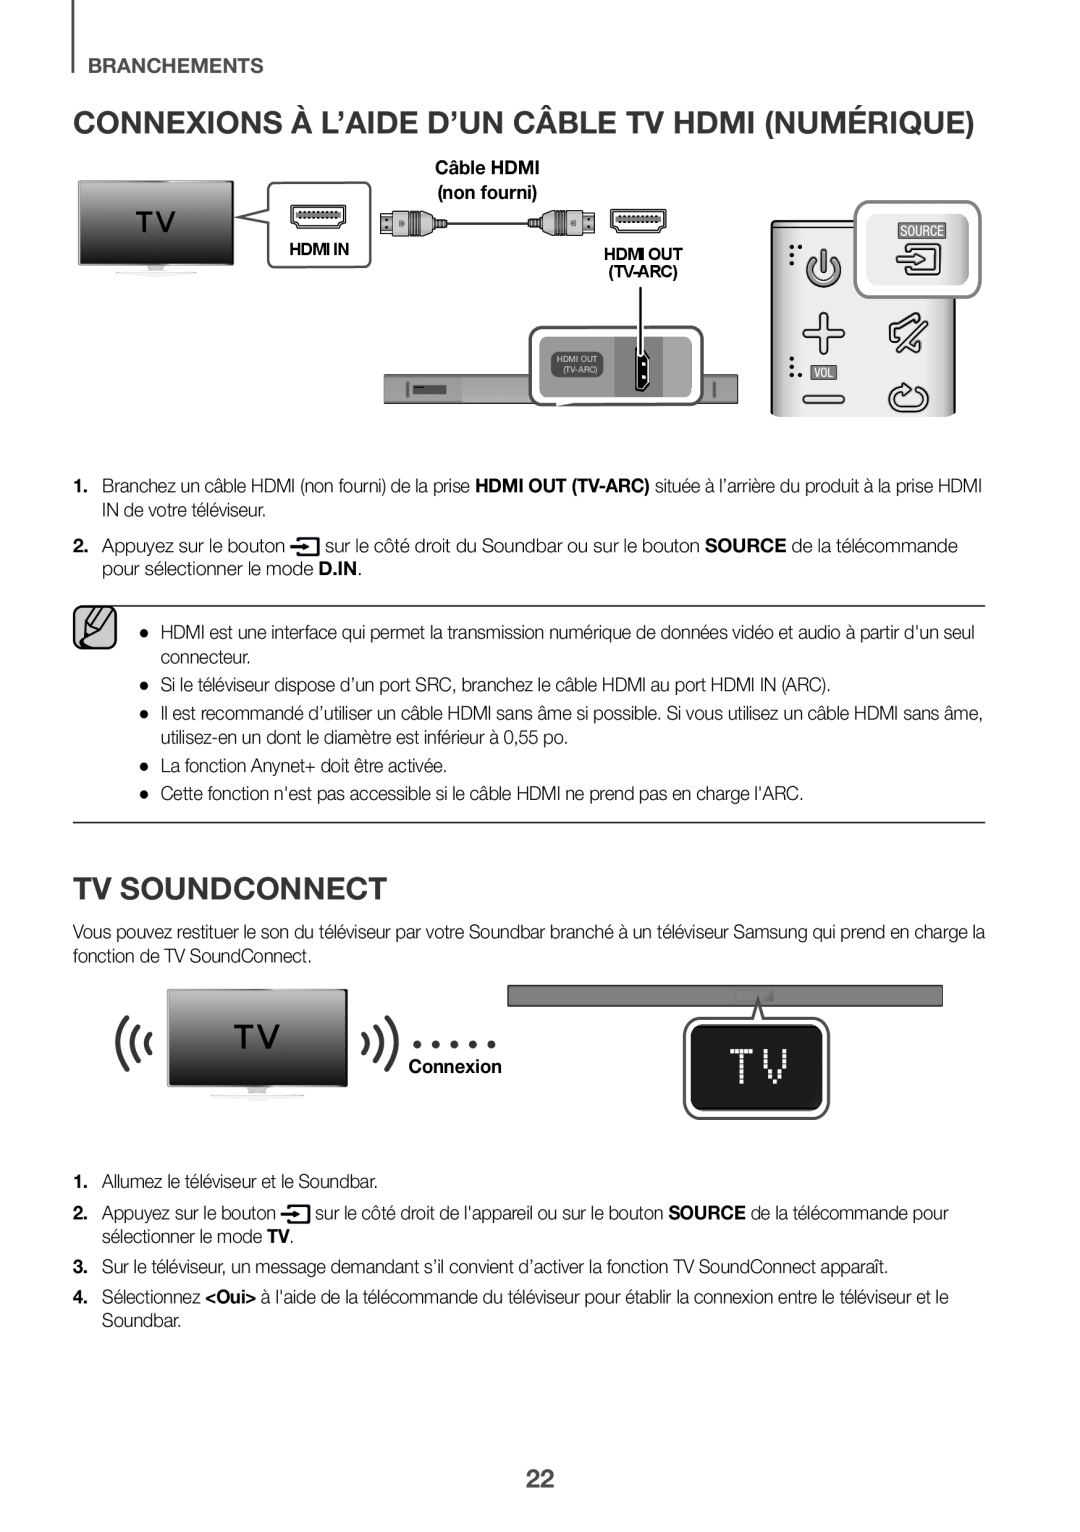 Connexions à l’aide d’un câble TV HDMI (numérique)
 ++Utilisation de la fonction Bluetooth POWER
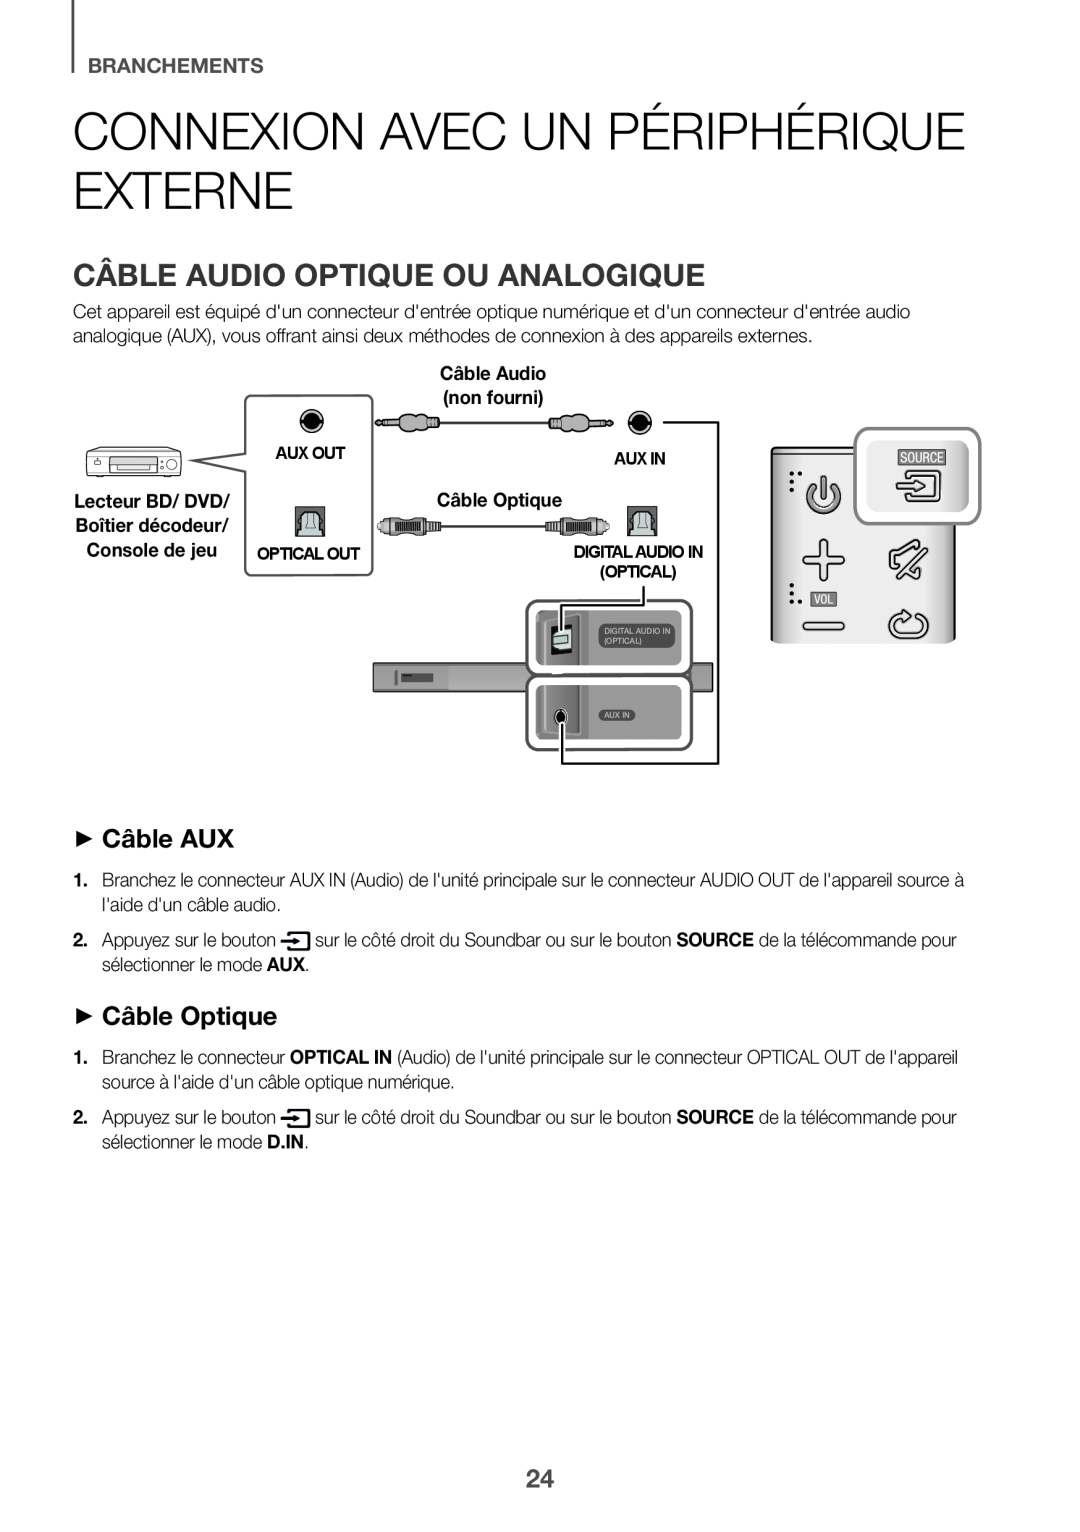 Connexion avec un périphérique externe
Câble audio optique ou analogique
++Câble AUX
++Câble Optique
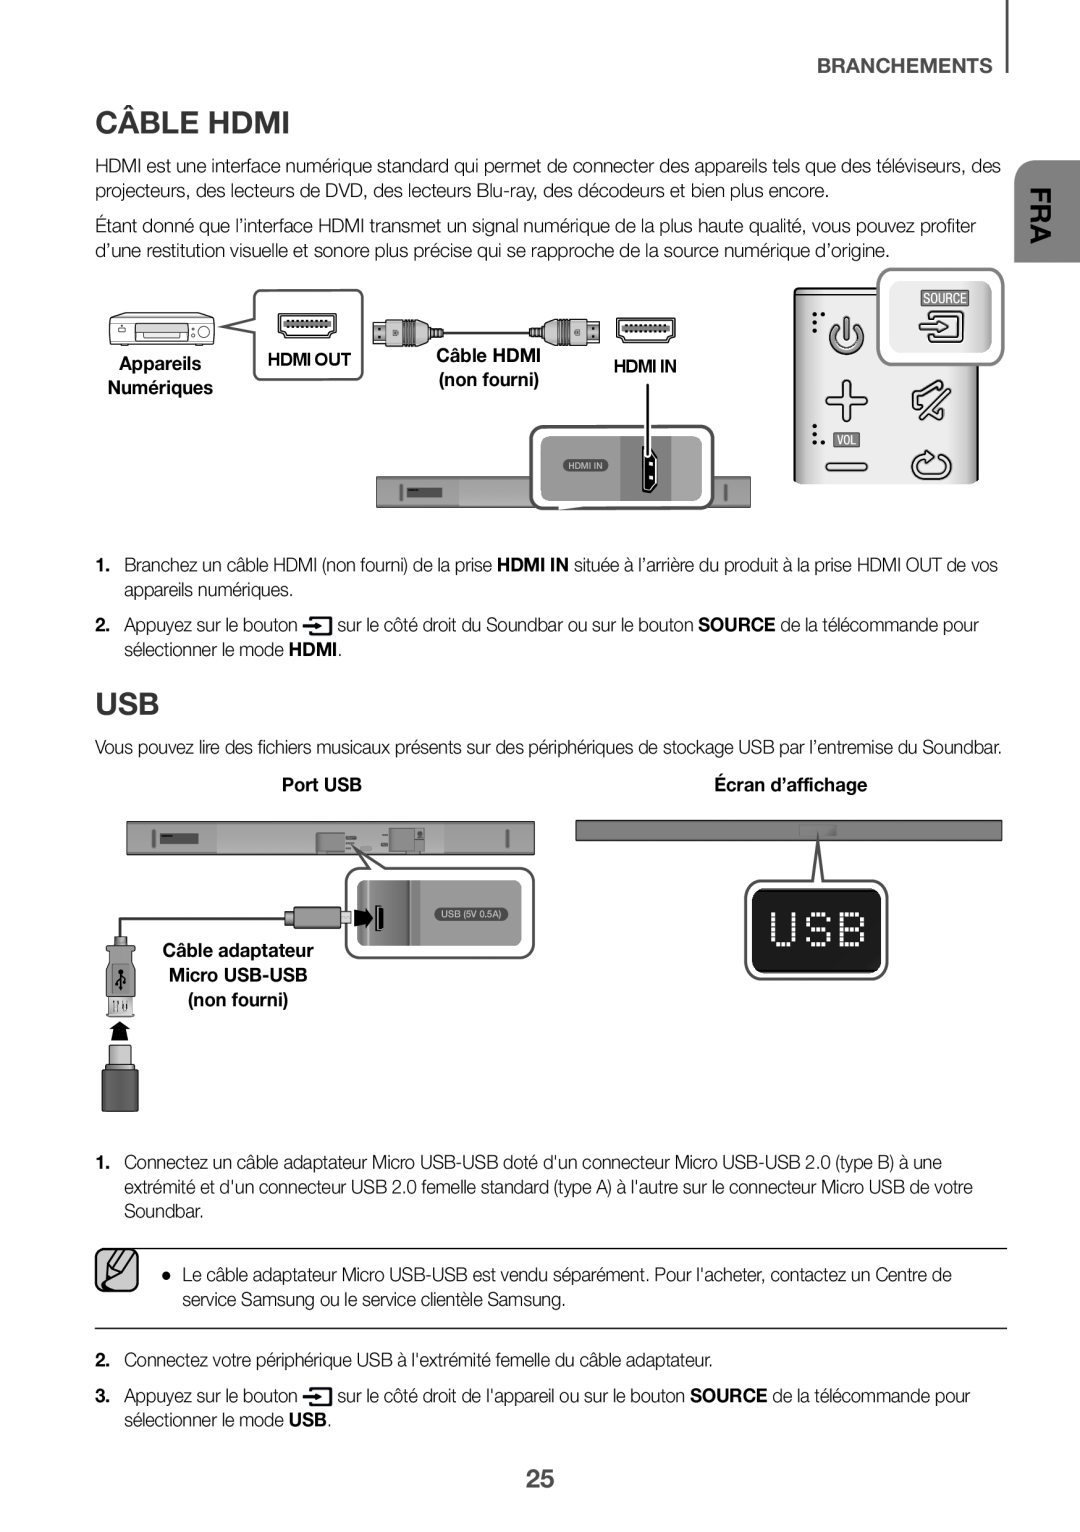 Câble HDMI
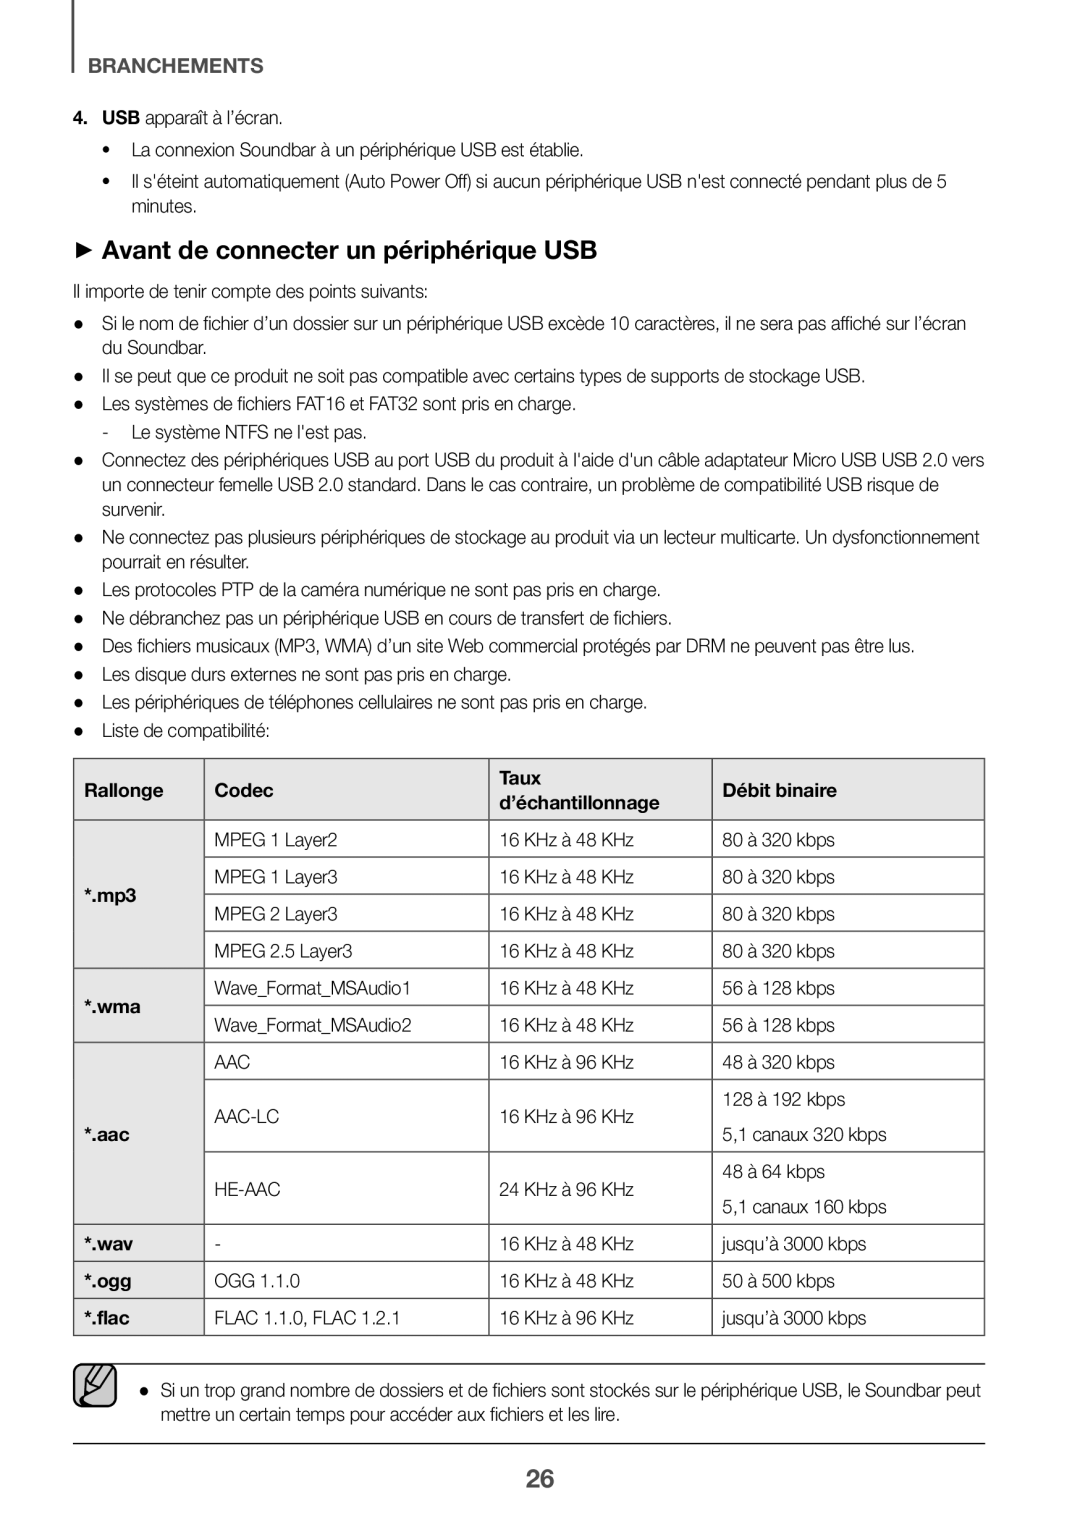 ++Avant de connecter un périphérique USB
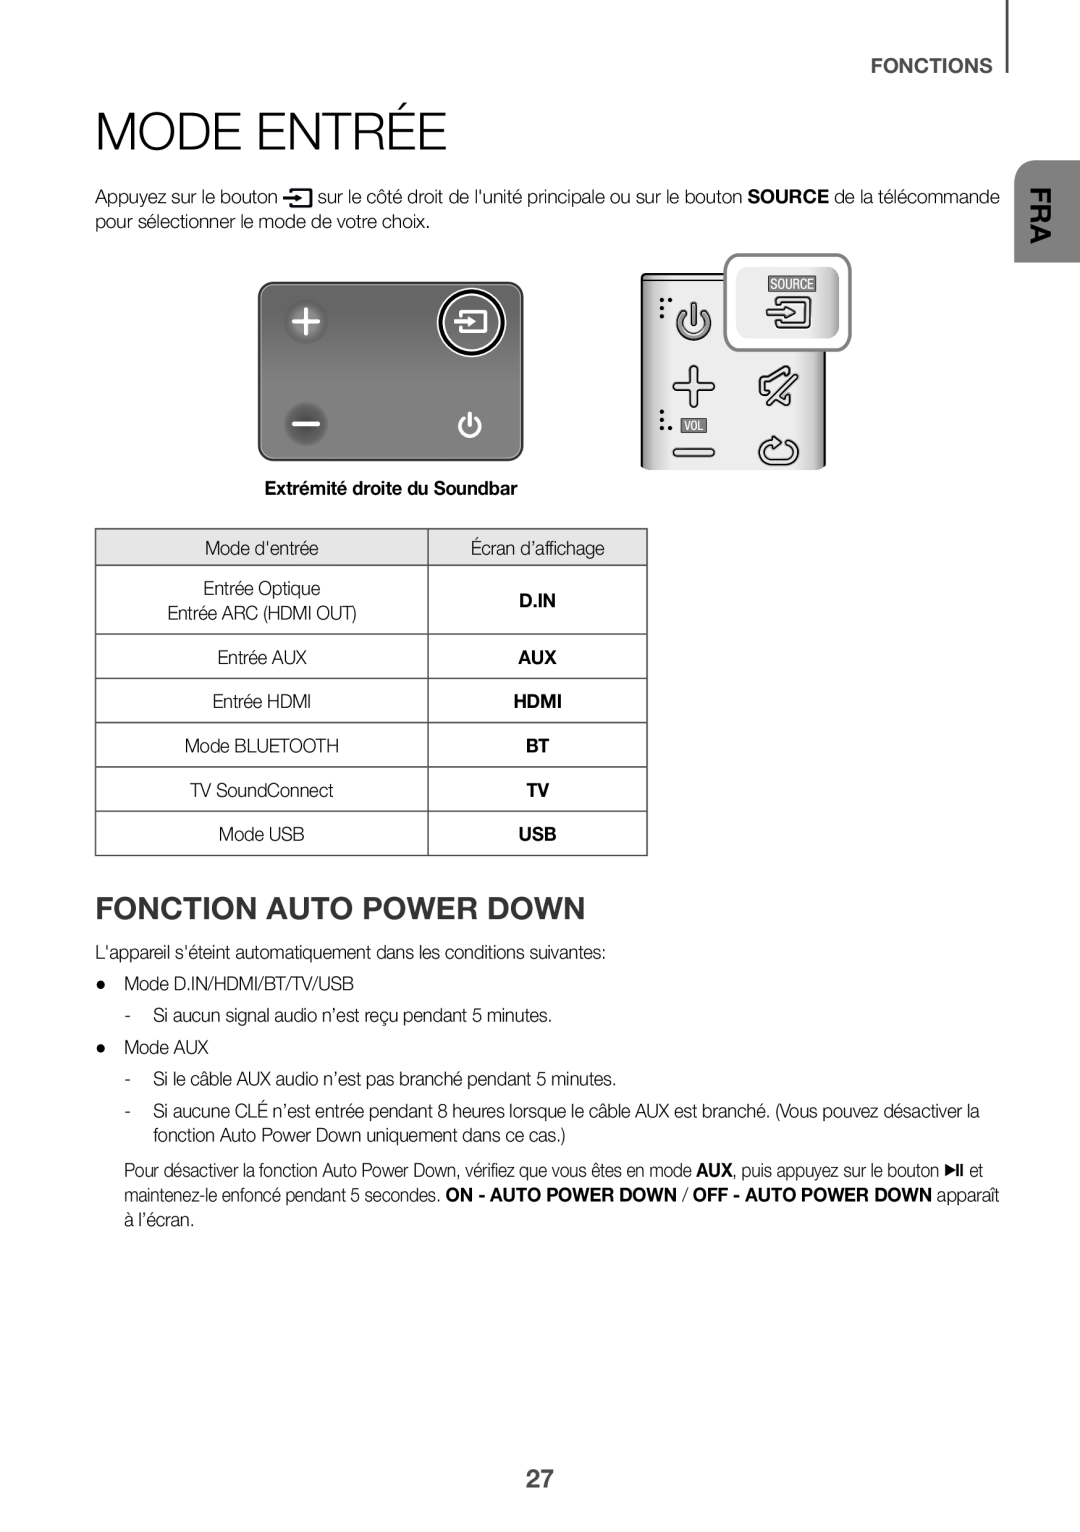 FONCTIONS
MODE ENTRÉE
FONCTION AUTO POWER DOWN
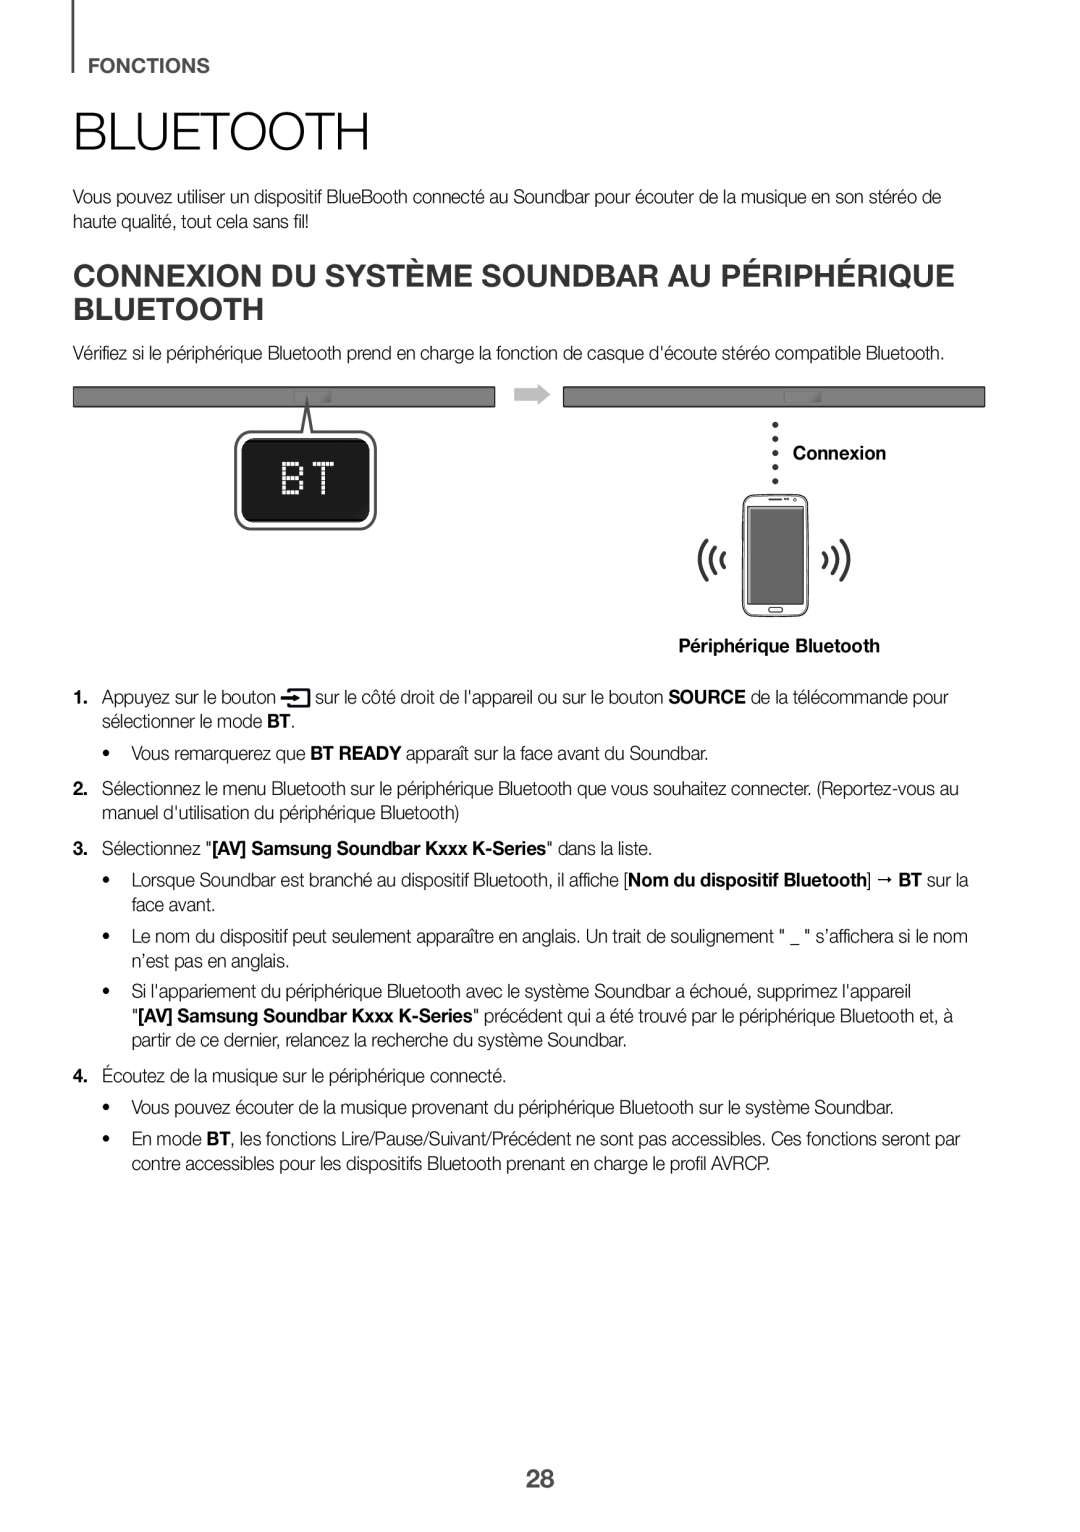 fonctions
Connexion du système Soundbar au périphérique Bluetooth
 Déconnexion du périphérique Bluetooth à partir du système Soundbar
Déconnexion du système Soundbar à partir du périphérique Bluetooth
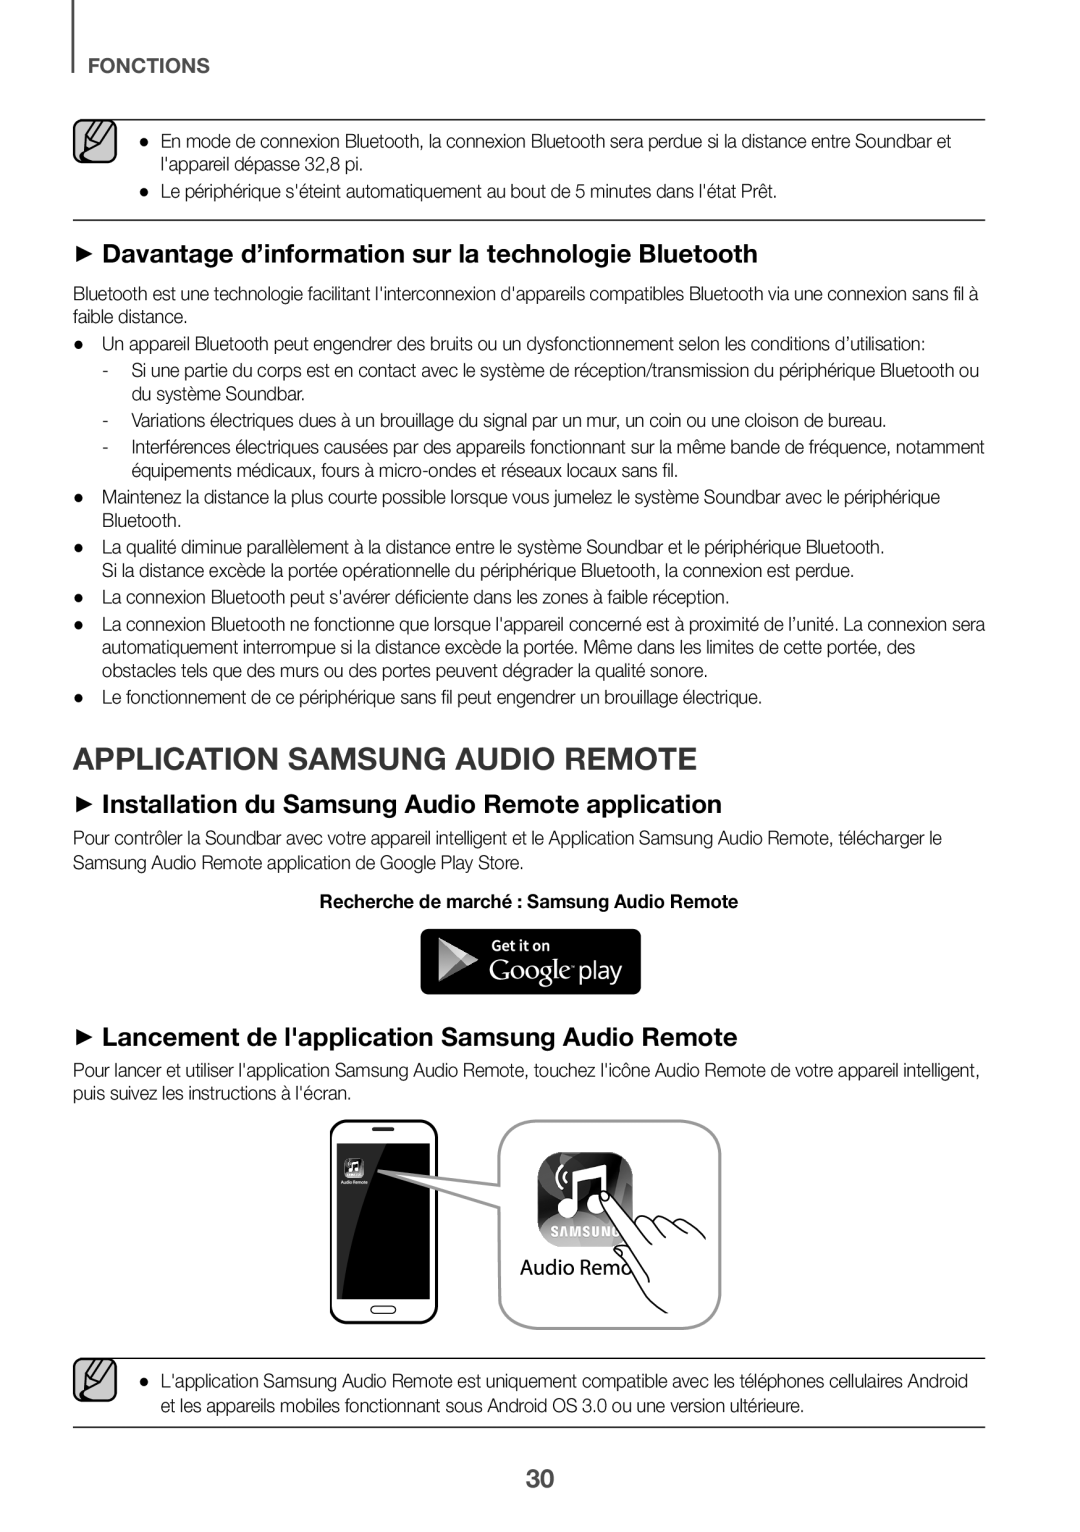 ++Davantage d’information sur la technologie Bluetooth
+Installation du Samsung Audio Remote application
++Lancement de l'application Samsung Audio Remote
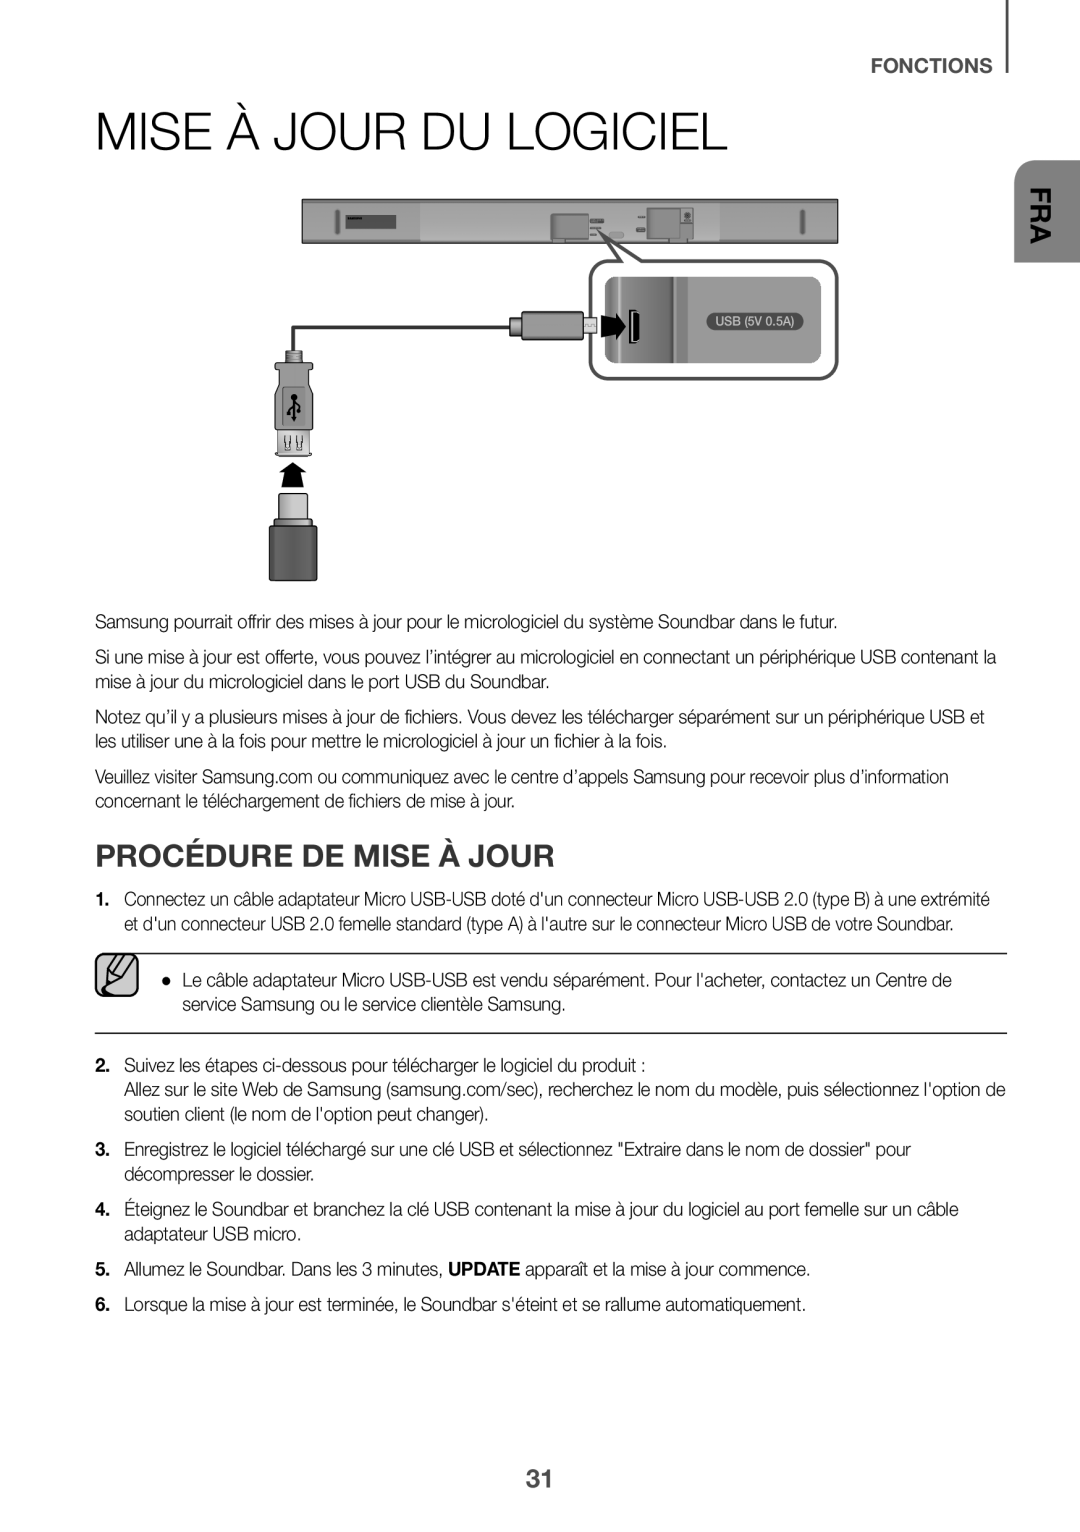 Mise à jour du logiciel
Procédure de mise à jour
 Si la UPDATE ne s'affiche pas
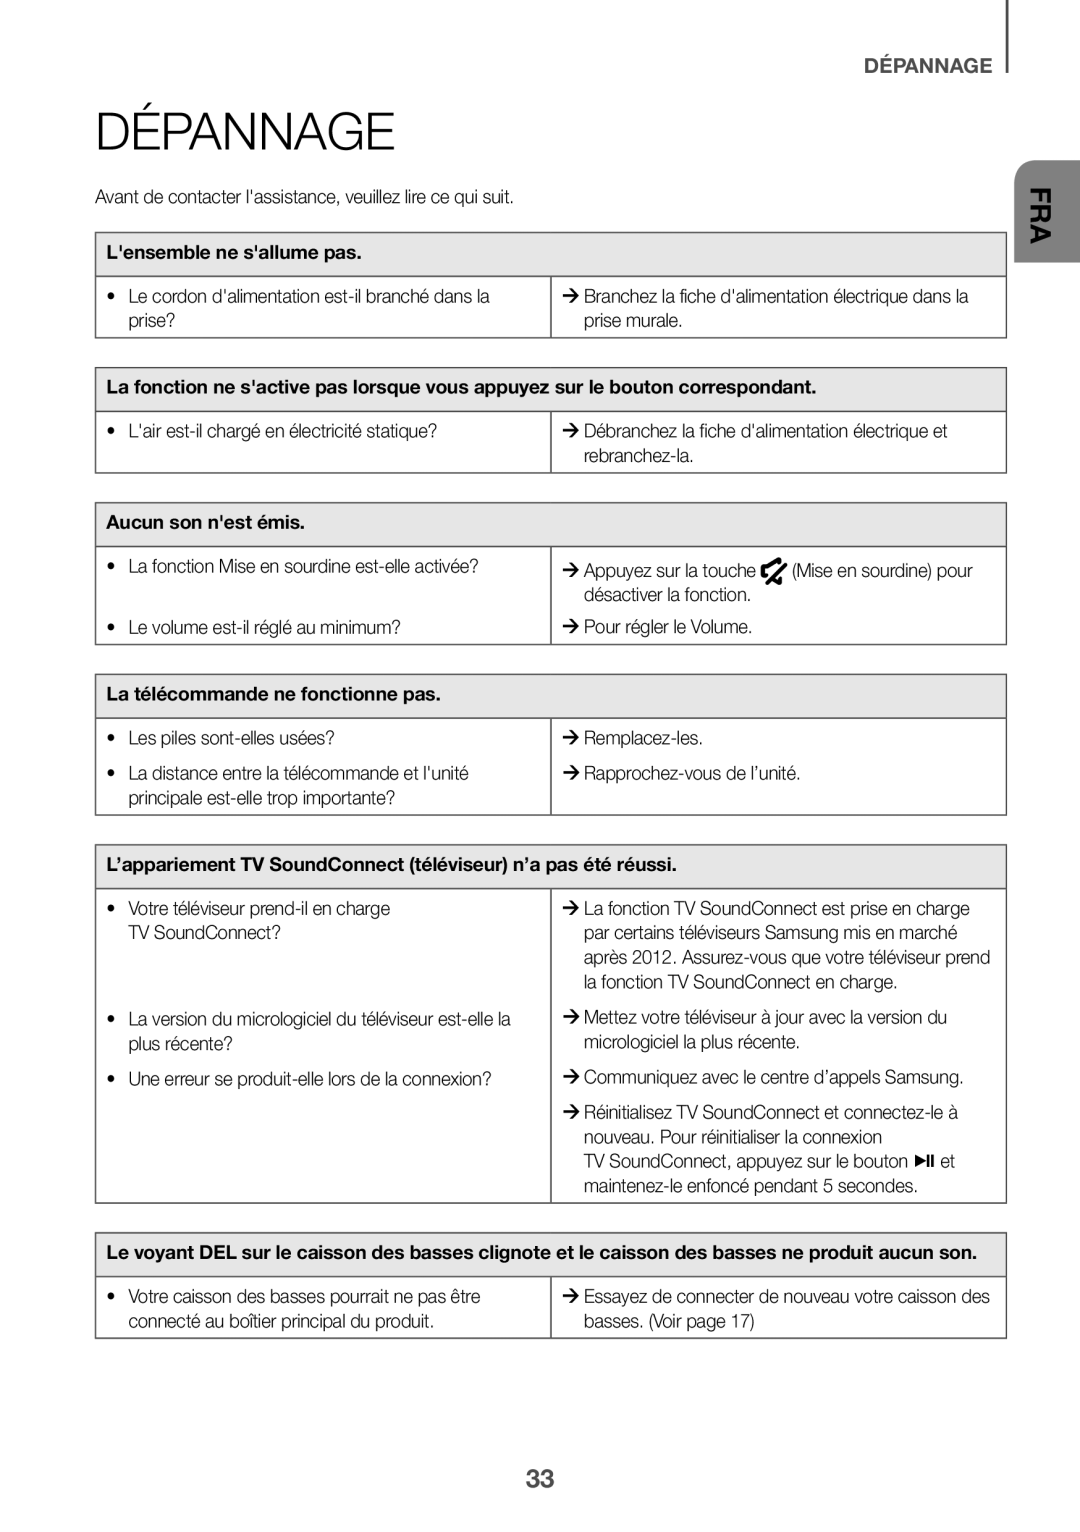 Dépannage
 annexe
Spécifications
 GARANTIE LIMITÉE À L’ACHETEUR INITIAL
Main-d’oeuvre
Pièces
un (1) an (au comptoir)
un (1) an
EXCLUSIONS (CE QUI N’EST PAS COUVERT)
Samsung Electronics Canada Inc
2050 Derry Rd West
Mississauga, On. L5N 0B9
Tel: 1-800-SAMSUNG (726-7864)
Fax: (905) 542
Website: http://www.samsung.com/ca_fr
 SIÈGE SOCIAL
www.samsung.com/ca_fr/support
Comment contacter Samsung dans le monde