 Thank you for purchasing this Samsung product
To receive more complete service, please register your product at
 GETTING STARTED
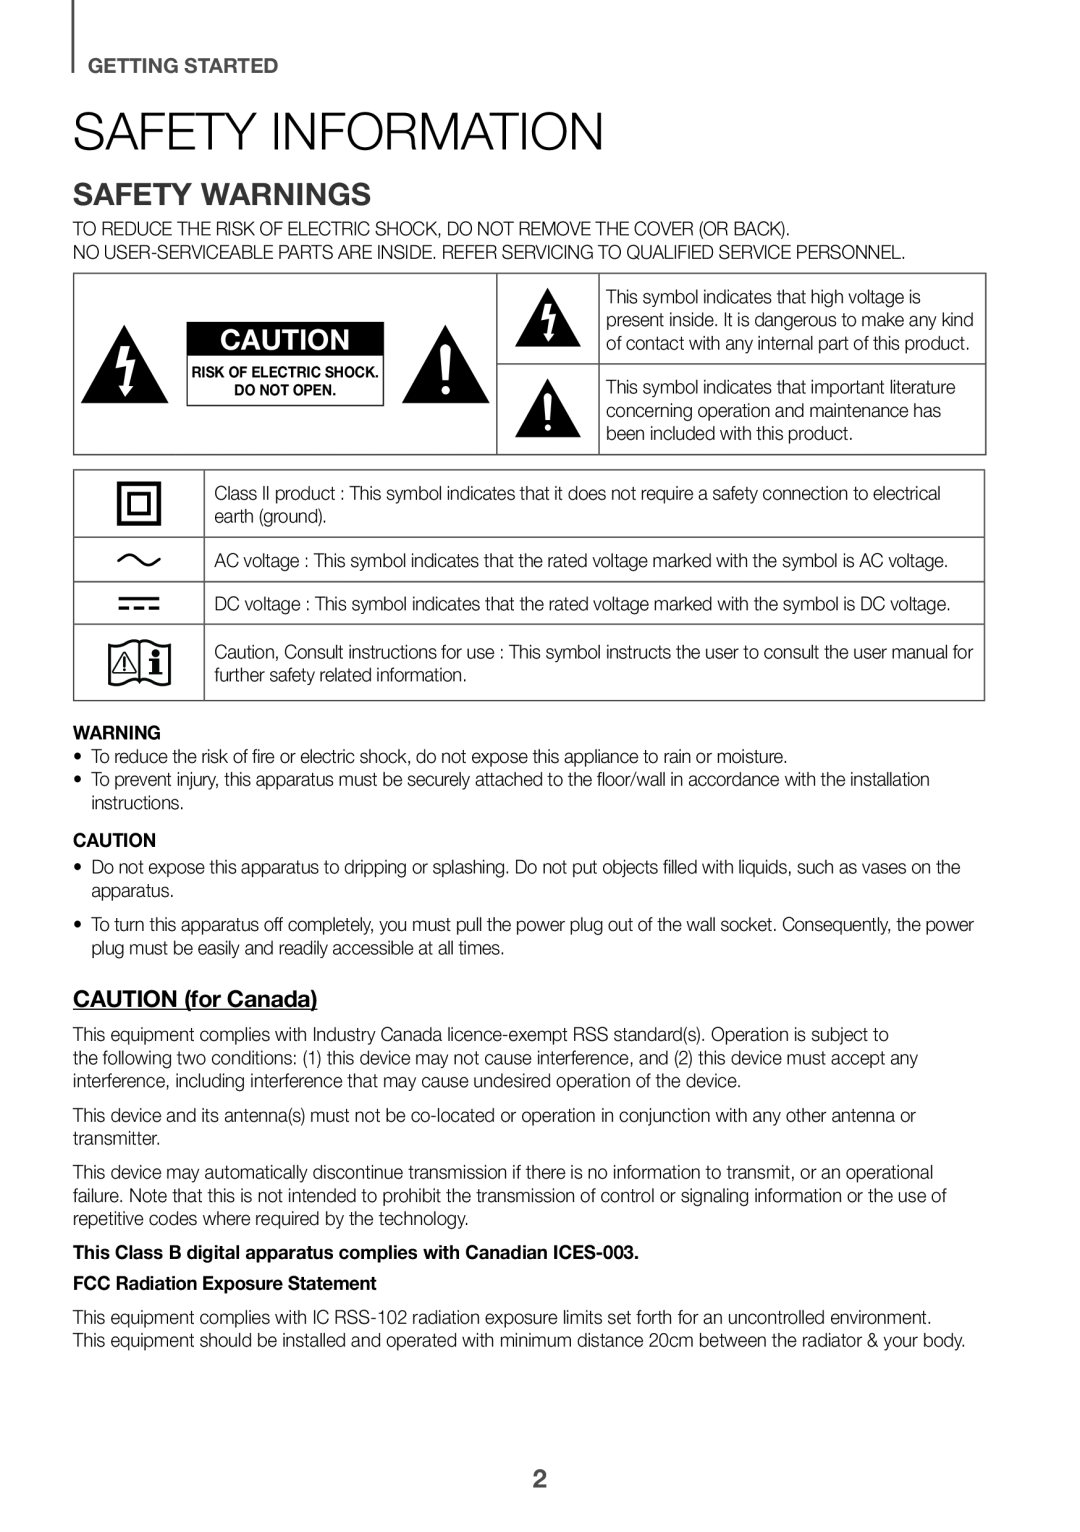
SAFETY INFORMATION
SAFETY WARNINGS
CAUTION (for Canada)
 Important Safety Instructions
LICENSES
 PRECAUTIONS
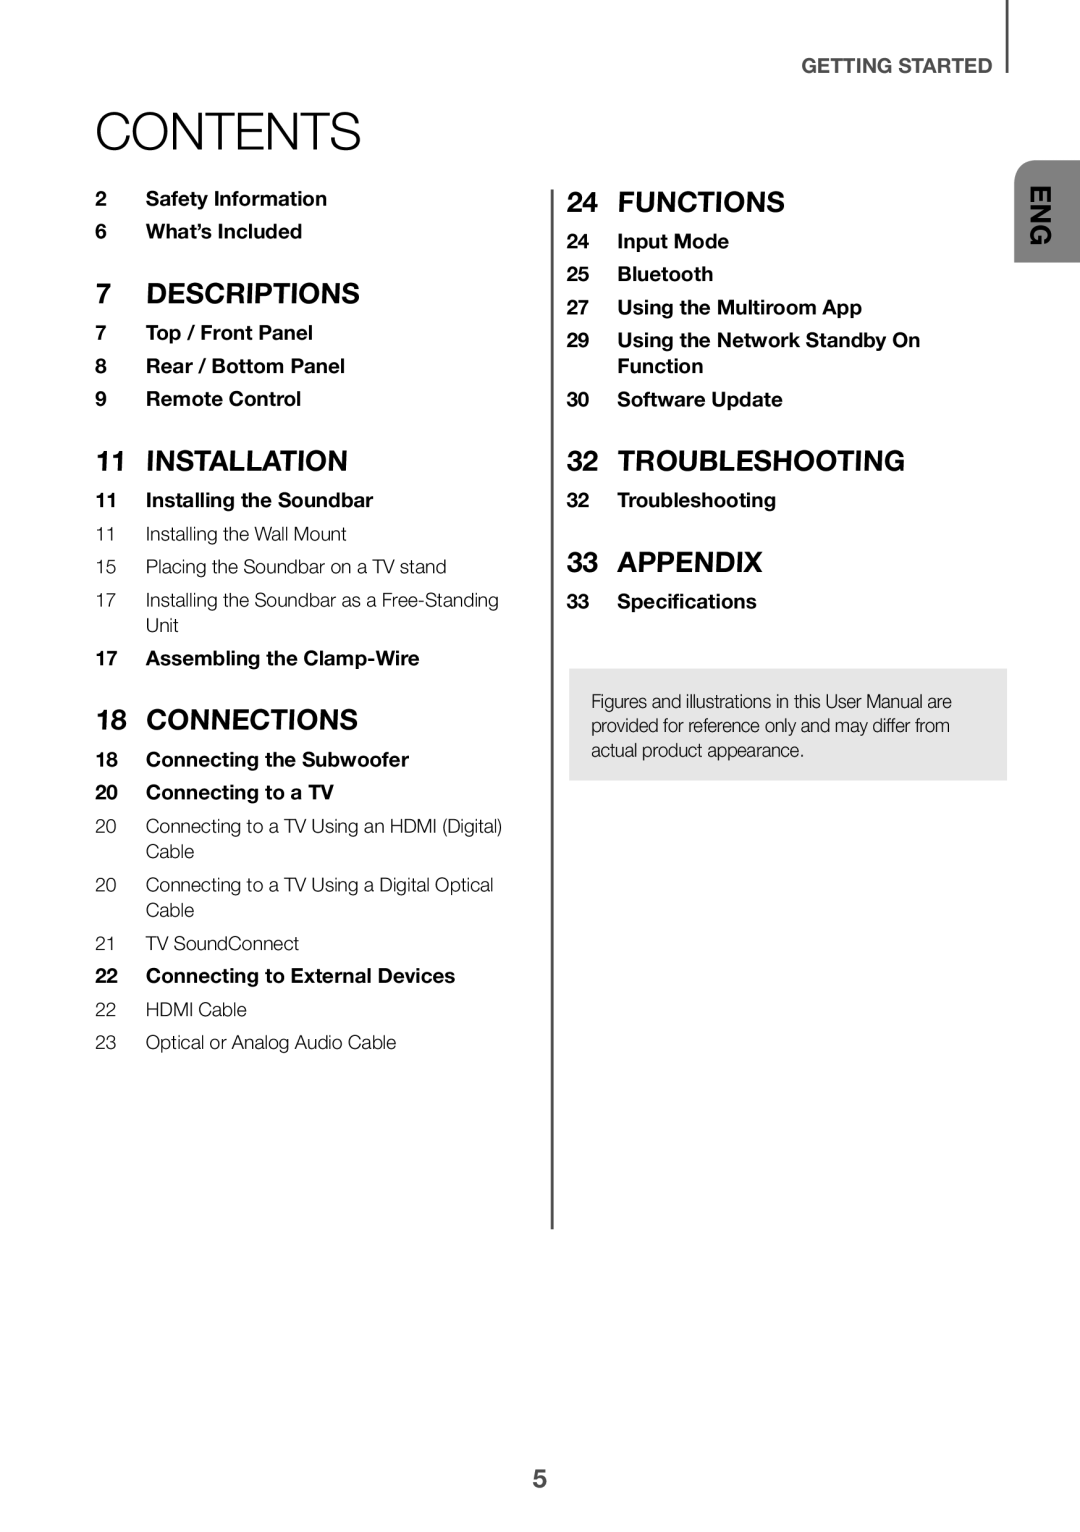 CONTENTS
2Safety Information
6What’s Included
7Top / Front Panel
8Rear / Bottom Panel
9Remote Control
11Installing the Soundbar
17Assembling the Clamp-Wire
18Connecting the Subwoofer
20Connecting to a TV
22Connecting to External Devices
Input Mode
Bluetooth
27 Using the Multiroom App
29Using the Network Standby On Function
30Software Update
32Troubleshooting
33Specifications
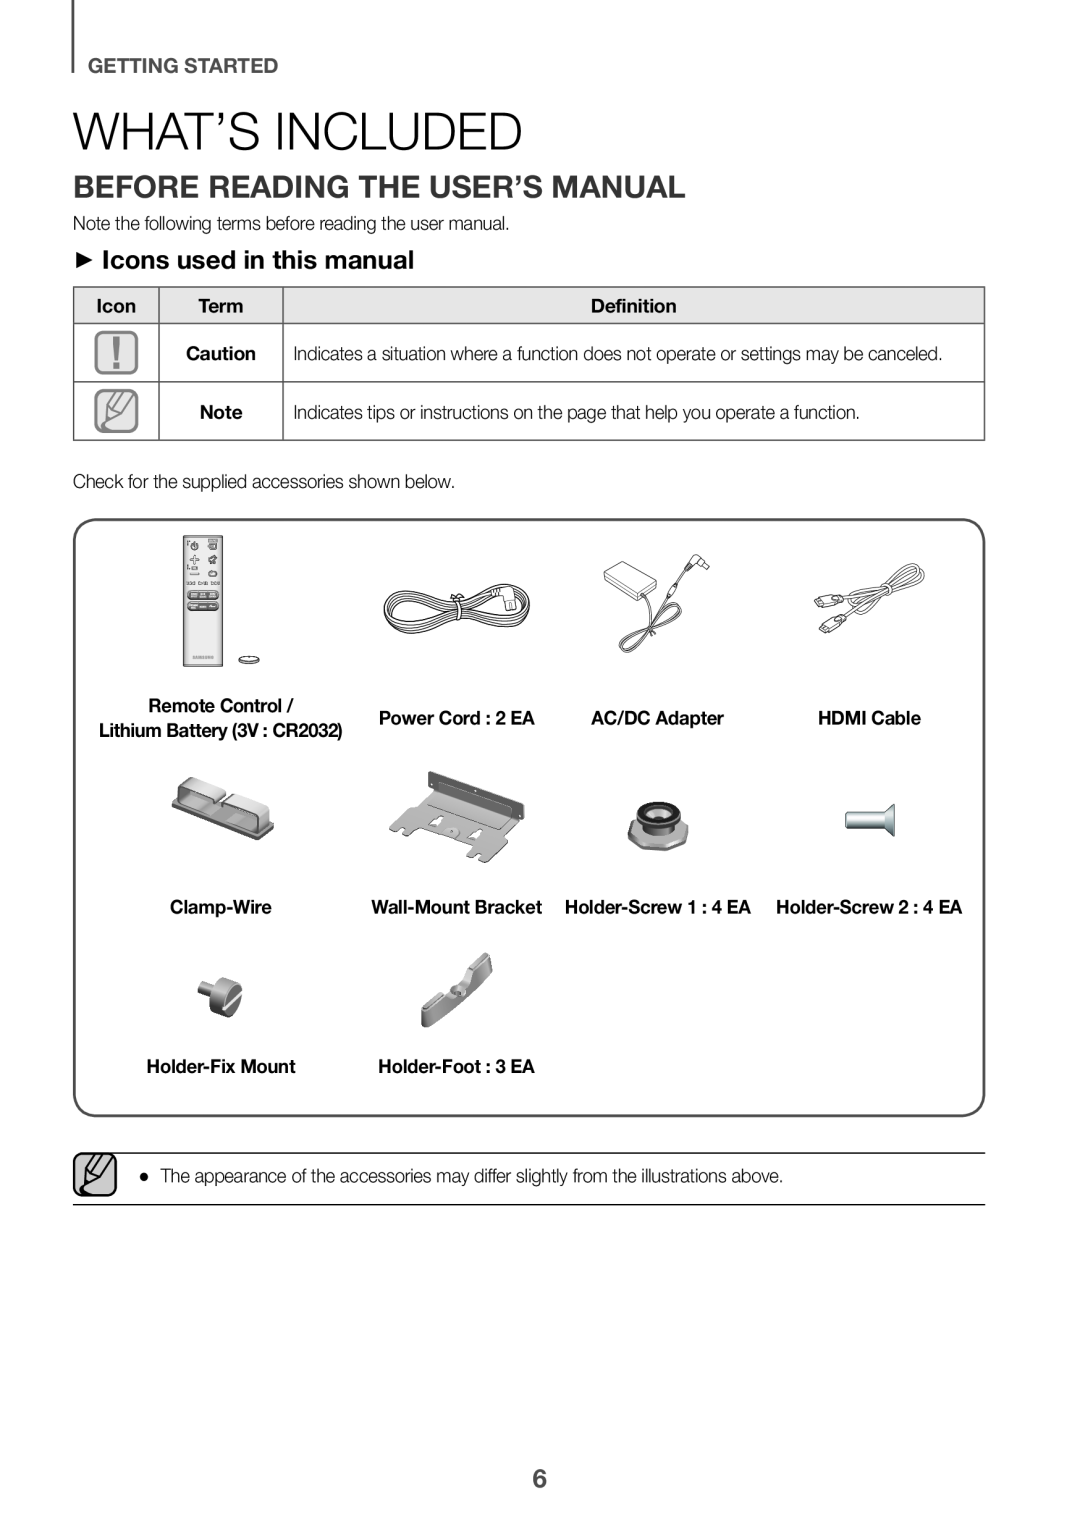 WHAT’S INCLUDED
BEFORE READING THE USER’S MANUAL
++Icons used in this manual
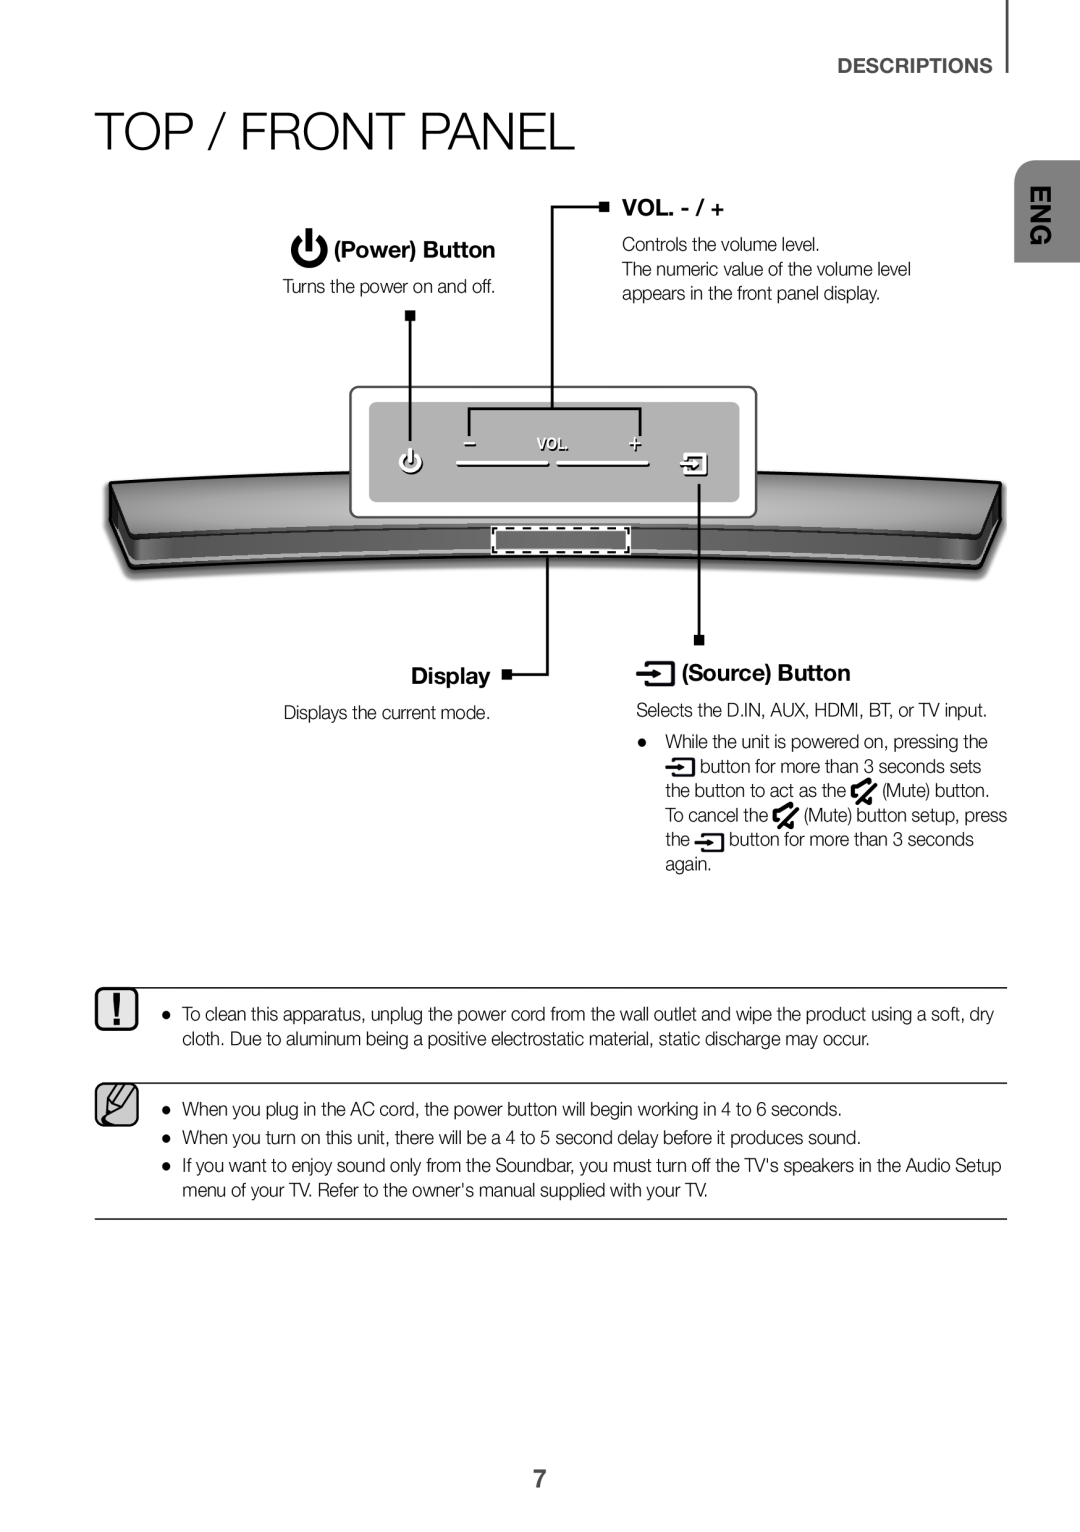 (Power) Button
DESCRIPTIONS
VOL. - /+
Display
(Source) Button
 REAR / BOTTOM PANEL
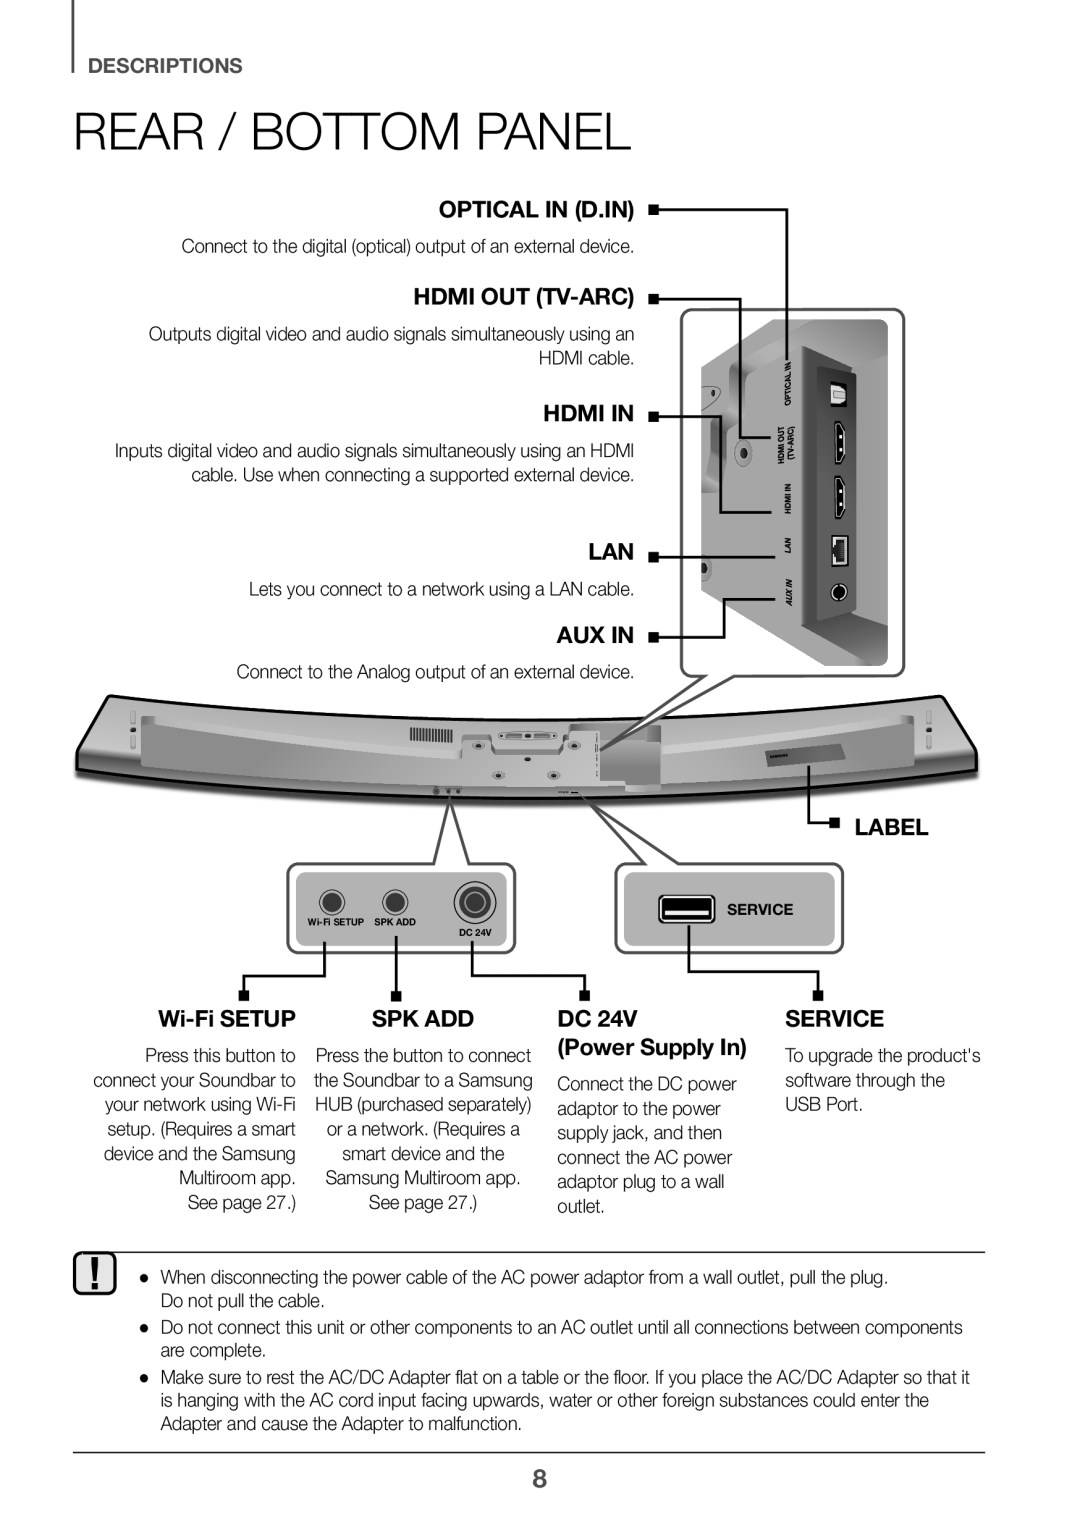
OPTICAL IN (D.IN)
HDMI OUT (TV-ARC)
LAN
LABEL
Wi-FiSE
TUP
K ADD
(Power Supply In)
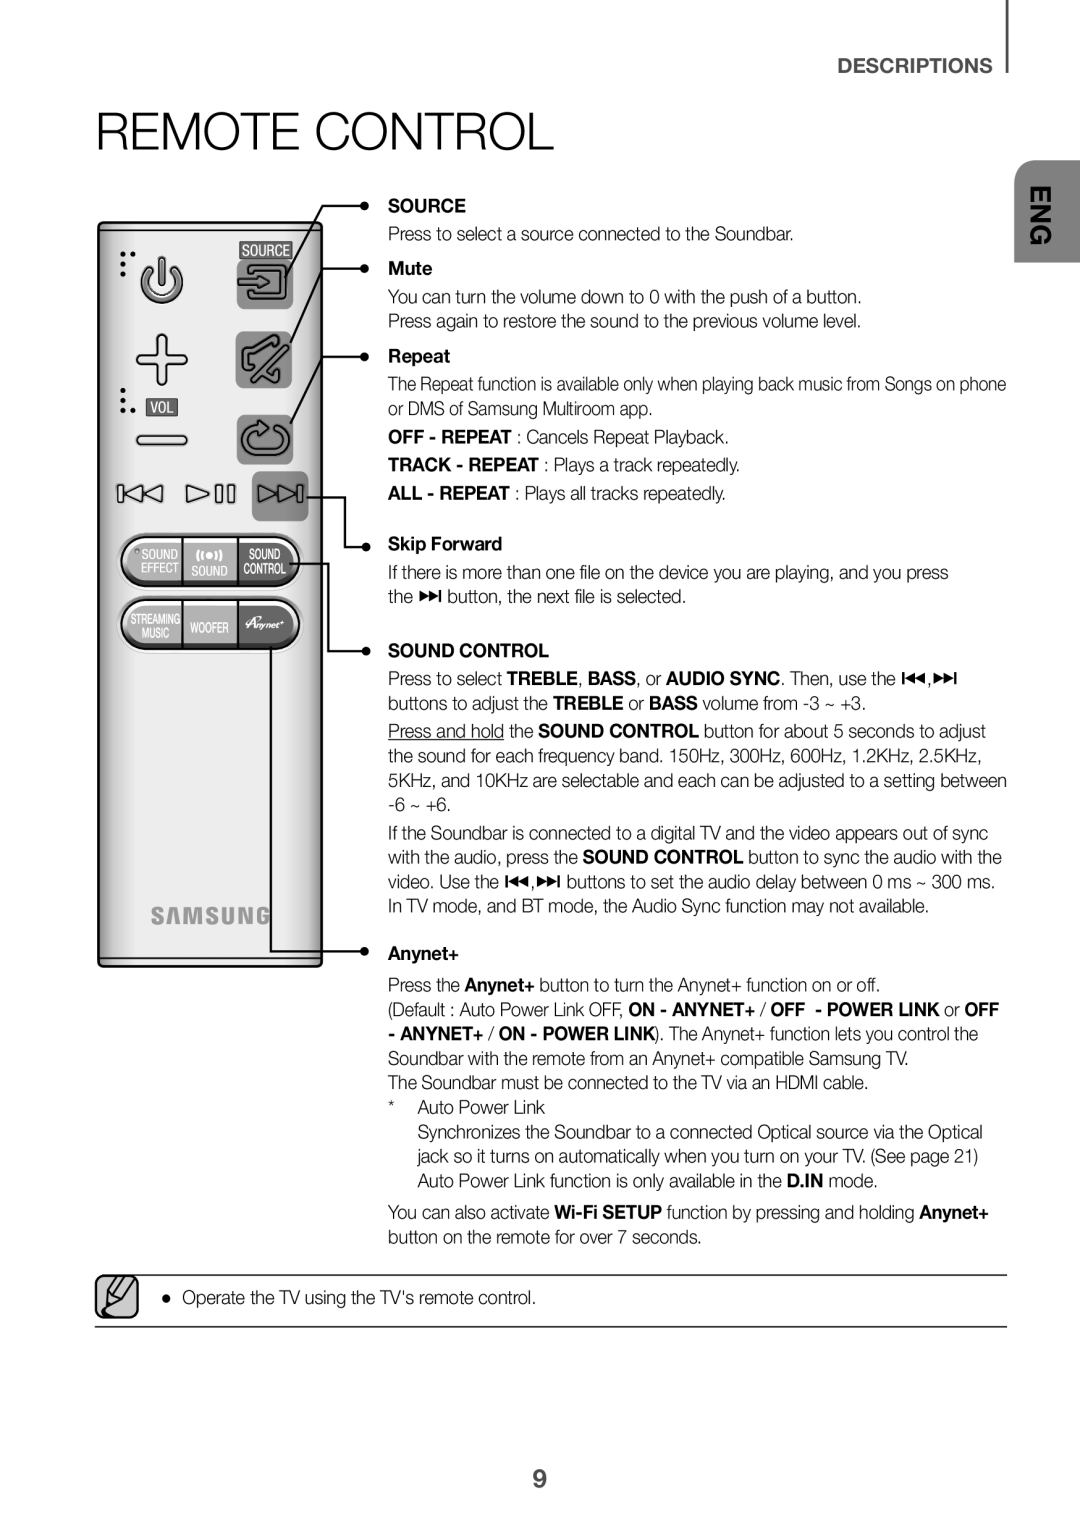 REMOTE CONTROL
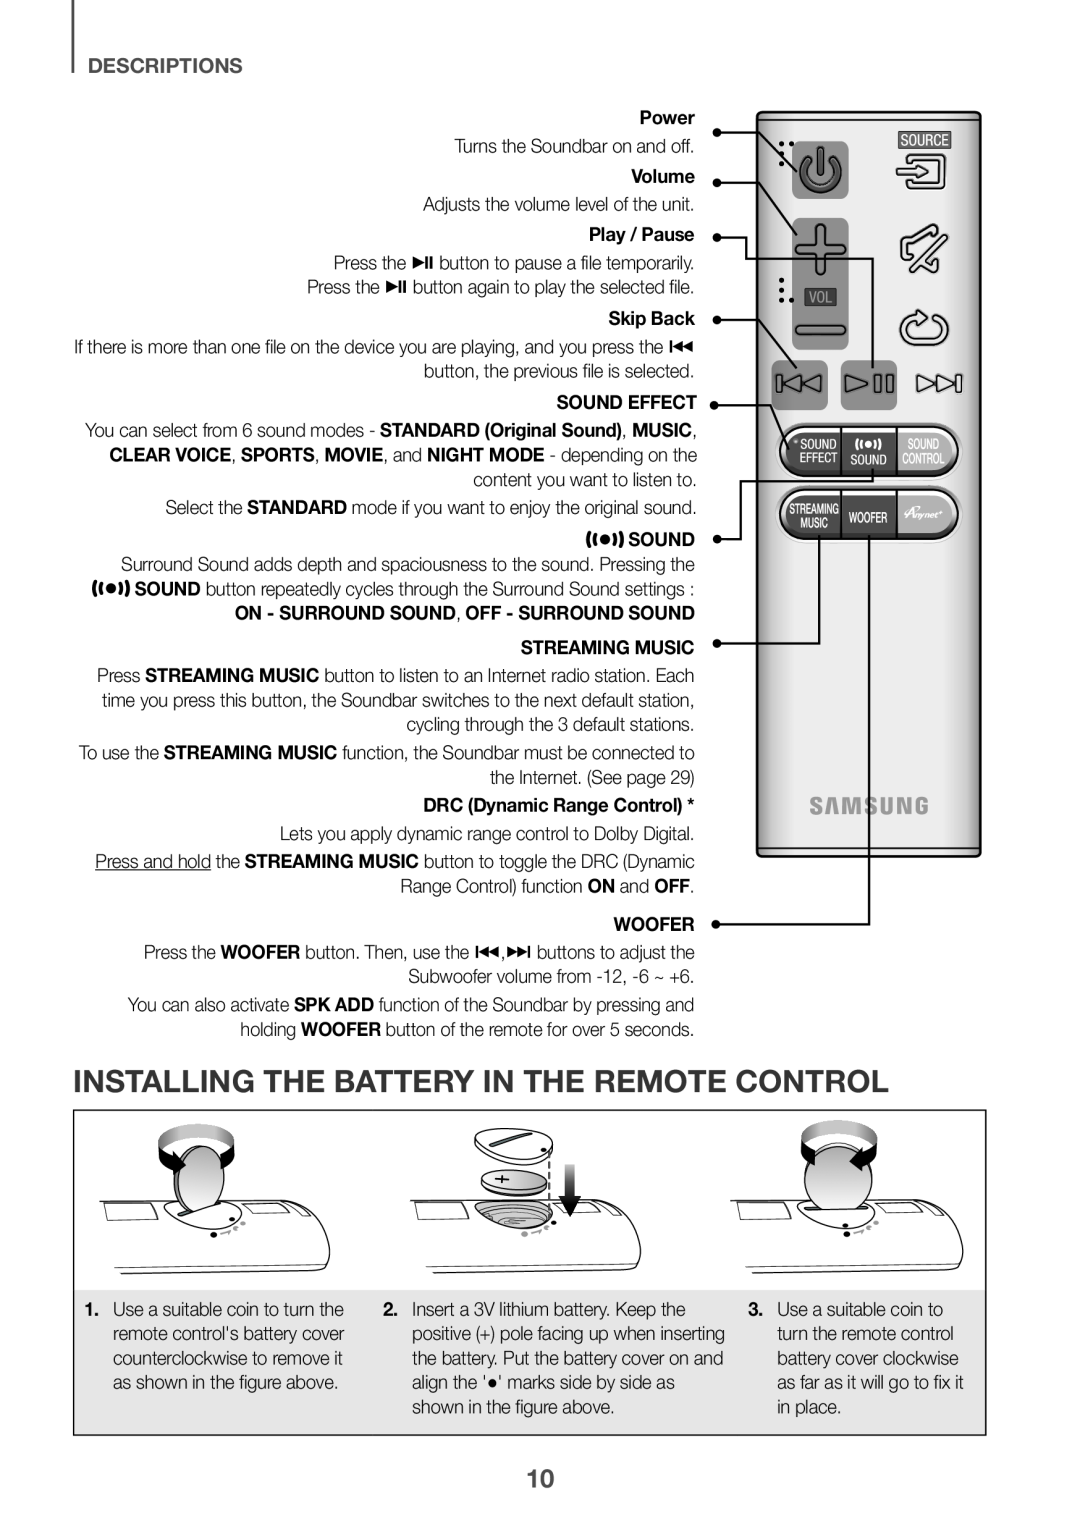 INSTALLING THE BATTERY IN THE REMOTE CONTROL
 INSTALLATION
INSTALLING THE SOUNDBAR
INSTALLING THE WALL MOUNT
++Installation Precautions
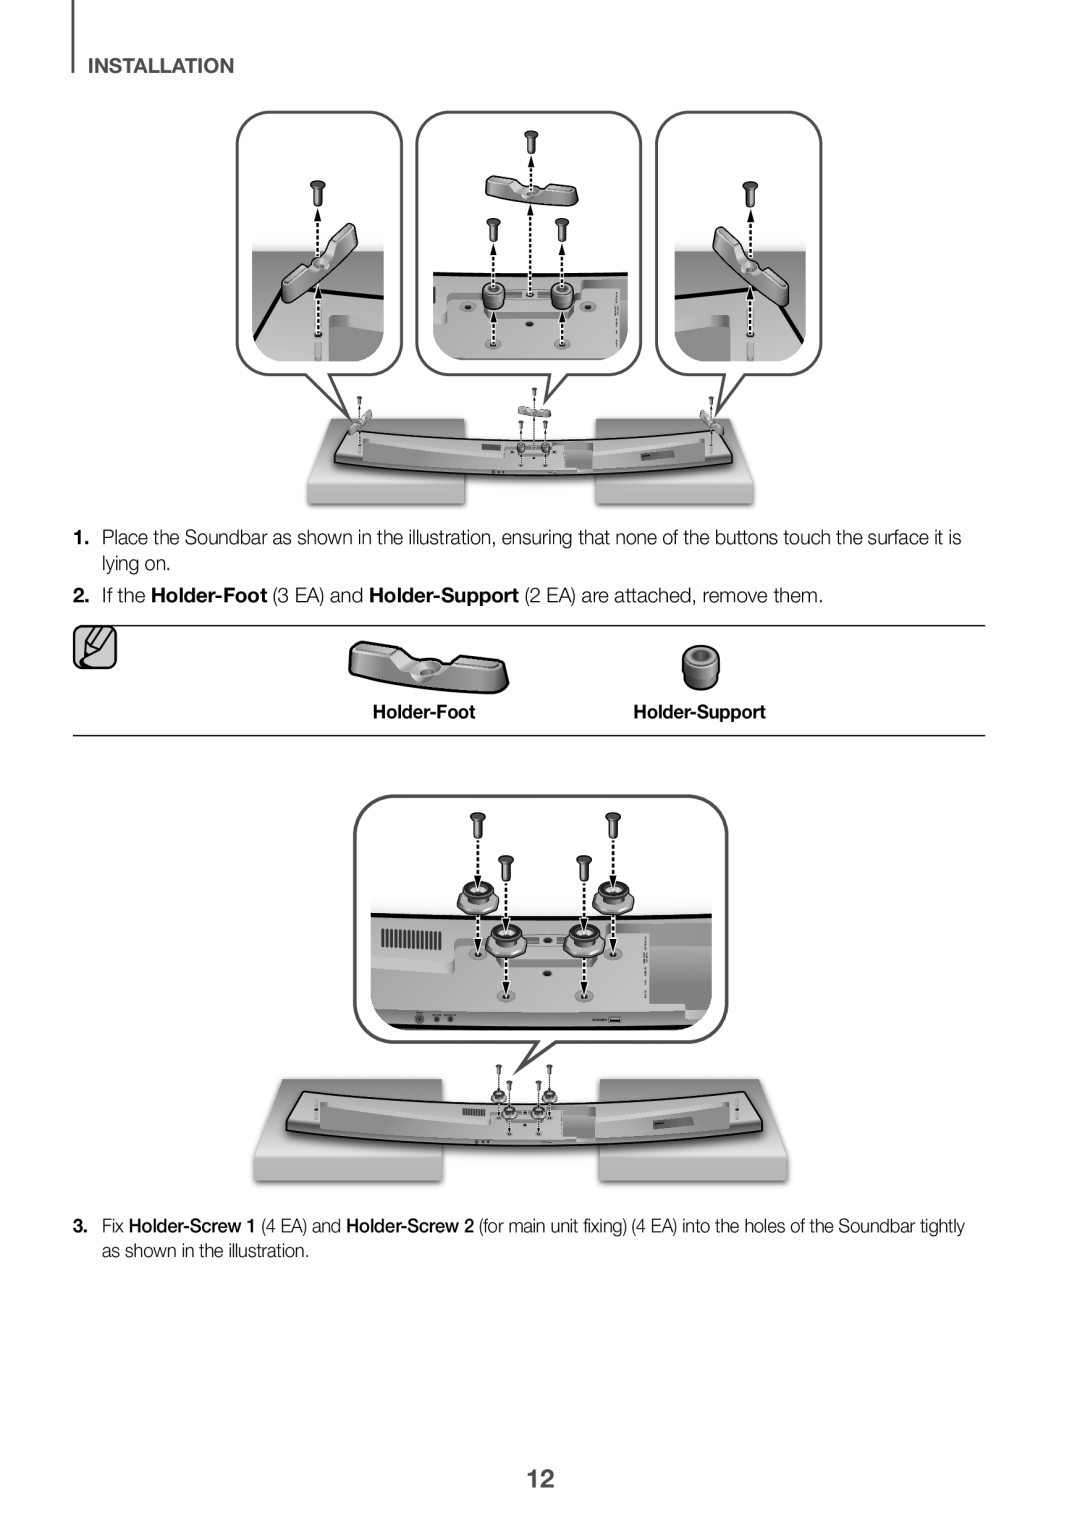 If the
Holder-Foot
Holder-Support
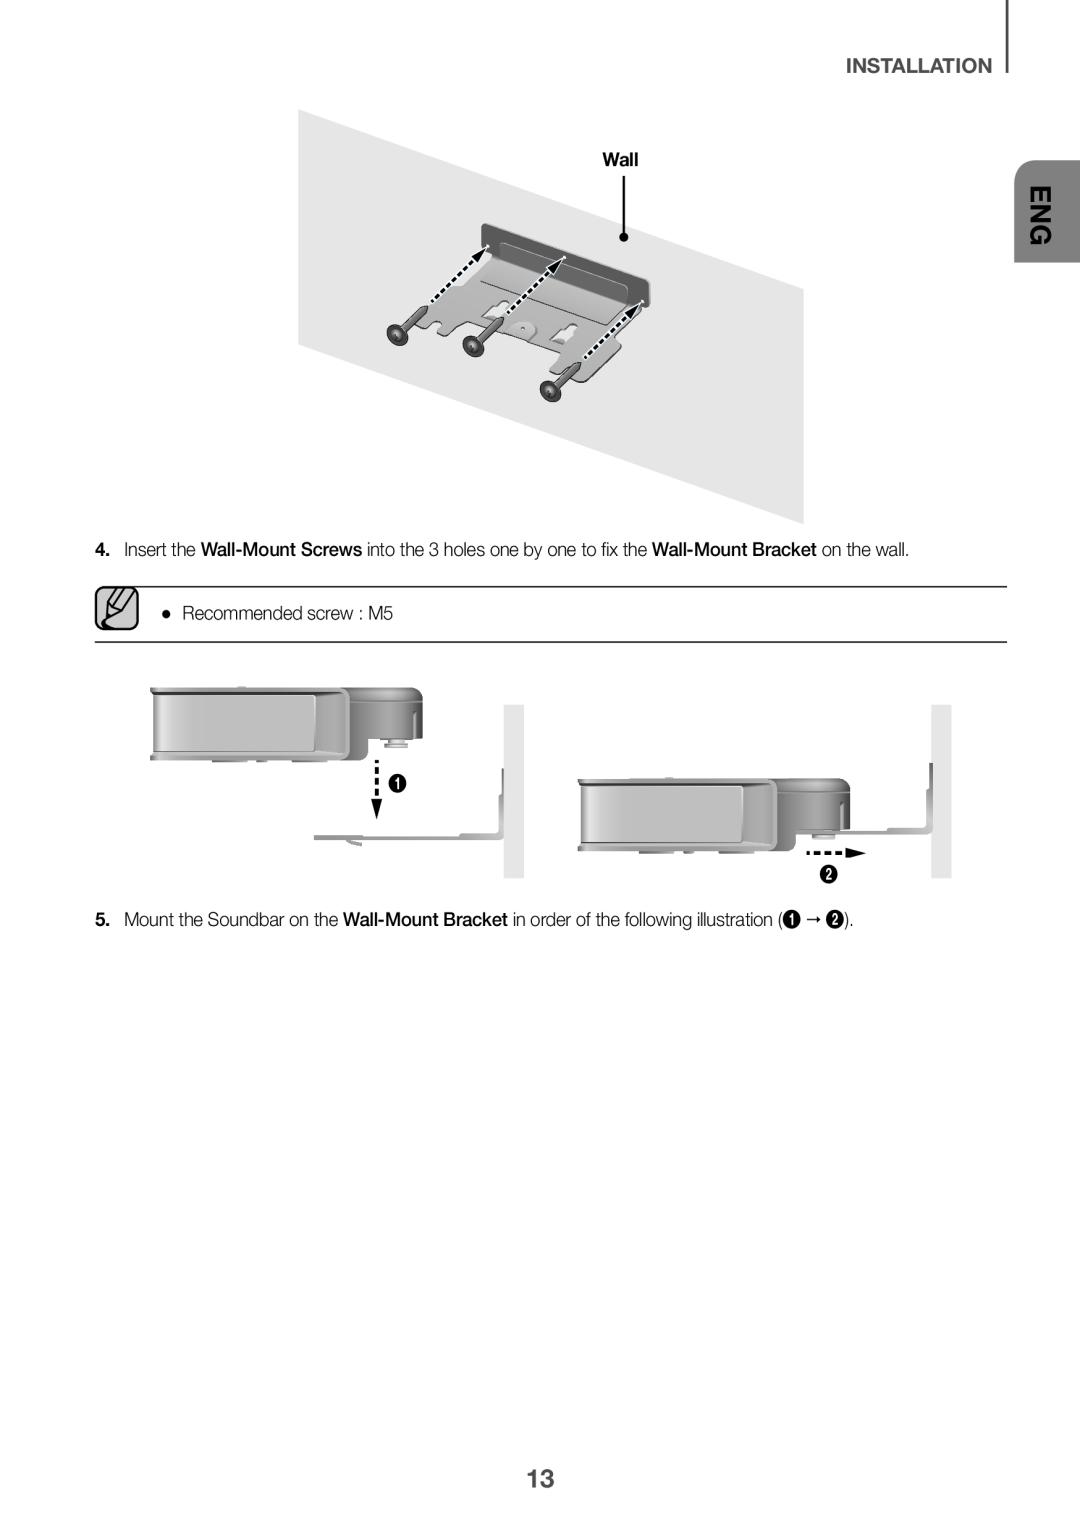 INSTALLATION
Wall
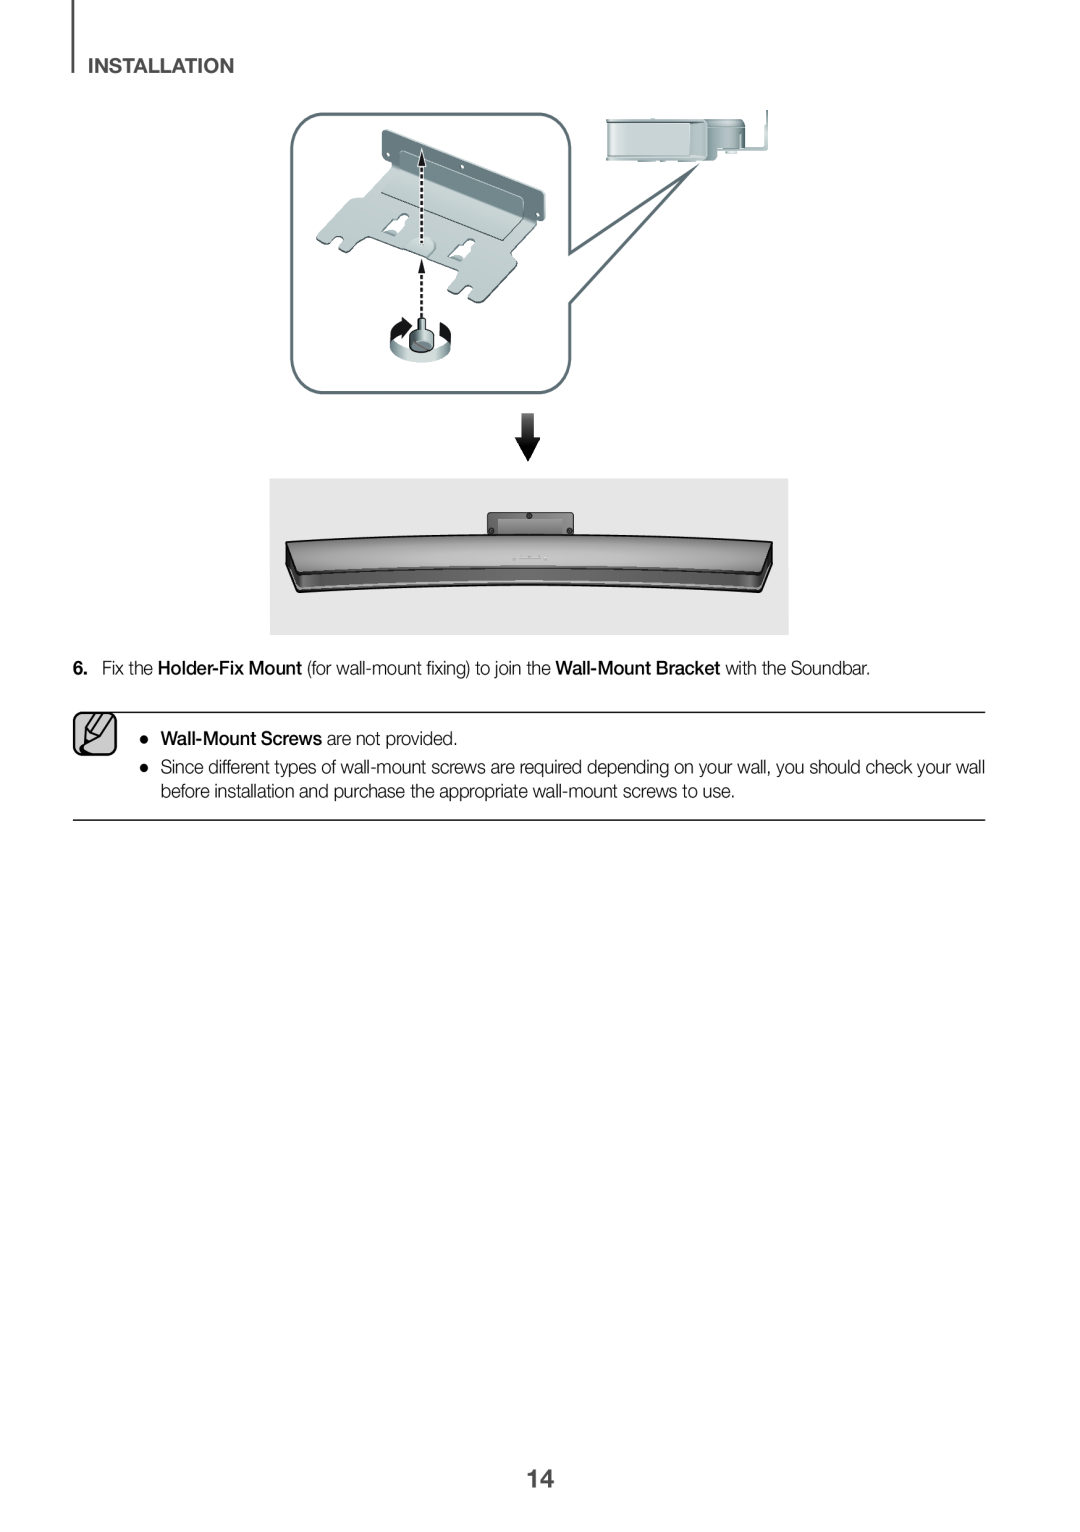 INSTALLATION
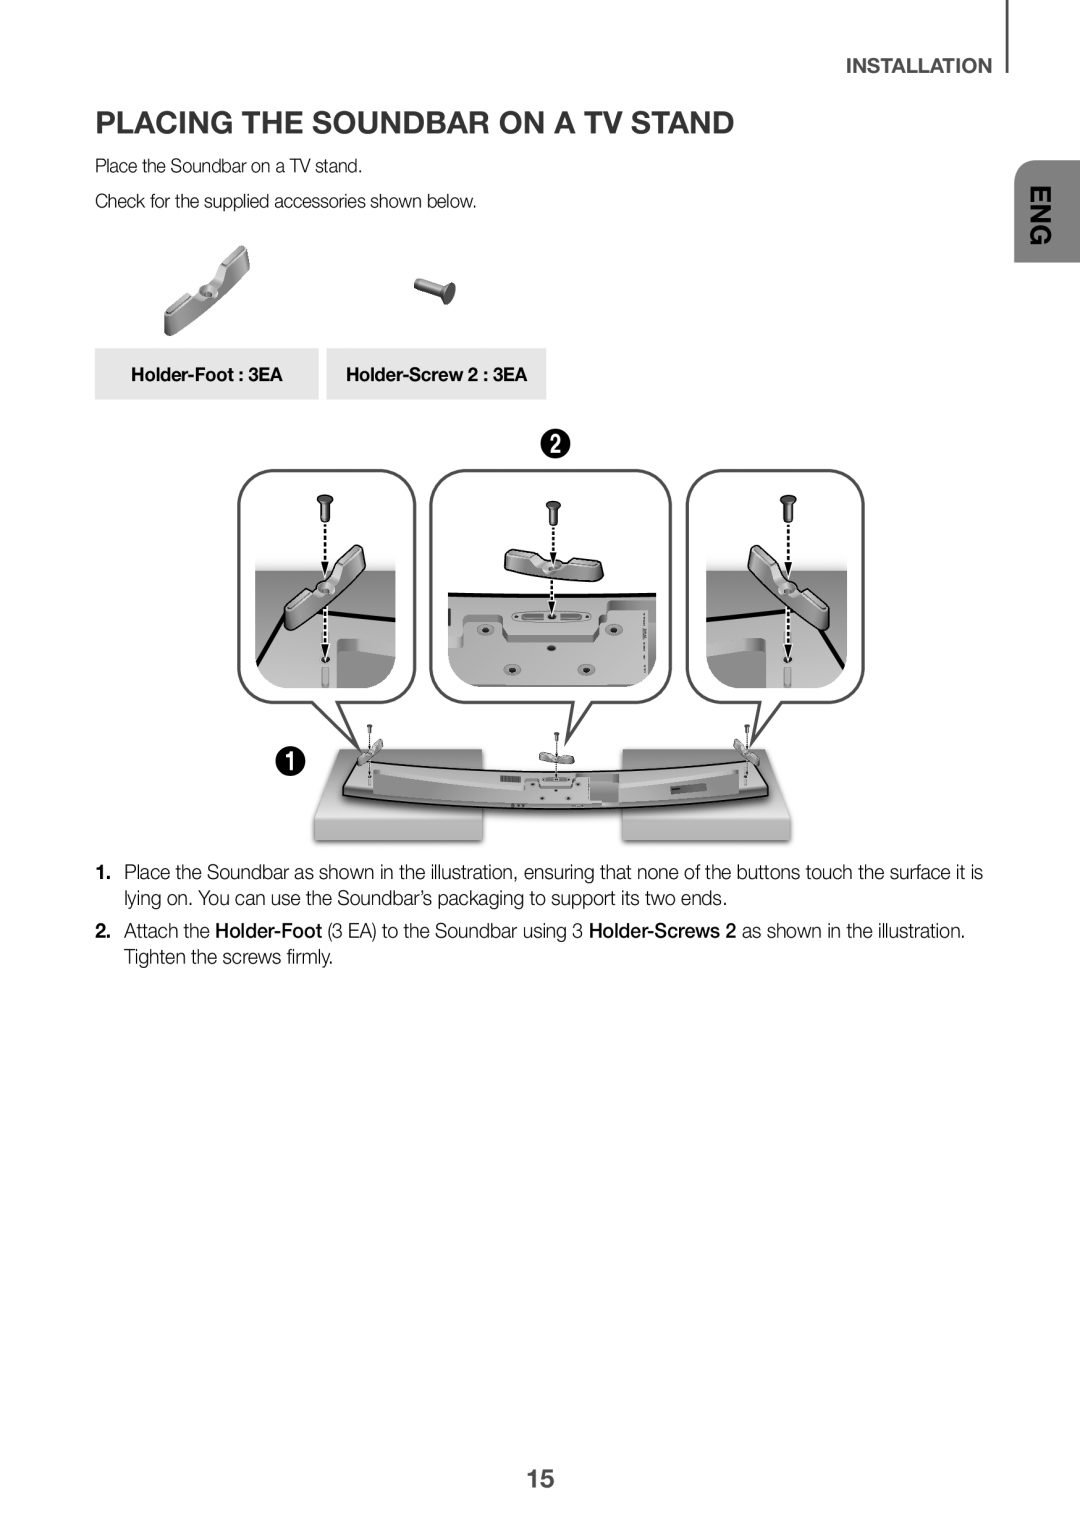 PLACING THE SOUNDBAR ON A TV STAND
Attach the
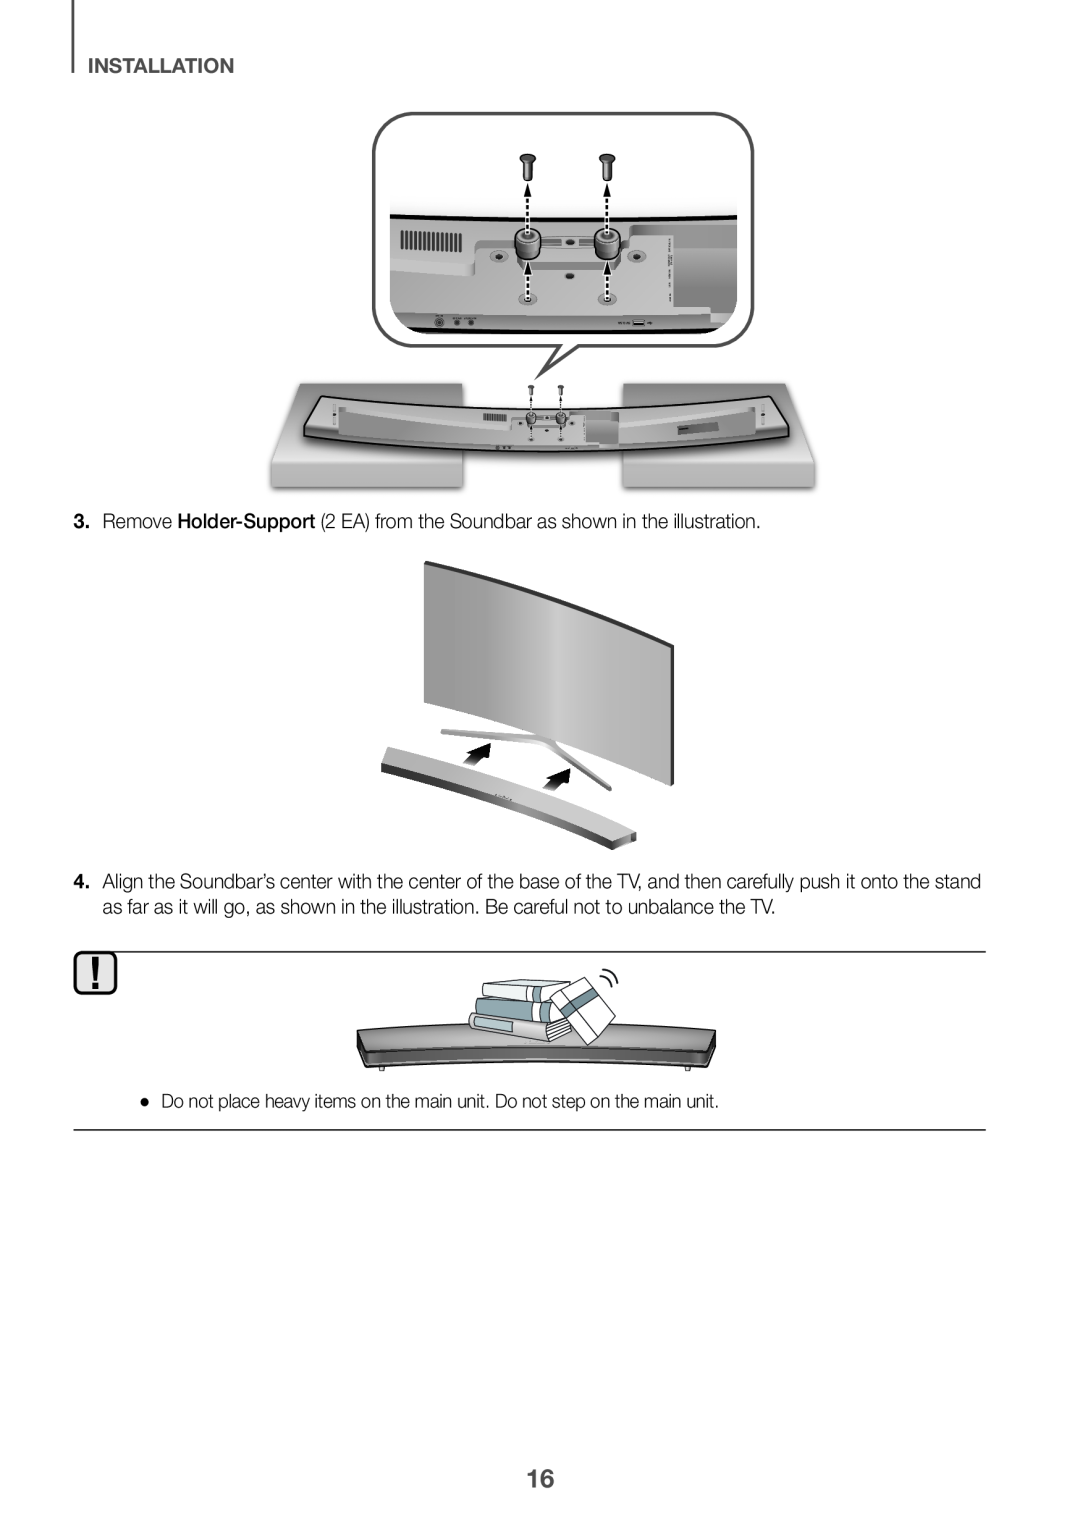 3.Remove Holder-Support(2 EA) from the Soundbar as shown in the illustration
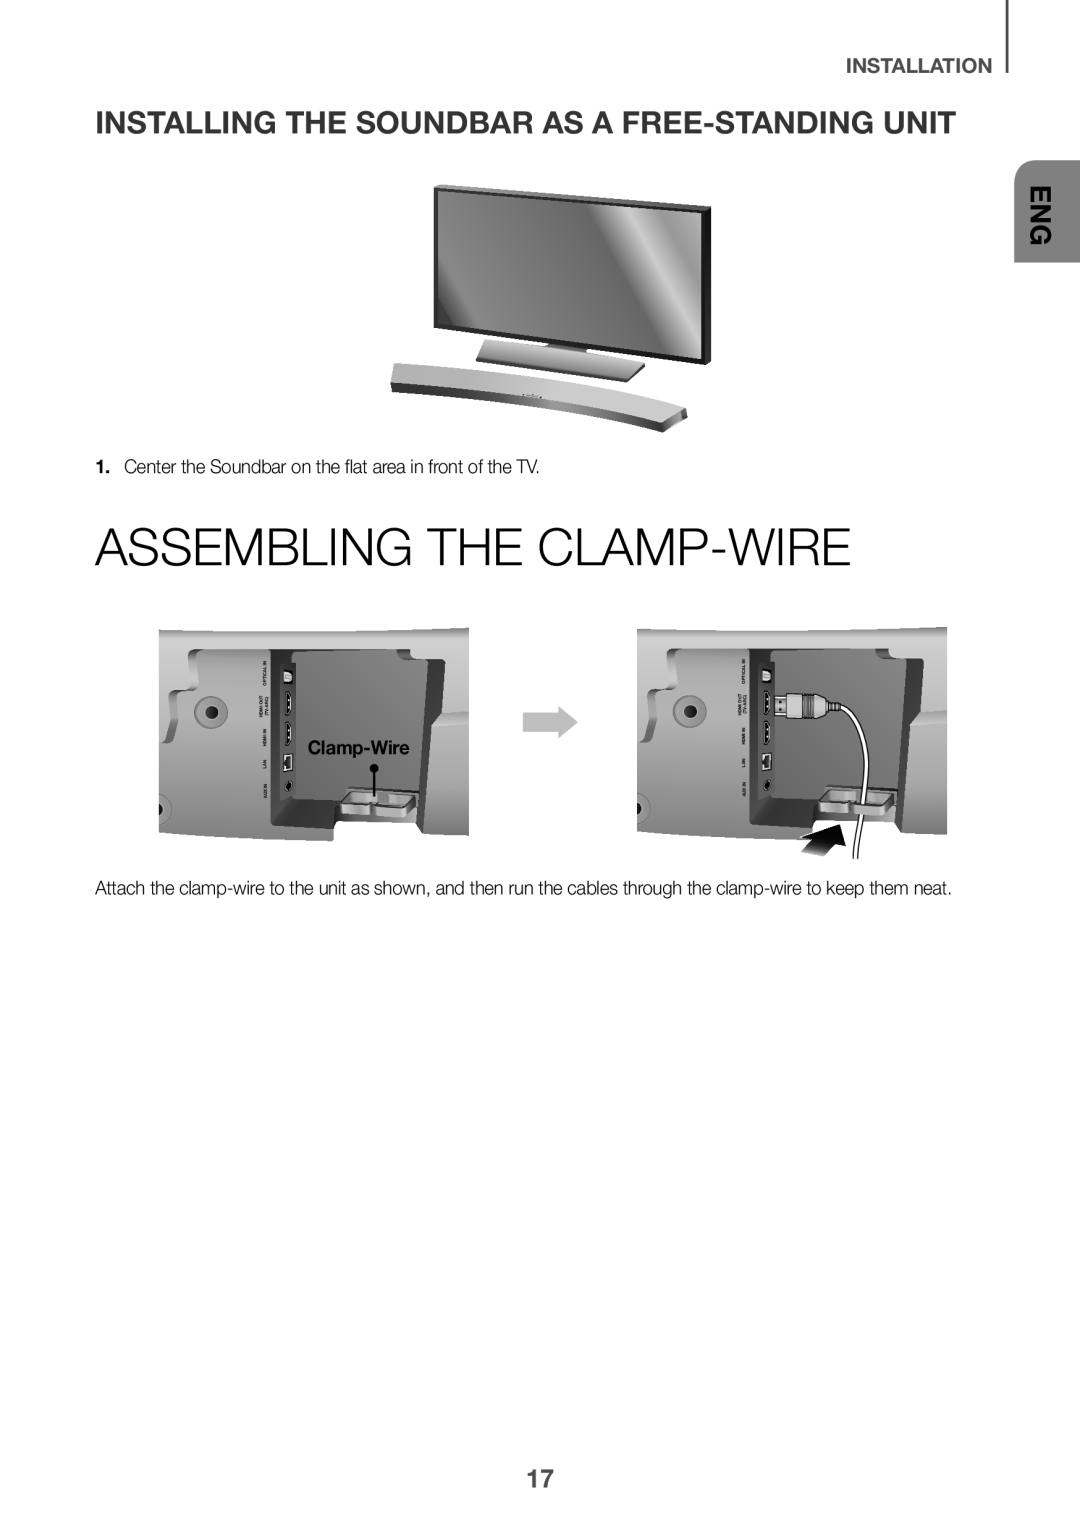 INSTALLING THE SOUNDBAR AS A FREE-STANDINGUNIT
ASSEMBLING THE CLAMP-WIRE
 CONNECTIONS
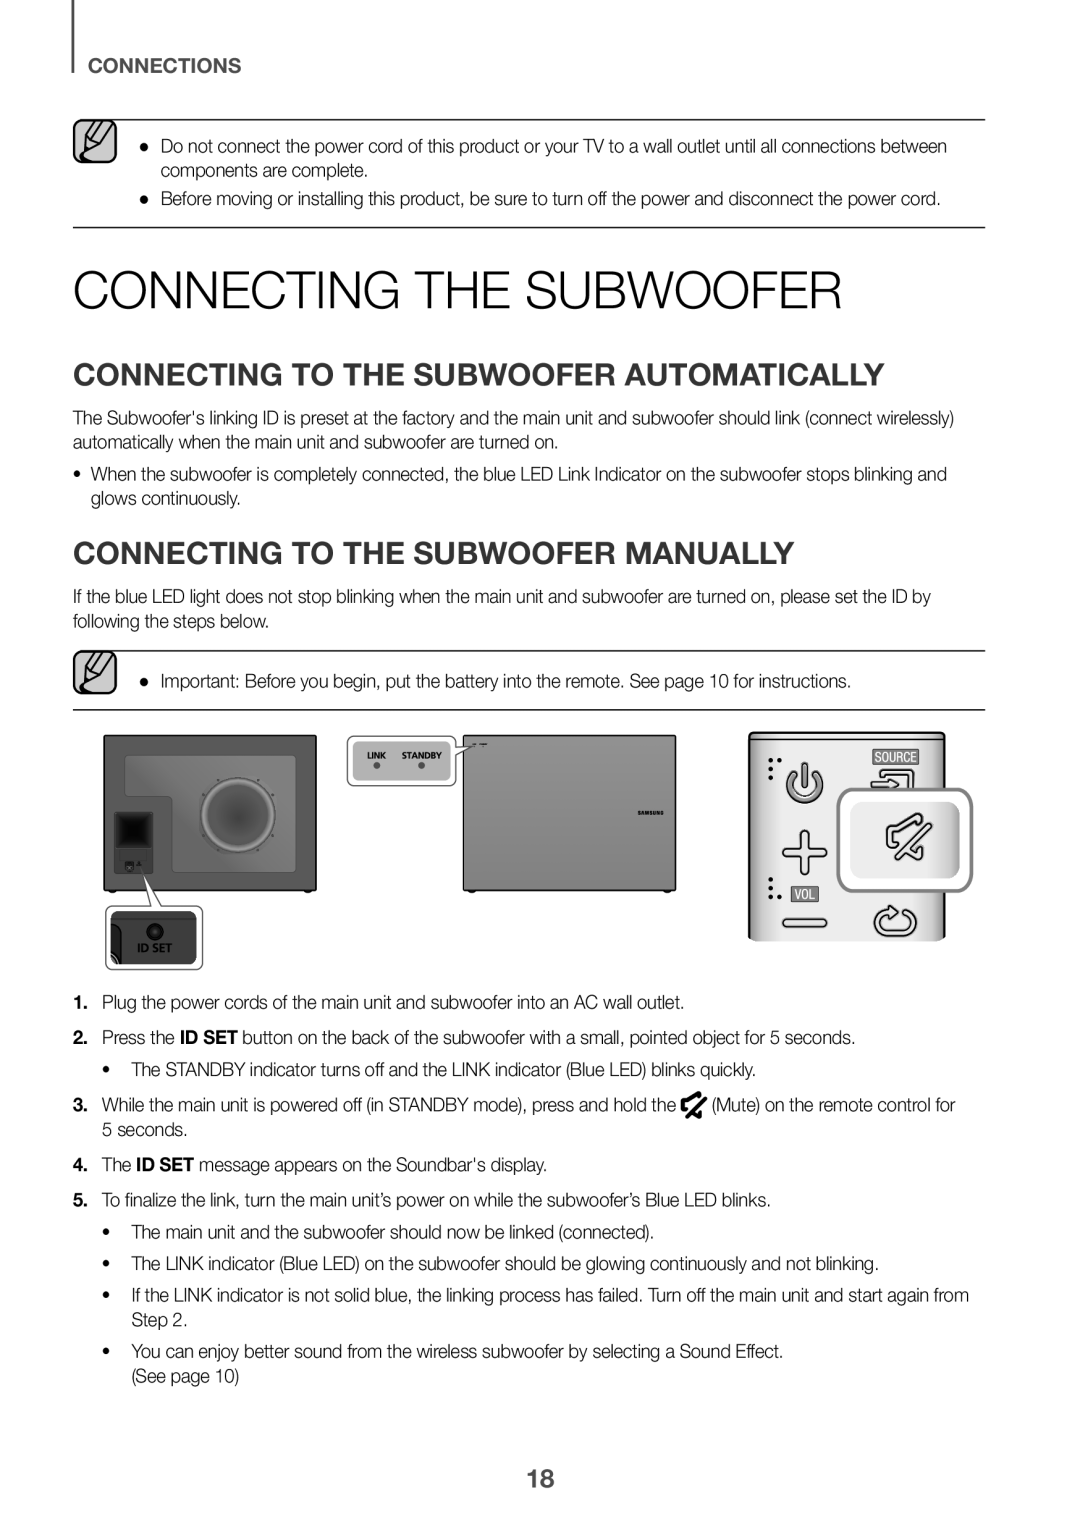
CONNECTING THE SUBWOOFER
CONNECTING TO THE SUBWOOFER AUTOMATICALLY
CONNECTING TO THE SUBWOOFER MANUALLY
 LED INDICATOR LAMP STATUS ON SUBWOOFER
 CONNECTING TO A TV
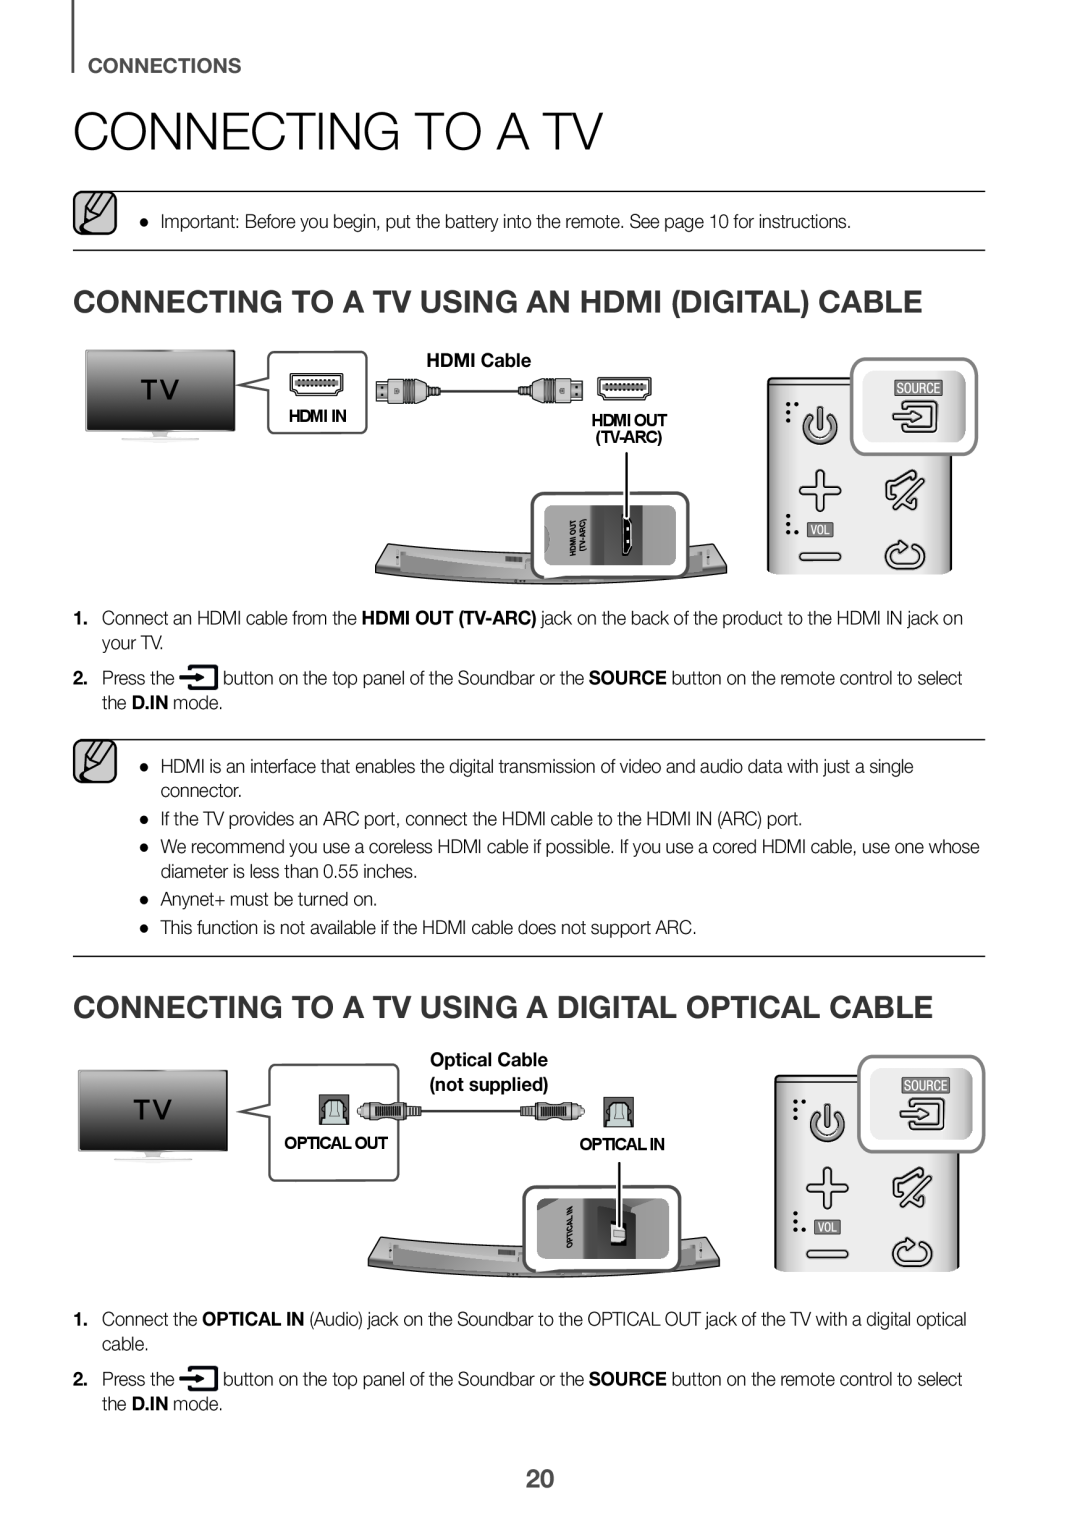
CONNECTING TO A TV USING AN HDMI (DIGITAL) CABLE
CONNECTING TO A TV USING A DIGITAL OPTICAL CABLE
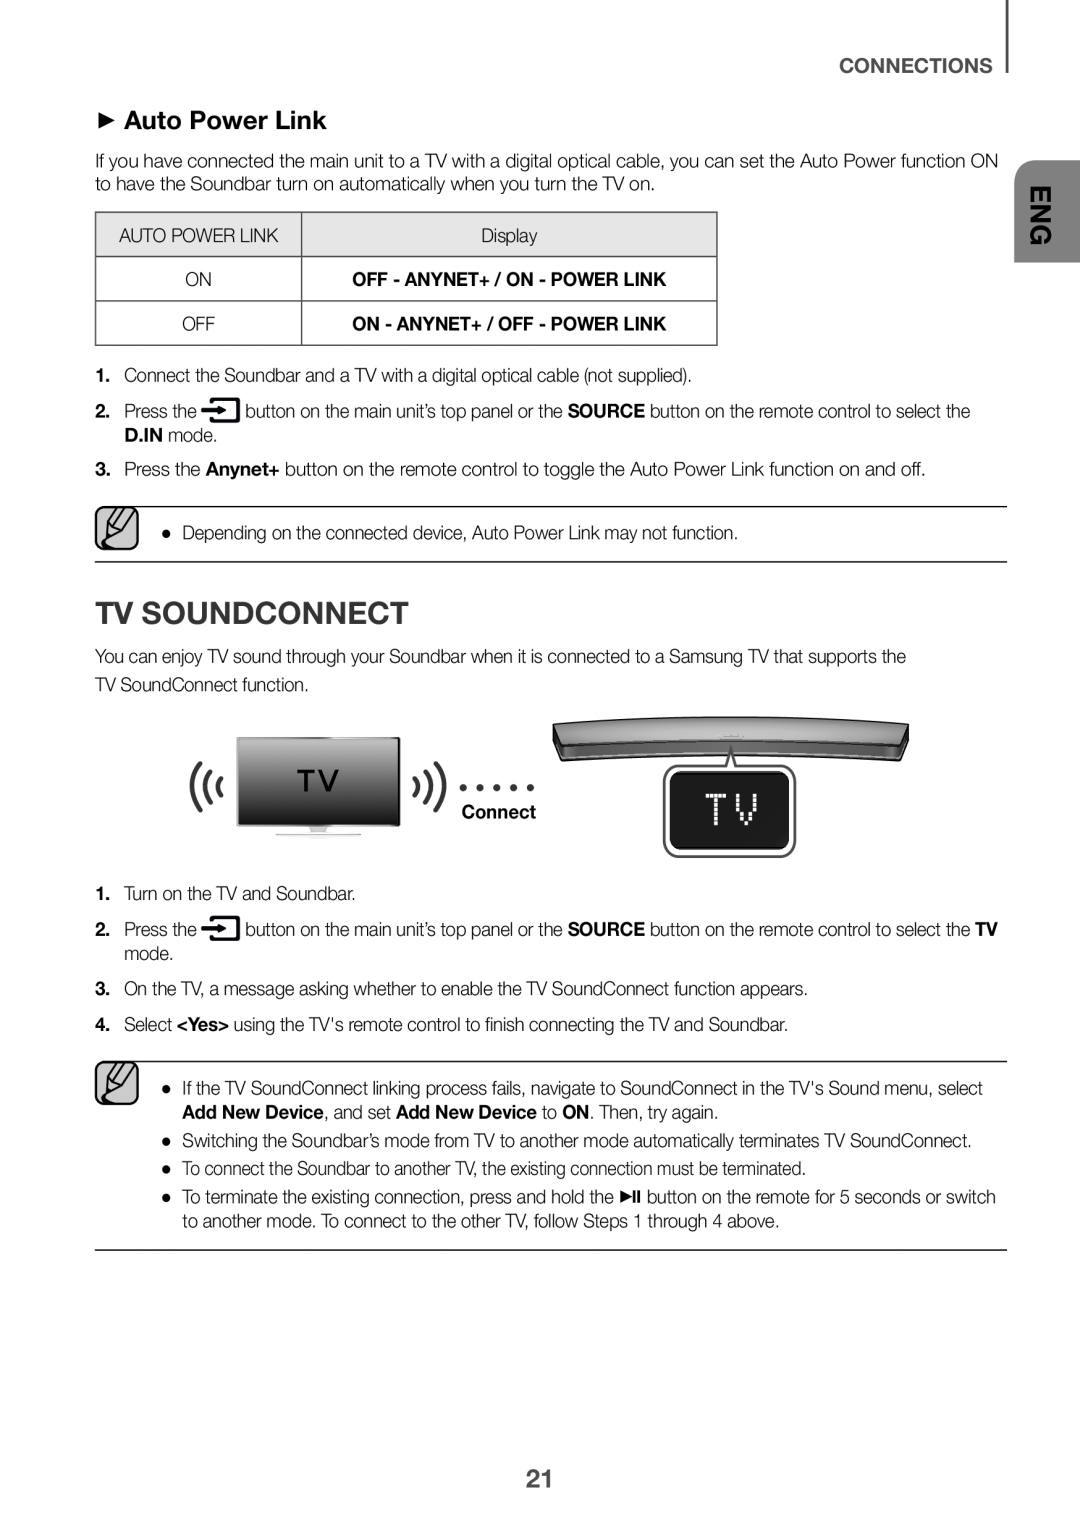 ++Auto Power Link
TV SOUNDCONNECT
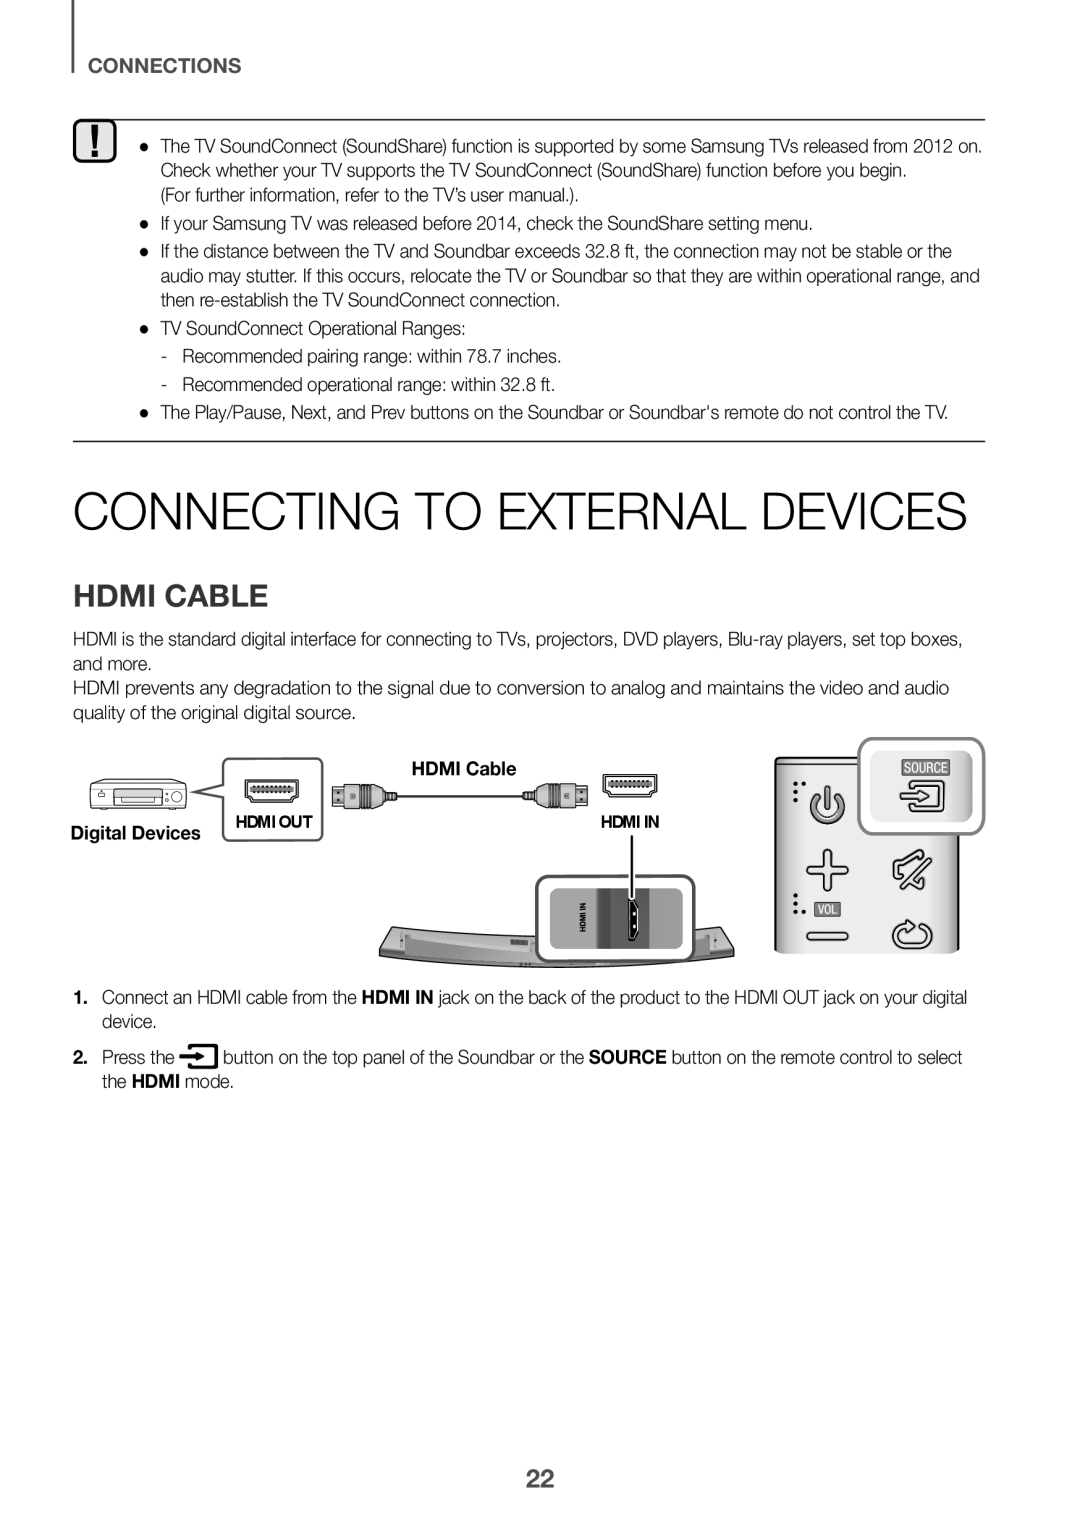 CONNECTING TO EXTERNAL DEVICES
HDMI CABLE
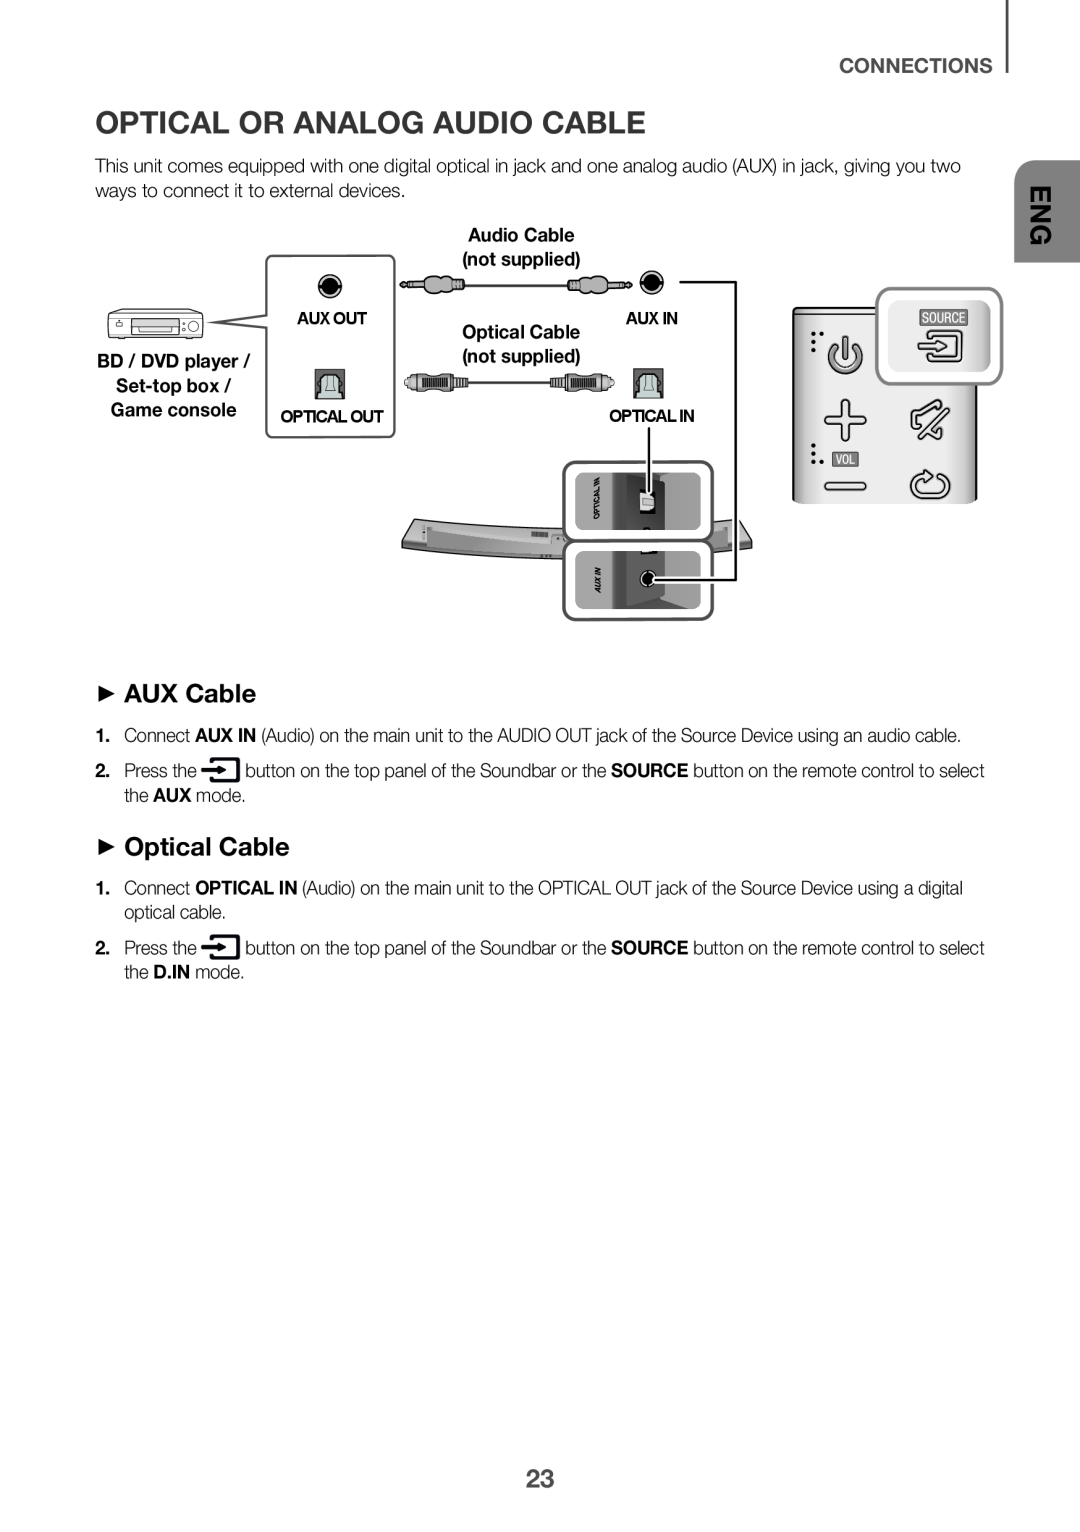 OPTICAL OR ANALOG AUDIO CABLE
++AUX Cable
++Optical Cable
 FUNCTIONS
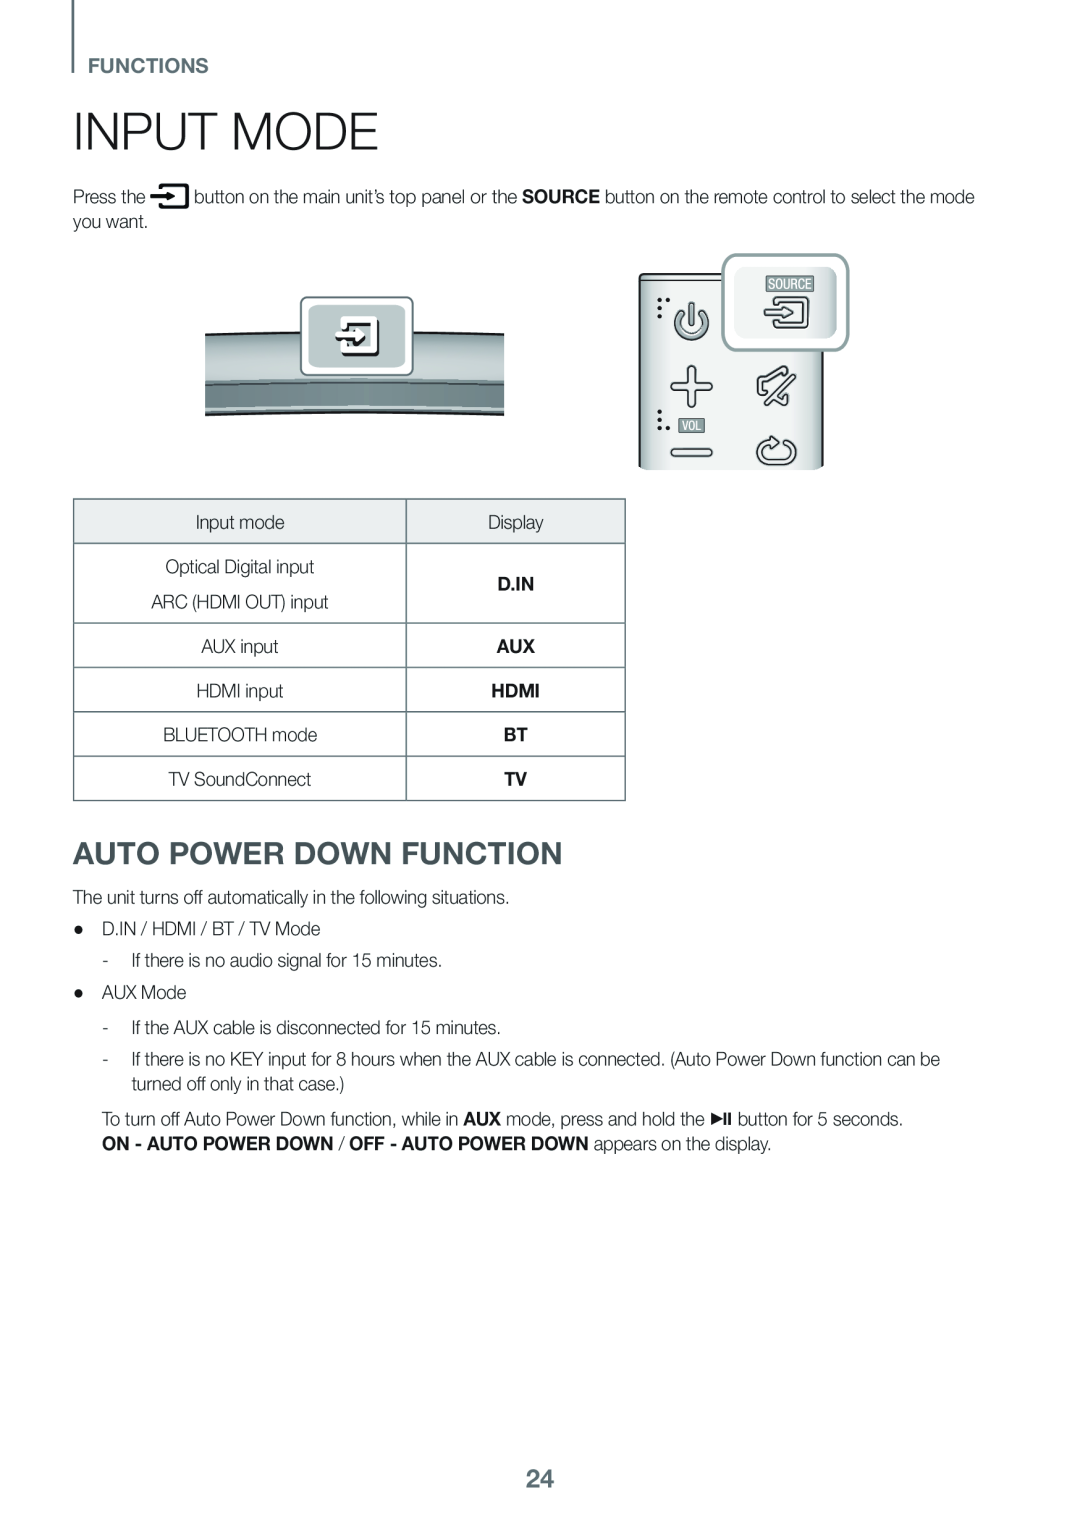
INPUT MODE
AUTO POWER DOWN FUNCTION
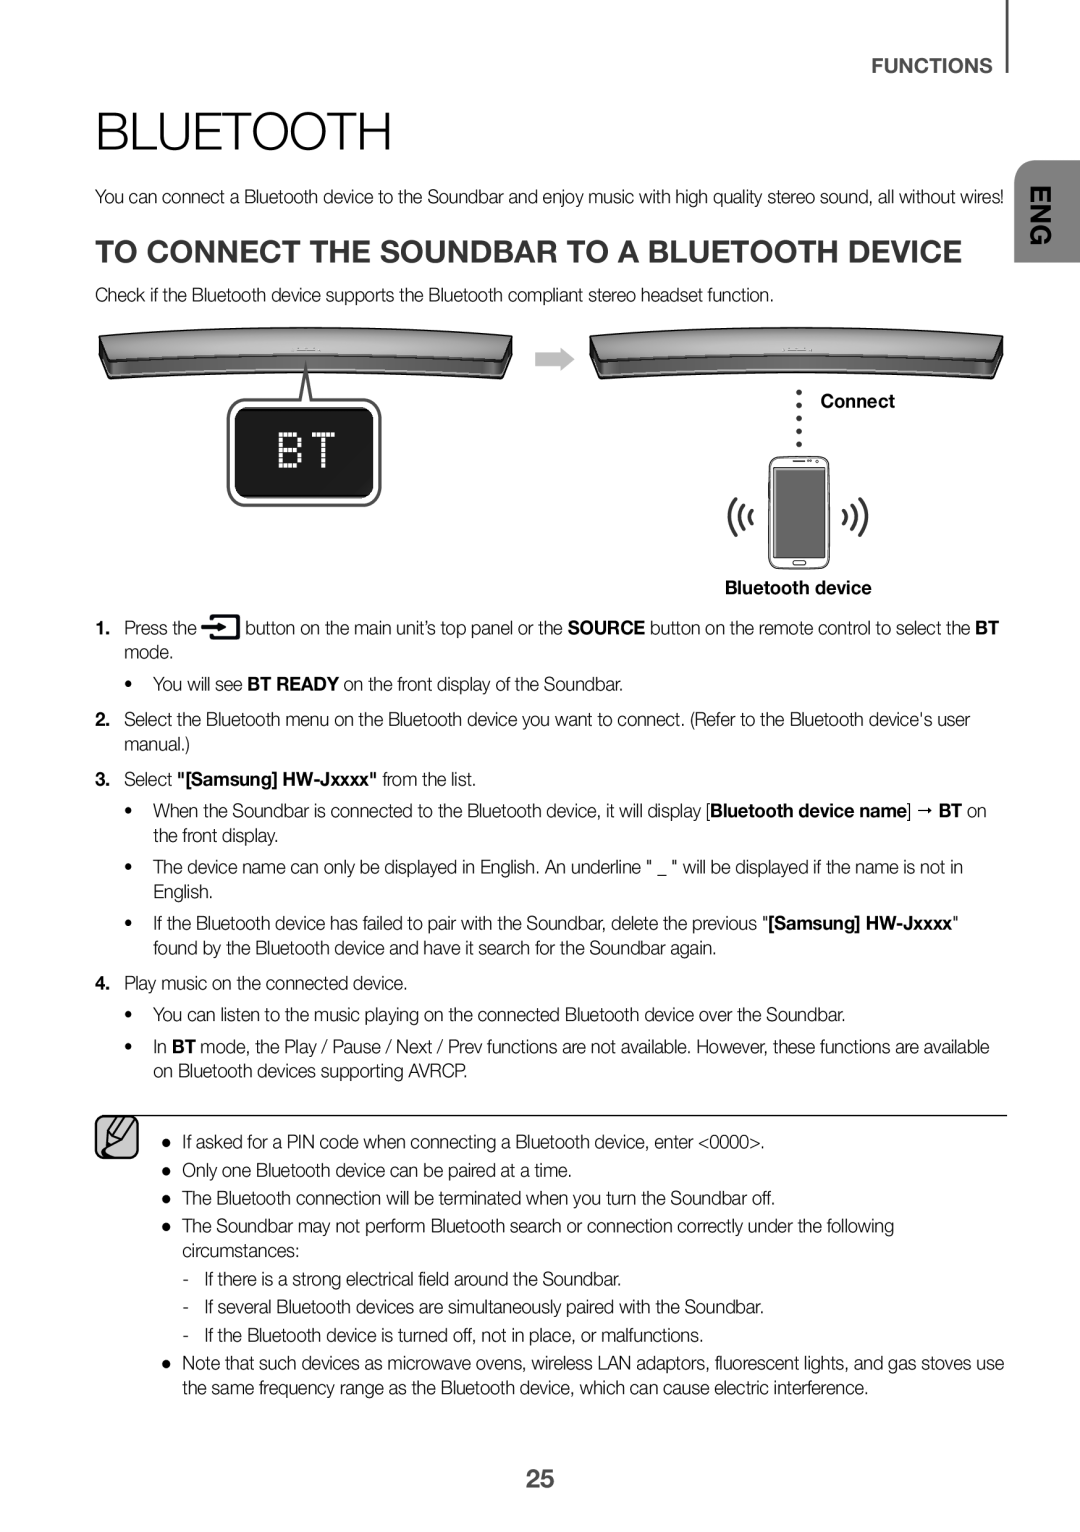 BLUETOOTH
TO CONNECT THE SOUNDBAR TO A BLUETOOTH DEVICE
 TO DISCONNECT THE BLUETOOTH DEVICE FROM A SOUNDBAR
TO DISCONNECT THE SOUNDBAR FROM A BLUETOOTH DEVICE
++More About Bluetooth
 USING THE MULTIROOM APP
BEFORE YOU BEGIN
++Communication Basics
Requirements:
INSTALLING THE SAMSUNG MULTIROOM APP
++Android or iOS
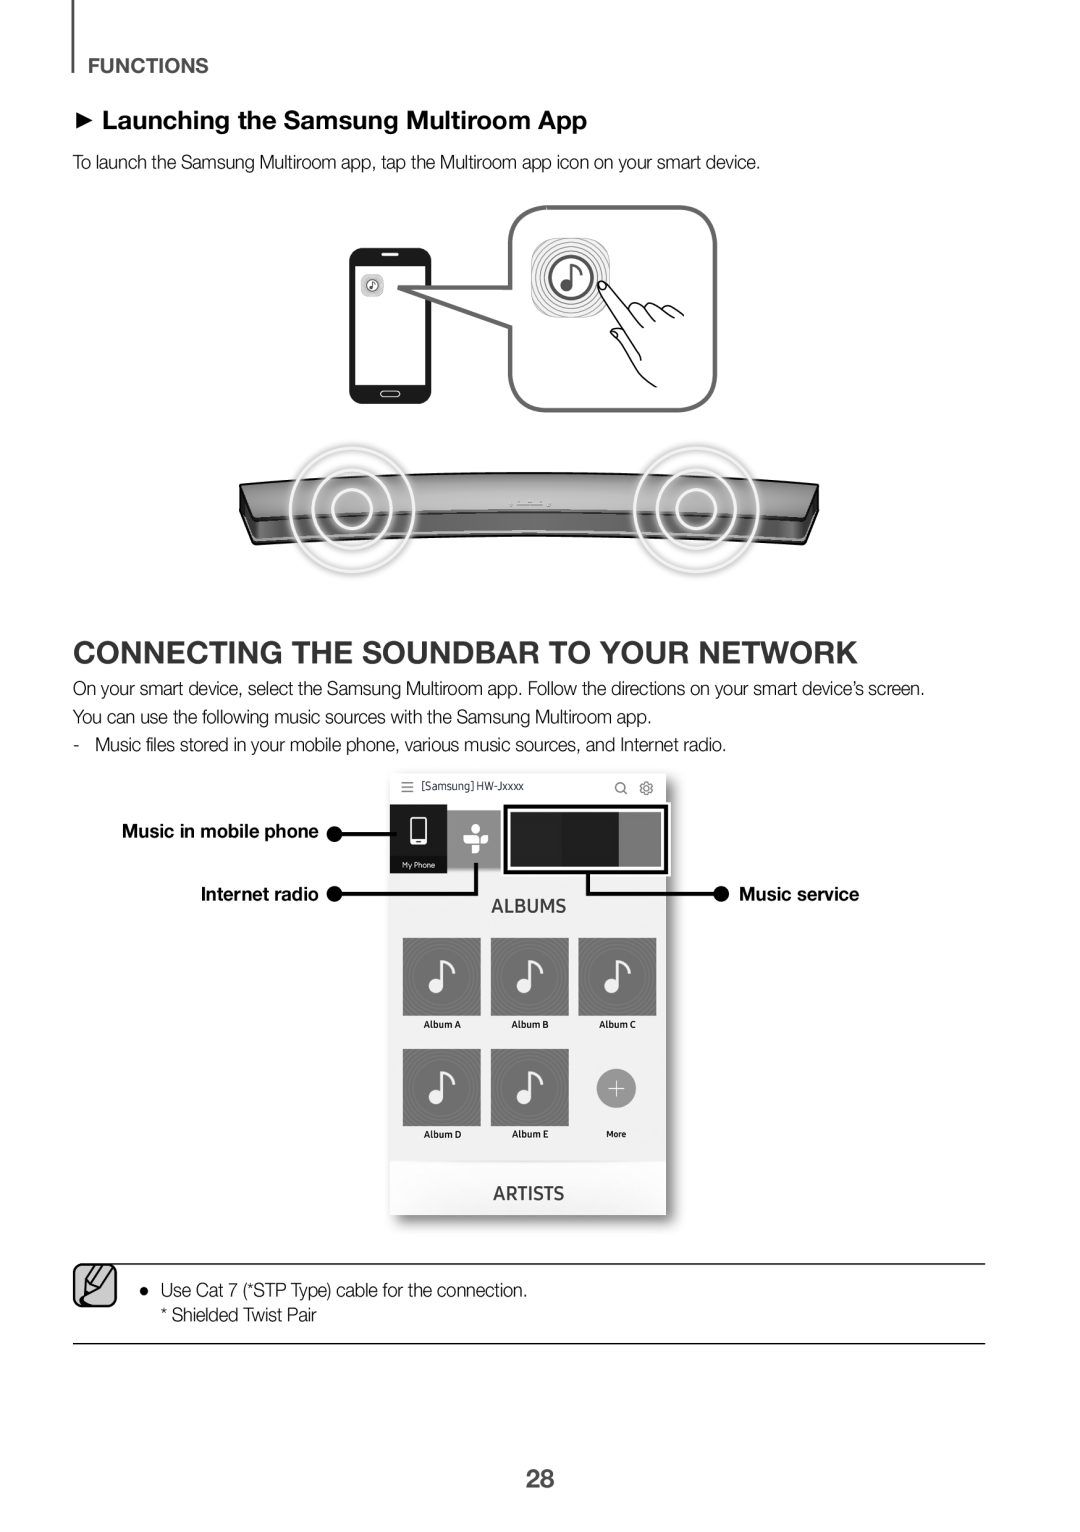 ++Launching the Samsung Multiroom App
CONNECTING THE SOUNDBAR TO YOUR NETWORK
 USING THE NETWORK STANDBY ON FUNCTION
 SOFTWARE UPDATE
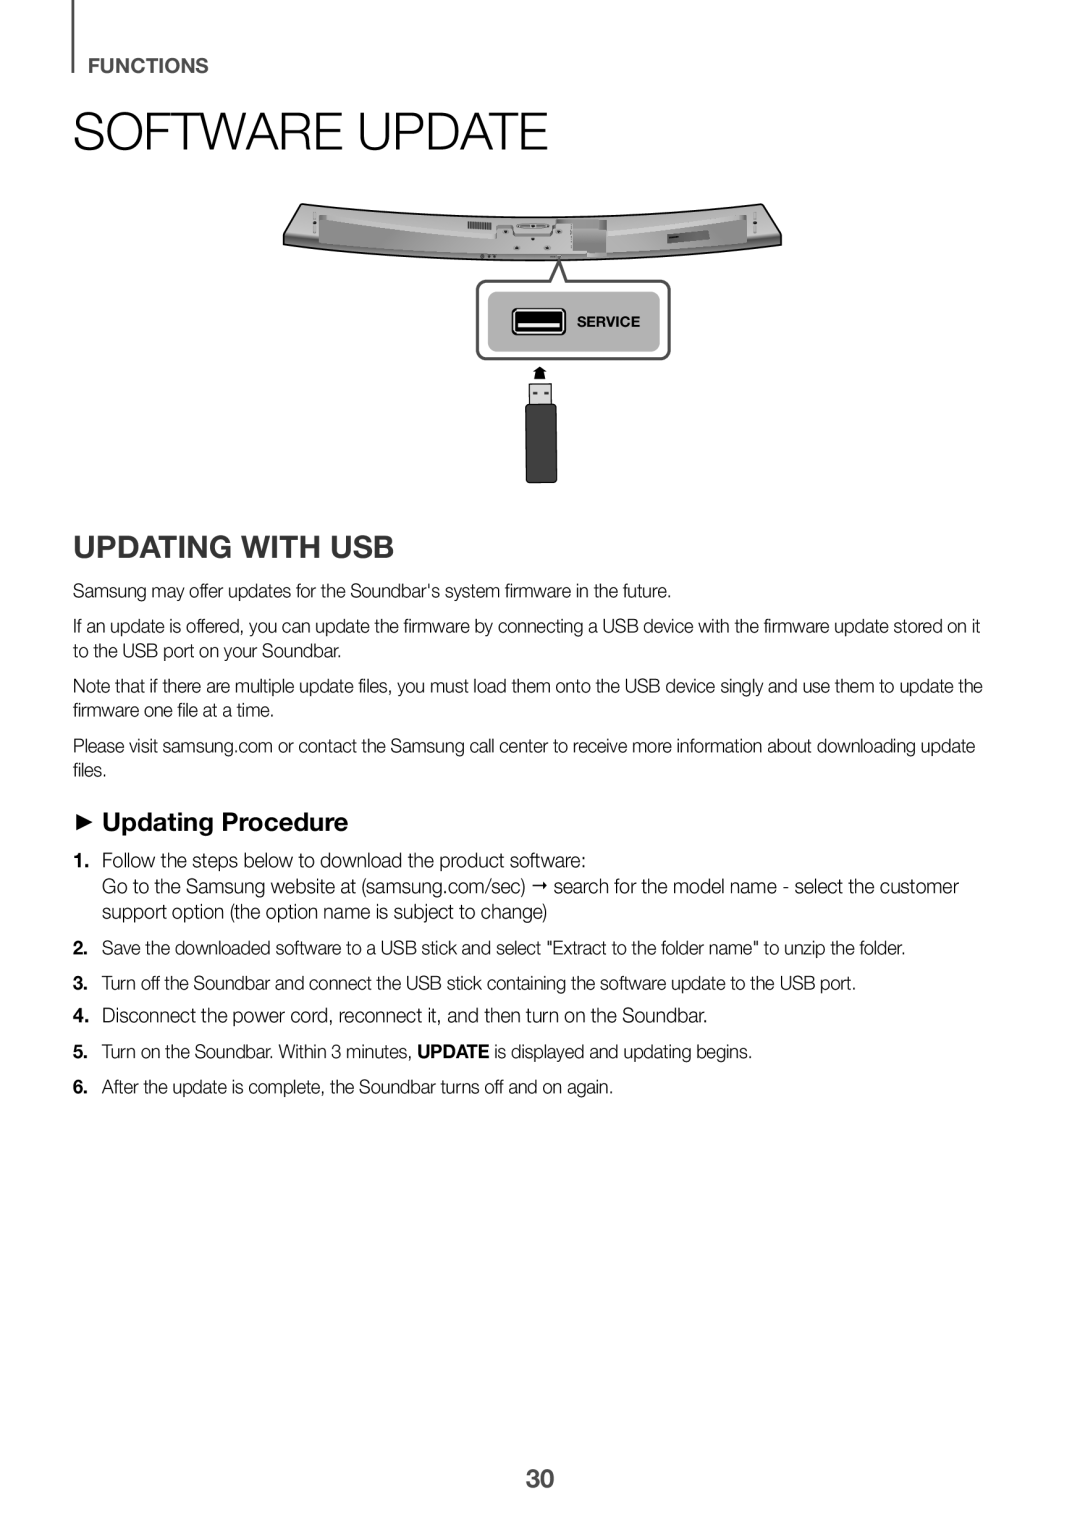
UPDATING WITH USB
++Updating Procedure
1.Follow the steps below to download the product software:
4.Disconnect the power cord, reconnect it, and then turn on the Soundbar
 ++If UPDATE was not displayed
AUTO UPDATE
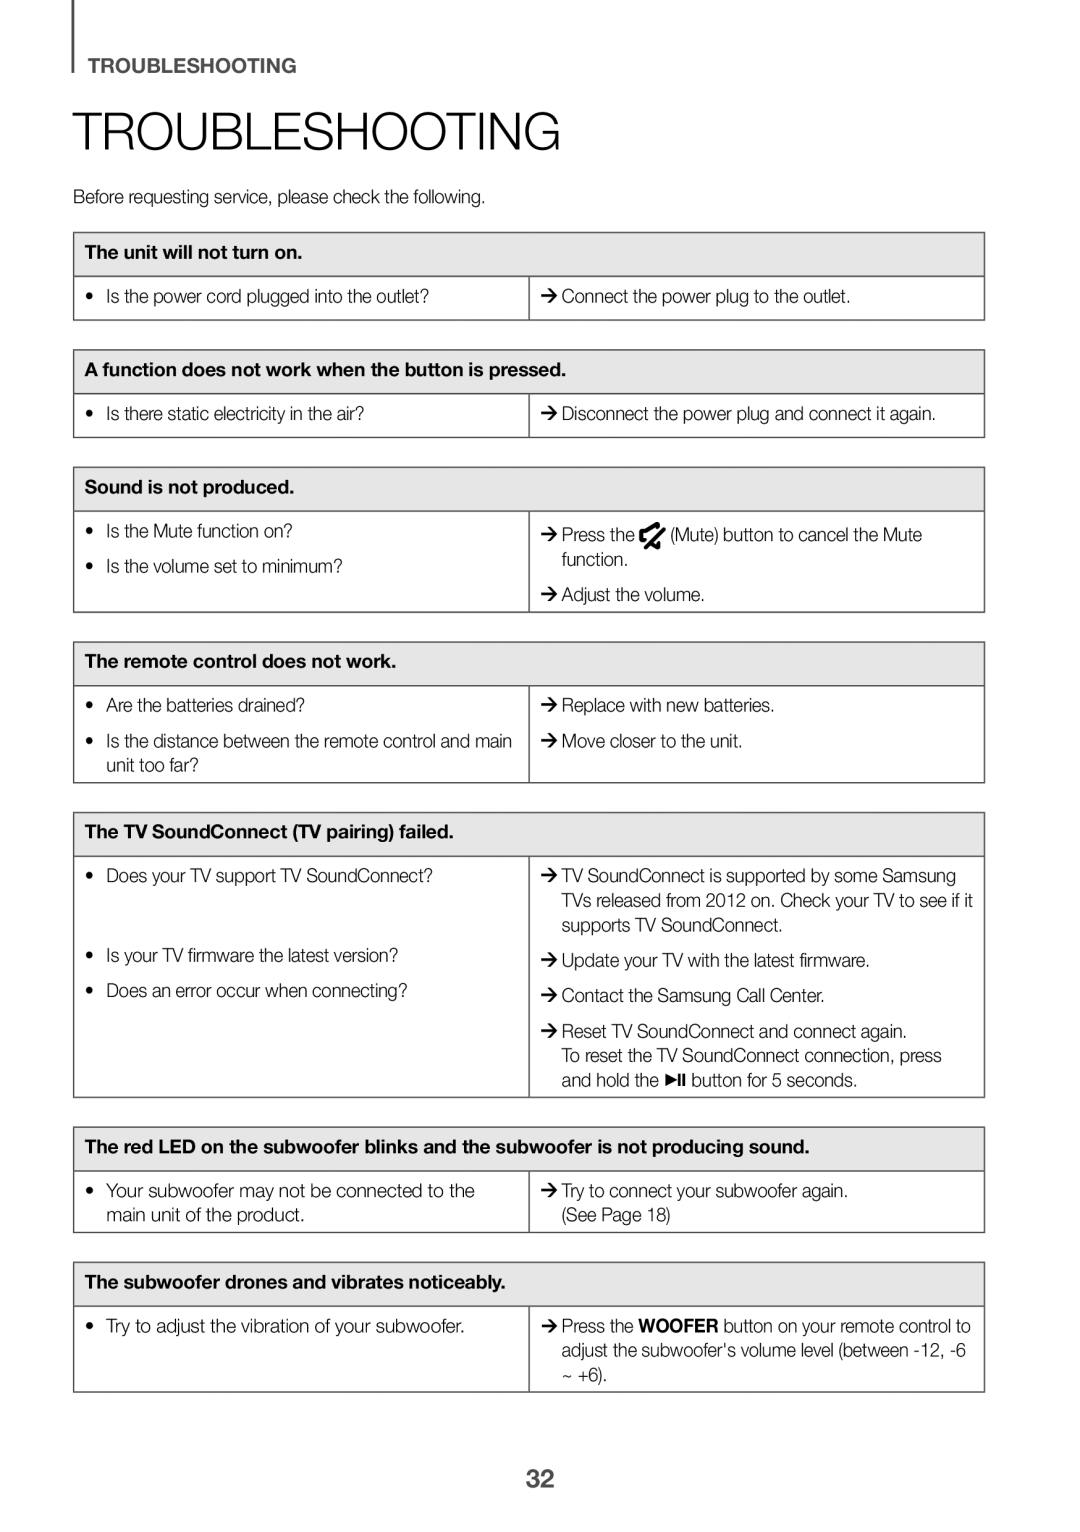 TROUBLESHOOTING
TROUBLESHOOTING
 APPENDIX
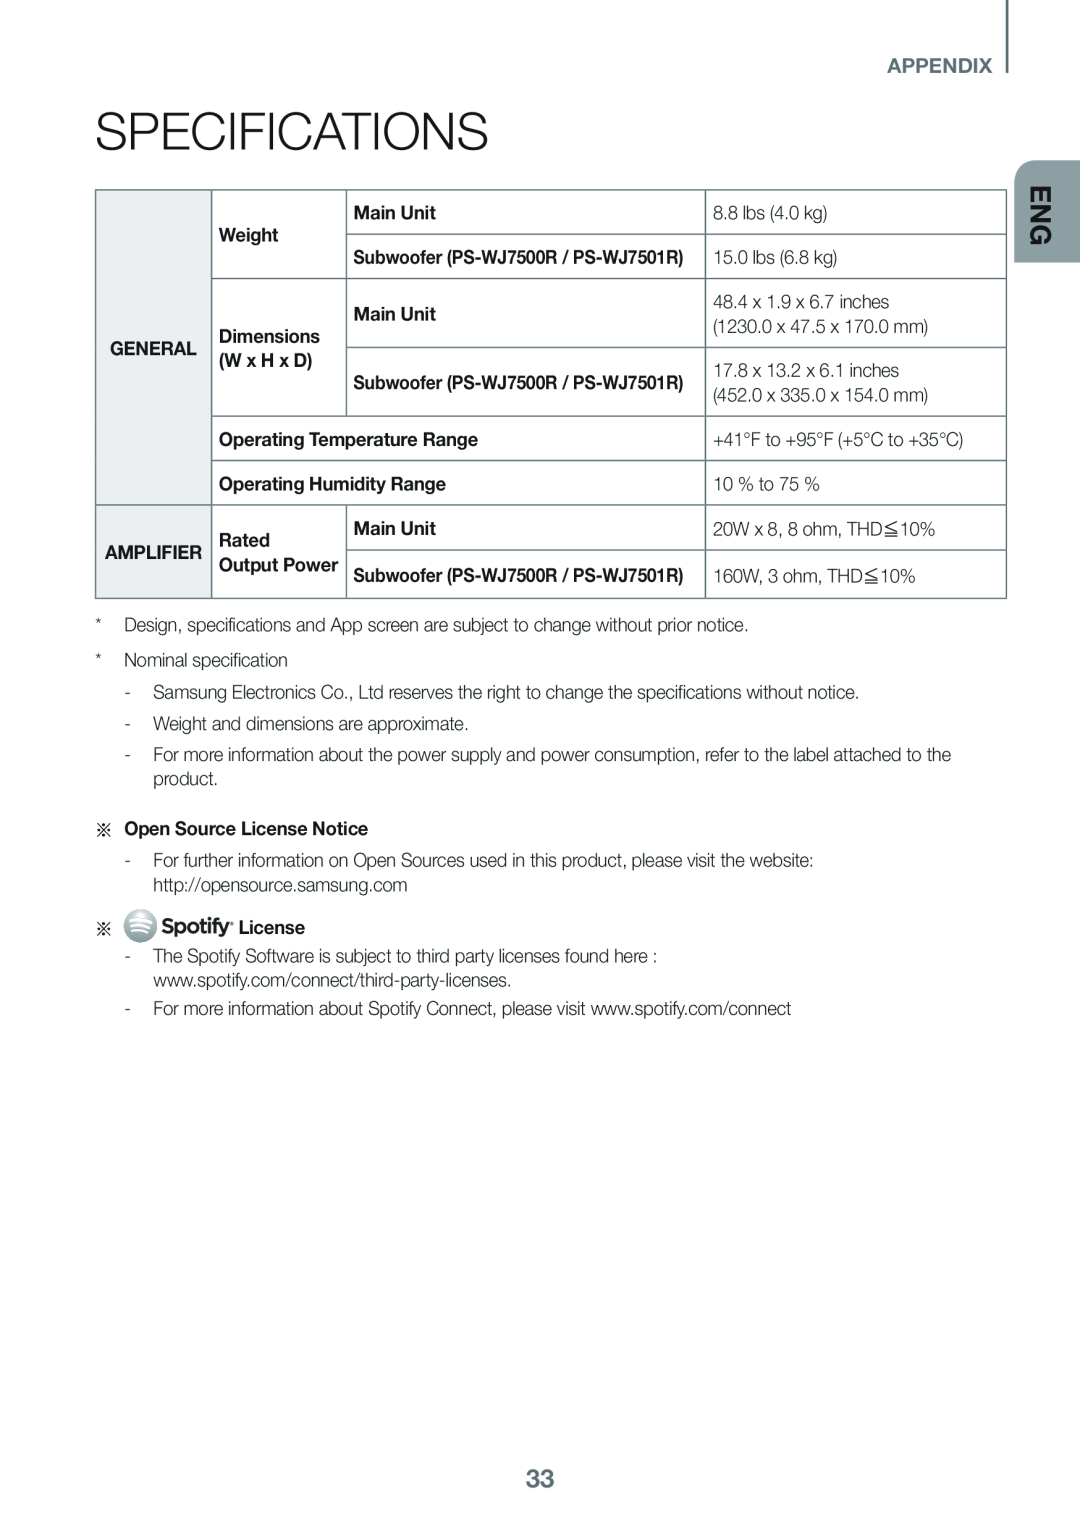
SPECIFICATIONS
 LIMITED WARRANTY TO ORIGINAL PURCHASER
LABOR
PARTS
One year (Carry- in)
One year
EXCLUSIONS (WHAT IS NOT COVERED)
Samsung Electronics Canada Inc
2050 Derry Rd West
Mississauga, On. L5N 0B9
Tel: 1-800-SAMSUNG (726-7864)
Fax: (905) 542
Website: www.samsung.com/ca
 HEADQUARTERS
Samsung Electronics Canada Inc
Derry Road West, Mississauga, Ontario
L5N 0B9 Canada
TEL: 1-800-SAMSUNG (1-800-726-7864)
www.samsung.com/ca/support
Contact SAMSUNG WORLD WIDE
 Merci d’avoir choisi un appareil Samsung
 DÉMARRAGE
AVERTISSEMENTS
ATTENTION (Pour le Canada)
 Consignes de sécurité importantes
LICENCE
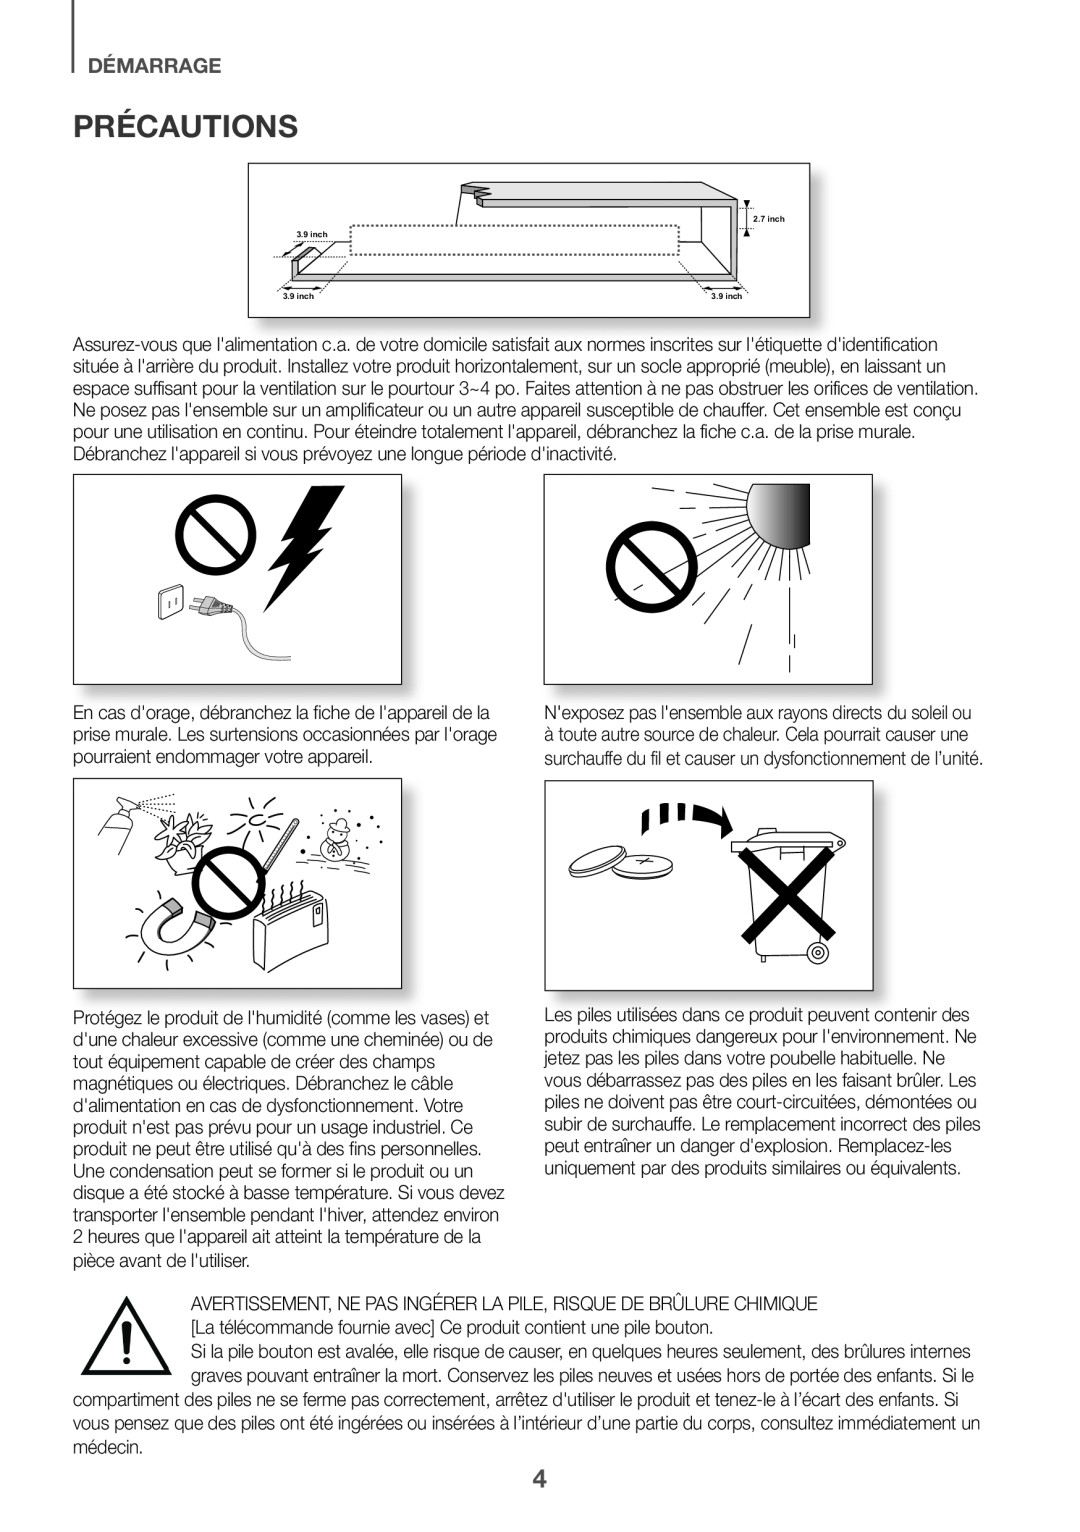 PRÉCAUTIONS
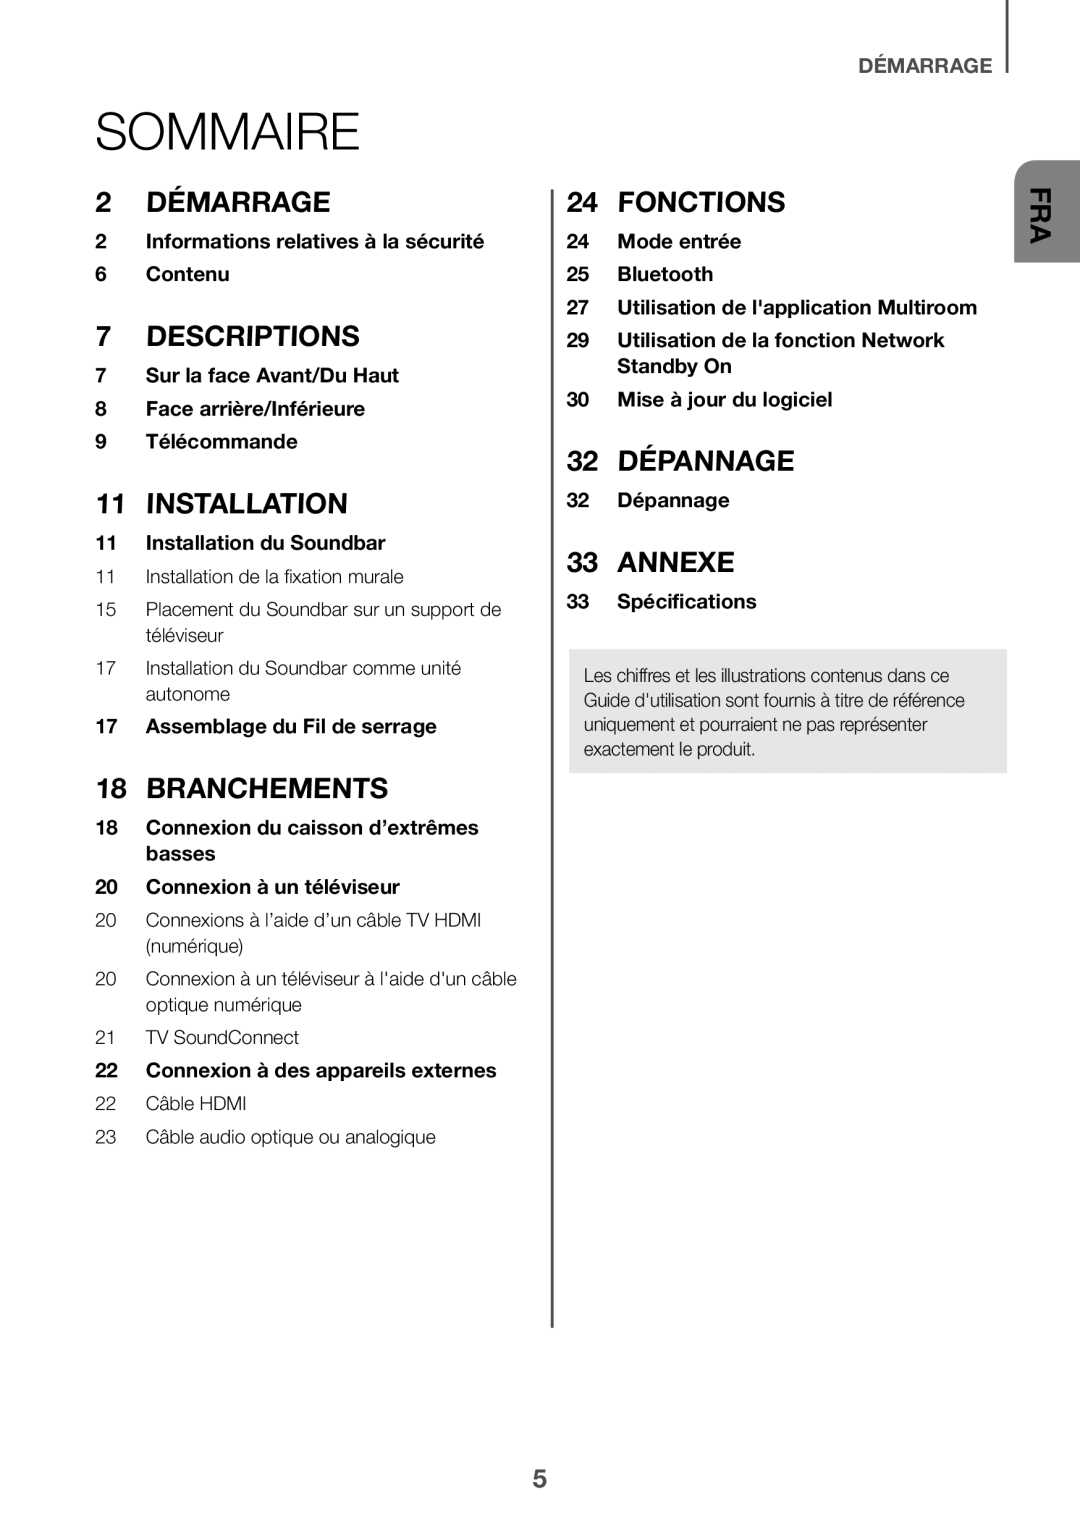 SOMMAIRE
2Informations relatives à la sécurité
6Contenu
7Sur la face Avant/Du Haut
8Face arrière/Inférieure
9Télécommande
11Installation du Soundbar
17Assemblage du Fil de serrage
18Connexion du caisson d’extrêmes basses
20 Connexion à un téléviseur
22Connexion à des appareils externes
Mode entrée
27 Utilisation de l'application Multiroom
29Utilisation de la fonction Network Standby On
30Mise à jour du logiciel
32Dépannage
33Spécifications
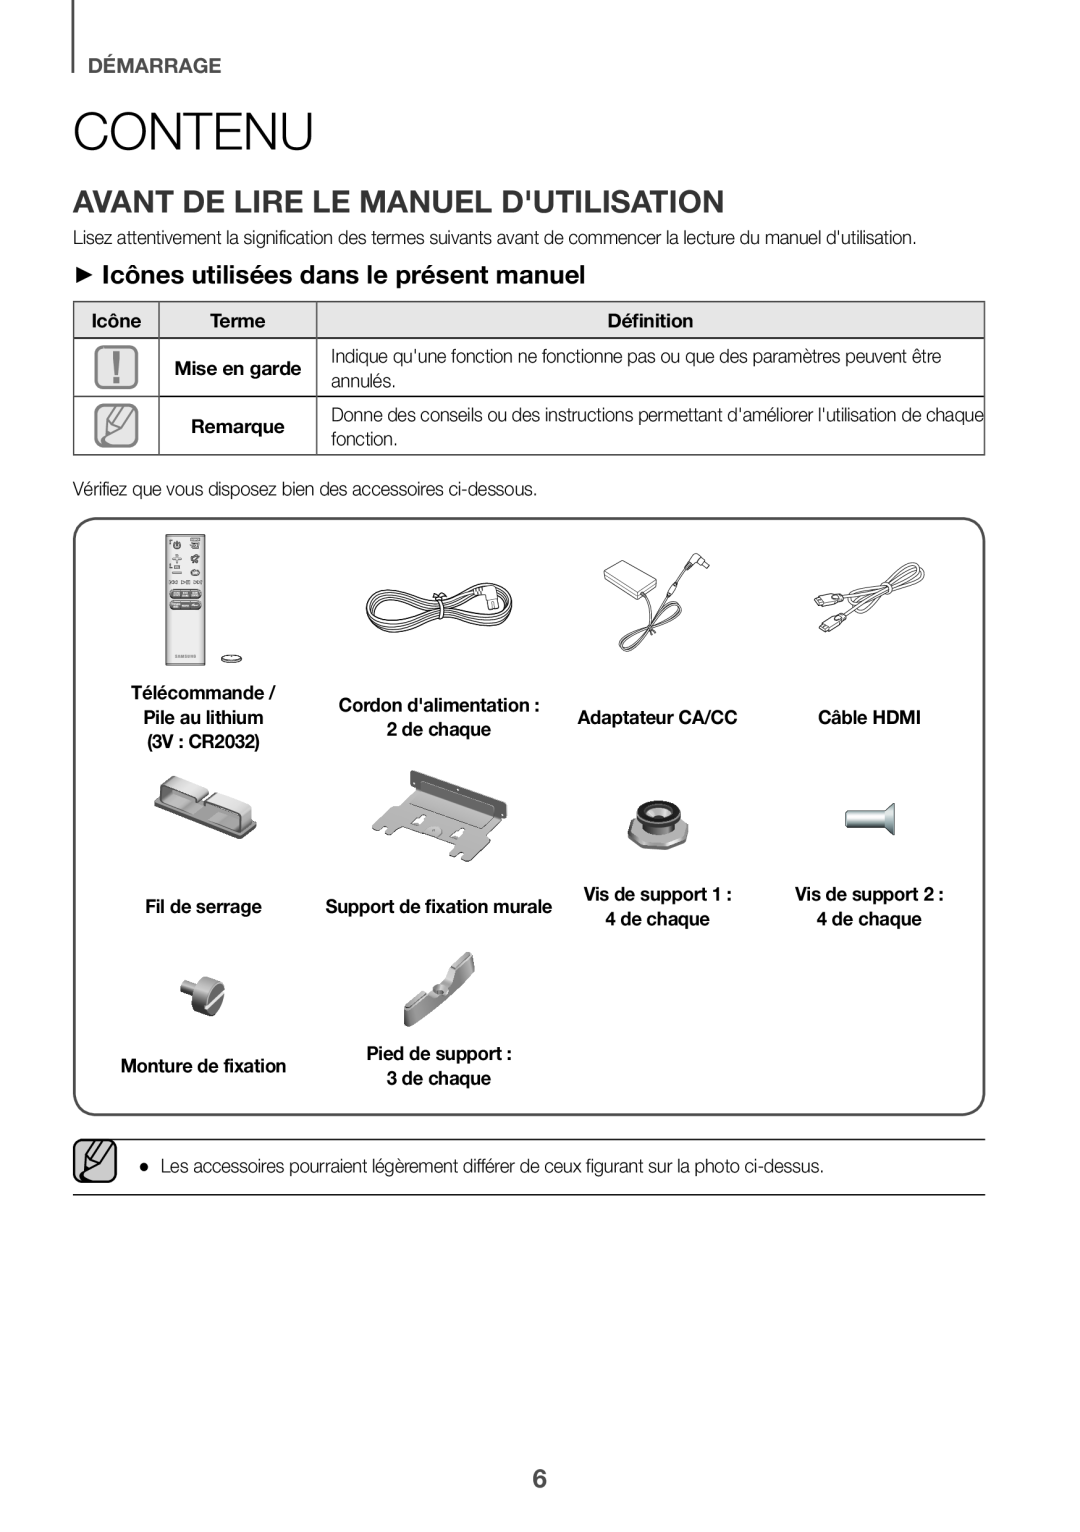 CONTENU
AVANT DE LIRE LE MANUEL D'UTILISATION
++Icônes utilisées dans le présent manuel
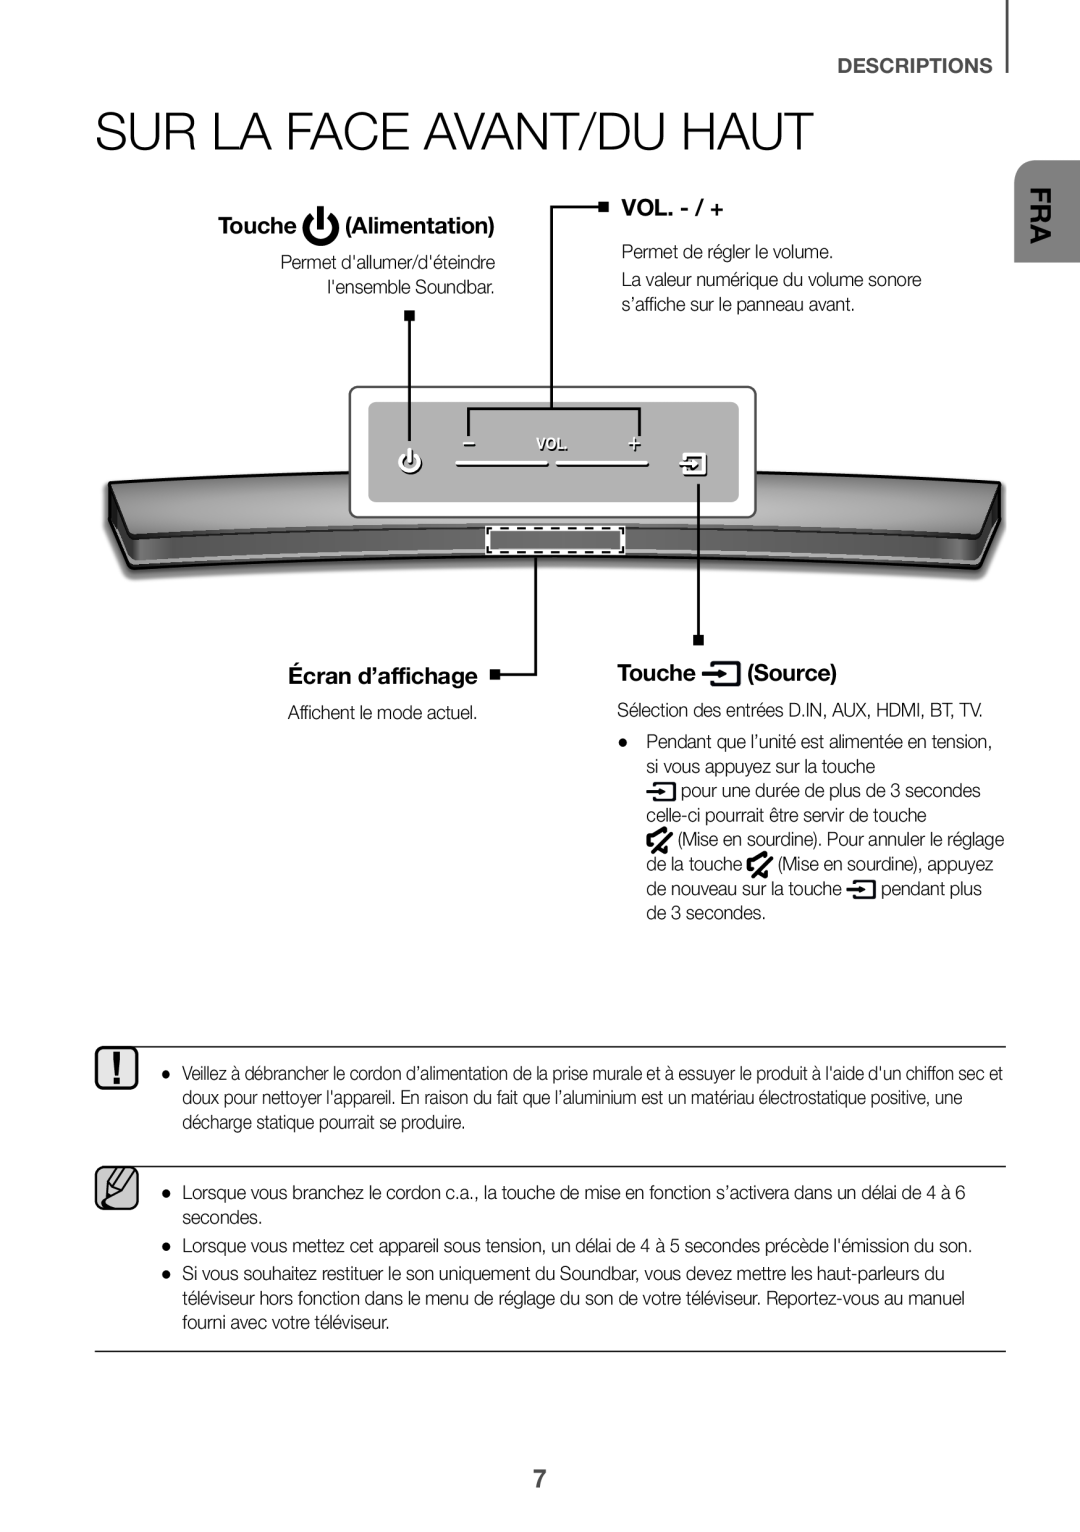 SUR LA FACE AVANT/DU HAUT
Touche
(Alimentation)
Écran d’affichage
Touche (Source)
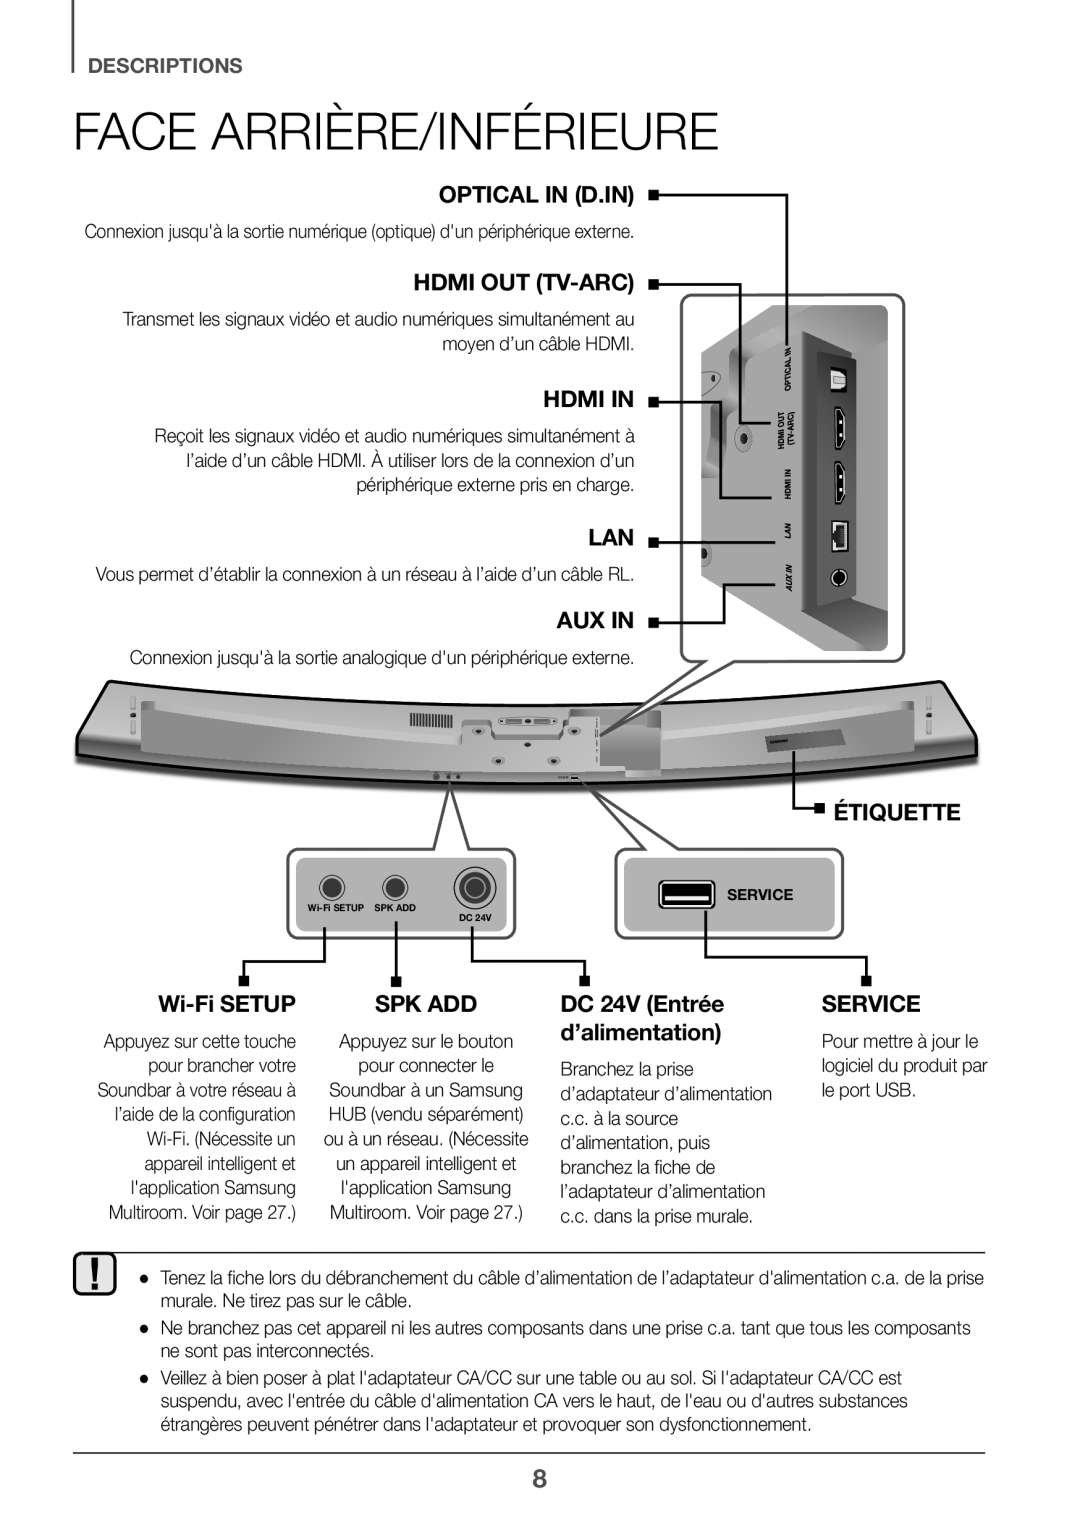 FACE ARRIÈRE/INFÉRIEURE
ÉTIQUETTE
DC 24V (Entrée d’alimentation)
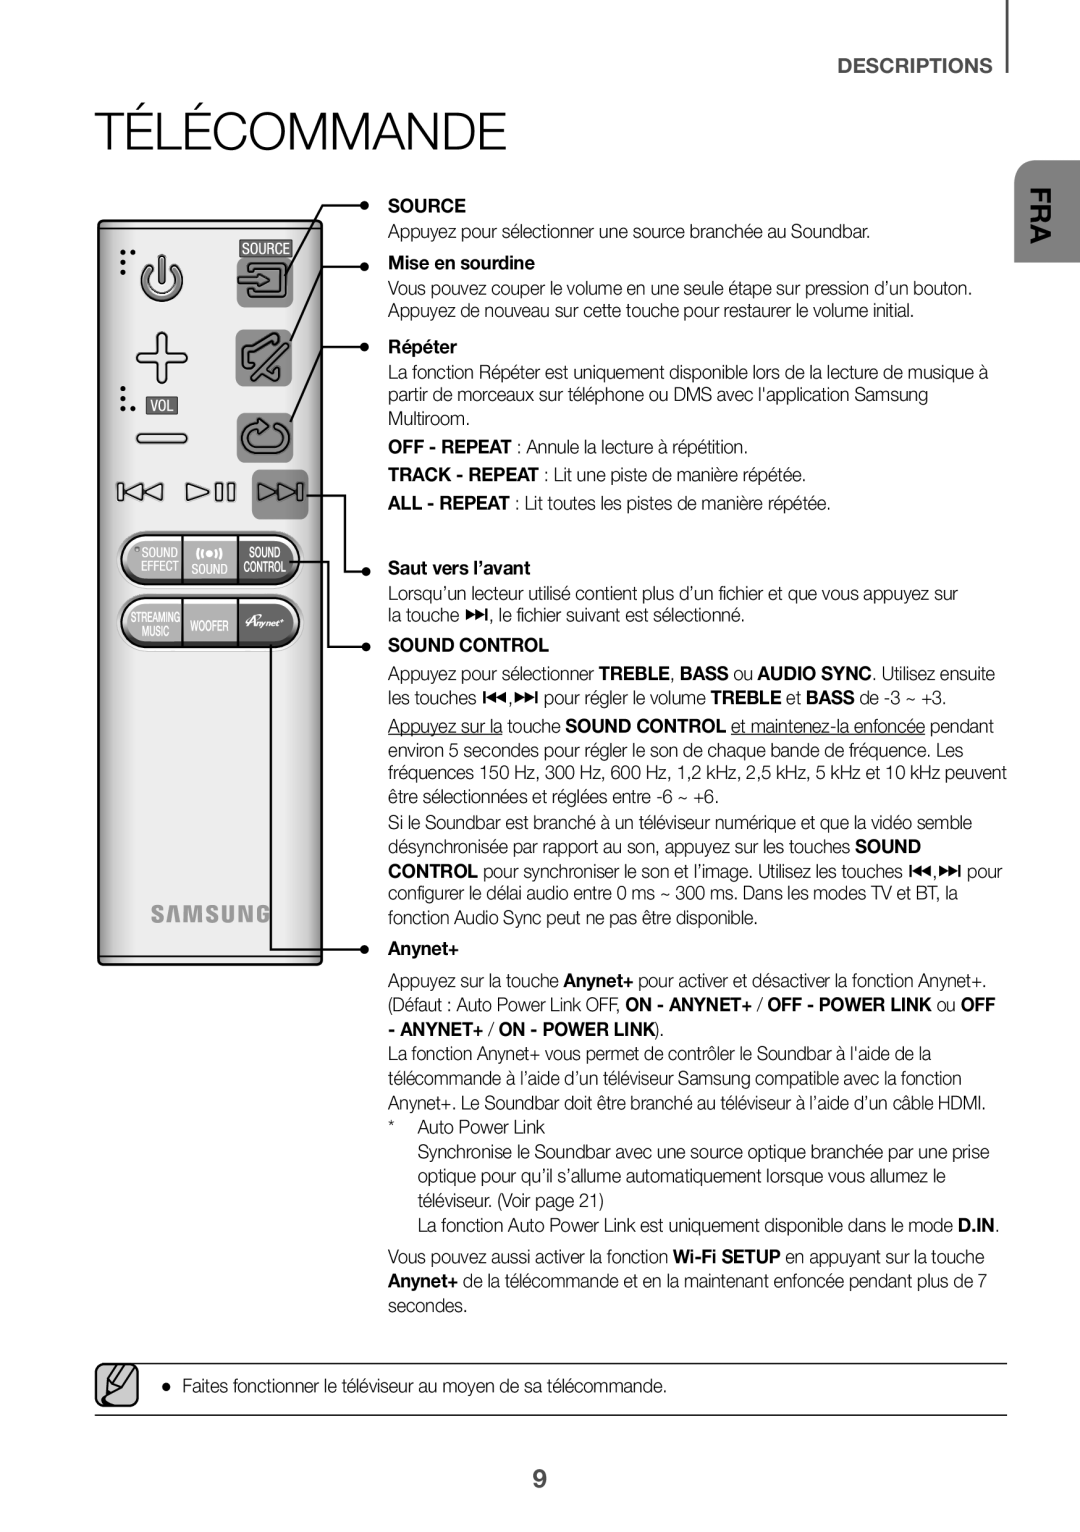 TÉLÉCOMMANDE
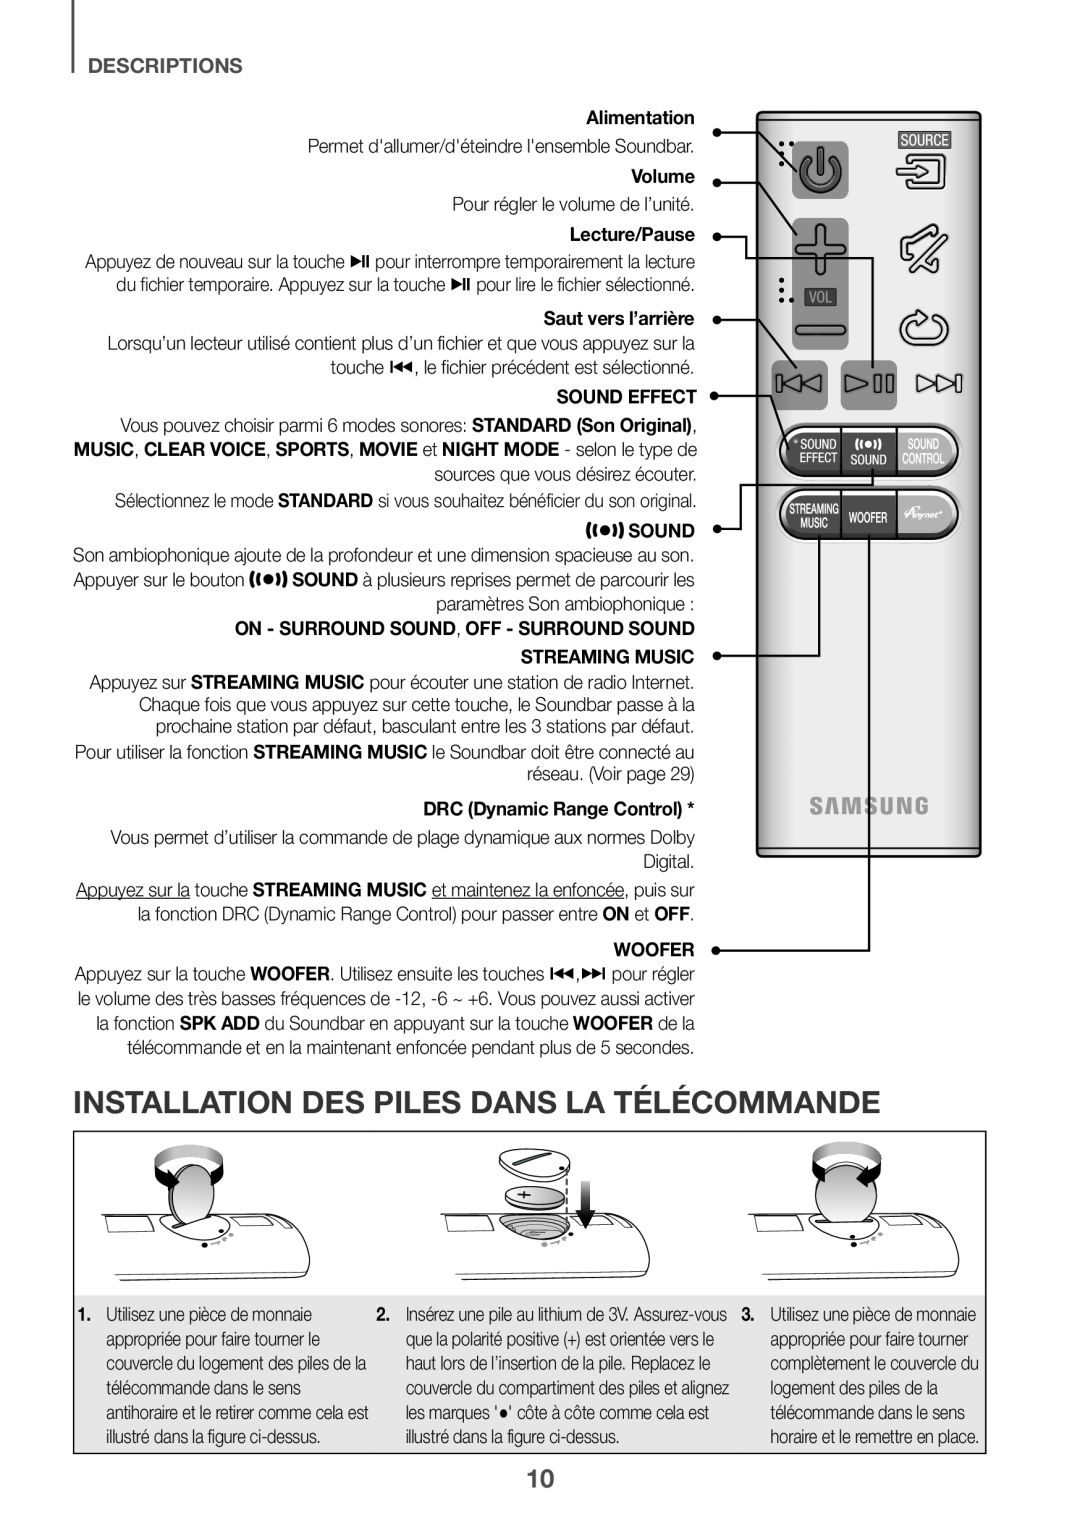 INSTALLATION DES PILES DANS LA TÉLÉCOMMANDE
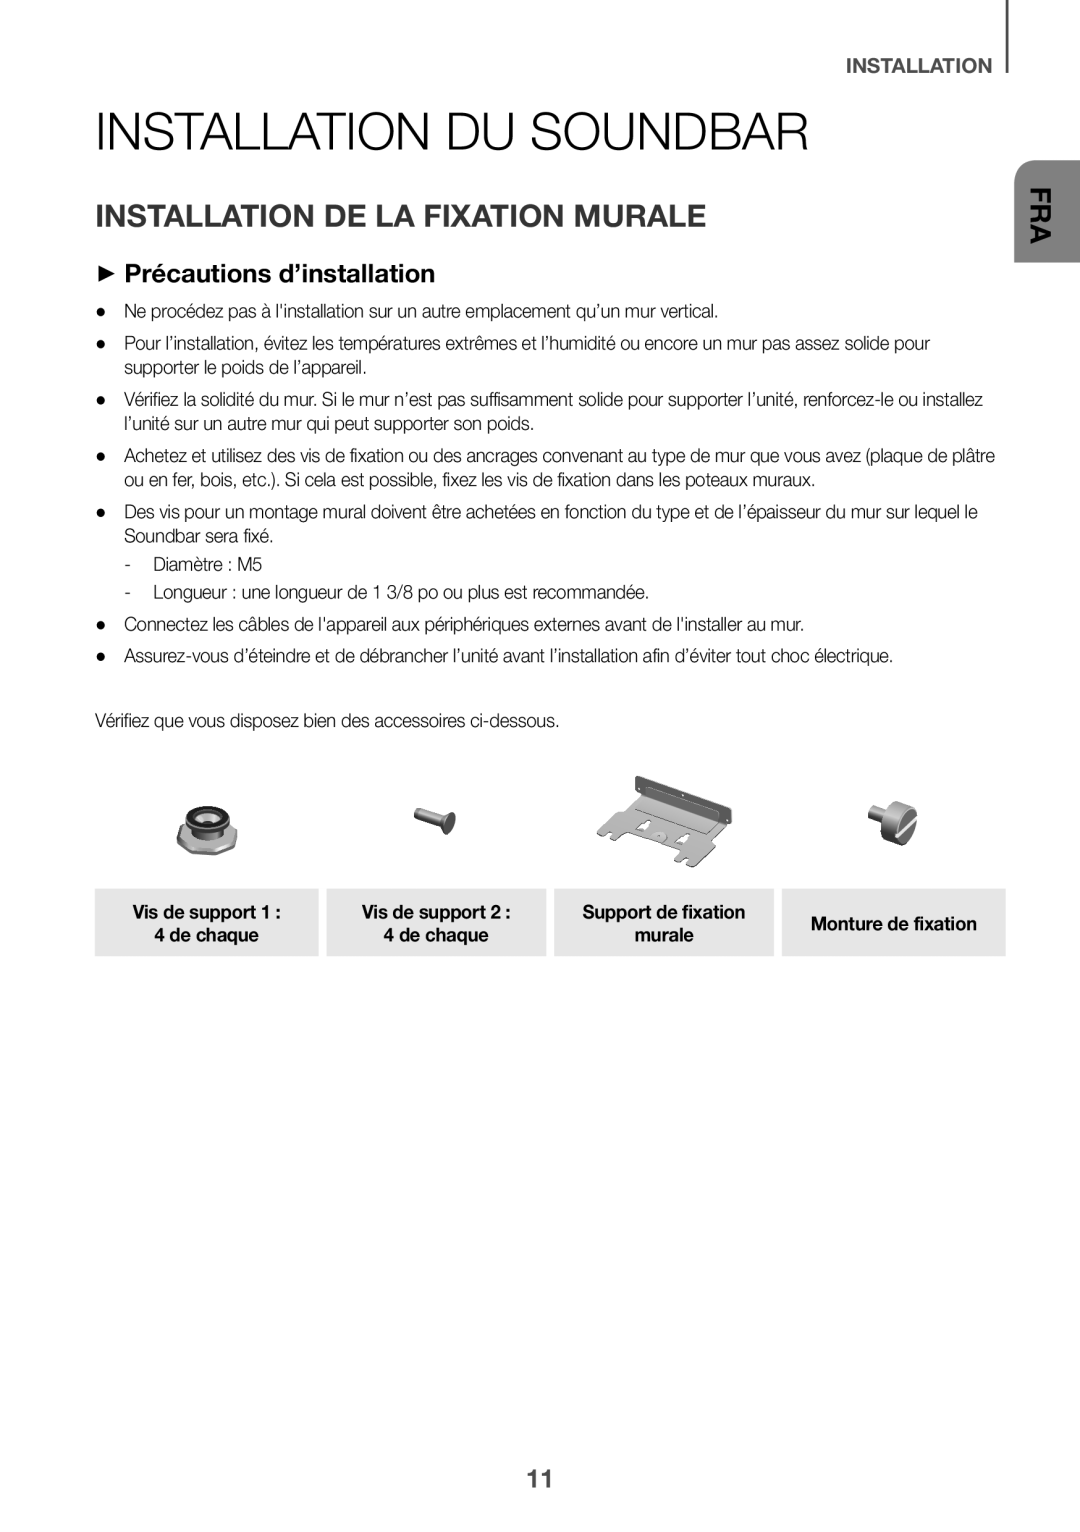 INSTALLATION DU SOUNDBAR
INSTALLATION DE LA FIXATION MURALE ++Précautions d’installation
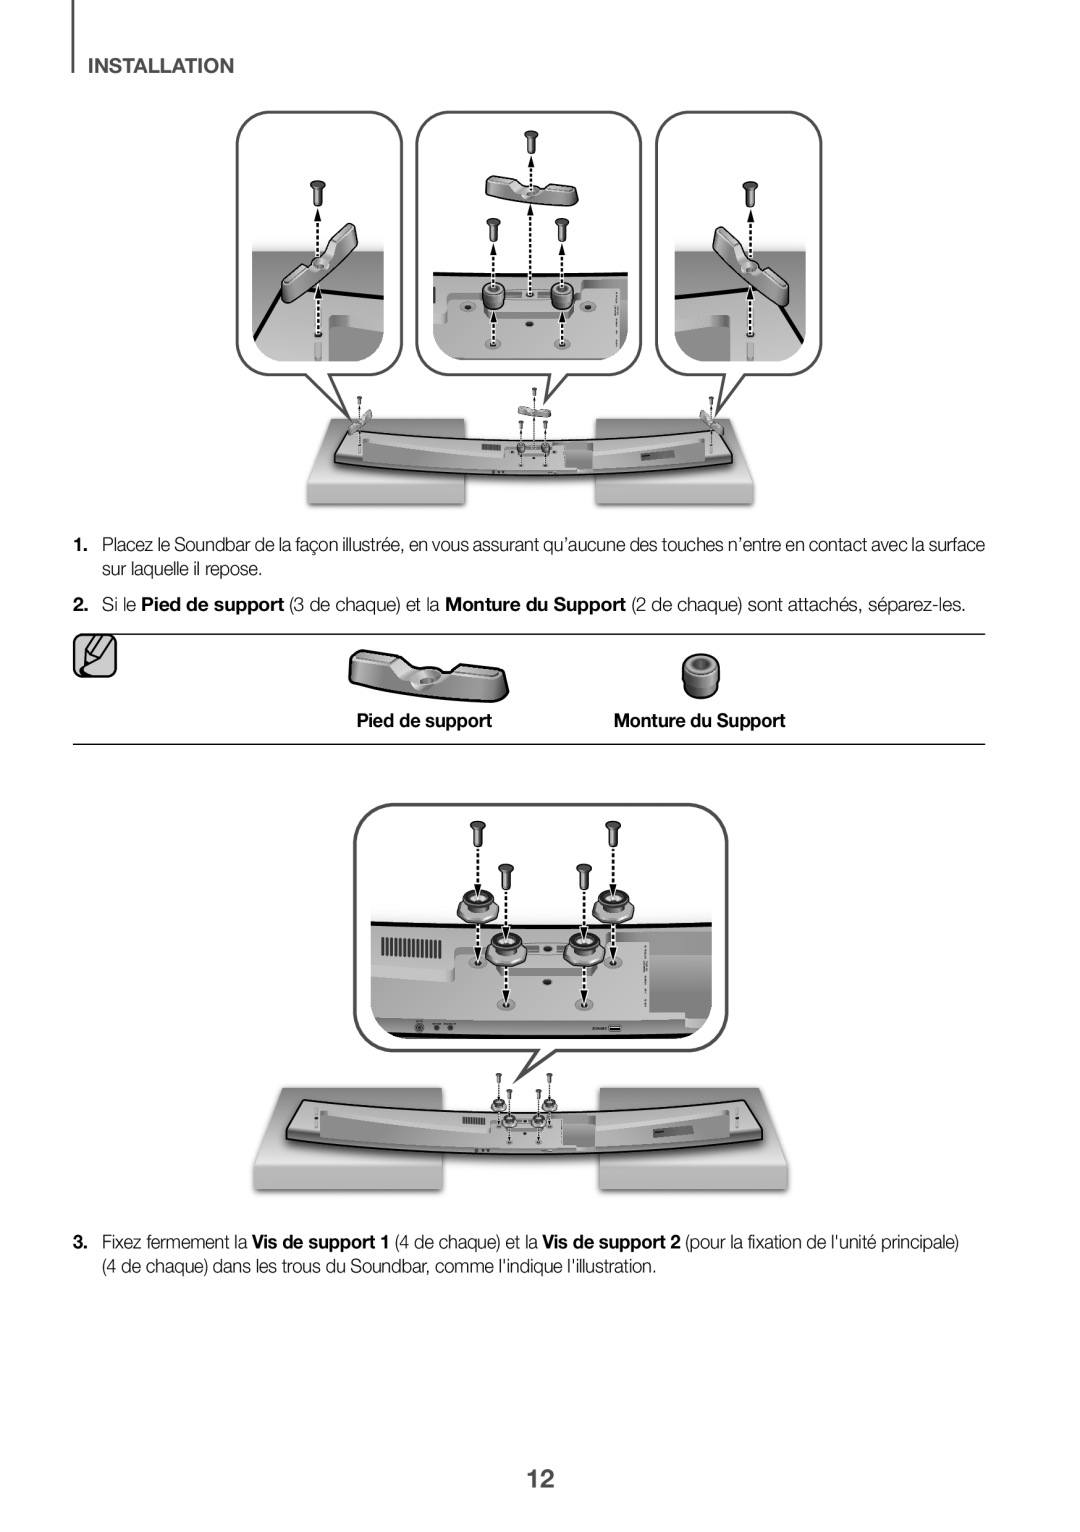 INSTALLATION
Pied de support
Monture du Support
Pied de support
Monture du Support
Vis de support
Vis de support
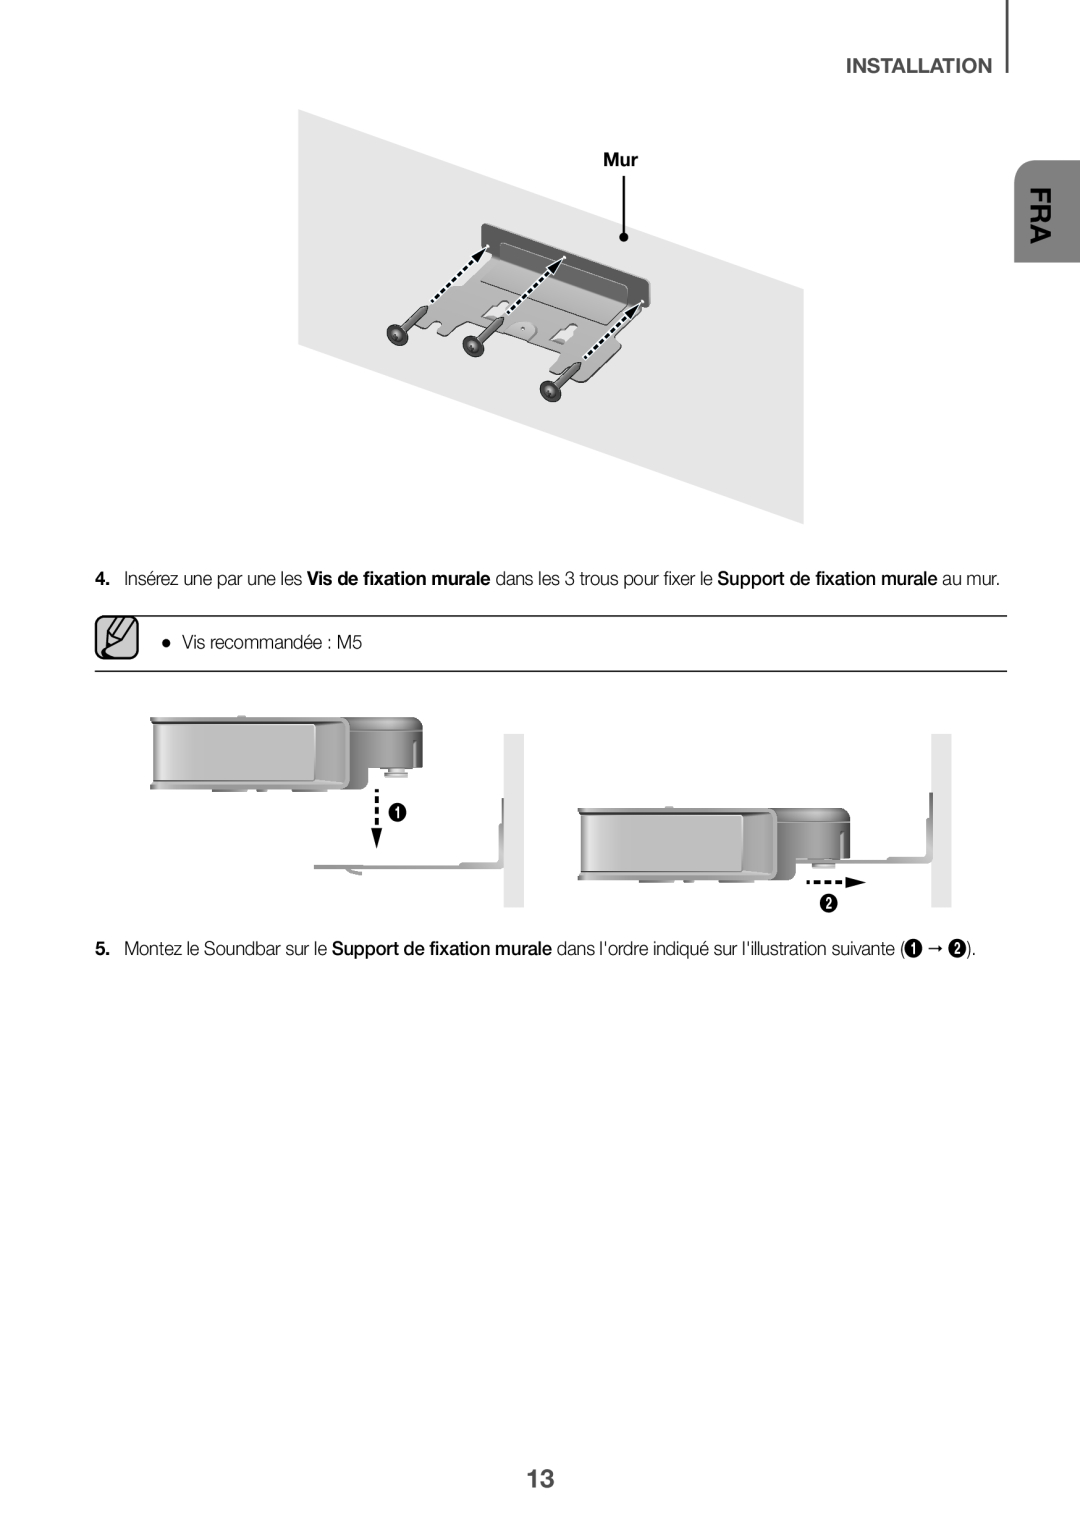 INSTALLATION
Mur
Vis de fixation murale
●● Vis recommandée : M5
 INSTALLATION
Ajustez la
Monture de fixation
●● Les Vis de fixation murale ne sont pas fournies
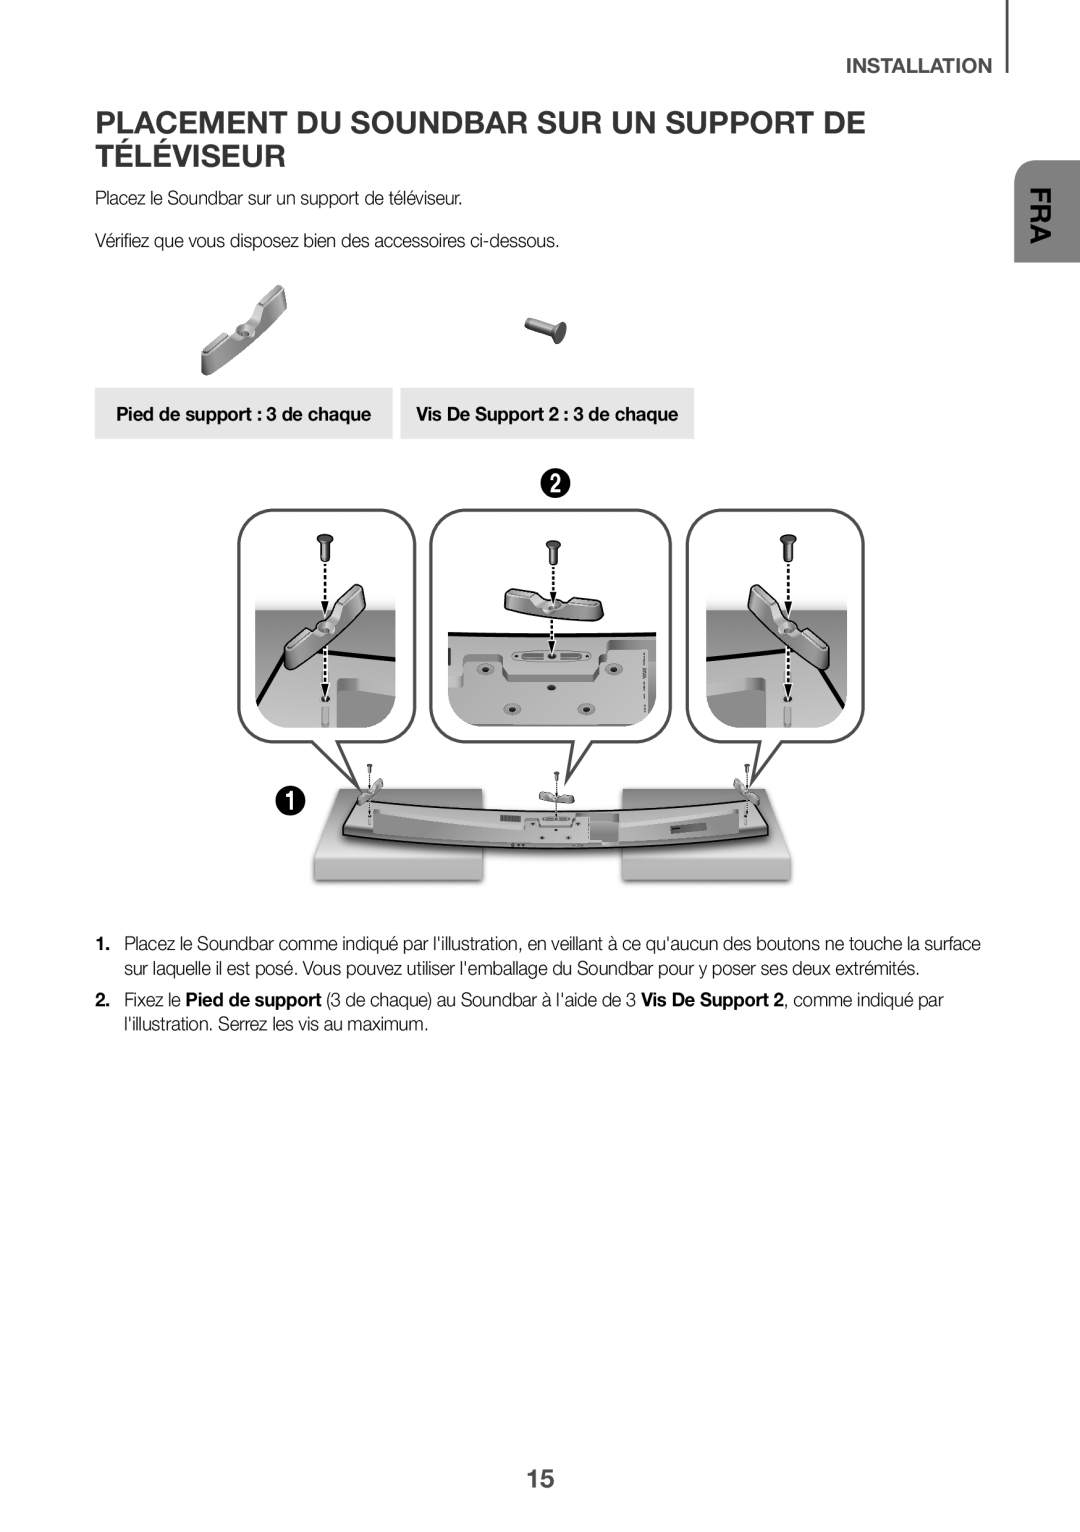 PLACEMENT DU SOUNDBAR SUR UN SUPPORT DE TÉLÉVISEUR
 INSTALLATION
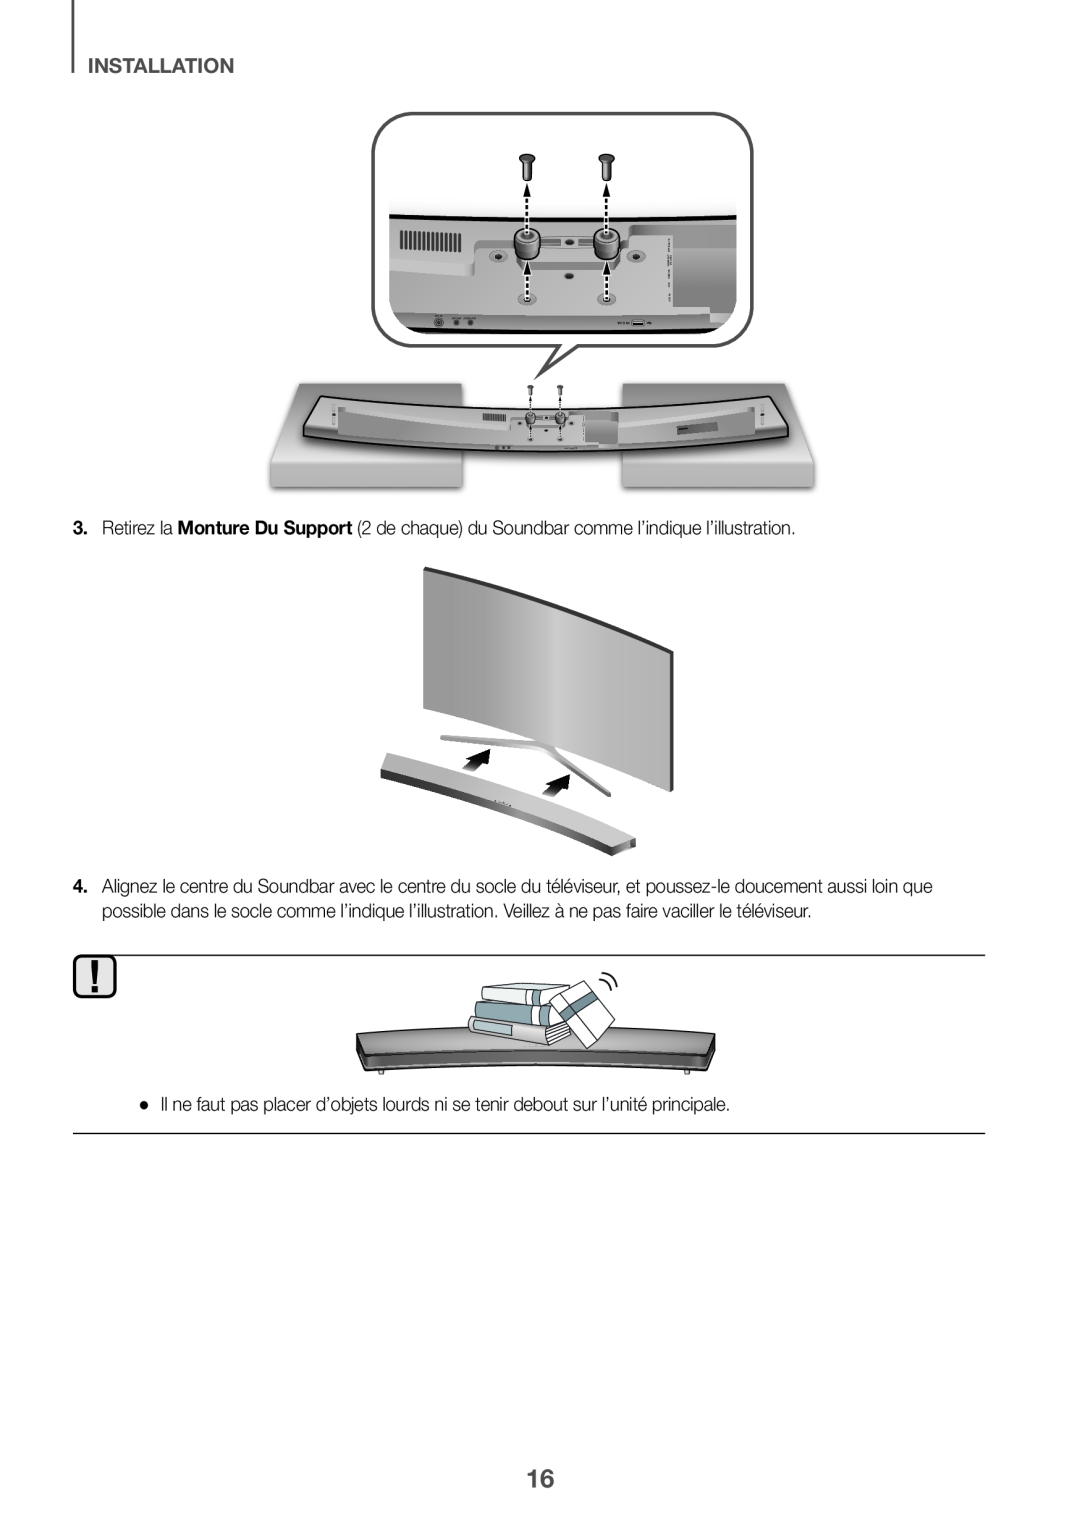
Retirez la
Monture Du Support
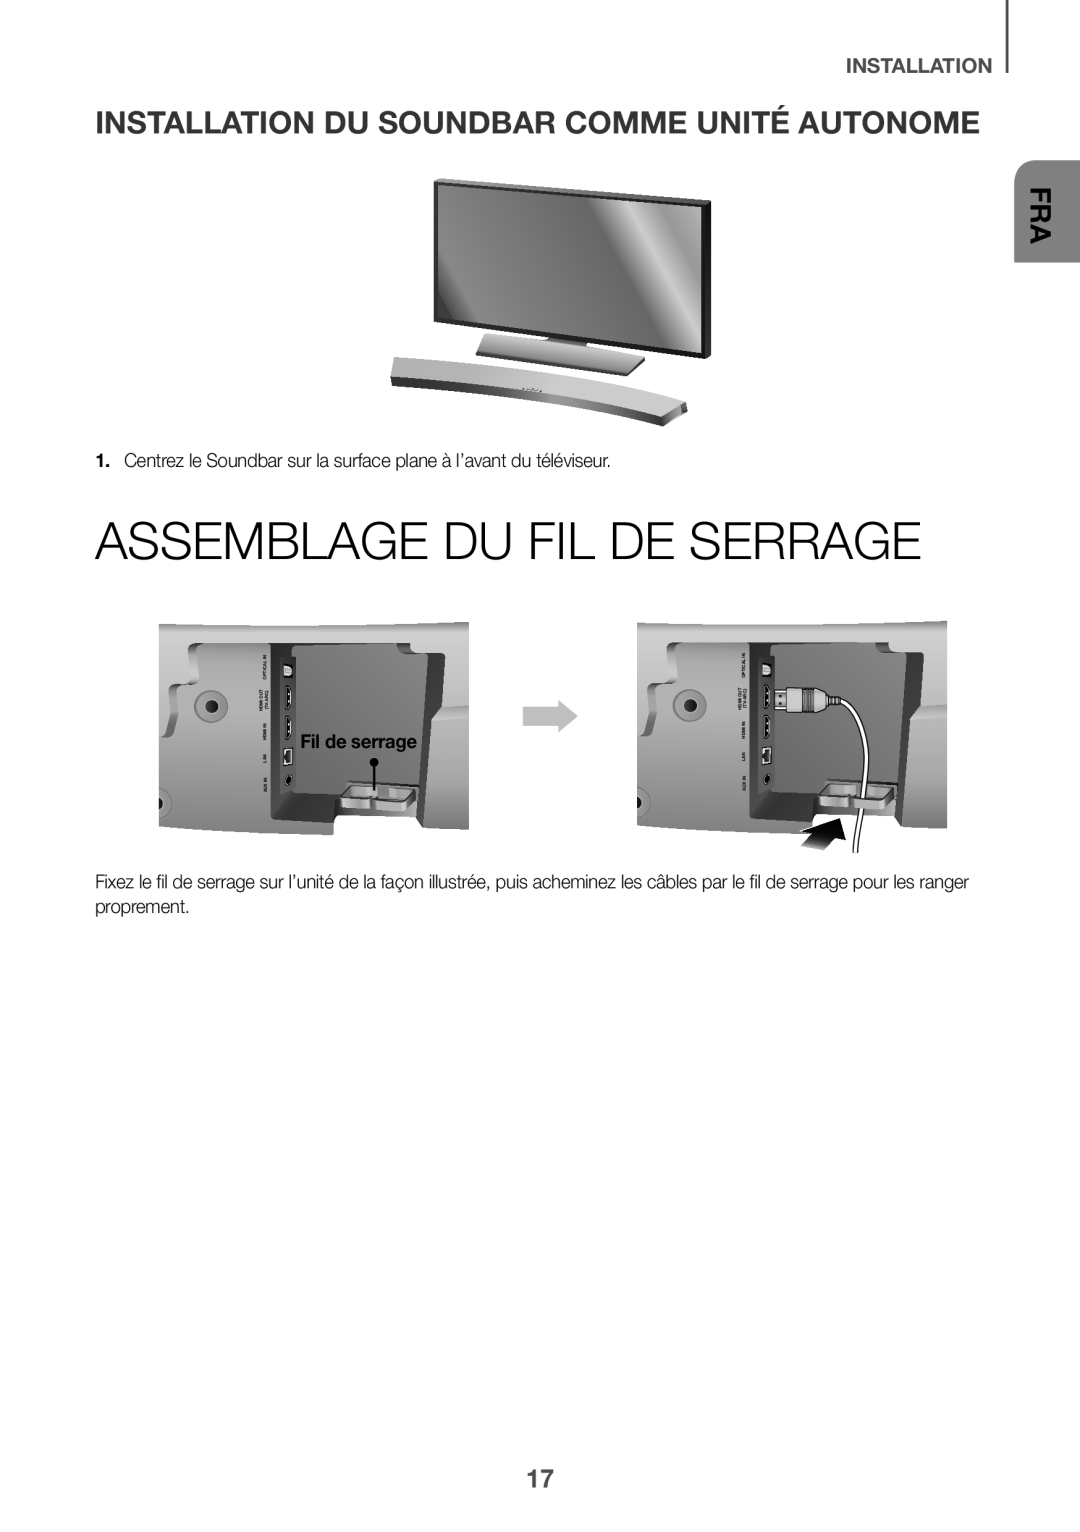 INSTALLATION DU SOUNDBAR COMME UNITÉ AUTONOME
ASSEMBLAGE DU FIL DE SERRAGE
 BRANCHEMENTS
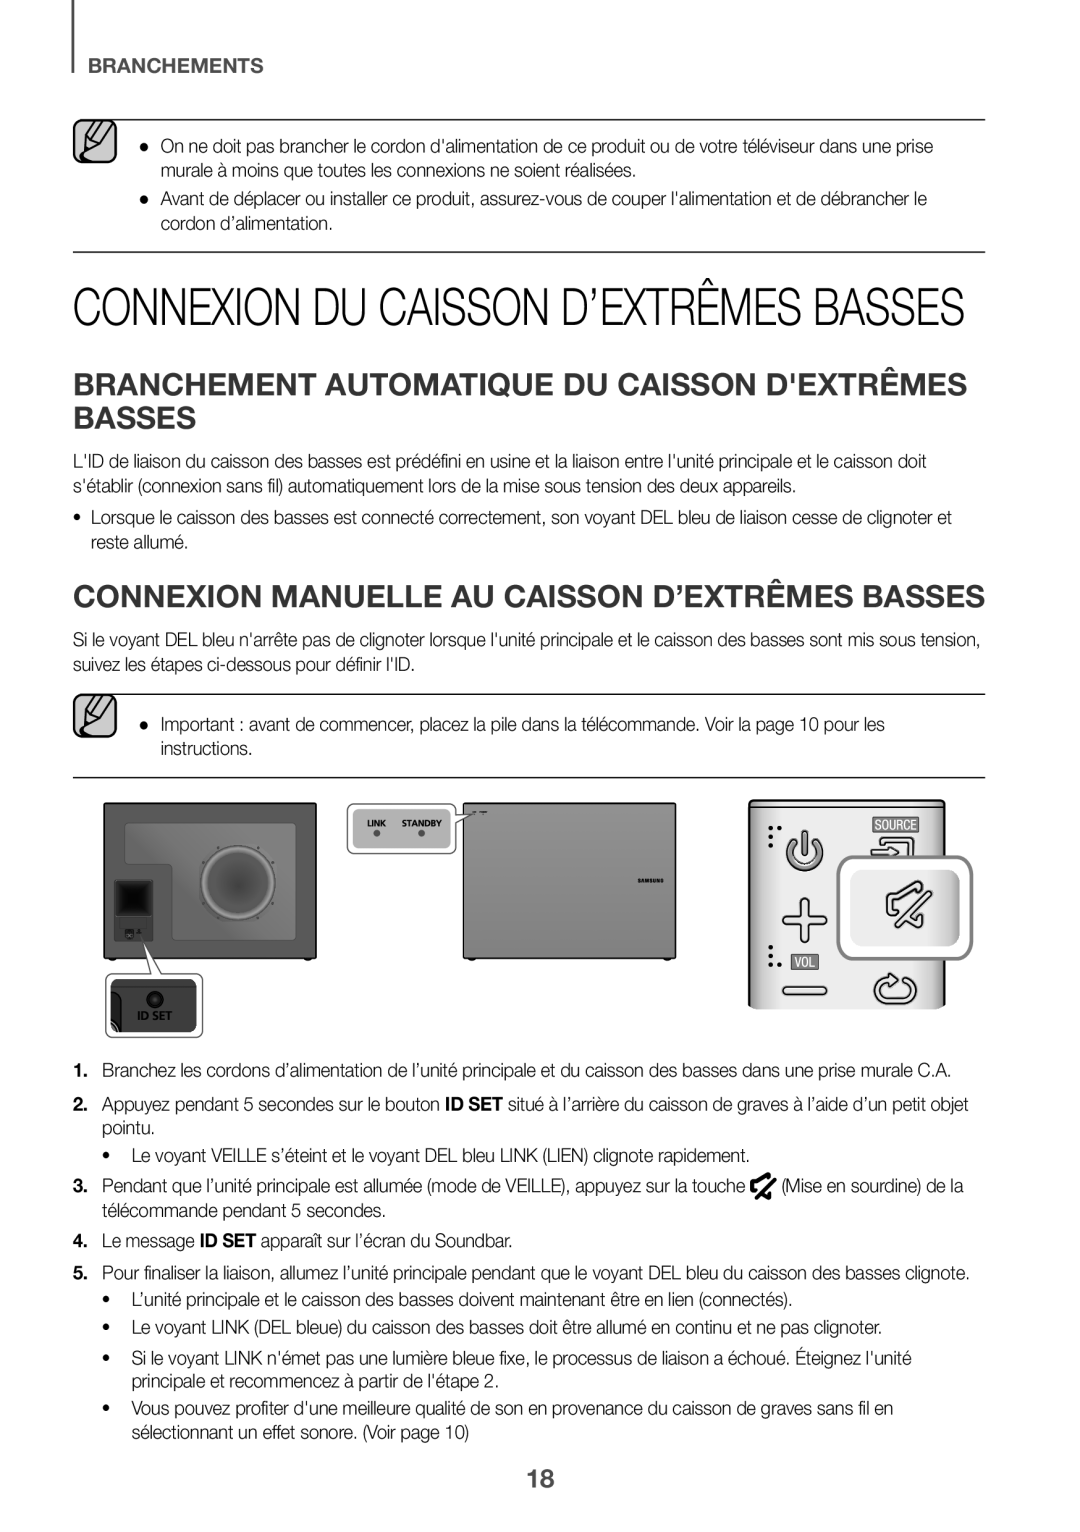
BRANCHEMENT AUTOMATIQUE DU CAISSON D'EXTRÊMES BASSES
CONNEXION MANUELLE AU CAISSON D’EXTRÊMES BASSES
 STATUT DU VOYANT LUMINEUX DEL SUR LE CAISSON DES BASSES
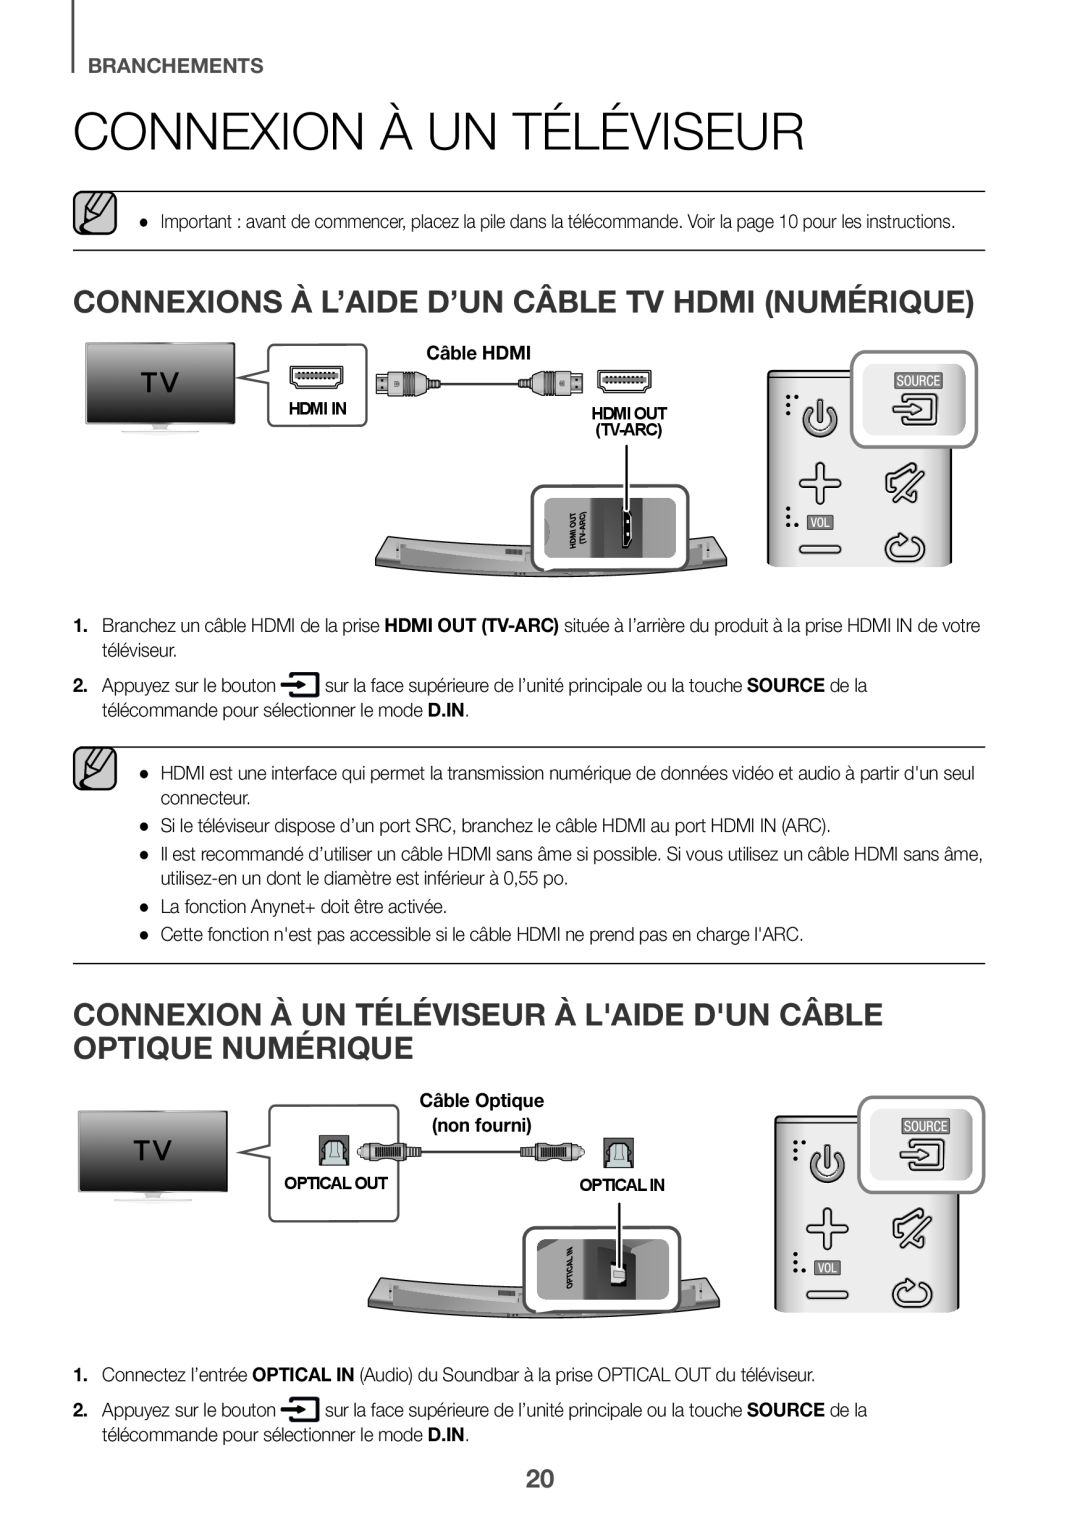 CONNEXION À UN TÉLÉVISEUR
CONNEXIONS À L’AIDE D’UN CÂBLE TV HDMI (NUMÉRIQUE)
CONNEXION À UN TÉLÉVISEUR À L'AIDE D'UN CÂBLE OPTIQUE NUMÉRIQUE
 BRANCHEMENTS
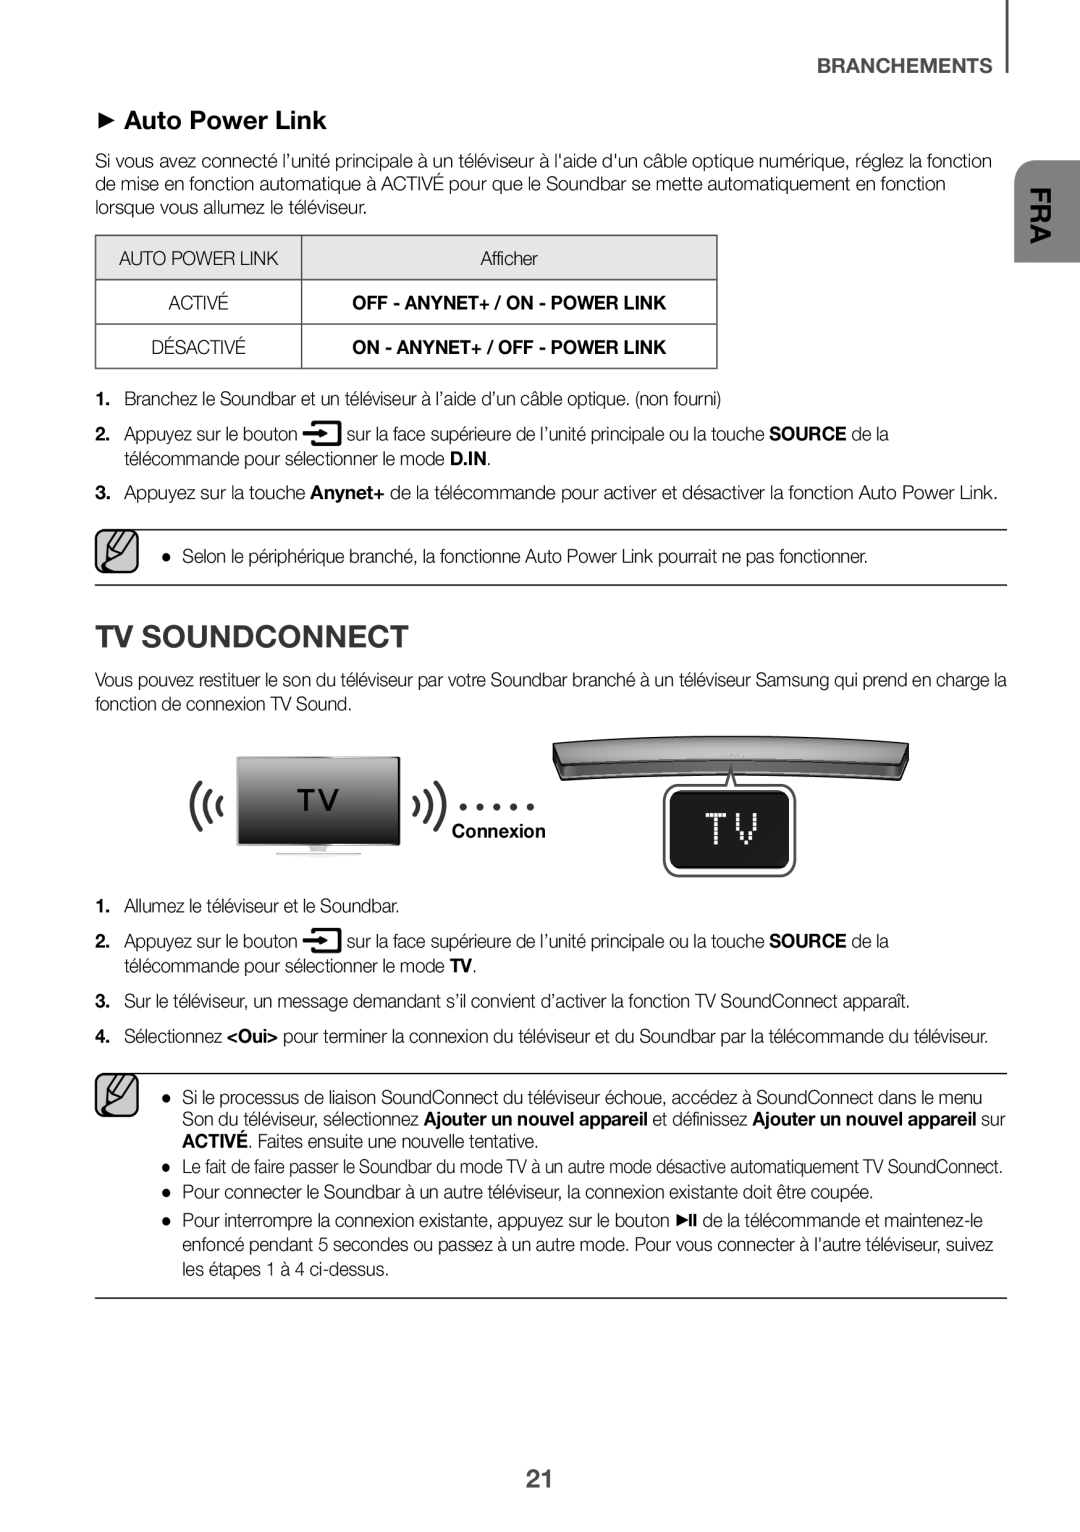
++Auto Power Link
AUTO POWER LINK
Afficher
ACTIVÉ
OFF - ANYNET+ / ON - POWER LINK
DÉSACTIVÉ
ON - ANYNET+ / OFF - POWER LINK
Branchez le Soundbar et un téléviseur à l’aide d’un câble optique. (non fourni)
SOURCE
D.IN
Appuyez sur la touche
Anynet+
TV SOUNDCONNECT
Connexion
1.Allumez le téléviseur et le Soundbar
SOURCE
Sélectionnez
<Oui
Ajouter un nouvel appareil
Ajouter un nouvel appareil
ACTIVÉ
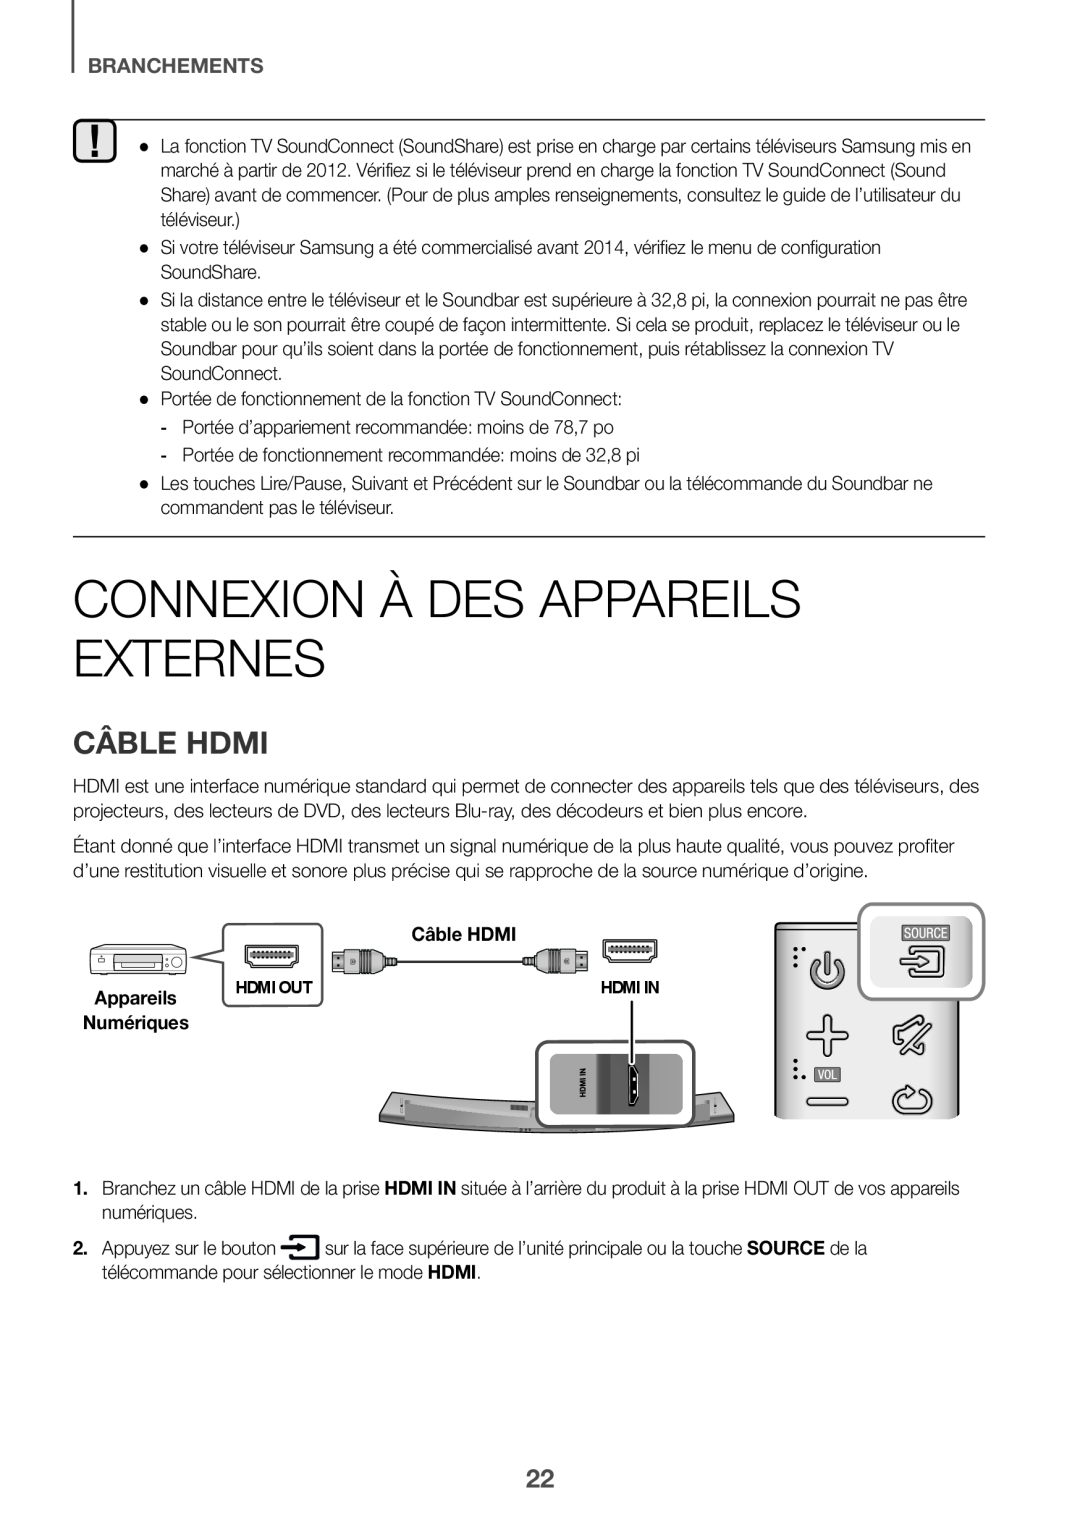 CONNEXION À DES APPAREILS EXTERNES
CÂBLE HDMI
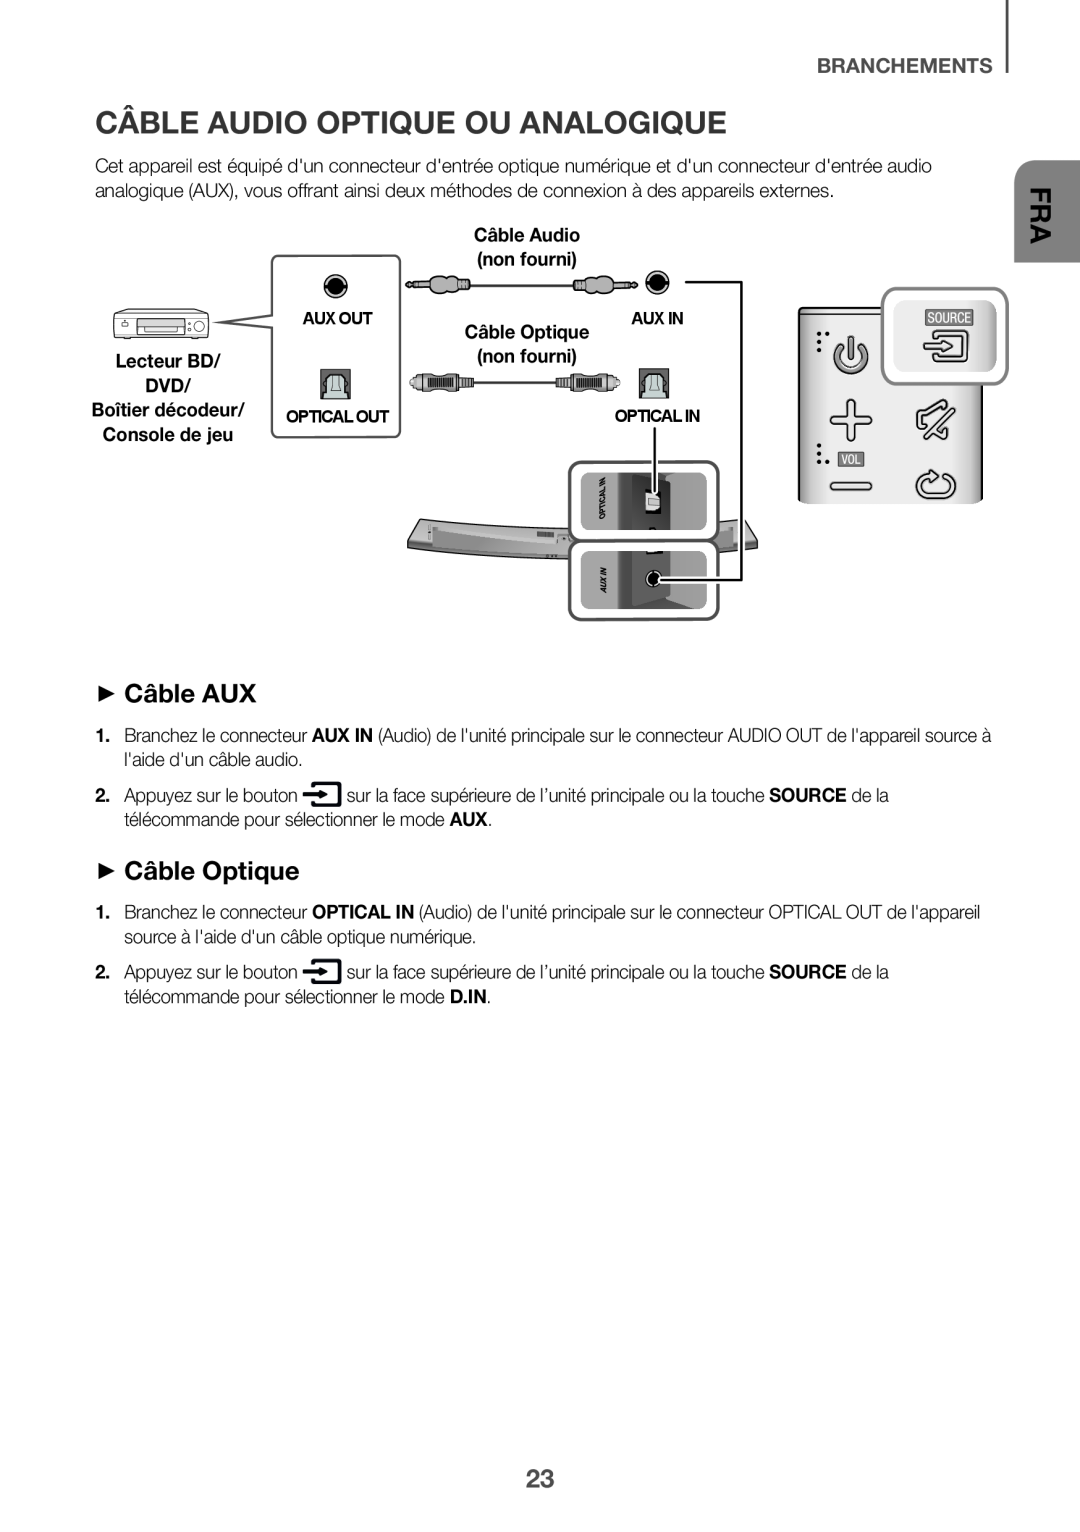 CÂBLE AUDIO OPTIQUE OU ANALOGIQUE
++Câble AUX
++Câble Optique
 FONCTIONS
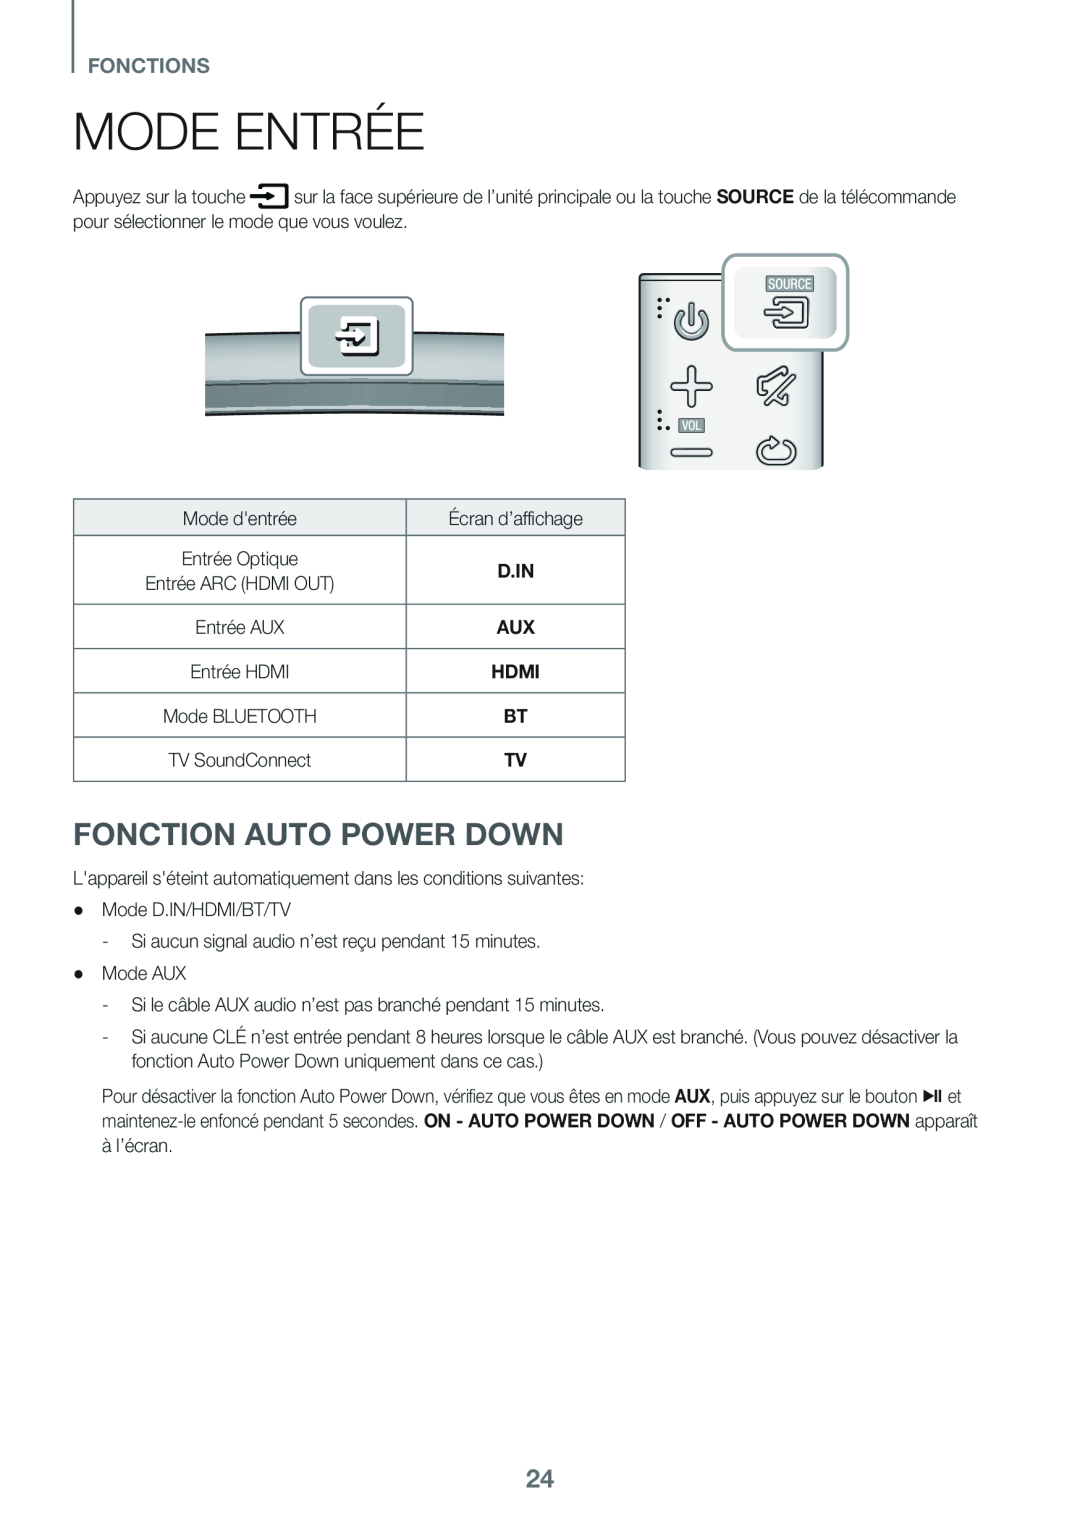
MODE ENTRÉE
FONCTION AUTO POWER DOWN
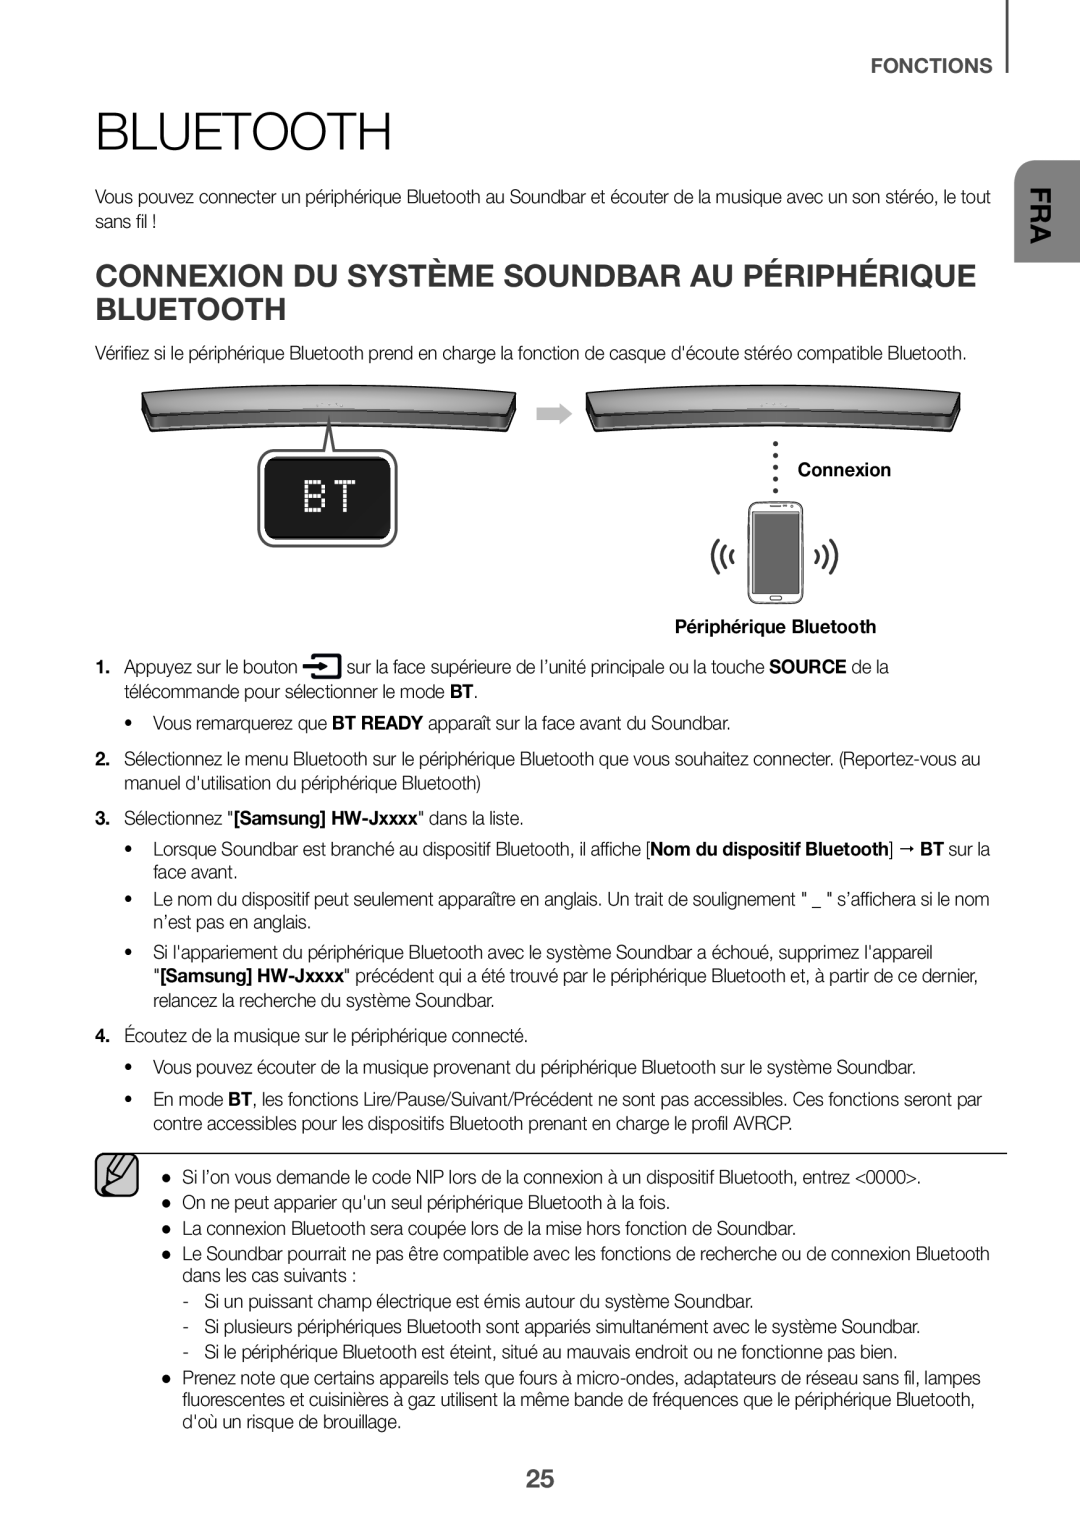 CONNEXION DU SYSTÈME SOUNDBAR AU PÉRIPHÉRIQUE BLUETOOTH
 DÉCONNEXION DU PÉRIPHÉRIQUE BLUETOOTH À PARTIR DU SYSTÈME SOUNDBAR
DÉCONNEXION DU SYSTÈME SOUNDBAR À PARTIR DU PÉRIPHÉRIQUE BLUETOOTH
++Davantage d’information sur la technologie Bluetooth
 UTILISATION DE L'APPLICATION MULTIROOM
AVANT DE COMMENCER
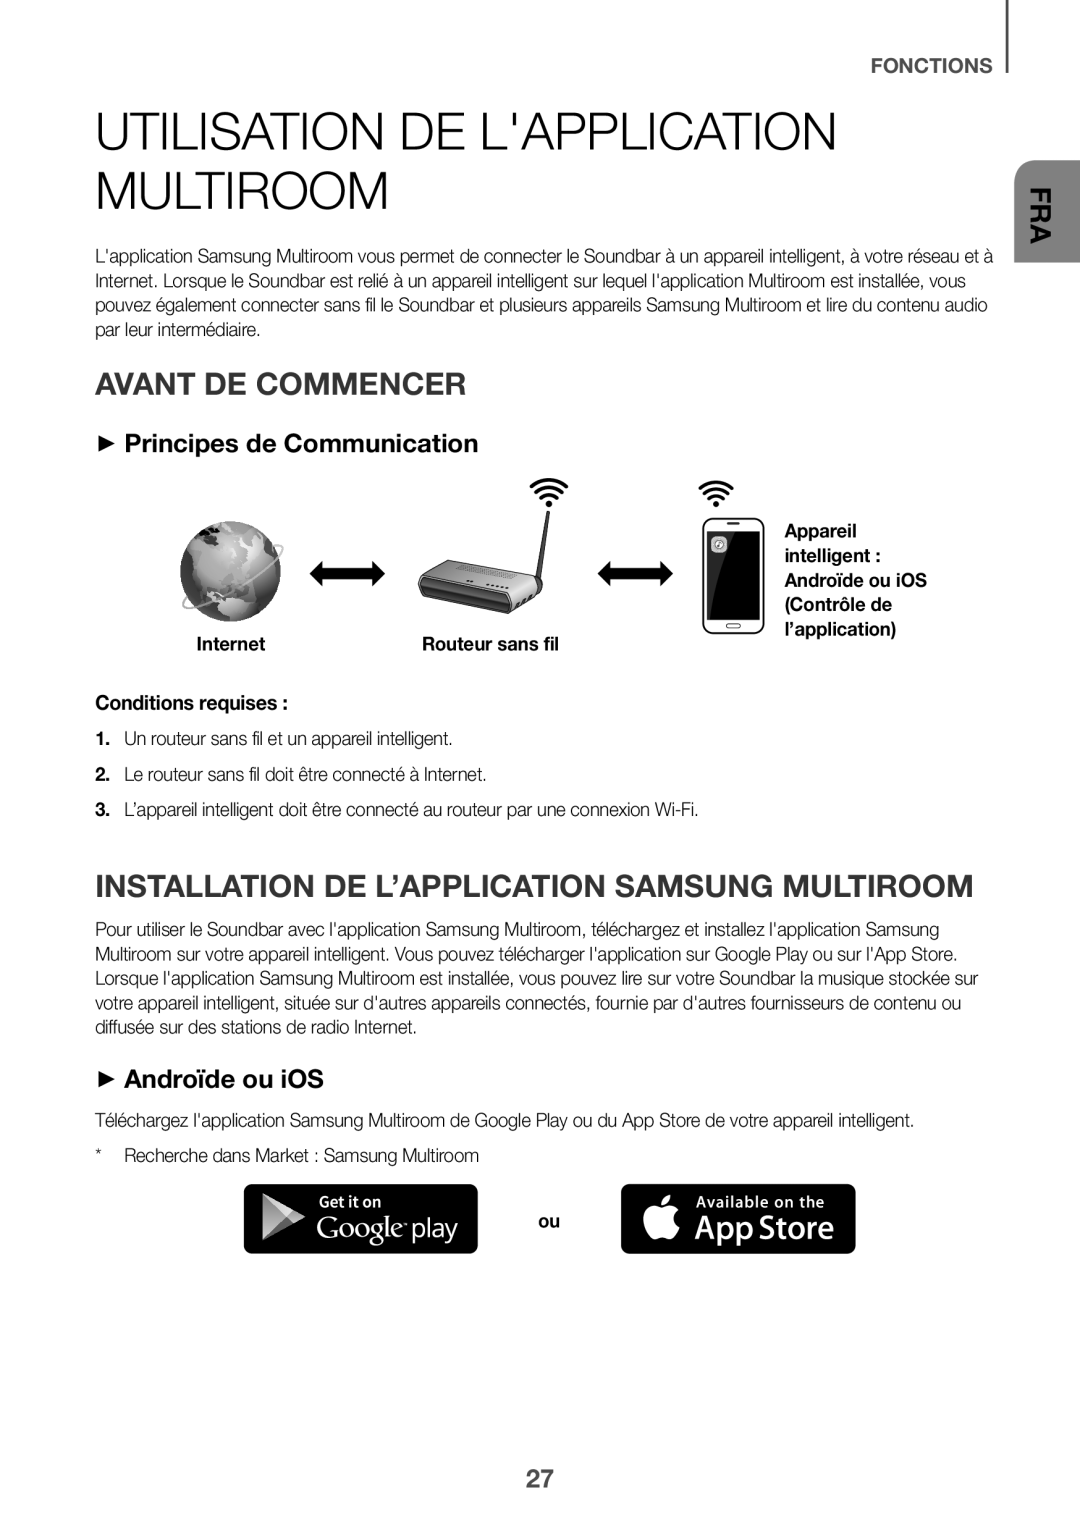
++Principes de Communication
Conditions requises :
INSTALLATION DE L’APPLICATION SAMSUNG MULTIROOM
++Androïde ou iOS
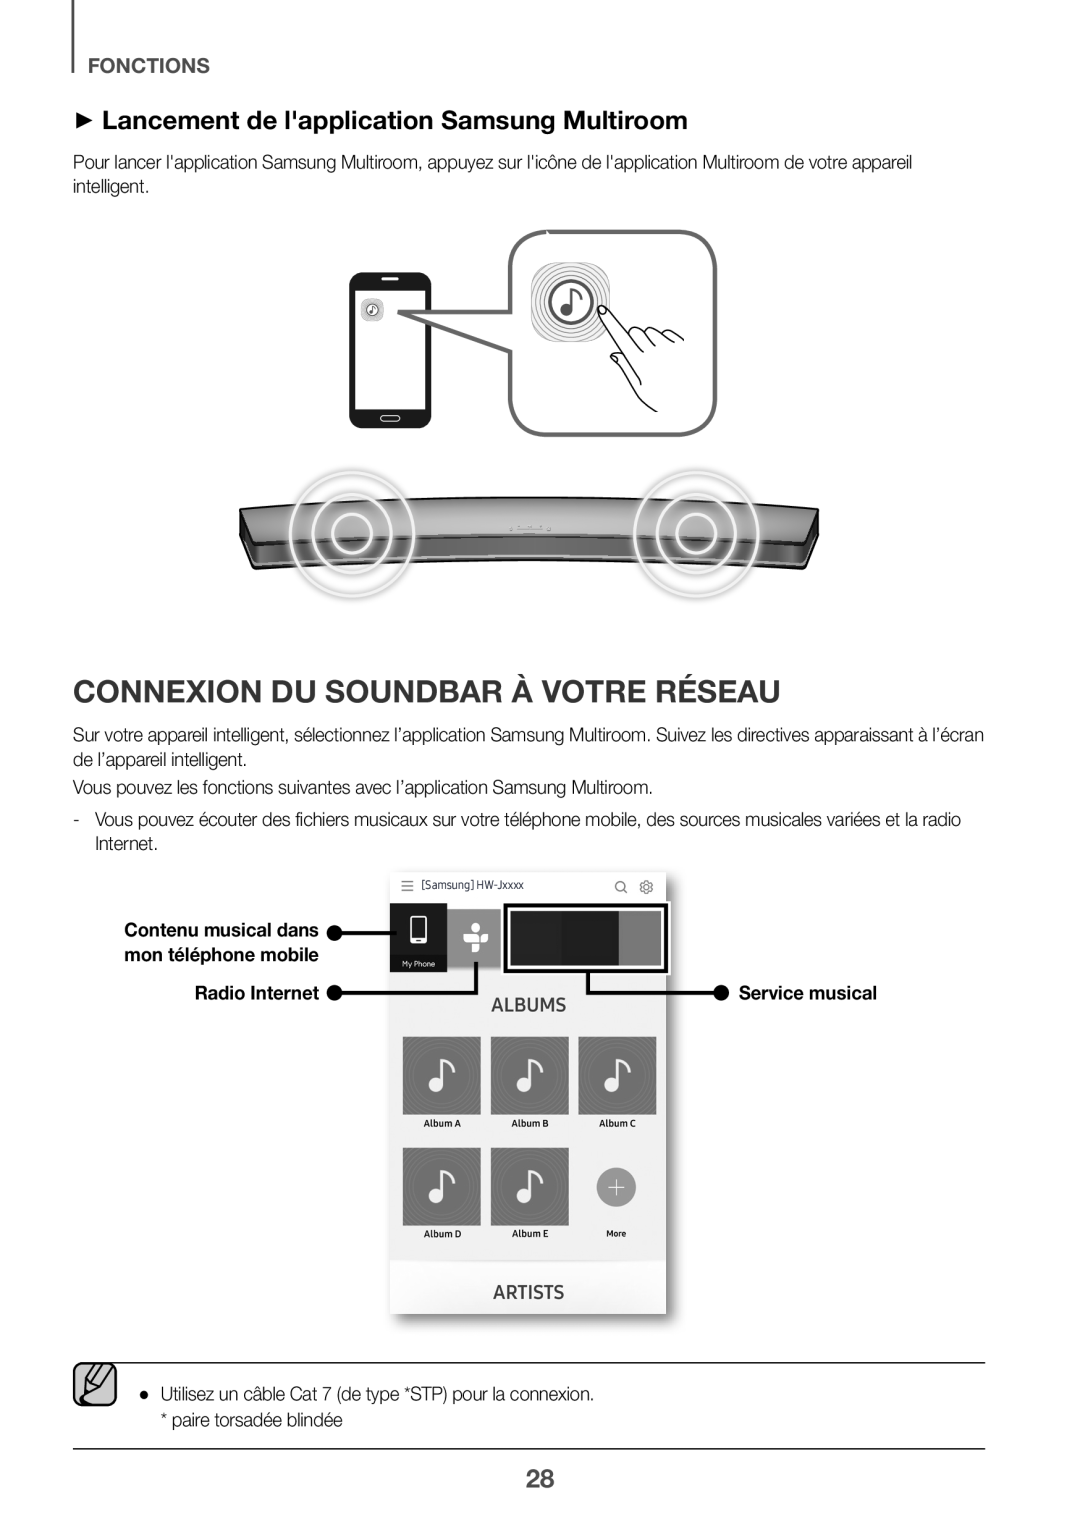 ++Lancement de l'application Samsung Multiroom
CONNEXION DU SOUNDBAR À VOTRE RÉSEAU
 FONCTIONS
UTILISATION DE LA FONCTION NETWORK STANDBY ON
1.Branchez l’appareil intelligent à votre Soundbar
●● Si la fonction Network Standby On ne fonctionne pas
 MISE À JOUR DU LOGICIEL
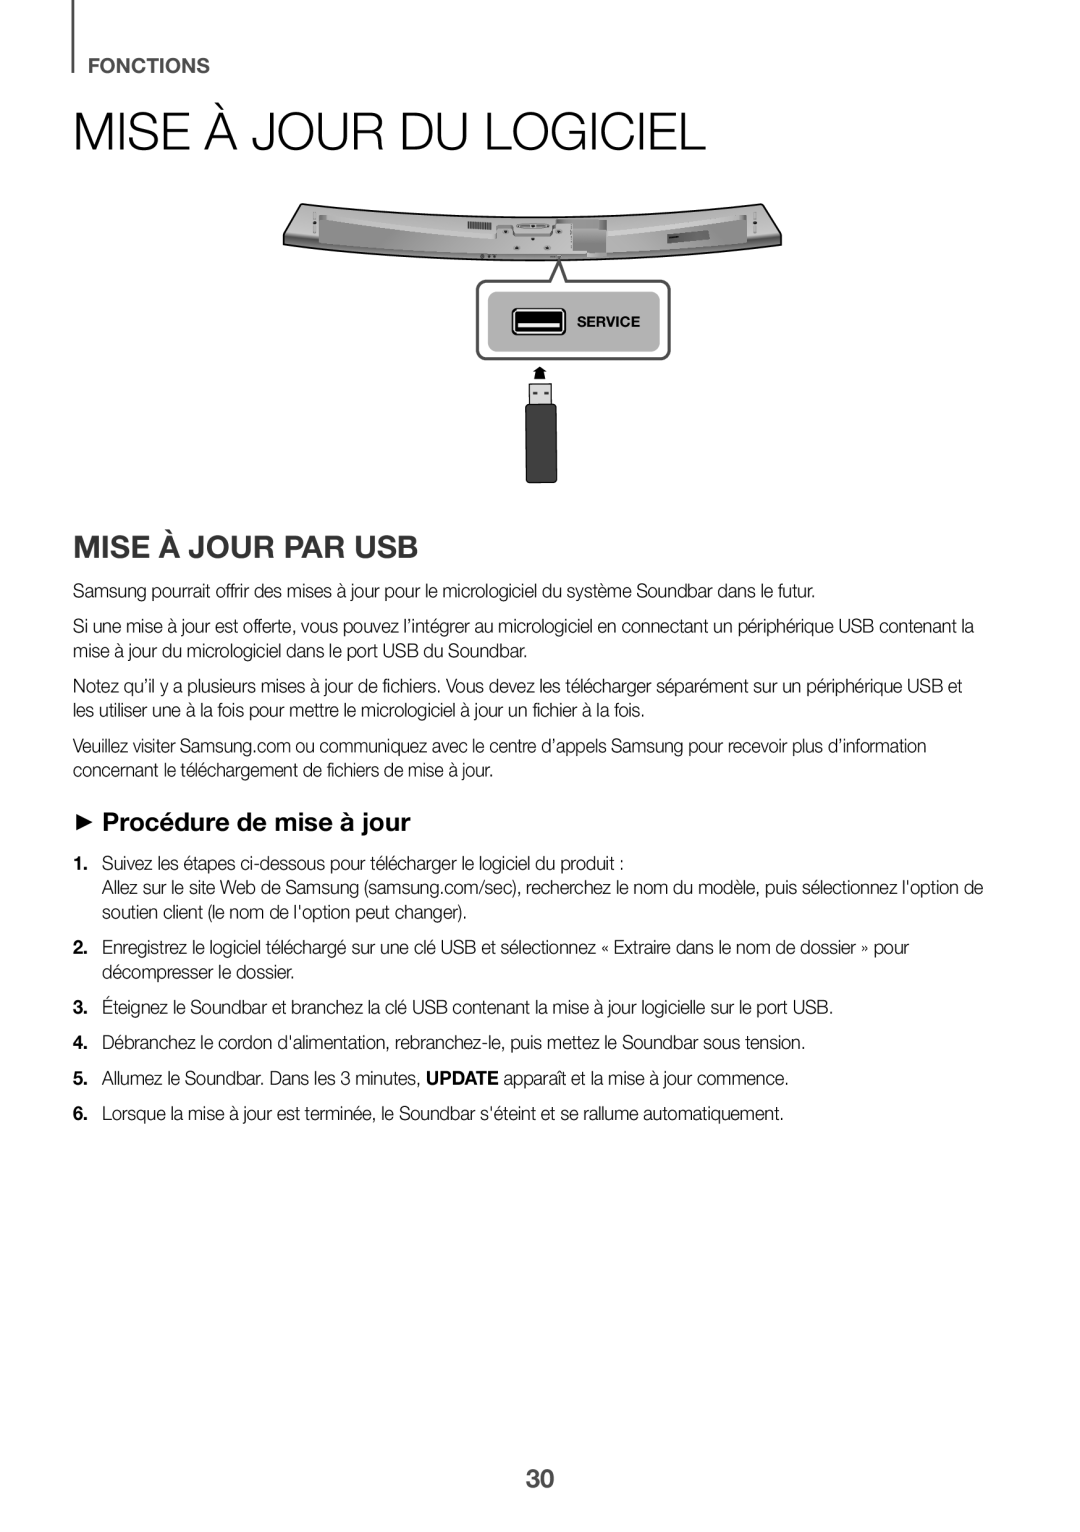
MISE À JOUR PAR USB
++Procédure de mise à jour
 ++Si la UPDATE ne s'affiche pas
MISE À JOUR AUTOMATIQUE
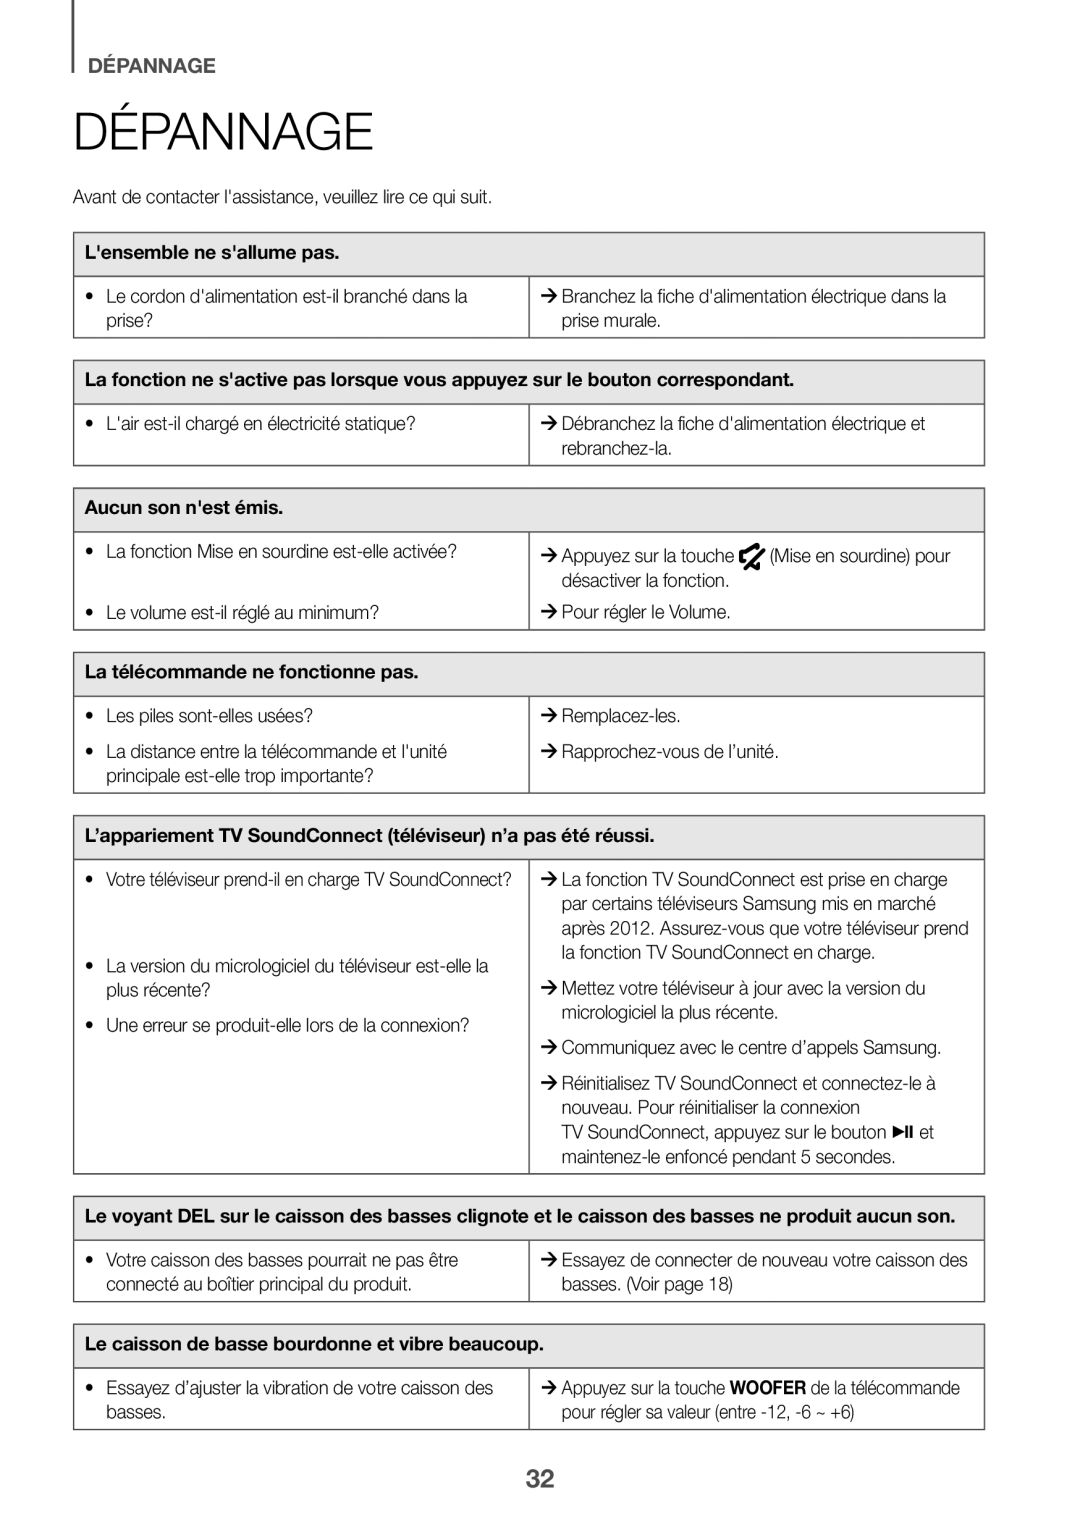 DÉPANNAGE
DÉPANNAGE
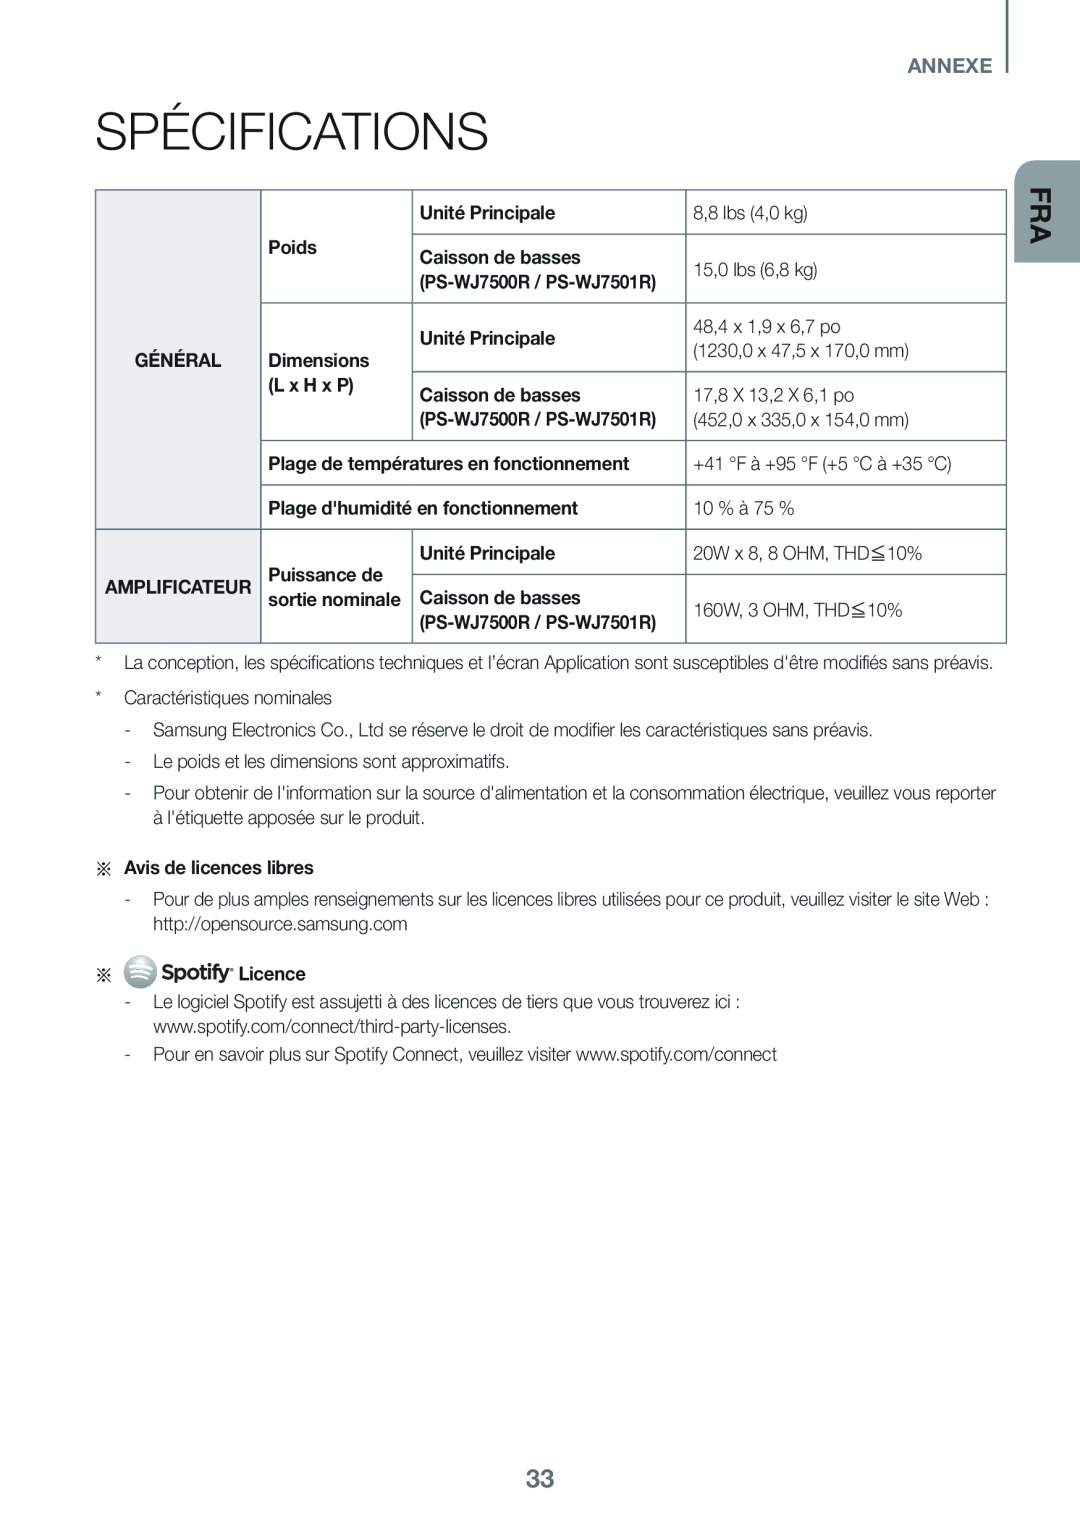 ANNEXE
SPÉCIFICATIONS
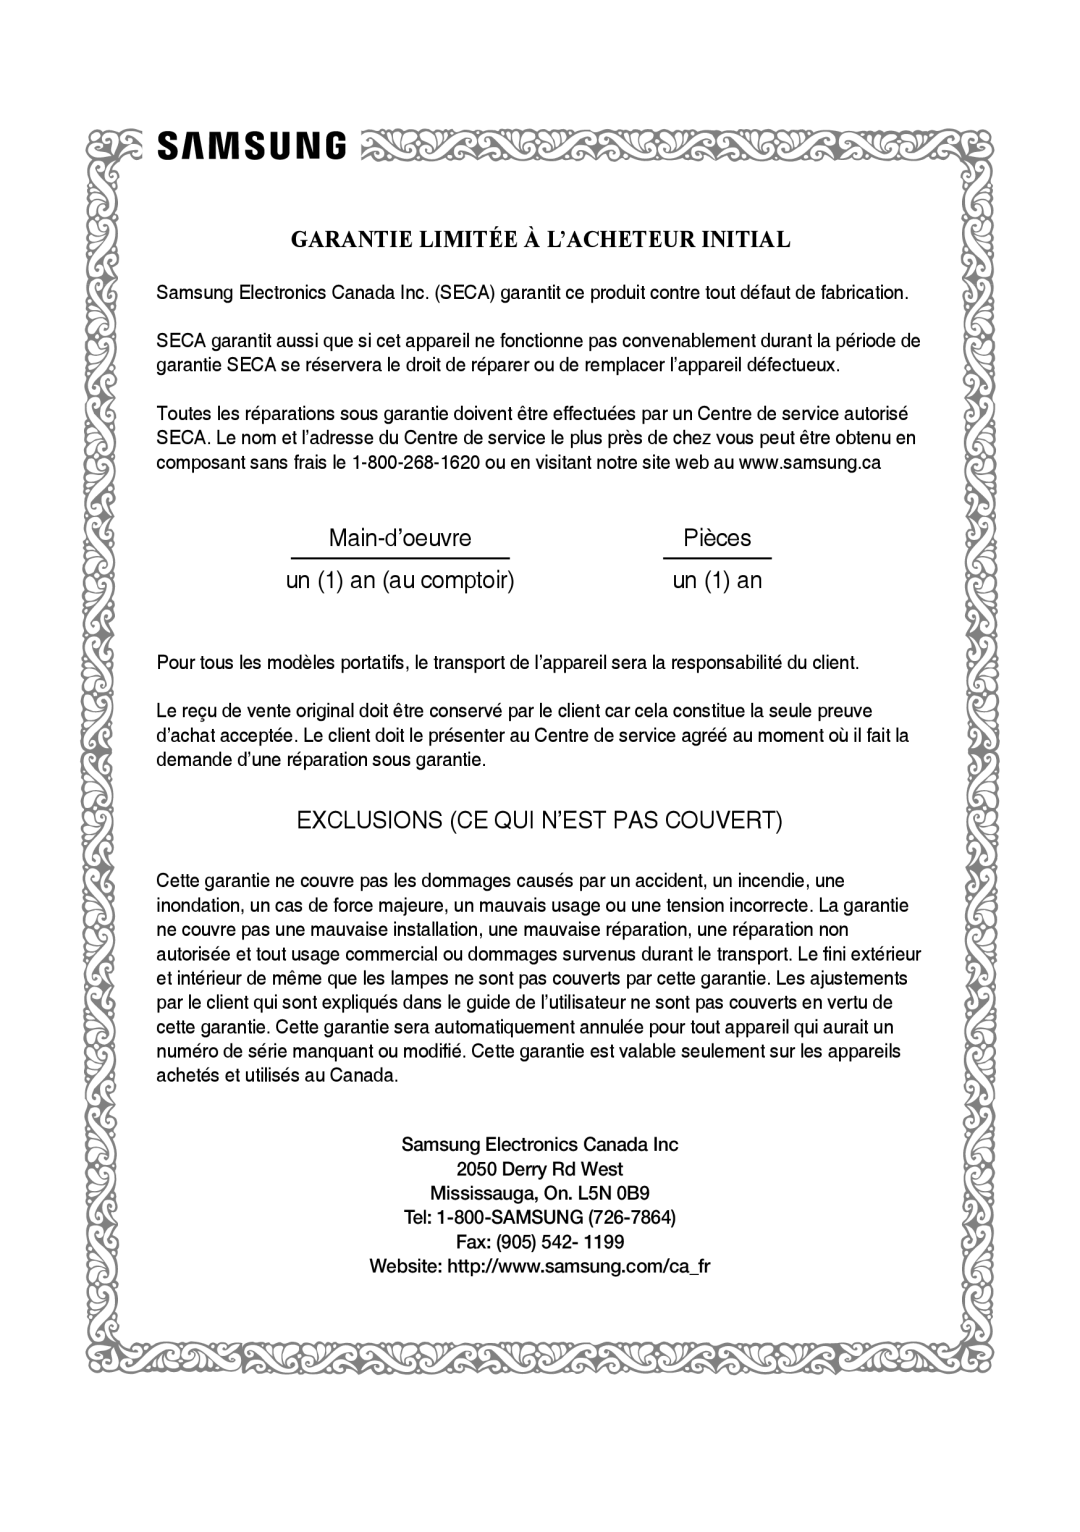 GARANTIE LIMITÉE À L’ACHETEUR INITIAL
Main-d’oeuvre
Pièces
un (1) an (au comptoir)
un (1) an
EXCLUSIONS (CE QUI N’EST PAS COUVERT)
Samsung Electronics Canada Inc
2050 Derry Rd West
Mississauga, On. L5N 0B9
Tel: 1-800-SAMSUNG (726-7864)
Fax: (905) 542
Website: http://www.samsung.com/ca_fr
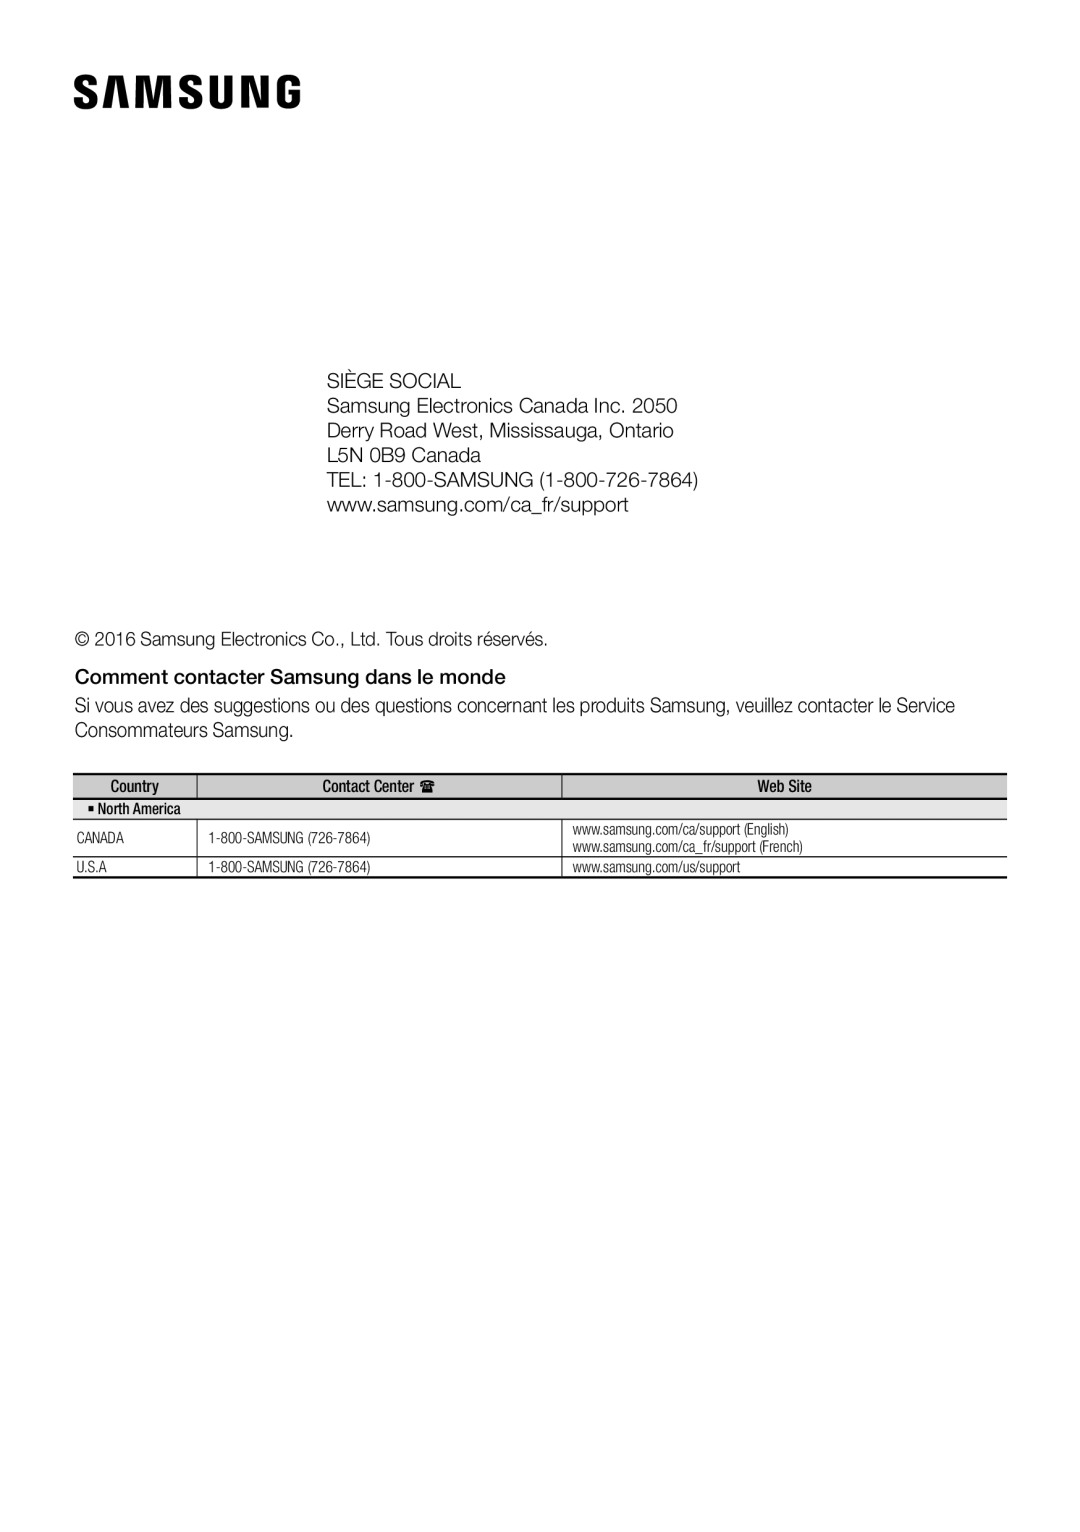 SIÈGE SOCIAL
www.samsung.com/ca_fr/support
Comment contacter Samsung dans le monde