 HMX-F80BN/HMX-F80SN
HMX-F800BN/HMX-F800SN
HMX-F810BN/HMX-F810SN
www.samsung.com/register
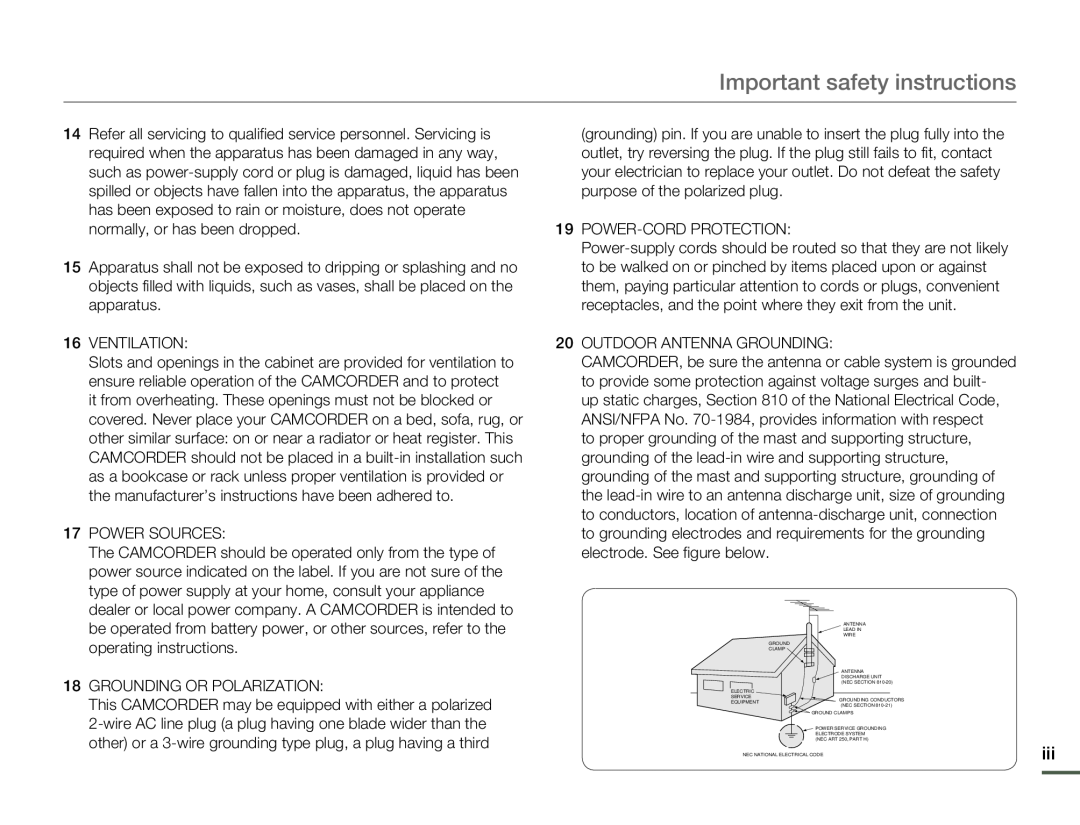
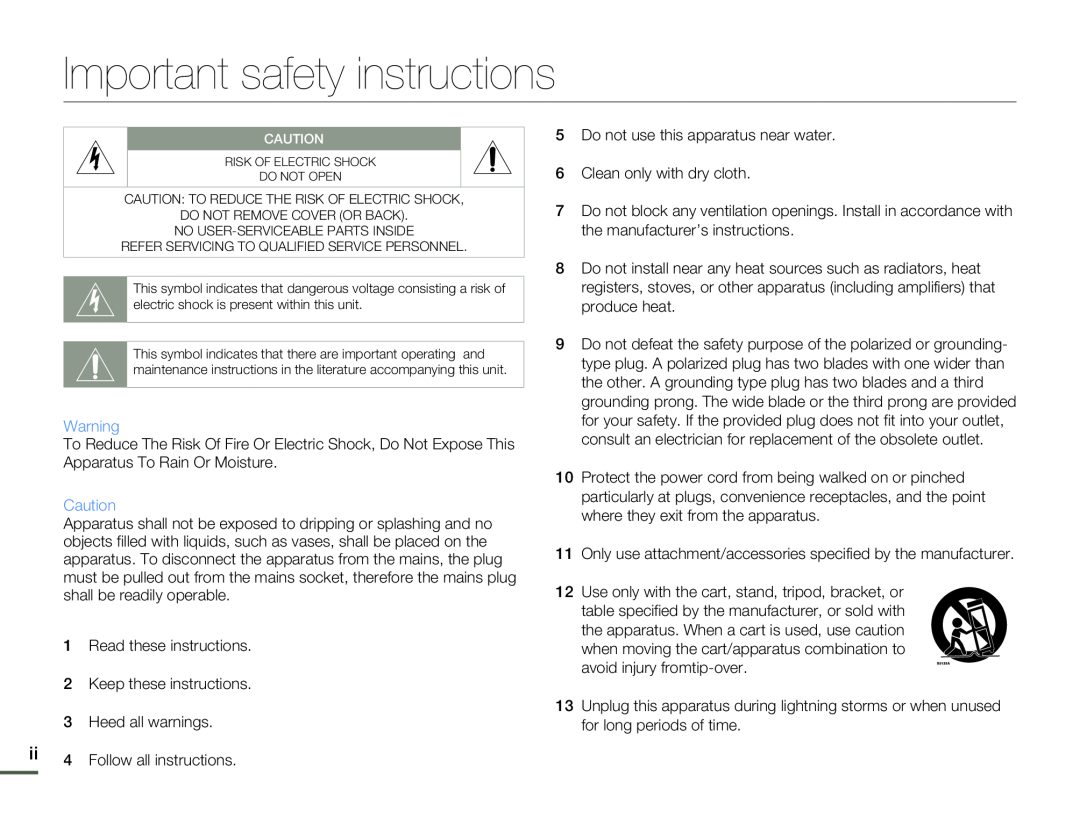 Important safety instructions
 Important safety instructions
 Important safety instructions
21LIGHTNING:
22POWER LINES:
23OVERLOADING:
24OBJECTS AND LIQUIDS:
25SERVICING:
26DAMAGE REQUIRING SERVICE:
27REPLACEMENT PARTS:
28SAFETY CHECK:
 Important safety instructions
USER INSTALLER CAUTION:
NOTE:
NOTE:
FCC Warning
 Before reading this user manual
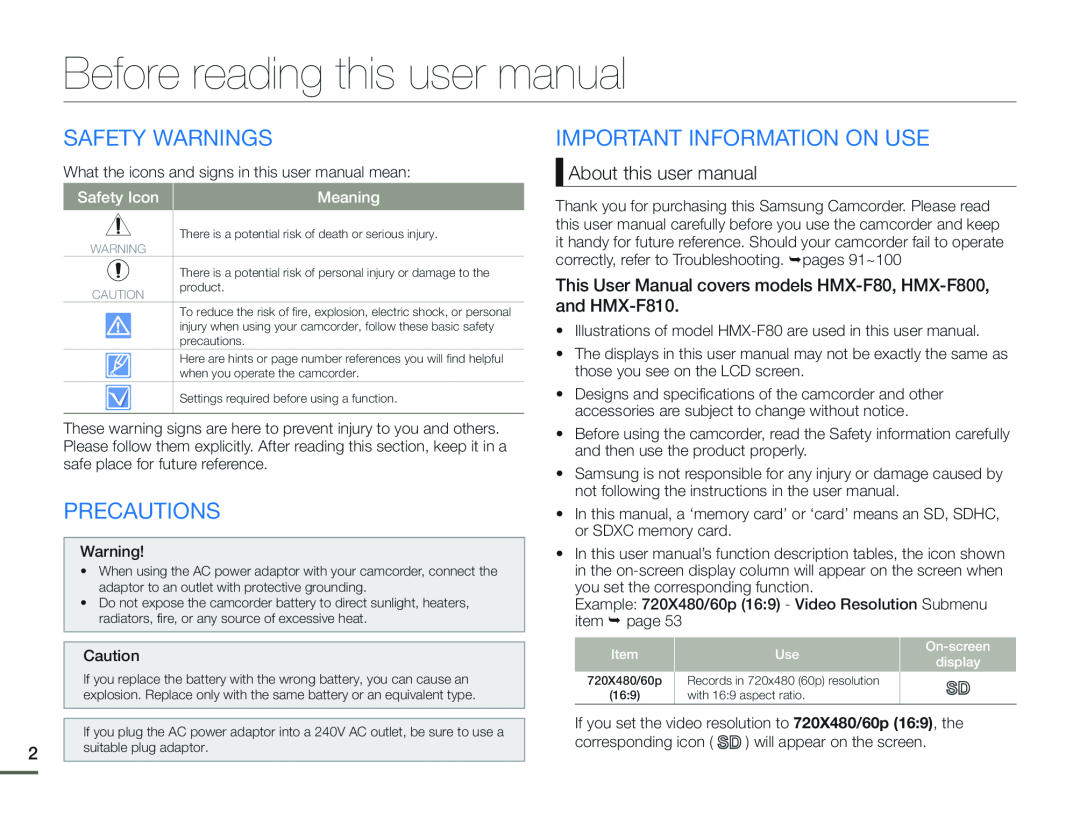
SAFETY WARNINGS
PRECAUTIONS
IMPORTANT INFORMATION ON USE
About this user manual
This User Manual covers models HMX-F80, HMX-F800,and HMX-F810
 Before reading this user manual
Before using this camcorder
Notes regarding trademarks
 Safety information
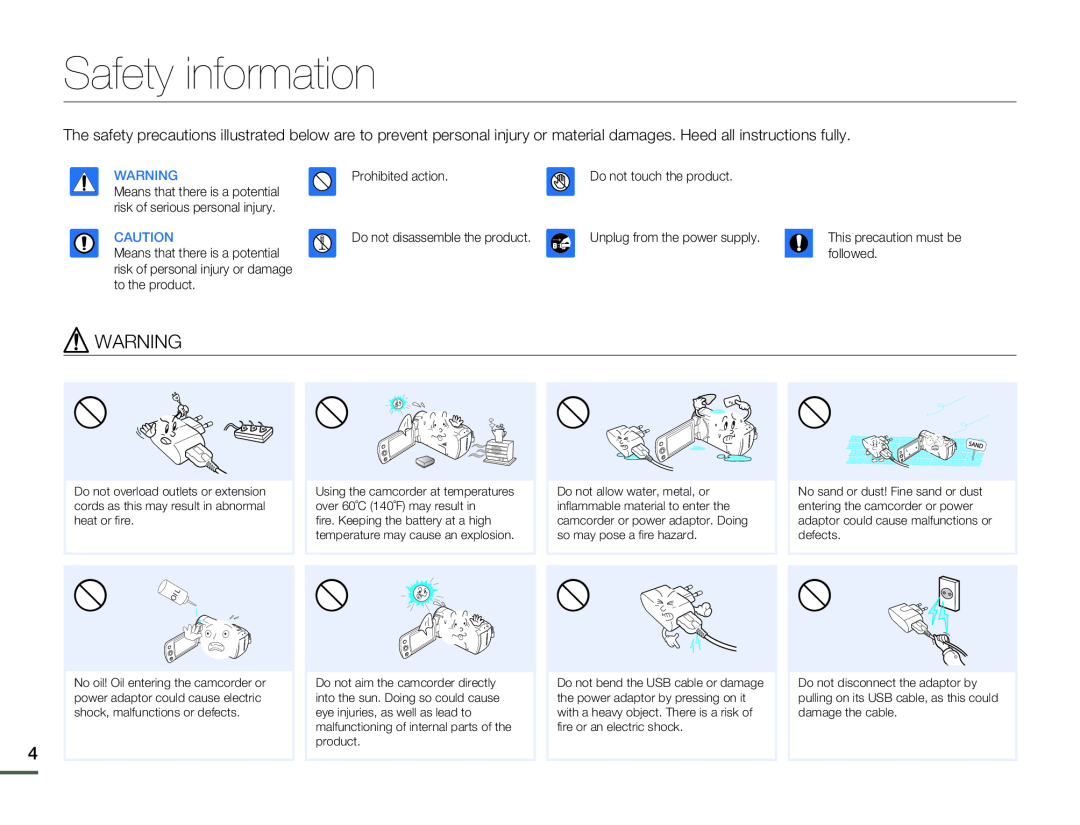
WARNING
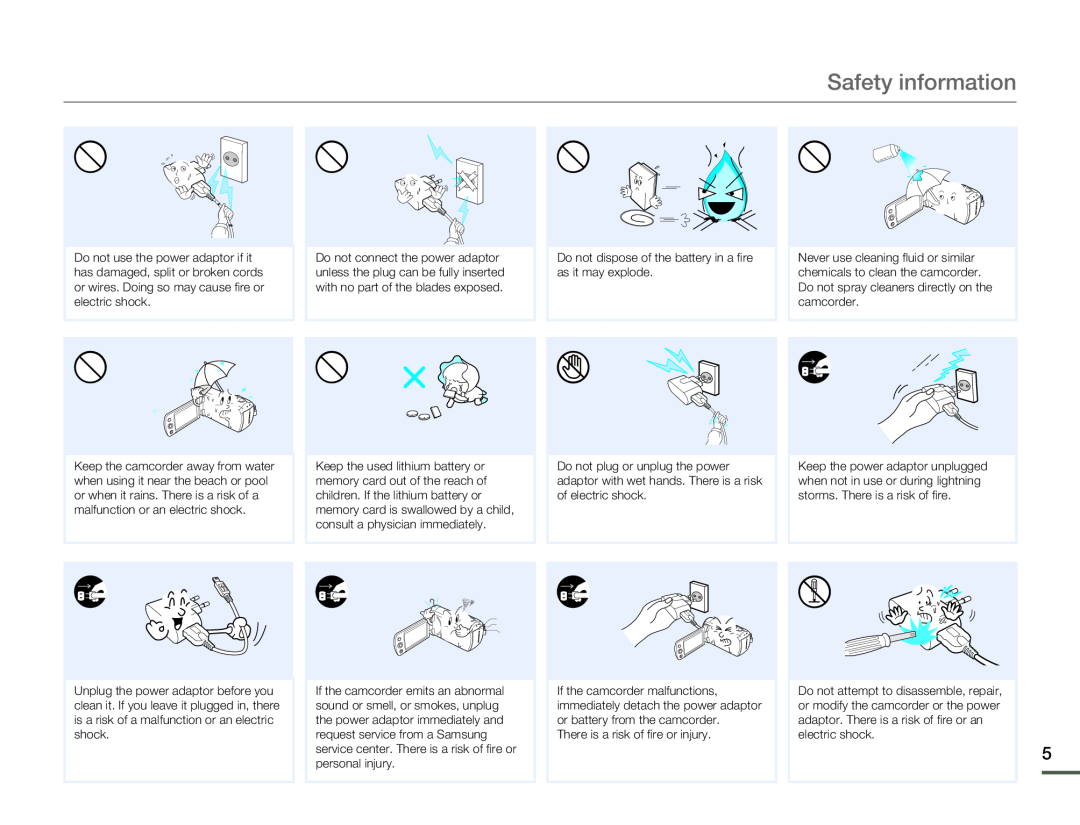 Safety information
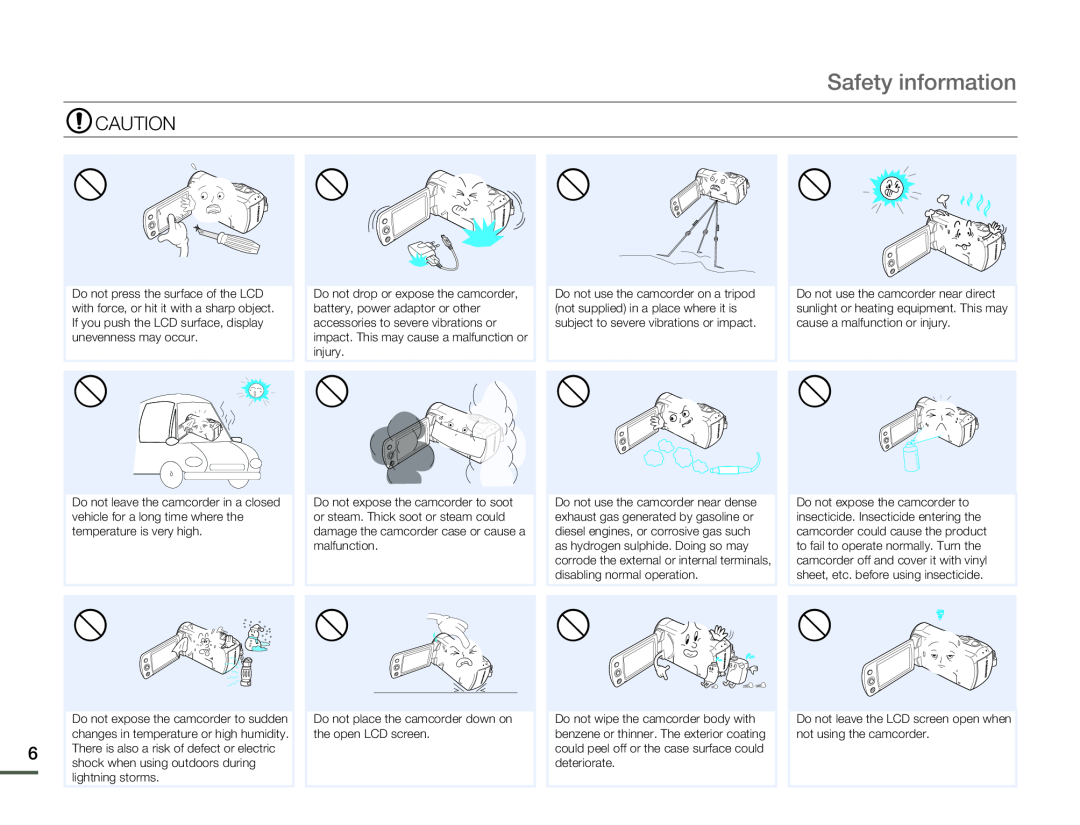 CAUTION
 Safety information
 Contents
Getting ready to start recording
Quick start guide
Getting to know the camcorder
Getting started
Basic operation of the camcorder
Basic recording
Basic playback
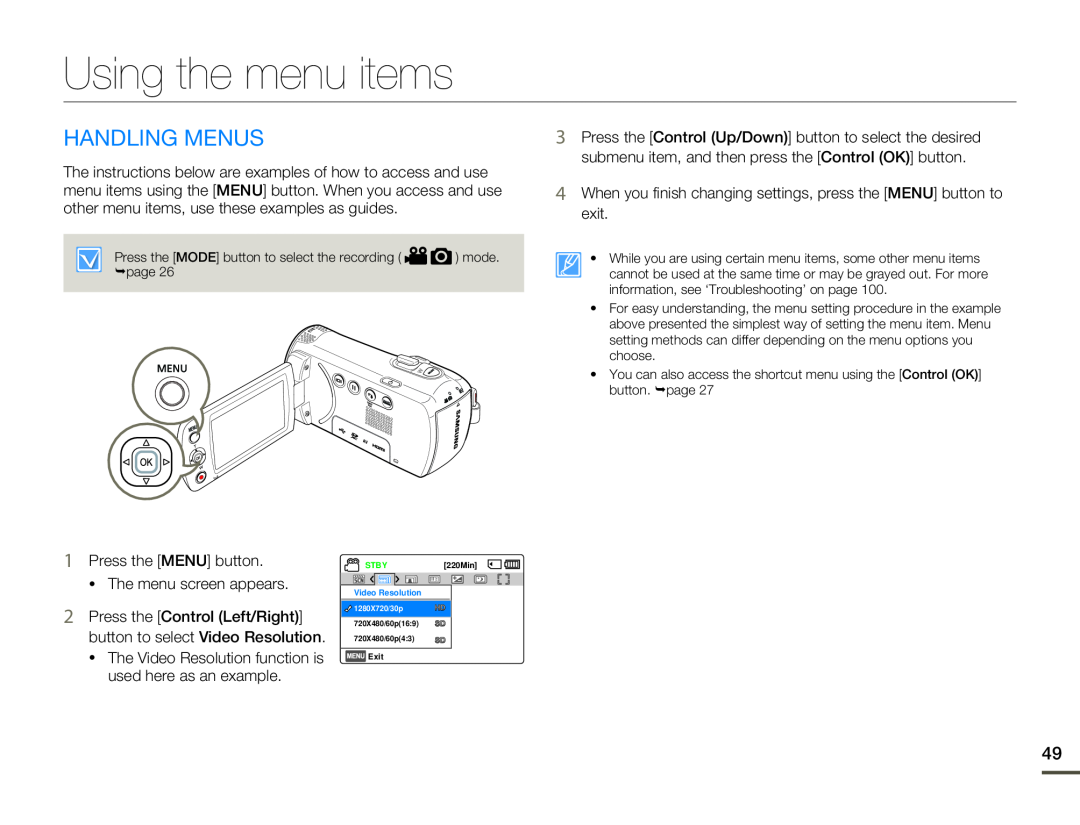
Using the menu items
 Contents
Advanced recording
Connecting to a TV
Dubbing videos
Advanced playback
Using with a windows computer
Troubleshooting
Other settings
Specifications
 Quick start guide
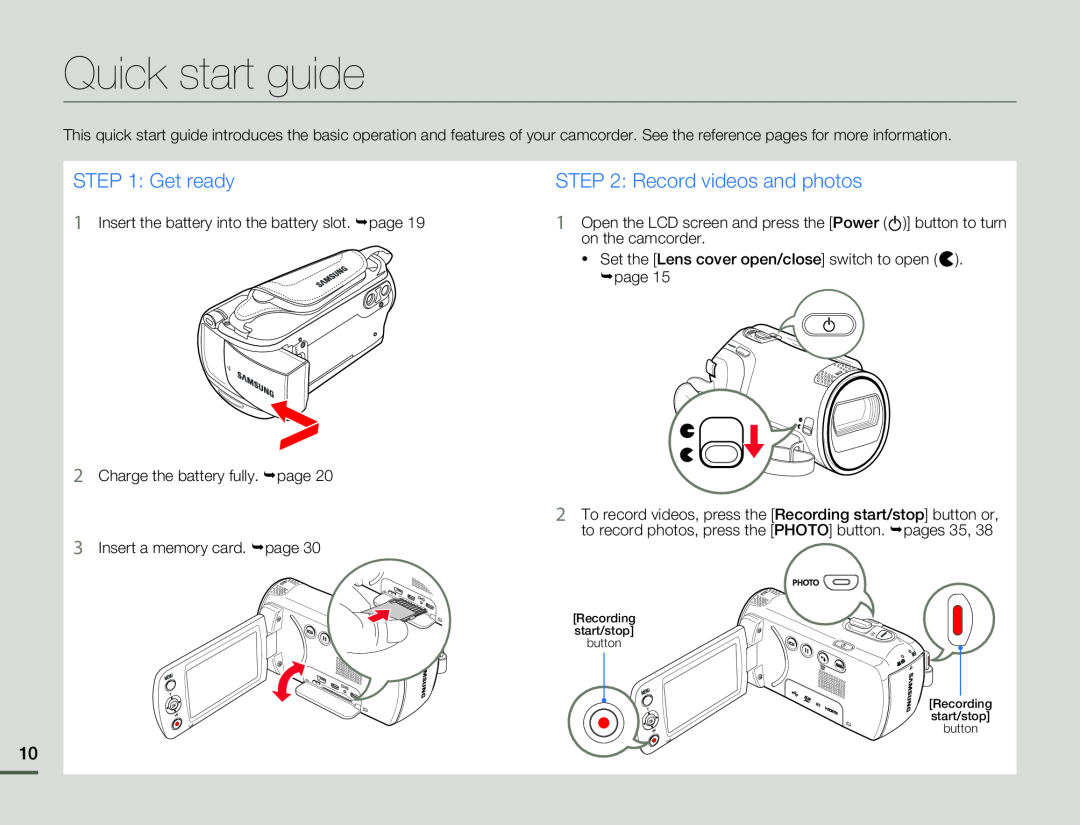
STEP 1: Get ready
STEP 2: Record videos and photos
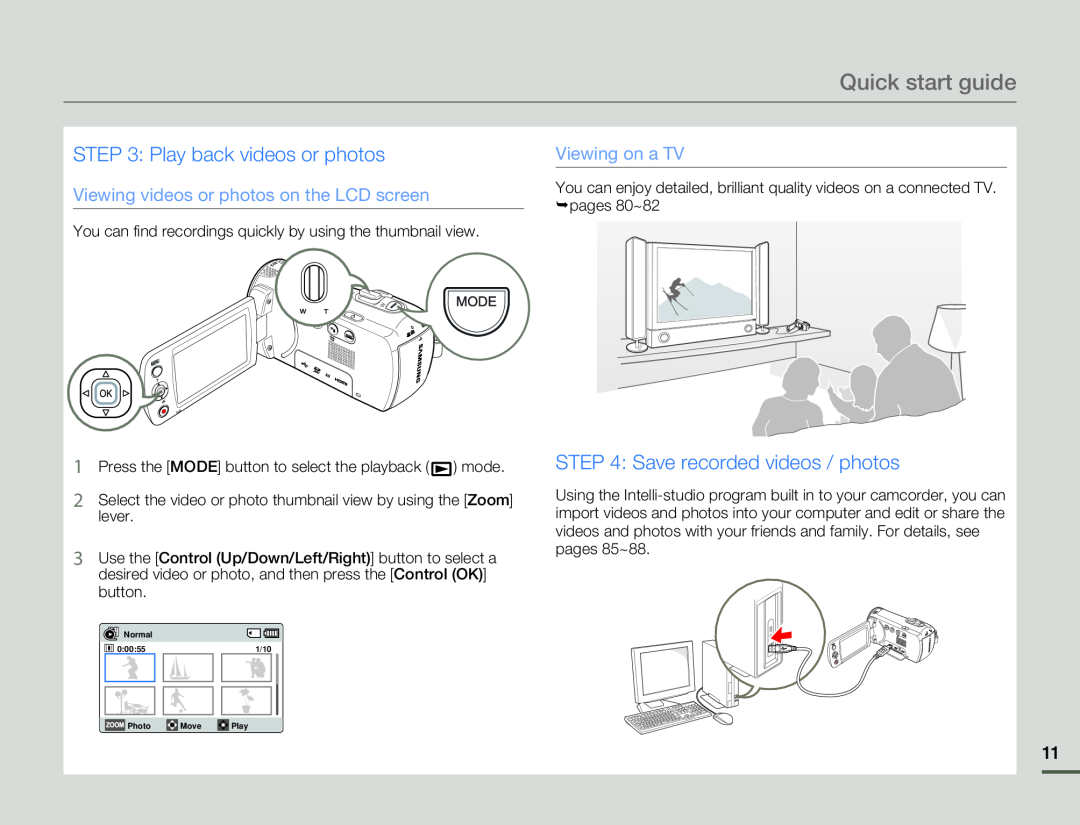 STEP 3: Play back videos or photos
Viewing videos or photos on the LCD screen
Viewing on a TV
STEP 4: Save recorded videos / photos
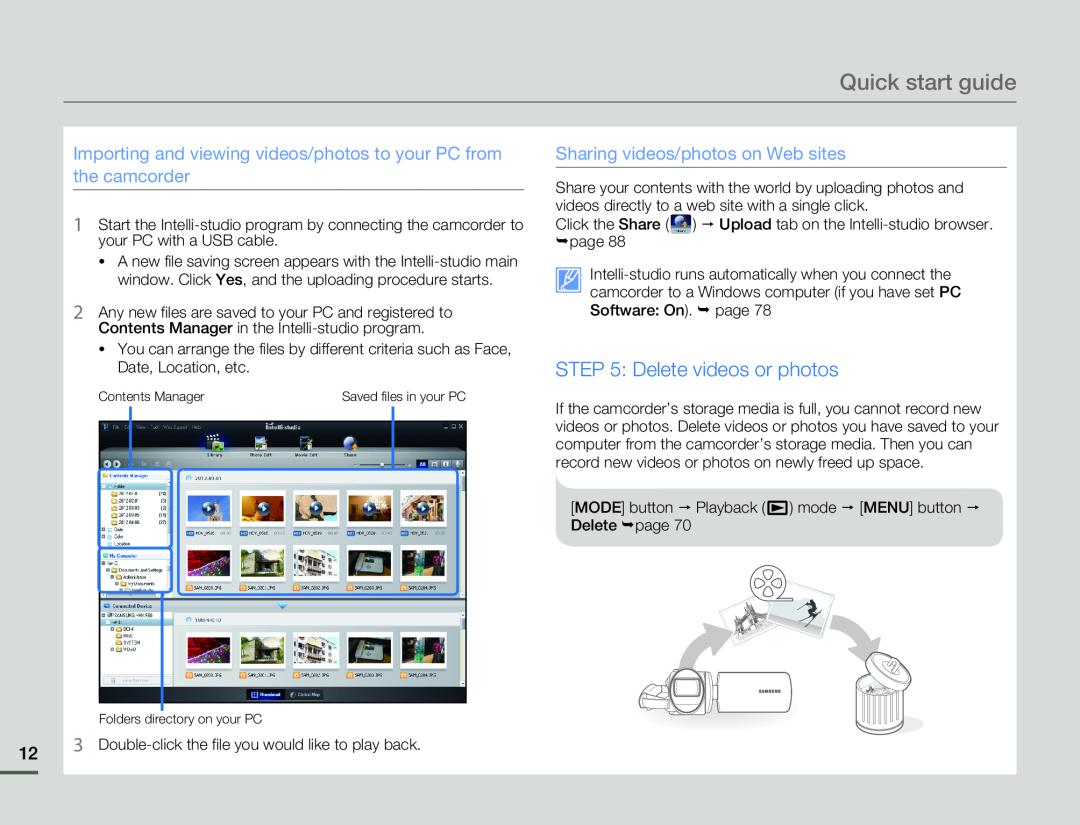 Importing and viewing videos/photos to your PC from the camcorder
Sharing videos/photos on Web sites
STEP 5: Delete videos or photos
 Getting to know the camcorder
WHAT'S INCLUDED WITH YOUR
CAMCORDER
Check your accessories
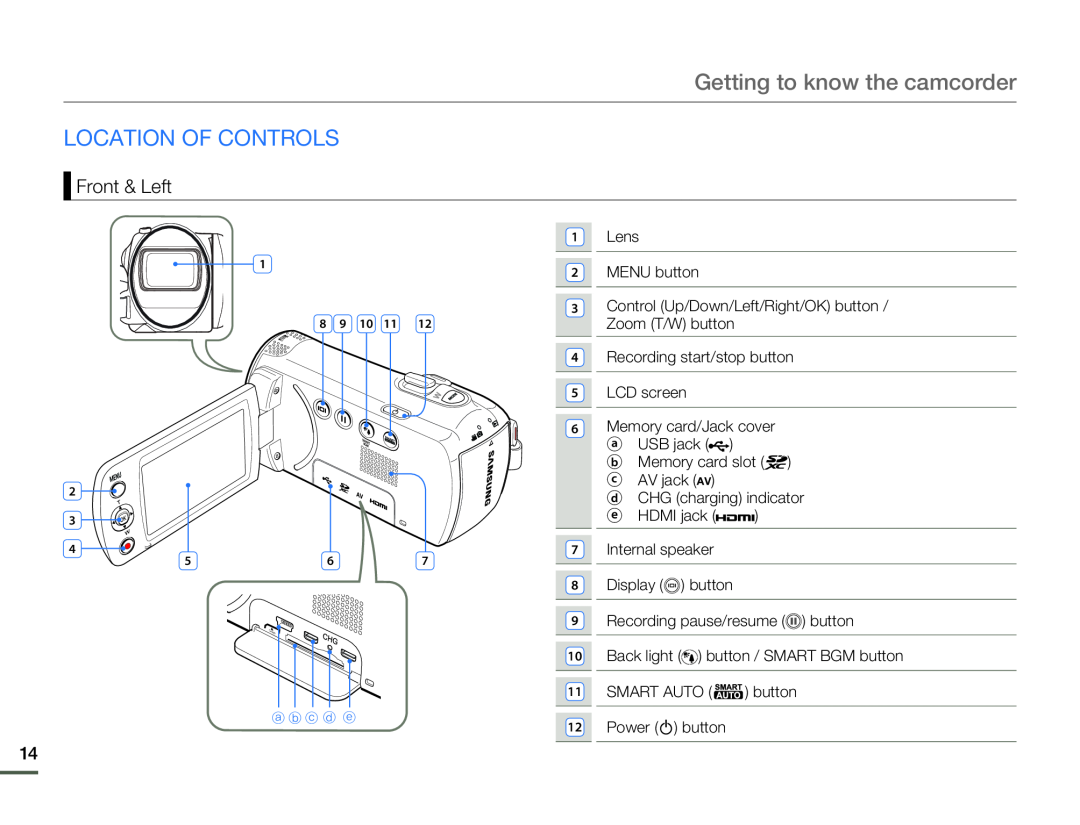 LOCATION OF CONTROLS
Front & Left
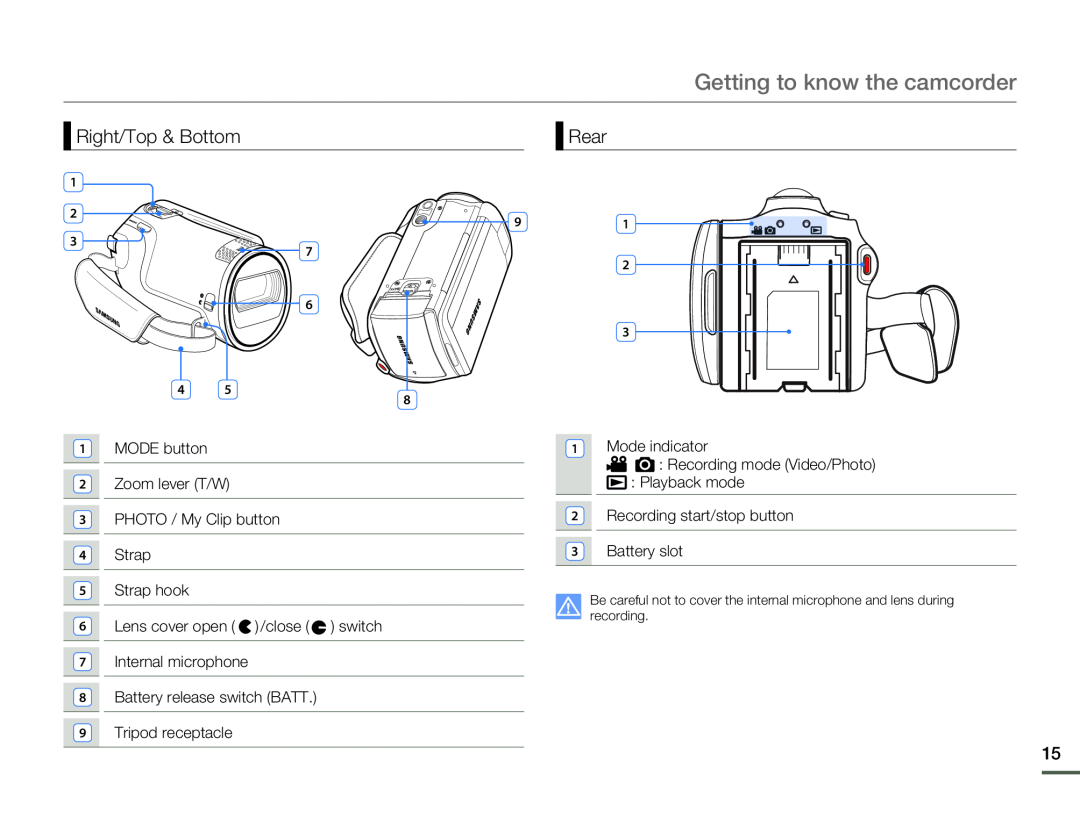 Right/Top & Bottom
Rear
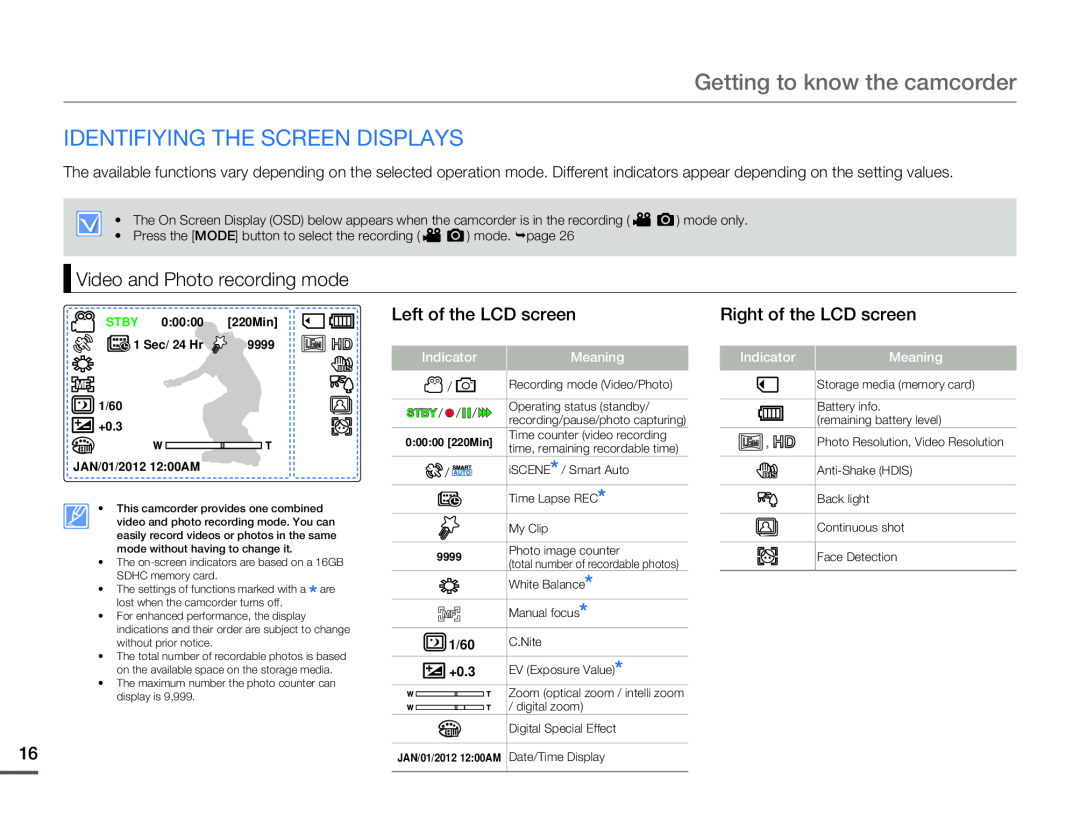 IDENTIFIYING THE SCREEN DISPLAYS
Video and Photo recording mode
Left of the LCD screen
Right of the LCD screen
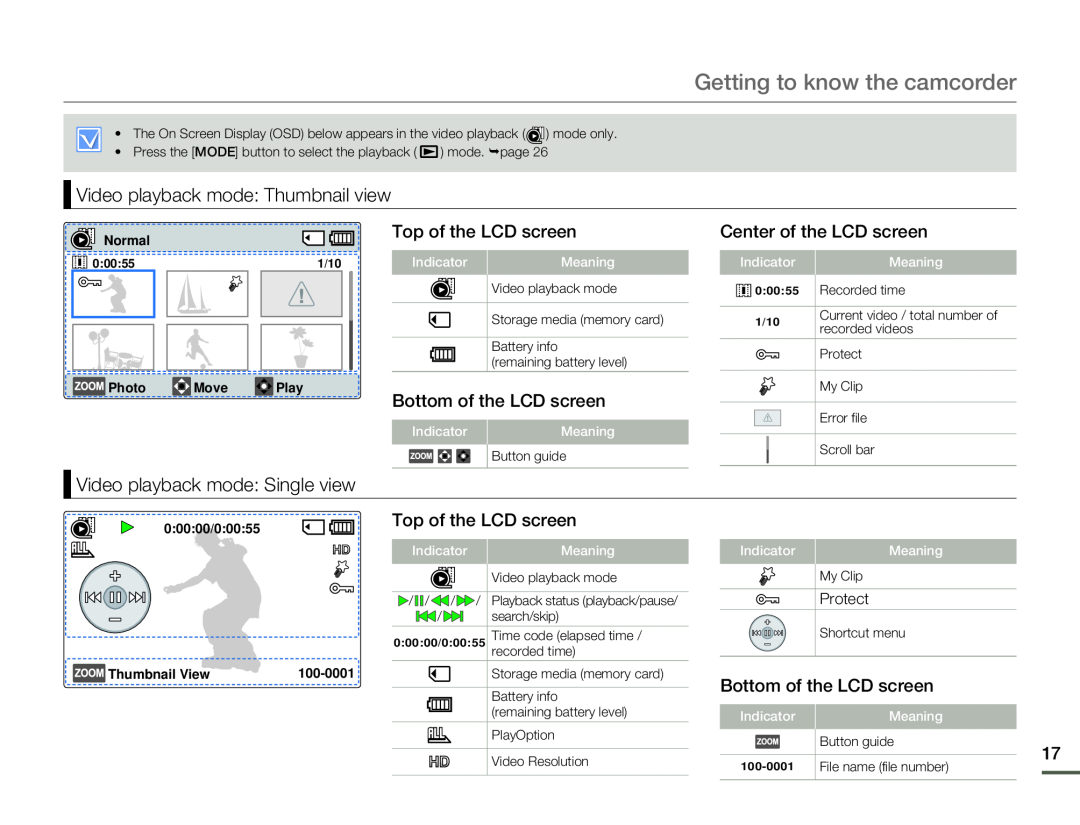 Video playback mode: Thumbnail view
Top of the LCD screen
Bottom of the LCD screen
Center of the LCD screen
Video playback mode: Single view
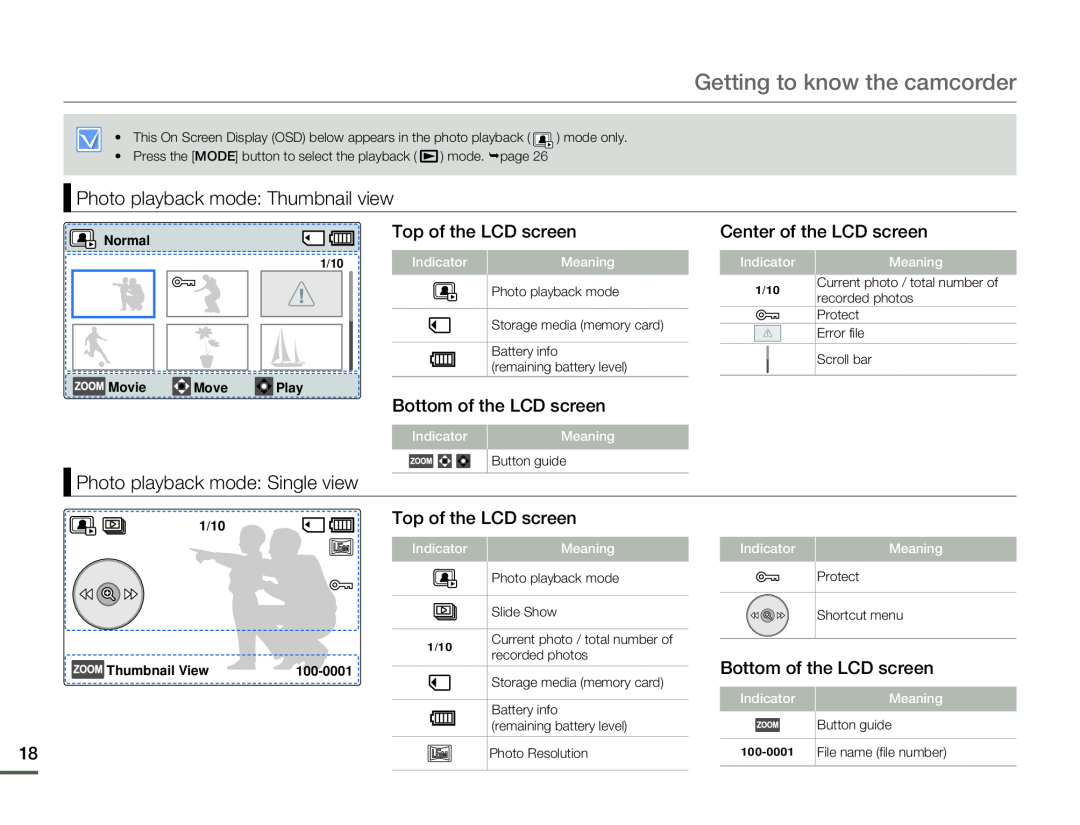 Photo playback mode: Thumbnail view
Photo playback mode: Single view
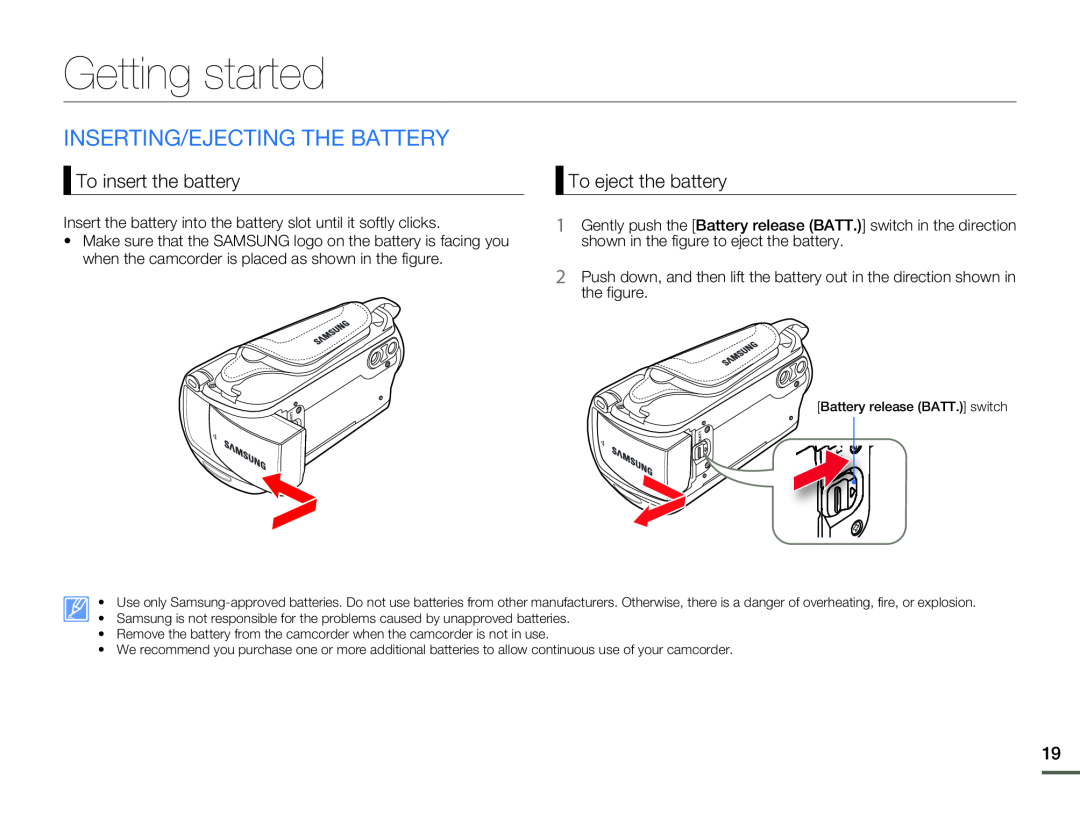 Getting started
INSERTING/EJECTING THE BATTERY
To insert the battery
To eject the battery
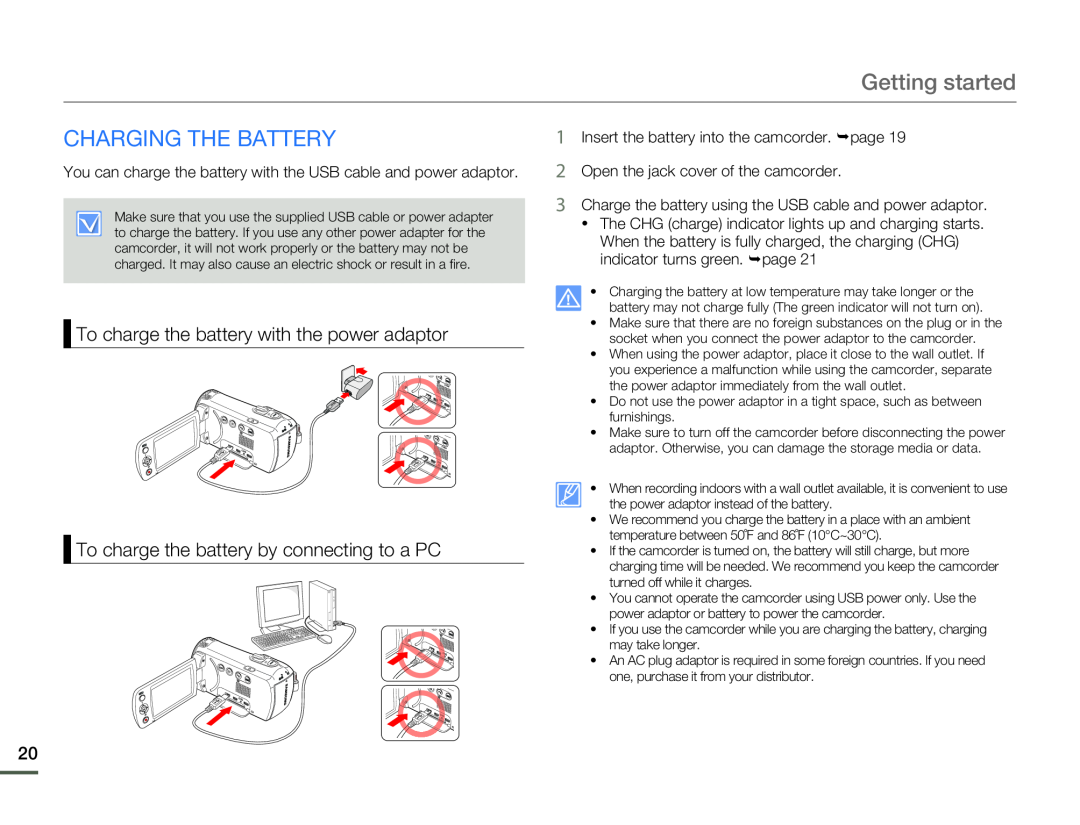 CHARGING THE BATTERY
To charge the battery with the power adaptor
To charge the battery by connecting to a PC
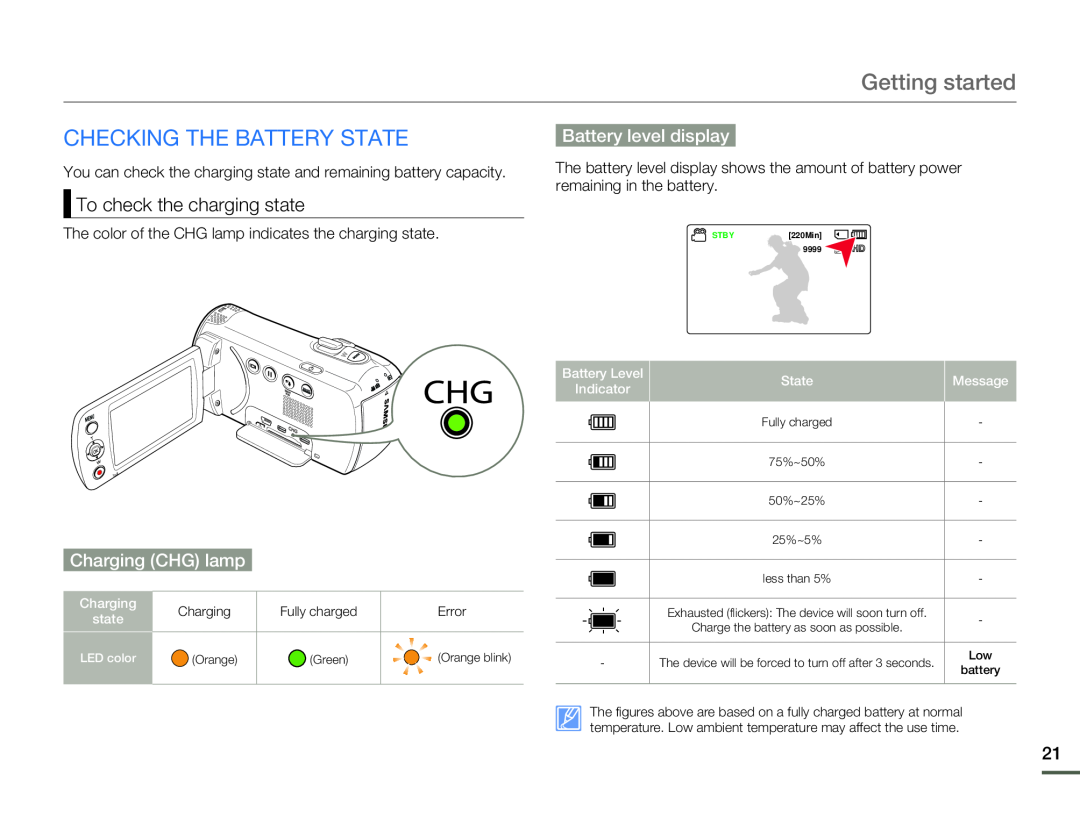 CHECKING THE BATTERY STATE
To check the charging state
Battery level display
Charging (CHG) lamp
 Available charging and running time for the battery
Continuous Recording (without zoom)
Using an AC power source
 About the battery
 Basic operation of the camcorder
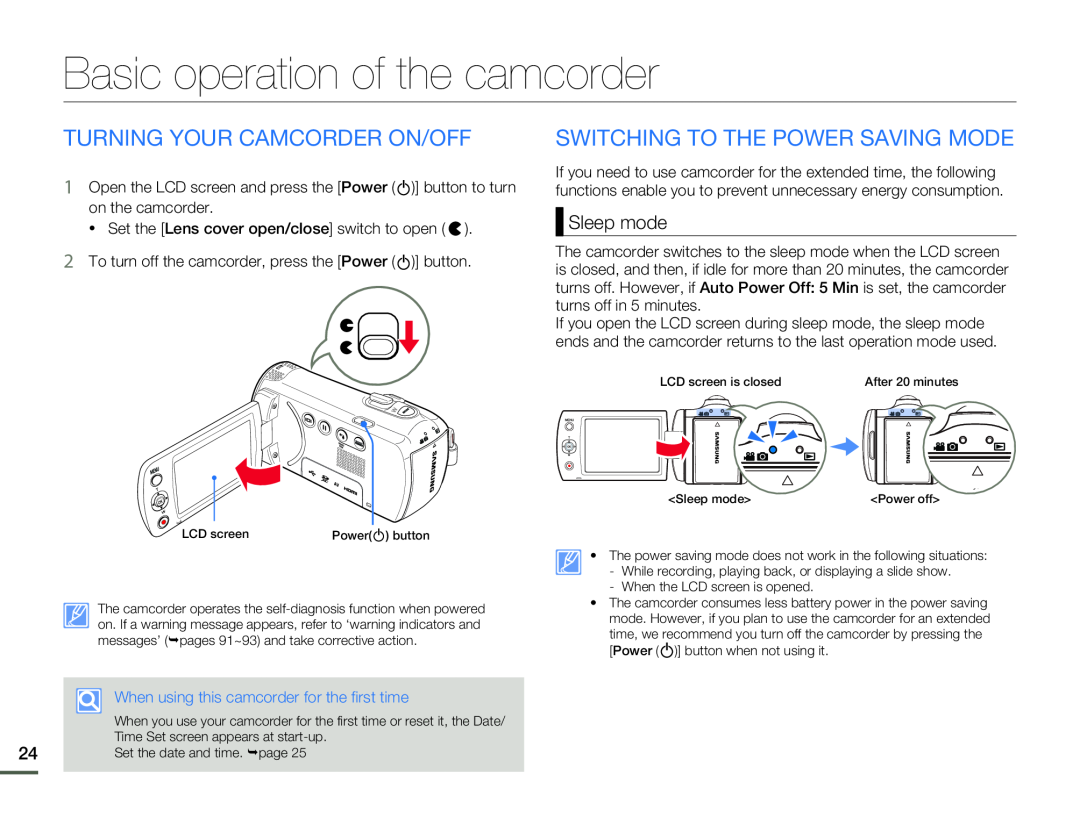
TURNING YOUR CAMCORDER ON/OFF
SWITCHING TO THE POWER SAVING MODE
Sleep mode
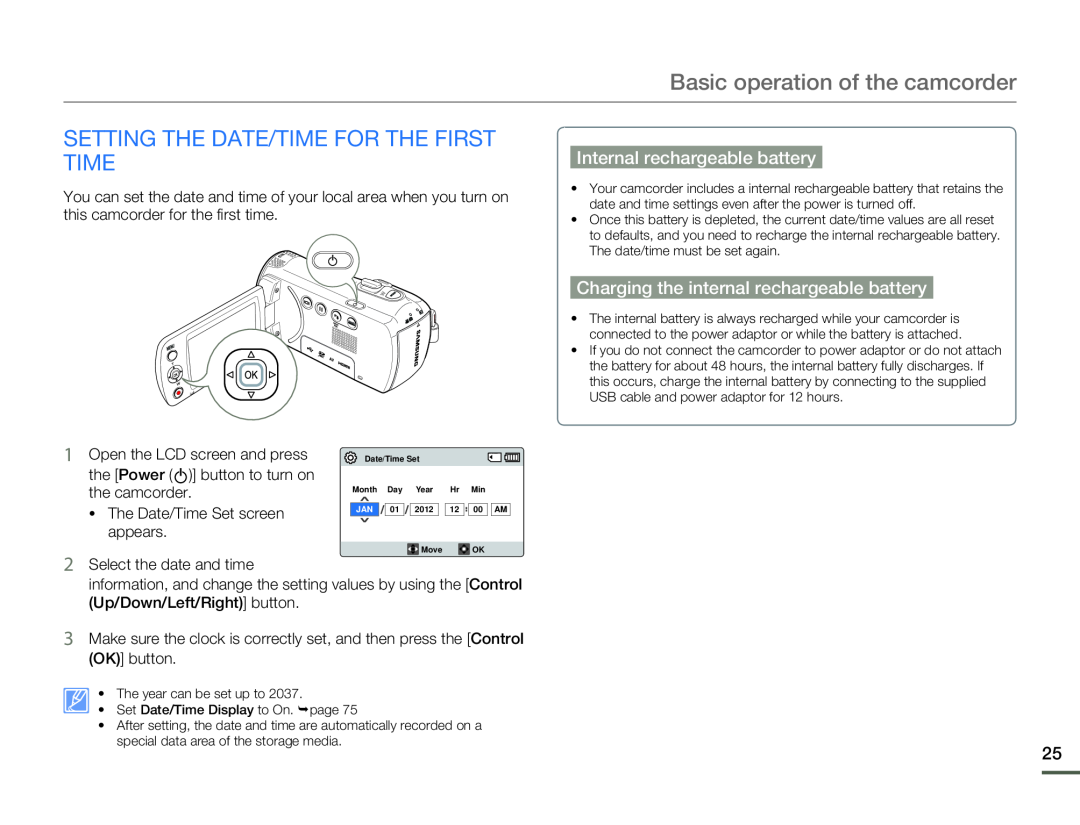 SETTING THE DATE/TIME FOR THE FIRST TIME
Internal rechargeable battery
Charging the internal rechargeable battery
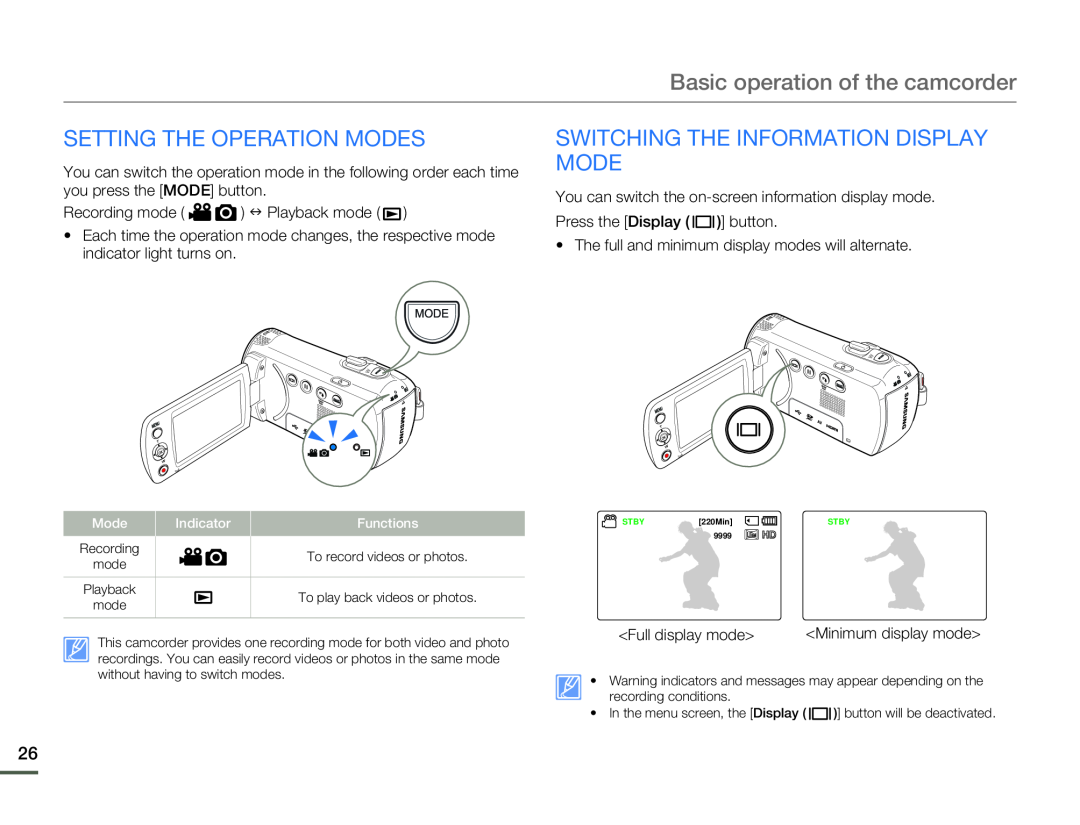 SETTING THE OPERATION MODES
SWITCHING THE INFORMATION DISPLAY MODE
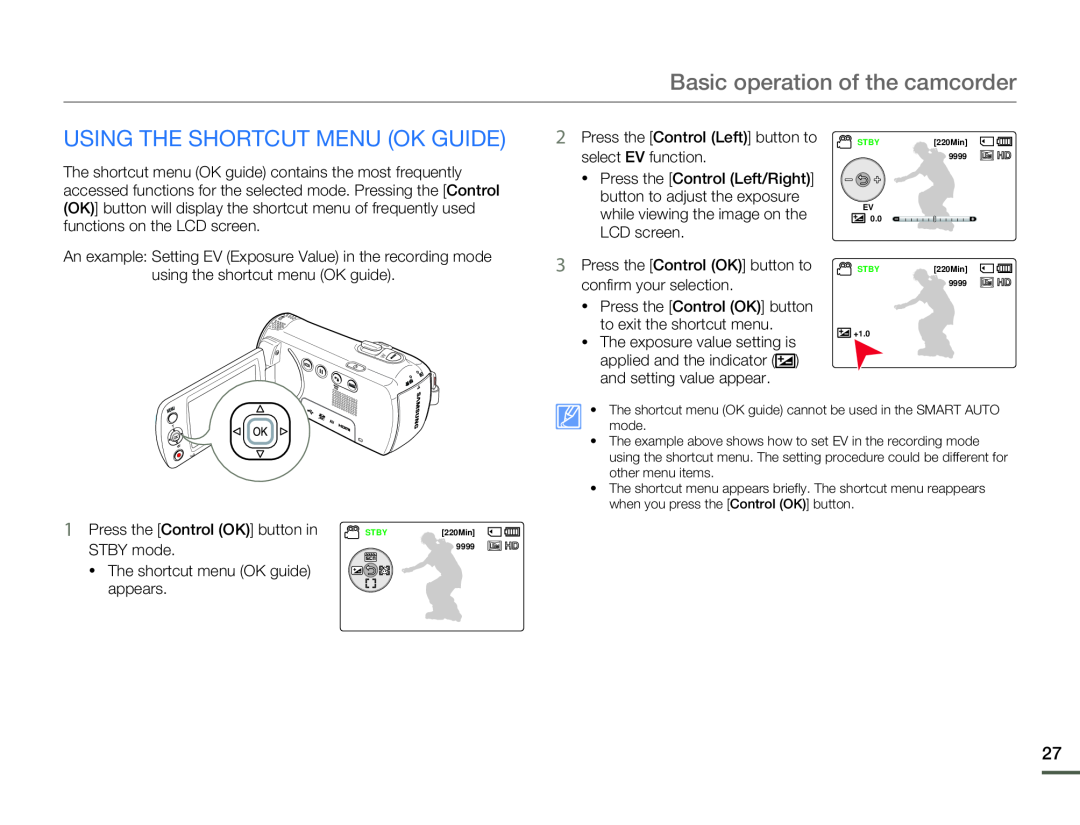 USING THE SHORTCUT MENU (OK GUIDE)
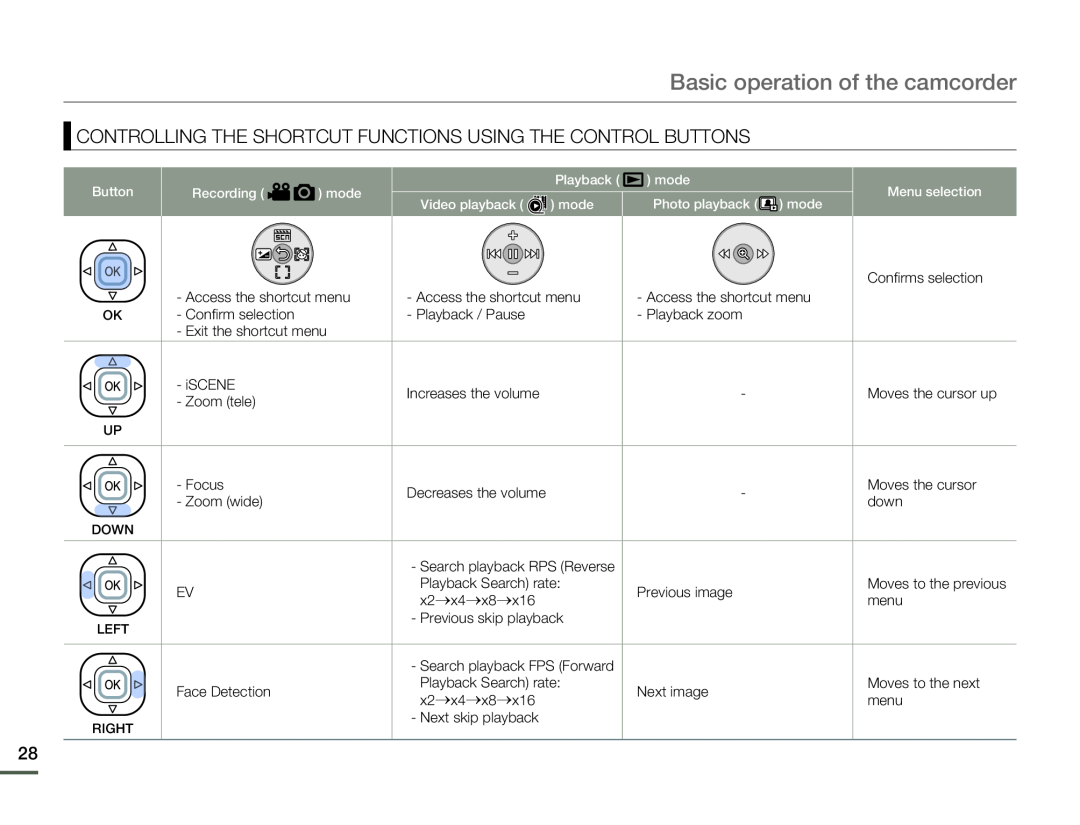 CONTROLLING THE SHORTCUT FUNCTIONS USING THE CONTROL BUTTONS
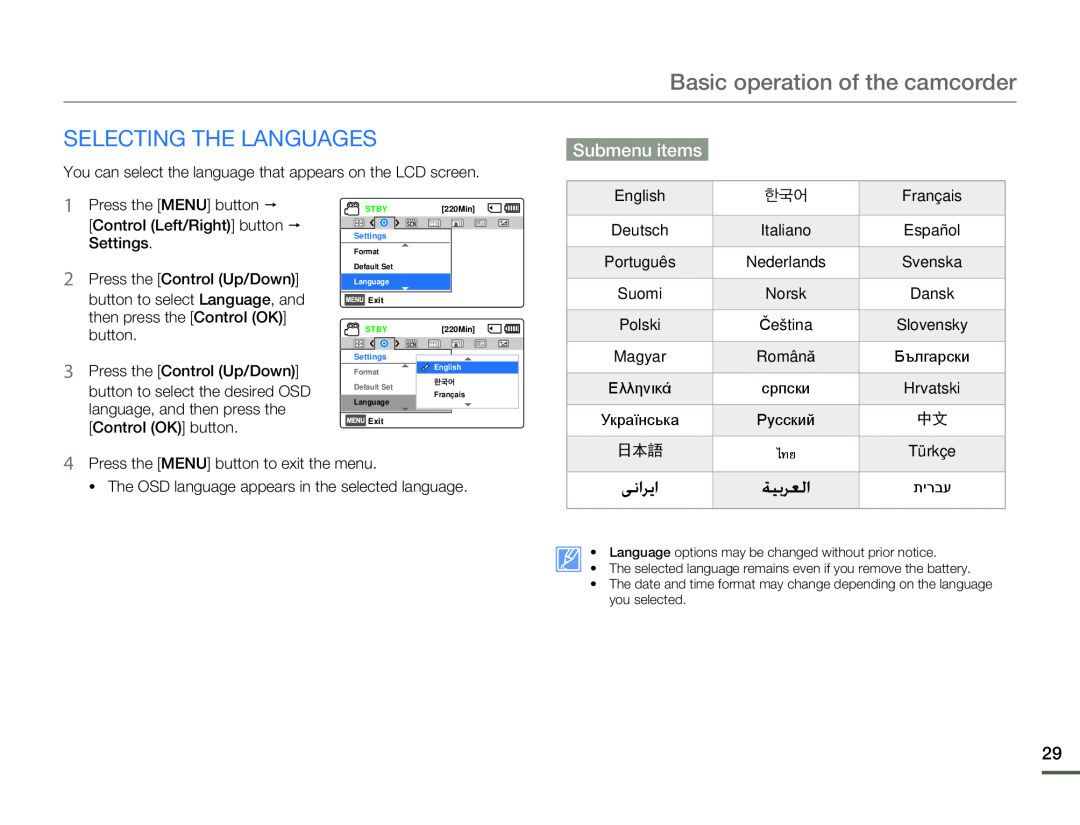 SELECTING THE LANGUAGES
Submenu items
 Getting ready to start recording
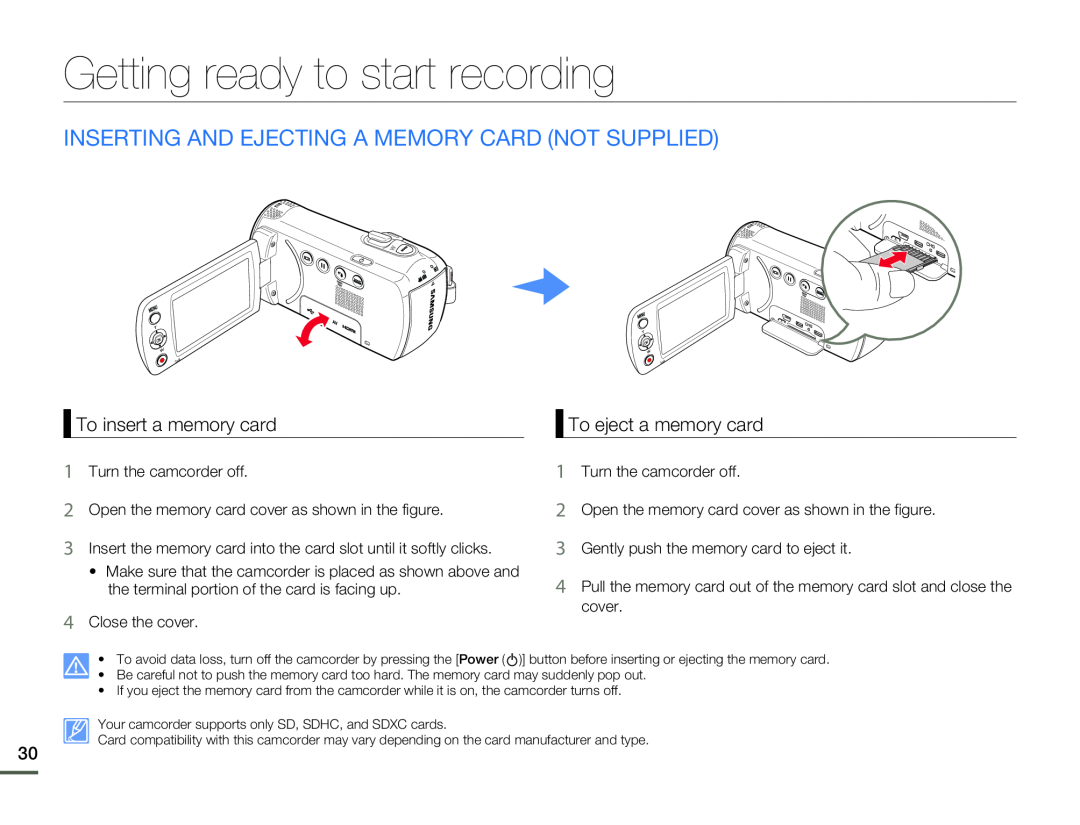
INSERTING AND EJECTING A MEMORY CARD (NOT SUPPLIED)
To insert a memory card
To eject a memory card
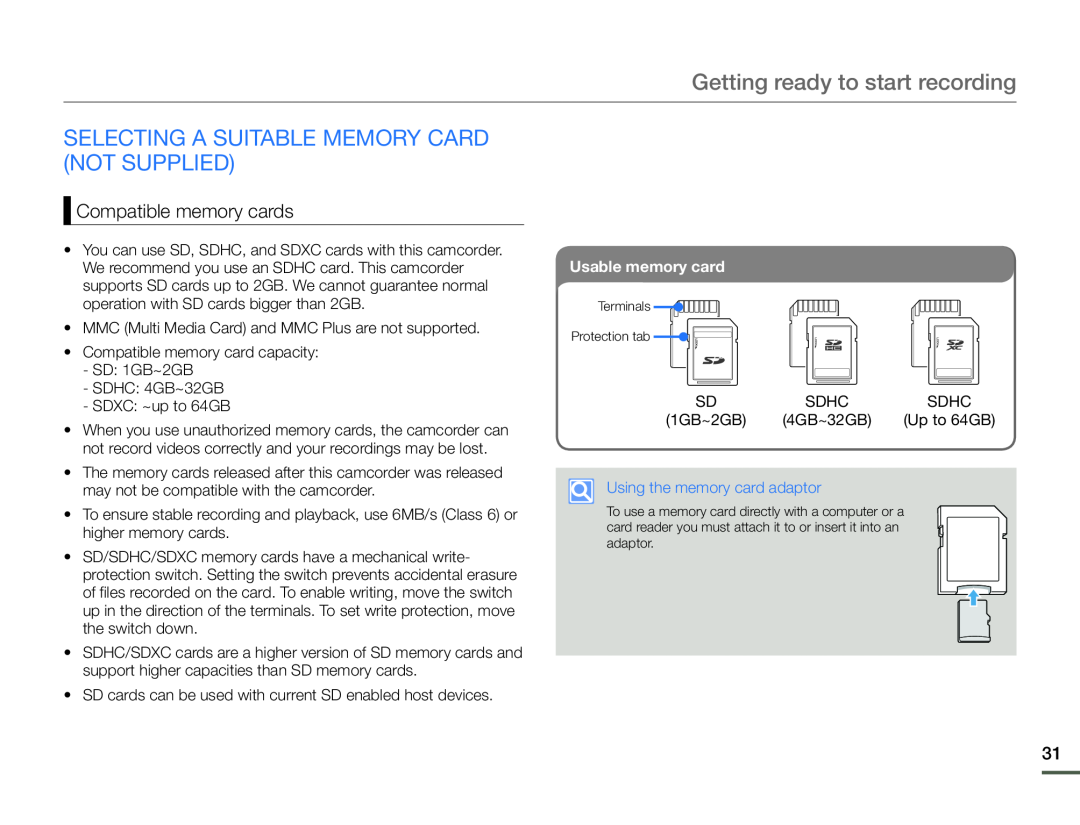 SELECTING A SUITABLE MEMORY CARD (NOT SUPPLIED)
Compatible memory cards
 Handling a memory card
 RECORDABLE TIME AND CAPACITY
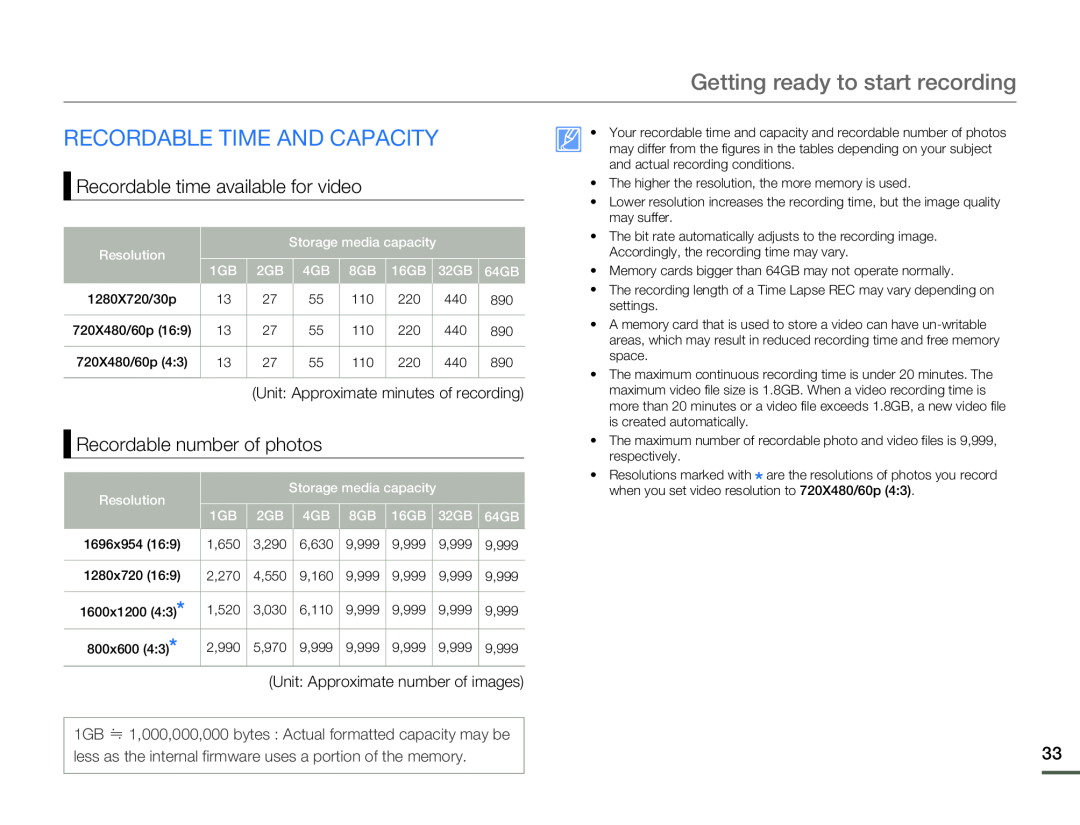
Recordable time available for video
Recordable number of photos
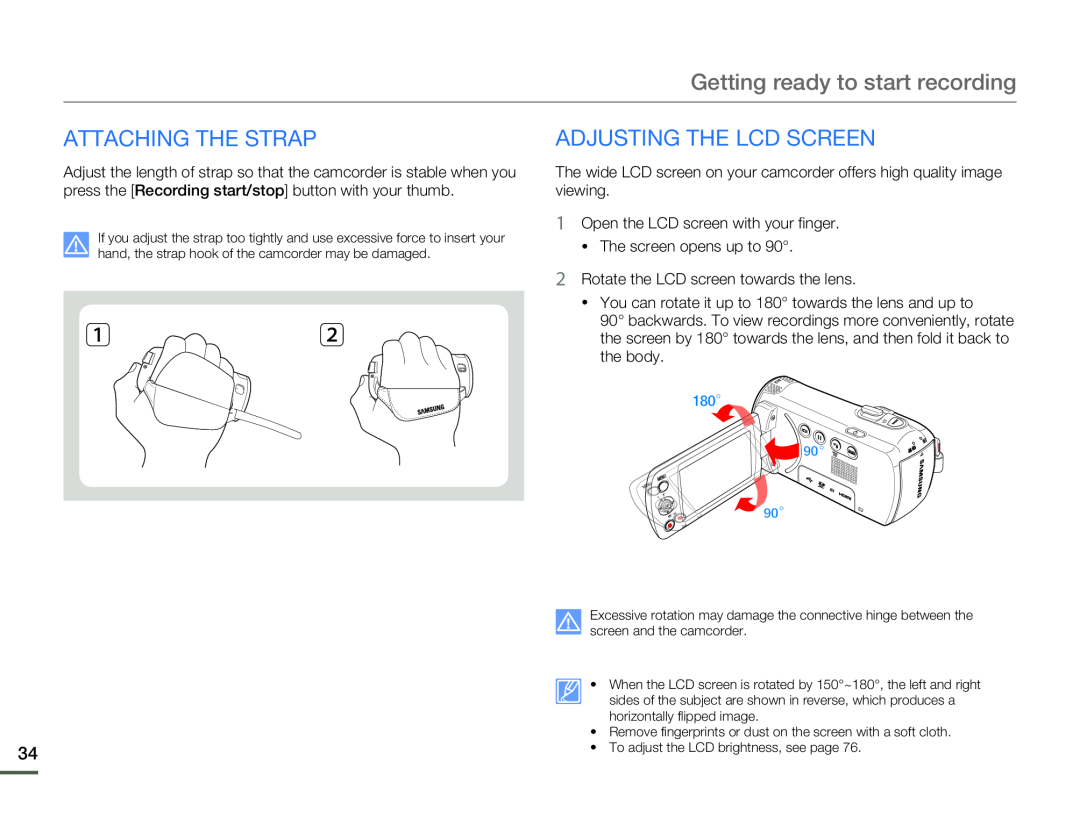 ATTACHING THE STRAP
 Basic recording
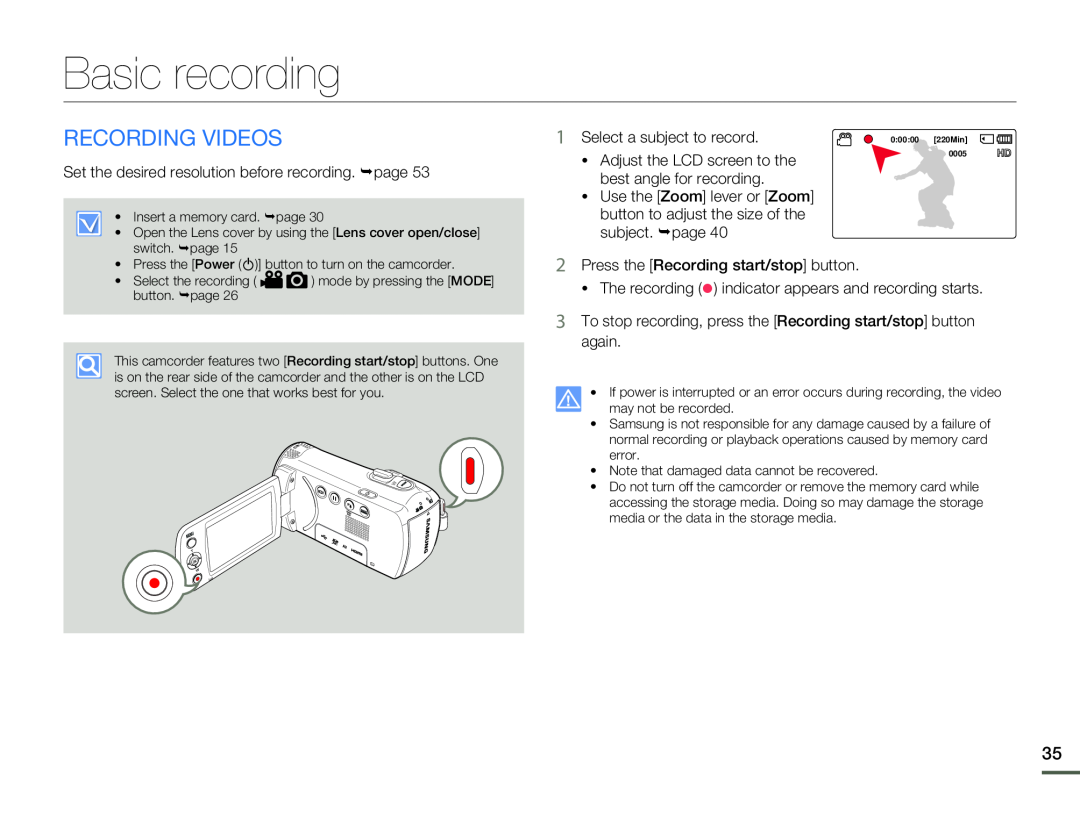
RECORDING VIDEOS
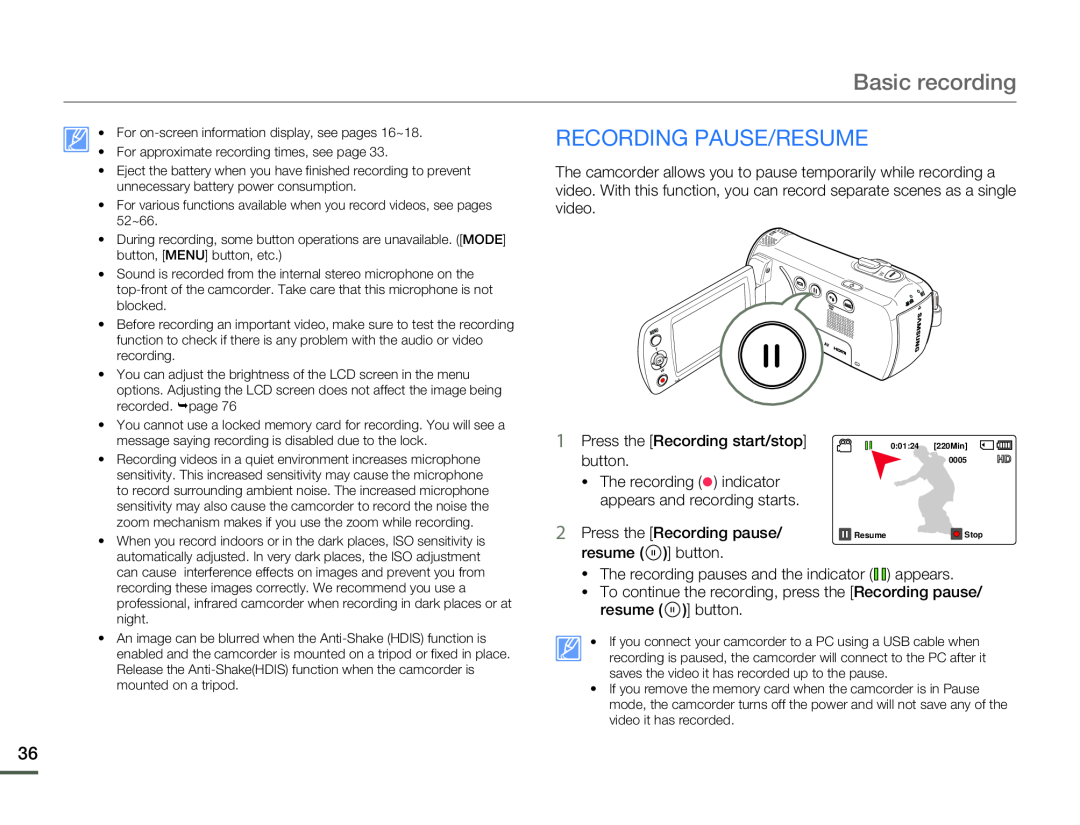 RECORDING PAUSE/RESUME
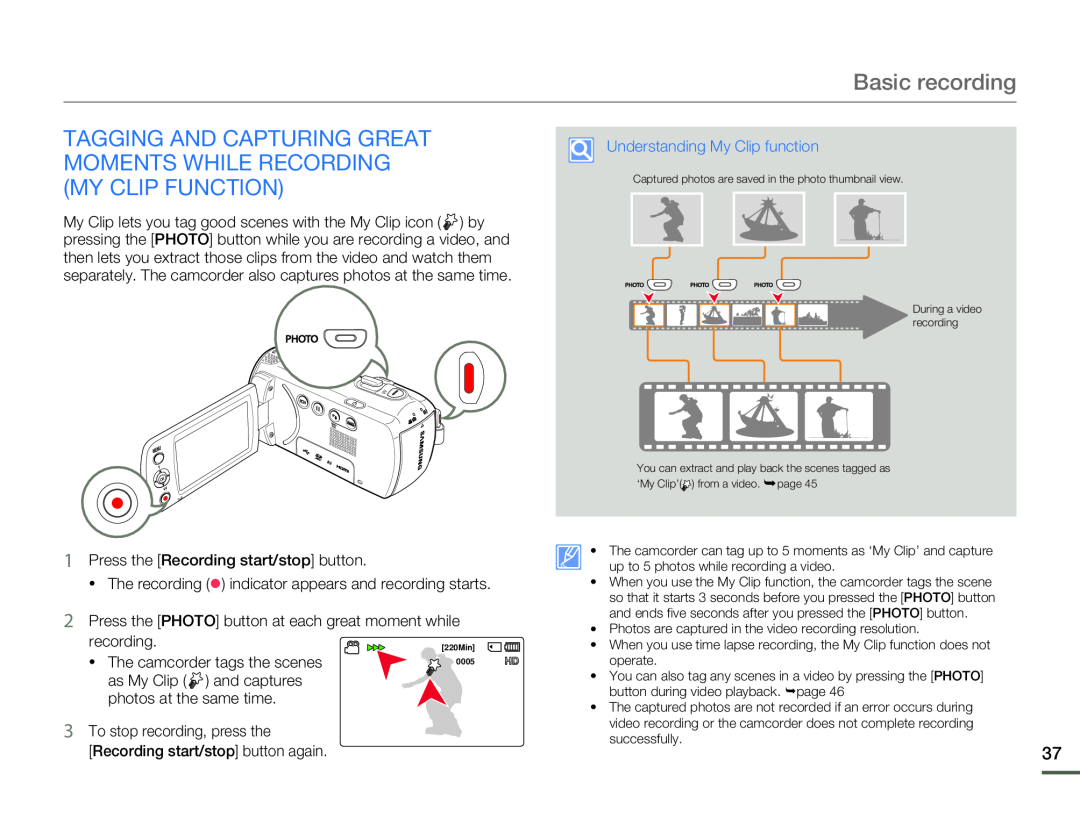 TAGGING AND CAPTURING GREAT MOMENTS WHILE RECORDING (MY CLIP FUNCTION)
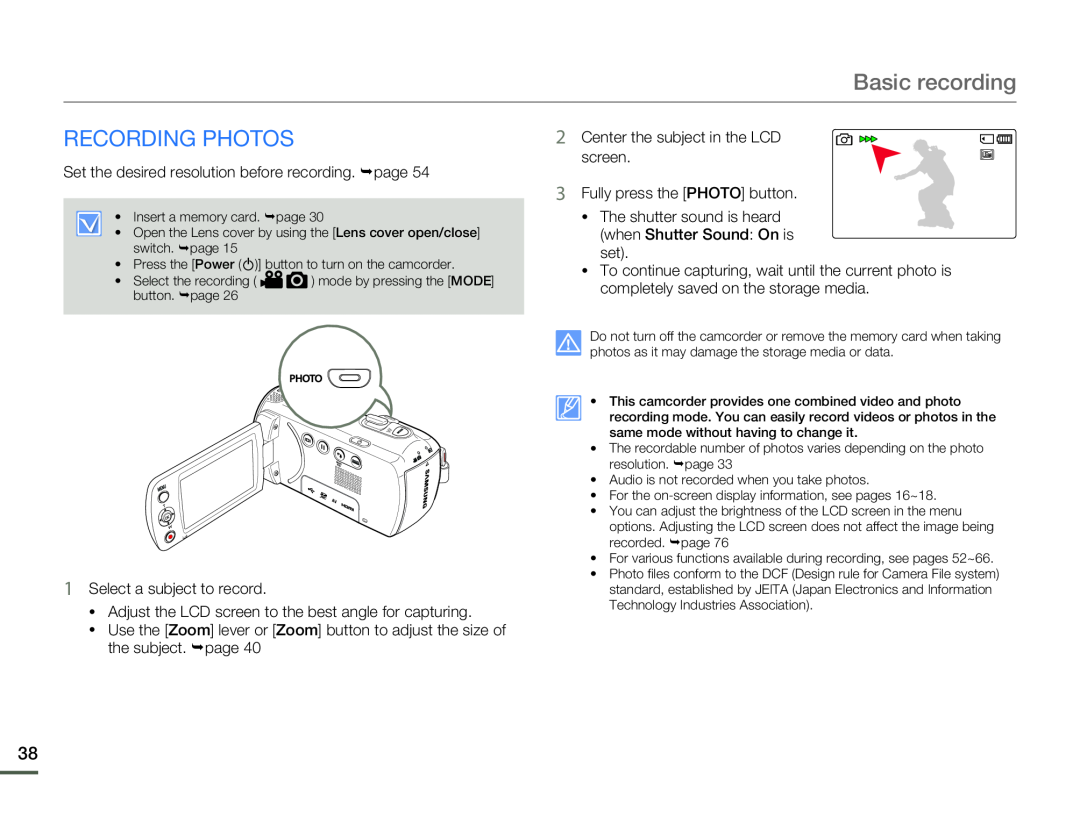 RECORDING PHOTOS
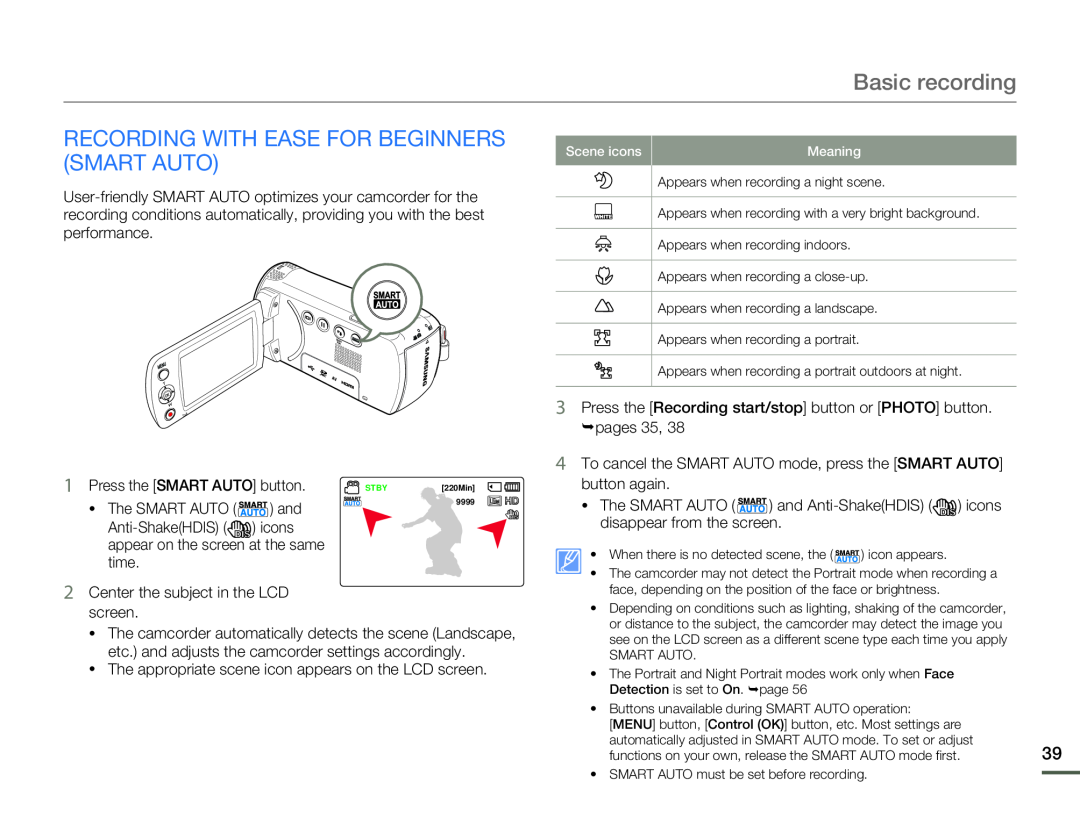 RECORDING WITH EASE FOR BEGINNERS (SMART AUTO)
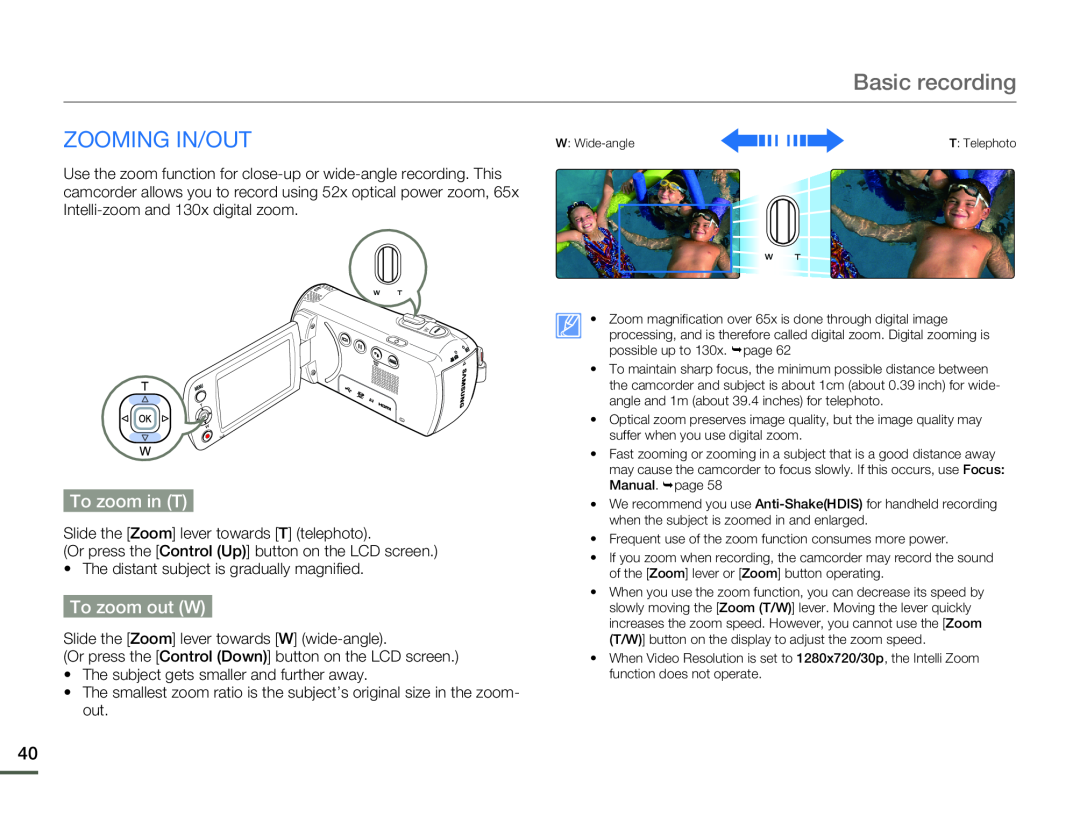 ZOOMING IN/OUT
To zoom in (T)
To zoom out (W)
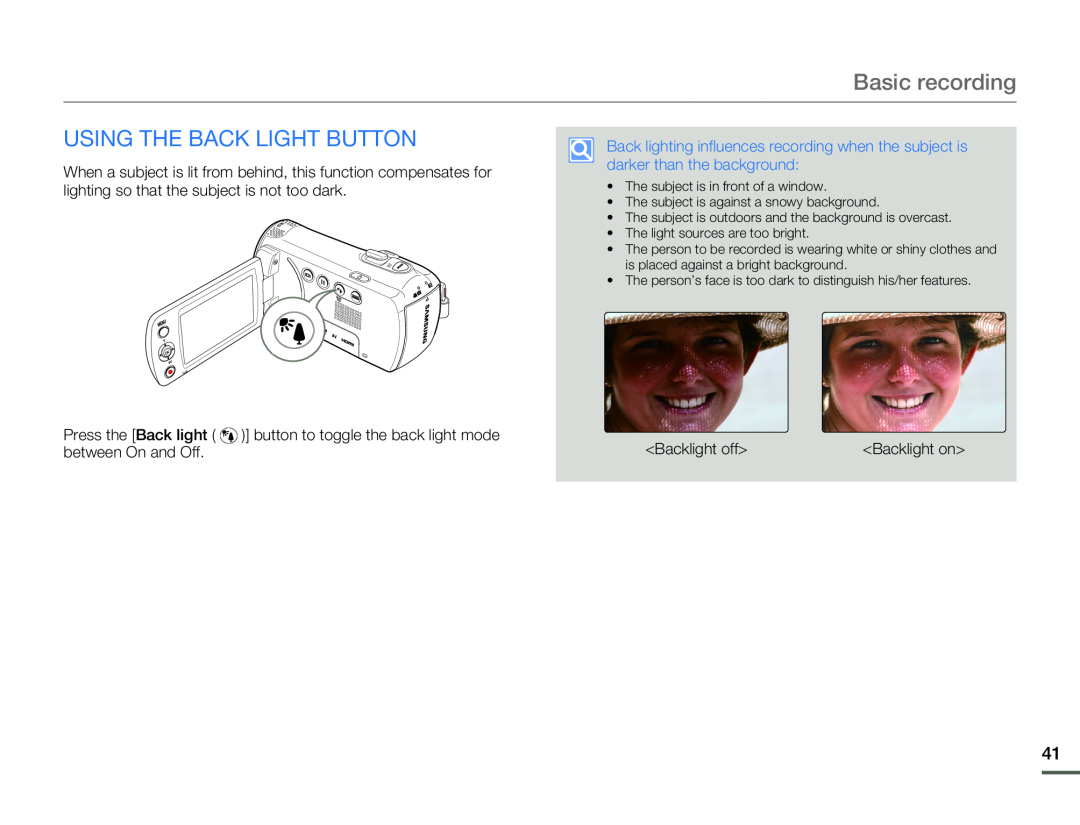 USING THE BACK LIGHT BUTTON
 Basic playback
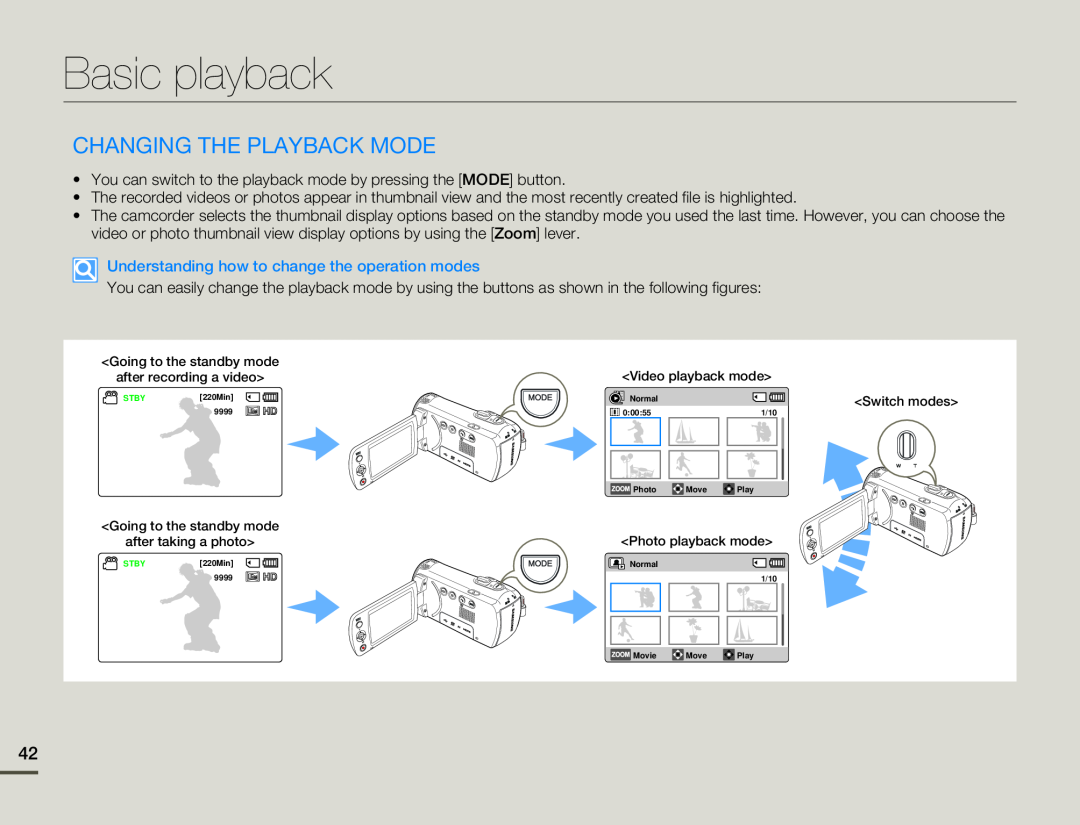
CHANGING THE PLAYBACK MODE
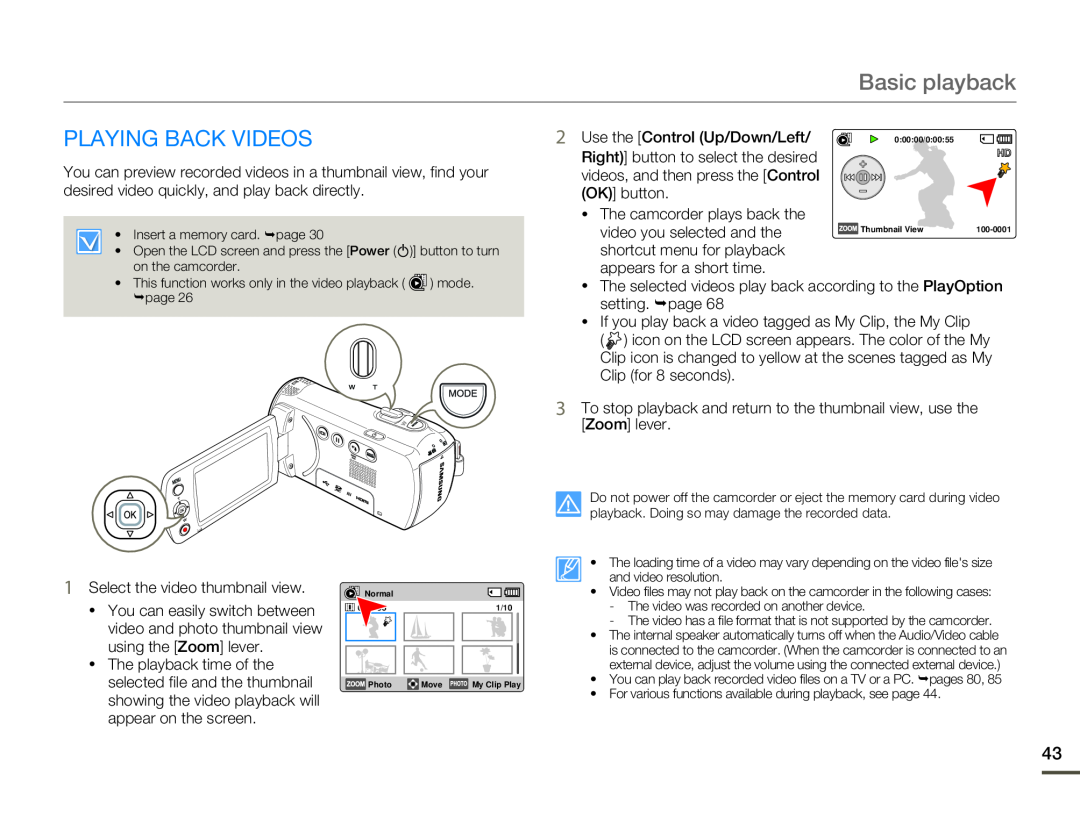 PLAYING BACK VIDEOS
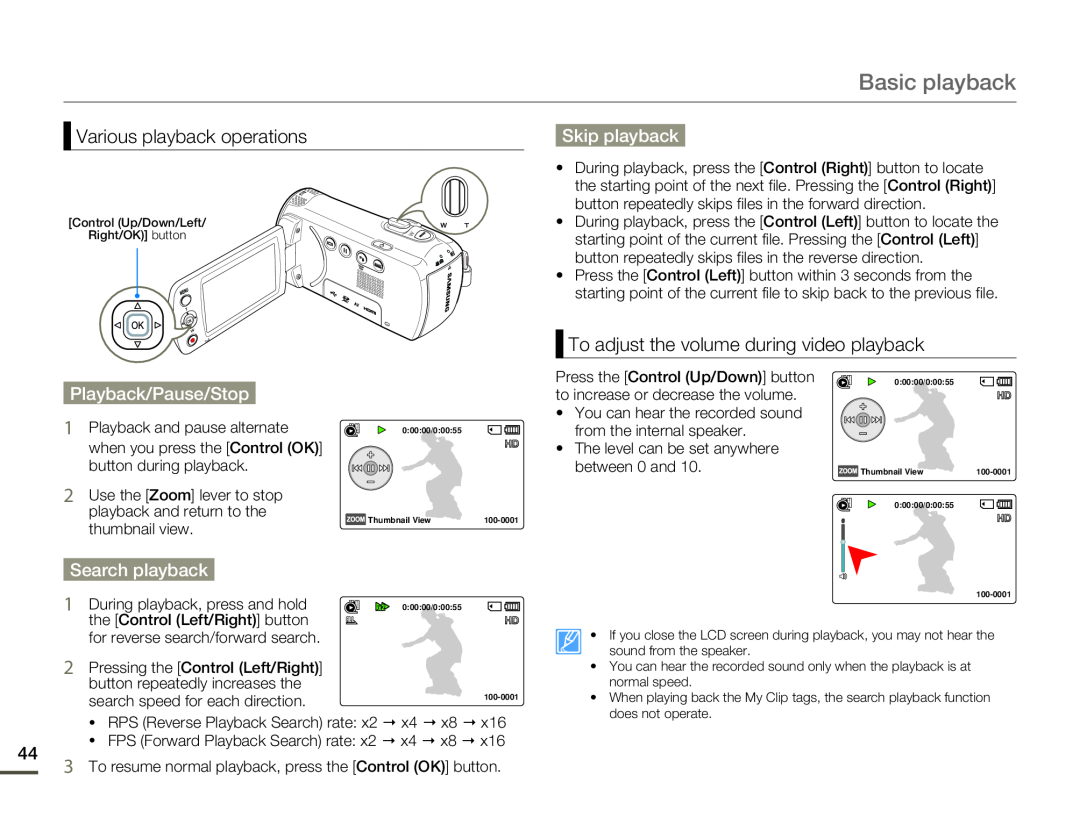 Various playback operations
Skip playback
To adjust the volume during video playback
Playback/Pause/Stop
Search playback
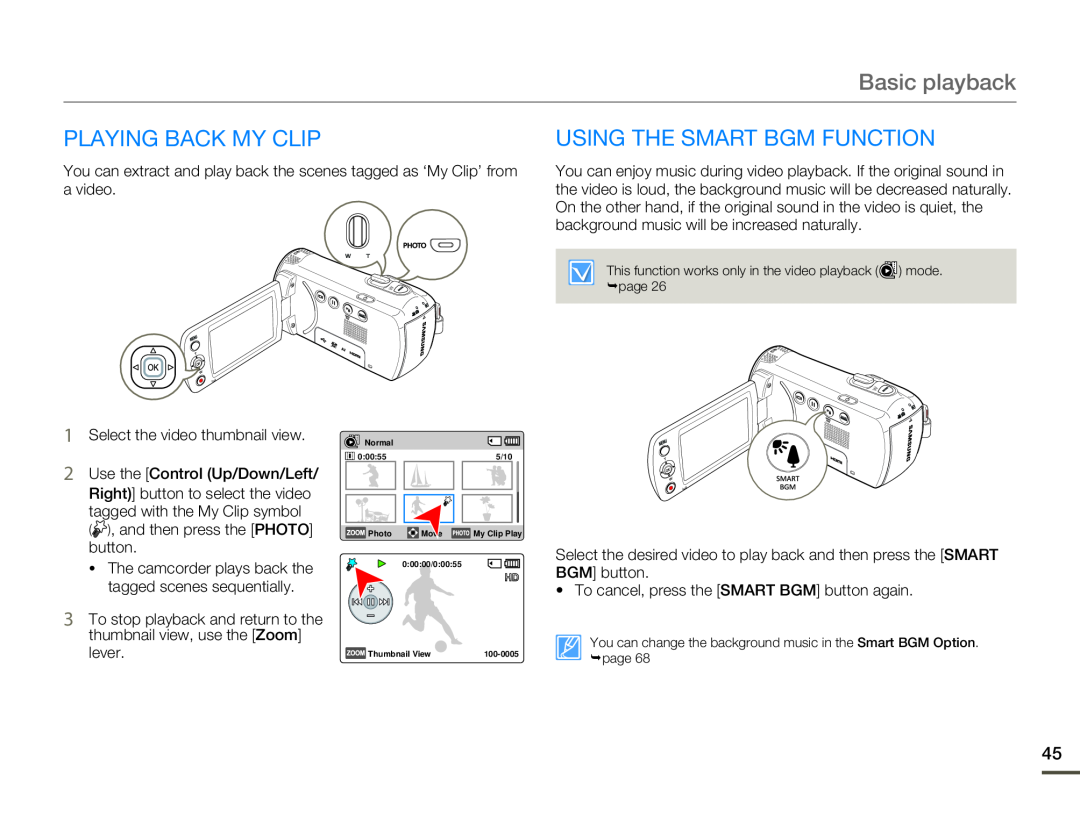 PLAYING BACK MY CLIP
USING THE SMART BGM FUNCTION
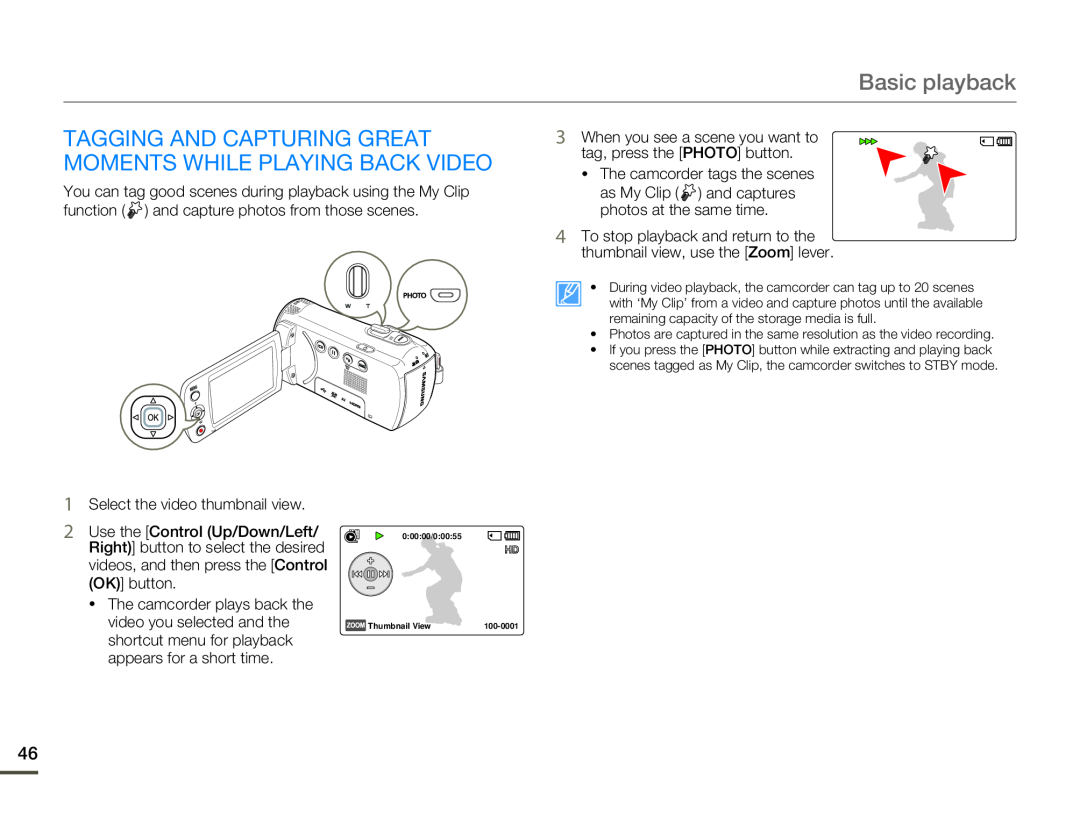 TAGGING AND CAPTURING GREAT MOMENTS WHILE PLAYING BACK VIDEO
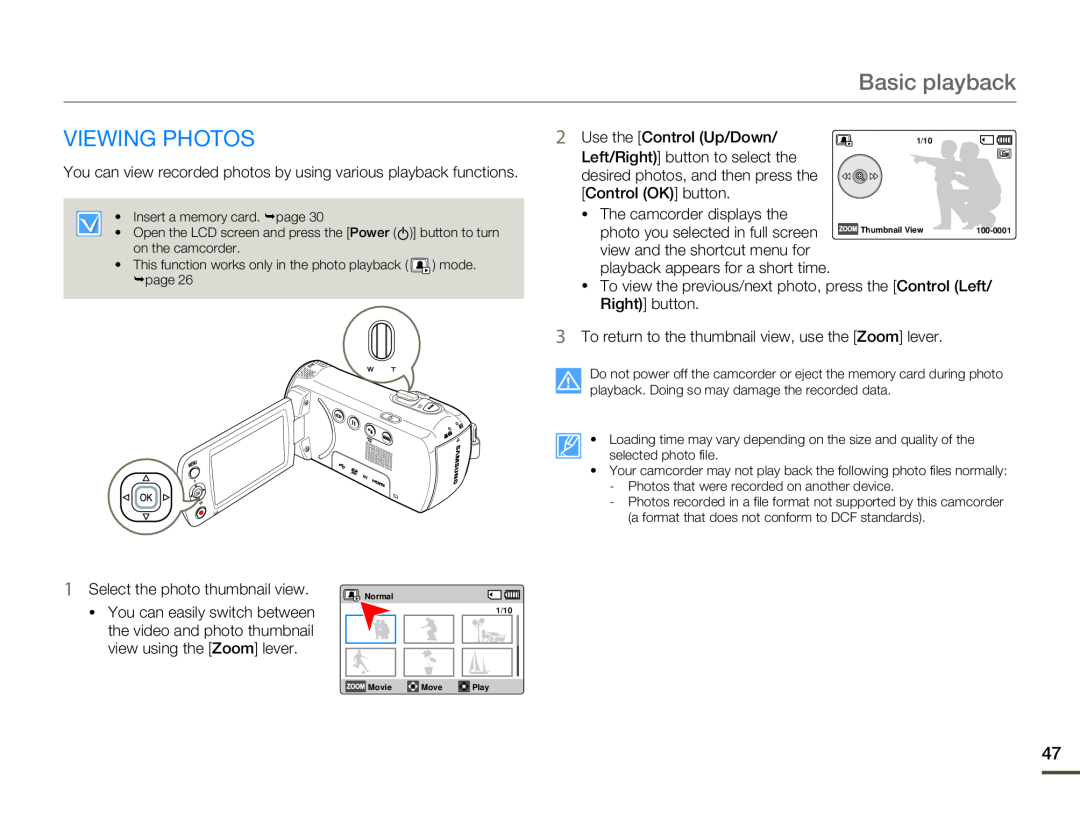 VIEWING PHOTOS
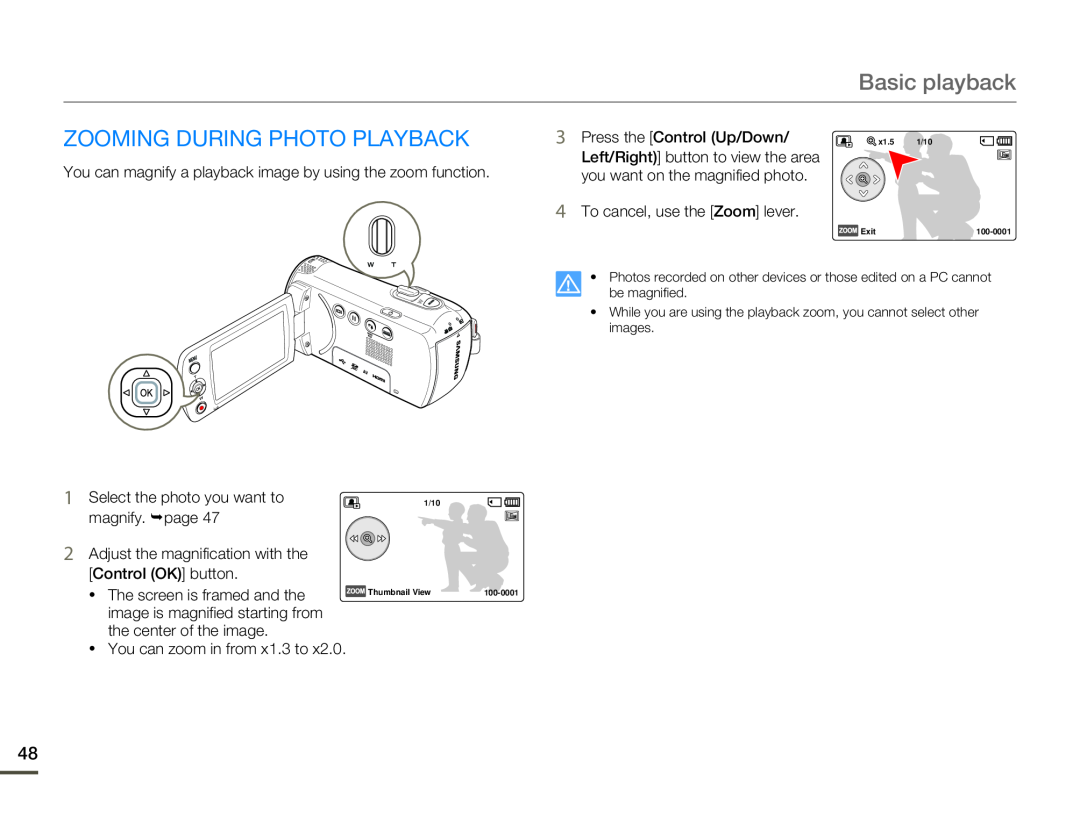 ZOOMING DURING PHOTO PLAYBACK
 Using the menu items
HANDLING MENUS
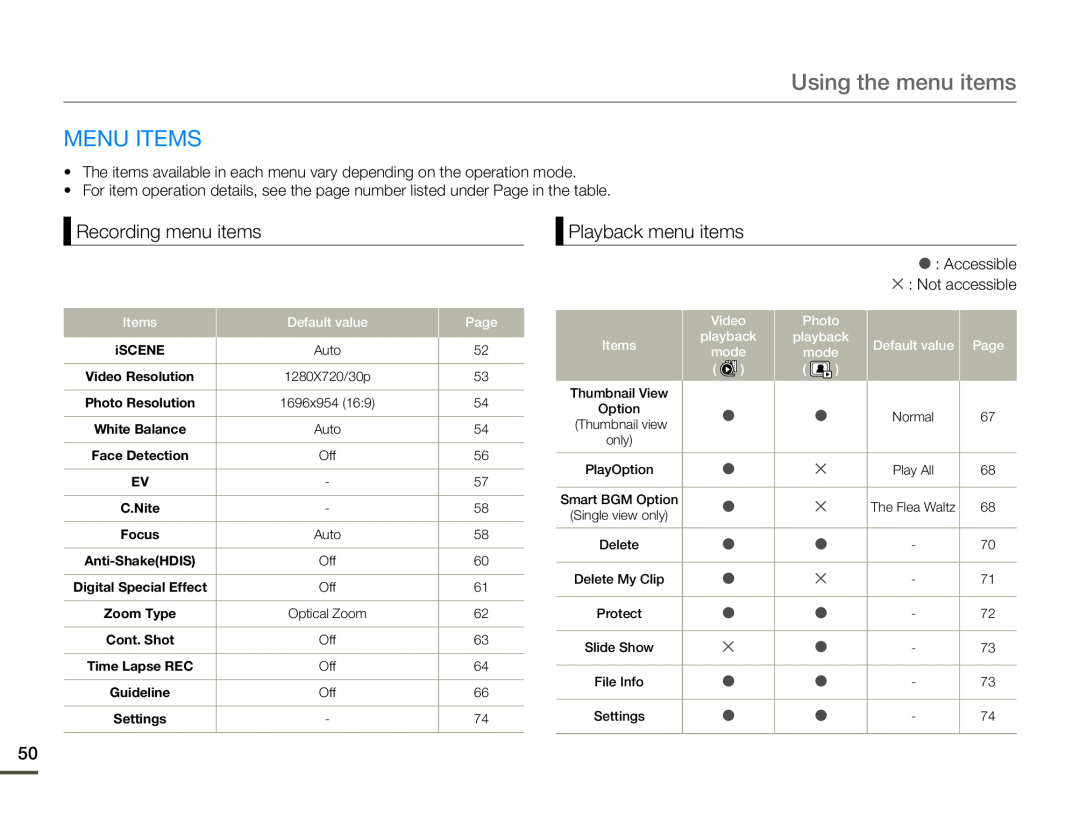 MENU ITEMS
Recording menu items
Playback menu items
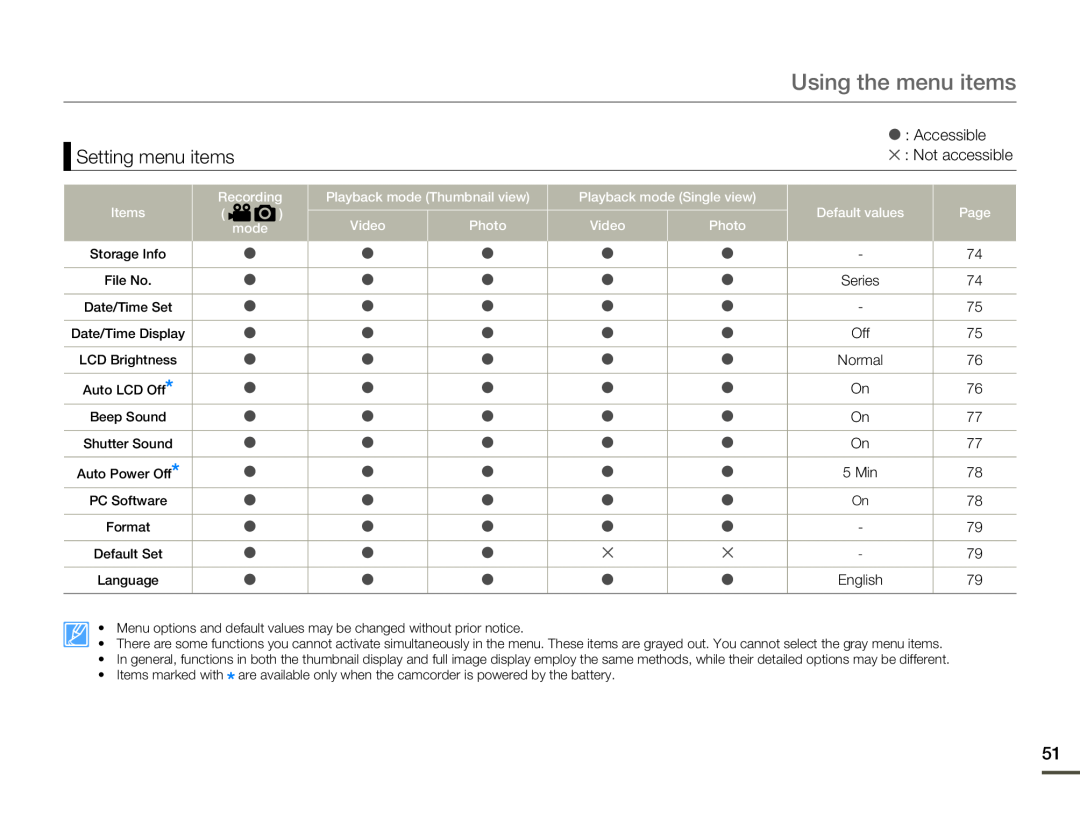 Setting menu items
 Advanced recording
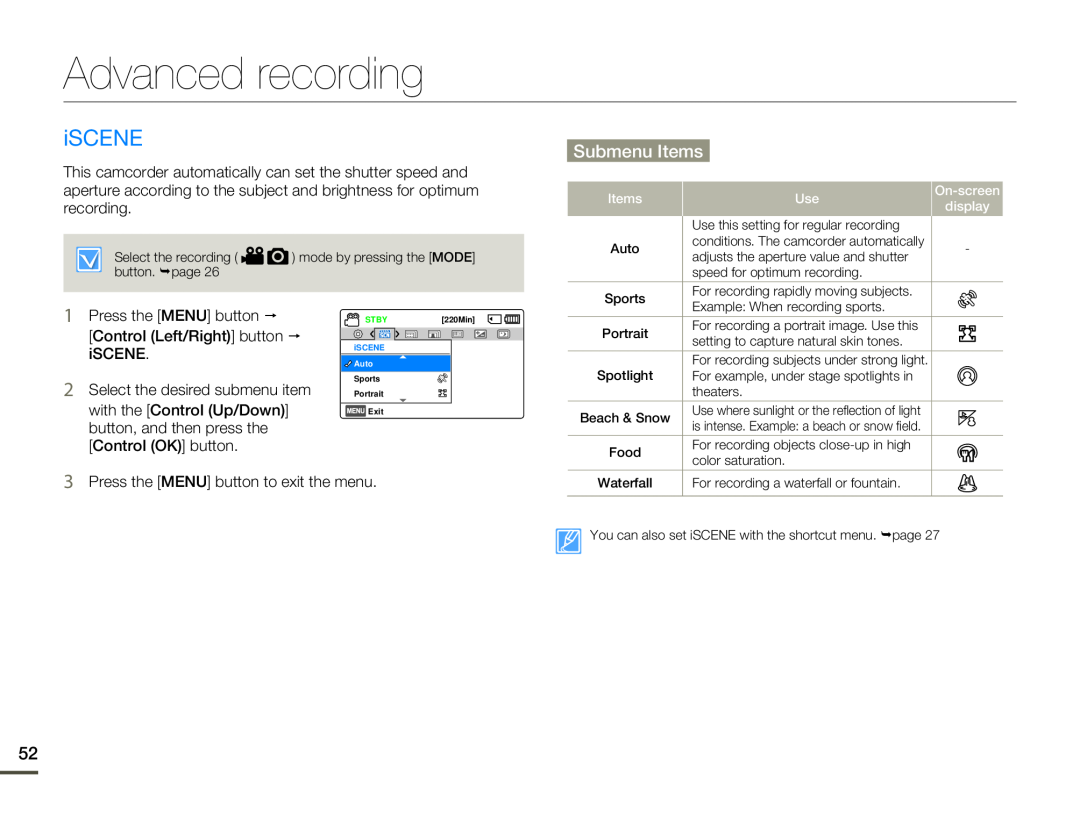
iSCENE
Submenu Items
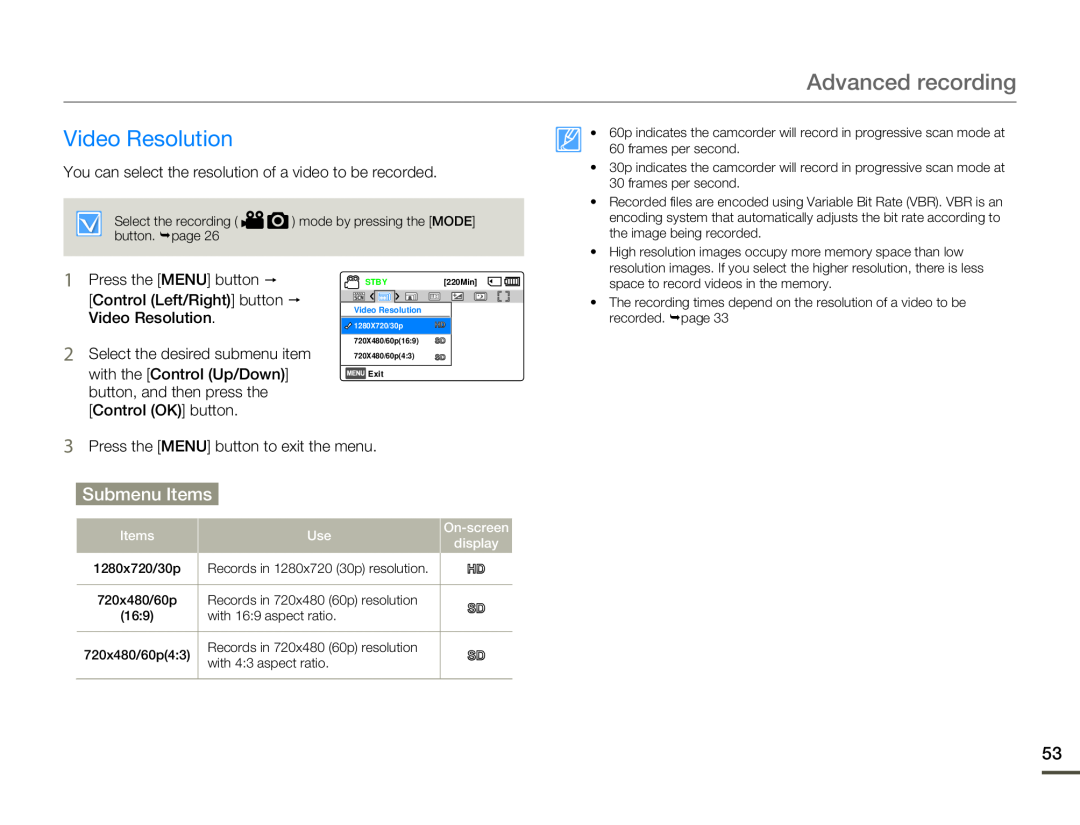 Video Resolution
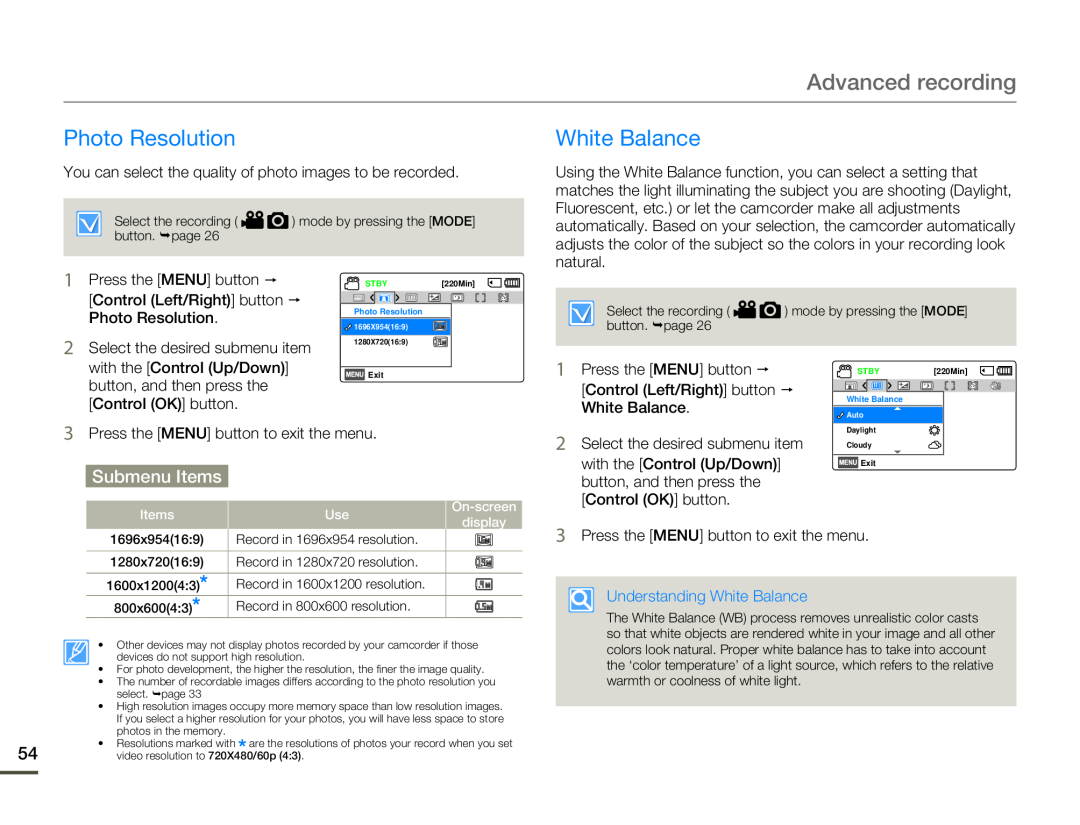 Photo Resolution
White Balance
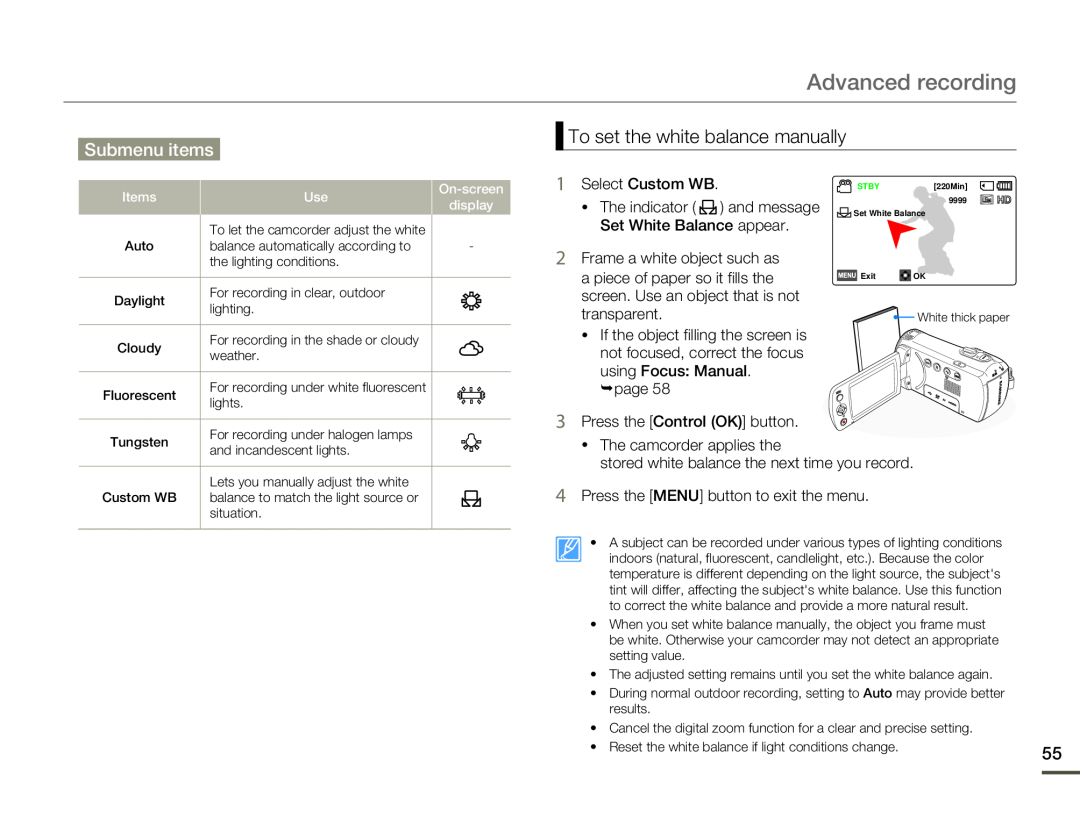 To set the white balance manually
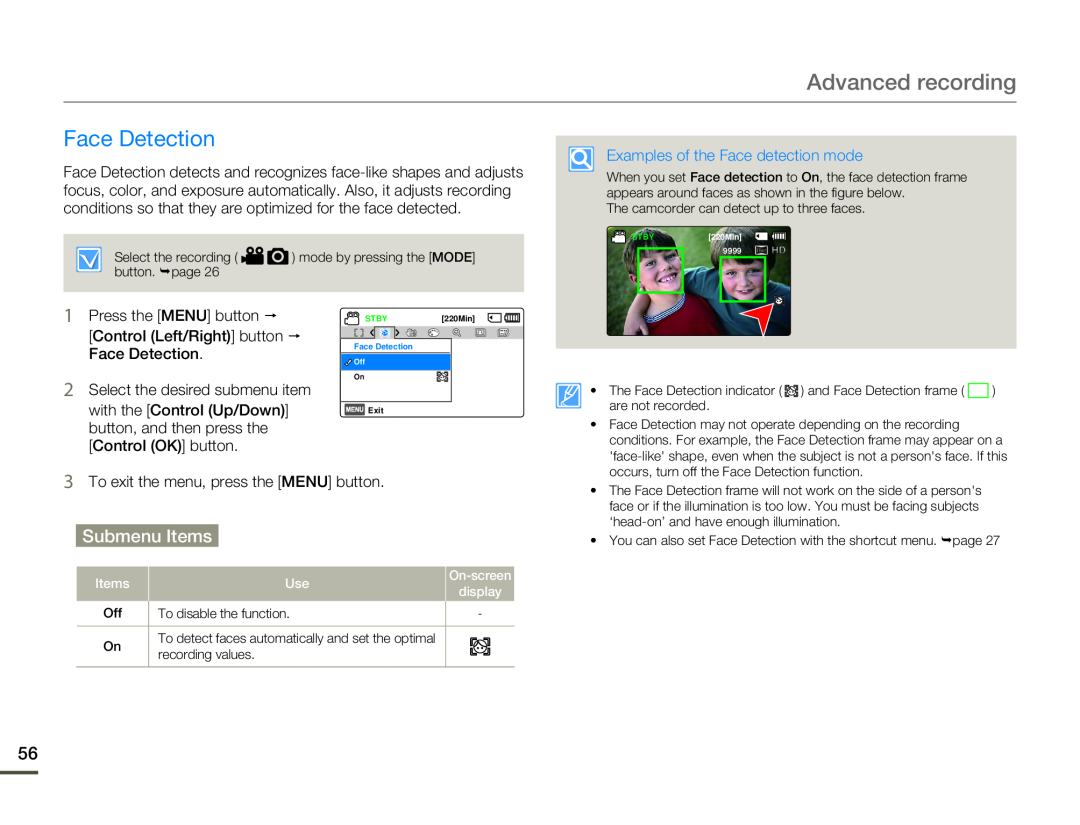 Face Detection
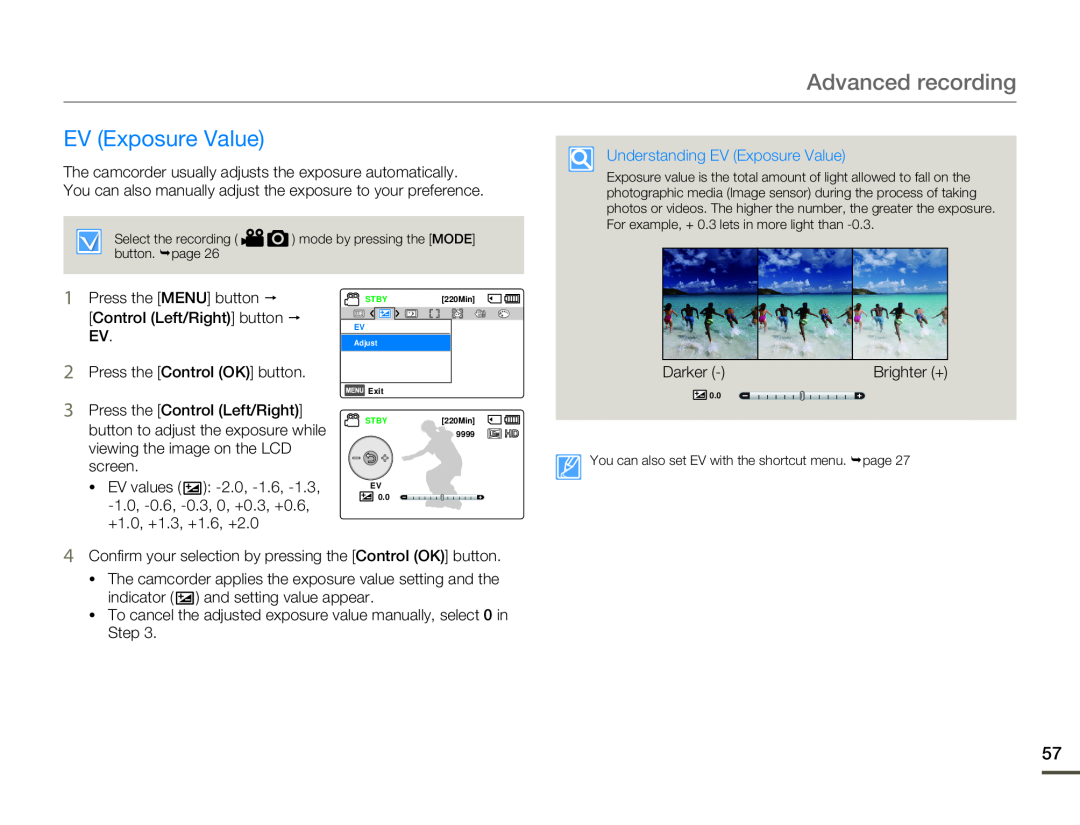 EV (Exposure Value)
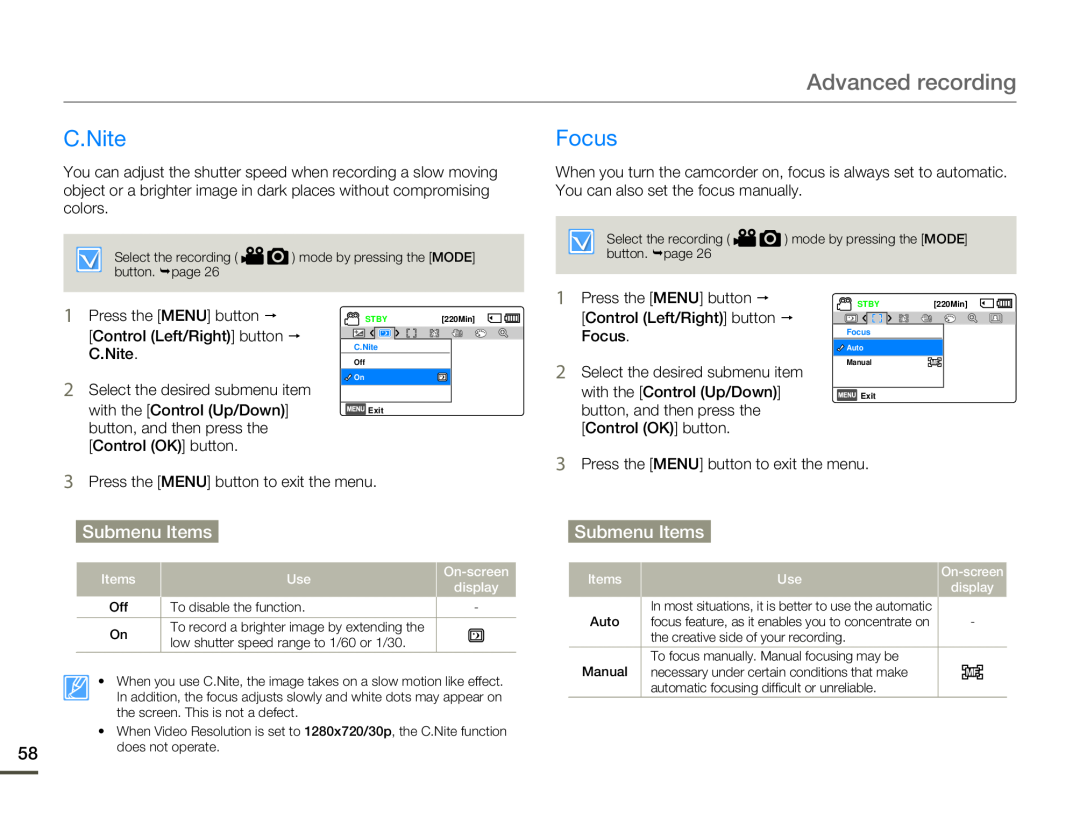 C.Nite
Focus
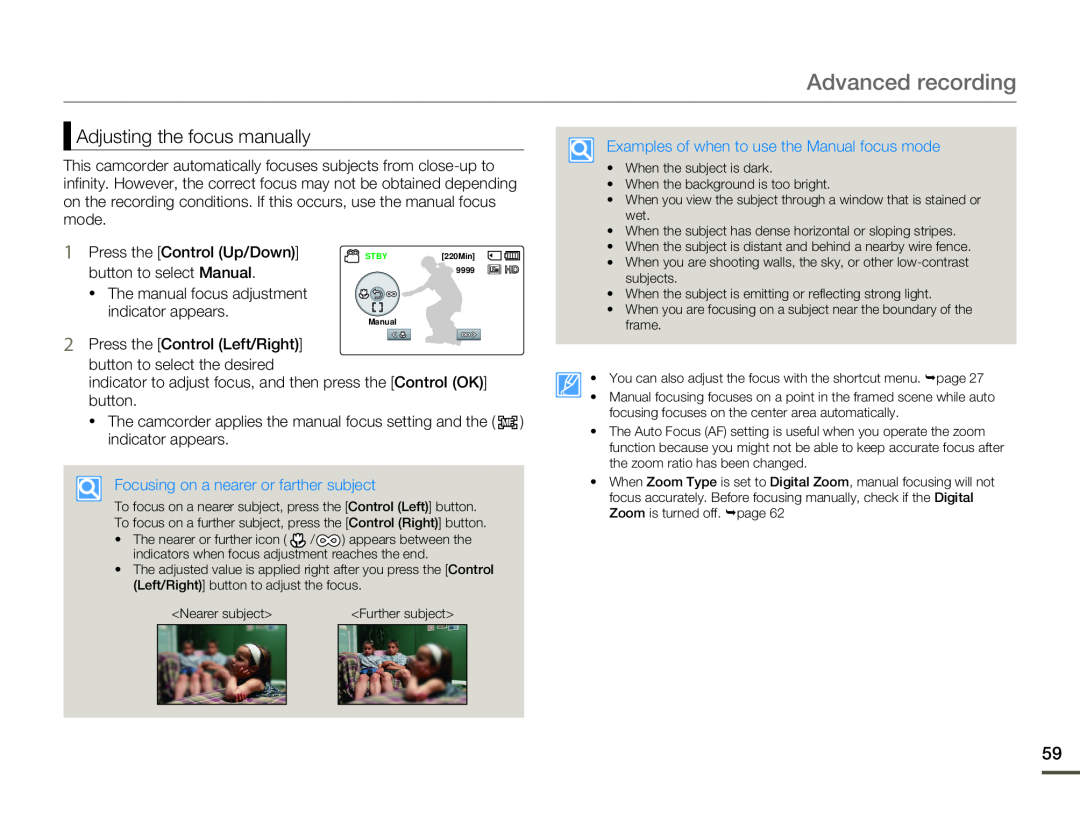 Adjusting the focus manually
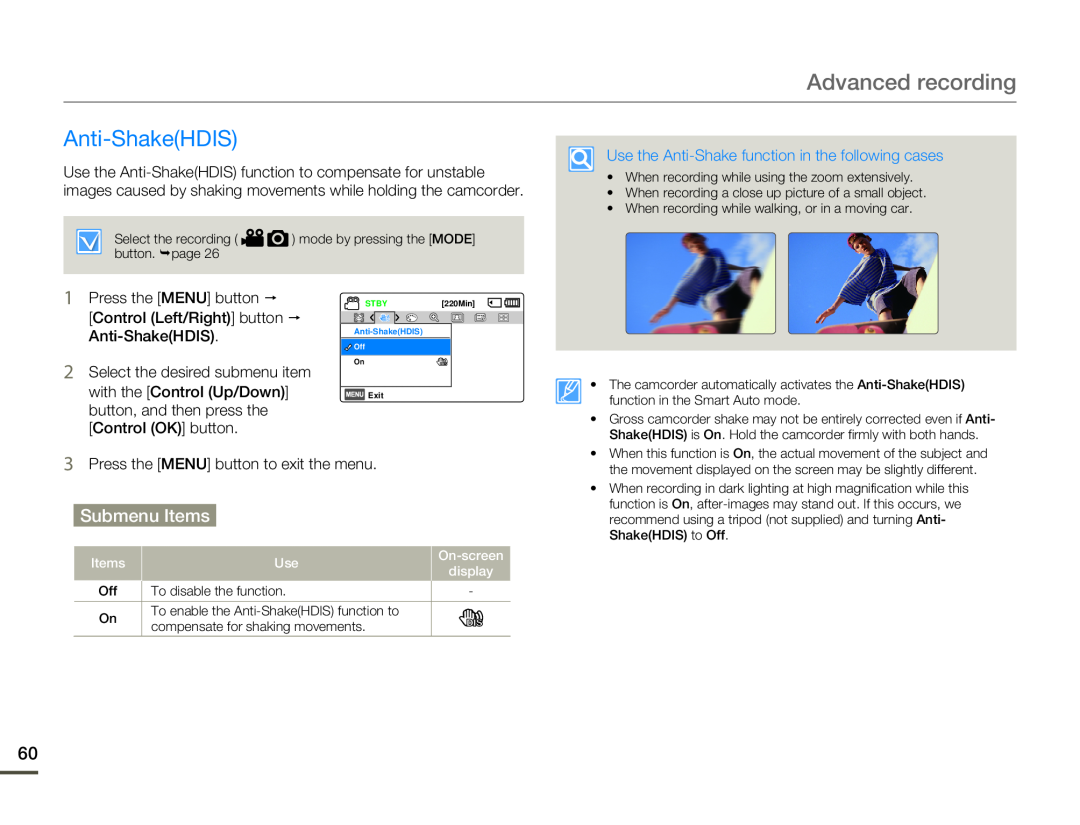 Anti-Shake(HDIS)
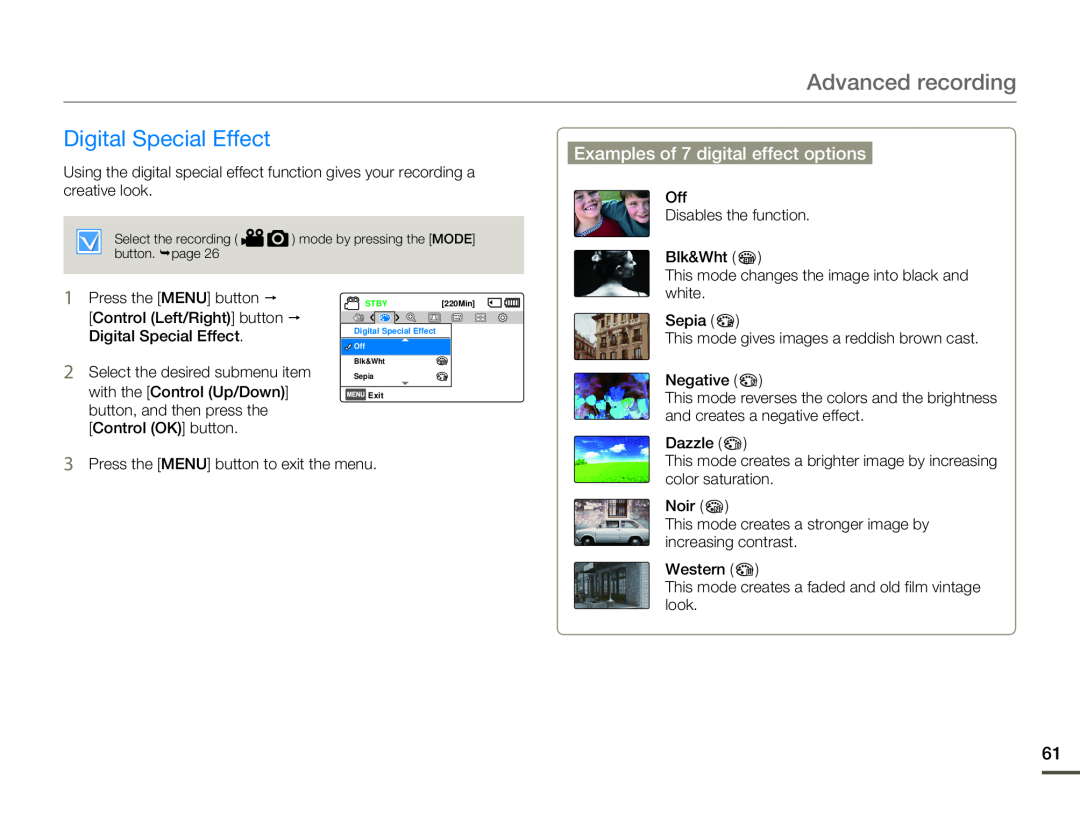 Digital Special Effect
Examples of 7 digital effect options
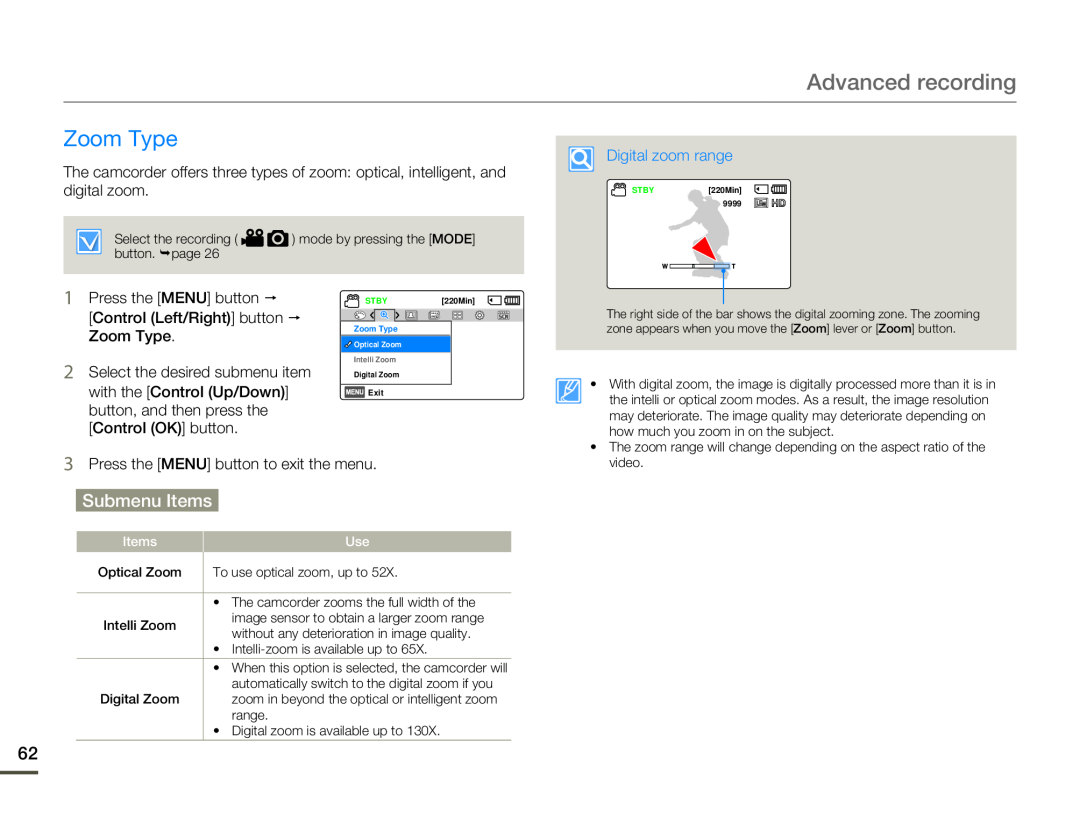 Zoom Type
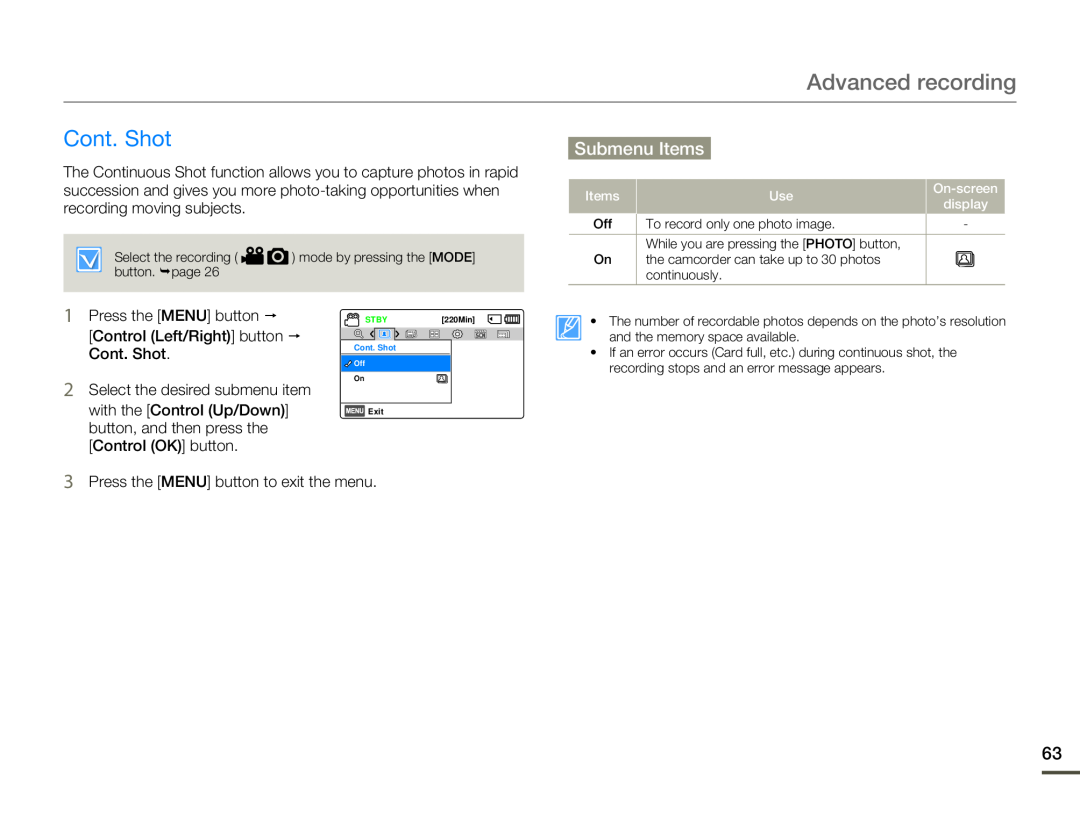 Cont. Shot
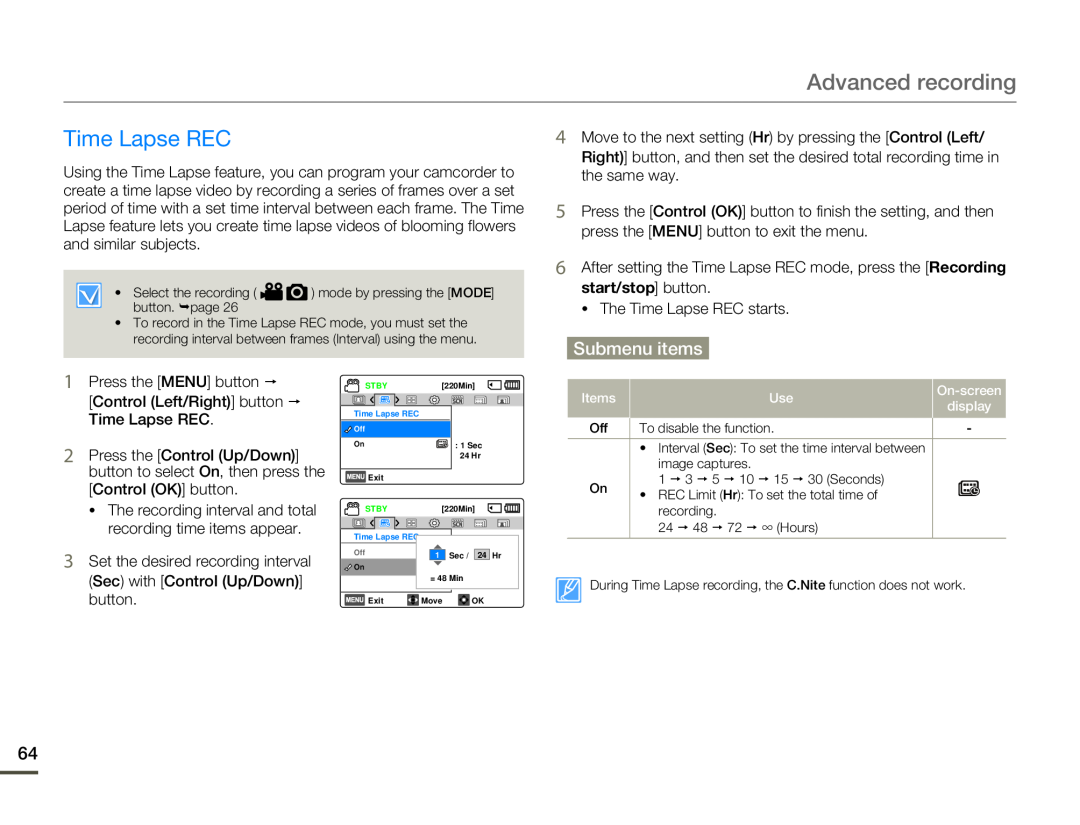 Time Lapse REC
 Advanced recording
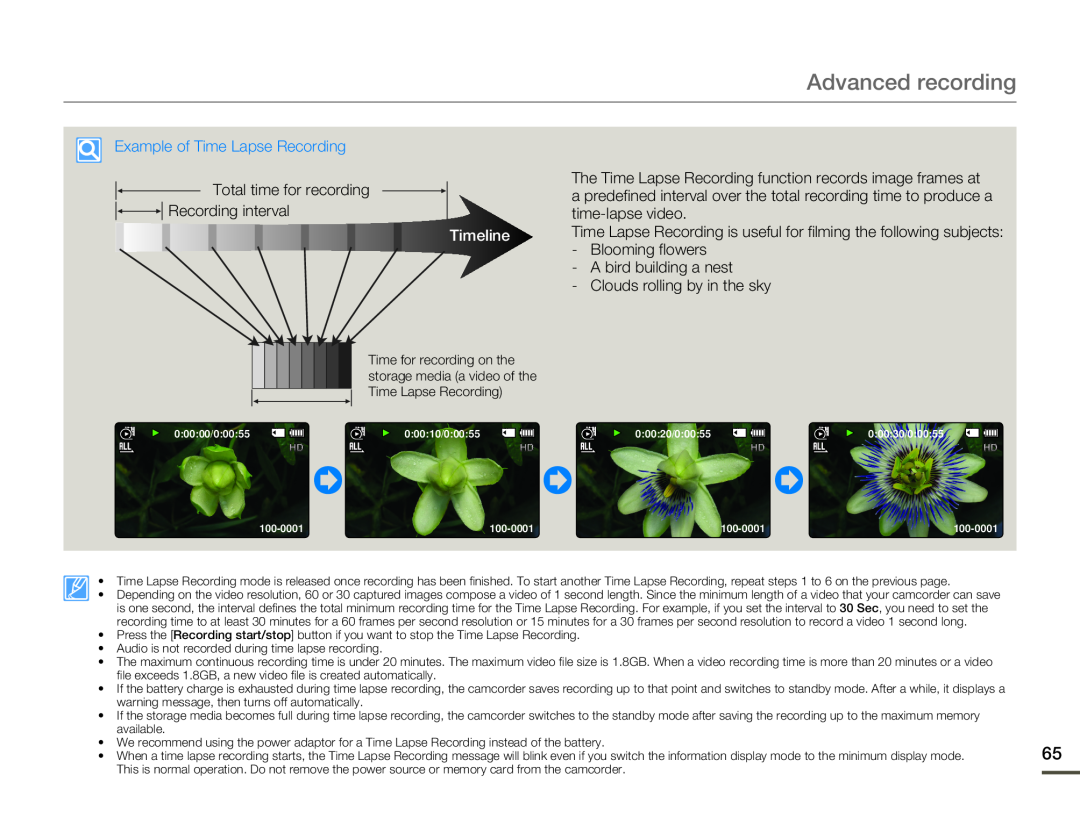
Example of Time Lapse Recording
Total time for recording
Recording interval
The Time Lapse Recording function records image frames at
a predefined interval over the total recording time to produce a
time-lapsevideo
Timeline
- Blooming flowers
- A bird building a nest
- Clouds rolling by in the sky
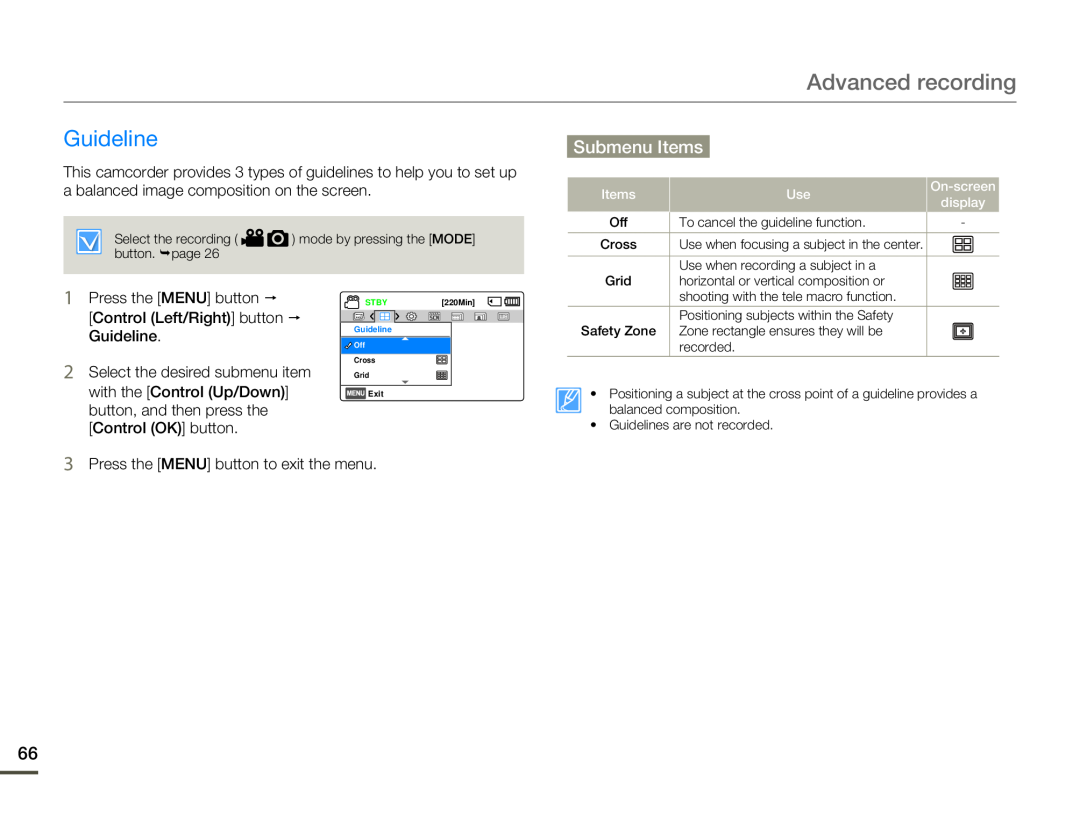 Guideline
 Advanced playback
Thumbnail View Option
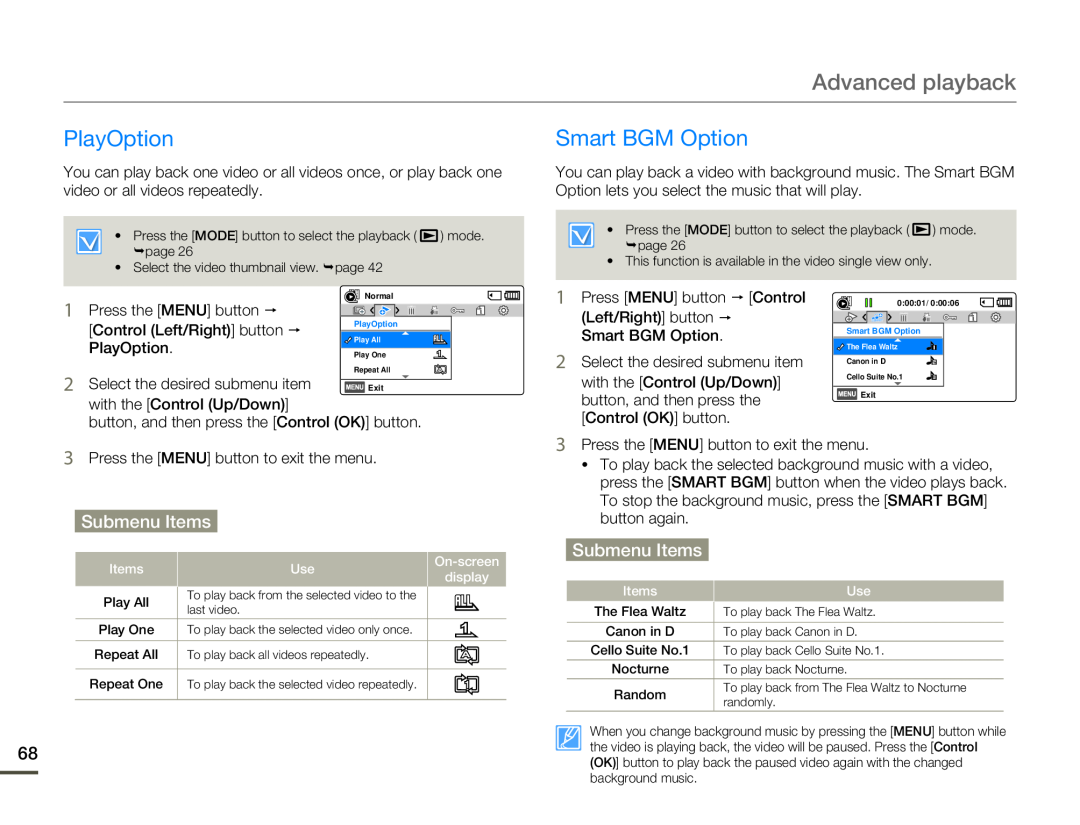 PlayOption
Smart BGM Option
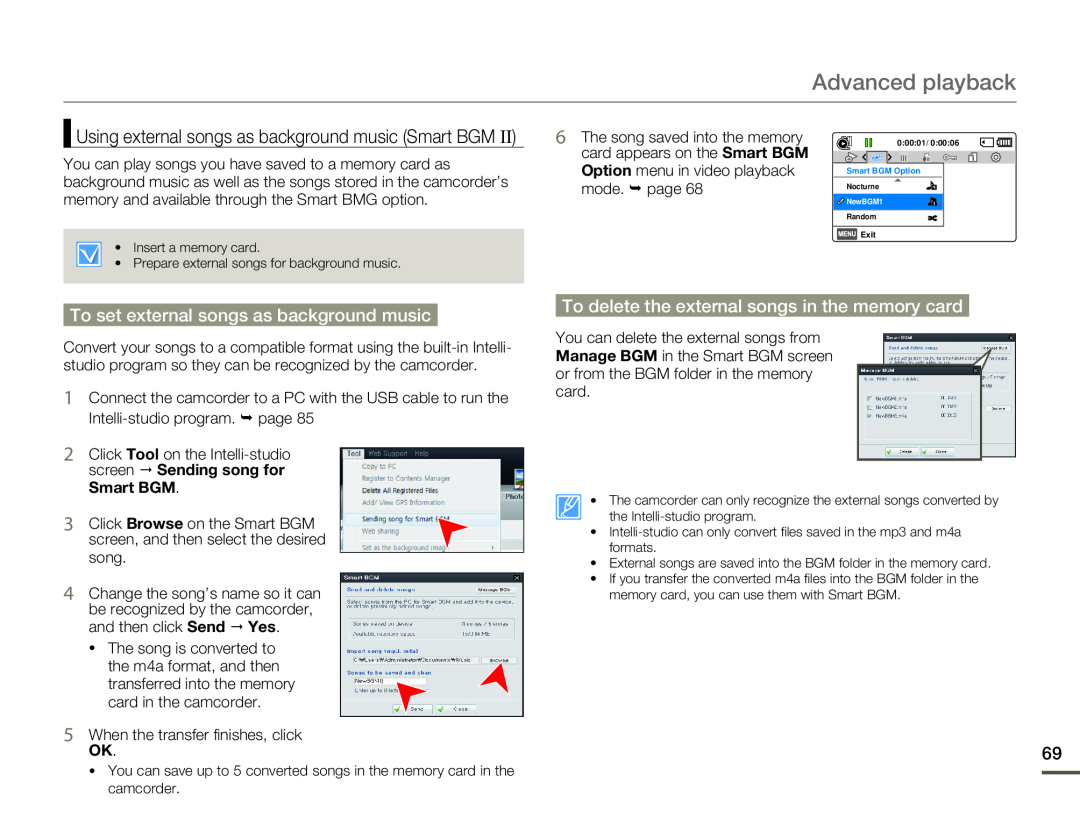 To set external songs as background music
To delete the external songs in the memory card
 Delete
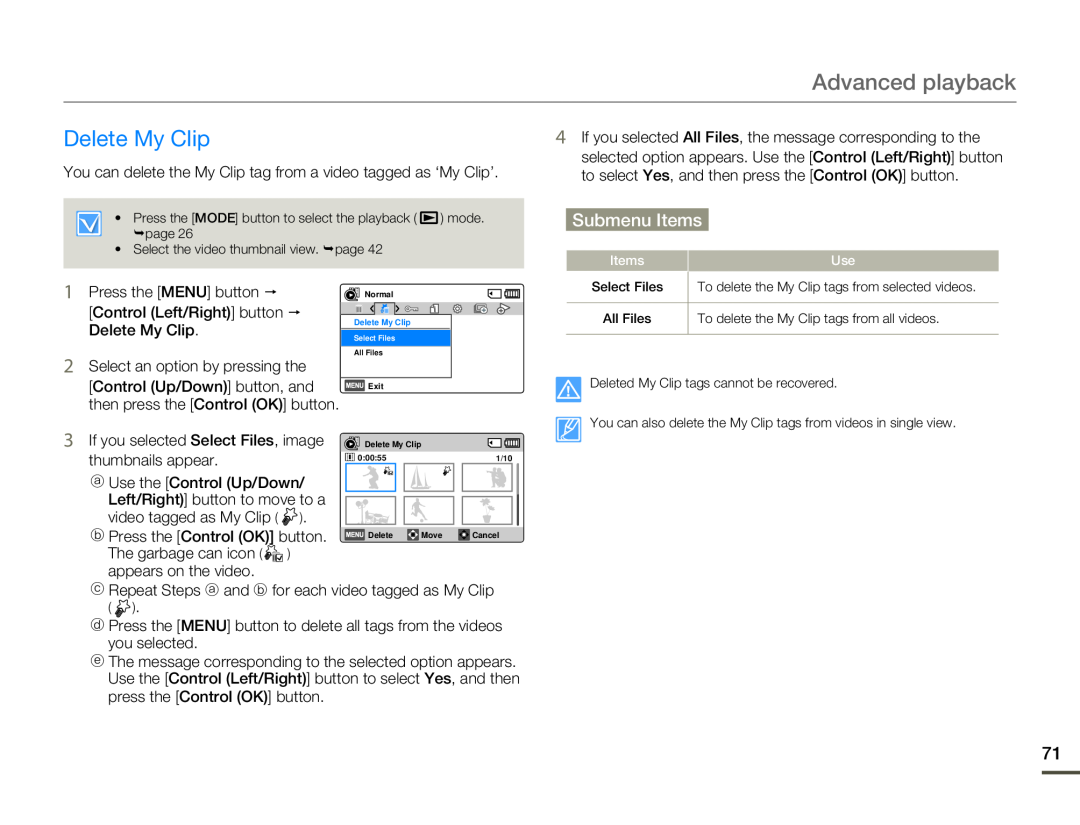 Delete My Clip
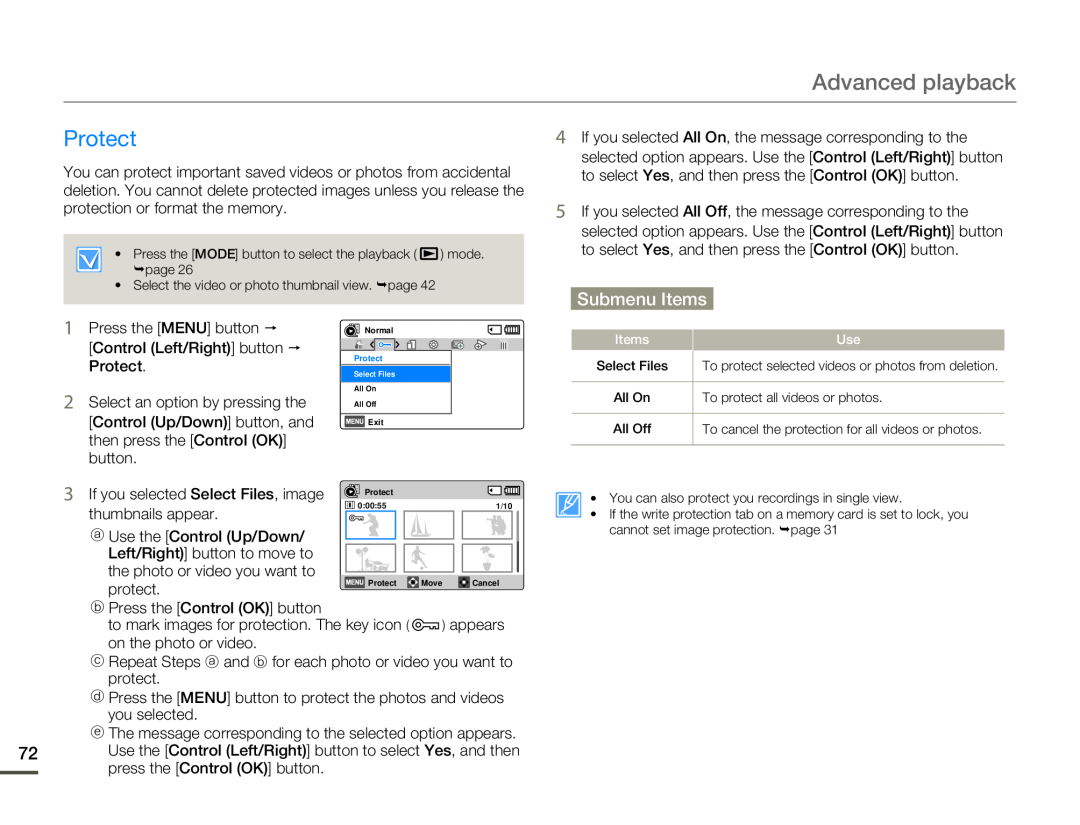 Protect
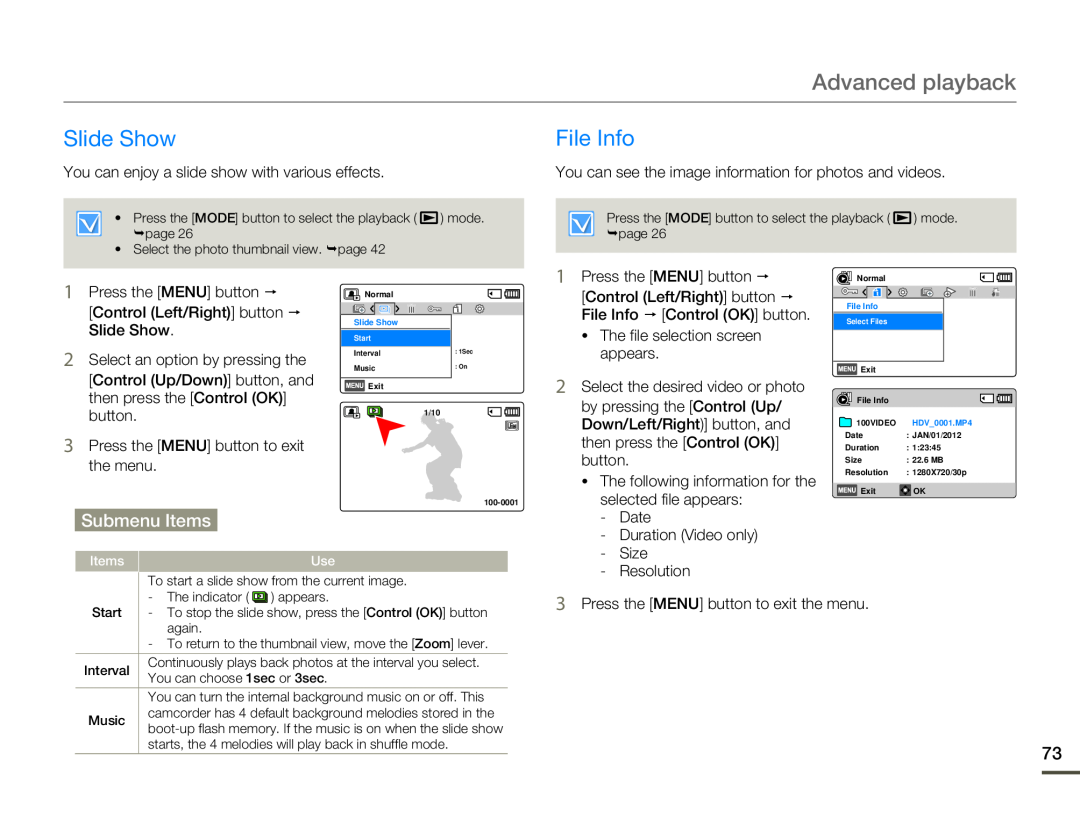 Slide Show
File Info
 Other settings
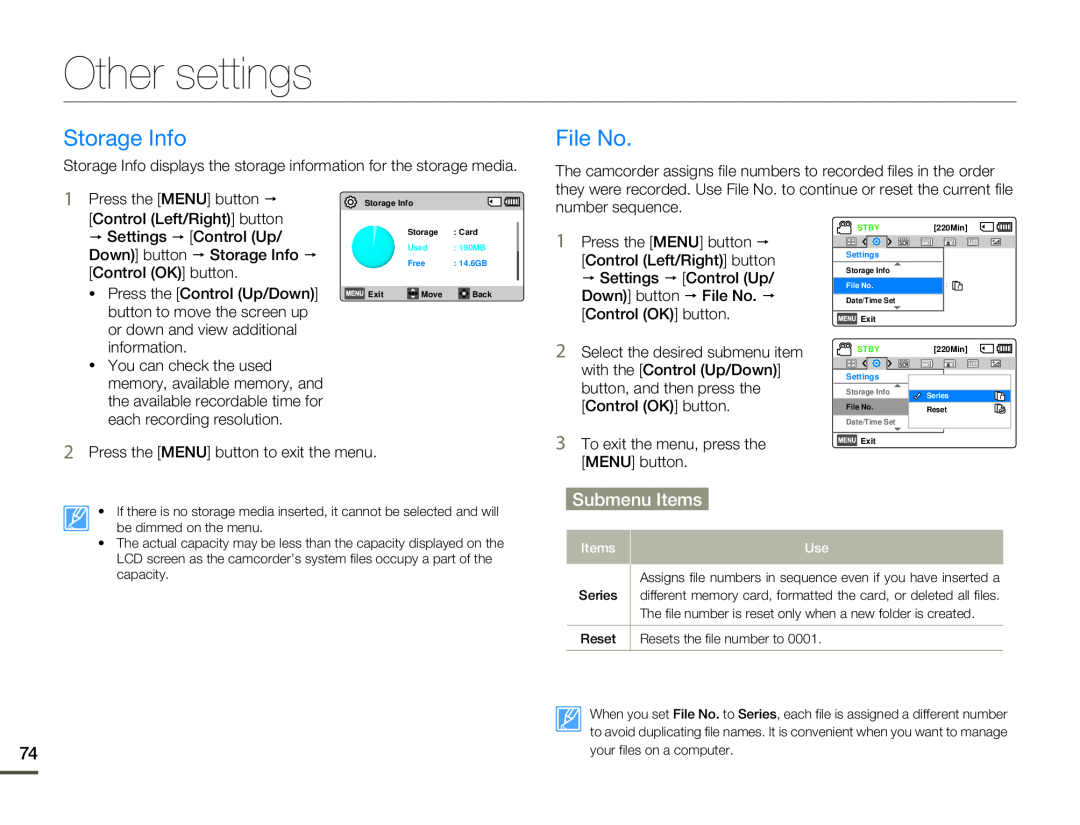
Storage Info
File No
 Date/Time Set
Date/Time Display
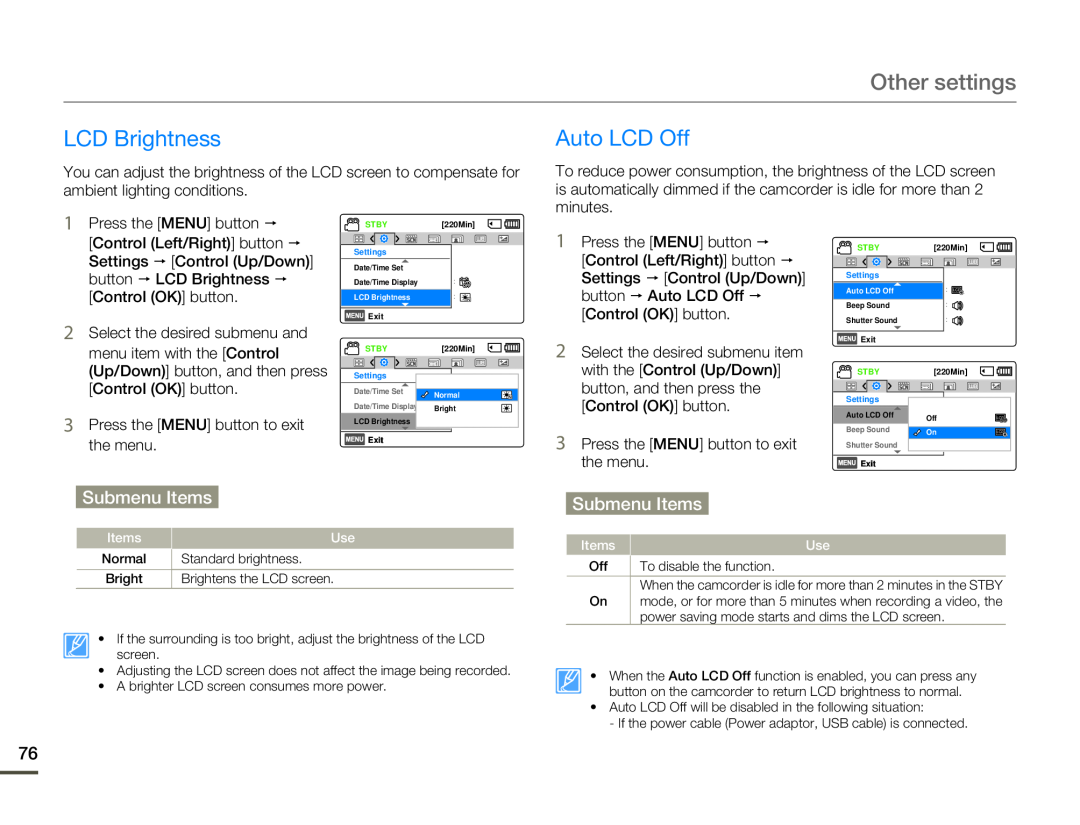 LCD Brightness
Auto LCD Off
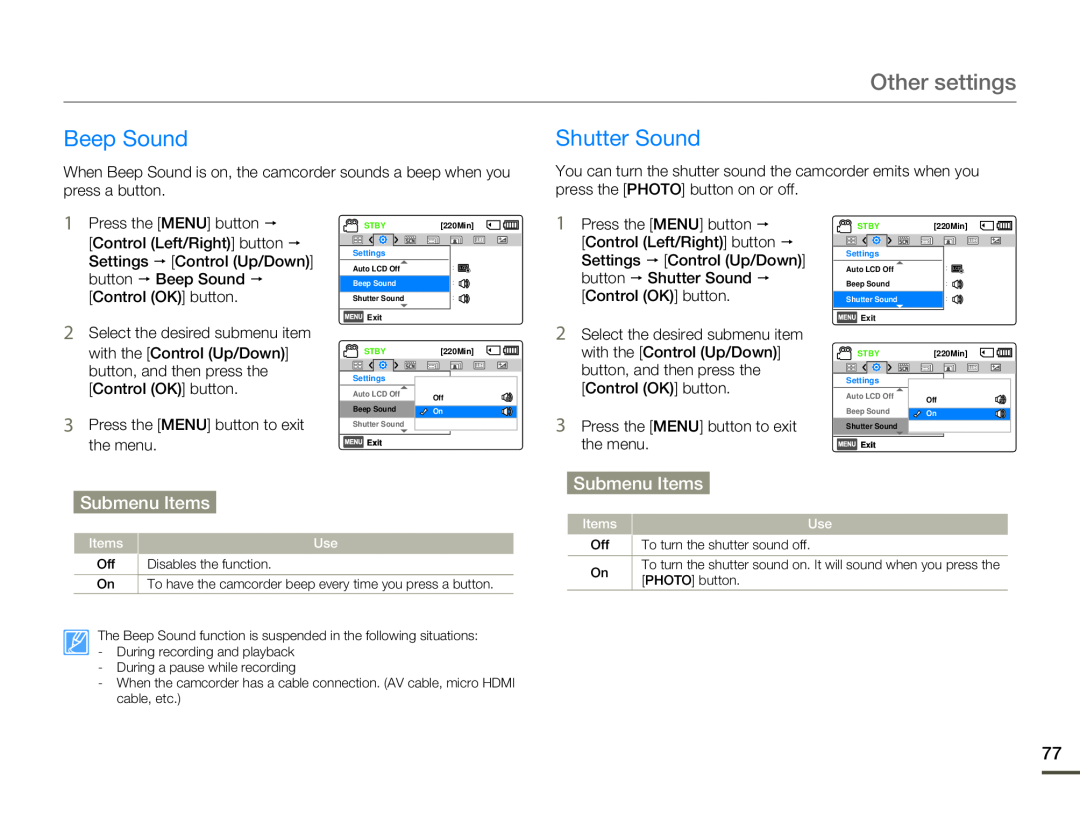 Beep Sound
Shutter Sound
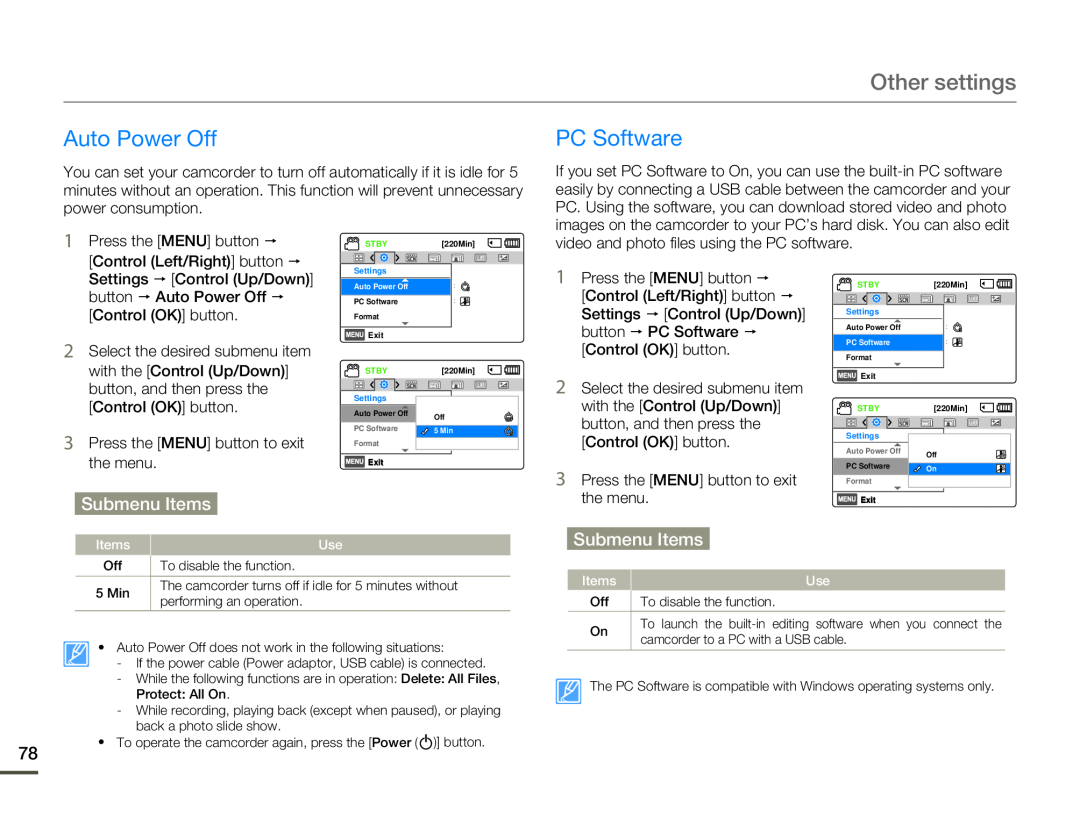 Auto Power Off
PC Software
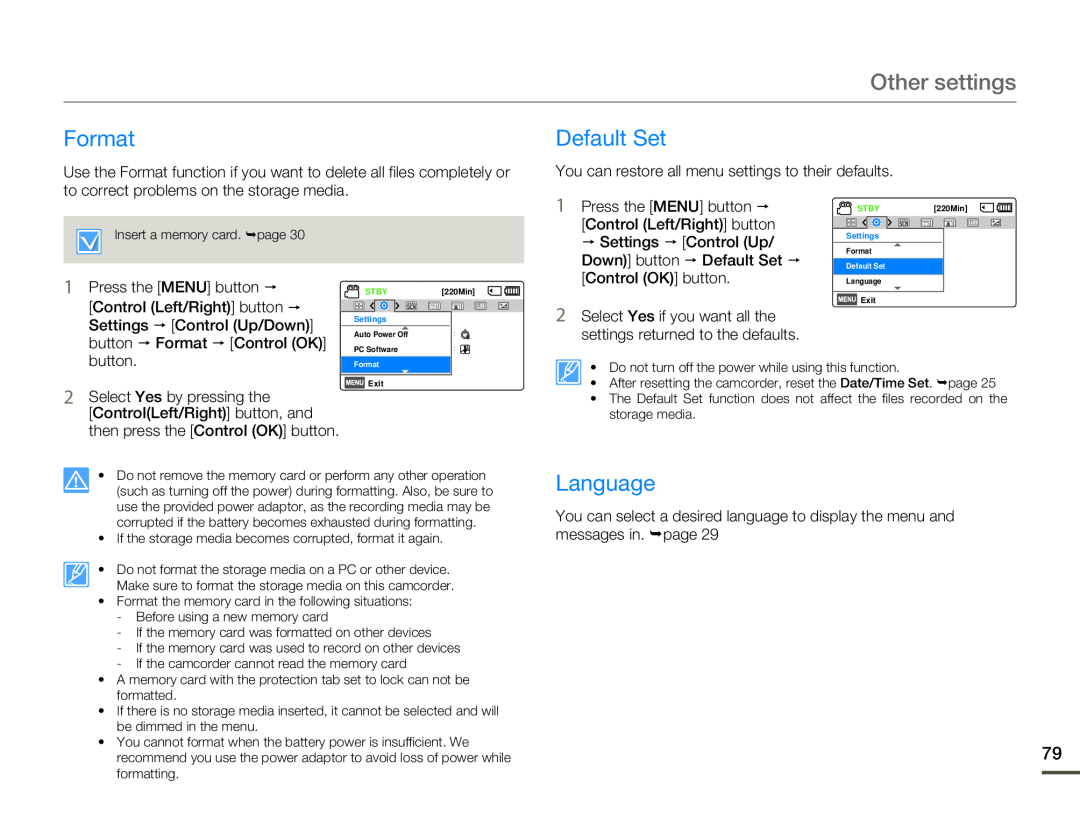 Format
Default Set
Language
 Connecting to a TV
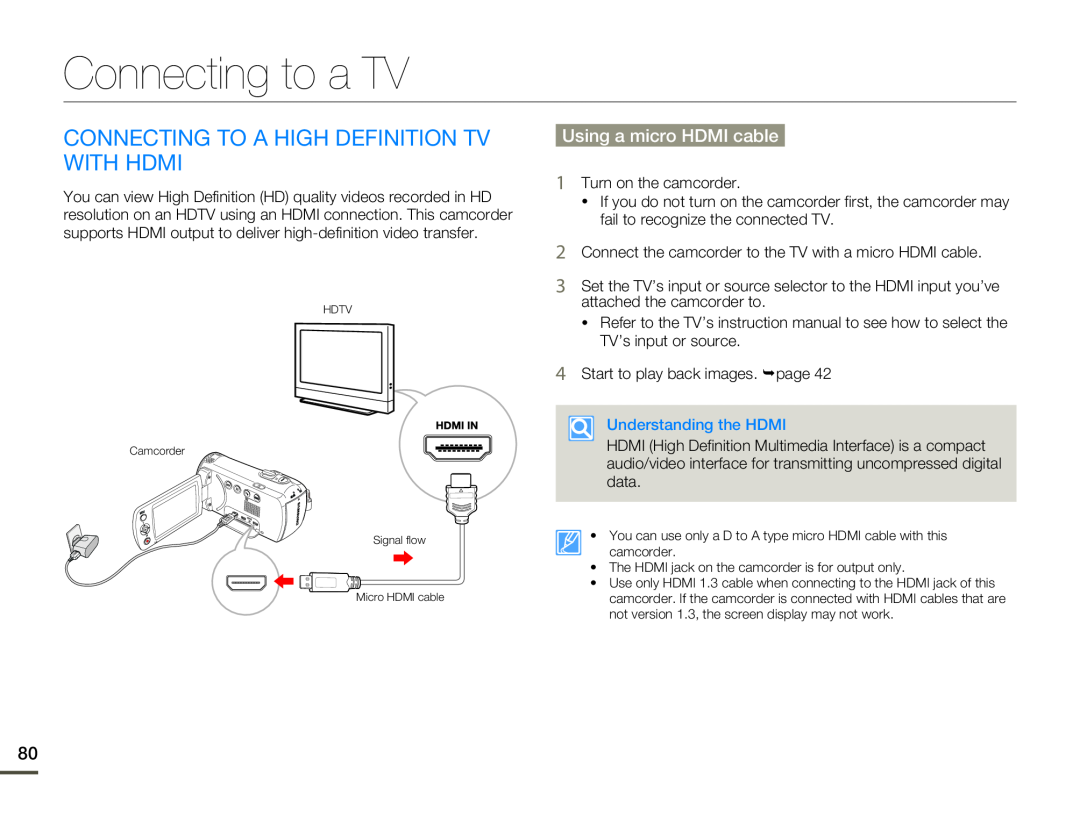
CONNECTING TO A HIGH DEFINITION TV WITH HDMI
Using a micro HDMI cable
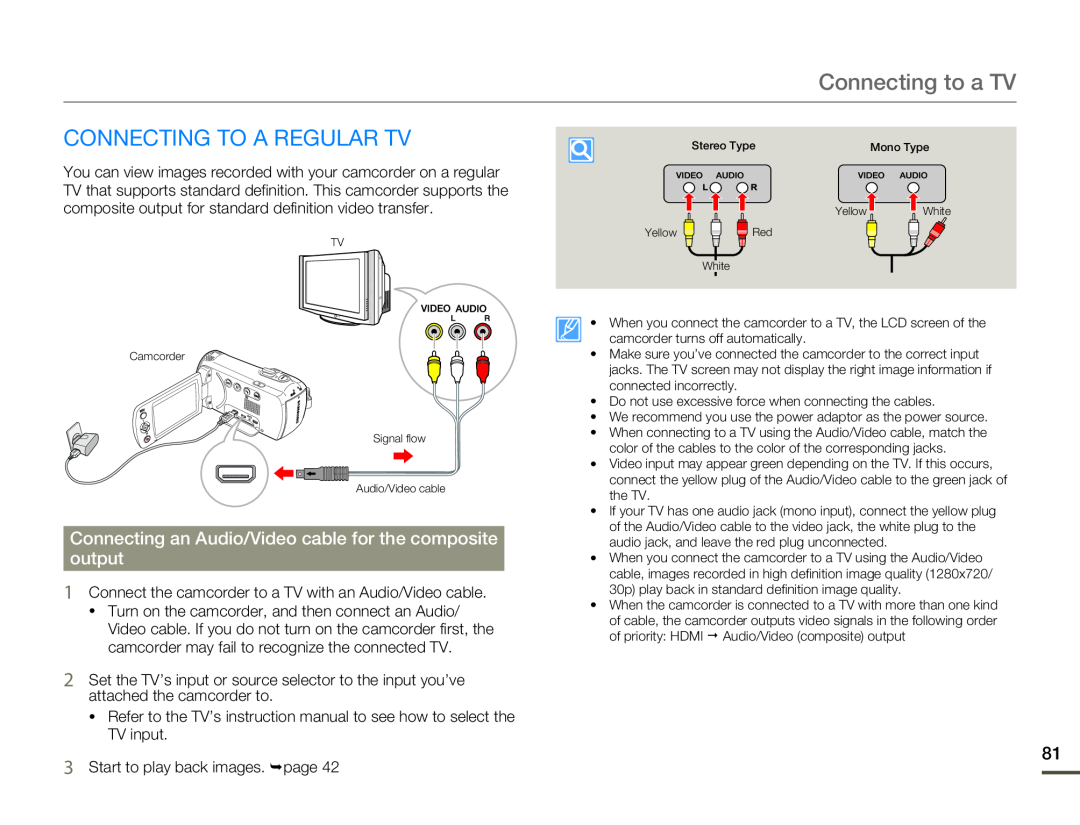 CONNECTING TO A REGULAR TV
Connecting an Audio/Video cable for the composite
output
 VIEWING ON A TV SCREEN
Image display depending on LCD and TV screen ratio
 Dubbing videos
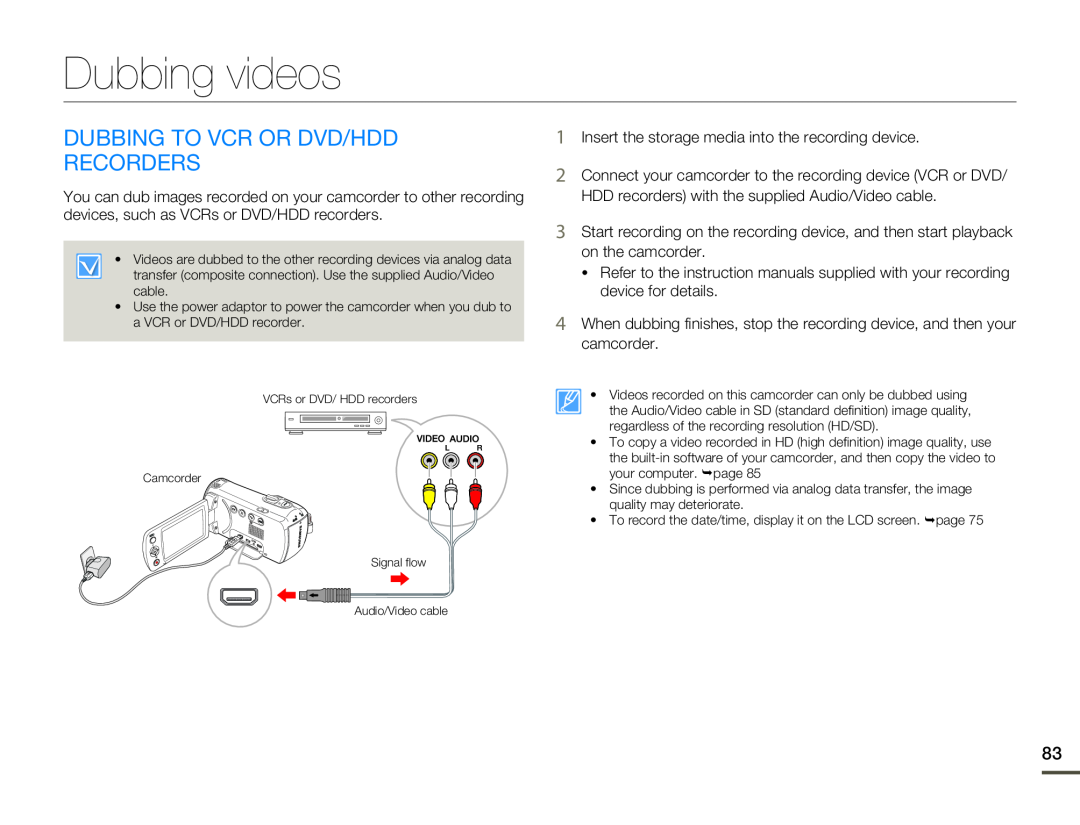
DUBBING TO VCR OR DVD/HDD
RECORDERS
 Using with a windows computer
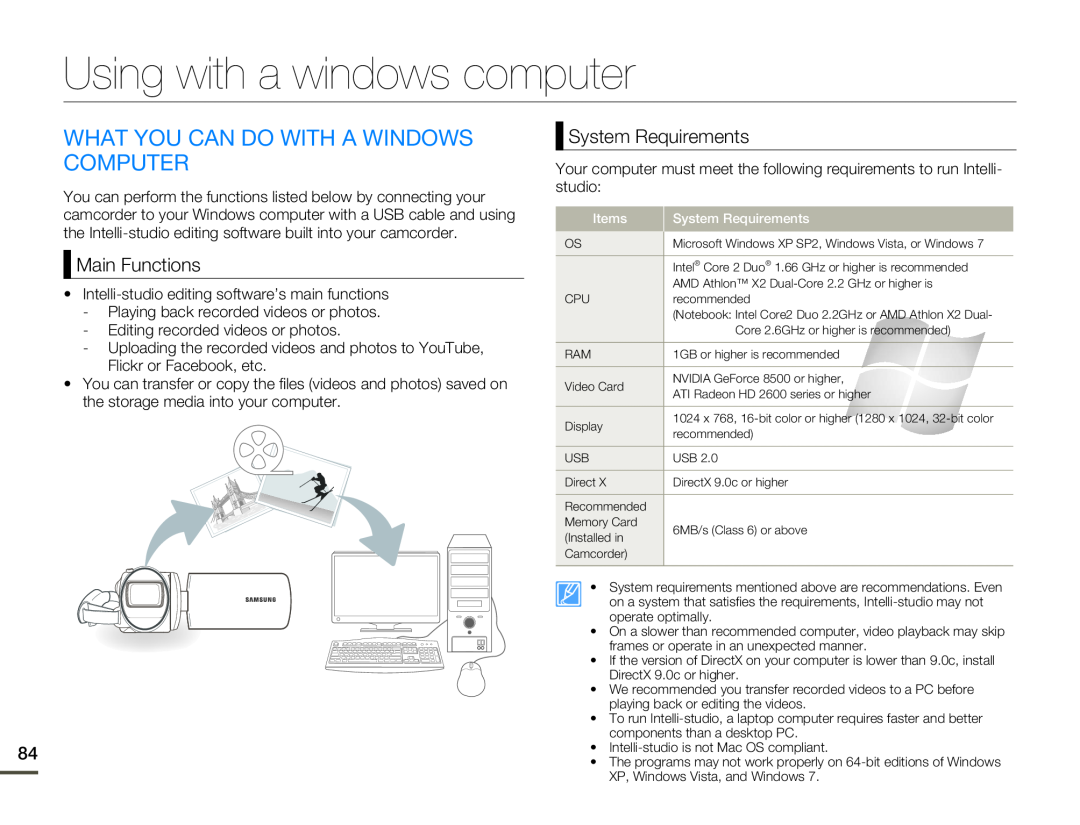
WHAT YOU CAN DO WITH A WINDOWS COMPUTER
Main Functions
System Requirements
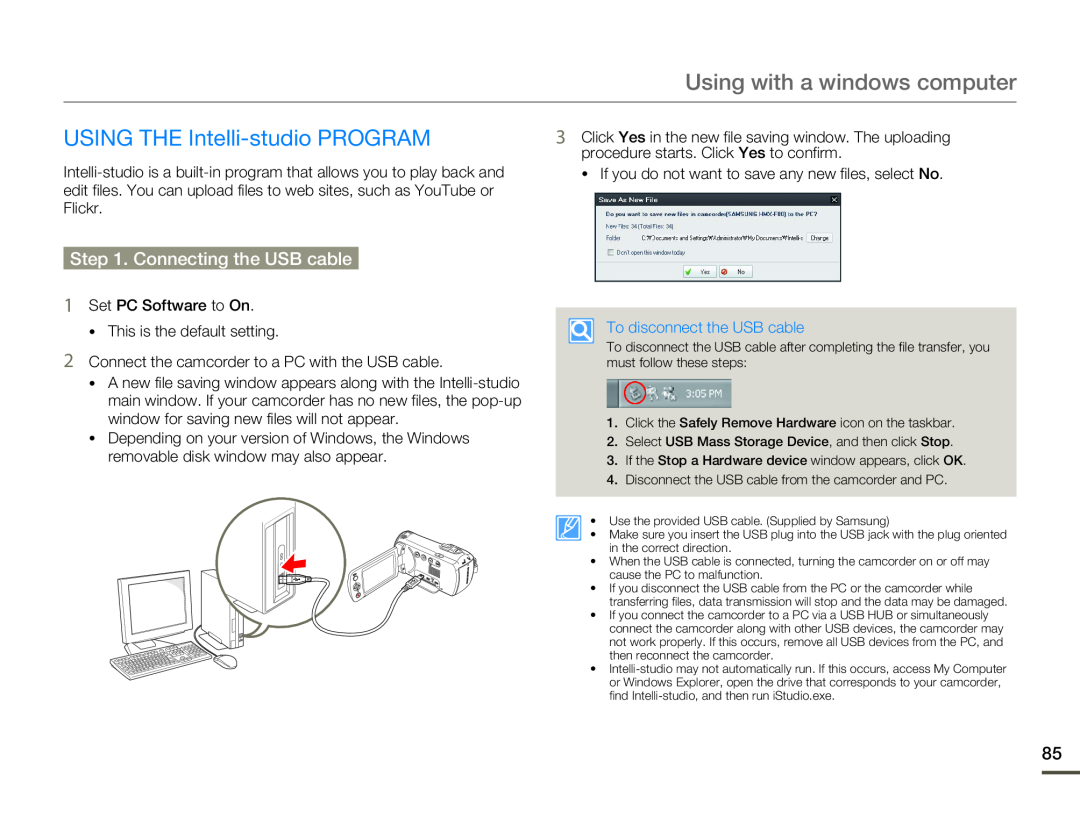 USING THE Intelli-studioPROGRAM
Step 1. Connecting the USB cable
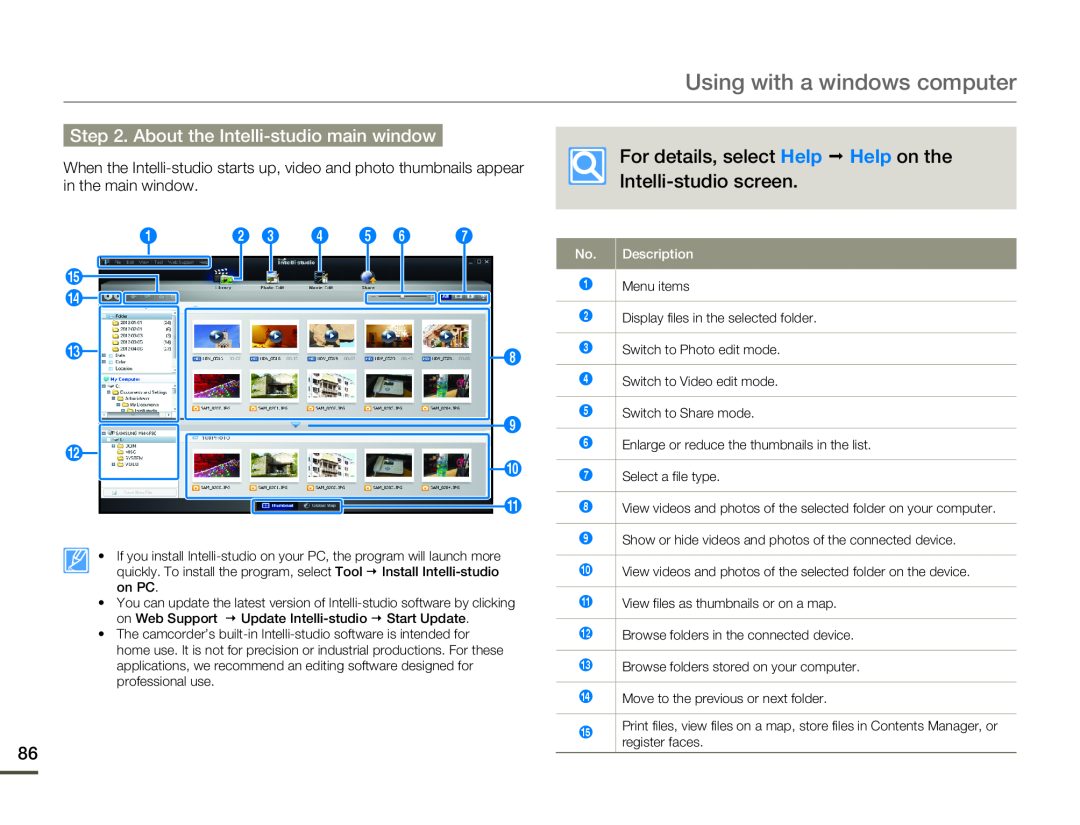 Step 2. About the Intelli-studiomain window
For details, select Help ΠHelp on the
Intelli-studioscreen
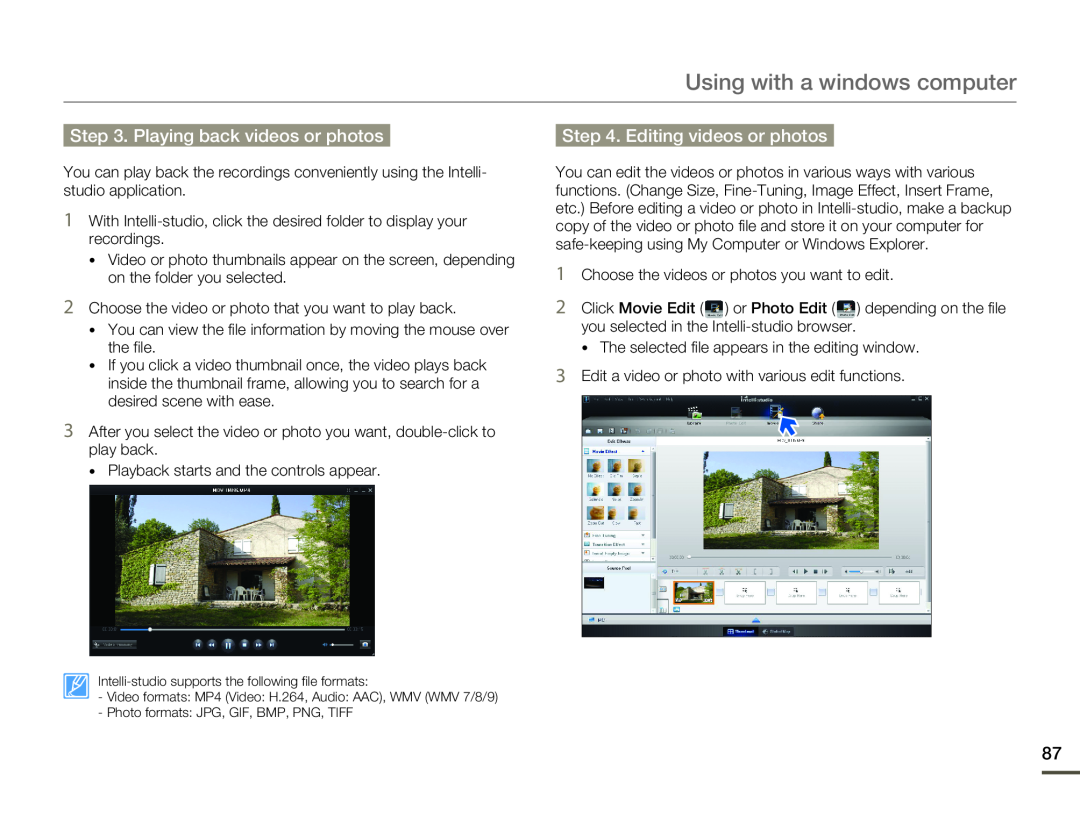 Step 3. Playing back videos or photos
Step 4. Editing videos or photos
 Step 5. Sharing the videos/photos online
 USING AS A REMOVABLE STORAGE DEVICE
Viewing and transferring the contents of storage media
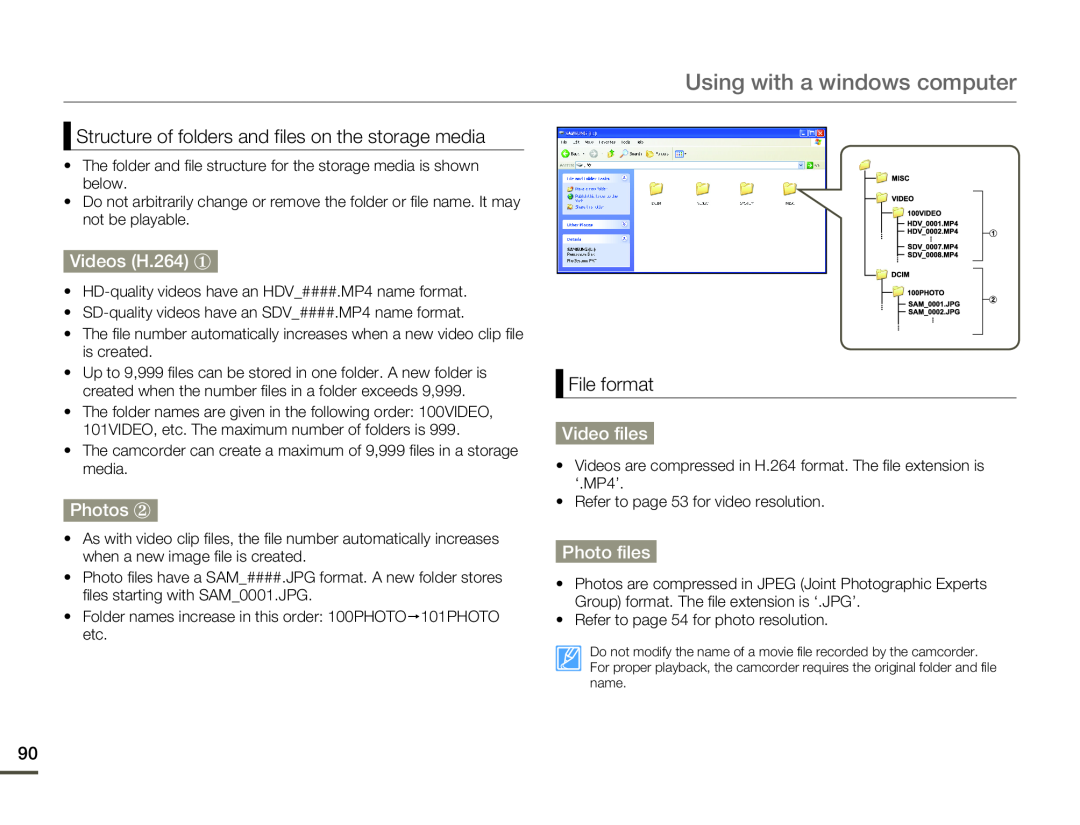 Structure of folders and files on the storage media
Videos (H.264) y
Photos z
File format
Video files
Photo files
 Troubleshooting
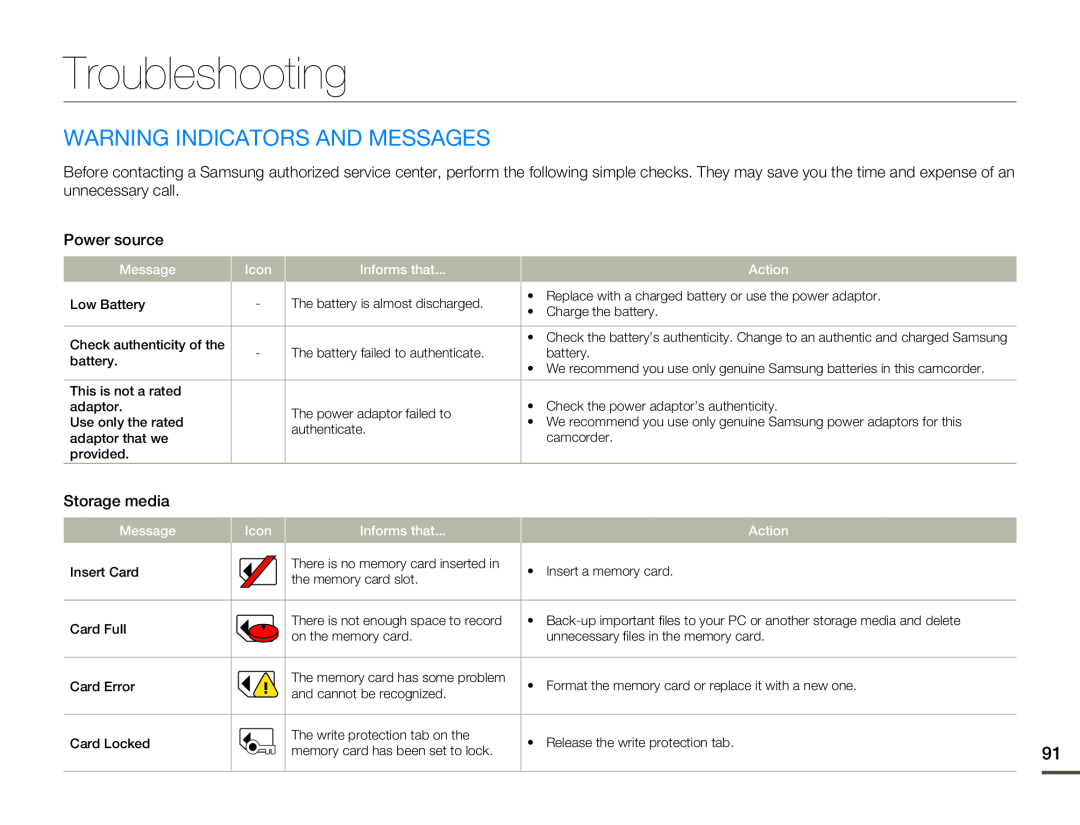
WARNING INDICATORS AND MESSAGES
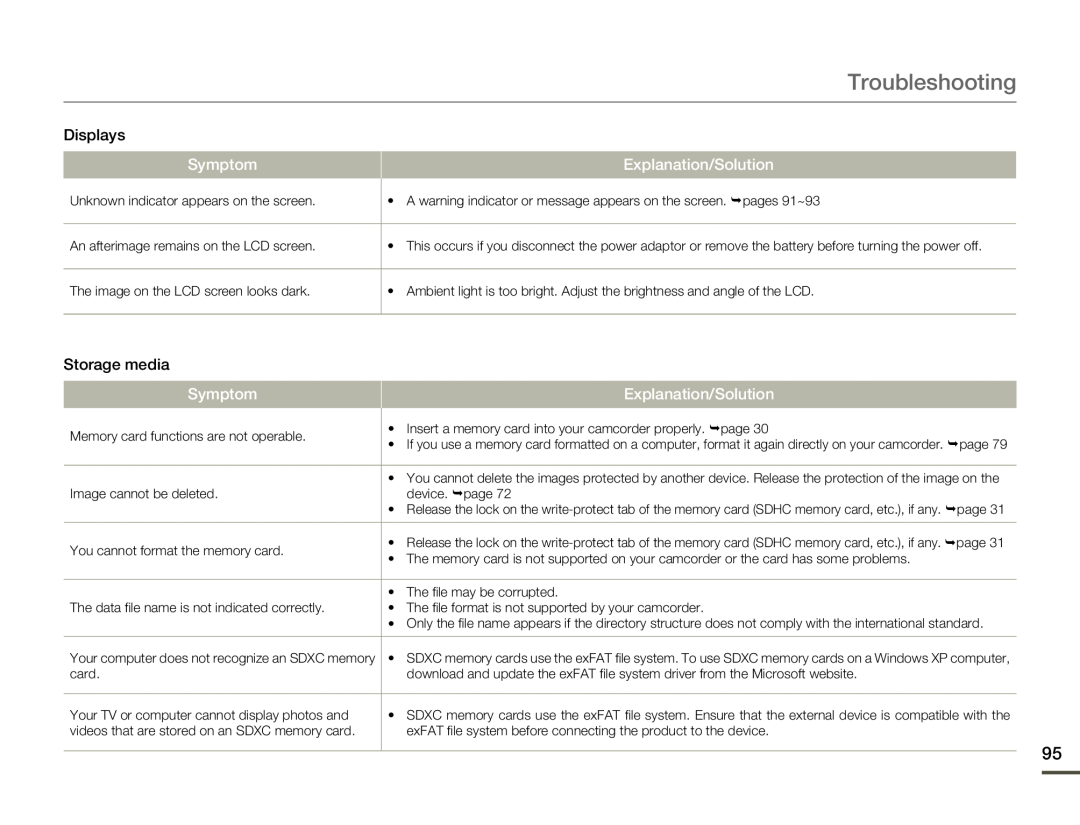
 Troubleshooting
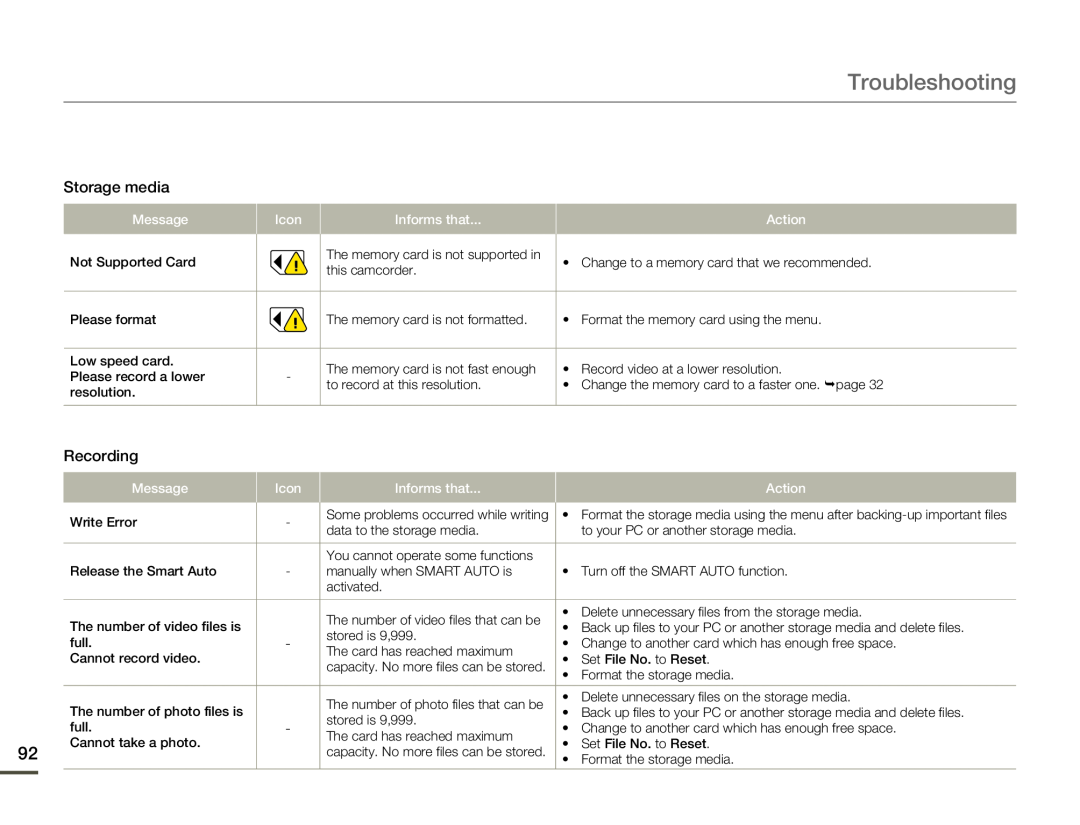
Storage media
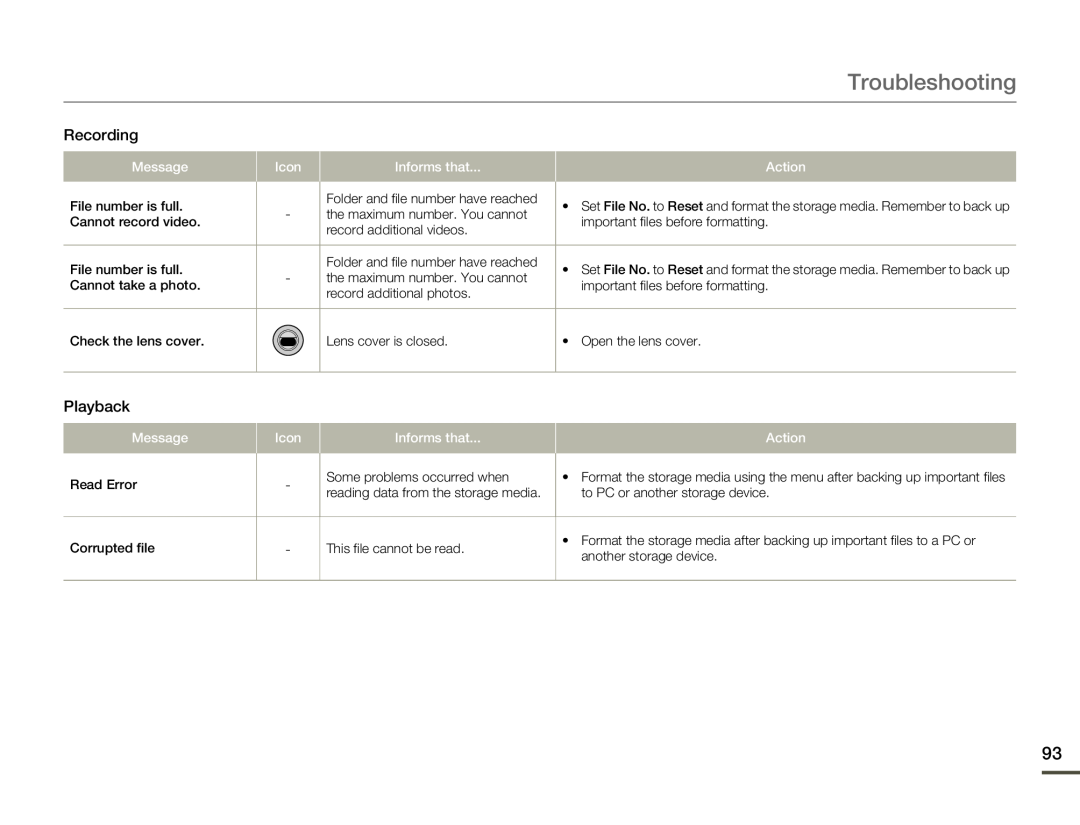
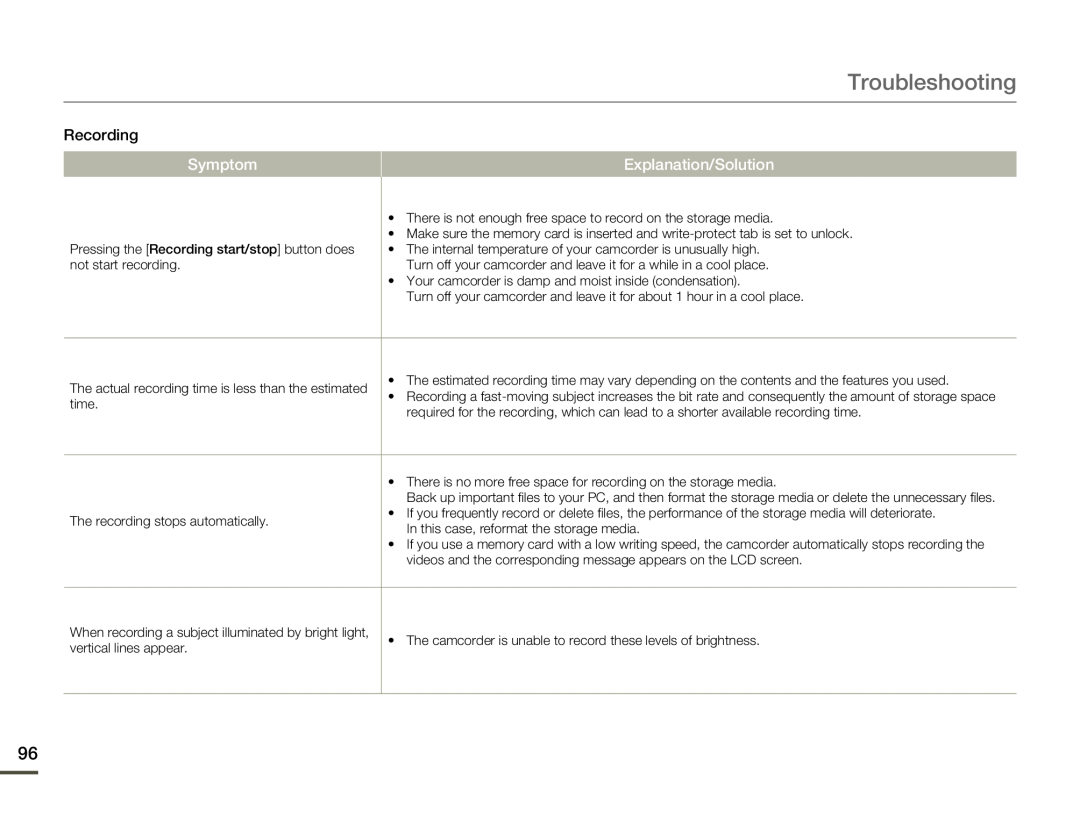
Recording
 Troubleshooting
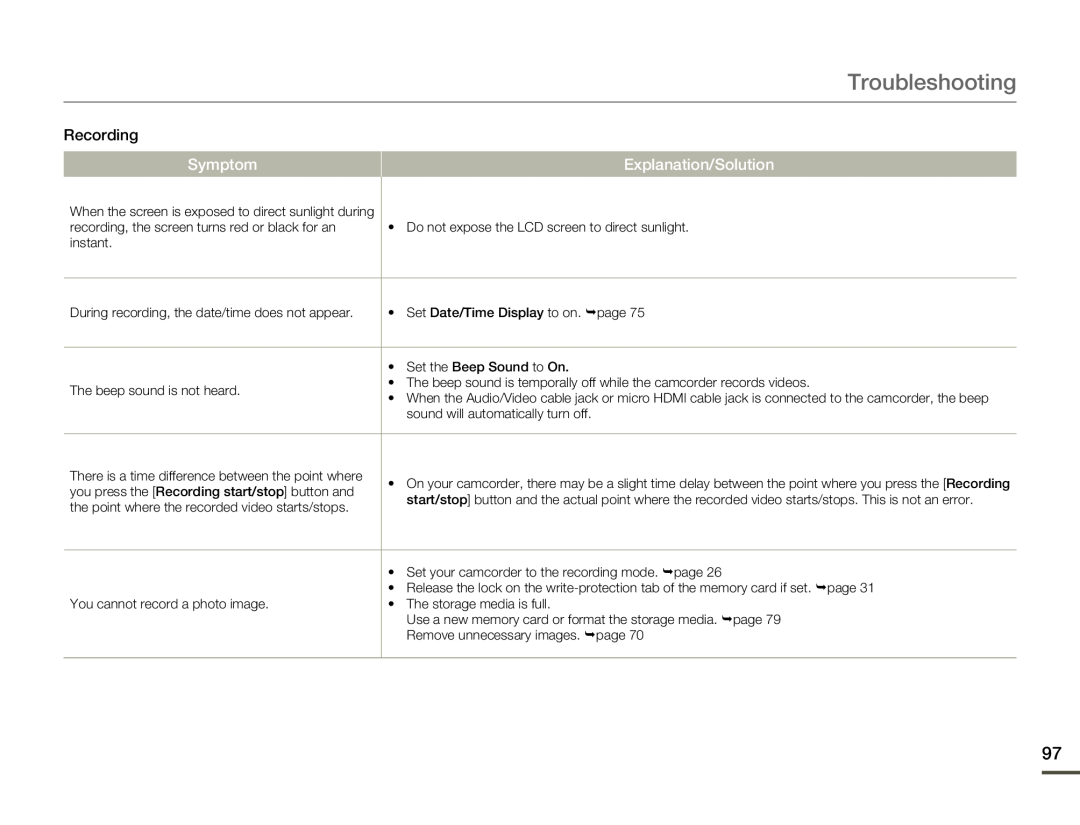
Recording
Playback
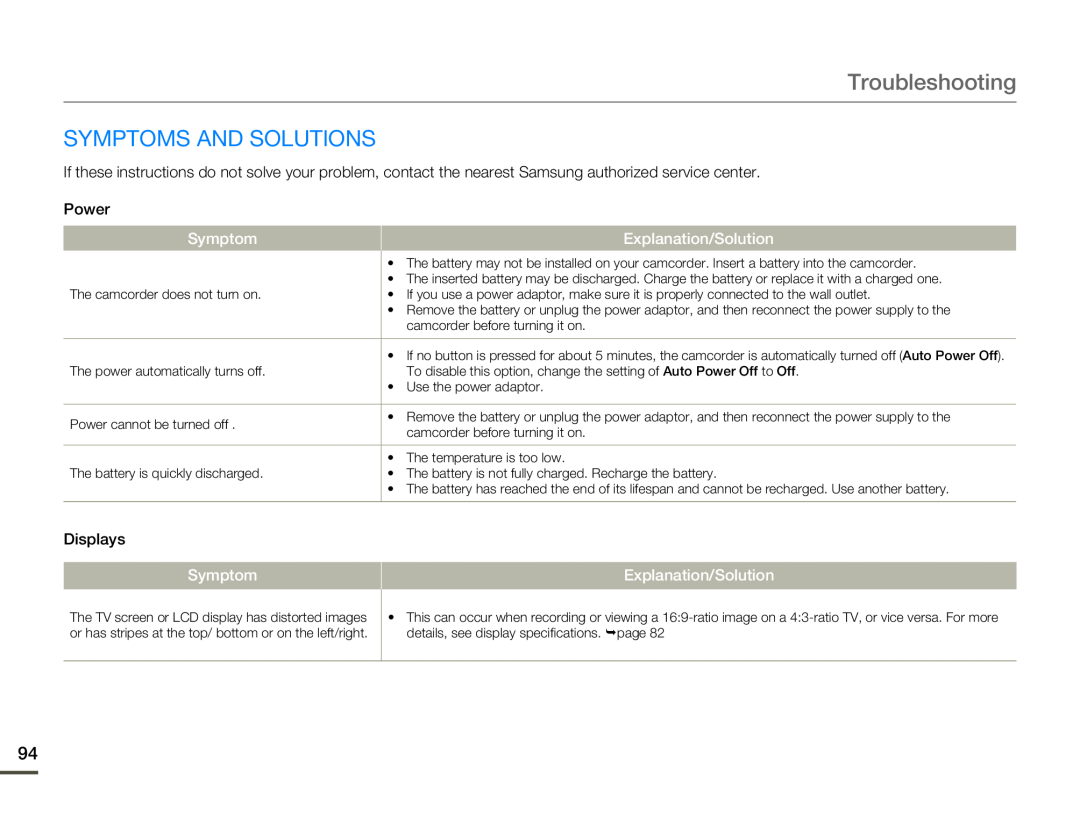 SYMPTOMS AND SOLUTIONS
 Troubleshooting
 Troubleshooting
 Troubleshooting
 Troubleshooting
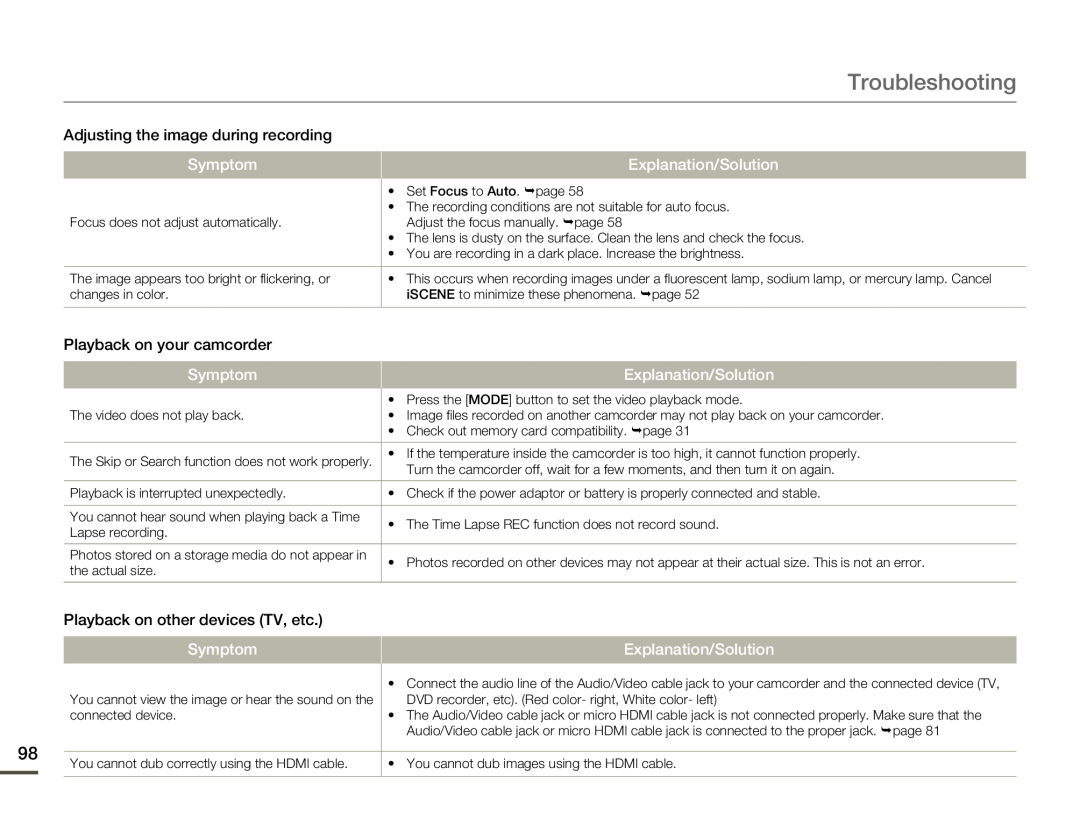
Adjusting the image during recording
Symptom
Explanation/Solution
Playback on your camcorder
Symptom
Explanation/Solution
Playback on other devices (TV, etc.)
Symptom
Explanation/Solution
 Troubleshooting
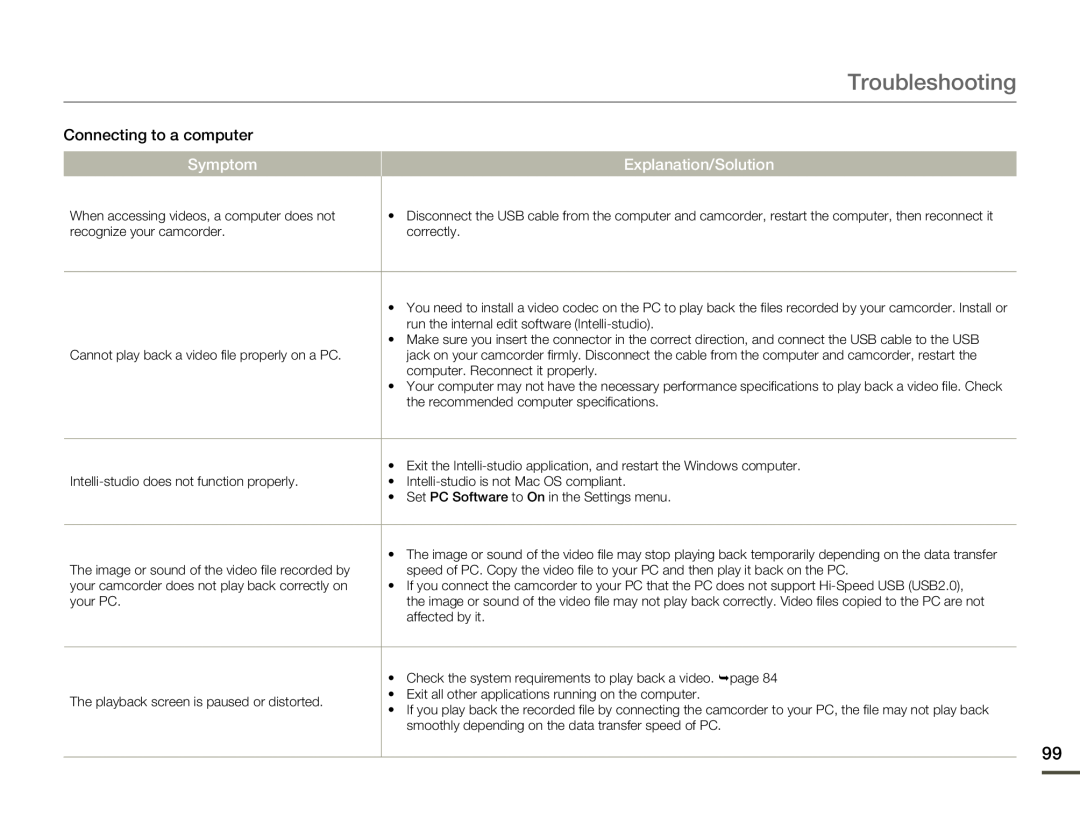
Connecting to a computer
Symptom
Explanation/Solution
 Troubleshooting
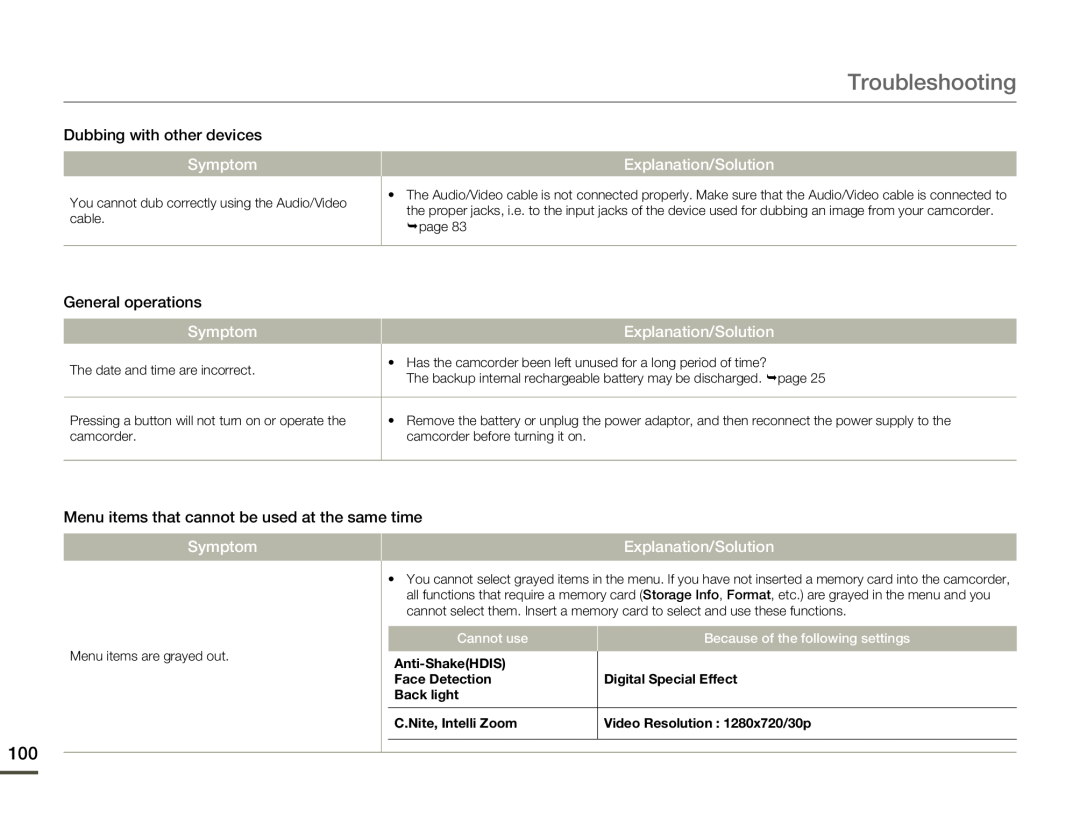
Dubbing with other devices
Symptom
Explanation/Solution
General operations
Symptom
Explanation/Solution
Menu items that cannot be used at the same time
Symptom
Explanation/Solution
 Maintenance & additional information
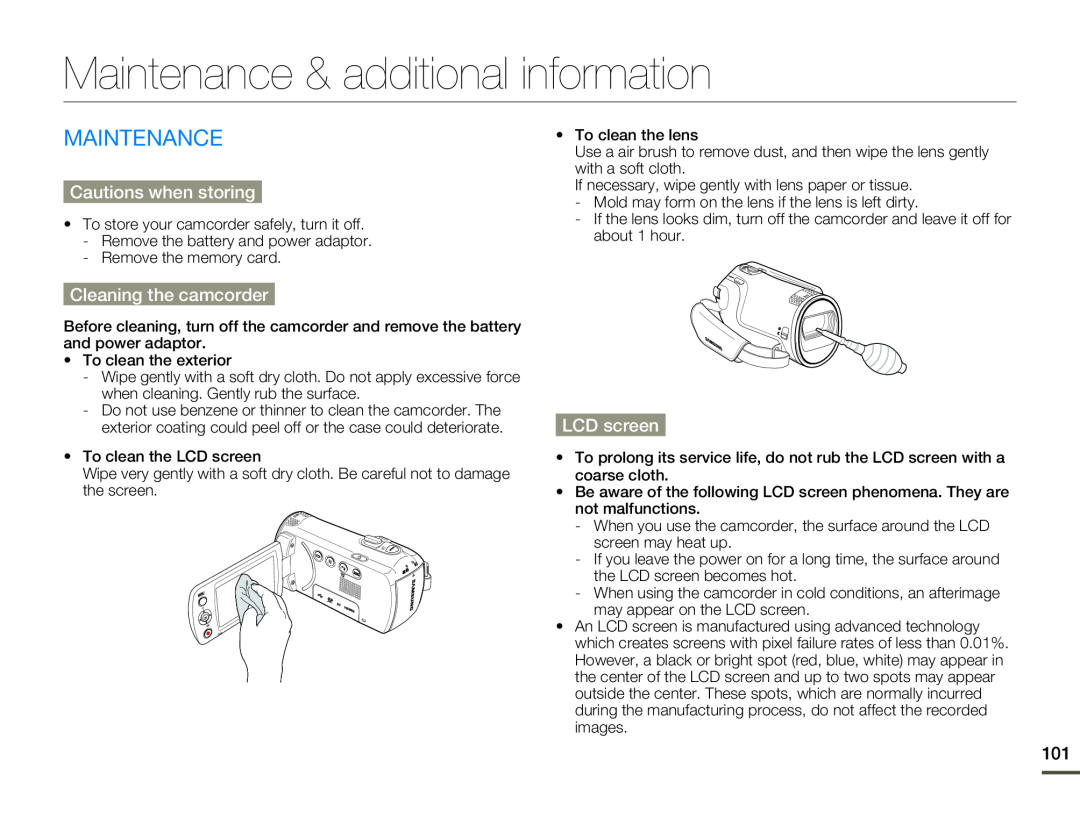
MAINTENANCE
Cautions when storing
Cleaning the camcorder
LCD screen
 Maintenance & additional information
USING YOUR CAMCORDER ABROAD
Power sources
On TV color systems
NTSC-compatiblecountries/regions
PAL-compatiblecountries/regions
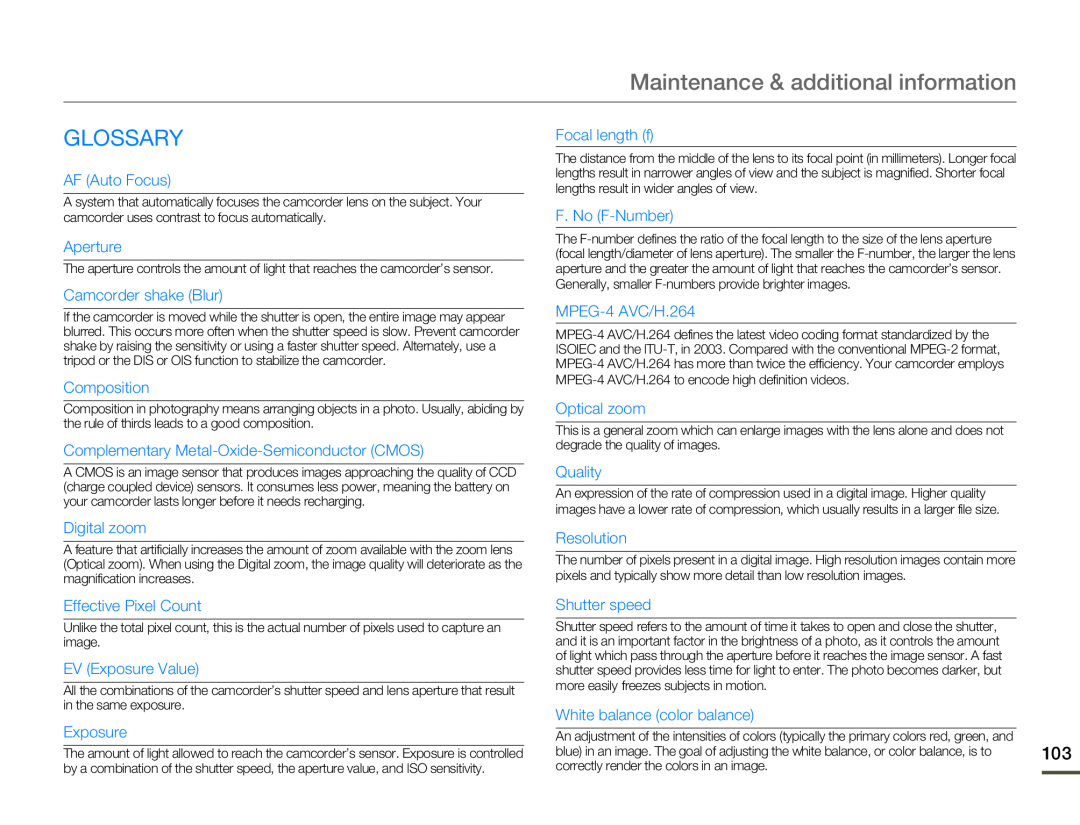 GLOSSARY
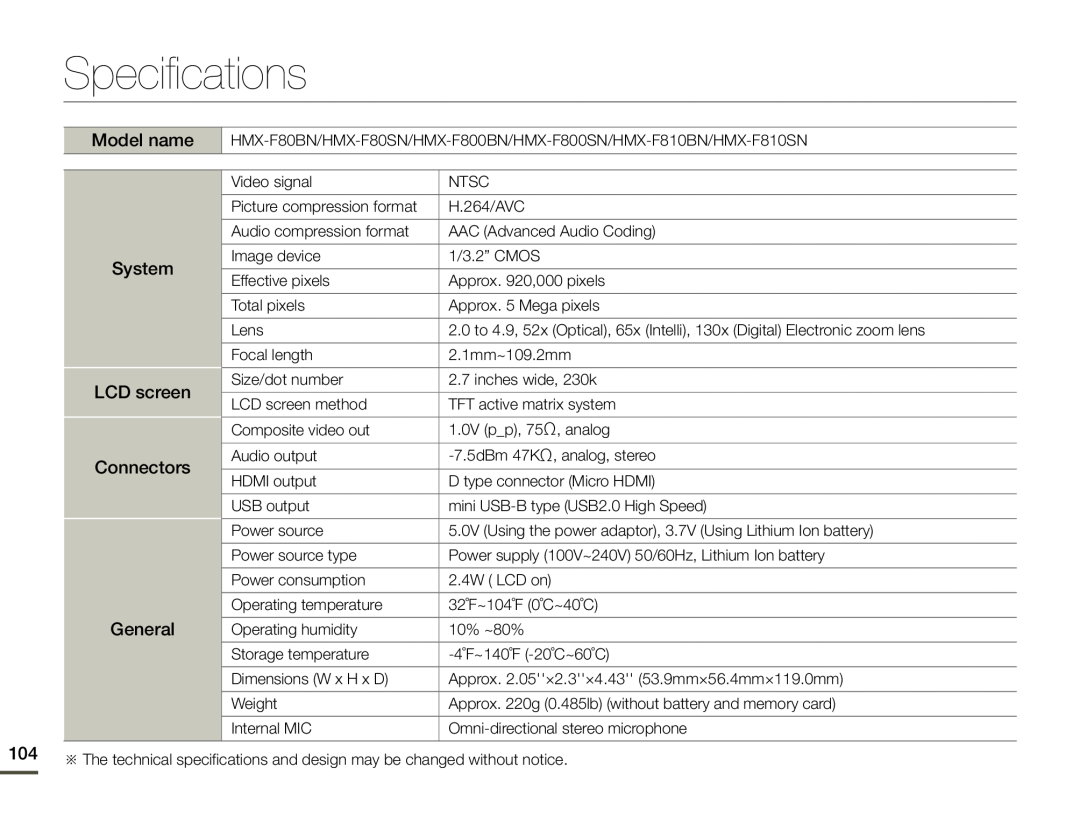 Specifications
Model name
System
Connectors
General
 Warranty
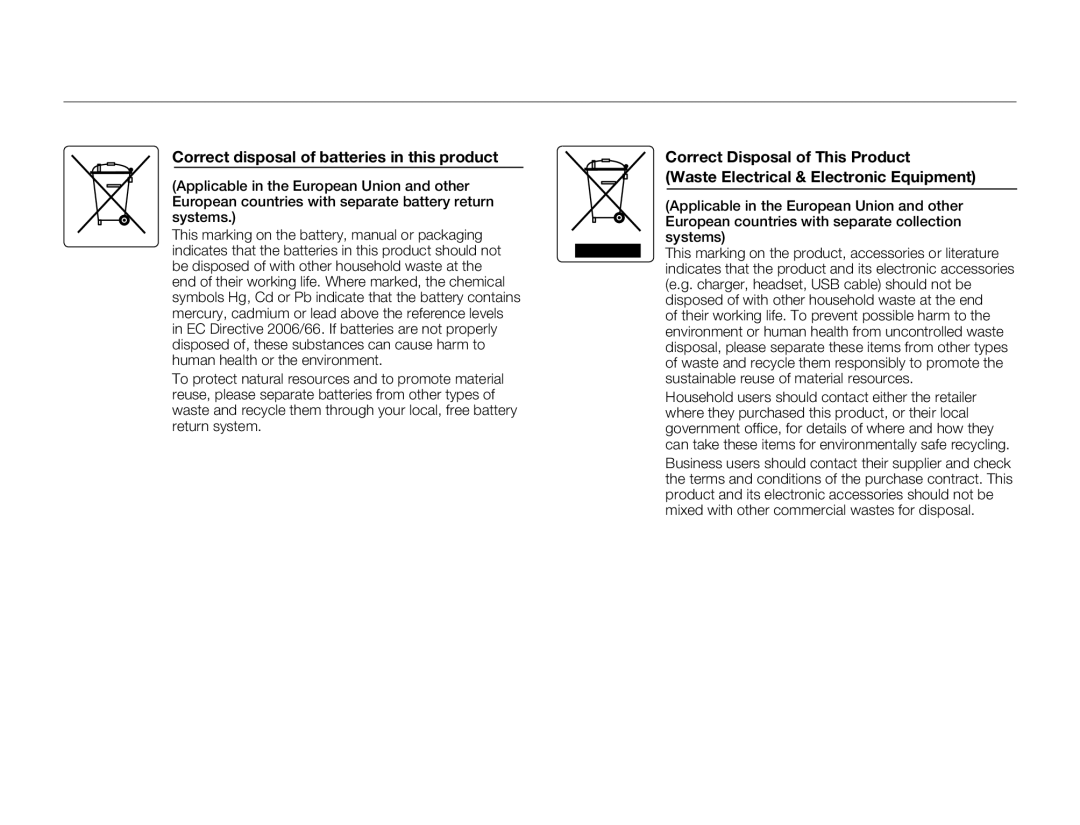 Correct disposal of batteries in this product
Correct Disposal of This Product
(Waste Electrical & Electronic Equipment)
 QUESTIONS OR COMMENTS