 Please read this manual before operating your device
and keep it for future reference
 Legal Notices
Open Source Software
Modification of Software
 Diagnostic Software
Samsung Knox
 Do you have questions about your Samsung Mobile Device
Legal Information
 Table of Contents
Calling
Make and Answer Calls
Applications
Camera and Video
Settings
How to Use Settings
Wi-Fi
Bluetooth
Airplane Mode
Data Usage
Location Settings
More Networks
Nearby Devices
Printing
Screen Mirroring
Sounds and Notifications
Display Settings
Wallpaper Settings
Lock Screen
Multi Window Settings
Notification Panel
Toolbox
Motions
Accessibility
Users
Private Mode
Finger Scanner
Accounts
Backup and Reset
 Application Manager
Default Applications
Application Settings
 Getting Started
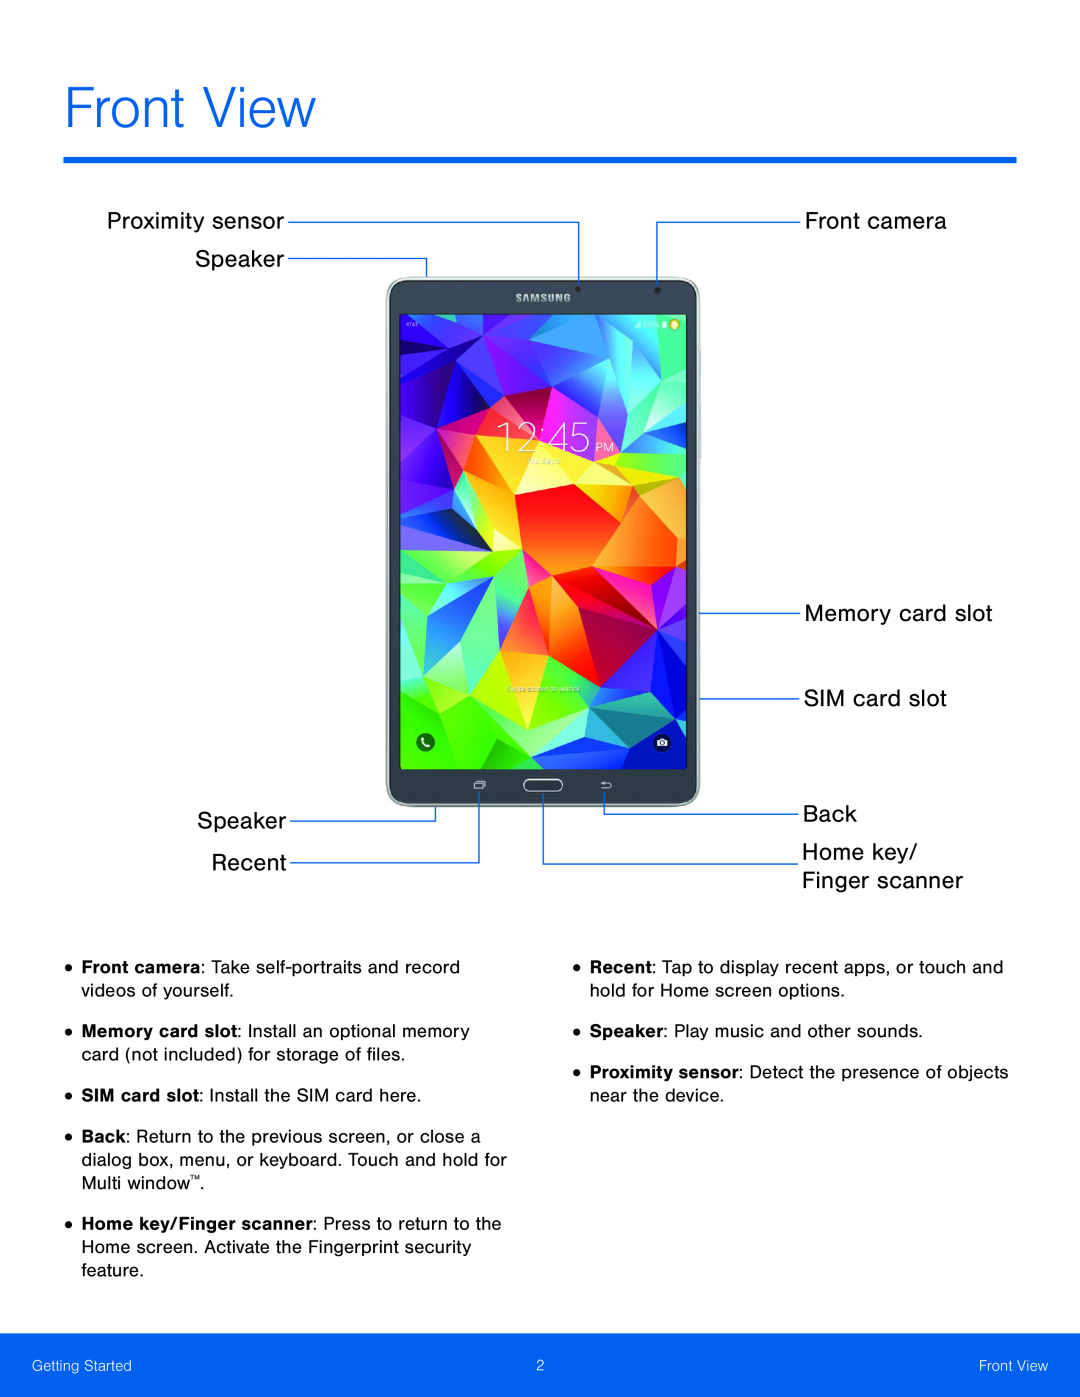 Front View
Proximity sensor
Speaker
Recent
Front camera
Memory card slot
SIM card slot
Back
Home key
Finger scanner
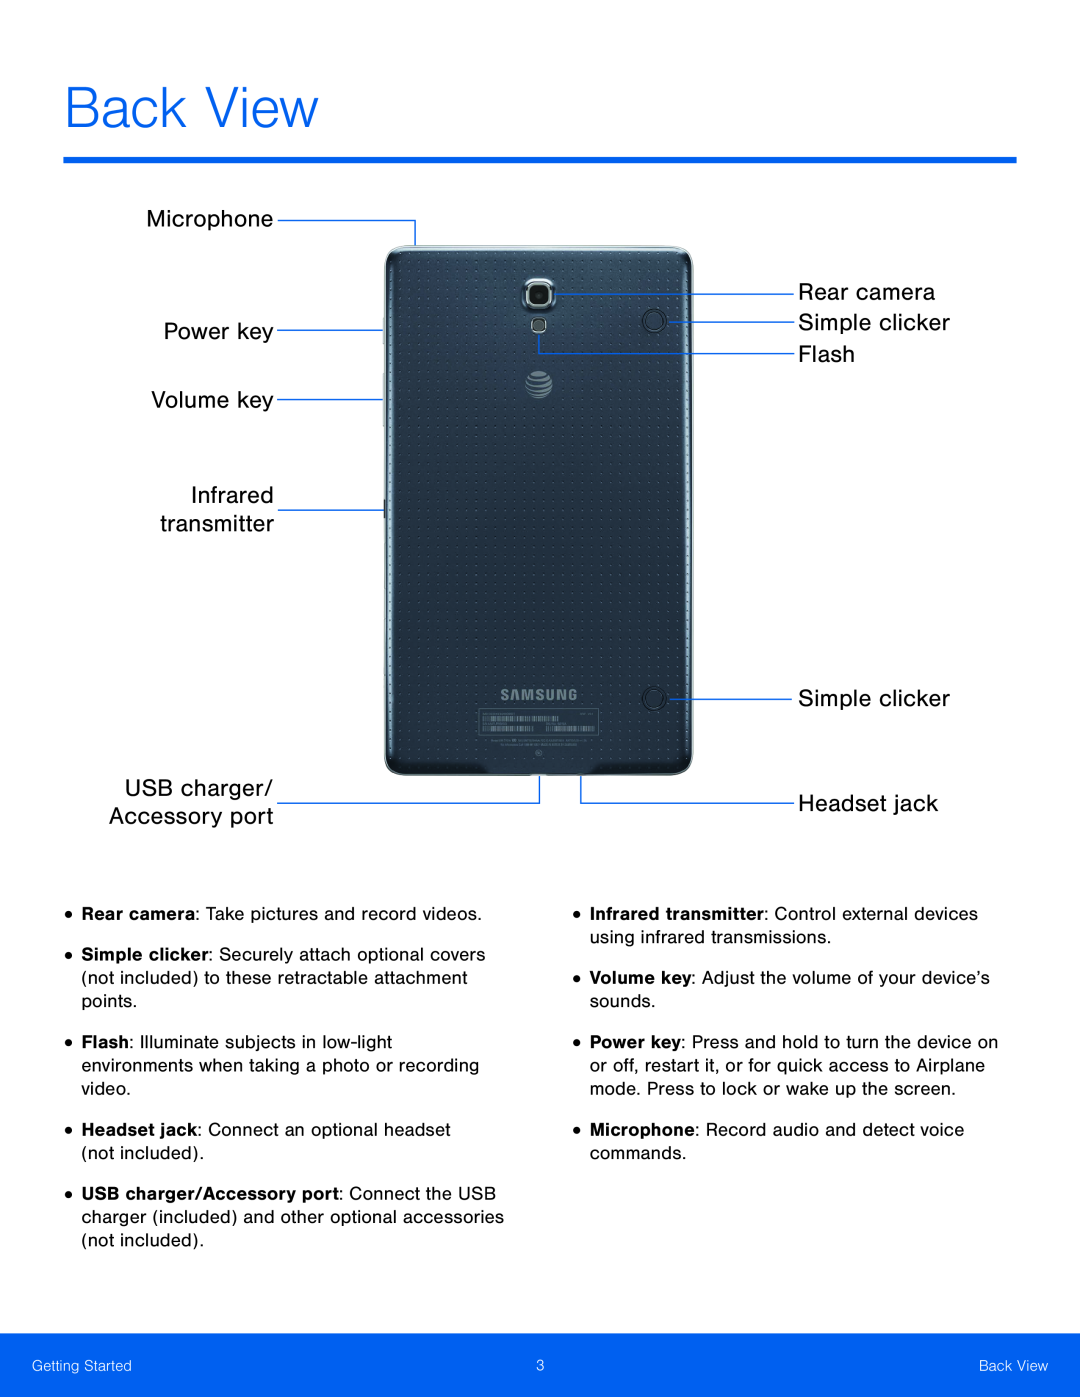 Back View
Microphone
Power key
Volume key
Infrared transmitter
USB charger
Accessory port
Rear camera
Simple clicker
Flash
Headset jack
 Assemble Your Device
Assemble Your Device
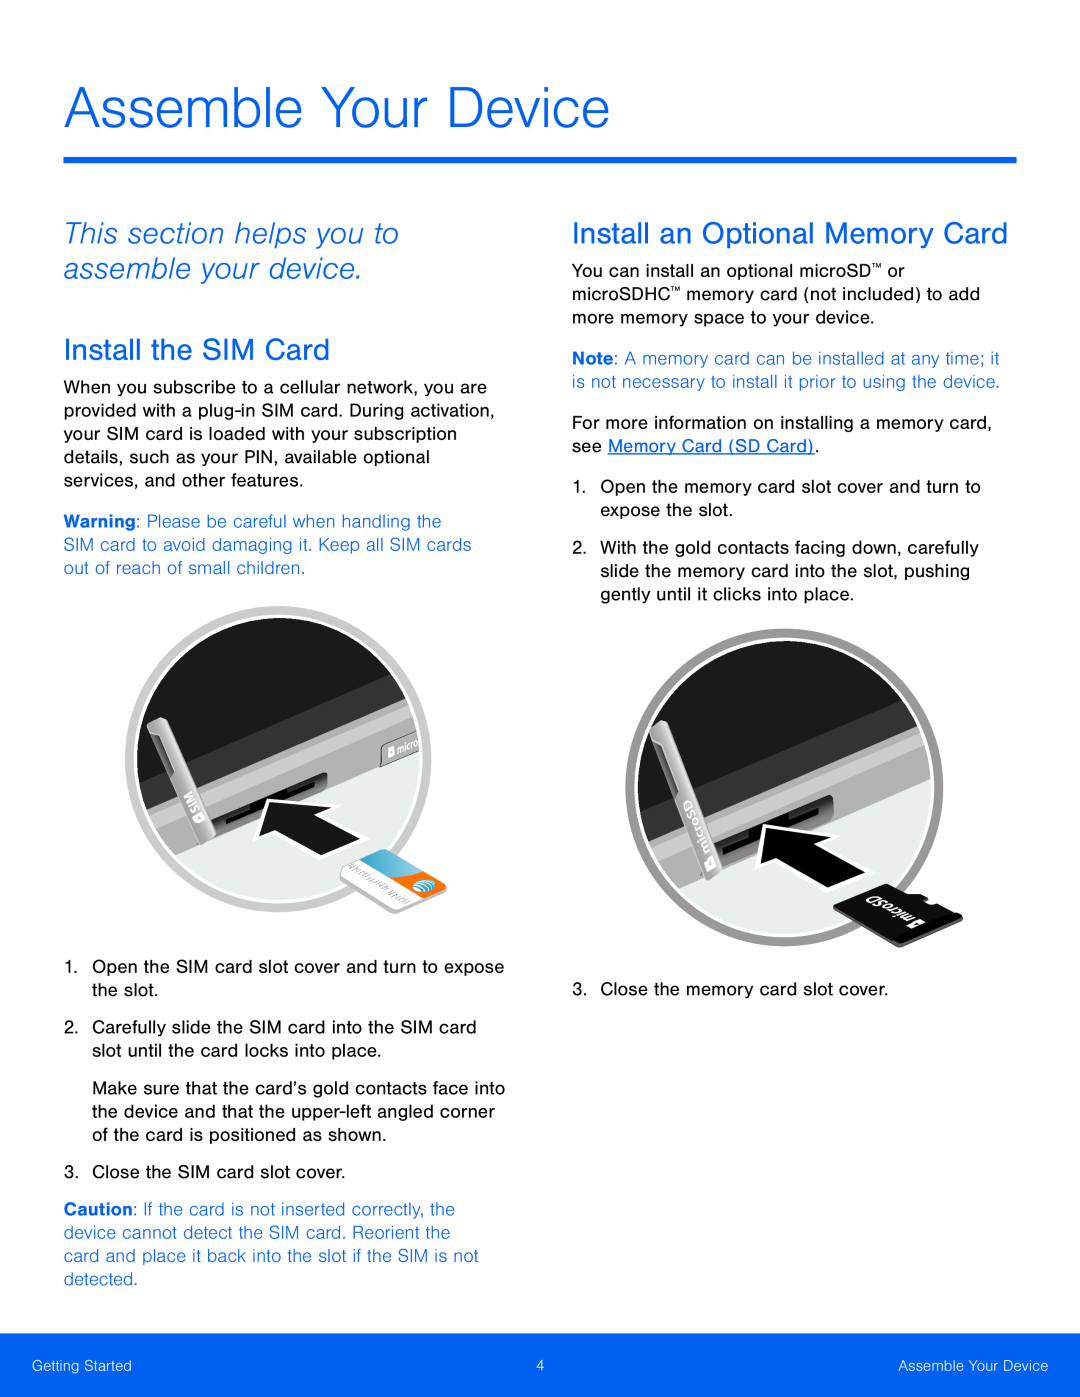
This section helps you to assemble your device
1.Open the SIM card slot cover and turn to expose the slot
3.Close the SIM card slot cover
For more information on installing a memory card, see Memory Card (SD Card)
1.Open the memory card slot cover and turn to expose the slot
3. Close the memory card slot cover
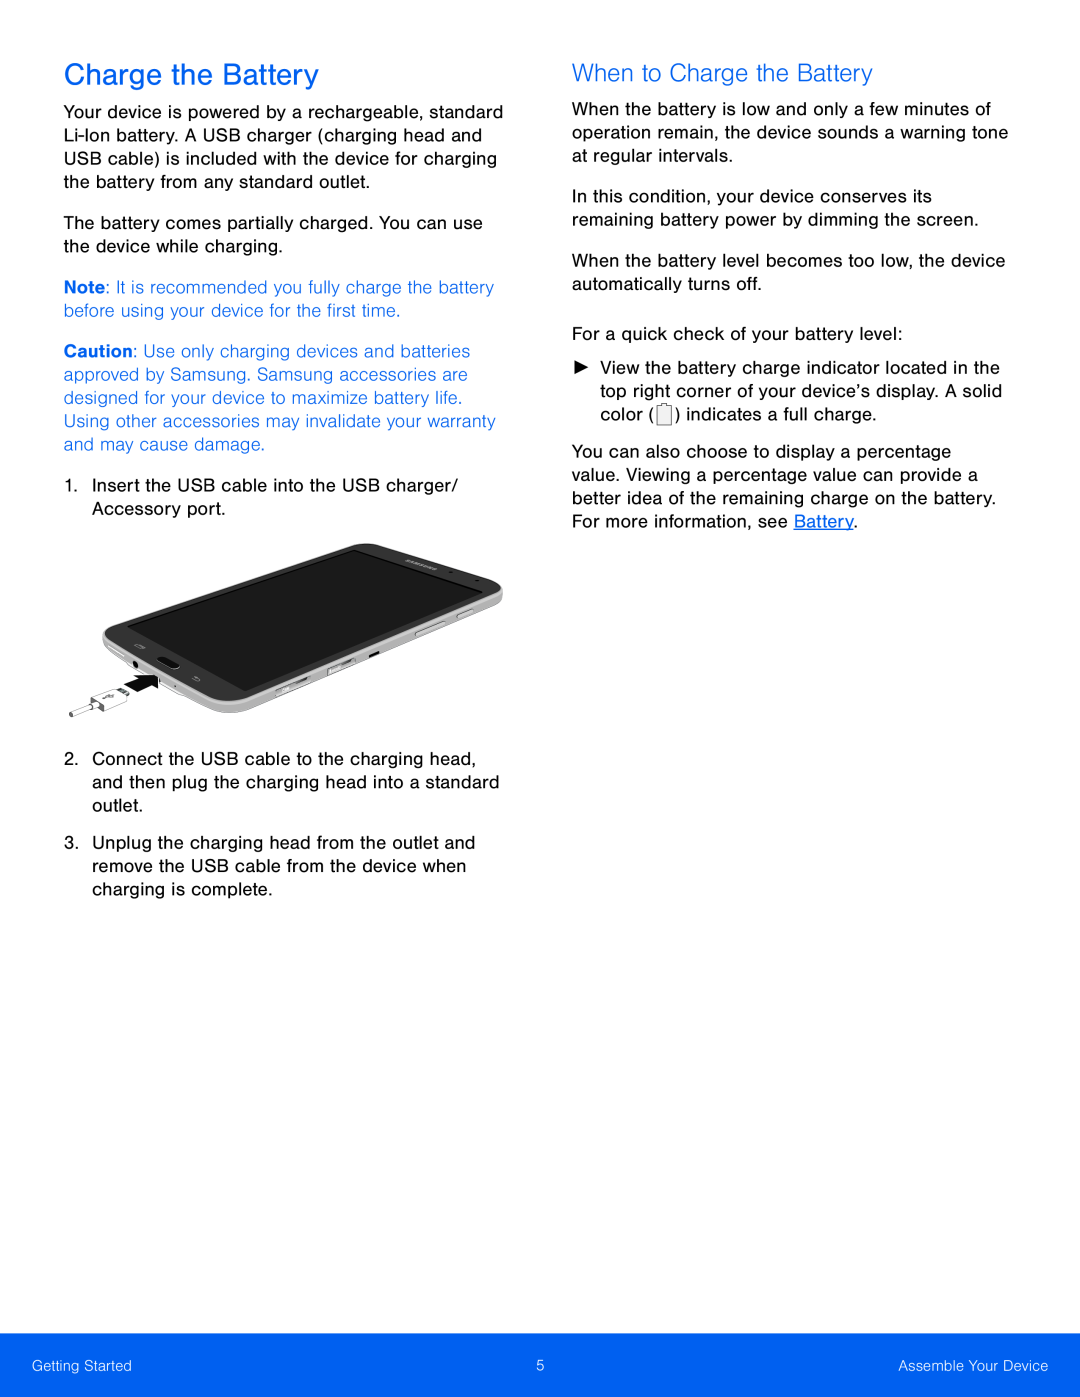 When to Charge the Battery
 Set Up Your Device
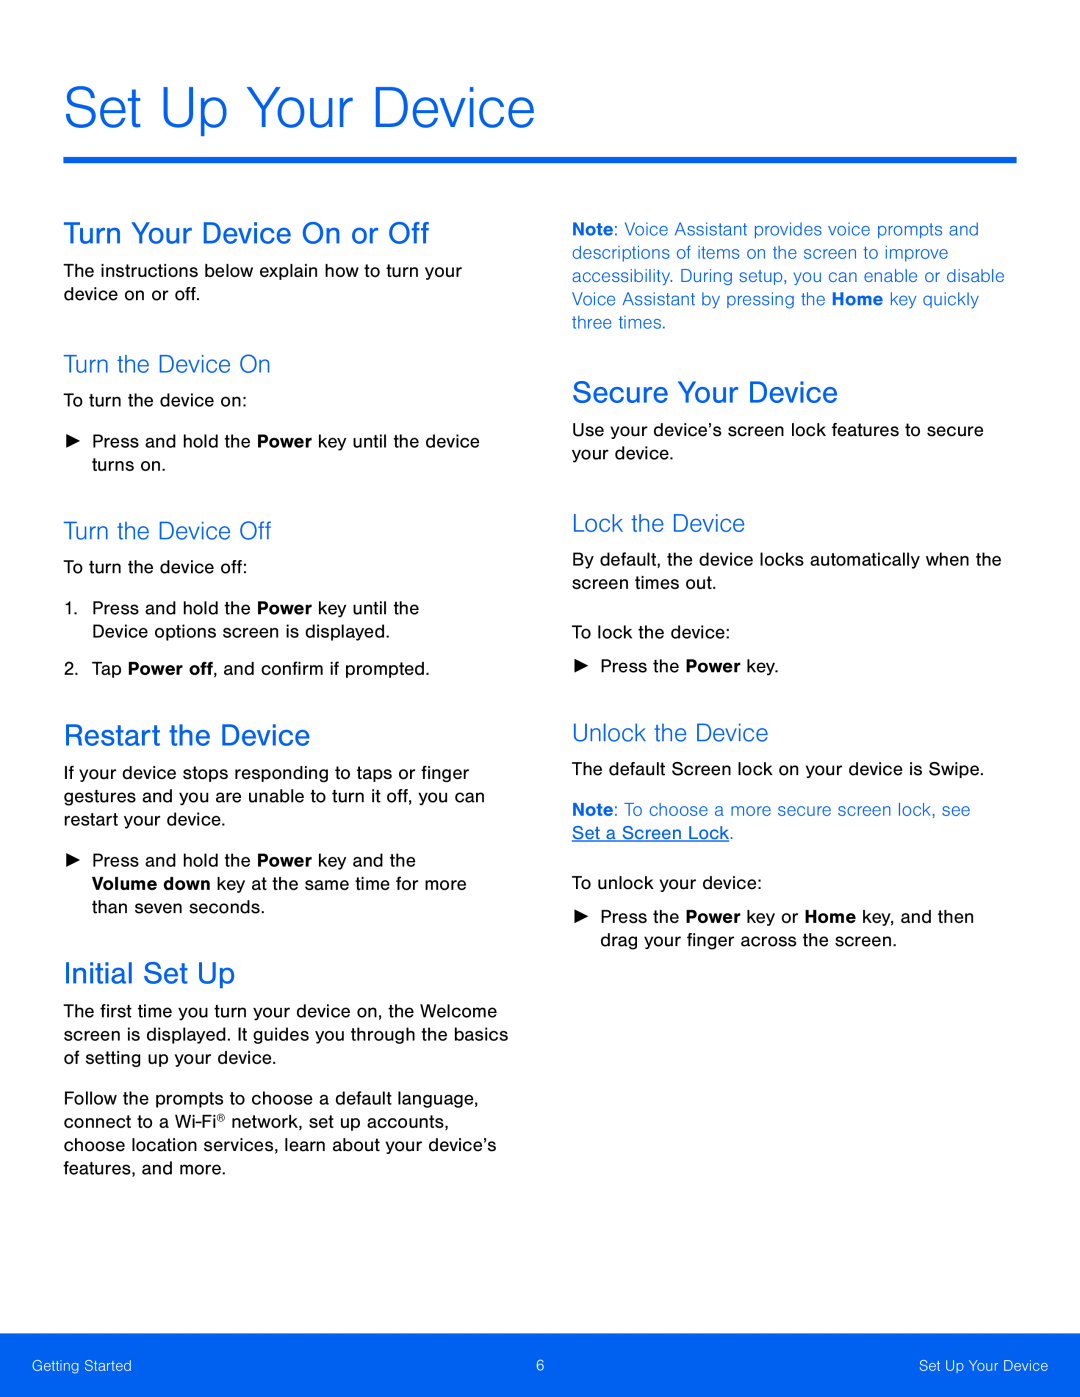
Turn the Device On
Turn the Device Off
Lock the Device
Unlock the Device
 Set Up Accounts on Your Device
 Know Your Device
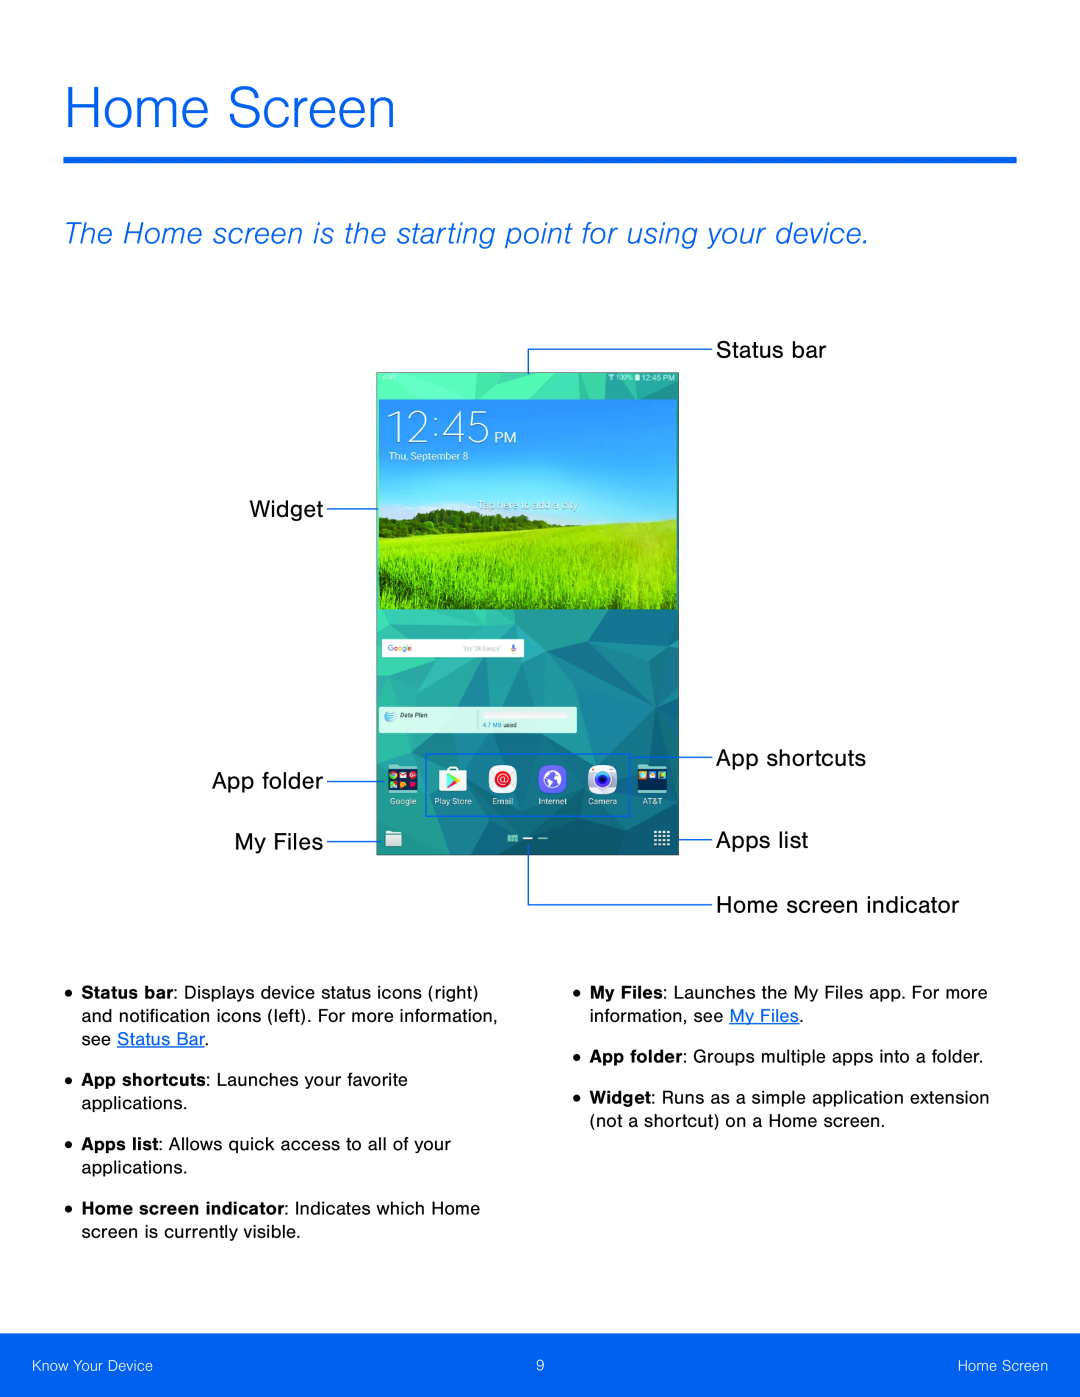 Home Screen
Widget
App folder
My Files
Status bar
App shortcuts
Apps list
Home screen indicator
 Add a Widget to a Home Screen
Remove a Widget
 Add a Shortcut to a Home Screen
Remove a Shortcut
Add a Folder to a Home Screen
Use Folders
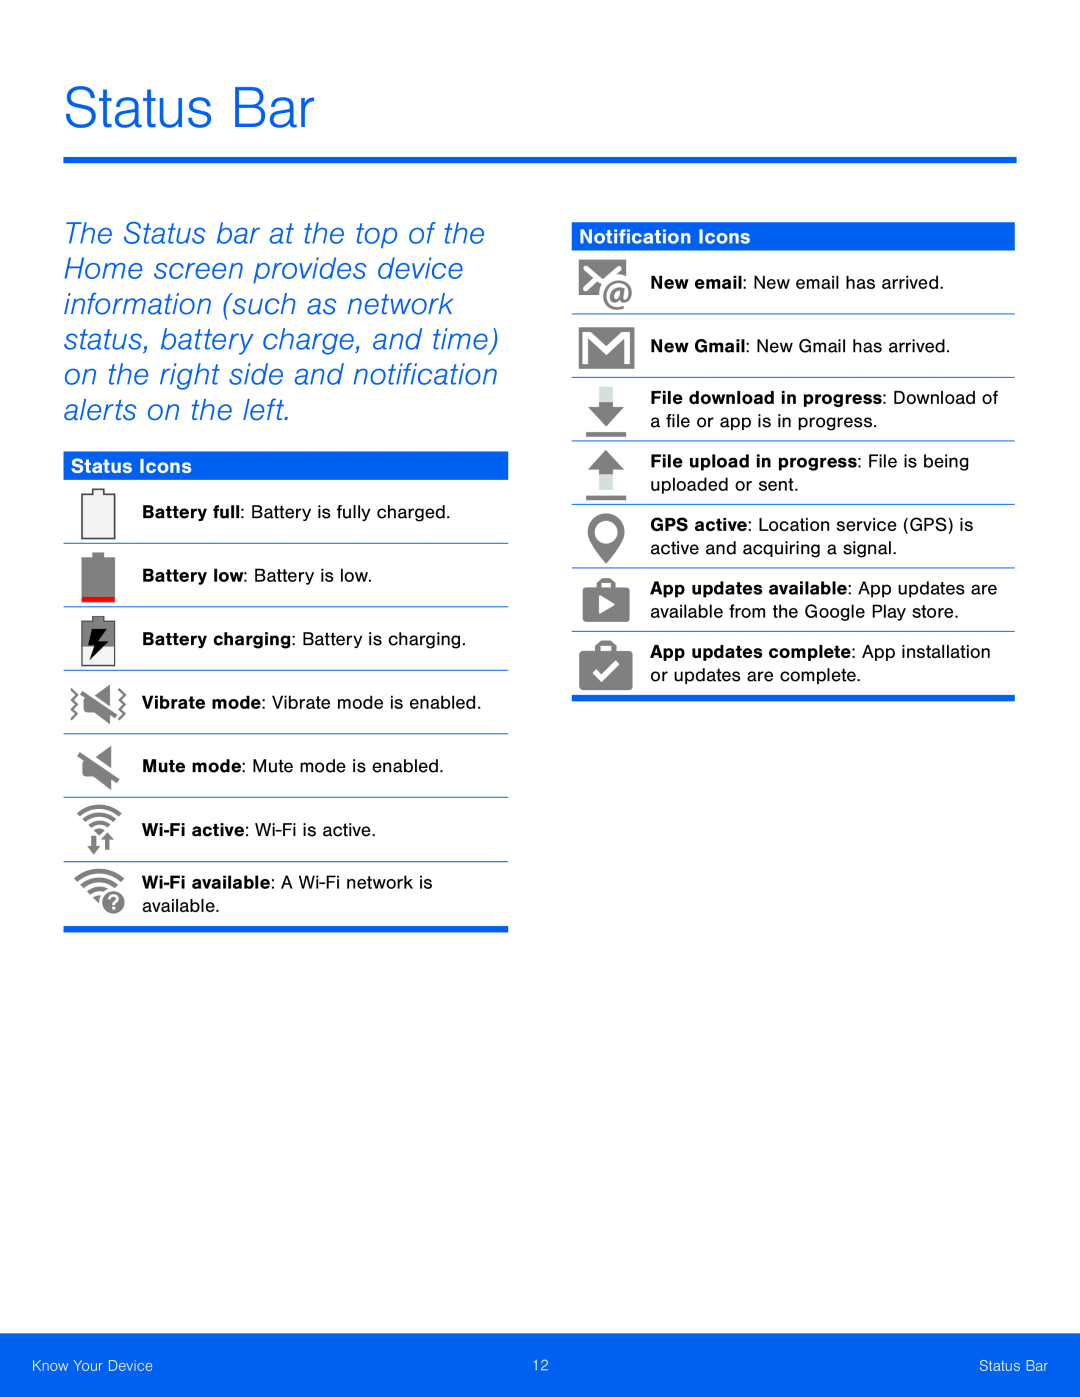 Status Icons
Notification Icons
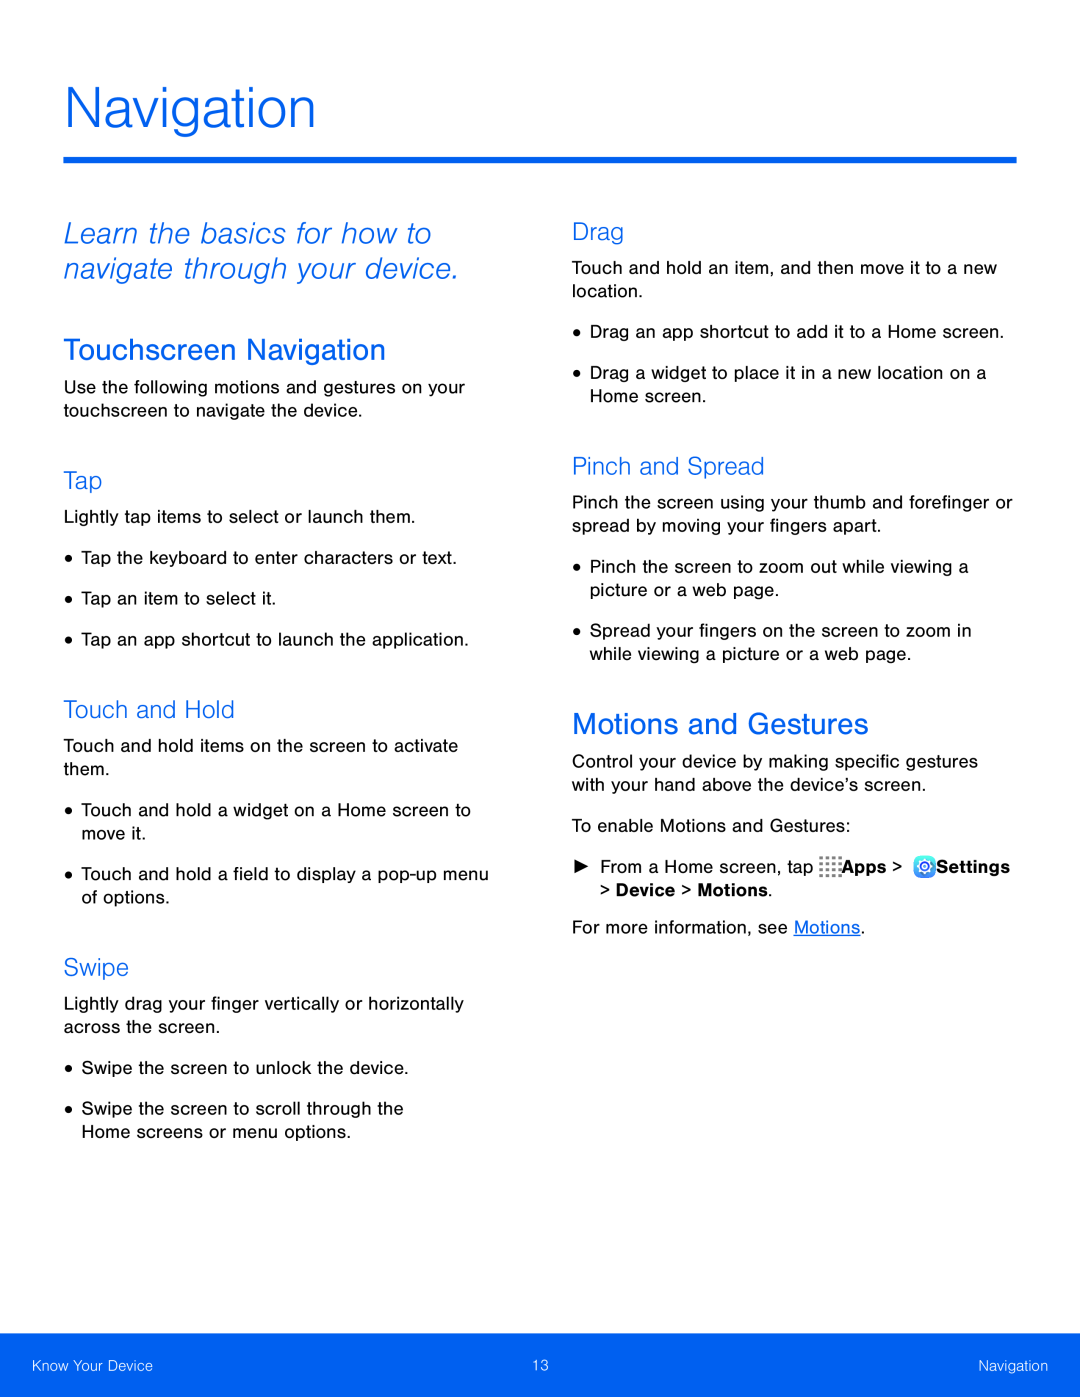 Navigation
Tap
Touch and Hold
Swipe
Drag
Pinch and Spread
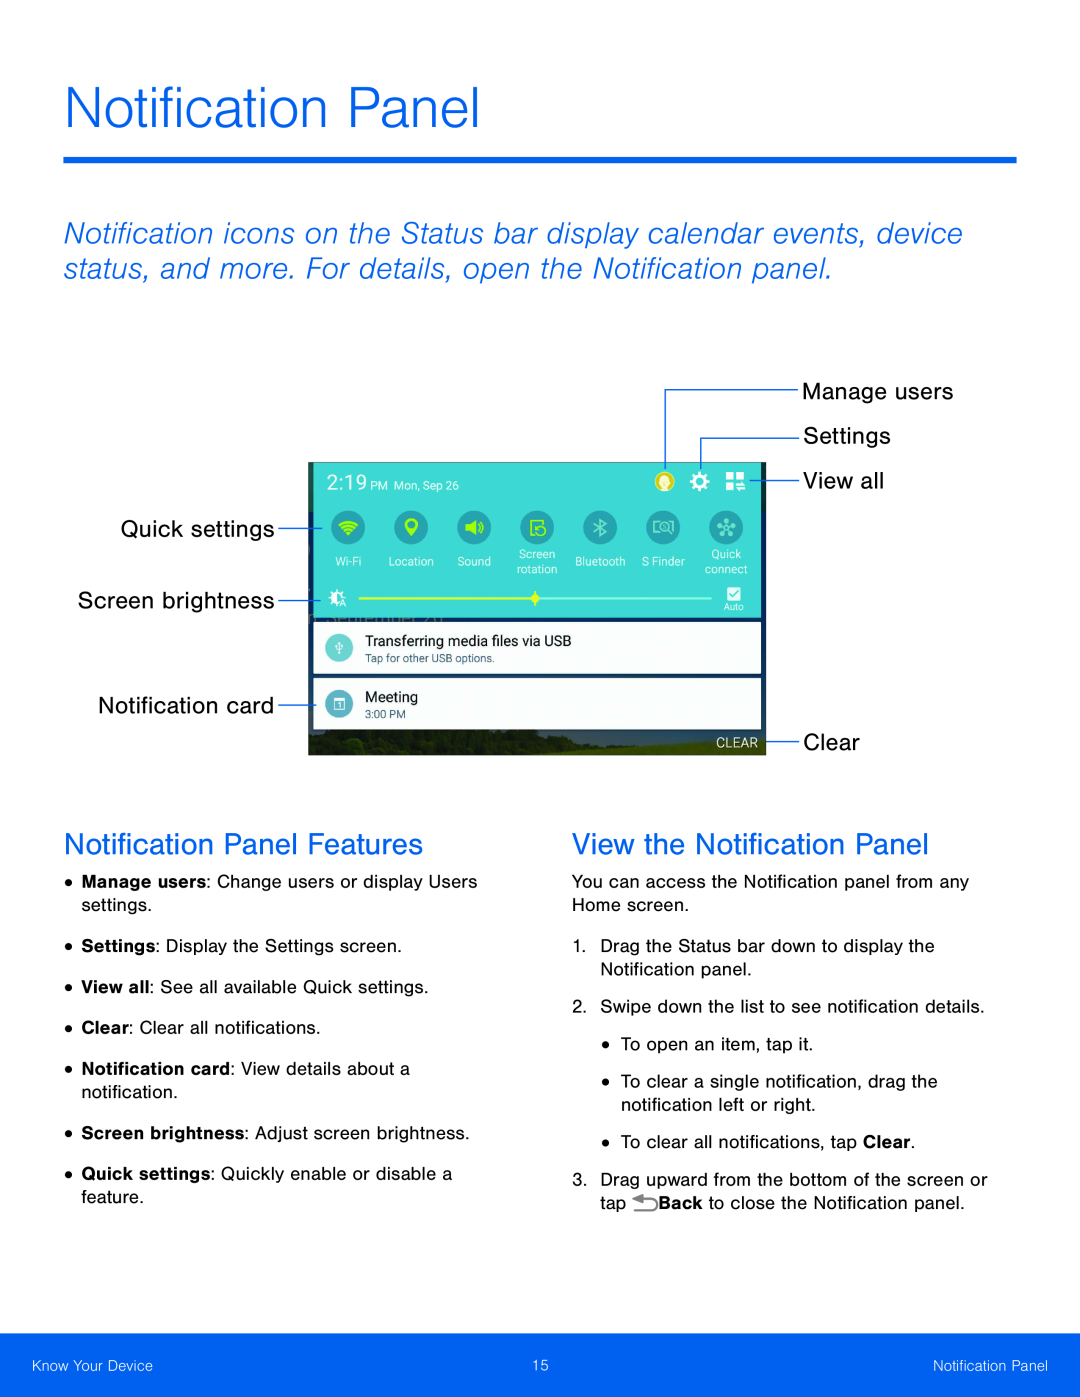 Quick settings
Screen brightness
Notification card
Manage users
View all
Clear
 To view additional Quick settings:
1.Drag the Status bar down to display the Notification panel
Drag the Status bar down to display the Notification panel
2.Tap View all
To customize Notification panel settings:
►From a Home screen, tap Apps
Settings > Device > Notification panel
– or –
From the Notification panel, tap View all
Edit
The following options are available:
Tap Reset to use the default layout
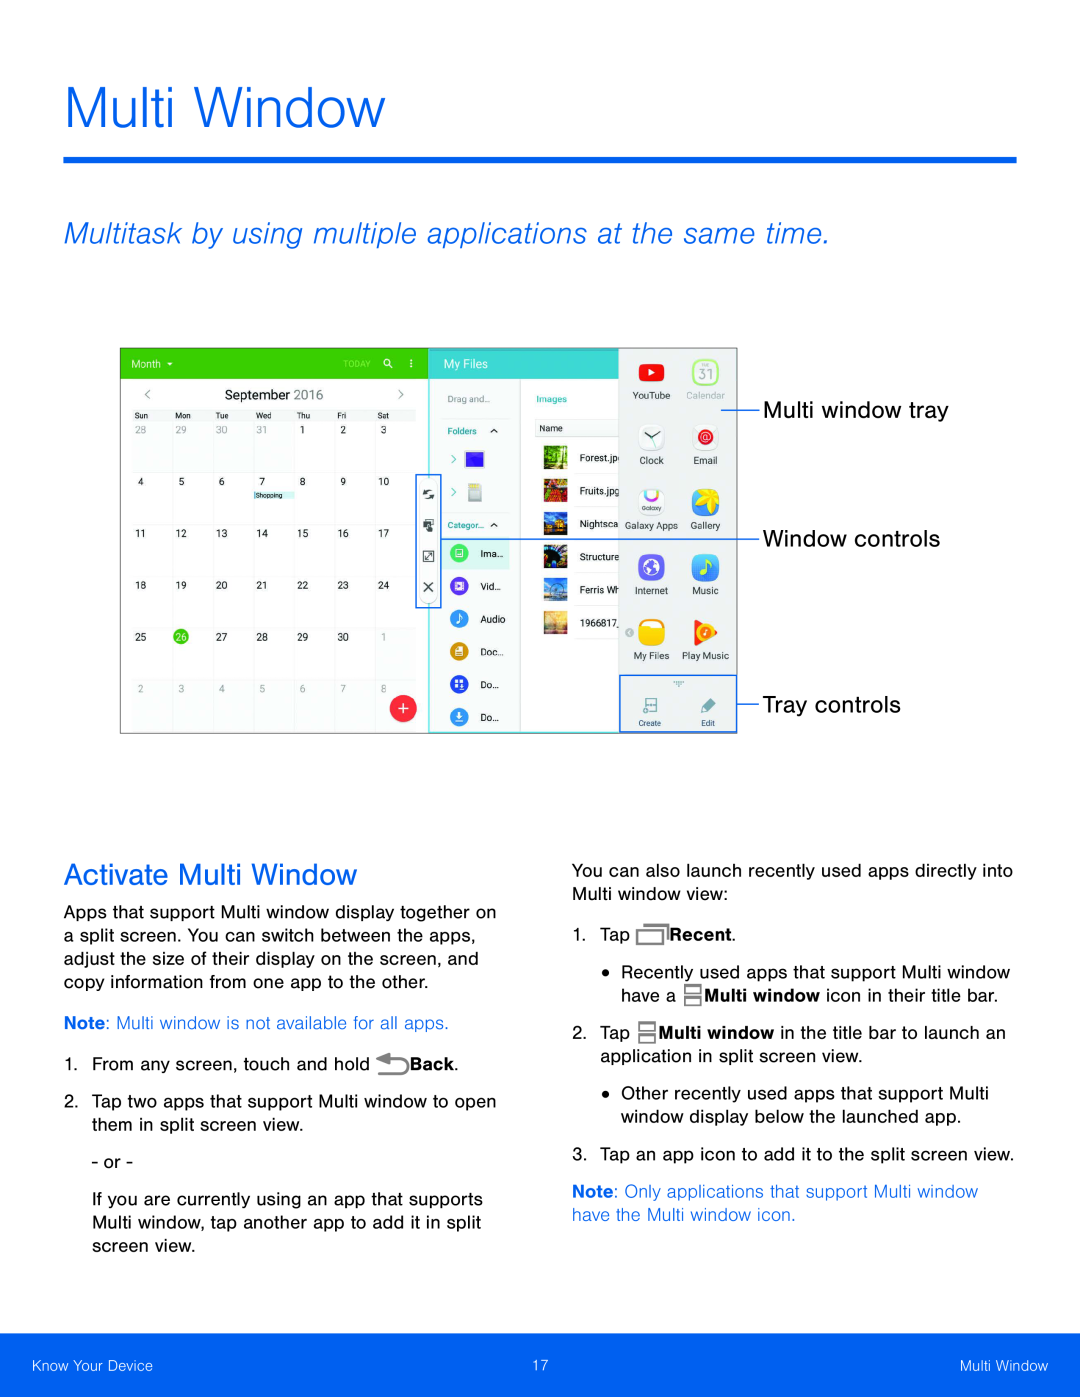 Multi Window
Multi window tray
Window controls
Tray controls
 Controls
Create a Window Group
Change the Order of Apps in the Multi Window Tray
Choose Apps to Display in the Multi Window Tray
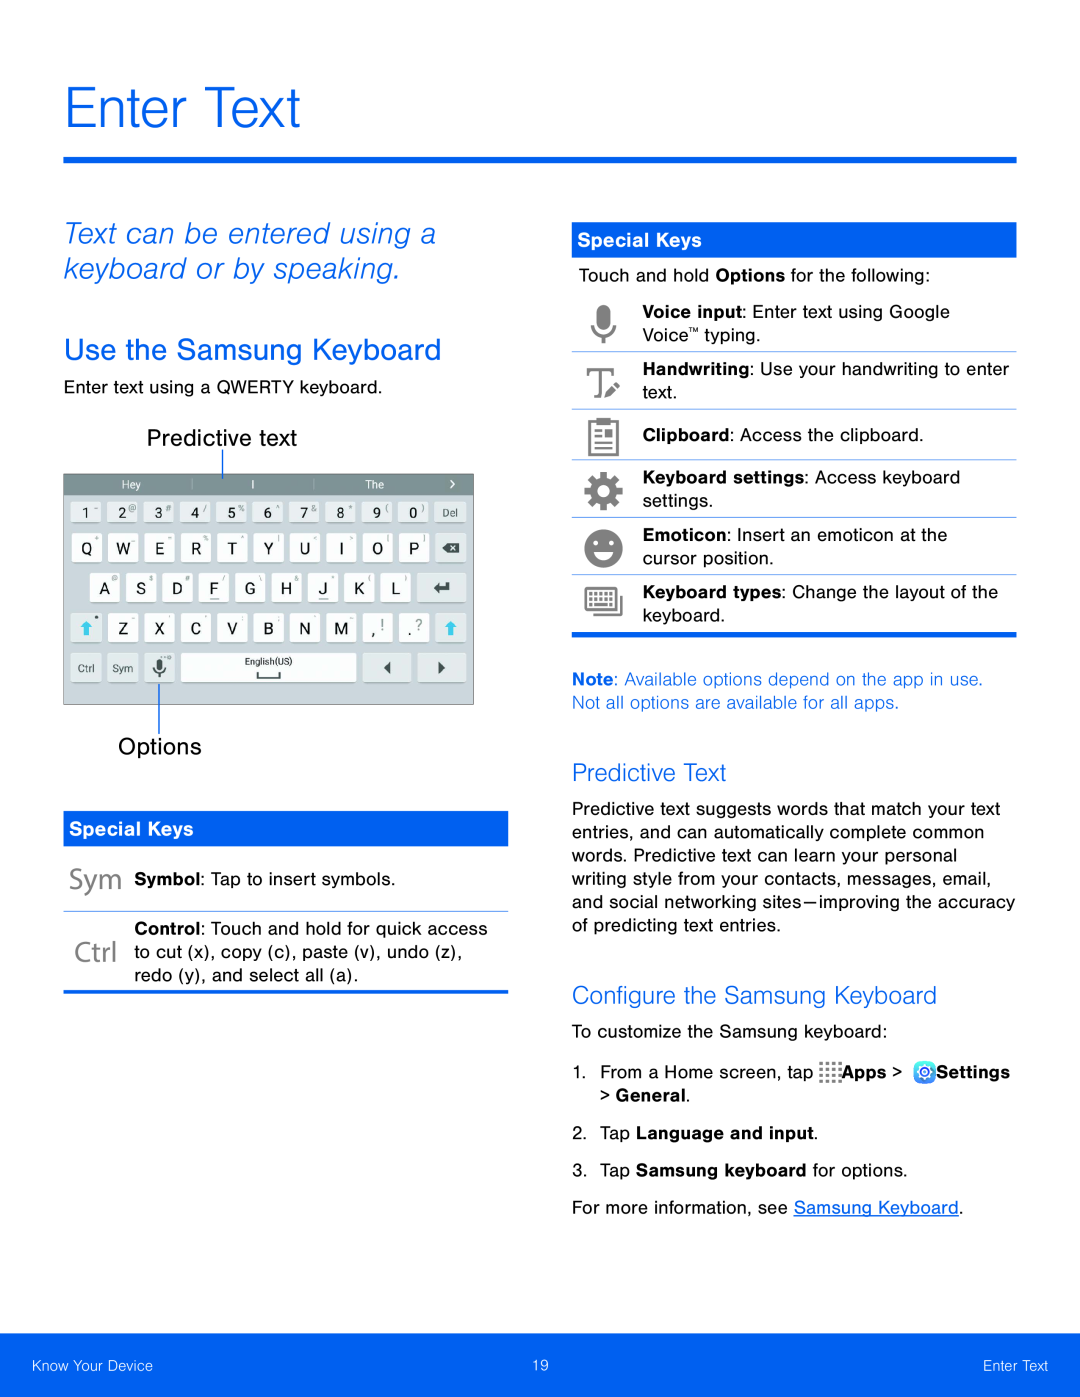 Enter Text
Predictive text
Options
Special Keys
Predictive Text
Configure the Samsung Keyboard
 Delete text
Configure Google Voice Typing
Configure Swype
 Calling
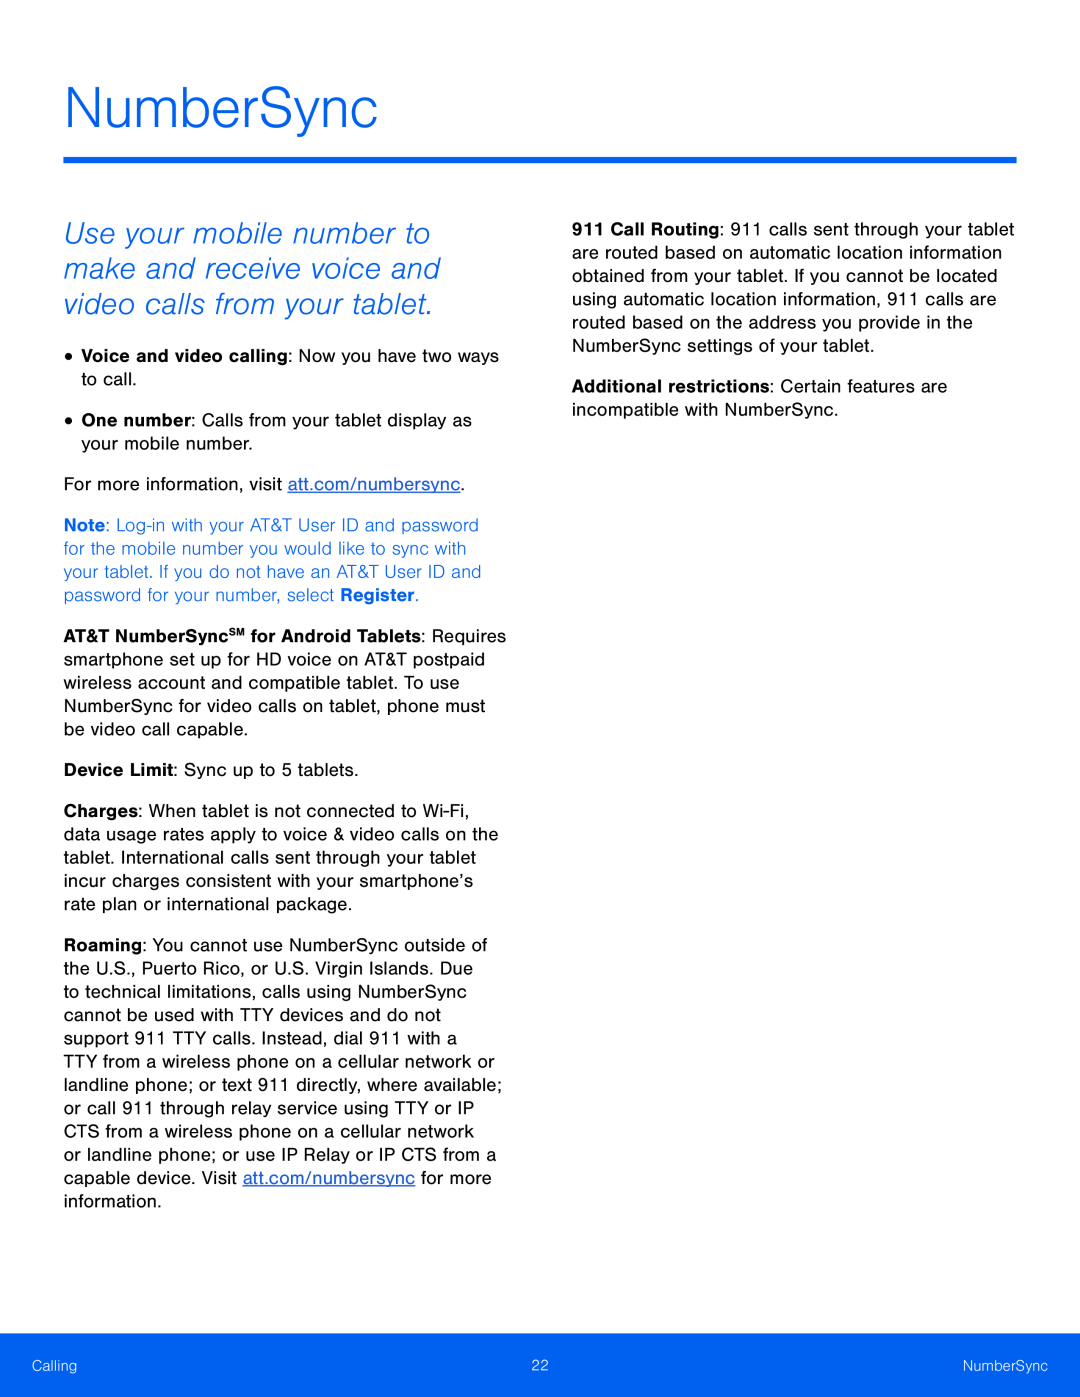 NumberSync
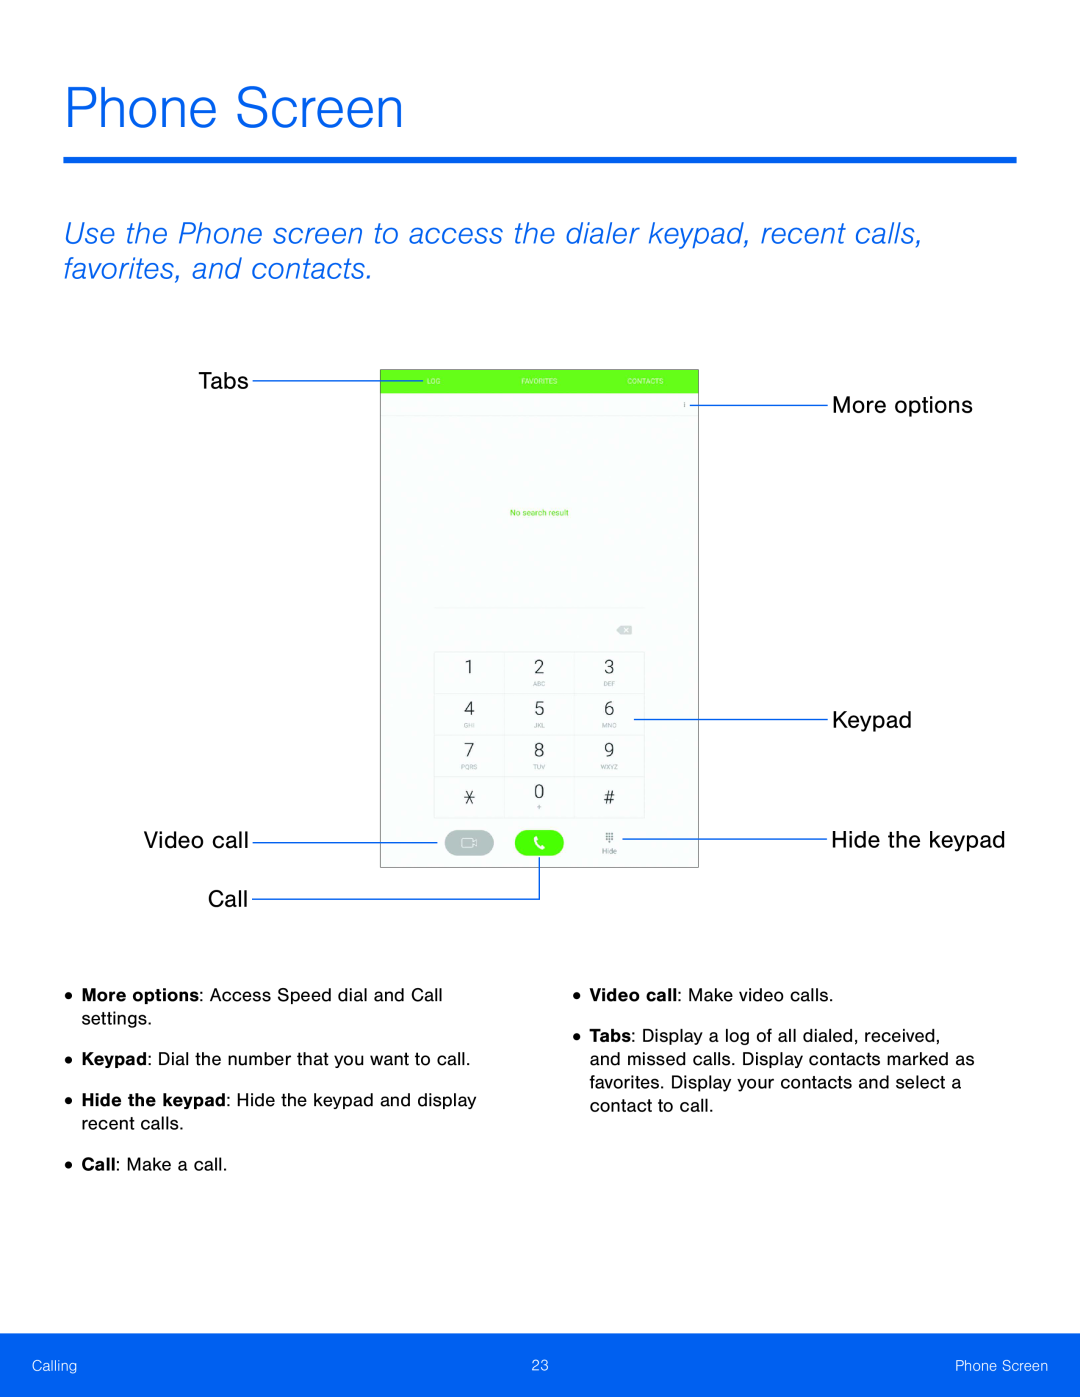 Phone Screen
Tabs
Video call
Call
More options
Keypad
Hide the keypad
 Dial a Number from Your Contacts List
Dial a Recent Number
 Adjust the Call Volume
Listen with a Bluetooth Headset
Place a New Call While on a Call
 Call Waiting
Save a Recent Call to Your Contacts List
Delete a Call from the Call Log
Video Call Options
Block a Number
 Speed Dial
 Applications
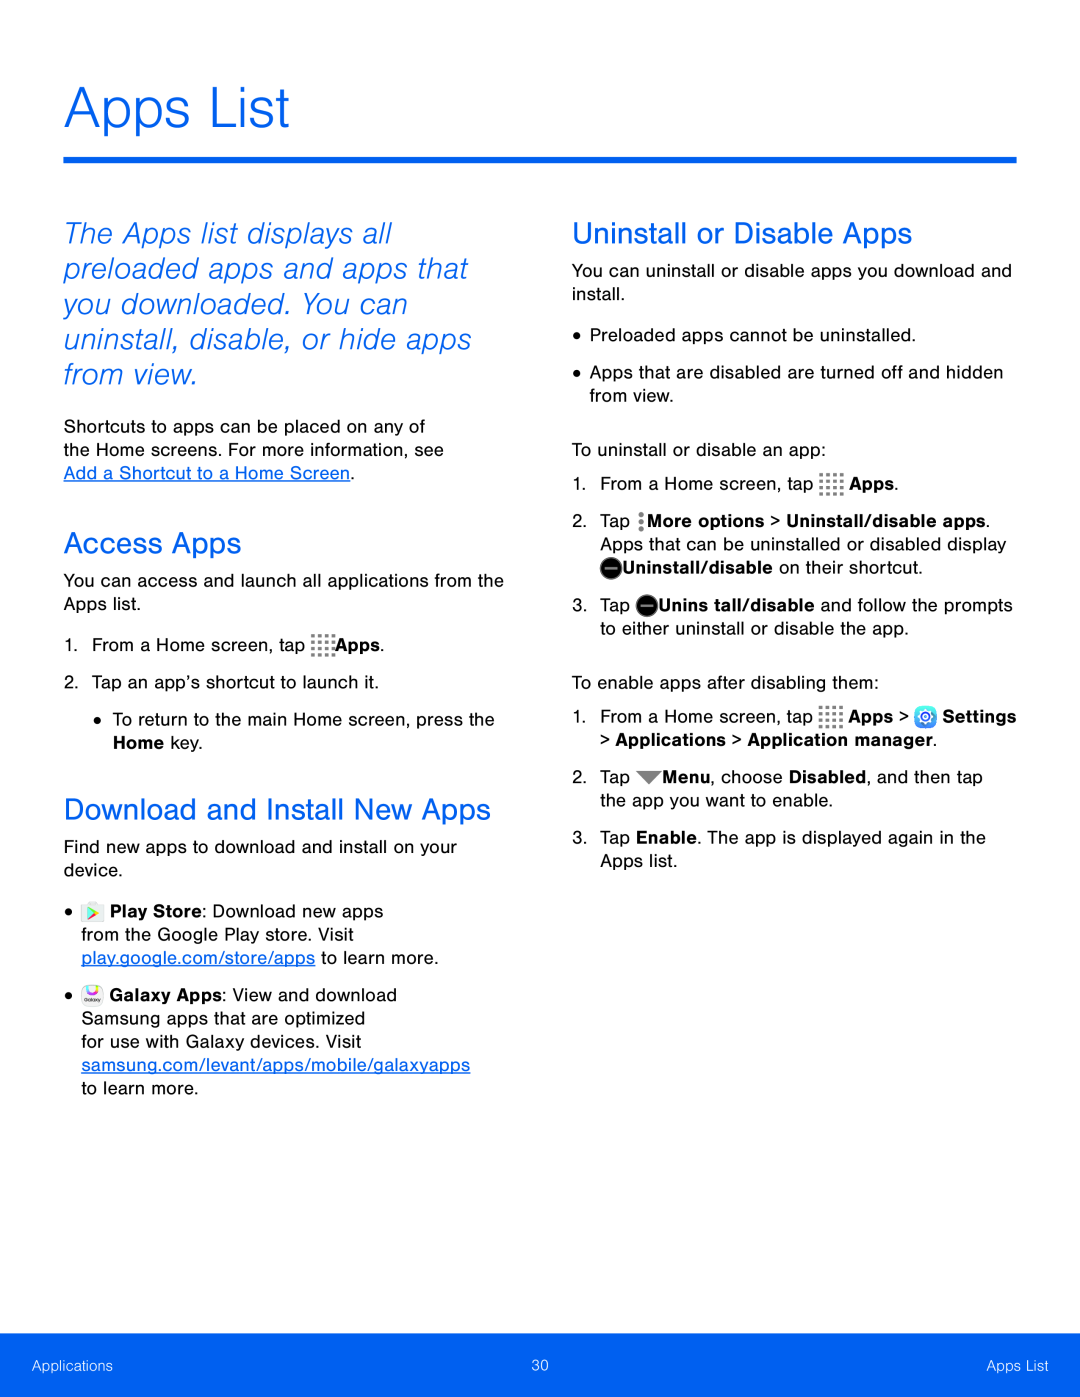 Apps List
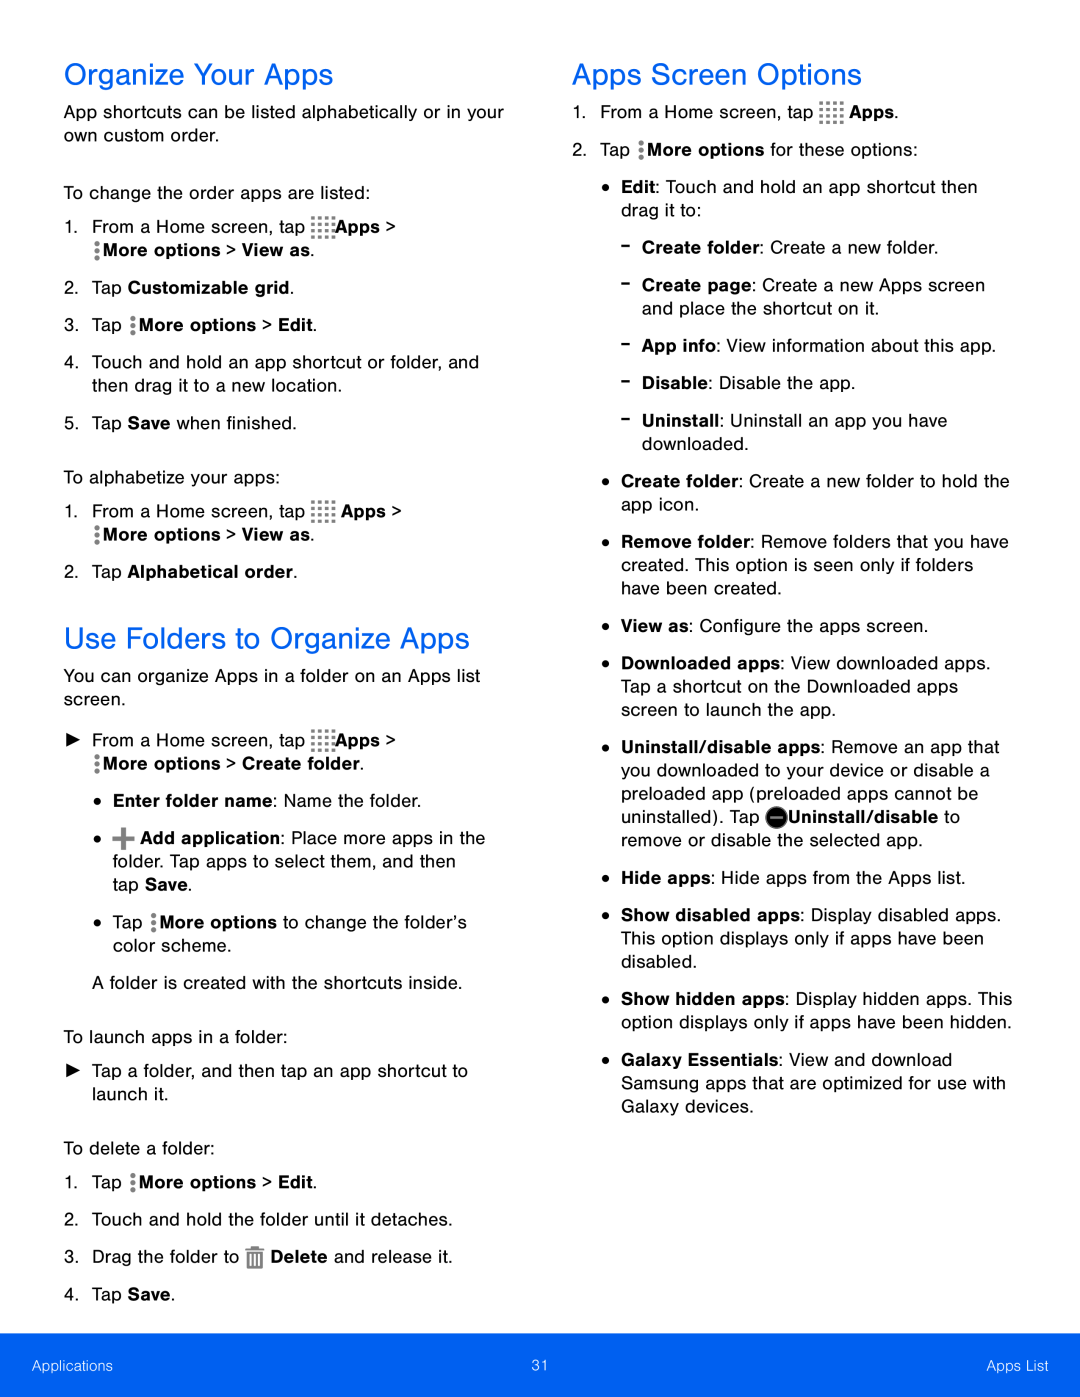 App shortcuts can be listed alphabetically or in your own custom order
To change the order apps are listed:
1.From a Home screen, tap Apps
From a Home screen, tap
More options > View as
2.Tap Customizable grid
3.Tap More options > Edit
4.Touch and hold an app shortcut or folder, and then drag it to a new location
5.Tap Save when finished
To alphabetize your apps:
1.From a Home screen, tap Apps
From a Home screen, tap
More options > View as
2.Tap Alphabetical order
You can organize Apps in a folder on an Apps list screen
►From a Home screen, tap Apps
From a Home screen, tap
More options > Create folder
•Enter folder name: Name the folder
•Tap More options to change the folder’s color scheme
Tap
A folder is created with the shortcuts inside
To launch apps in a folder:
►Tap a folder, and then tap an app shortcut to launch it
To delete a folder:
1.Tap More options > Edit
2.Touch and hold the folder until it detaches
3.Drag the folder to Delete and release it
4.Tap Save
1.From a Home screen, tap Apps
From a Home screen, tap
2.Tap More options for these options:
•Edit: Touch and hold an app shortcut then drag it to:
-Create folder: Create a new folder
-Create page: Create a new Apps screen and place the shortcut on it
-App info: View information about this app
-Disable: Disable the app
-Uninstall: Uninstall an app you have downloaded
•Create folder: Create a new folder to hold the app icon
•View as: Configure the apps screen
uninstalled). Tap Uninstall/disable to remove or disable the selected app
•Hide apps: Hide apps from the Apps list
 Google Apps
Google Apps
Note: Certain apps require a Google Account. Visit google.comto learn more
Open, view, rename, and share your
Google Docs™ and files
Visit drive.google.comto learn more about Google Drive™
Send and receive email with Gmail
Google’s web-basedemail service
Visit gmail.comto learn more
Search not only the Internet, but also the apps and contents of your device
Visit google.com/mobile/+to learn more about Google+™
Visit hangouts.google.comto learn more
Visit google.com/mapsto learn more
Location Services
Automatically backs up your photos and videos to your Google Account
Visit photos.google.comto learn more about Google Photos™
Visit play.google.com/store/booksto learn more
Visit play.google.comto learn more
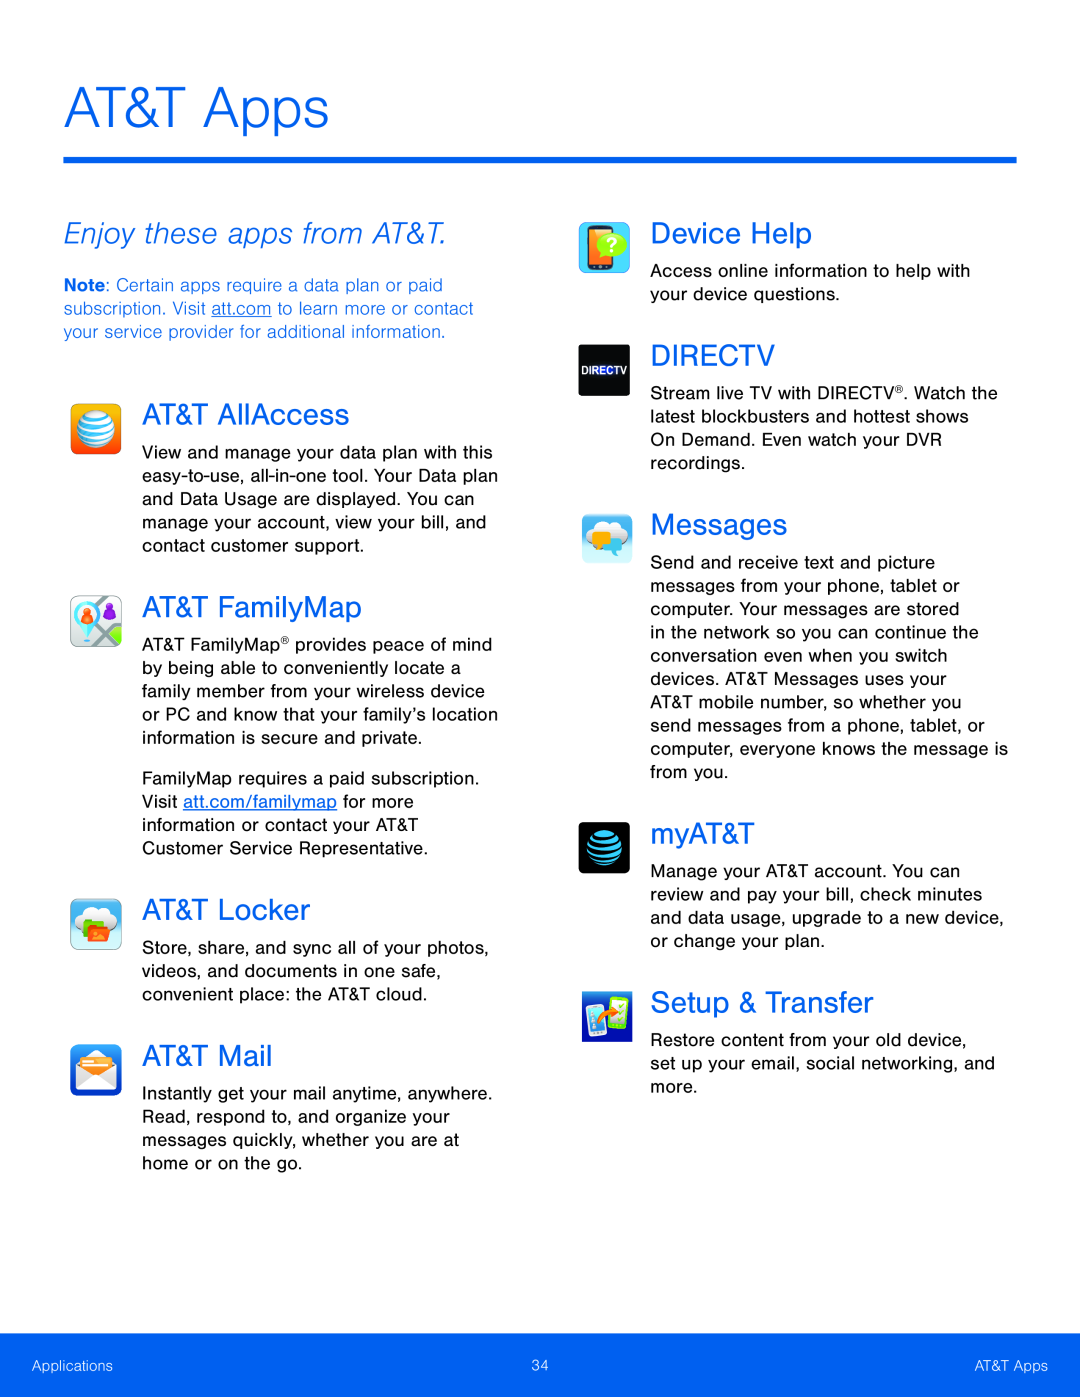 AT&T Apps
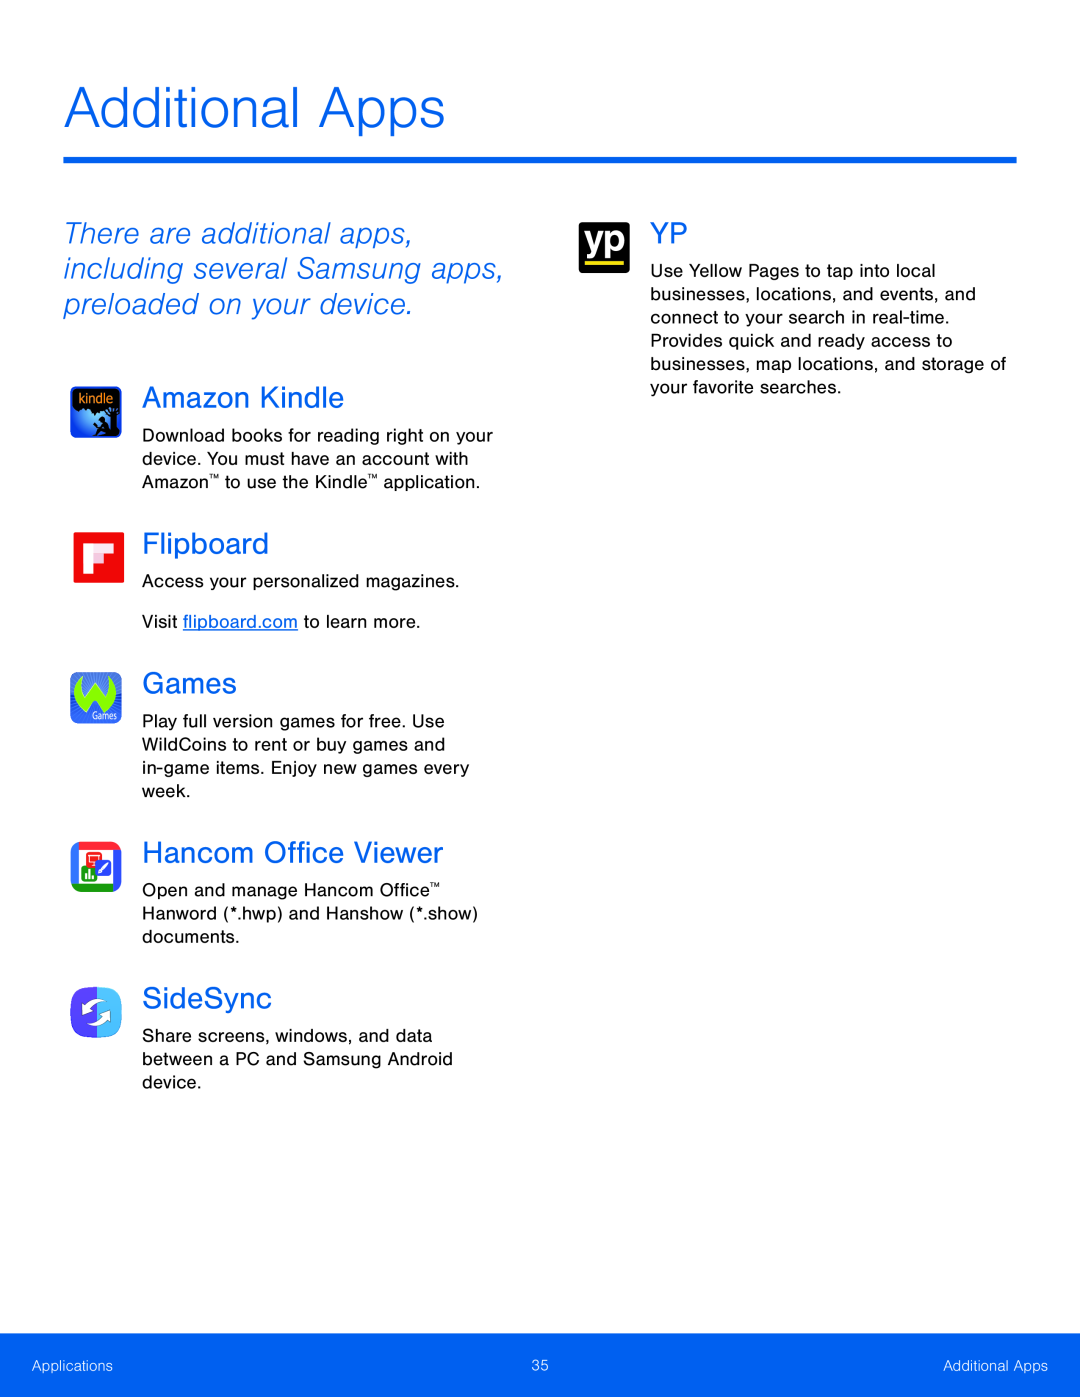 Additional Apps
 Calculator
 Calendar
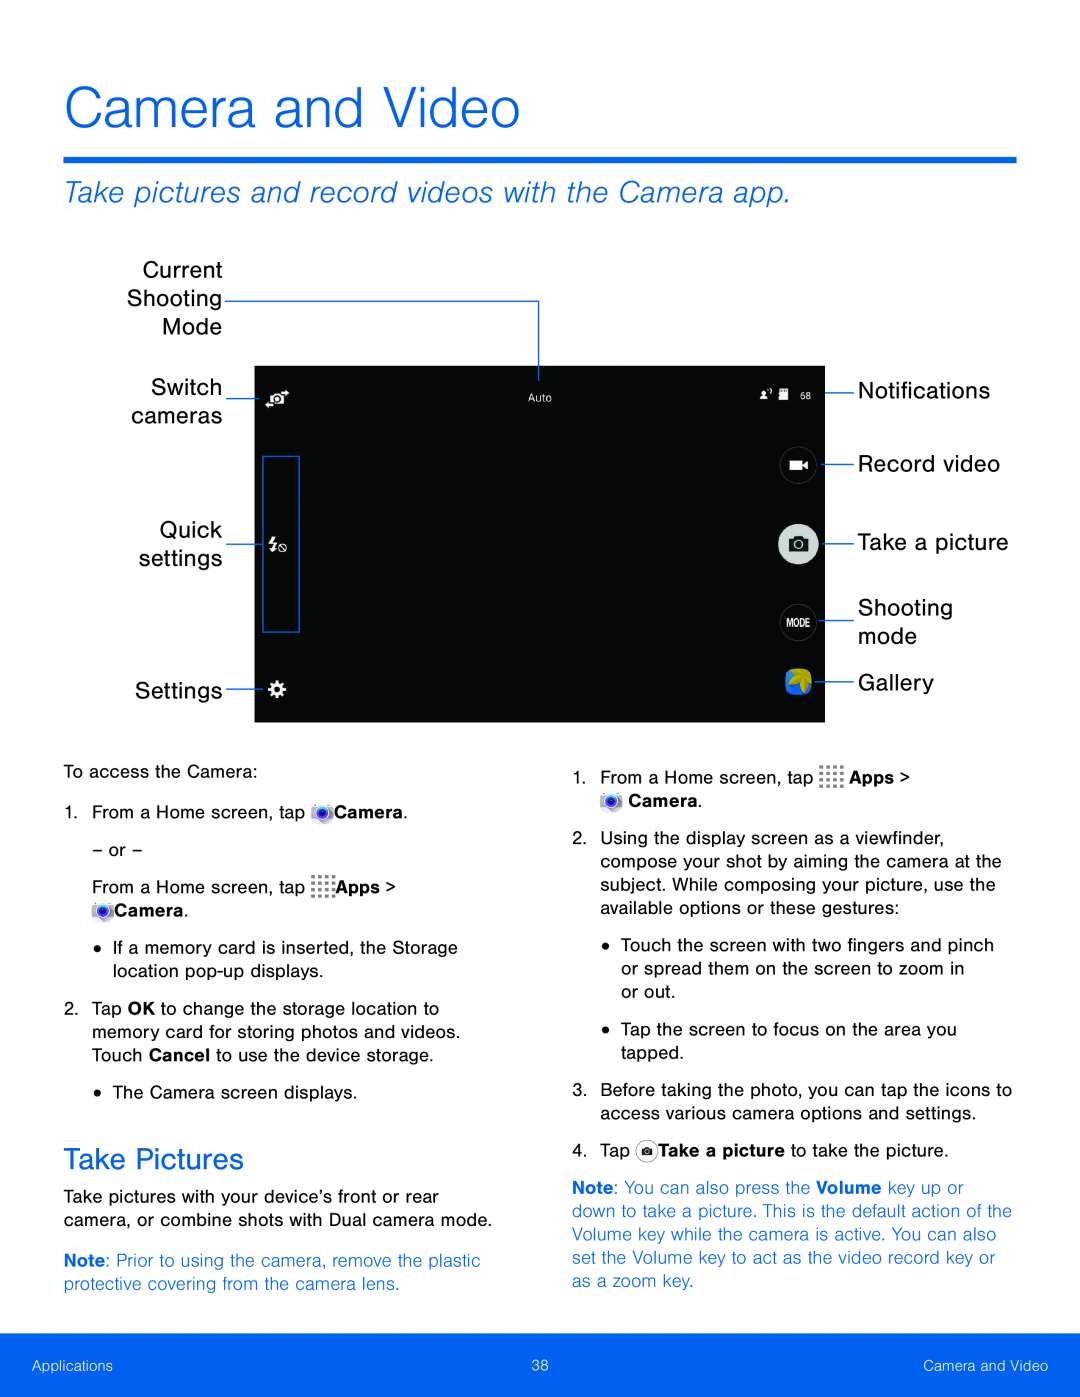 Current
Shooting
Mode
Switch cameras
Notifications
Record video
Take a picture
Shooting mode
Gallery
 Reorganize shortcuts for easy access to the camera’s various options
1.From a Home screen, tap Apps > Camera
From a Home screen, tap
3.Touch and hold a settings icon and drag it to the left side of the screen
1.From a Home screen, tap Apps > Camera
From a Home screen, tap
2.Tap MODE Mode to display the Shooting Modes
3.Tap each mode to see a description of that mode
1.From a Home screen, tap Apps > Camera
From a Home screen, tap
2.Tap MODE Mode > Dual camera
3.Touch and drag the inset picture to another position on the screen
5.Tap Effects, and then tap a style for the inset picture
1.From a Home screen, tap Apps > Camera
From a Home screen, tap
Tap
•Burst shots: Take a series of pictures of moving subjects
Low-light
•Face detection: Detect faces in pictures for tagging with the person’s name
•Tap to take pics: Tap anywhere on the screen to take a picture
•Recording mode: Select Normal, Limit for email, or Fast motion mode
Video stabilization: Activate or deactivate
 •Effects: Access to pre-installedand downloaded effects
•Flash: Activate or deactivate the flash
•Timer: Take time-delayedpictures or videos
•View mode: View pictures and videos in standard ratio or full screen
Location tags: Attach a GPS location tag to the picture
Storage location: Select the memory location for storage
Review pics/videos: Set to show pictures or videos after taking them
Shutter sound: Set the camera to make a sound when pictures are captured
Voice control: Set the camera to take pictures with voice commands
Reset settings: Reset the camera settings
 Clock
ClockCreate an Alarm
Delete an Alarm
 Contacts
Find a Contact
Add a Contact
Edit a Contact
 Share a Contact
Link Contacts
Unlink Contacts
Delete Contacts
Mark Contacts as Favorites
Remove Contacts from Favorites
 Create a Group
Rename a Group
Add Contacts to a Group
Send an Email to a Group
Delete a Group
 Email
Email
 This section describes how to create and send an email using the Email app
1.From a Home screen, tap Apps > Email > Compose
2.Tap the To field to manually add an email
address or tap Add recipient to select a recipient from Contacts or Groups
•Tap More to add Cc and Bcc fields
3.Tap the Subject and Message fields to enter text
•Tap Attach to add Files, Images, Audio, and more to your email
•Tap More options for additional email options
4.Review your message and tap Send
To remove an email account:
1.From a Home screen, tap Apps > Email
From a Home screen, tap
2.Tap More options > Settings
Tap
3.Tap the account you want to remove
4.Tap Remove account. Confirm when prompted
1.From a Home screen, tap Apps > Email
From a Home screen, tap
2.Tap More options > Settings
Tap
3.Under General settings, tap an option, and then follow the prompts
4.Tap an account to configure specific settings for only that account
 Galaxy Apps
 Gallery
Zoom In or Out
 Internet
Save and Open Bookmarks
 Saved Pages
View History
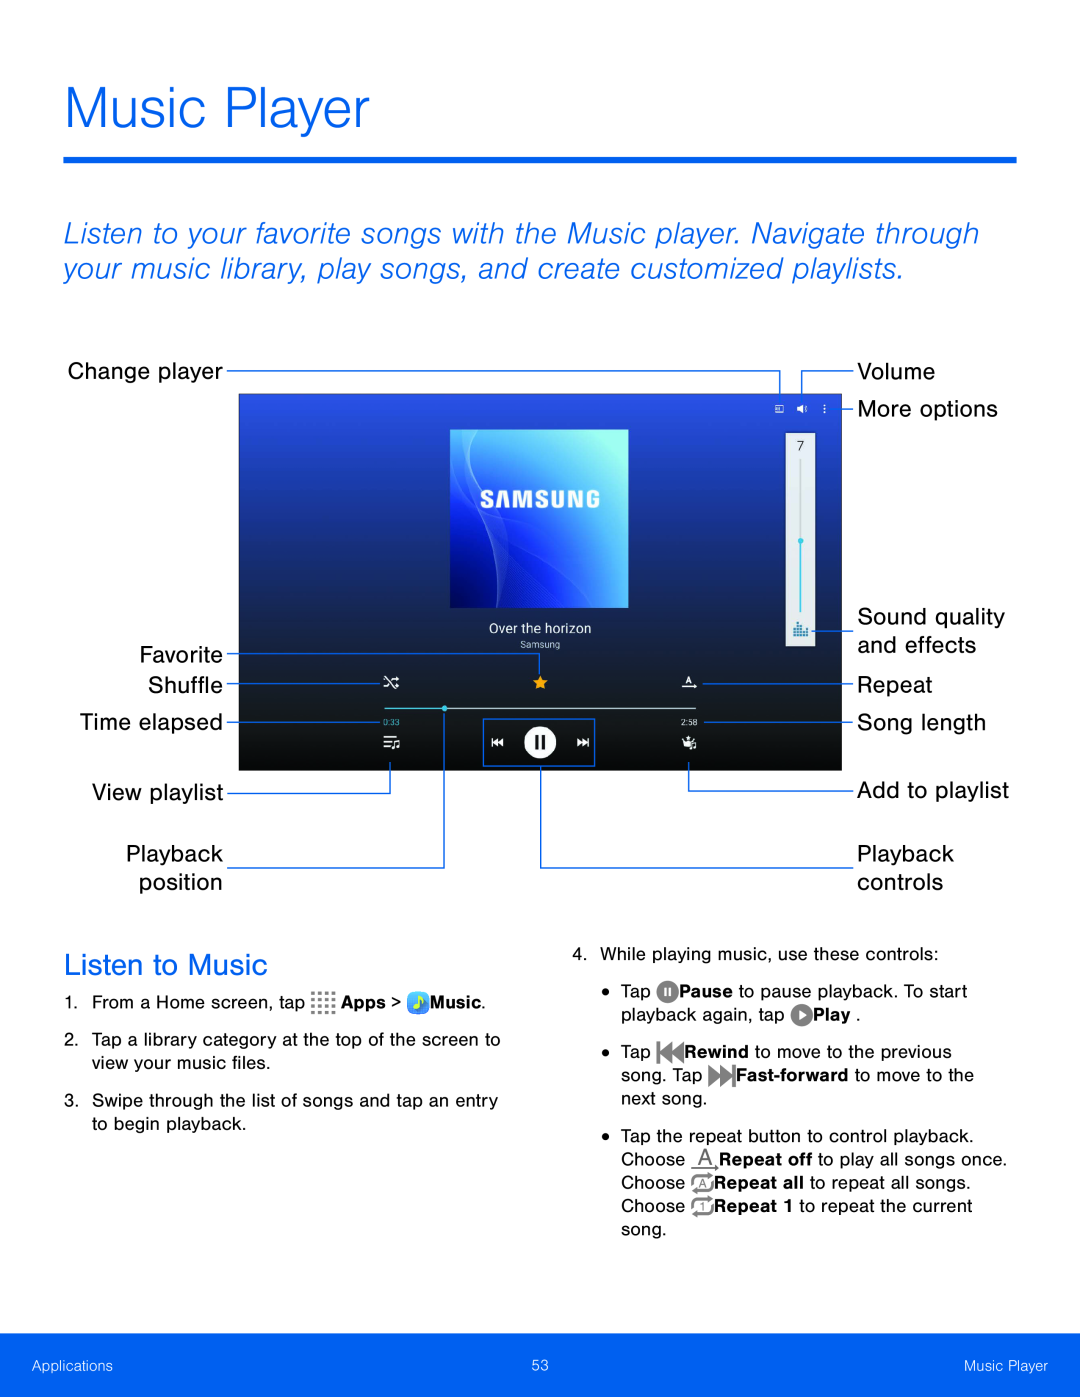 Music Player
Change player
Favorite
Shuffle
Time elapsed
View playlist
Playback position
Volume
Sound quality and effects
Repeat Song length
Add to playlist
Playback controls
 list. Choose Shuffle on to play songs in random order
 My Files
Shortcuts
Group Options
 File Options
Additional Functions
 S Voice
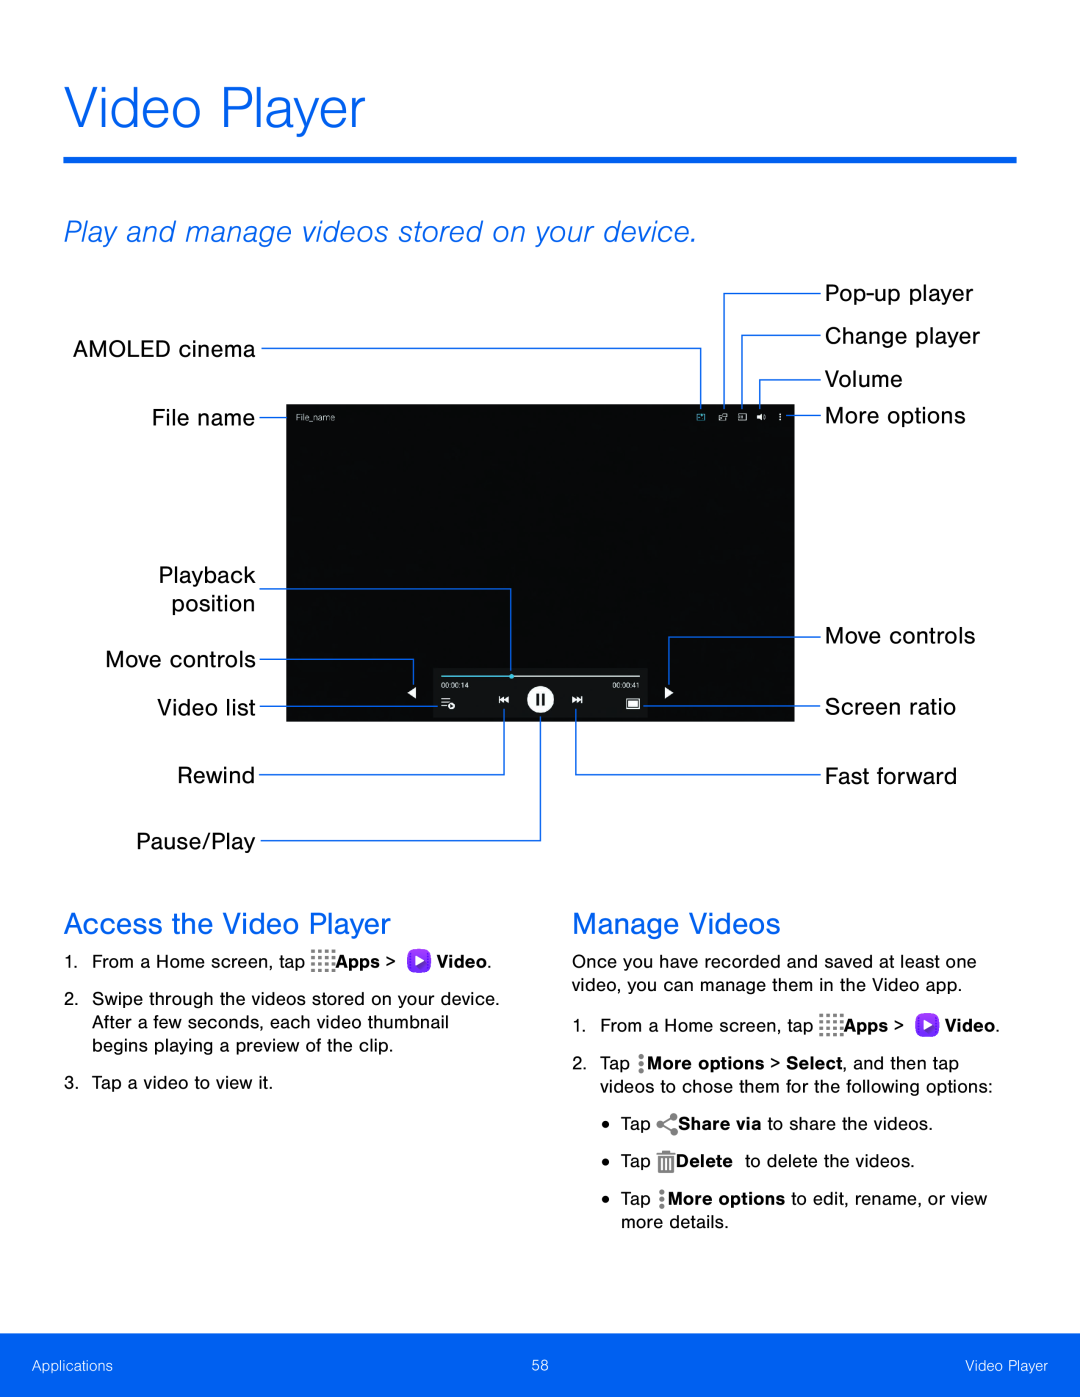 Video Player
AMOLED cinema
File name
Move controls
Video list
Rewind
Pause/Play
Pop-upplayer
Screen ratio
Fast forward
 1.From a Home screen, tap Apps > Video
From a Home screen, tap
2.Tap a video to view it
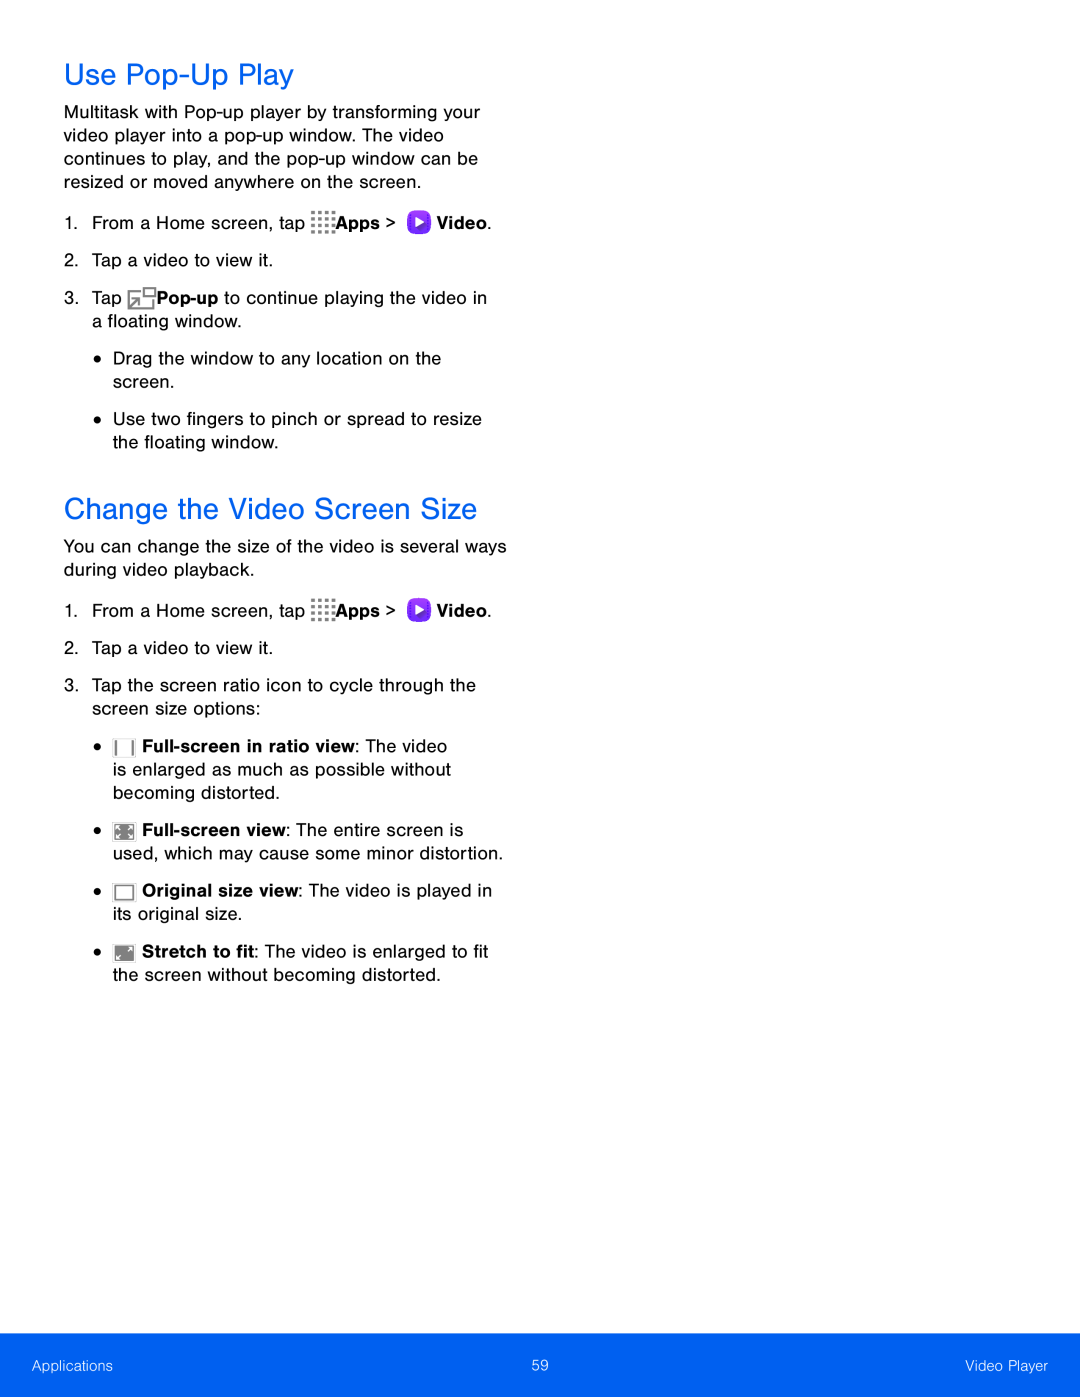
3.Tap Pop-upto continue playing the video in a floating window
Drag the window to any location on the screen
Use two fingers to pinch or spread to resize the floating window
You can change the size of the video is several ways during video playback
1.From a Home screen, tap Apps > Video
From a Home screen, tap
2.Tap a video to view it
Tap a video to view it
3.Tap the screen ratio icon to cycle through the screen size options:
Original size view: The video is played in its original size
 Settings
 How to Use Settings
 Wi-Fi
Wi-FiWi-FiStatus Indicators
Manually Connect to a Wi-FiNetwork
 Wi-FiDirect Status Indicator
 Bluetooth
Bluetooth Status Indicator
 1.From a Home screen, tap Apps > Settings > Connections
From a Home screen, tap
2.Tap Bluetooth > More options > Received files
Change the name others use when pairing with your device using Bluetooth
1.From a Home screen, tap Apps > Settings > Connections
From a Home screen, tap
2.Tap Bluetooth > More options > Rename device
3.Tap the device name field to rename your device
4.Tap OK to save changes
1.From a Home screen, tap Apps > Settings
From a Home screen, tap
>Connections
Connections
2.Tap Bluetooth, and then tap On/Off to turn on Bluetooth
Tap Bluetooth, and then tap On/Off to turn on Bluetooth
3.Tap Scan. Your device starts scanning for Bluetooth devices within range
1.From a Home screen, tap Apps > Settings > Connections
From a Home screen, tap
2.Tap Bluetooth, and then tap On/Off to turn on Bluetooth
Tap Bluetooth, and then tap On/Off to turn on Bluetooth
3.Tap Settings next to the previously paired device, and then tap Rename
4.Enter a new name, and tap OK
1.From a Home screen, tap Apps > Settings > Connections
From a Home screen, tap
2.Tap Bluetooth, and then tap On/Off to turn on Bluetooth
Tap Bluetooth, and then tap On/Off to turn on Bluetooth
4.Tap the device name field and edit your device name
 Airplane Mode
 Data Usage
 Location Settings
 More Networks
Default Setup Options
AT&T MicroCell
 Add a VPN
Connect to a VPN
Disconnect from a VPN
Edit or Delete a VPN
 Nearby Devices
 Printing
 Screen Mirroring
 Sounds and Notifications
 Choose from preset vibration patterns or create your own pattern
1.From a Home screen, tap Apps > Settings > Device
From a Home screen, tap
2.Tap Sounds and notifications > Vibrations
3.Tap a pattern to preview and select it
4.When finished, tap OK
Choose a sound for notifications, such as for new messages and event reminders
1.From a Home screen, tap Apps > Settings > Device
From a Home screen, tap
2.Tap Sounds and notifications > Notification ringtone
Set various other sound options
1.From a Home screen, tap Apps > Settings > Device
From a Home screen, tap
2.Tap Sounds and notifications > Other sounds
4.Configure notification for Samsung applications:
•Call: Configure notifications for calls
•Email: Configure email account notifications
•Calendar: Choose a sound for Calendar notifications
1.From a Home screen, tap Apps > Settings > Device
From a Home screen, tap
2.Tap Sounds and notifications > Do not disturb
3.Tap Turn on now to turn the feature on
Tap Allow exceptions to allow alarms, calls, messages, or events and reminders
Choose which notifications can be displayed while the device is locked
1.From a Home screen, tap Apps > Settings > Device
From a Home screen, tap
Set whether application notifications are displayed
1.From a Home screen, tap Apps > Settings > Device
From a Home screen, tap
2.Tap Sounds and notifications > Application notifications
 Display Settings
 1.From a Home screen, tap Apps > Settings > Device
From a Home screen, tap
2.Tap Display > Screen mode and choose a screen mode
– or –
Choose a specific type of screen mode based on what you are viewing
Optimize the screen for reading with selected applications
1.From a Home screen, tap Apps > Settings > Device
From a Home screen, tap
2.Tap Display > Reading mode
3.Tap On/Off to enable Reading mode
4.Tap Edit to select additional applications for use with Reading mode
1.From a Home screen, tap Apps > Settings > Device
From a Home screen, tap
2.Tap Display > Auto adjust screen tone to turn the feature on
1.From a Home screen, tap Apps > Settings > Device
From a Home screen, tap
2.Tap Display > Daydream
3.Tap On/Off to turn on Daydream
4.Configure the following options:
•Colors: Display a changing screen of colors
Desk home screen: Select items to display while the device is docked. Tap
•Flipboard: Display pictures from Flipboard. Tap Settings for options
•Photo table: Display pictures in a photo table. Tap Settings for options
5.Tap More options for additional options:
•Preview: See a demonstration of Daydream
•Select when to daydream: Select when your device can go into Daydream mode
Set the length of time Recent and Back remain lit after you tap them
1.From a Home screen, tap Apps > Settings > Device
From a Home screen, tap
2.Tap Display > Touch key light duration to choose a timeout period
 Wallpaper Settings
 Lock Screen
 Multi Window Settings
 Notification Panel
Notification Panel
 Toolbox
 Motions
 Accessibility
 Dexterity and interaction
Press and hold delay: Select a time interval for this action
More settings
Answering and ending calls: Select shortcuts for answering and ending calls
Services
 Users
Users
 Private Mode
 Finger Scanner
 Accounts
 Backup and Reset
Reset Network Settings
Factory Data Reset
 Language and Input
Language and Input
Configure your device’s language and input settings
 Configure options for using the Swype keyboard
1.From a Home screen, tap Apps > Settings
From a Home screen, tap
>General
General
2.Tap Language and input
Tap Language and input
3.Tap Swype for options:
•Settings: Configure basic options
•Themes: Change the keyboard layout
•Gestures: Learn about using Swype gestures
•Help: View information on using Swype
Speak rather than type your text entries using Google voice typing
1.From a Home screen, tap Apps > Settings
From a Home screen, tap
>General
General
2.Tap Language and input
Tap Language and input
3.Tap Google voice typing for options:
•Languages: Select languages for Google voice typing
•“Ok Google” detection: Launch a Google search whenever you say “OK Google”
•Hands-free:Allow requests with the device locked
•Speech output: Select options for spoken feedback
•Block offensive words: Hide recognized offensive voice results
1.From a Home screen, tap Apps > Settings
From a Home screen, tap
>General
General
2.Tap Language and input > Text-to-speechoptions for the following settings:
Tap Settings next to each TTS engine for options
•Speech rate: Set the speed at which the text is spoken
•Default language status: Display the default language in use
Configure pointer speed for an optional mouse or trackpad (not included)
1.From a Home screen, tap Apps > Settings > General
From a Home screen, tap
2.Tap Language and input
Tap Language and input
4.Tap OK to save your setting
 Date and Time
 Accessories
 Battery
 Power Saving
 Storage
Install a Memory Card
Mount a Memory Card
 Remove a Memory Card
Format a Memory Card
 Security
 Lock your SIM card by requiring a PIN
1.From a Home screen, tap Apps > Settings
From a Home screen, tap
>General
General
2.Tap Security > Set up SIM card lock
•Tap Lock SIM card and enter the PIN
•Tap Change SIM PIN to change the PIN
Display password characters briefly as you type them
1.From a Home screen, tap Apps > Settings > General
From a Home screen, tap
2.Tap Security
Tap Security
3.Tap Make passwords visible to turn the feature on
Automatically receive security updates
1.From a Home screen, tap Apps > Settings
From a Home screen, tap
>General
General
2.Tap Security for options:
Tap Security for options:
Send security reports: Send security reports to Samsung using
1.From a Home screen, tap Apps > Settings
From a Home screen, tap
>General
General
2.Tap Security for options:
Tap Security for options:
•Storage type: Select a storage location for credential contents
•Install from device storage: Install a new certificate from storage
Protect your device with these advanced security options
1.From a Home screen, tap Apps > Settings
From a Home screen, tap
>General
General
2.Tap Security for options:
Tap Security for options:
•Trust agents: Perform selected actions when trusted devices are connected
Set a Screen Lock
Set a Screen Lock
 About Device
 Application Manager
Manage Apps
 Default Applications
 Application Settings
 Google Settings