DVD Camcorder: Advanced Recording
Setting the Custom White Balance
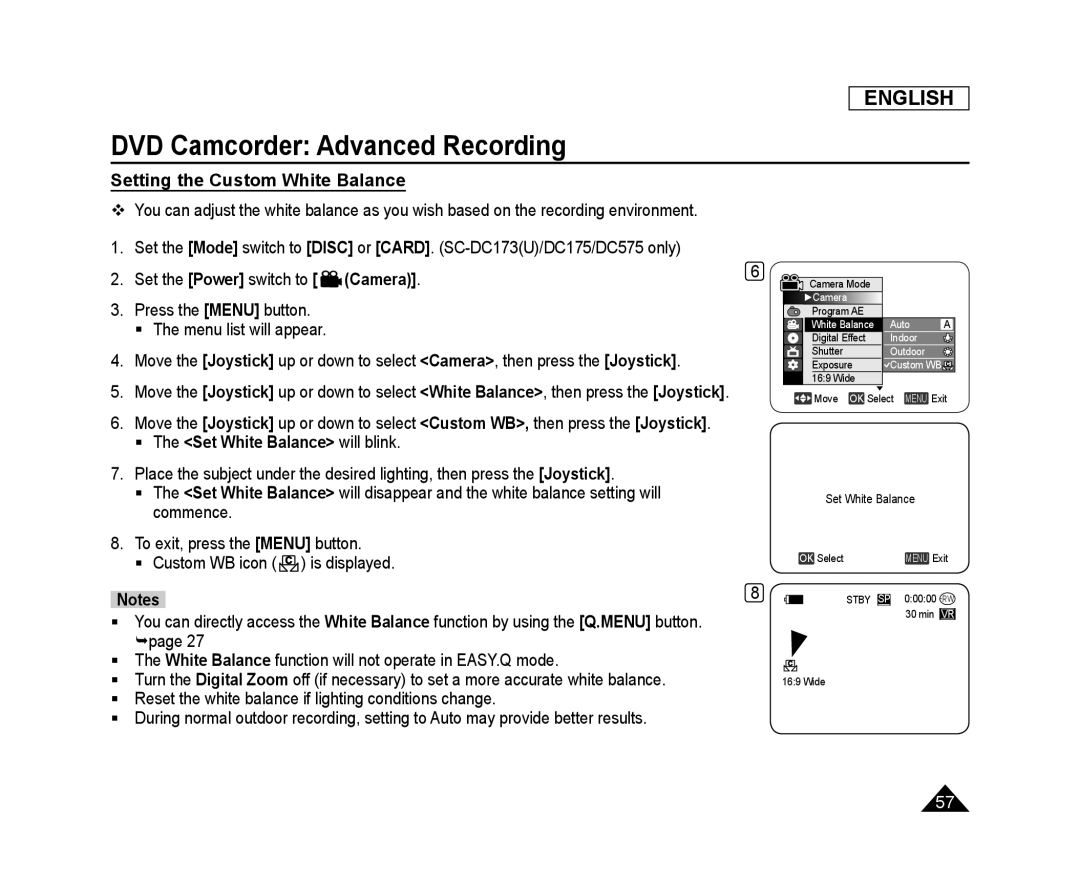
You can adjust the white balance as you wish based on the recording environment.
1. Set the [Mode] switch to [DISC] or [CARD].
2. Set the [Power] switch to [ | (Camera)]. | 6 |
|
3.Press the [MENU] button.
The menu list will appear.
4.Move the [Joystick] up or down to select <Camera>, then press the [Joystick].
5.Move the [Joystick] up or down to select <White Balance>, then press the [Joystick].
6.Move the [Joystick] up or down to select <Custom WB>, then press the [Joystick].
The <Set White Balance> will blink.
7.Place the subject under the desired lighting, then press the [Joystick].
The <Set White Balance> will disappear and the white balance setting will commence.
8.To exit, press the [MENU] button.
Custom WB icon ( ![]() ) is displayed.
) is displayed.
Notes | 8 |
|
You can directly access the White Balance function by using the [Q.MENU] button. page 27
The White Balance function will not operate in EASY.Q mode.
Turn the Digital Zoom off (if necessary) to set a more accurate white balance.
Reset the white balance if lighting conditions change.
During normal outdoor recording, setting to Auto may provide better results.
ENGLISH
Camera Mode |
|
|
►Camera |
|
|
Program AE |
| A |
White Balance | Auto | |
Digital Effect | Indoor |
|
Shutter | Outdoor |
|
Exposure | Custom WB |
|
16:9 Wide | ▼ |
|
|
| |
Move OK Select MENU Exit | ||
Set White Balance
OK SelectMENU Exit
STBY SP | 0:00:00 | |
|
| |
| 30 min | VR |
16:9 Wide |
|
|
57
