 ENGLISH
AD68-01230A
 Contents
 ENGLISH
Contents
DVD Camcorder: Basic Recording
DVD Camcorder: Advanced Recording
DVD Camcorder: Thumbnail index and Playlist
DVD Camcorder
DVD Camcorder: Playlist
DVD Camcorder: Disc Manager
 PictBridge™
Digital Still Camera Mode
USB Interface
 ENGLISH
Contents
 Notes and Safety Instructions
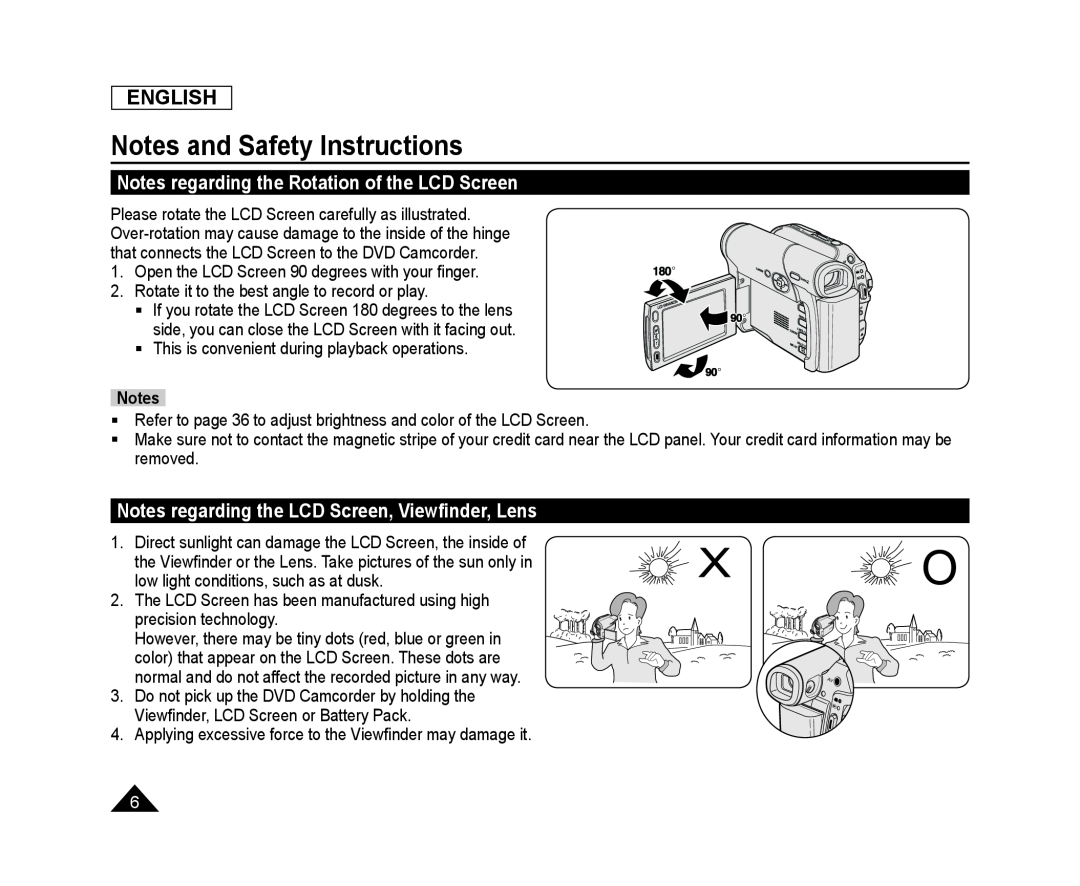
Notes regarding the Rotation of the LCD Screen
Notes regarding the LCD Screen, Viewfinder, Lens
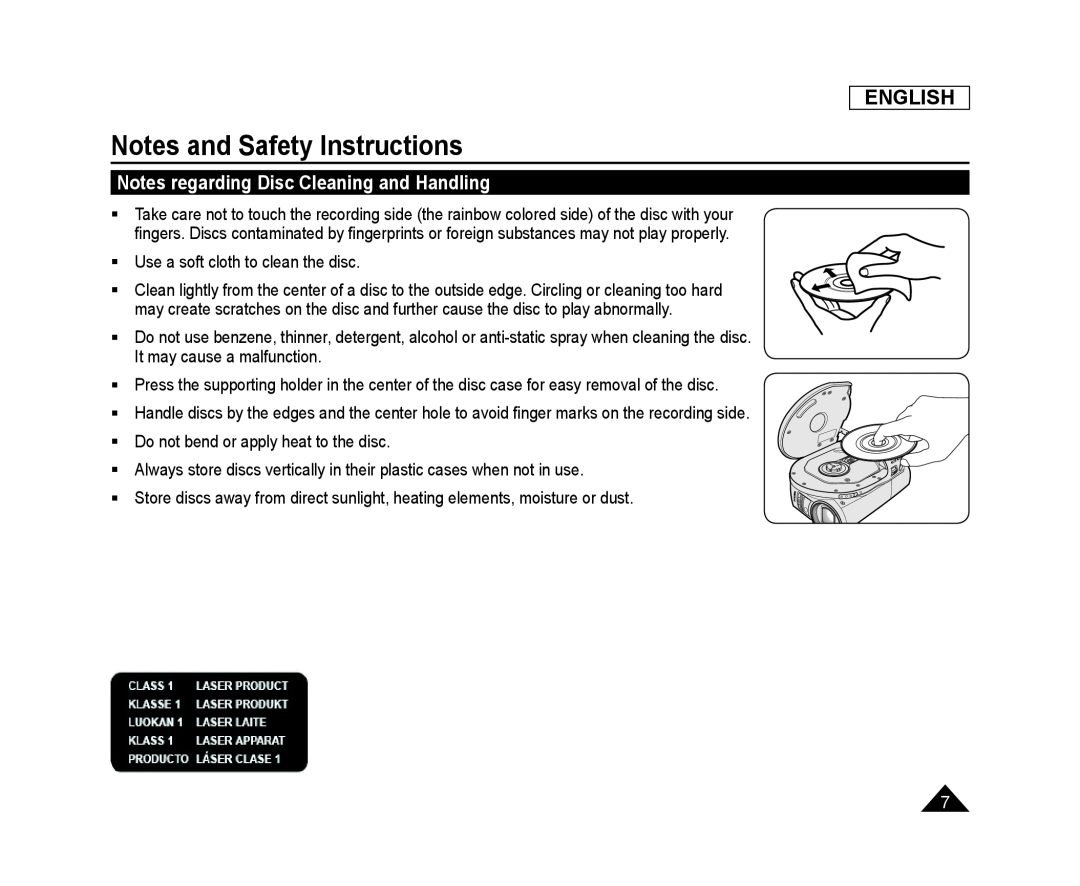 Notes regarding Disc Cleaning and Handling
 Notes regarding DVD Camcorder
Notices regarding Copyright (SC-DC175/DC575only)
Servicing & Replacement Parts
 Getting to Know Your DVD Camcorder
Features
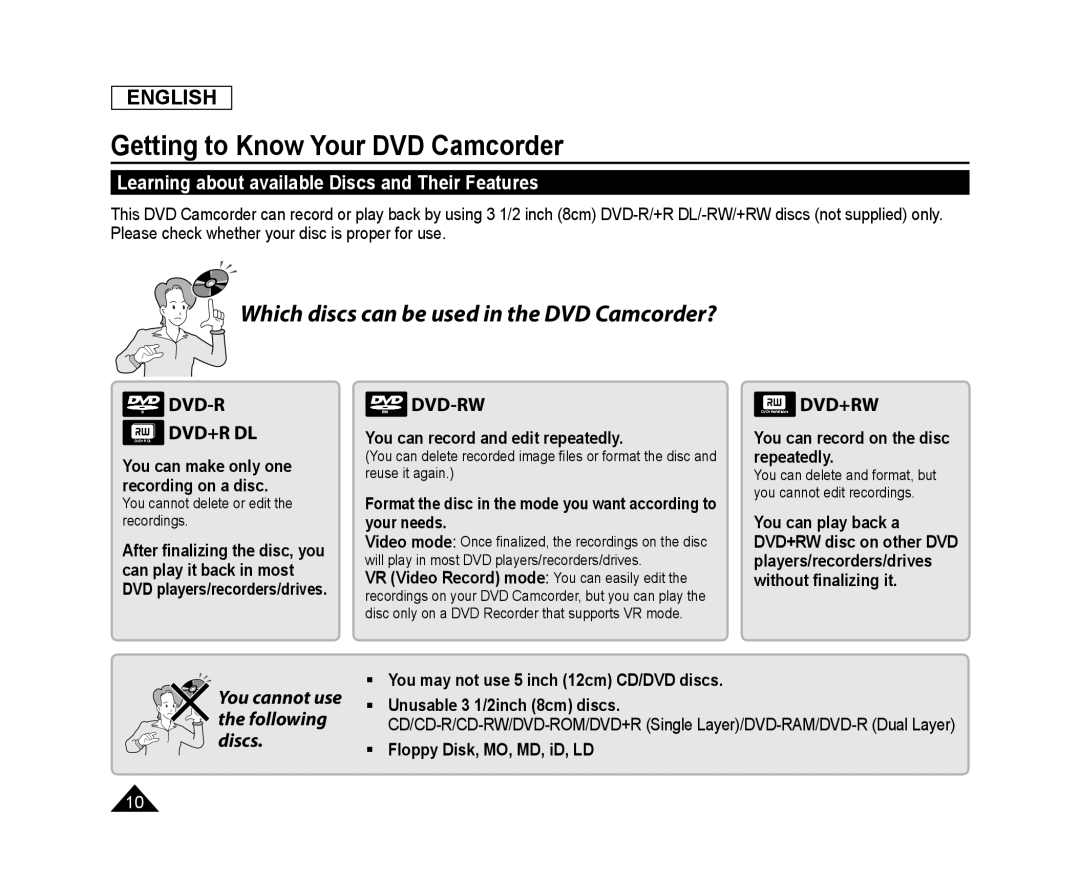 Learning about available Discs and Their Features
DVD-R
DVD-RW
DVD+RW
 ENGLISH
Getting to Know Your DVD Camcorder
Which discs recorded on the DVD Camcorder can be played in
DVD players/recorders/drives
DVD-R
DVD-RW
DVD+RW
DVD+R DL
In Video mode
In VR mode
Notes
Bad Disc
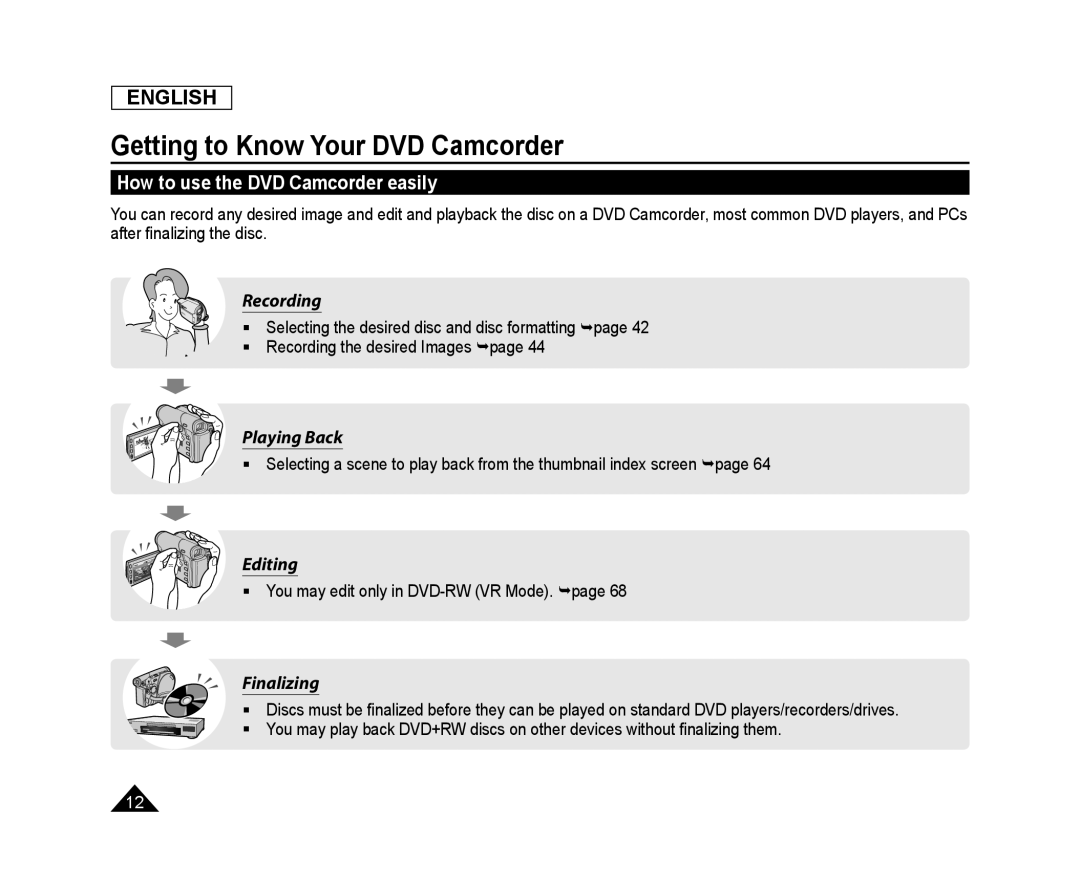 How to use the DVD Camcorder easily
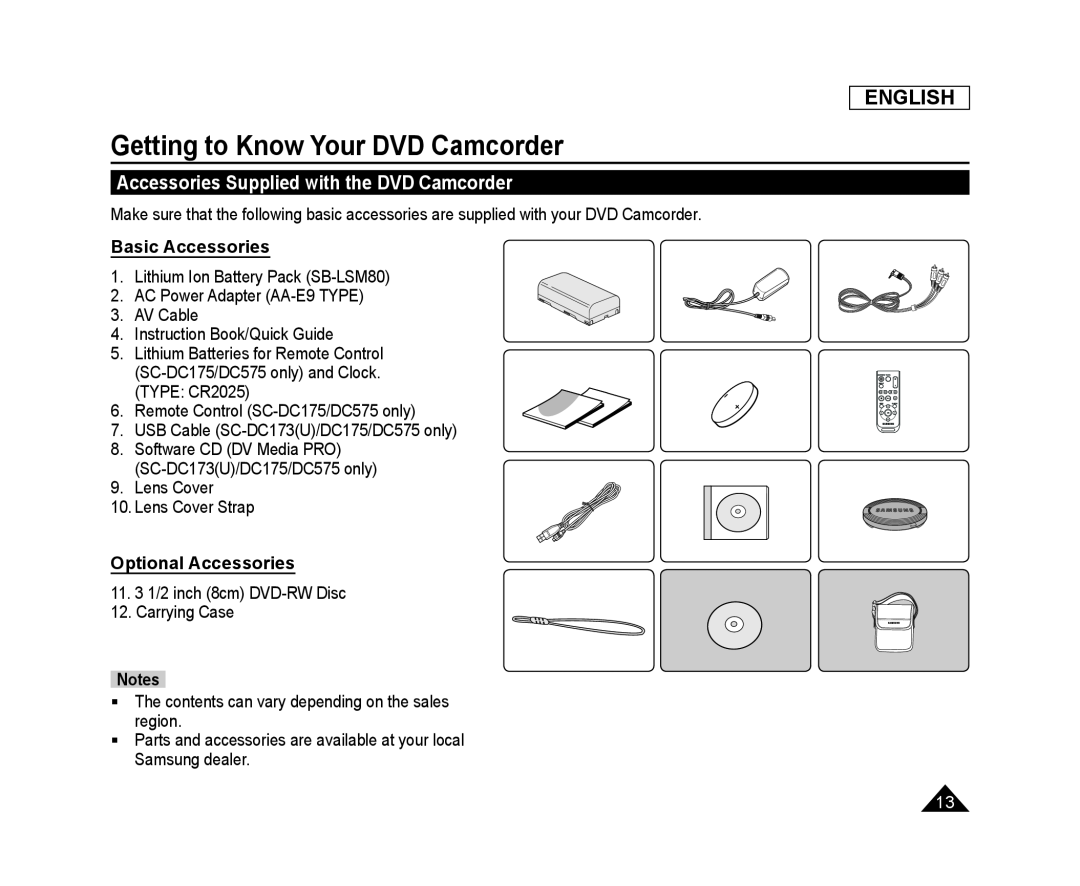 Accessories Supplied with the DVD Camcorder
Basic Accessories
Optional Accessories
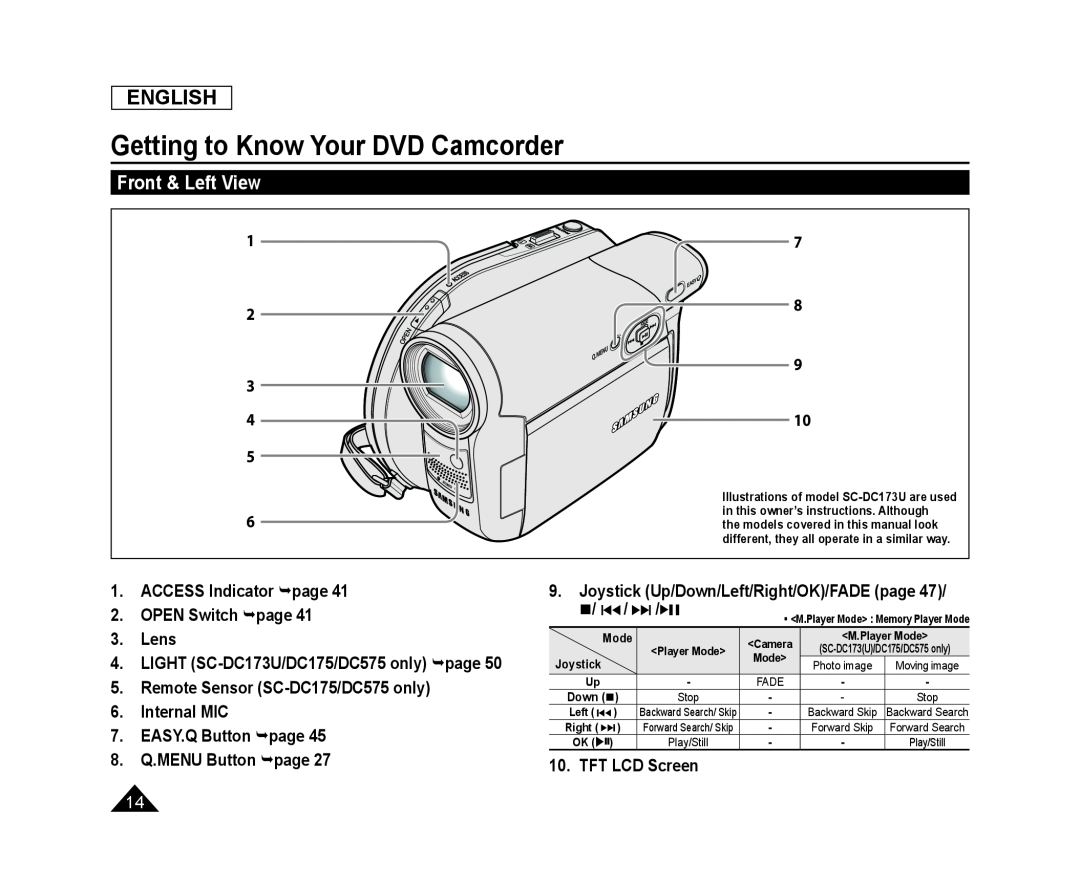 Front & Left View
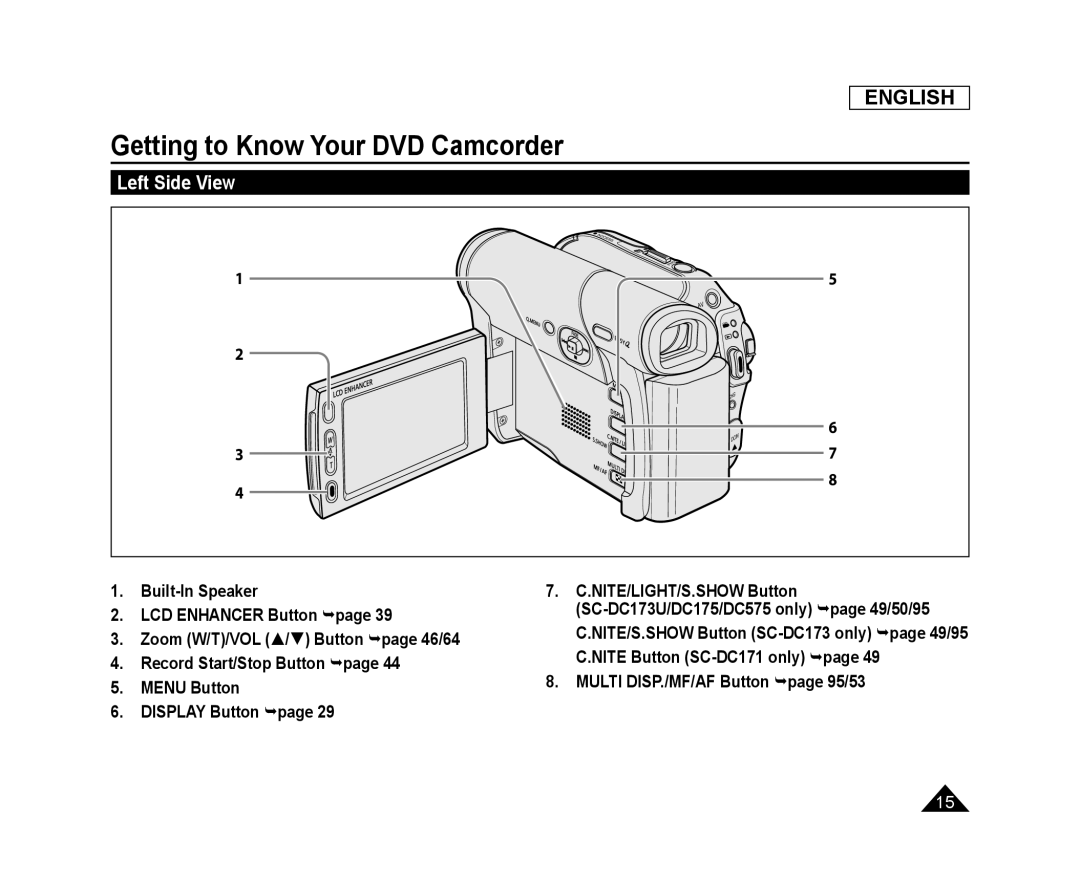 Left Side View
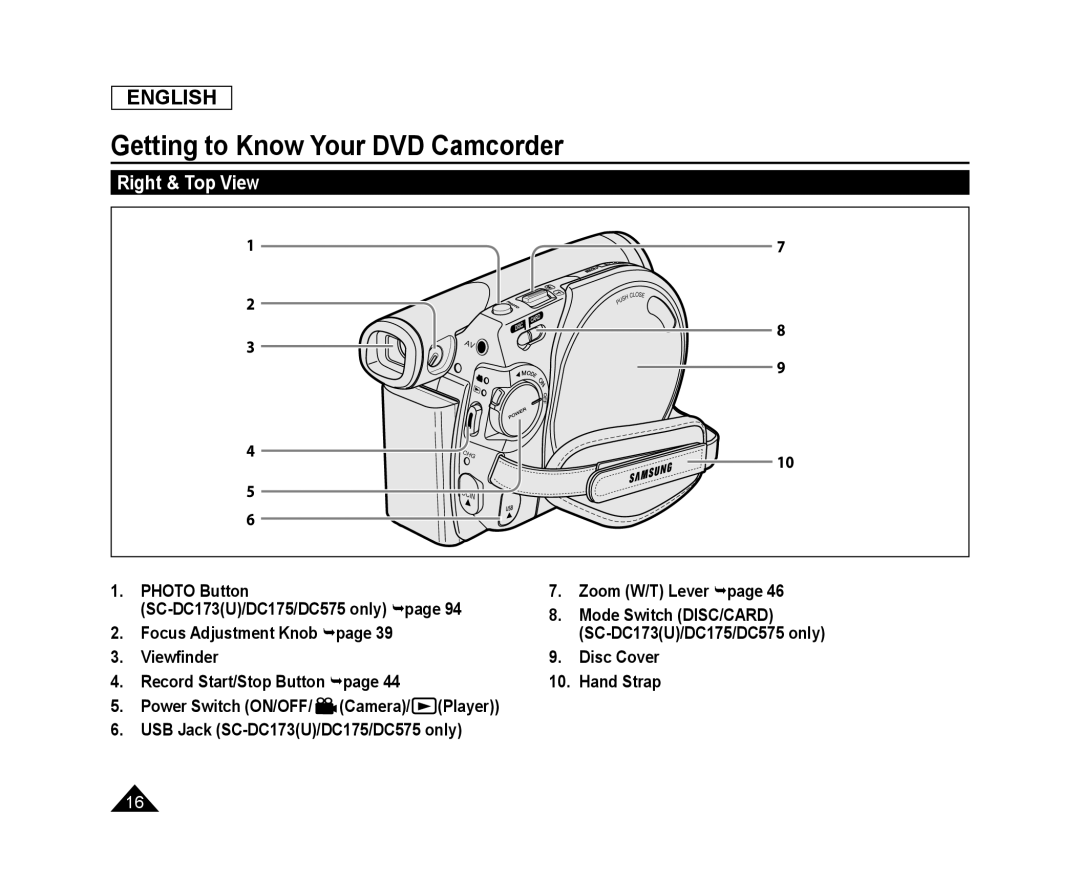 Right & Top View
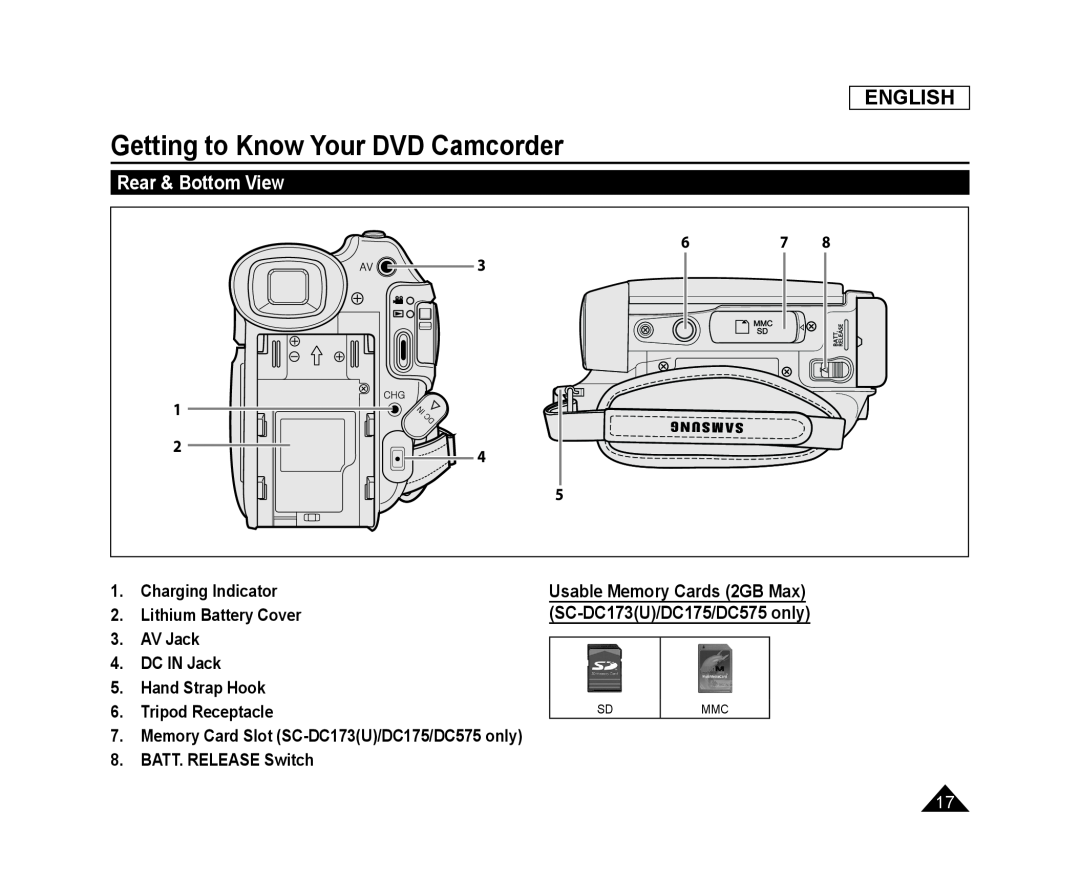 Rear & Bottom View
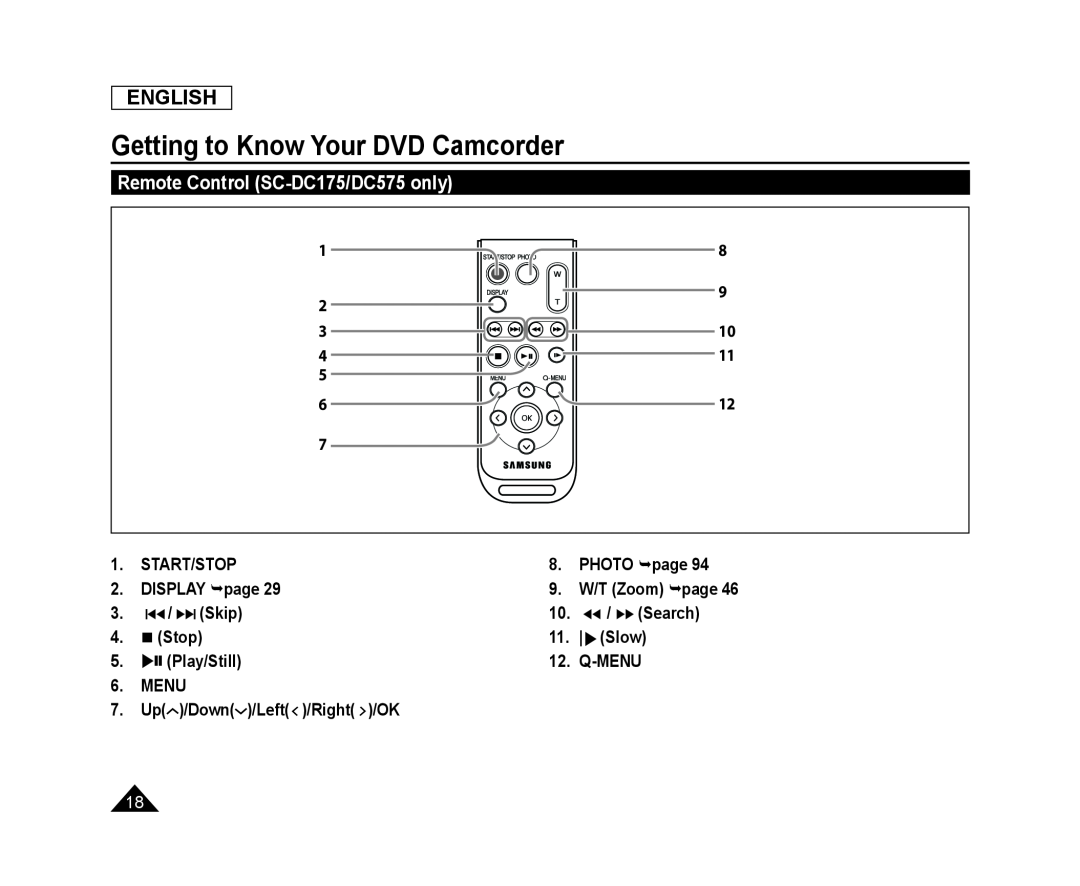 Remote Control (SC-DC175/DC575only)
 Preparation
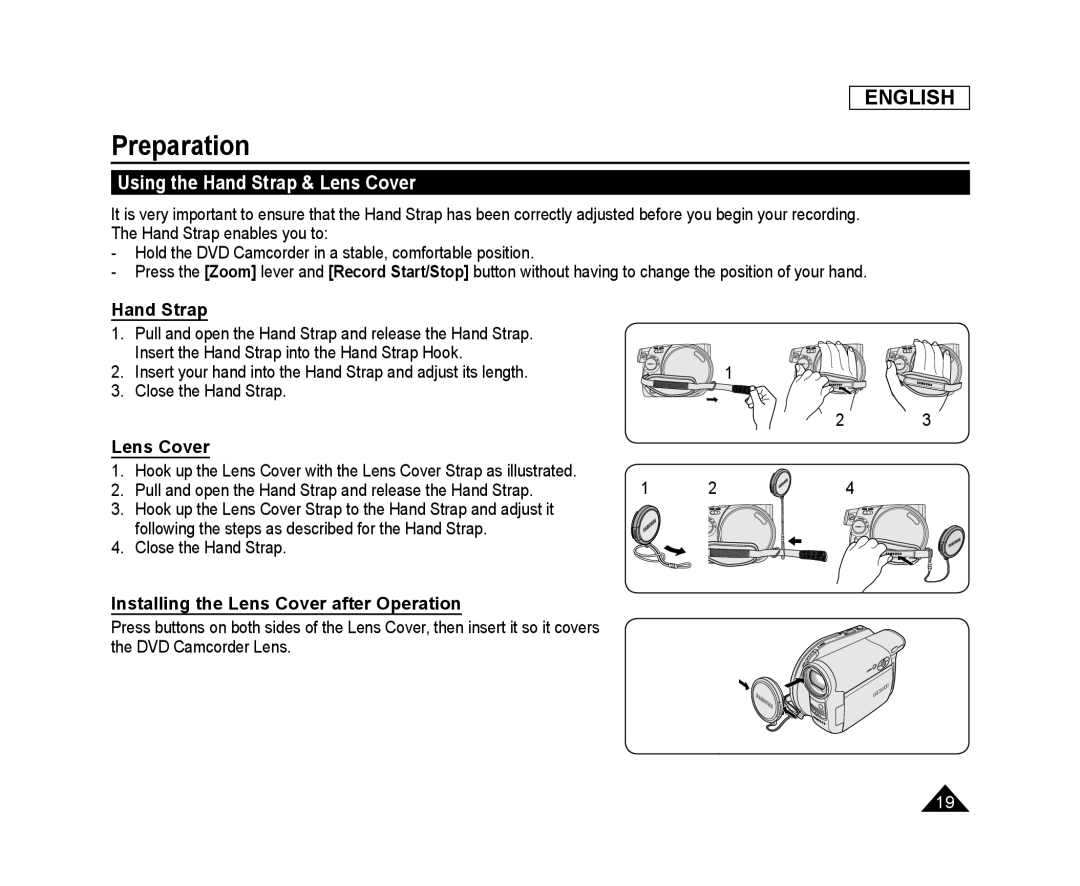
Using the Hand Strap & Lens Cover
Hand Strap
Lens Cover
Installing the Lens Cover after Operation
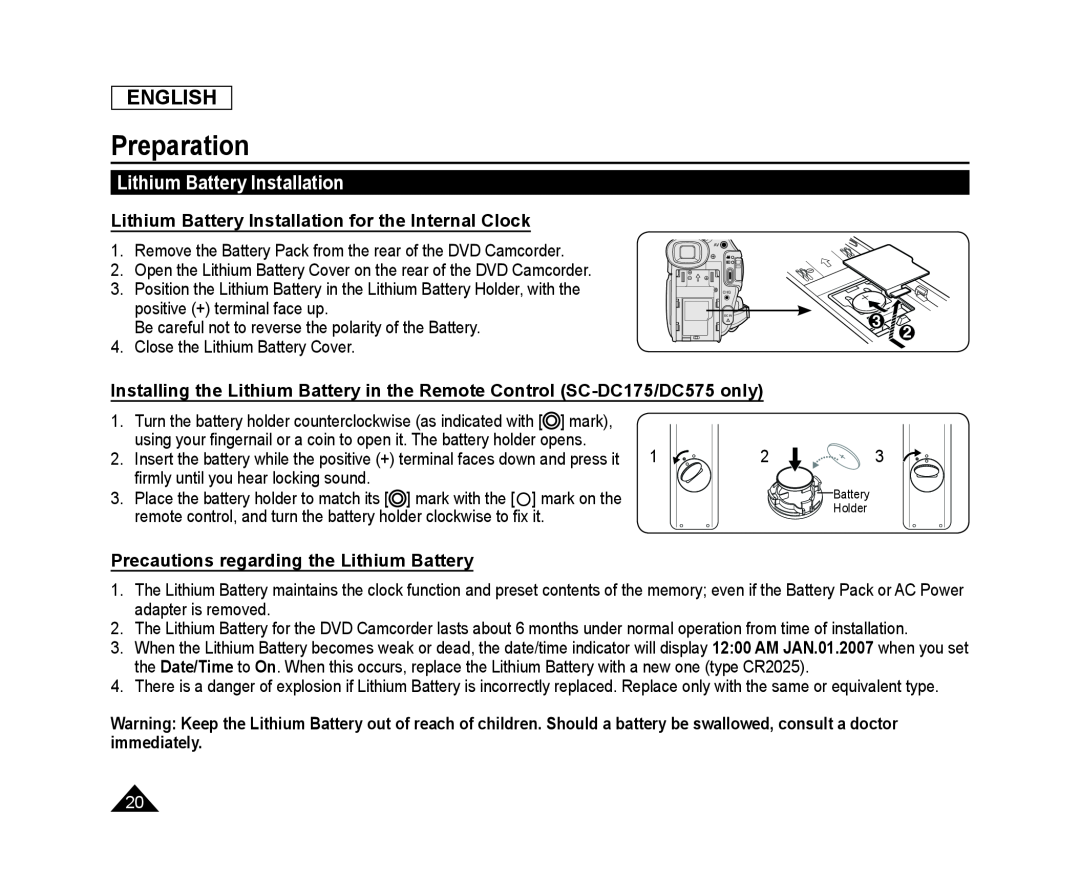 Lithium Battery Installation
Lithium Battery Installation for the Internal Clock
Installing the Lithium Battery in the Remote Control (SC-DC175/DC575only)
Precautions regarding the Lithium Battery
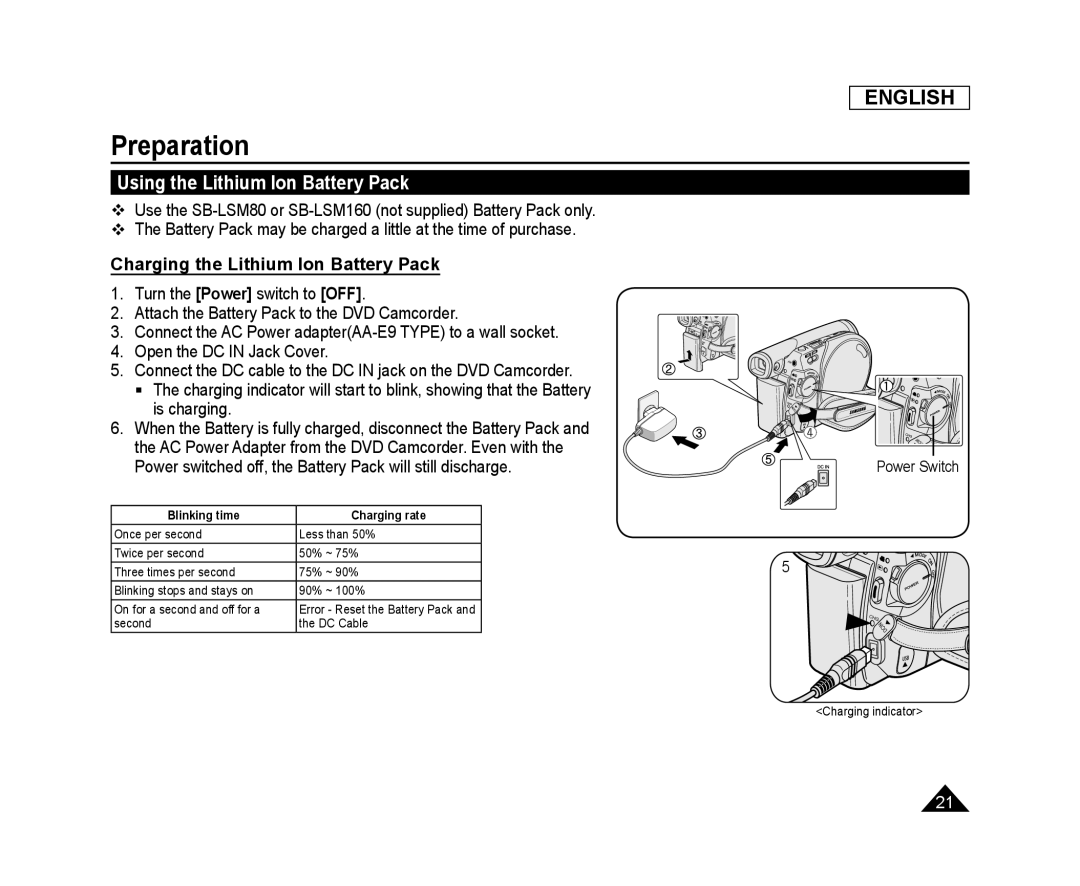 Using the Lithium Ion Battery Pack
Charging the Lithium Ion Battery Pack
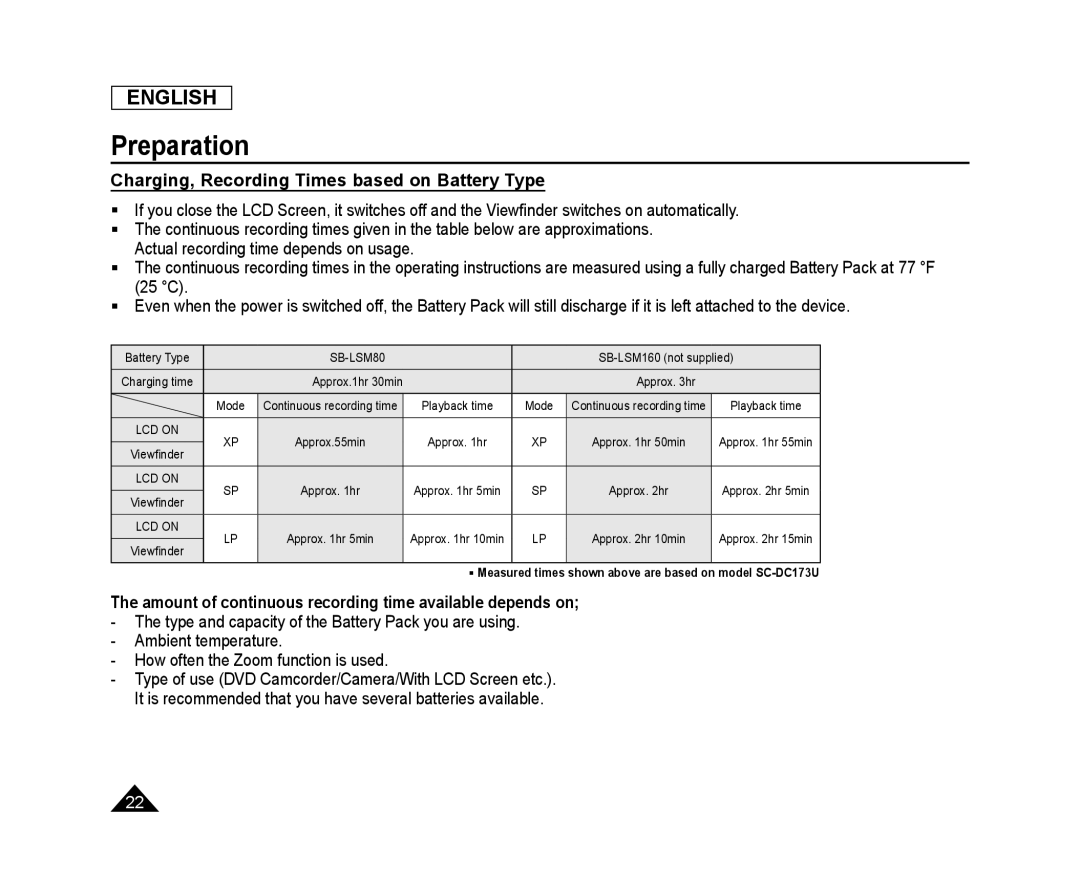 Charging, Recording Times based on Battery Type
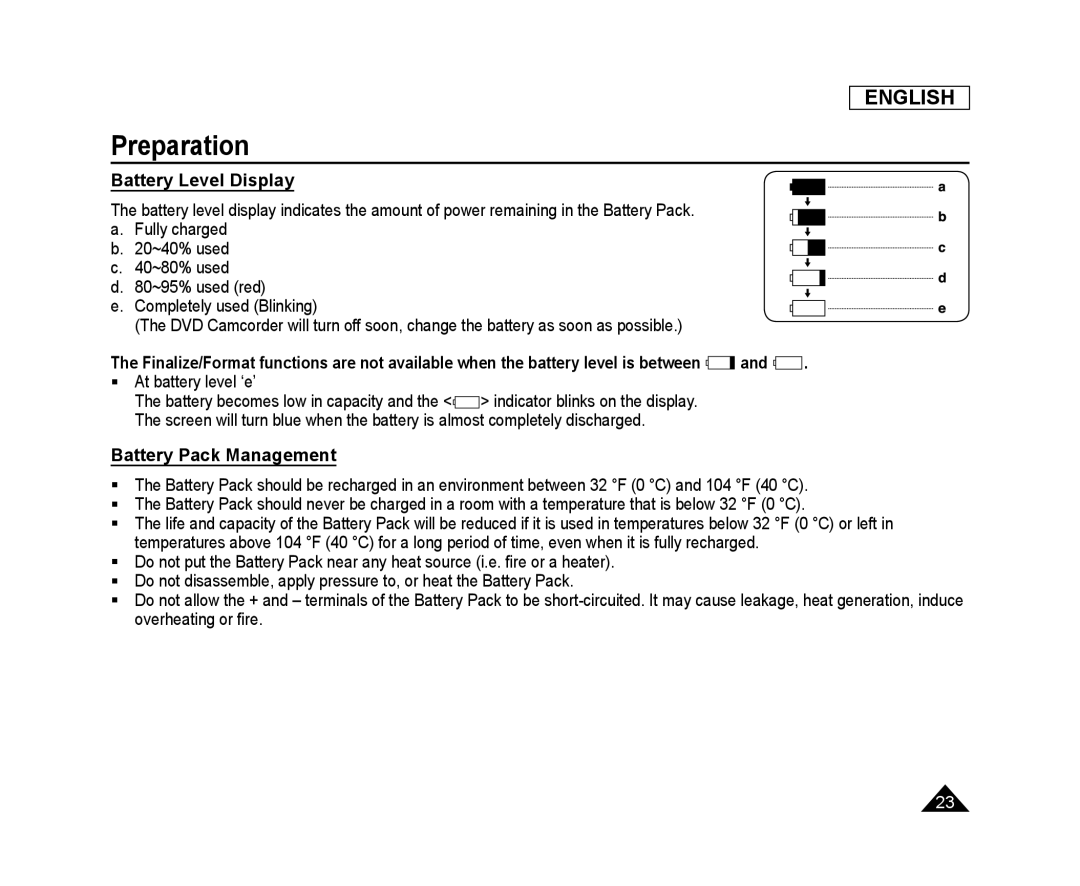 Battery Level Display
Battery Pack Management
 Maintaining the Battery Pack
 Connecting a Power Source
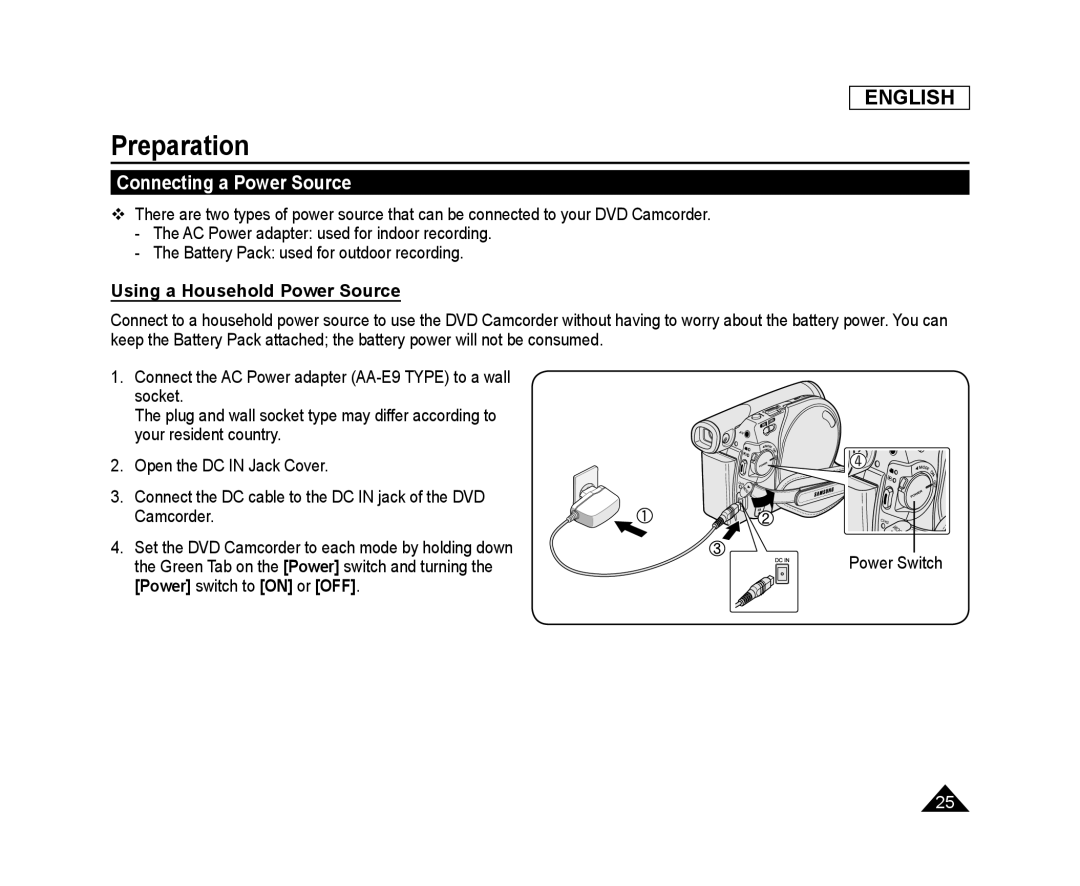
Using a Household Power Source
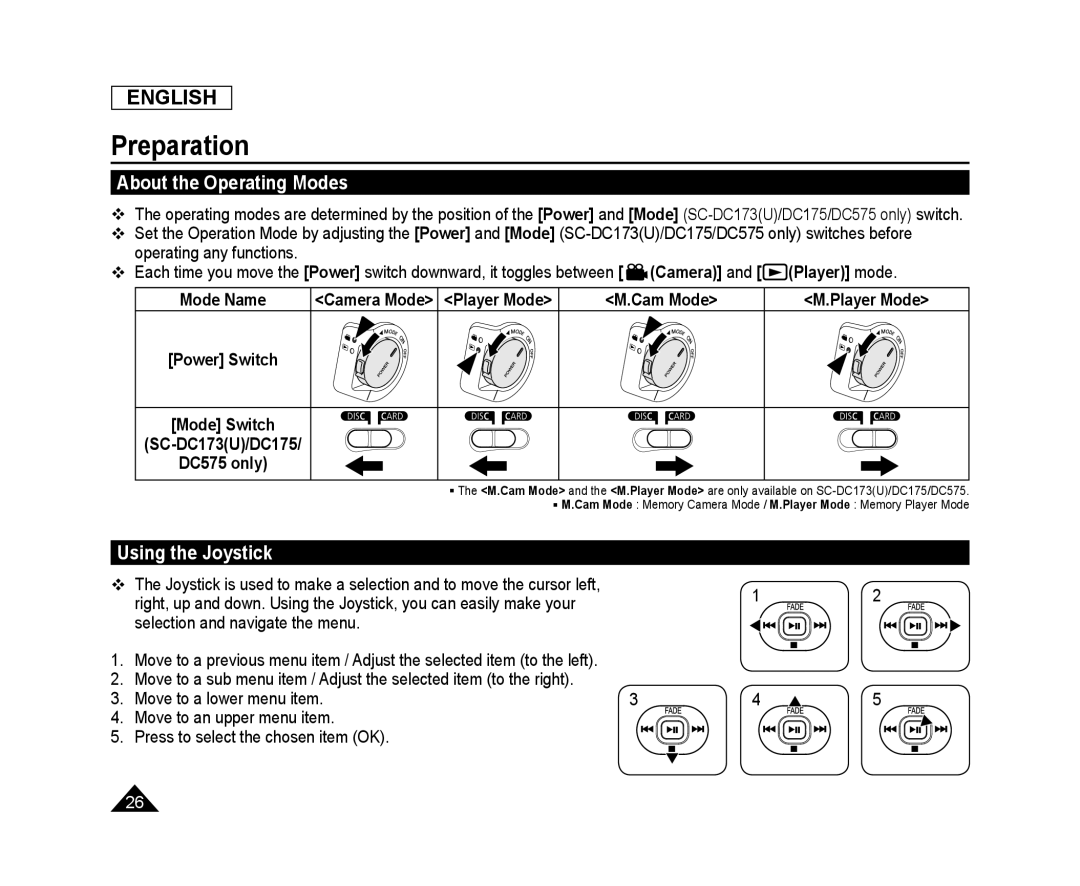 About the Operating Modes
Using the Joystick
 Using the Q.MENU
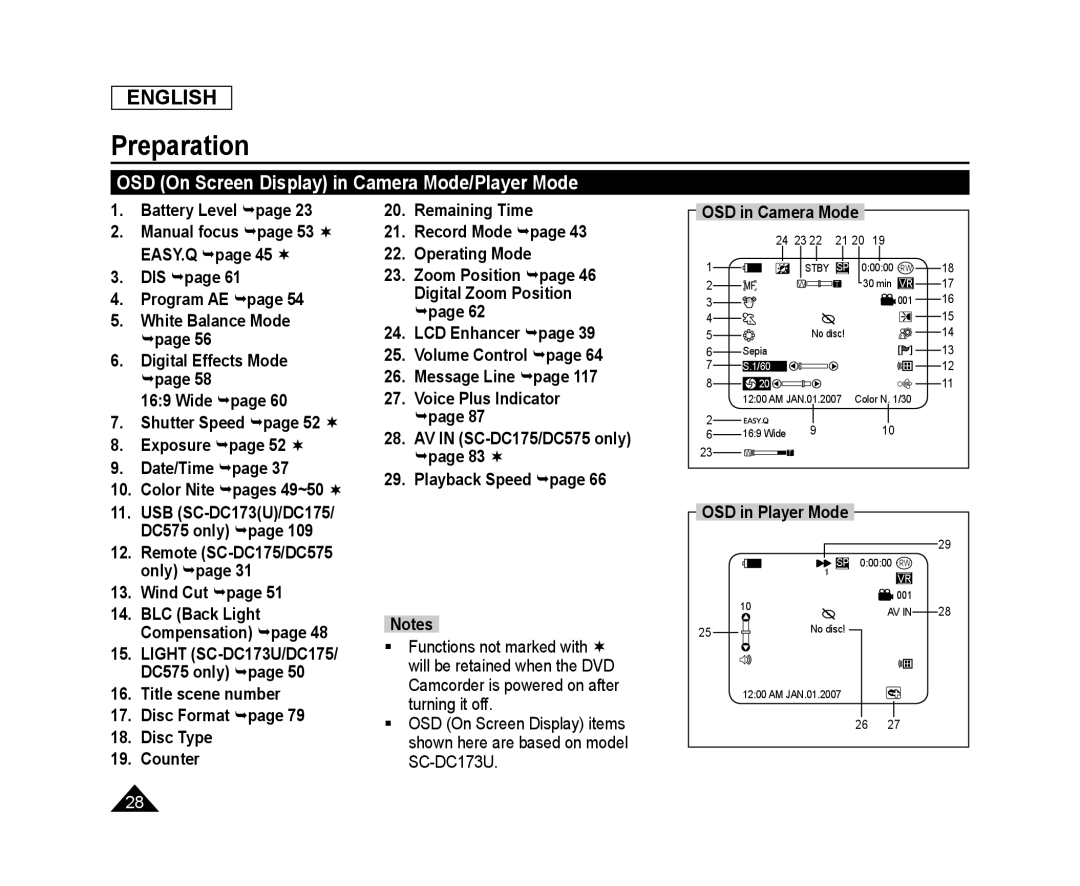 OSD (On Screen Display) in Camera Mode/Player Mode
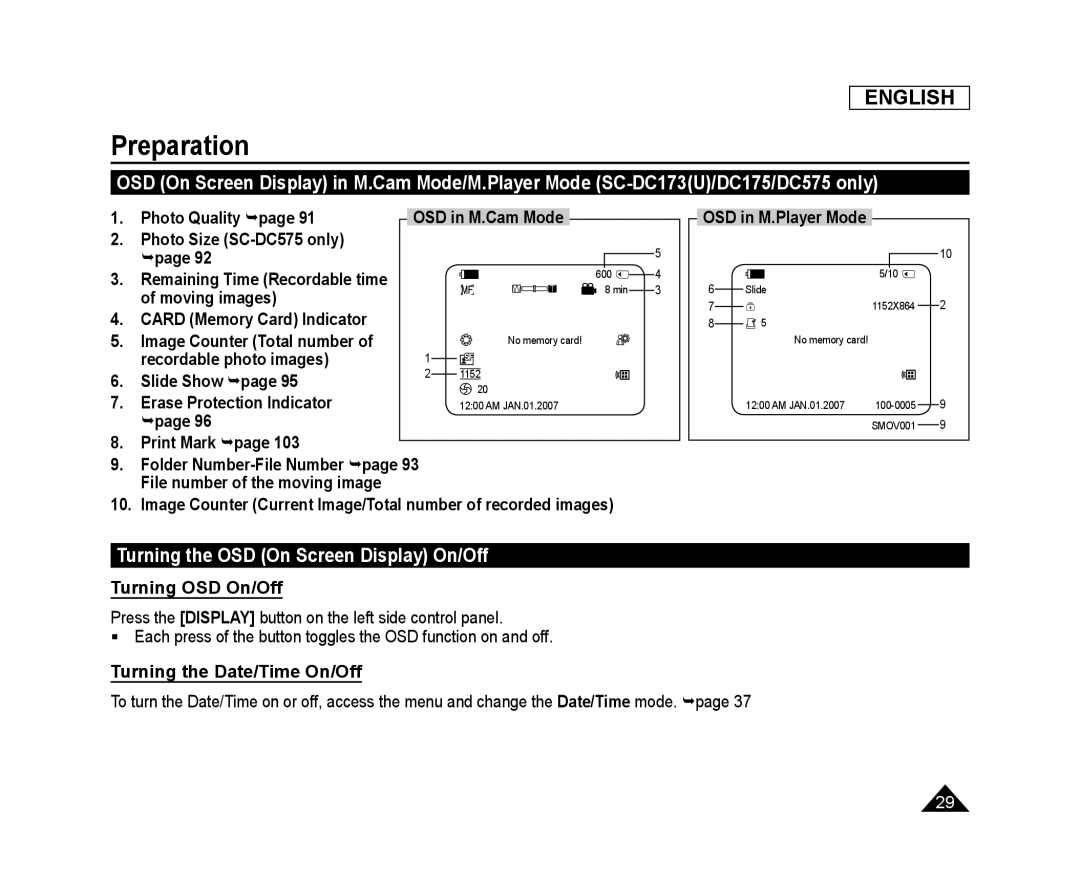 Turning the OSD (On Screen Display) On/Off
Turning OSD On/Off
Turning the Date/Time On/Off
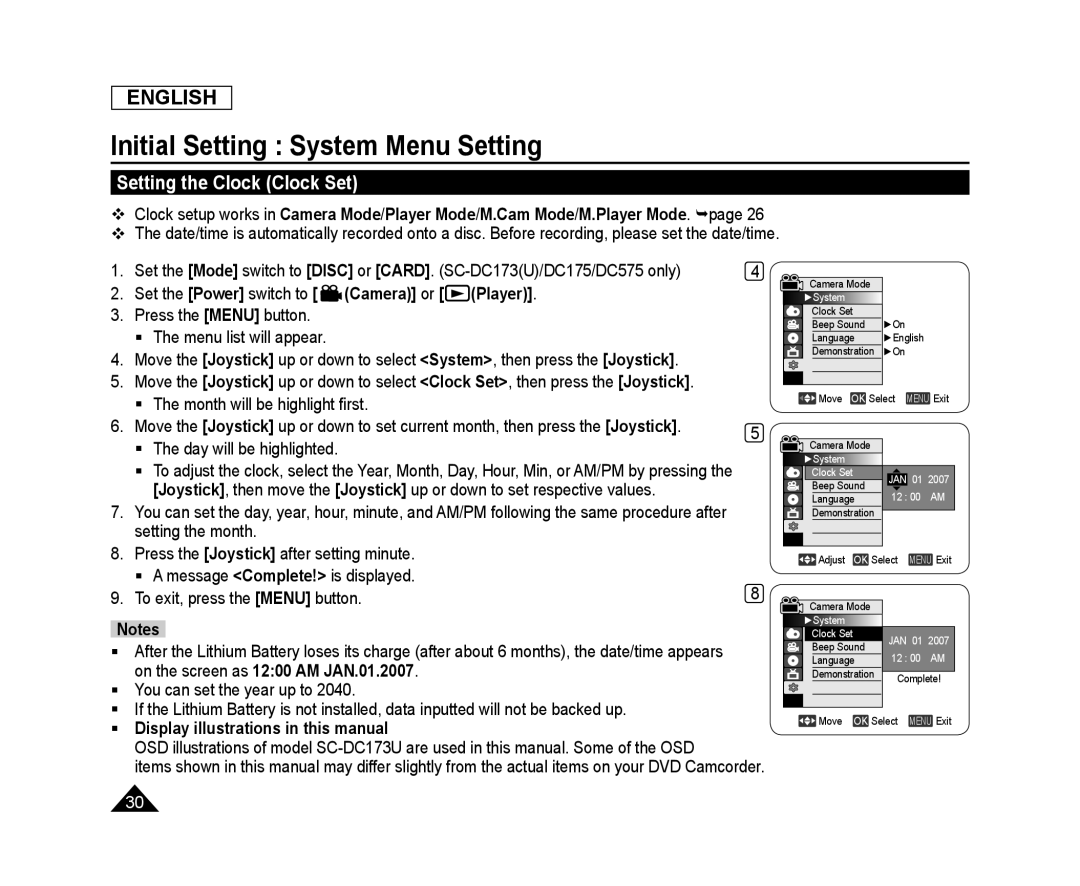 Initial Setting : System Menu Setting
Setting the Clock (Clock Set)
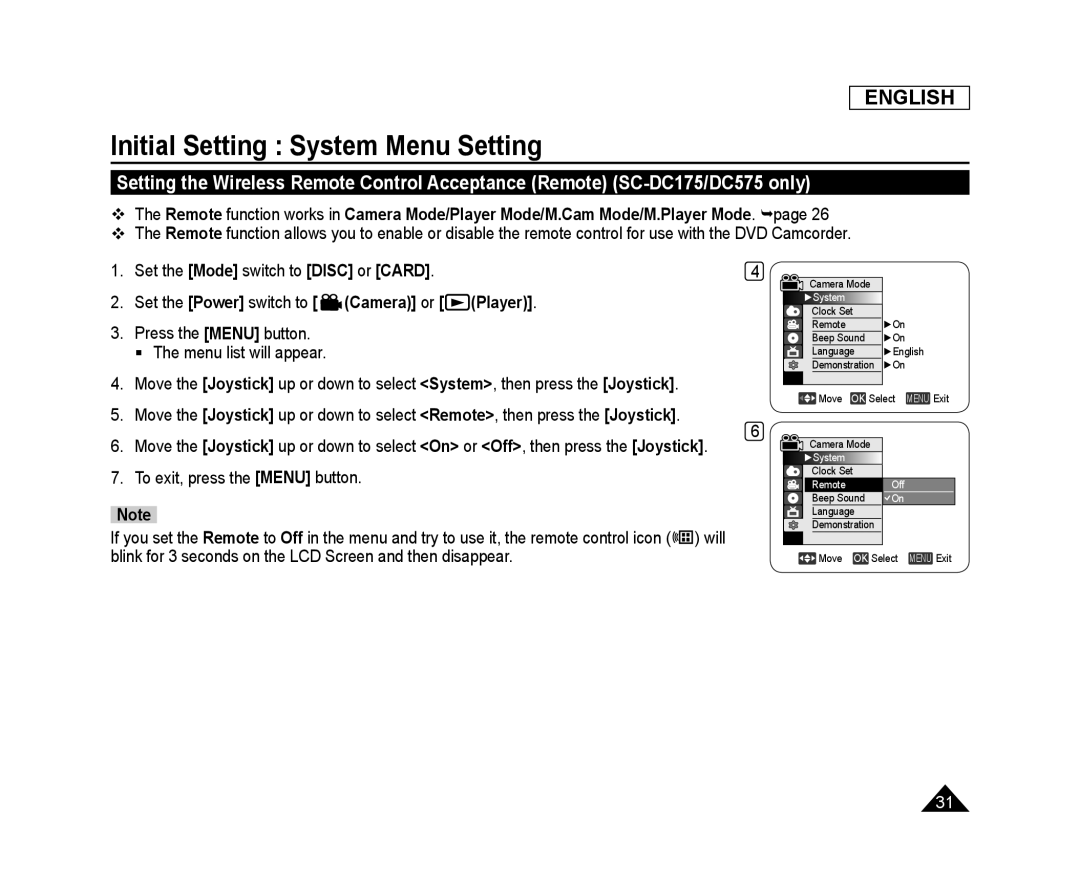 Setting the Wireless Remote Control Acceptance (Remote) (SC-DC175/DC575only)
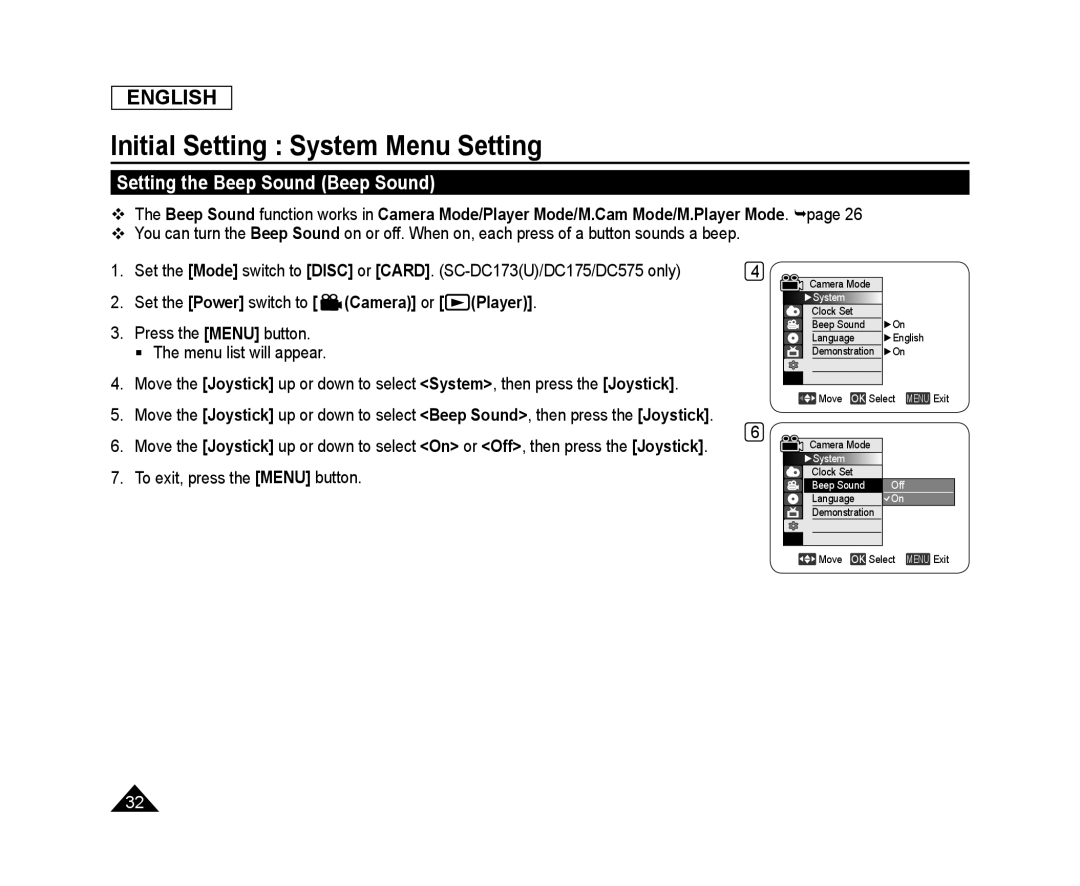 Setting the Beep Sound (Beep Sound)
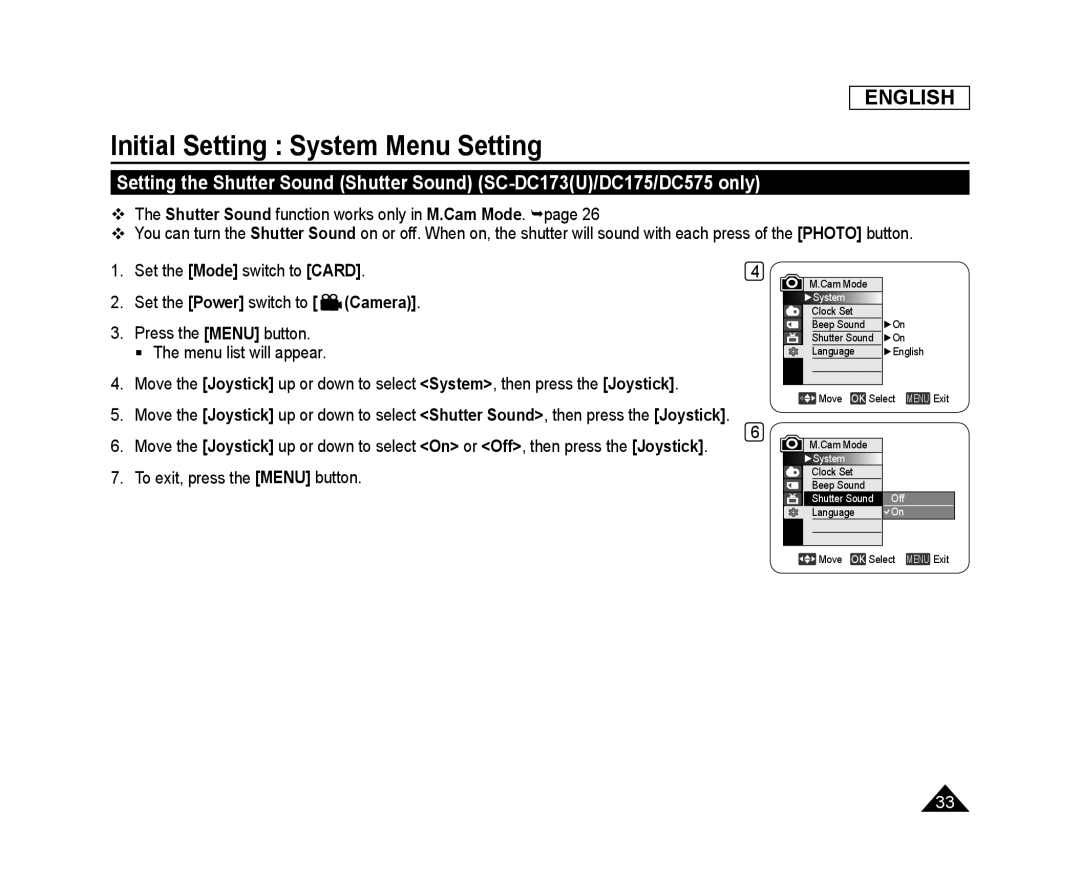 Setting the Shutter Sound (Shutter Sound) (SC-DC173(U)/DC175/DC575only)
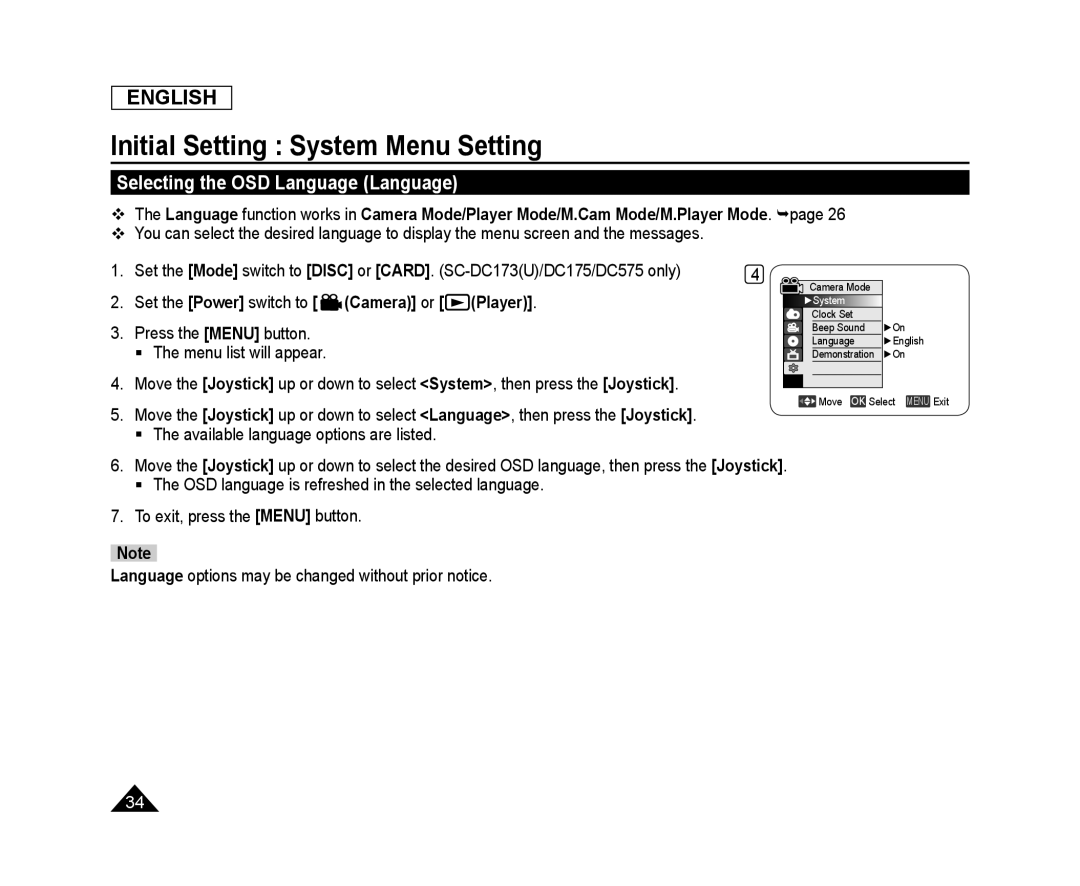 Selecting the OSD Language (Language)
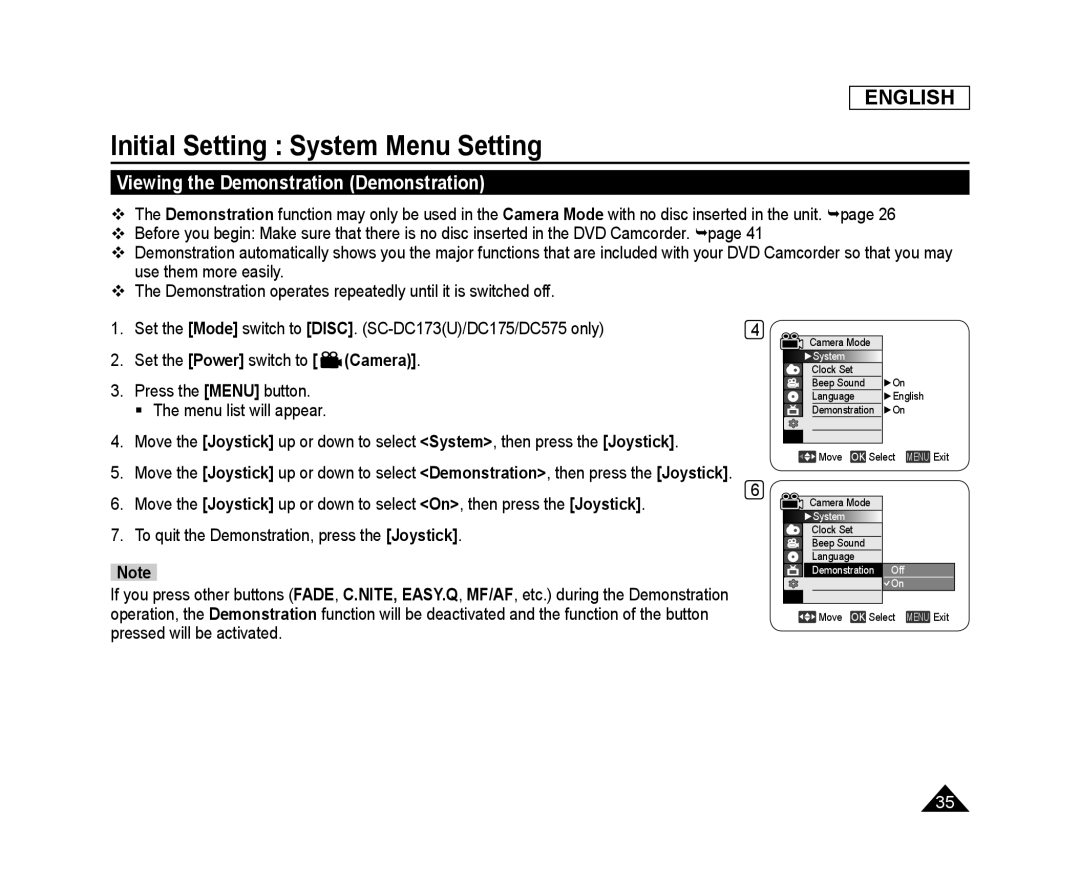 Viewing the Demonstration (Demonstration)
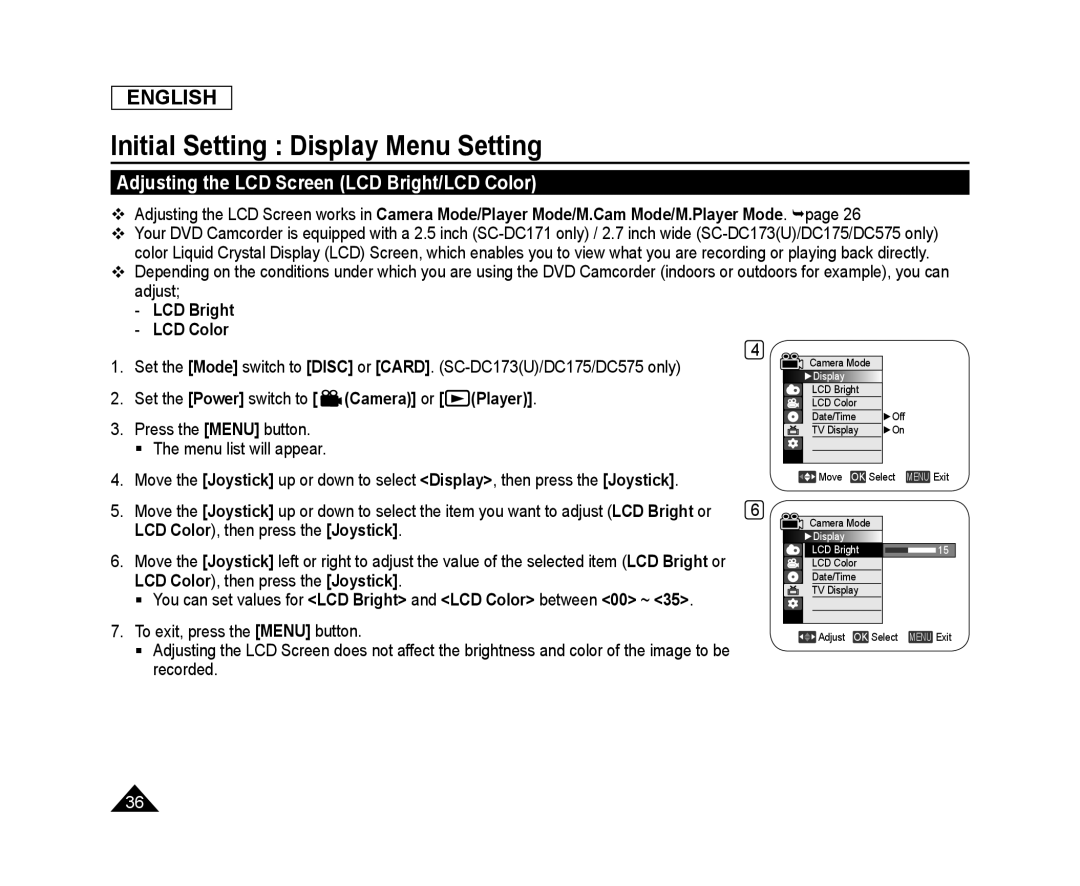 Initial Setting : Display Menu Setting
Adjusting the LCD Screen (LCD Bright/LCD Color)
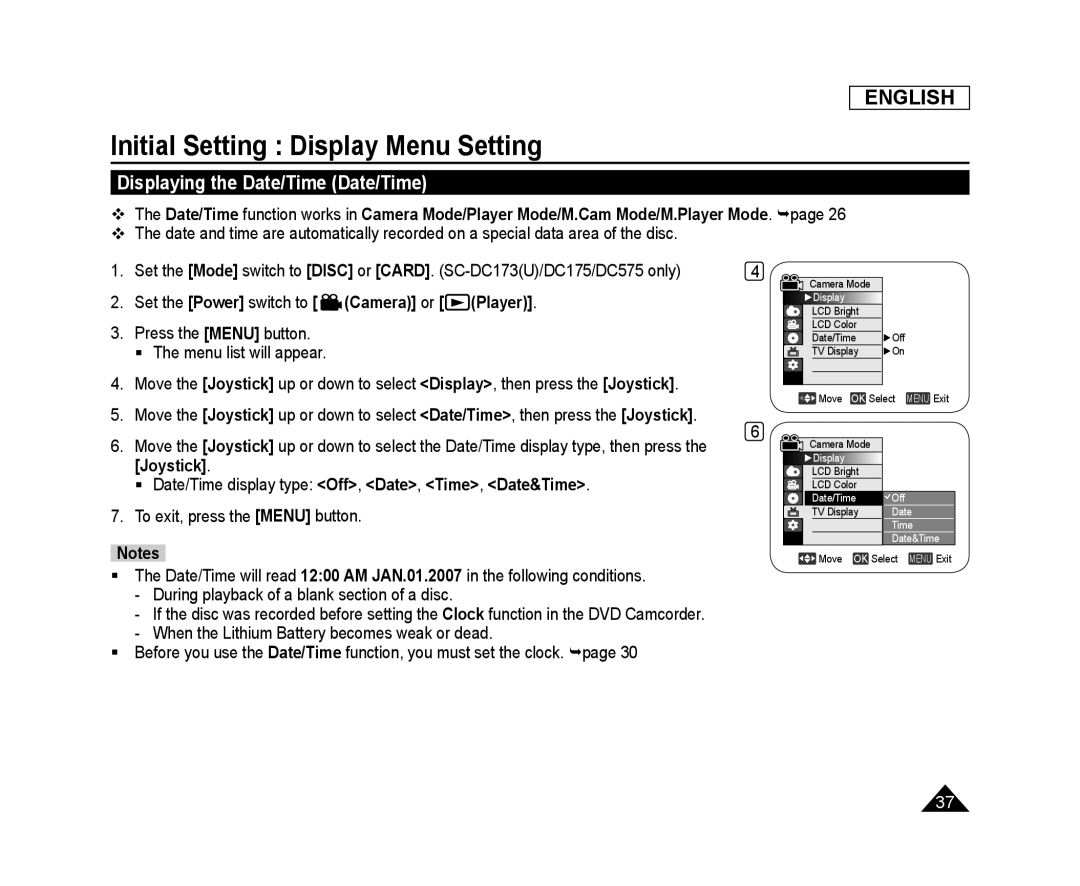 Displaying the Date/Time (Date/Time)
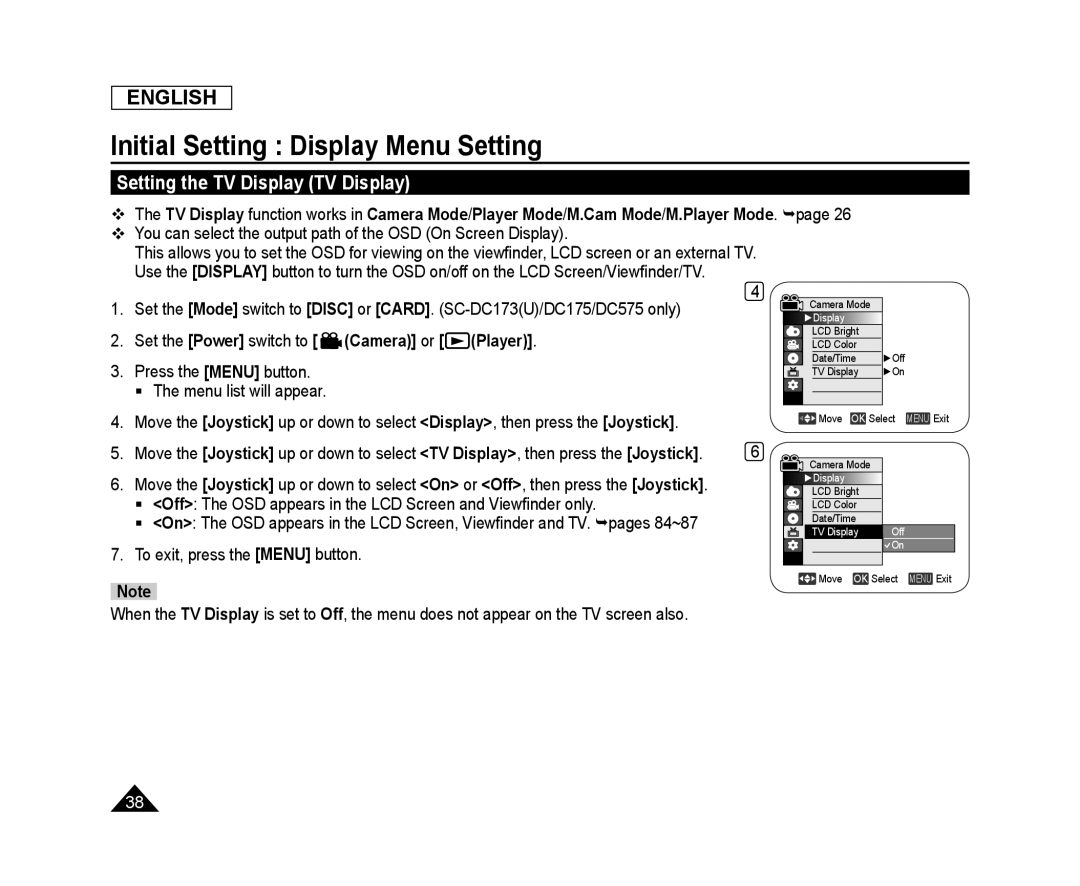 Setting the TV Display (TV Display)
 DVD Camcorder: Before Recording
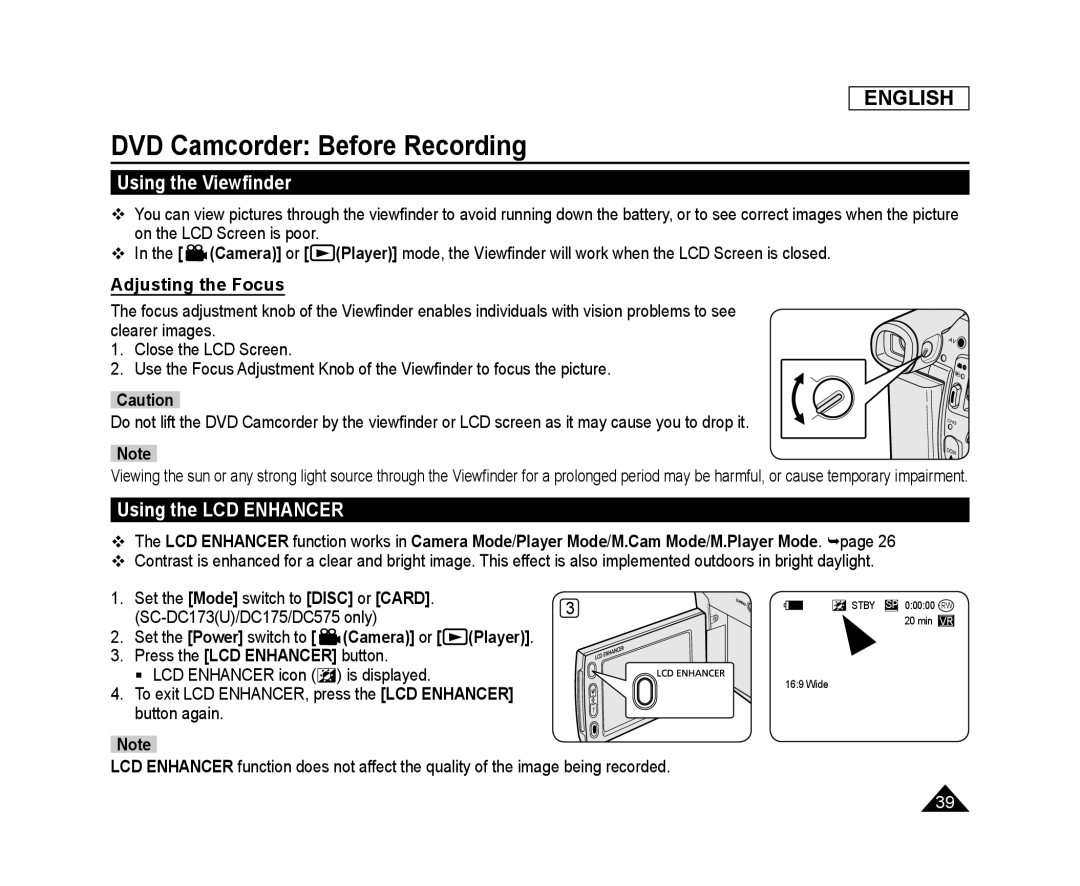
Using the Viewfinder
Adjusting the Focus
Using the LCD ENHANCER
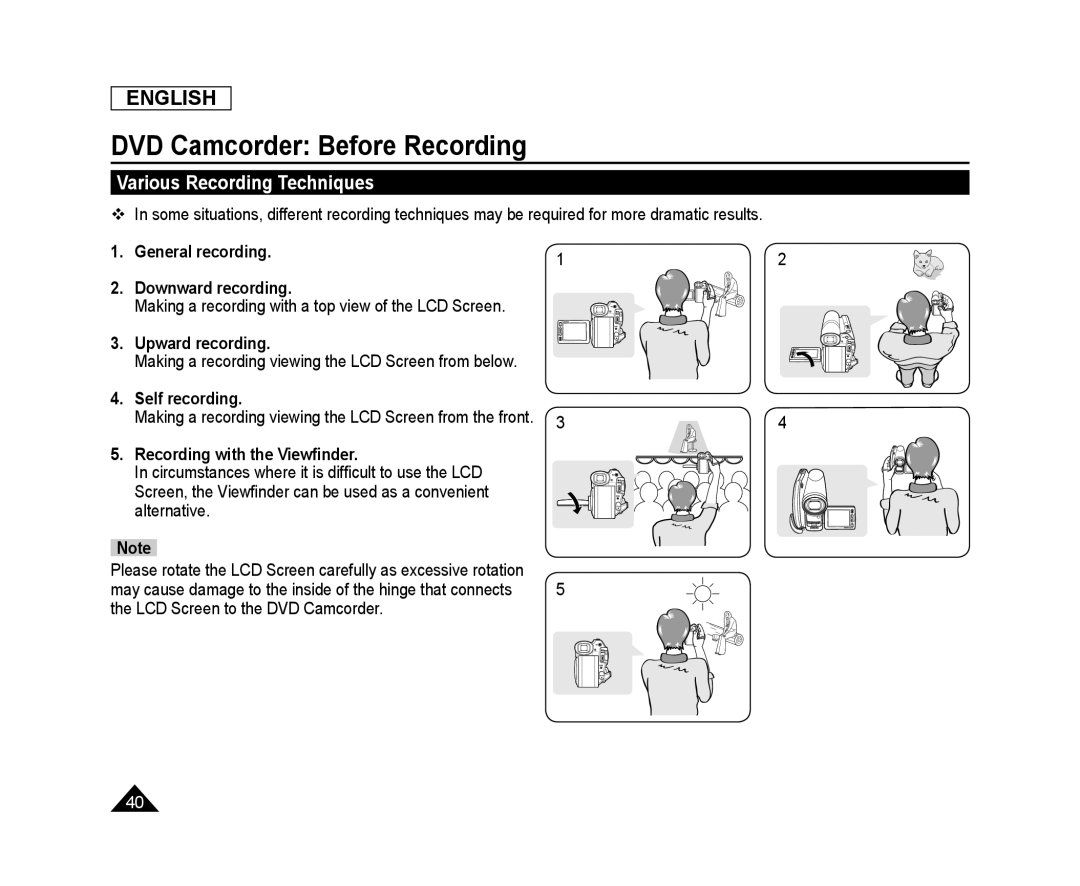 Various Recording Techniques
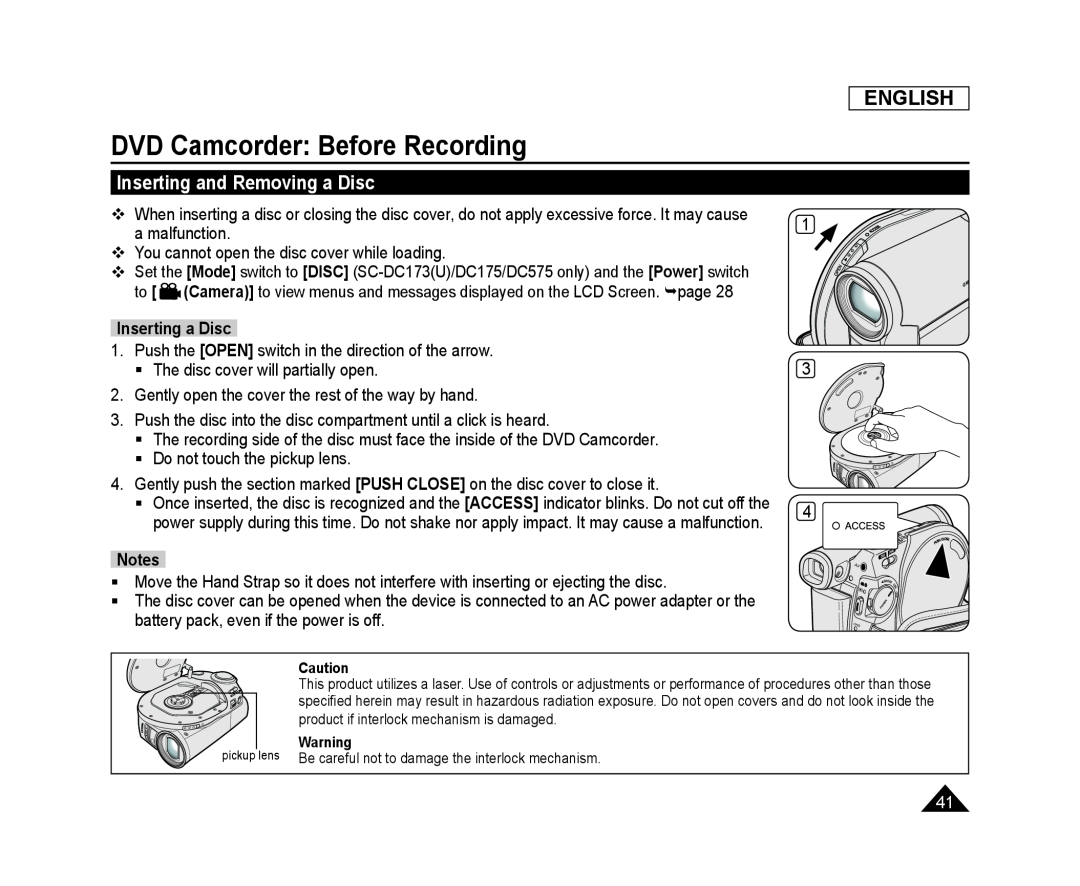 Inserting and Removing a Disc
 ENGLISH
DVD Camcorder: Before Recording
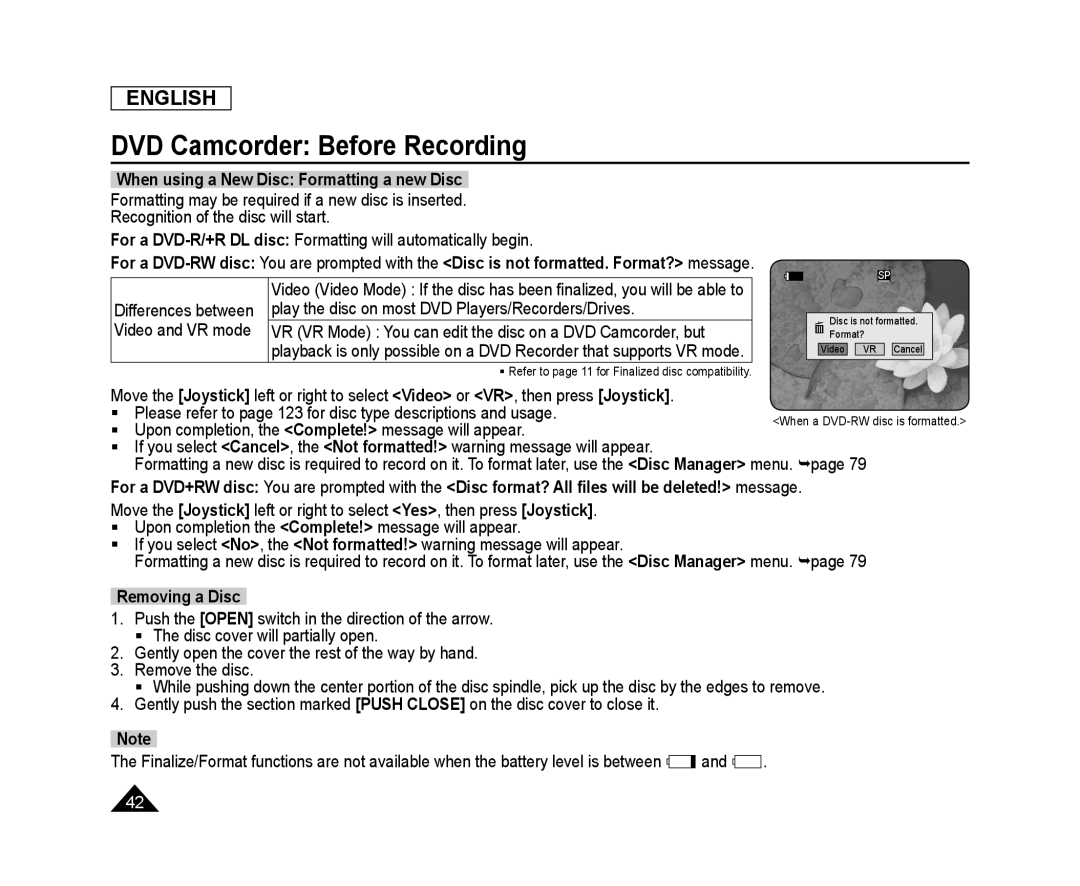
When using a New Disc: Formatting a new Disc
For a
DVD-R/+R
DL disc:
[Joystick]
<Video
<VR
[Joystick]
<Complete
<Cancel
<Not formatted
<Disc Manager
<Complete
<No
<Not formatted
<Disc Manager
Removing a Disc
[OPEN]
[PUSH CLOSE]
Note
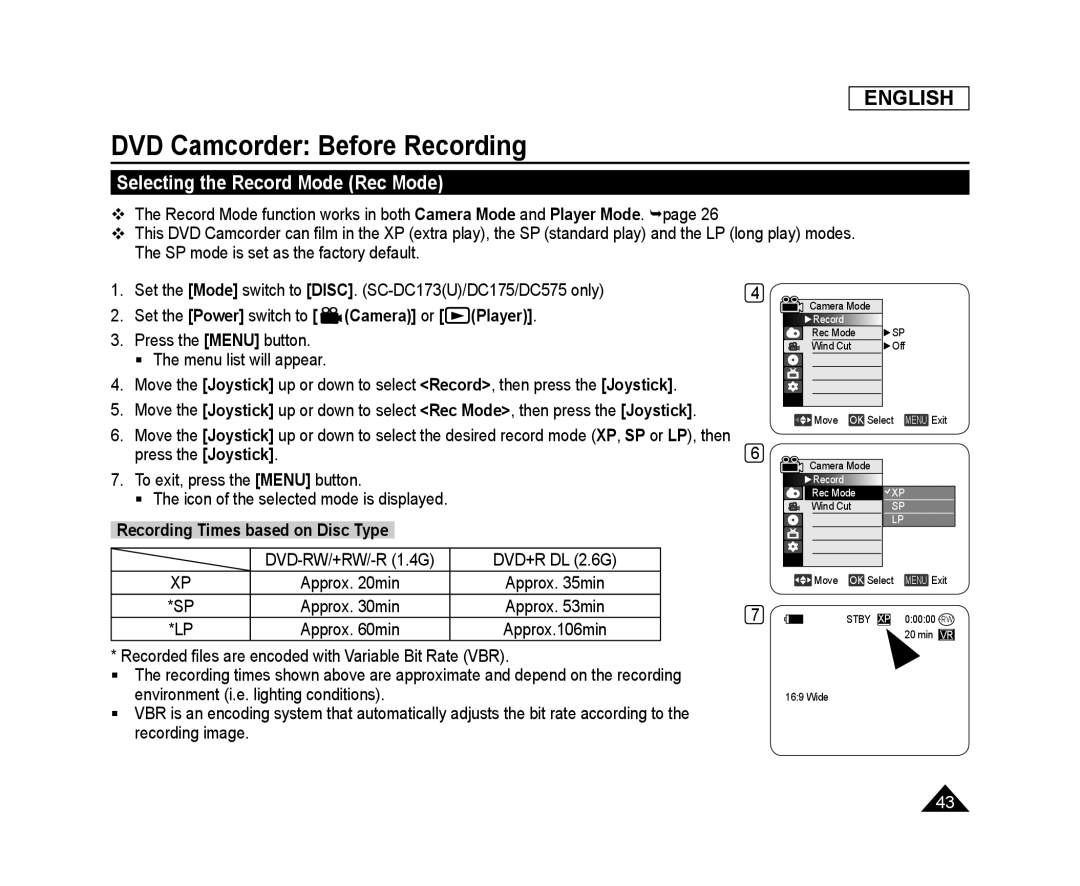 Selecting the Record Mode (Rec Mode)
 DVD Camcorder: Basic Recording
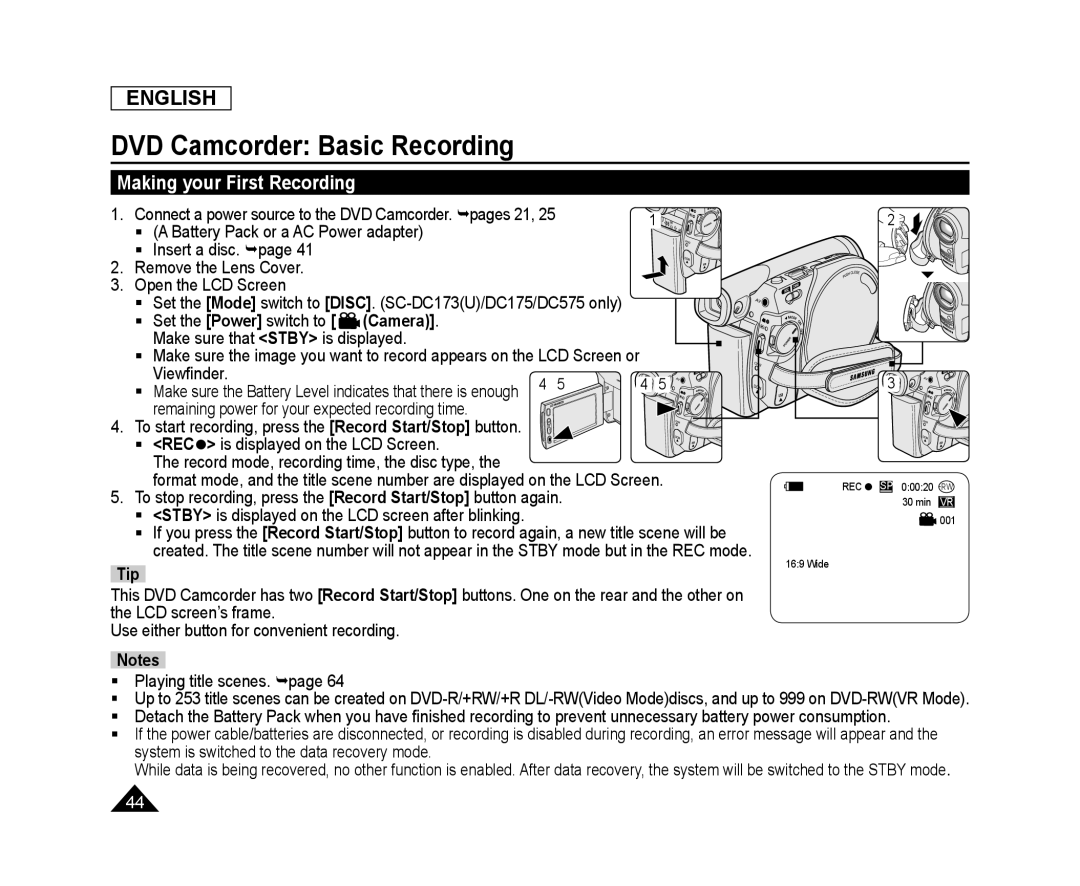
Making your First Recording
 Recording with Ease for Beginners (EASY.Q Mode)
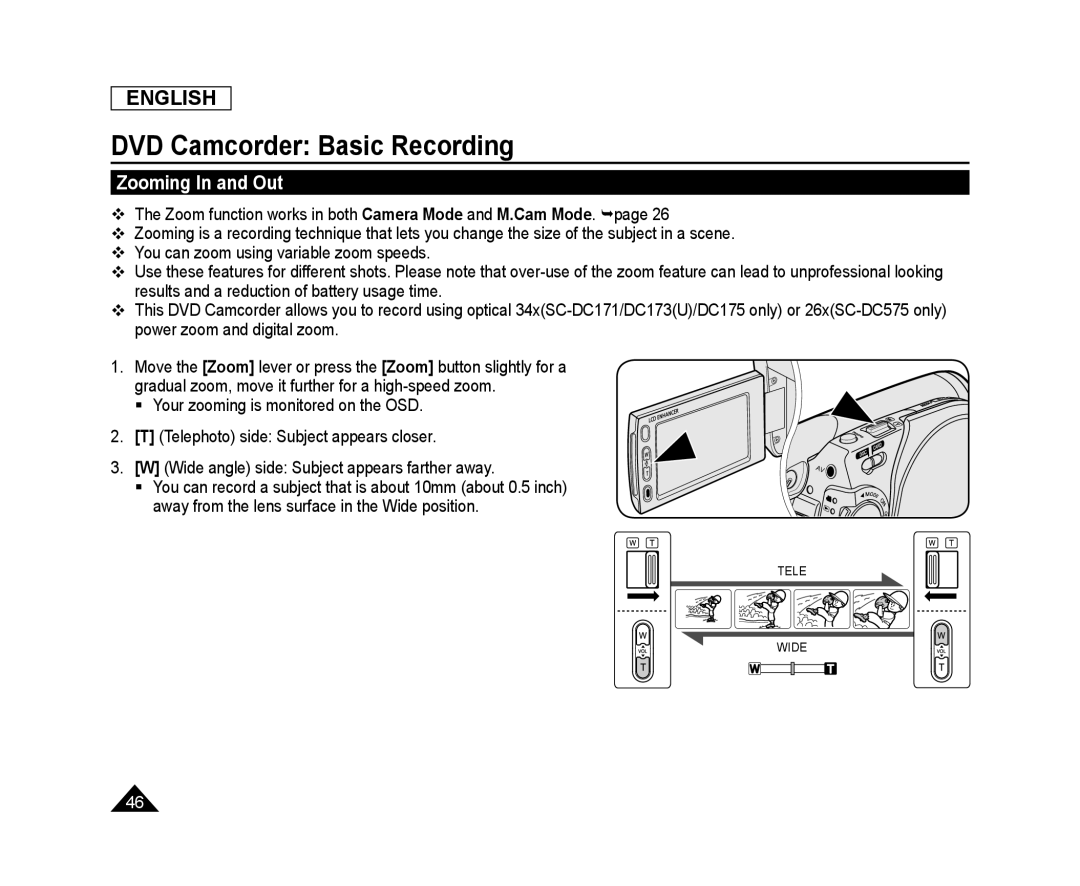 Zooming In and Out
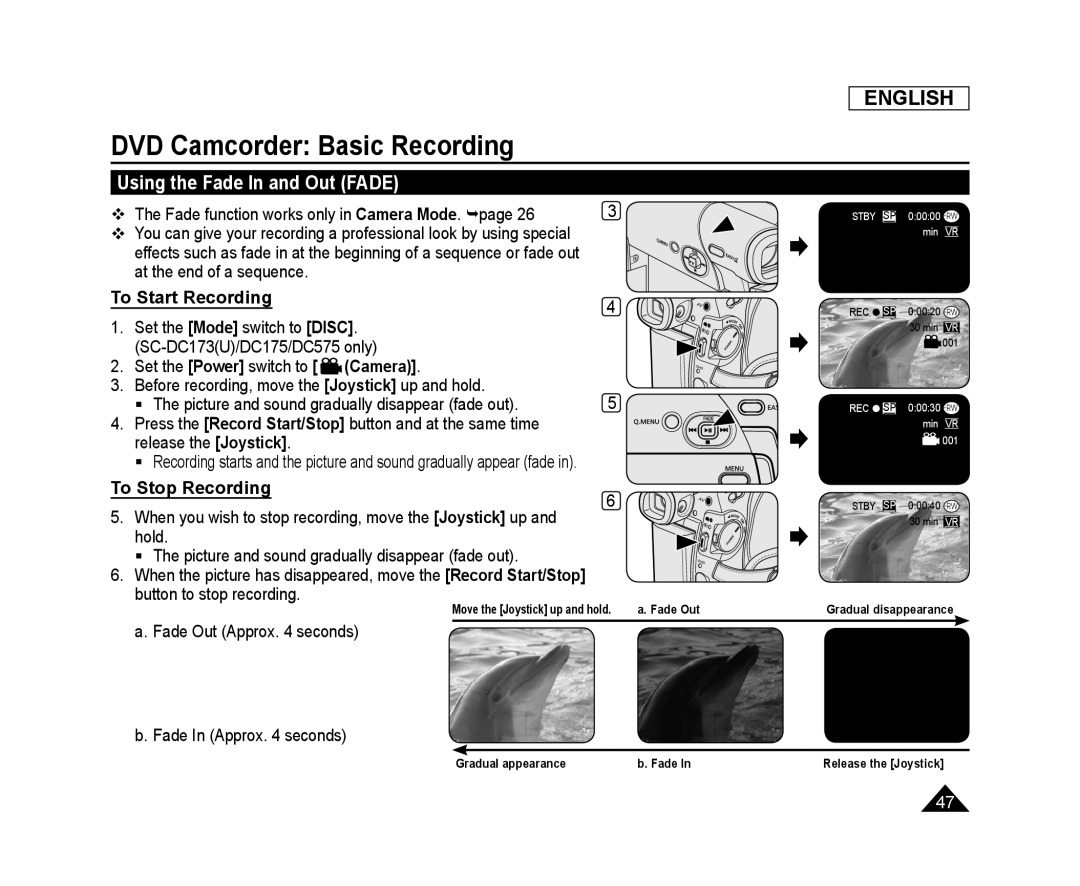 Using the Fade In and Out (FADE)
To Start Recording
To Stop Recording
 Using Back Light Compensation Mode (BLC)
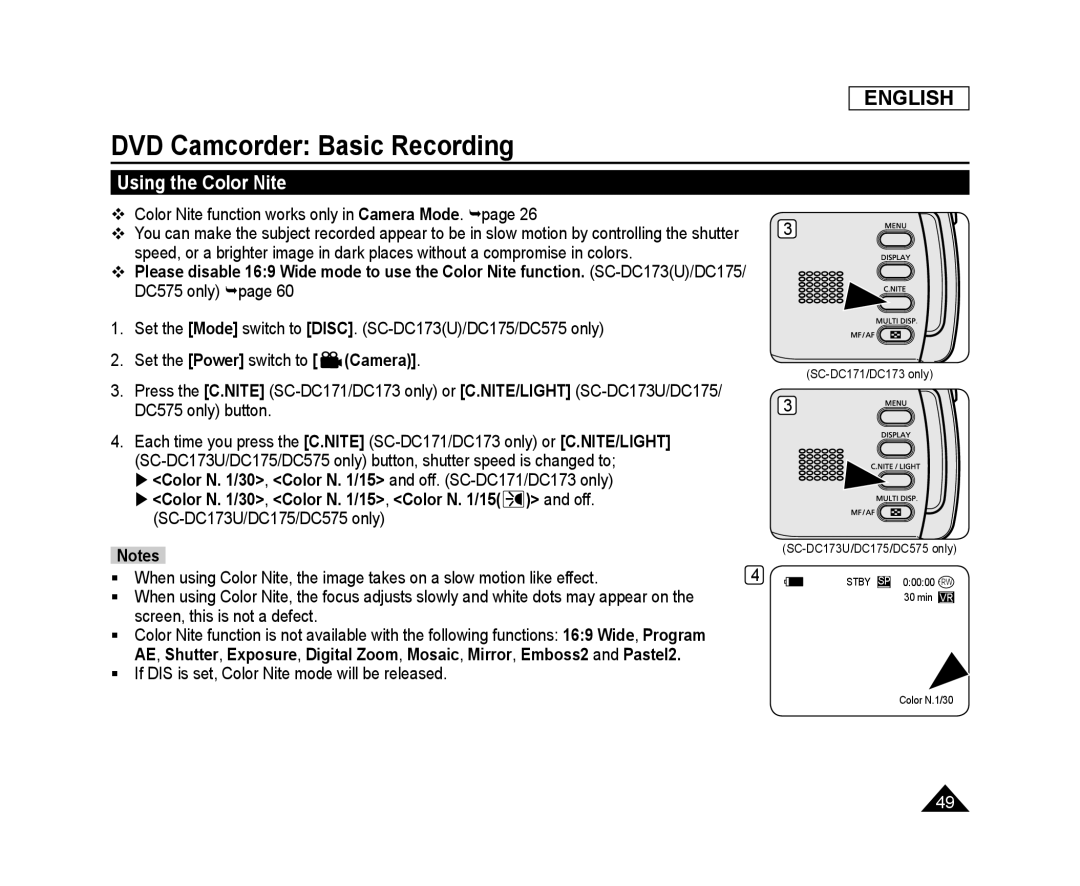 Using the Color Nite
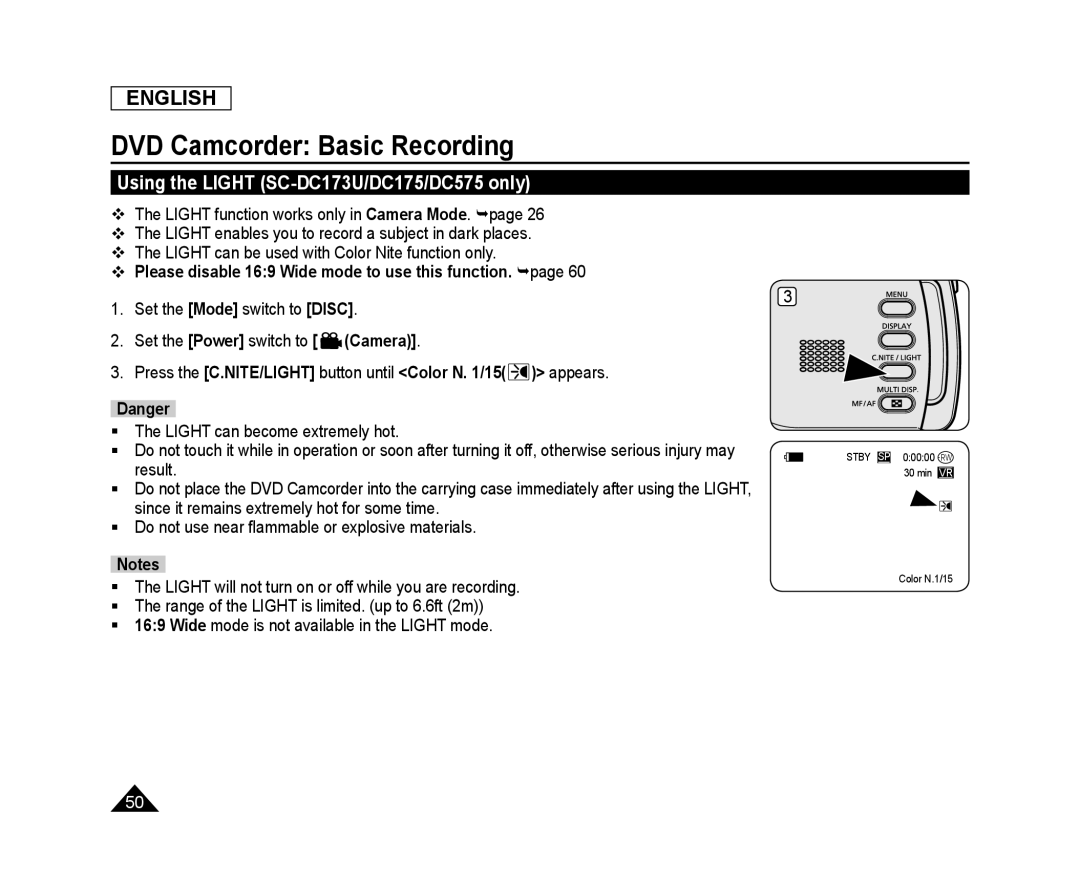 Using the LIGHT (SC-DC173U/DC175/DC575only)
 DVD Camcorder: Advanced Recording
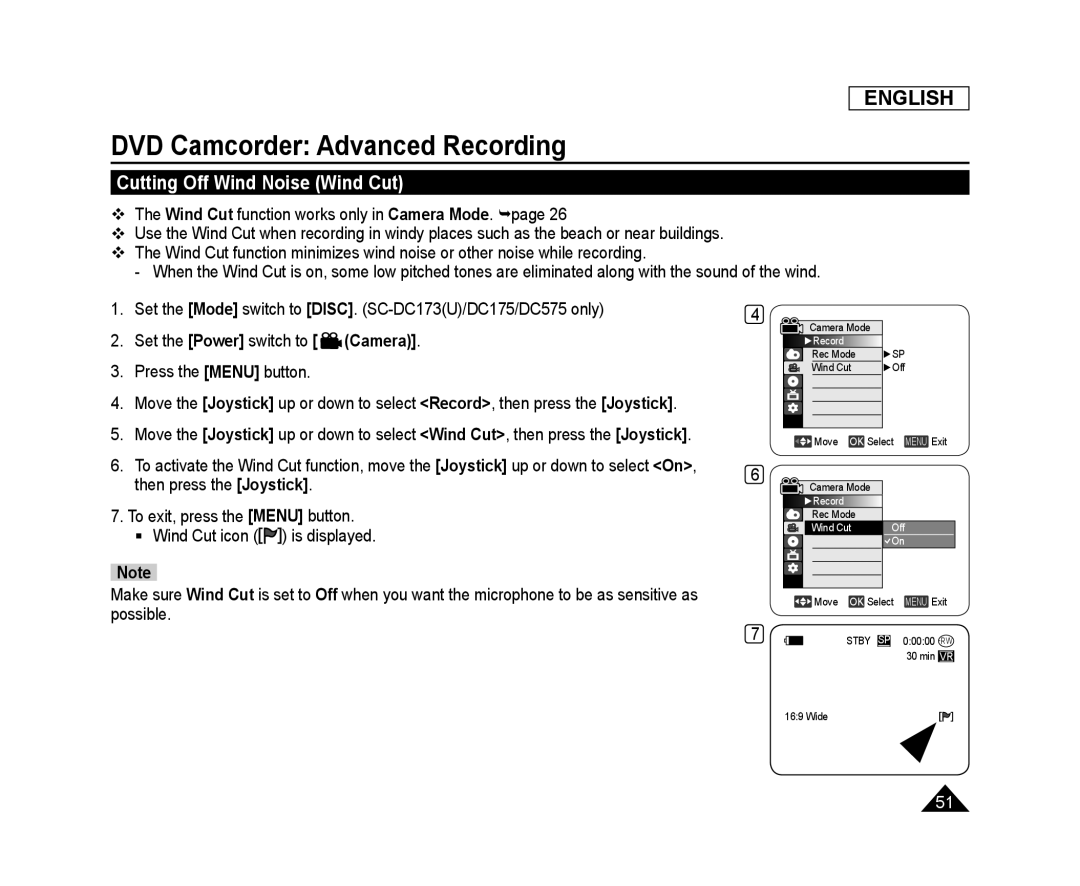
Cutting Off Wind Noise (Wind Cut)
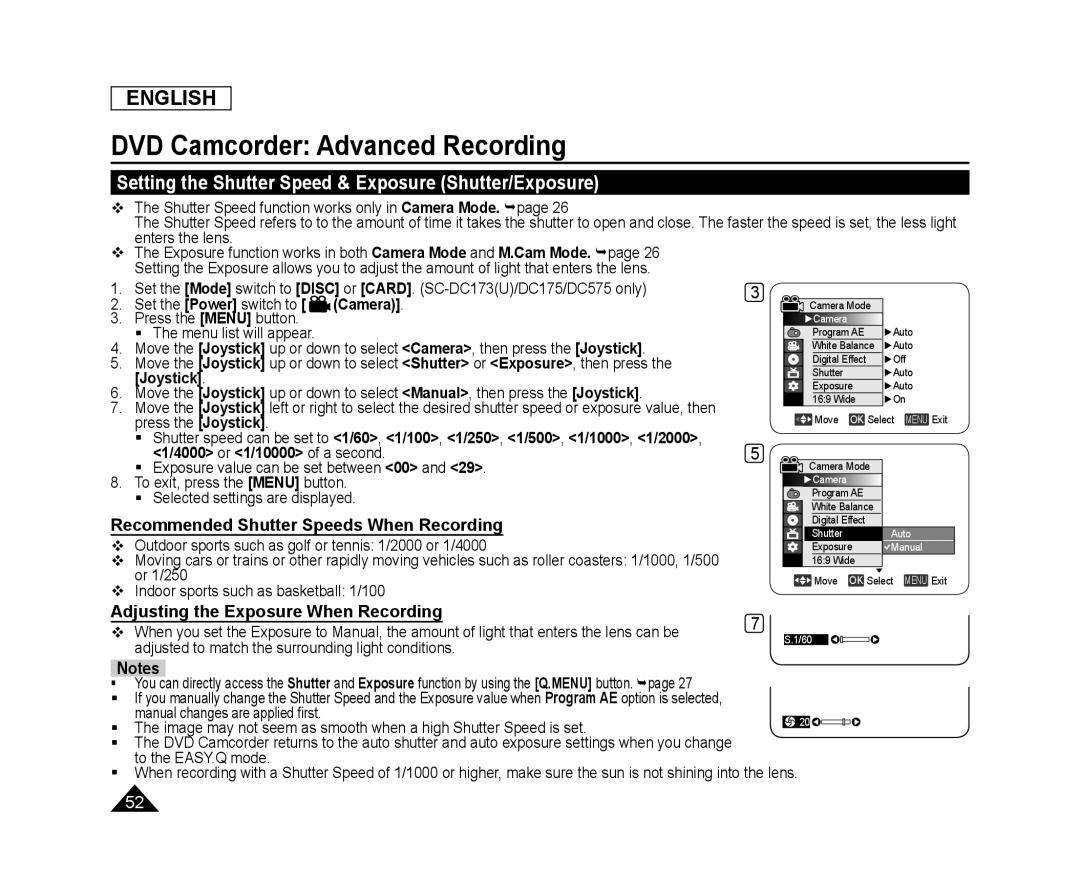 Setting the Shutter Speed & Exposure (Shutter/Exposure)
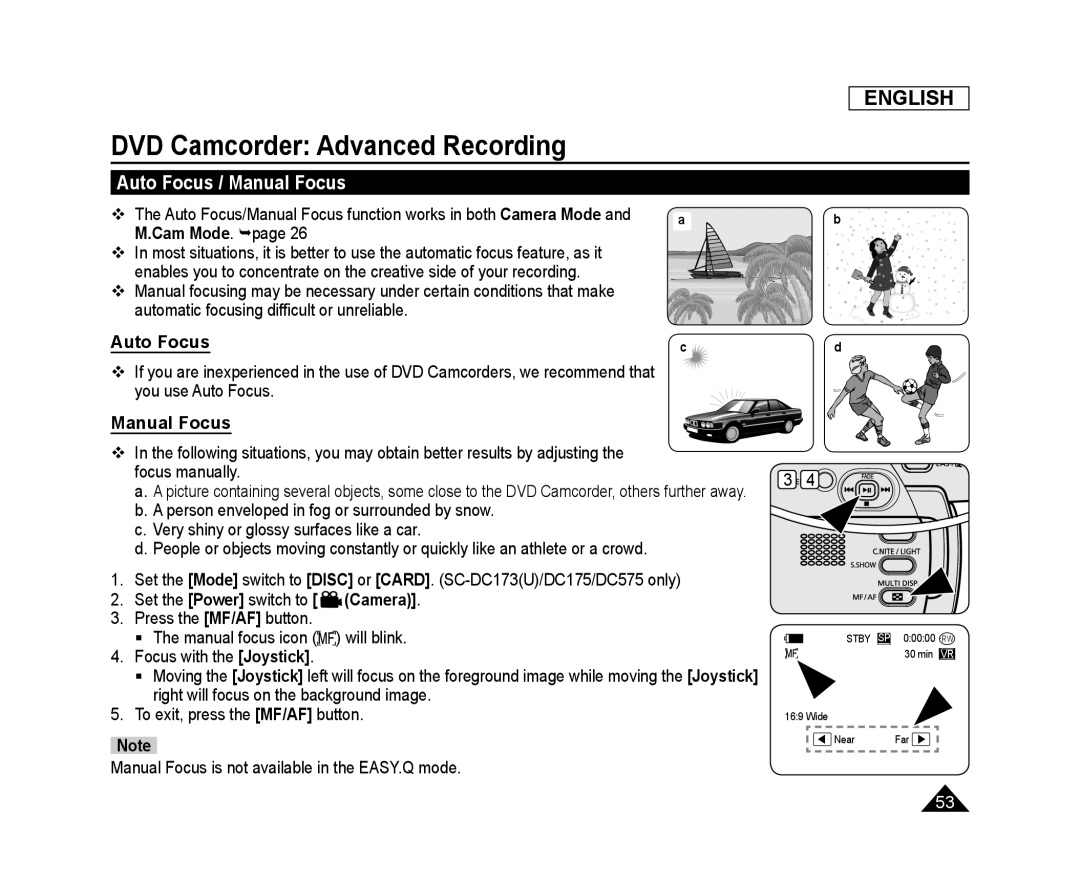 Auto Focus / Manual Focus
Auto Focus
Manual Focus
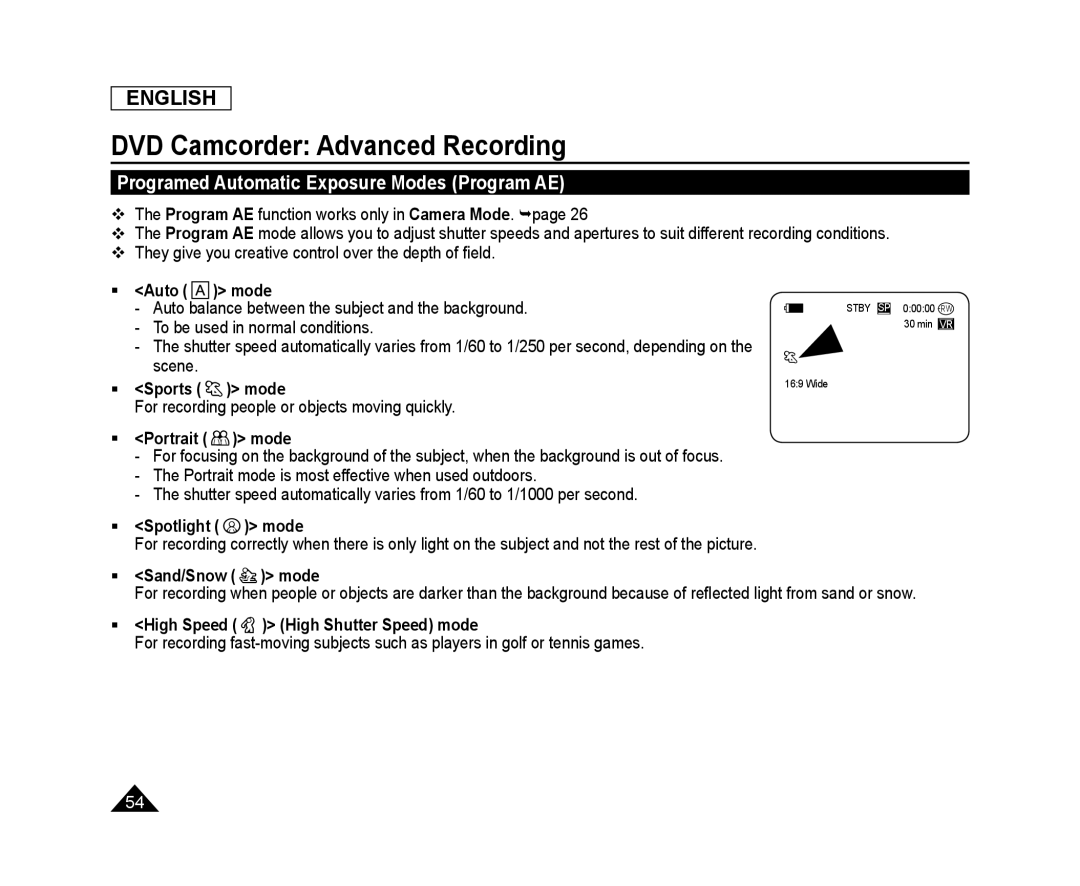 Programed Automatic Exposure Modes (Program AE)
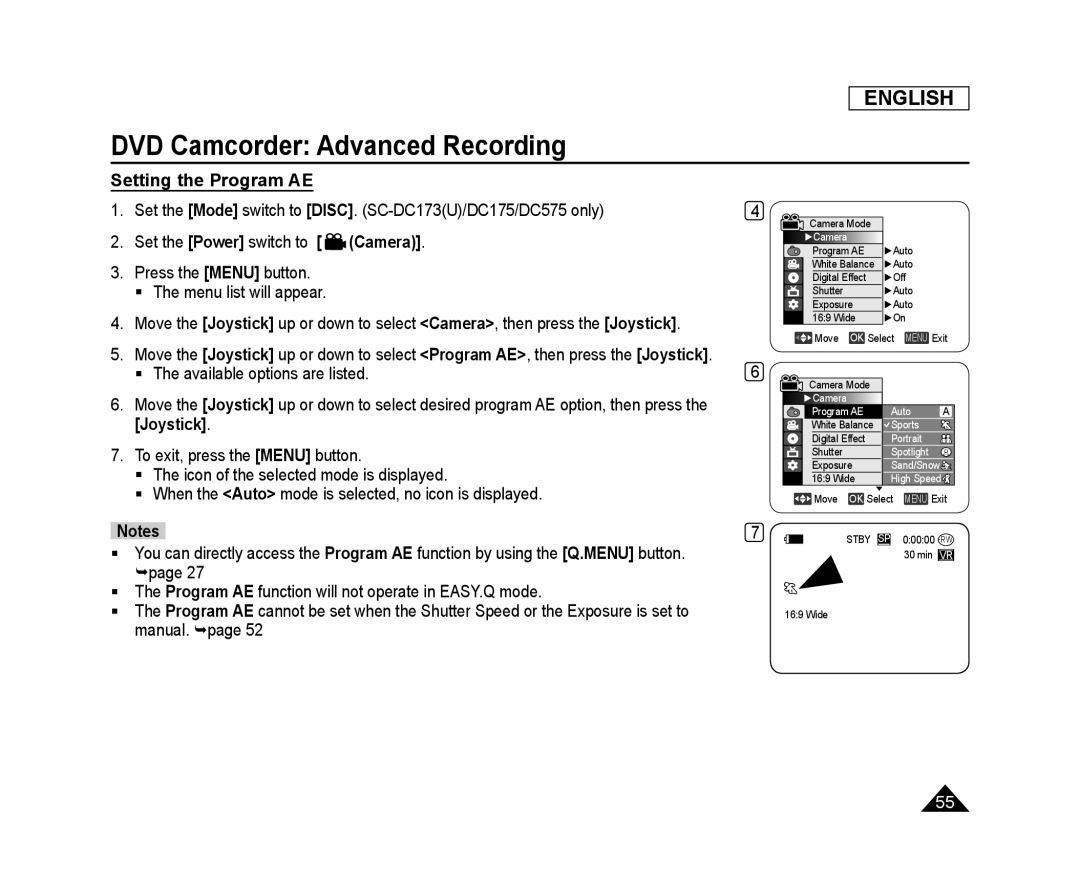 Setting the Program AE
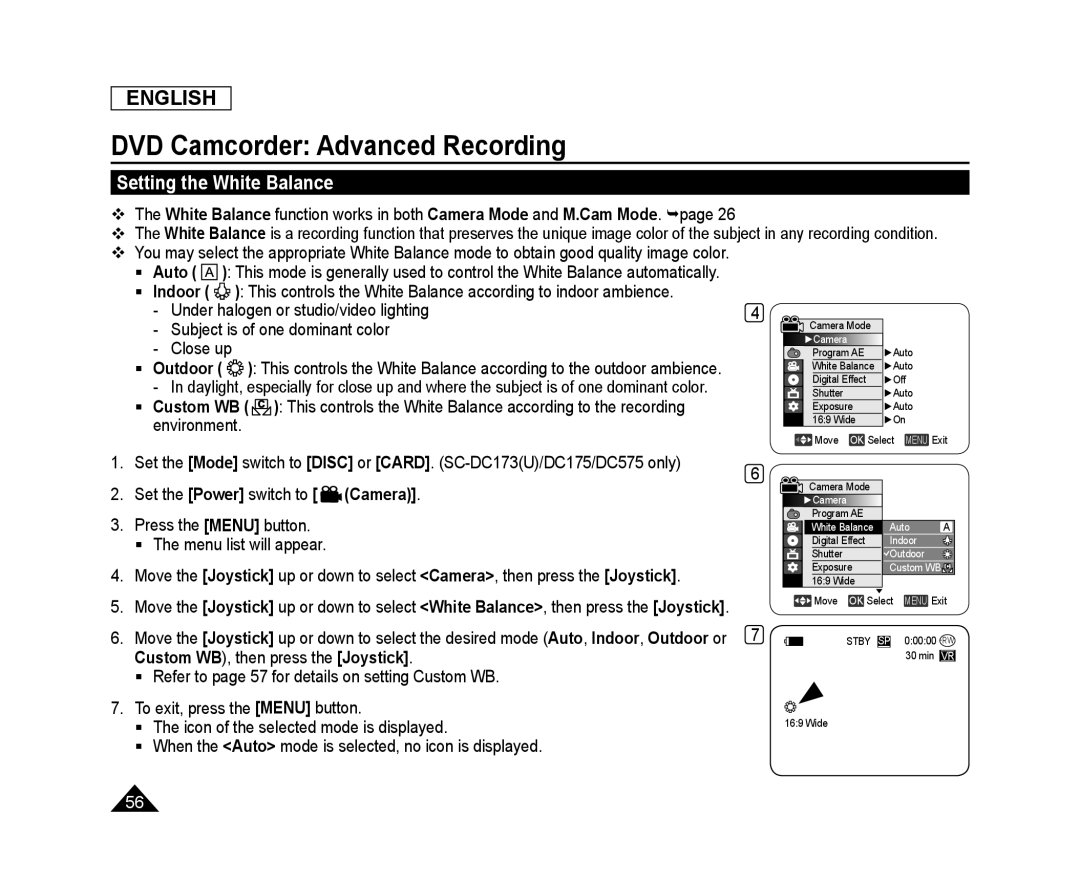 Setting the White Balance
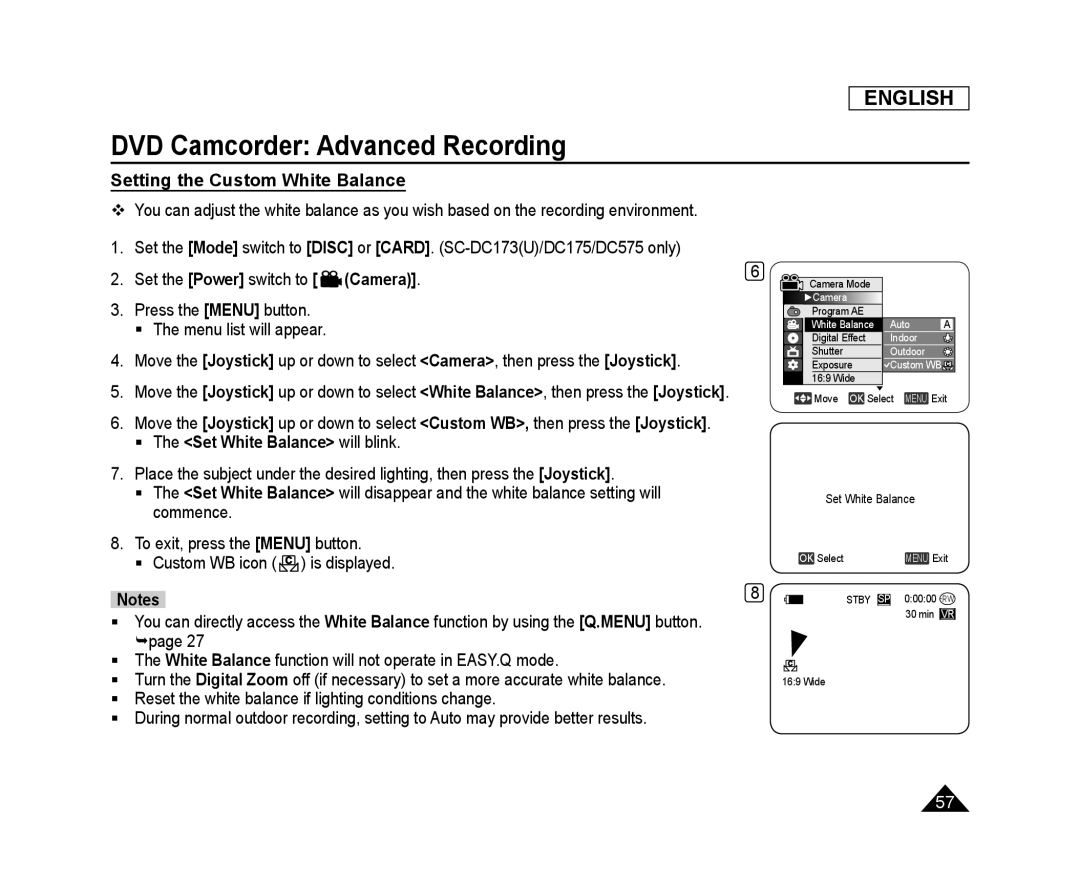 Setting the Custom White Balance
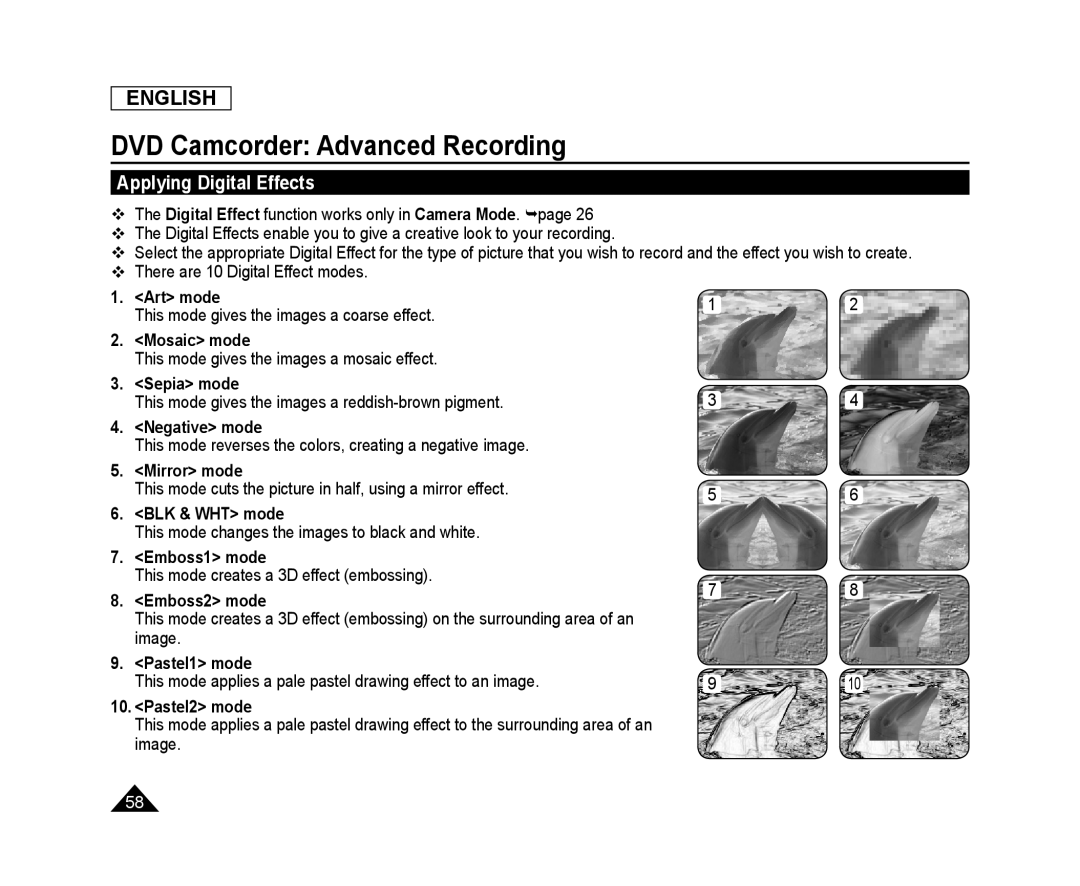 Applying Digital Effects
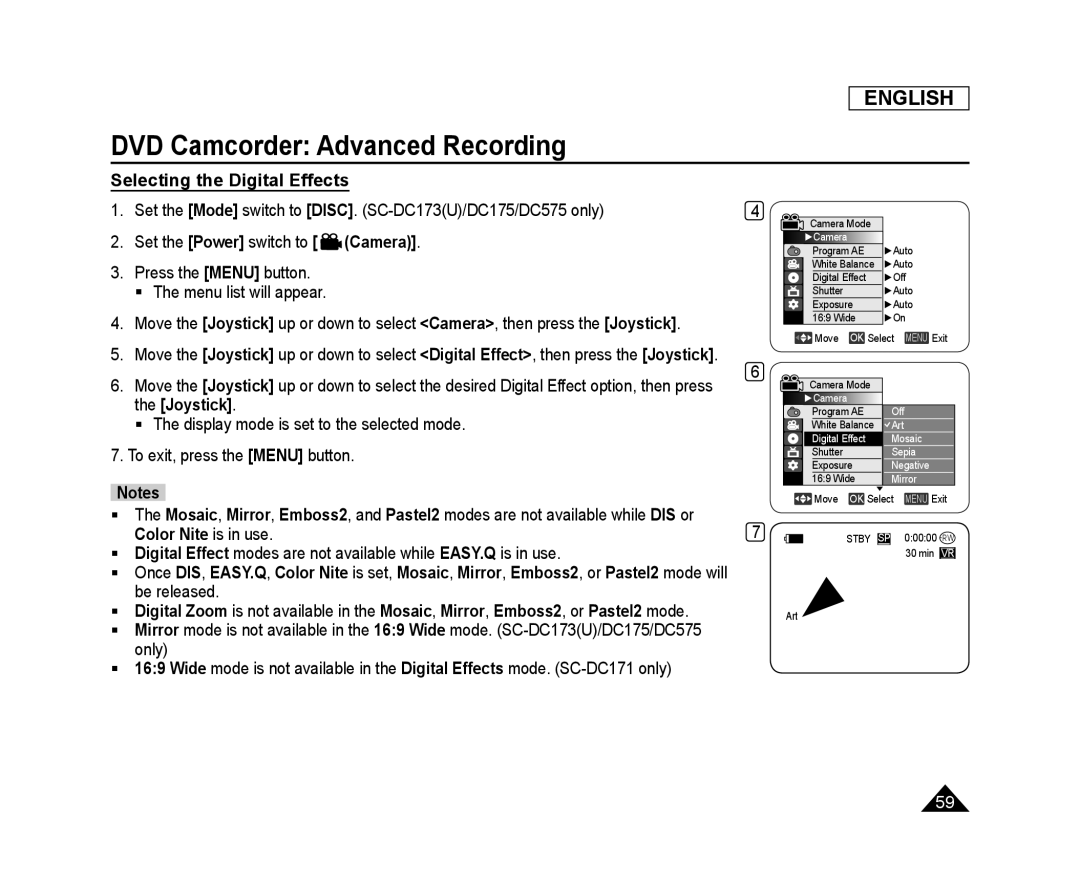 Selecting the Digital Effects
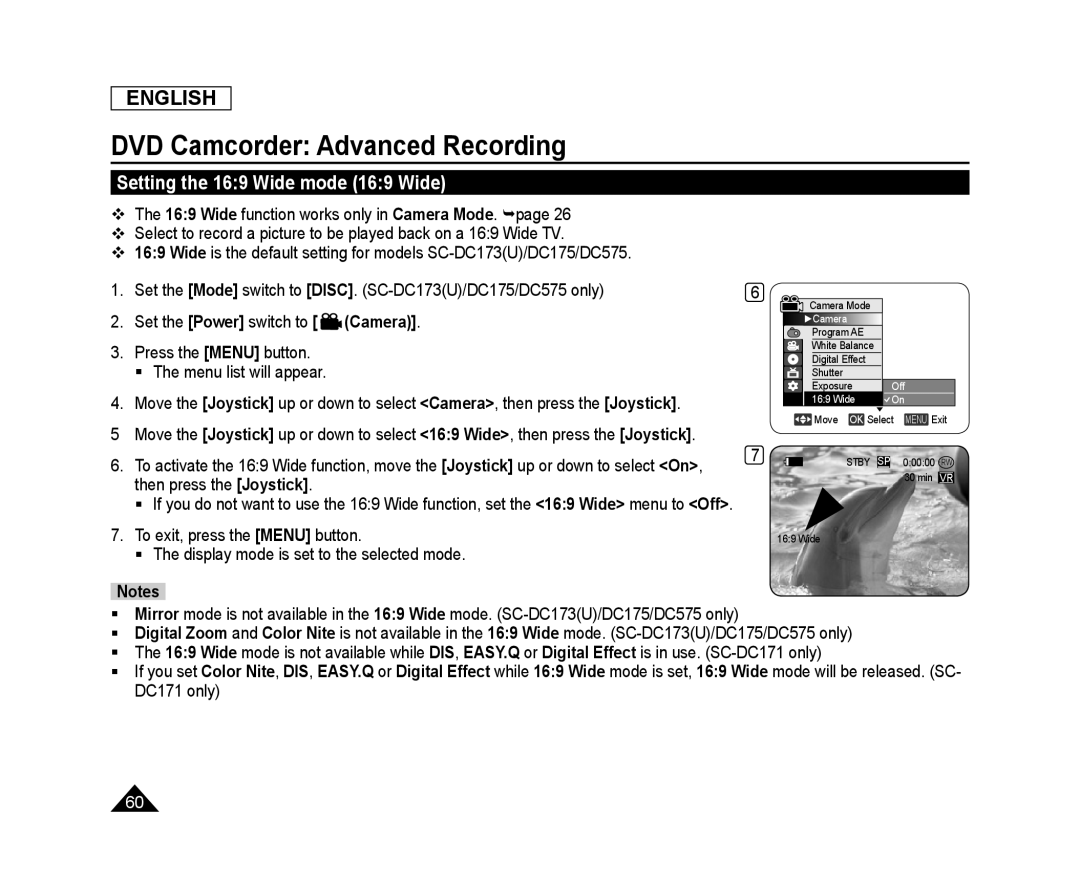 Setting the 16:9 Wide mode (16:9 Wide)
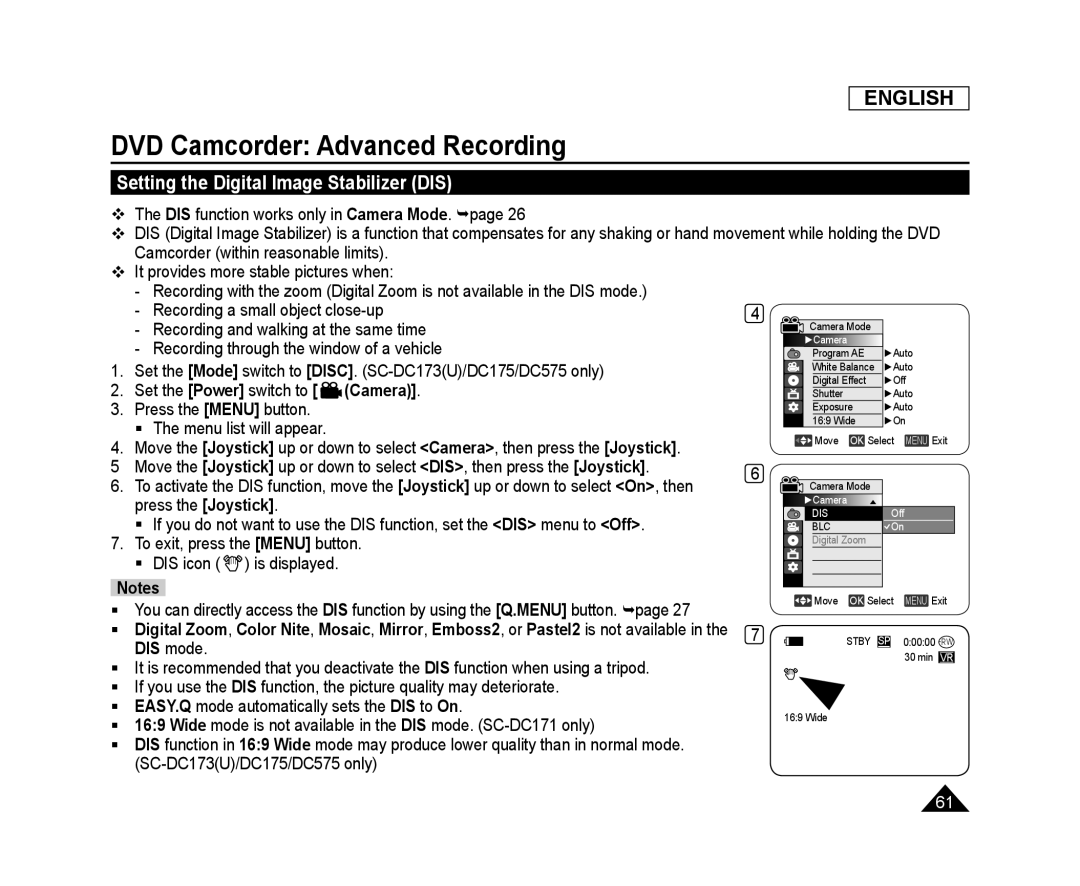 Setting the Digital Image Stabilizer (DIS)
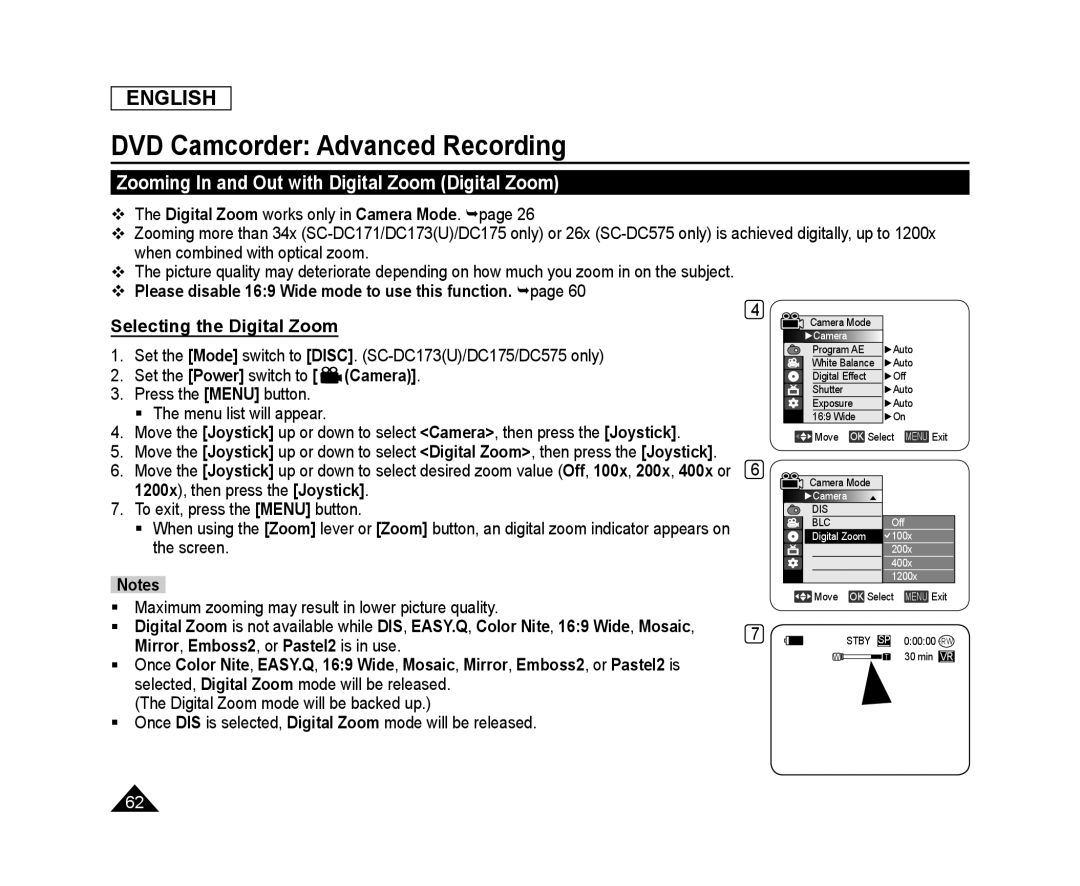 Zooming In and Out with Digital Zoom (Digital Zoom)
Selecting the Digital Zoom
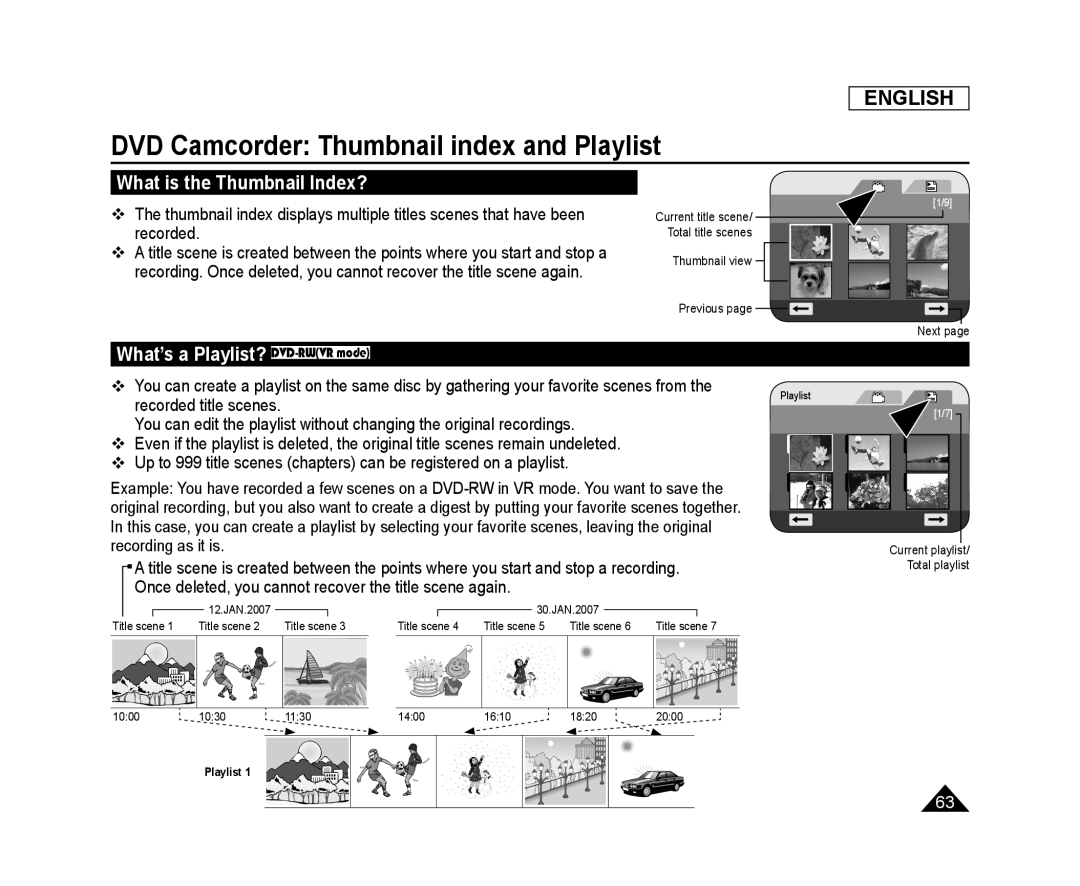 DVD Camcorder: Thumbnail index and Playlist
What is the Thumbnail Index
What’s a Playlist? DVD-RW(VRmode)
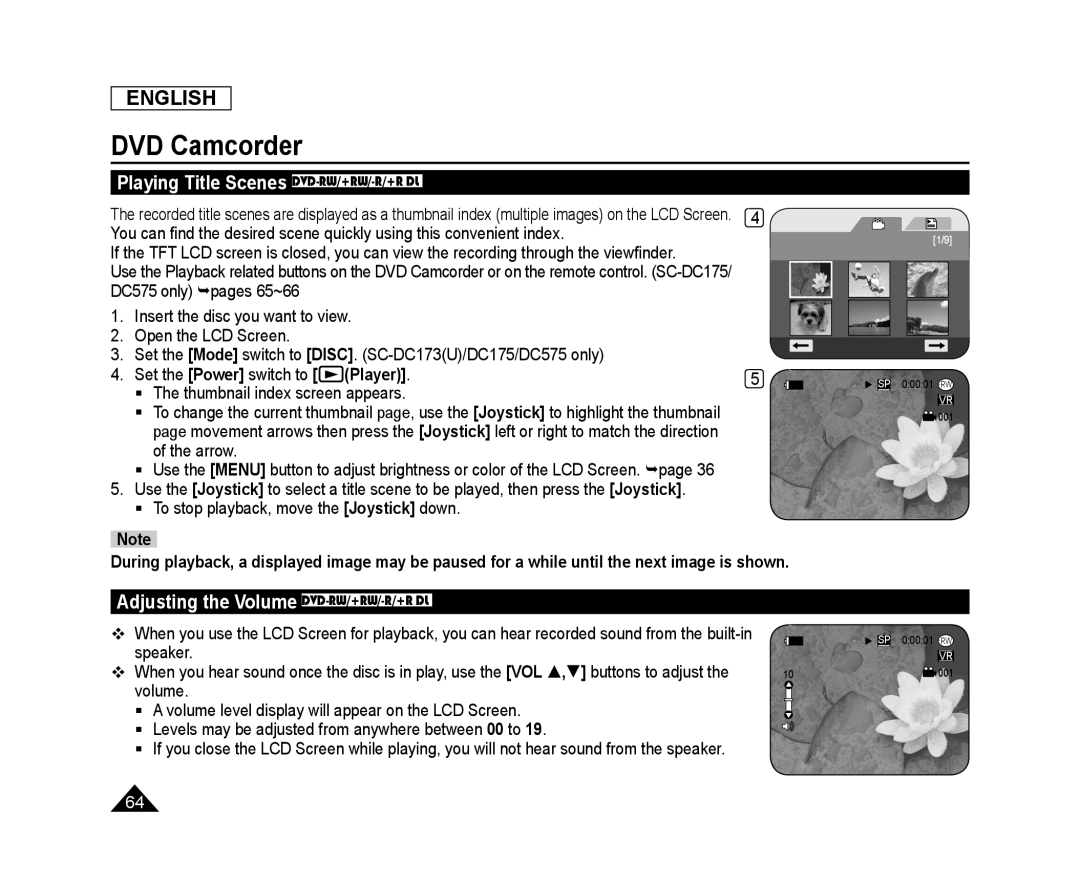 Playing Title Scenes DVD-RW/+RW/-R/+RDL
Adjusting the Volume DVD-RW/+RW/-R/+RDL
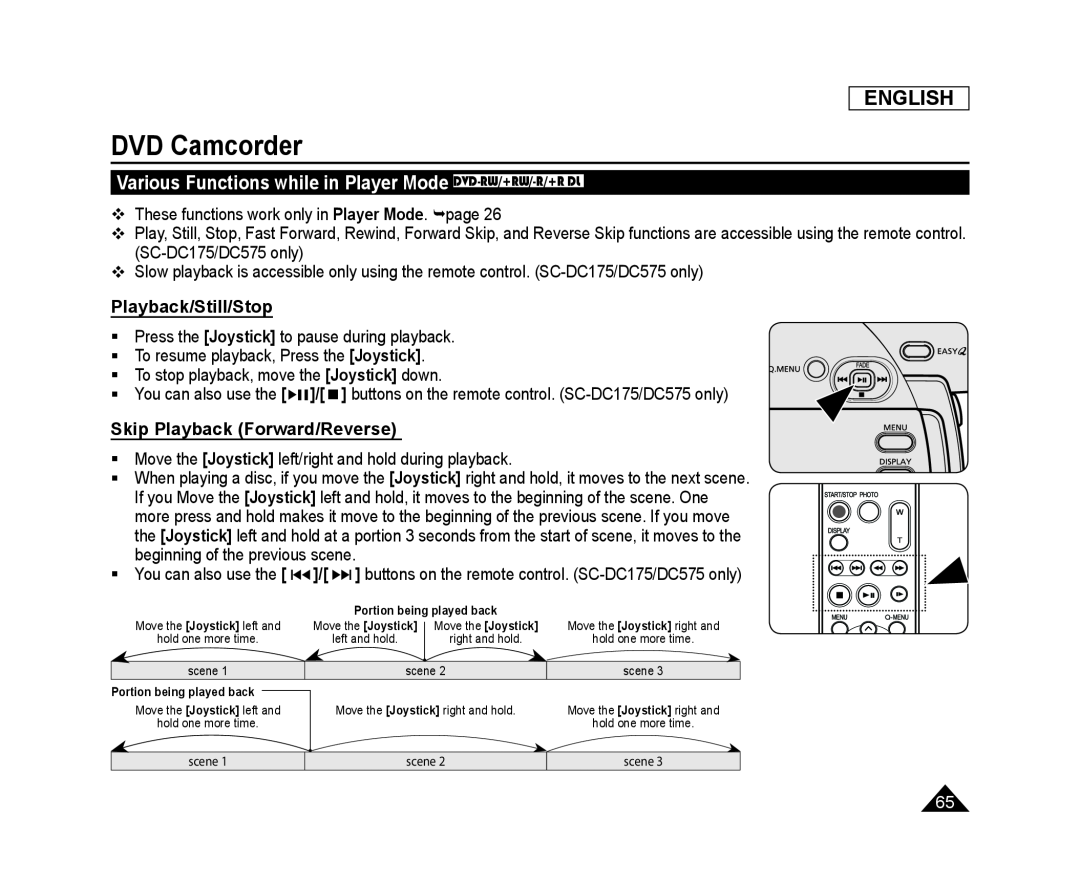 Various Functions while in Player Mode DVD-RW/+RW/-R/+RDL
Playback/Still/Stop
Skip Playback (Forward/Reverse)
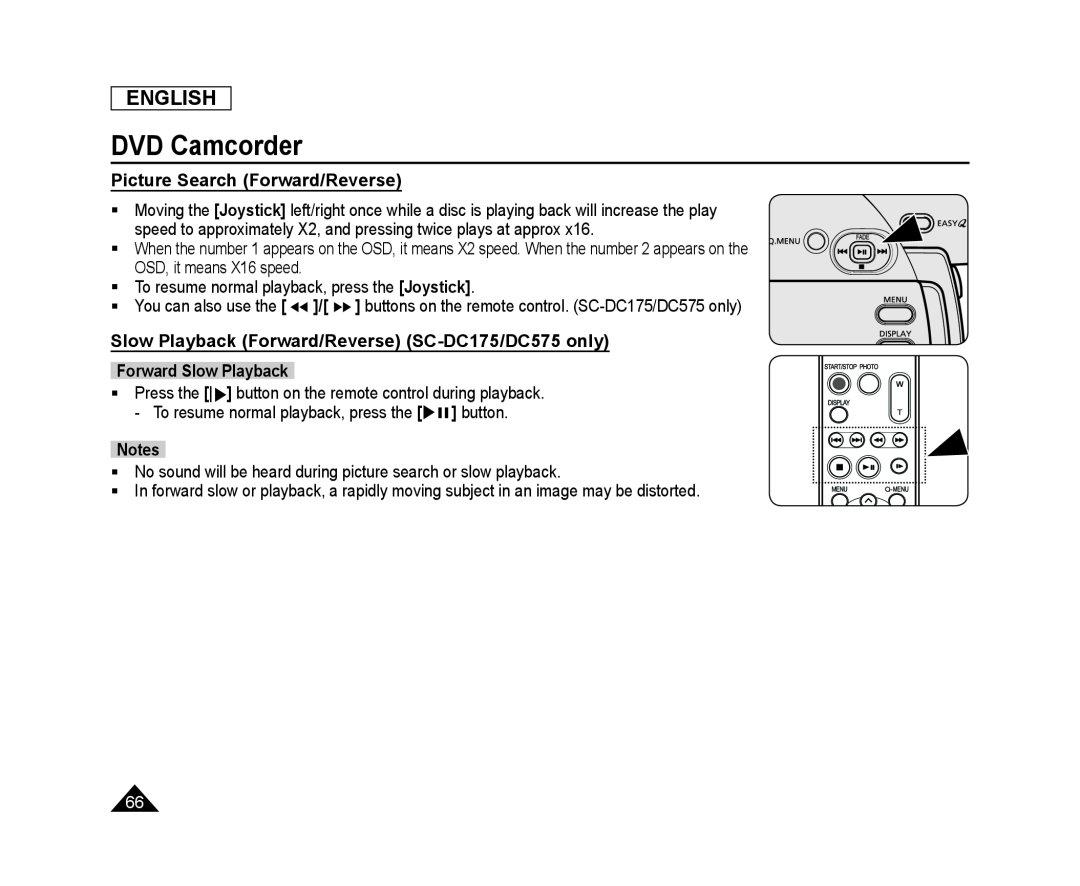 Picture Search (Forward/Reverse)
Slow Playback (Forward/Reverse) (SC-DC175/DC575only)
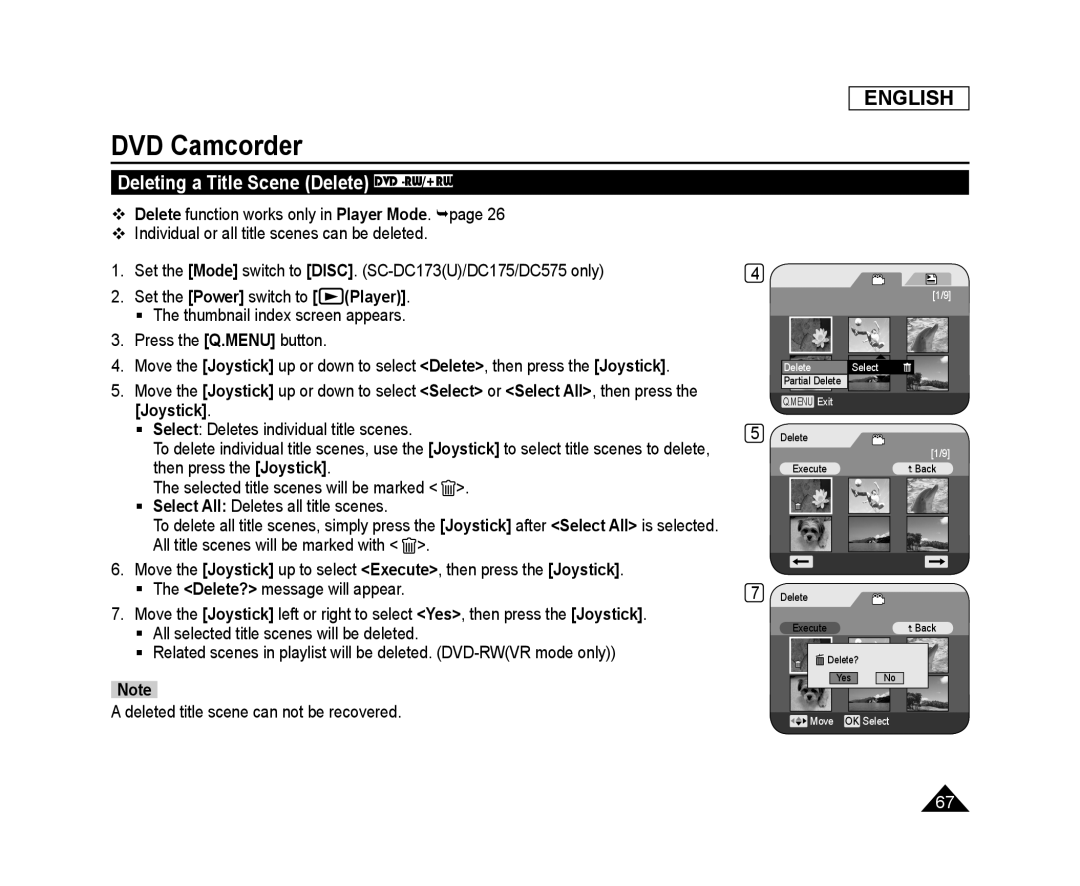 Deleting a Title Scene (Delete) DVD -RW/+RW
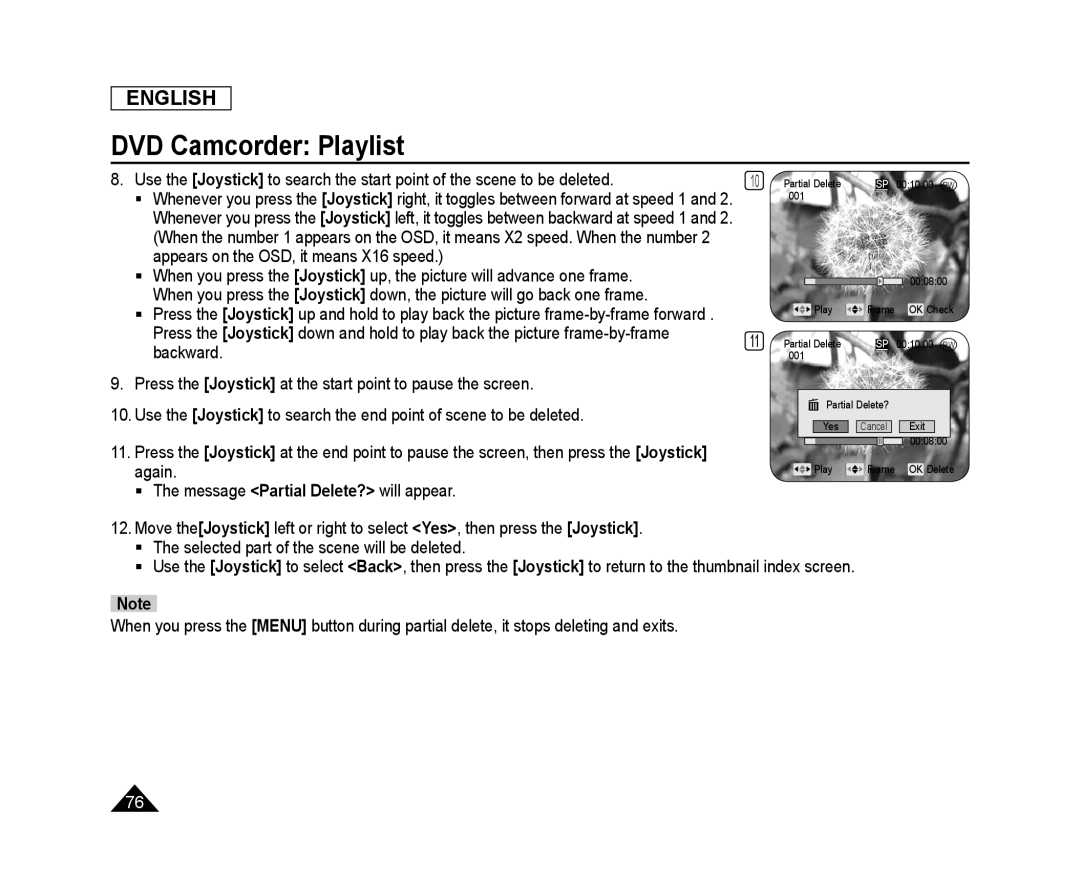
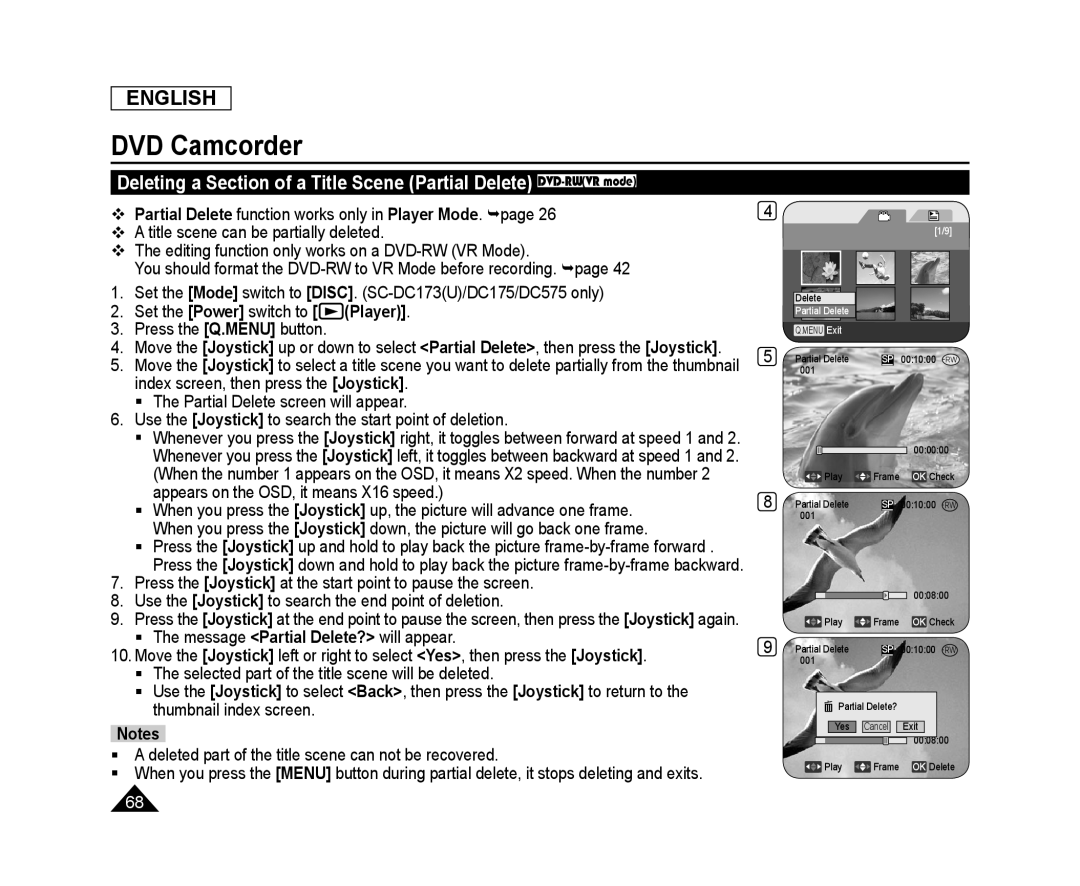 Deleting a Section of a Title Scene (Partial Delete) DVD-RW(VRmode)
 DVD Camcorder: Playlist
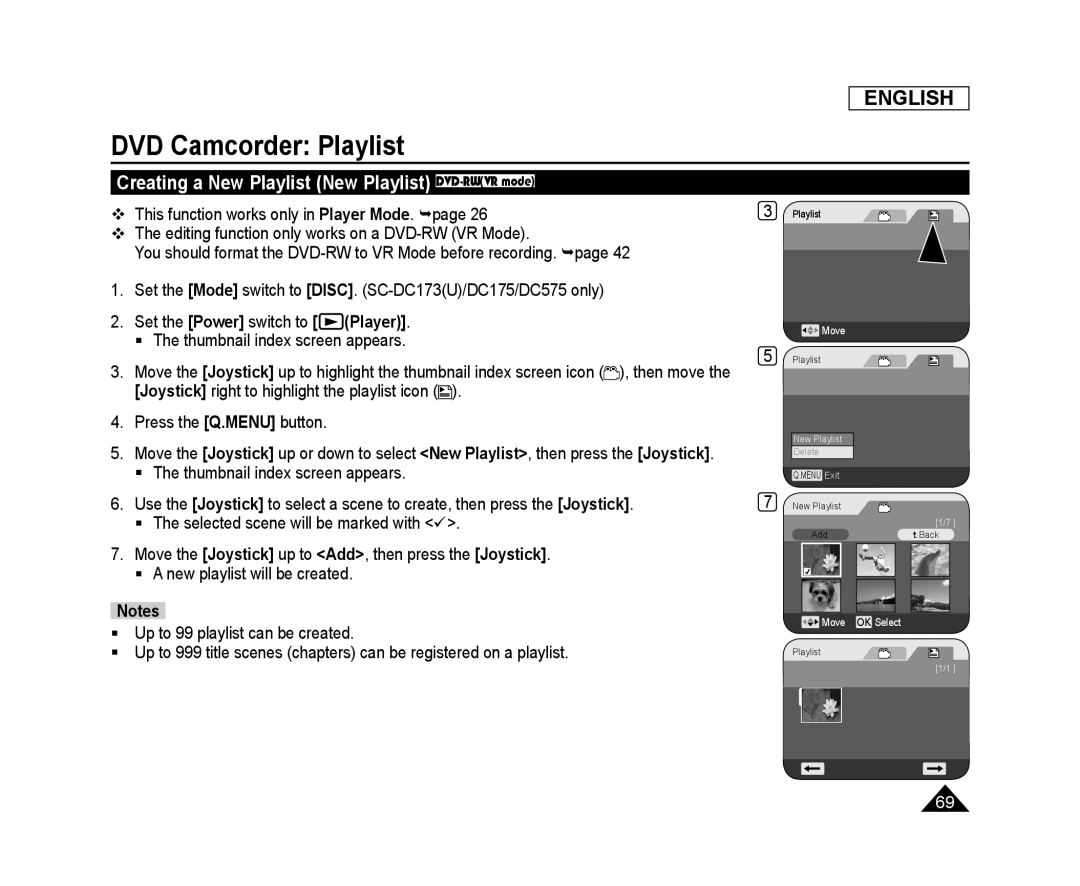
Creating a New Playlist (New Playlist) DVD-RW(VRmode)
 Playing the Playlist DVD-RW(VRmode)
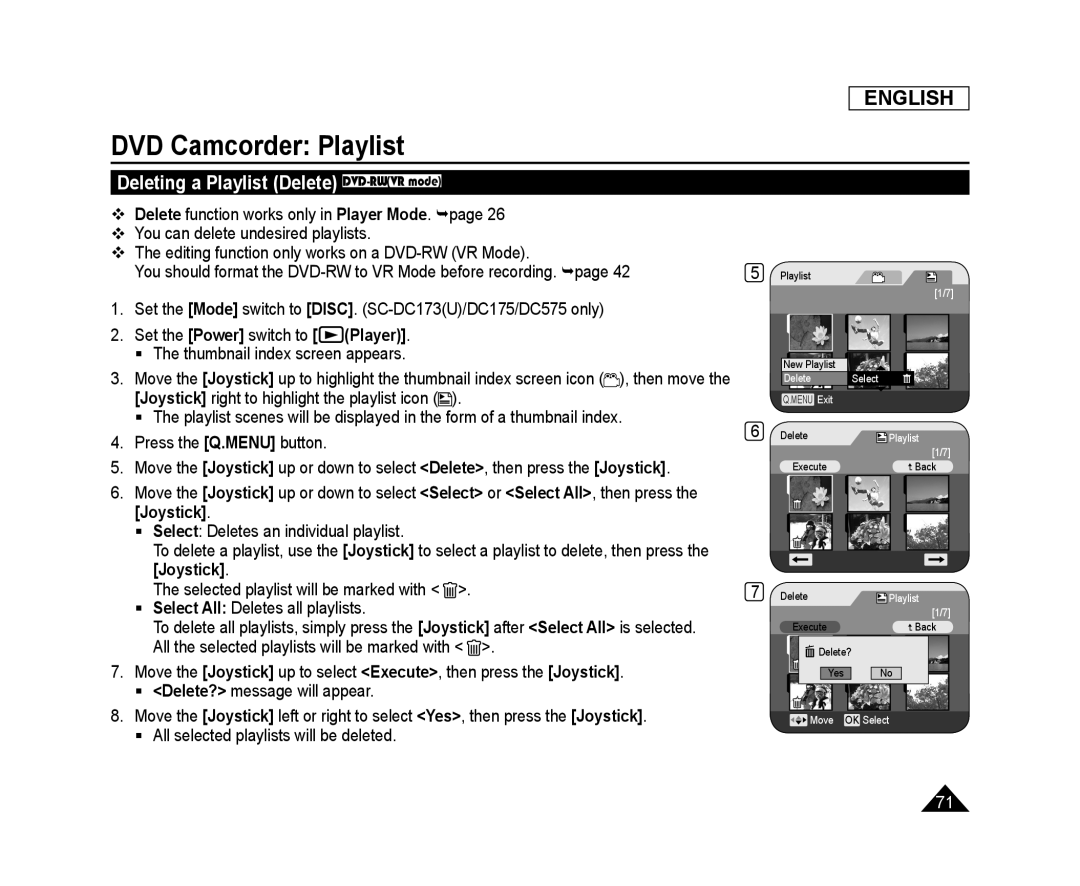 Deleting a Playlist (Delete) DVD-RW(VRmode)
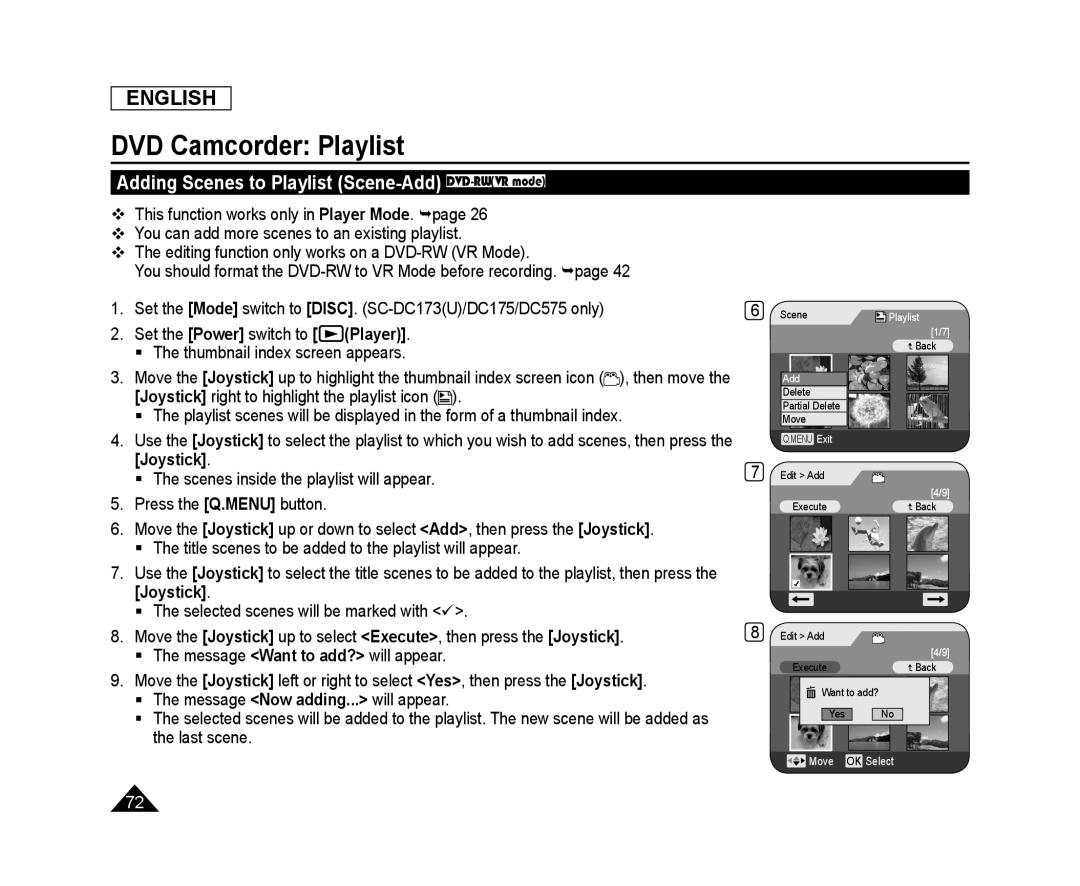 Adding Scenes to Playlist (Scene-Add) DVD-RW(VRmode)
 ENGLISH
DVD Camcorder: Playlist
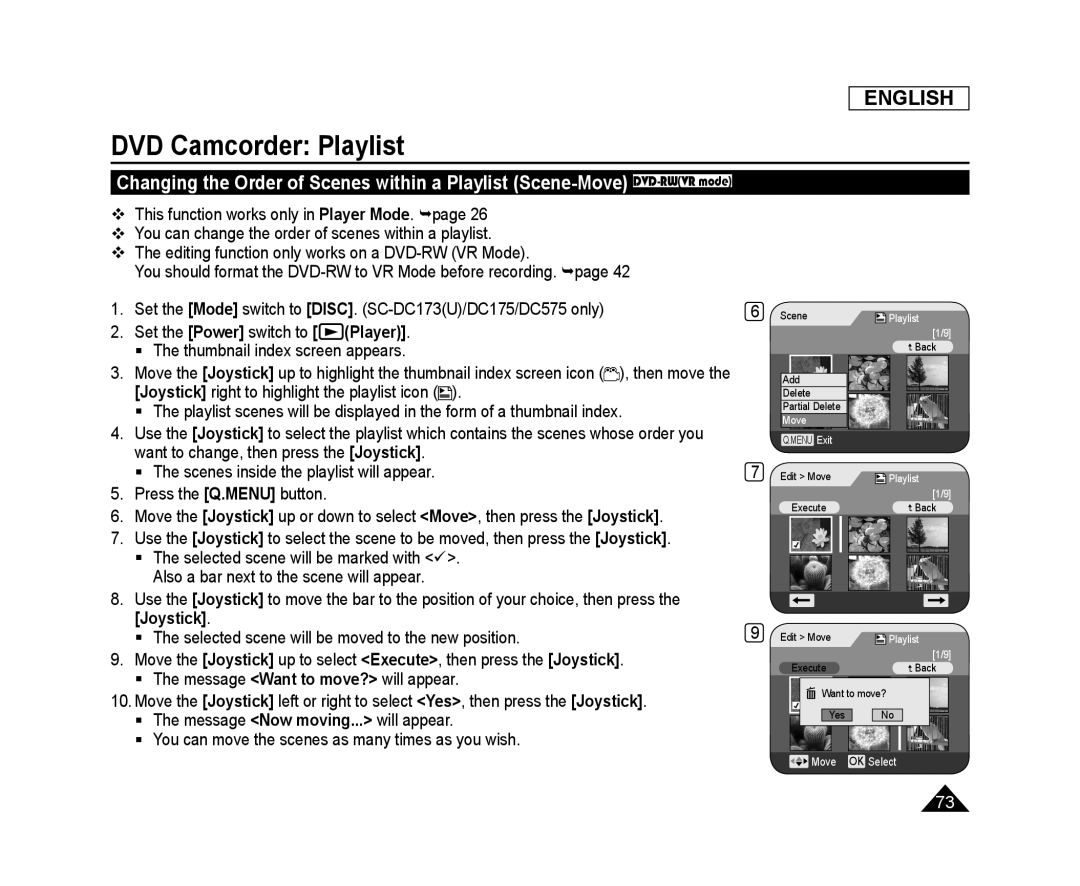
Changing the Order of Scenes within a Playlist (Scene-Move) DVD-RW(VRmode)
Player Mode
[Mode]
[DISC]
[Power]
(Player)]
[Joystick]
[Joystick]
[Joystick]
[Joystick]
[Q.MENU]
[Joystick]
<Move
[Joystick]
[Joystick]
[Joystick]
[Joystick]
[Joystick]
[Joystick]
<Execute
[Joystick]
<Want to move
[Joystick]
<Yes
[Joystick]
<Now moving
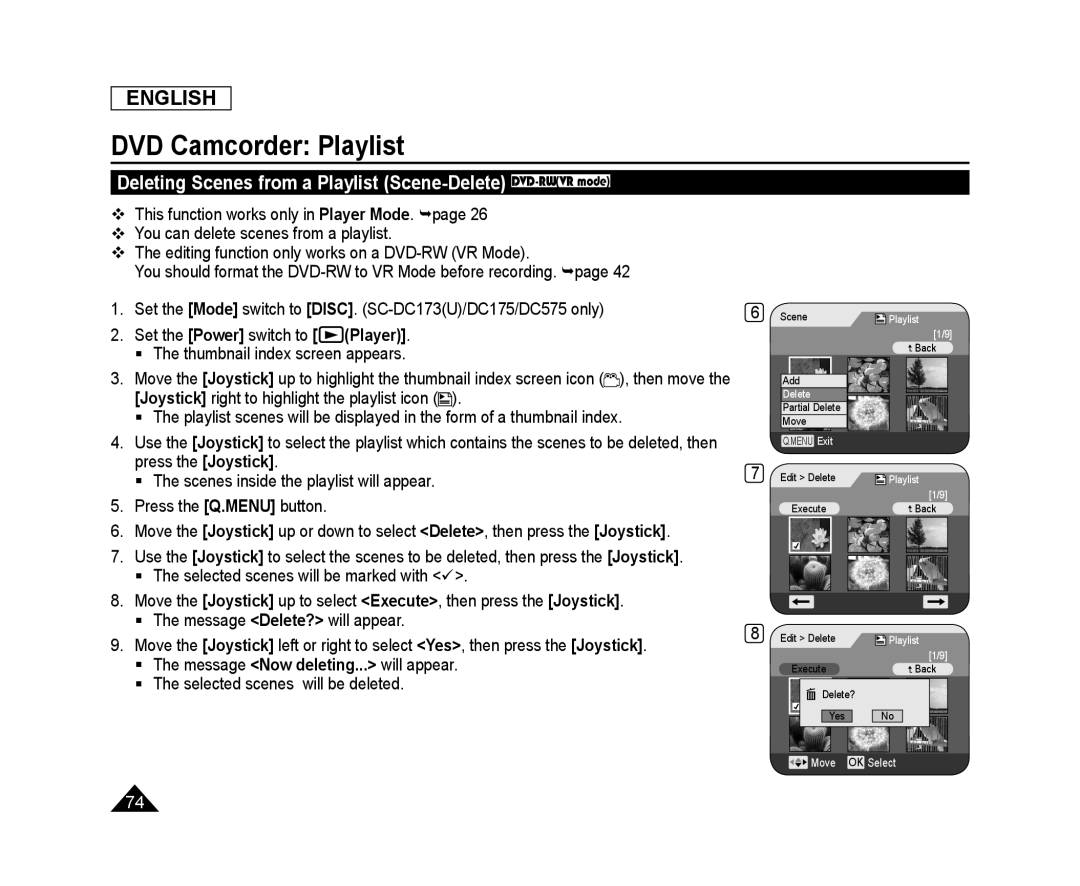 Deleting Scenes from a Playlist (Scene-Delete) DVD-RW(VRmode)
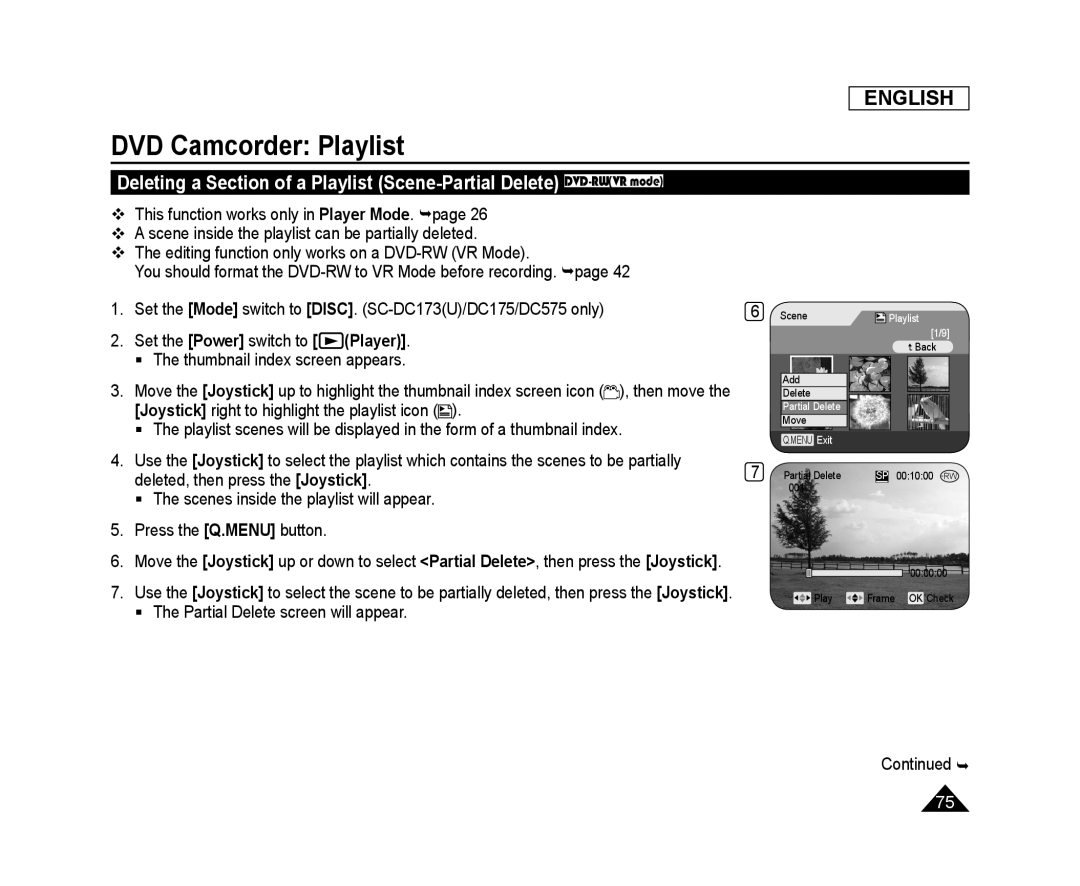 Deleting a Section of a Playlist (Scene-PartialDelete) DVD-RW(VRmode)
 ENGLISH
DVD Camcorder: Playlist
 DVD Camcorder: Disc Manager
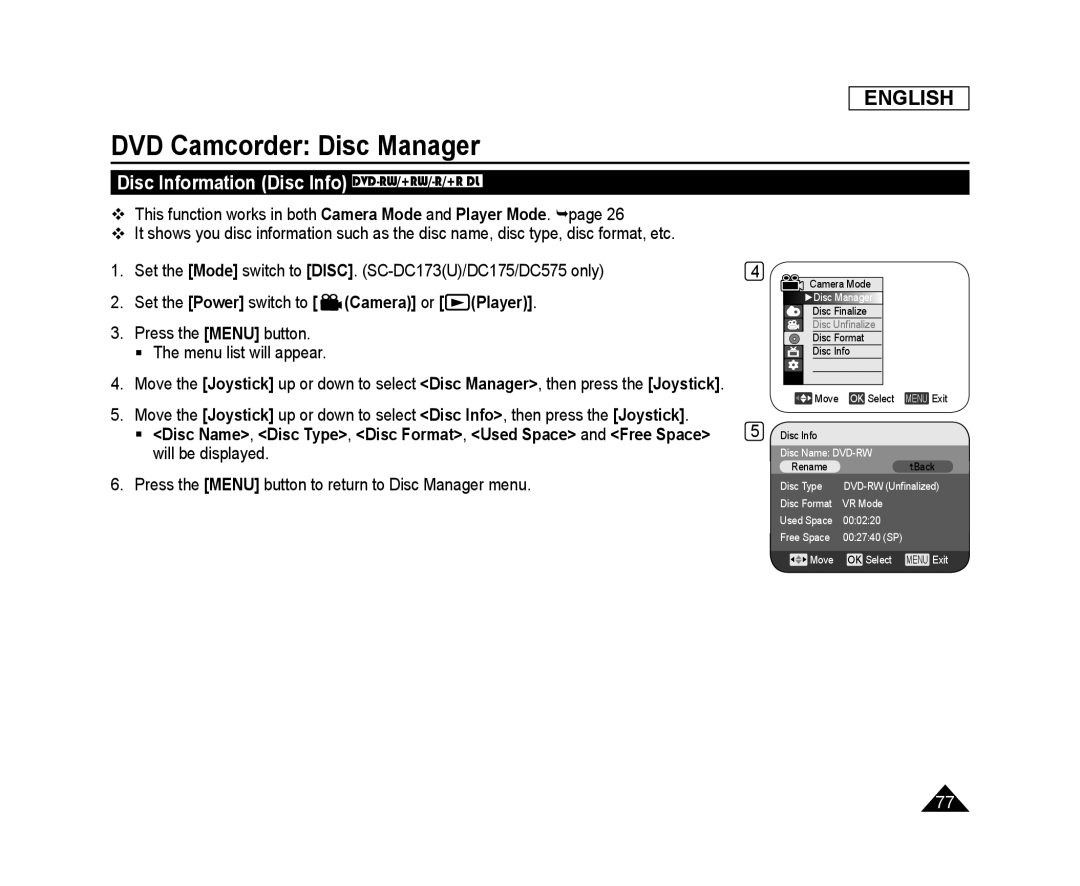
Disc Information (Disc Info) DVD-RW/+RW/-R/+RDL
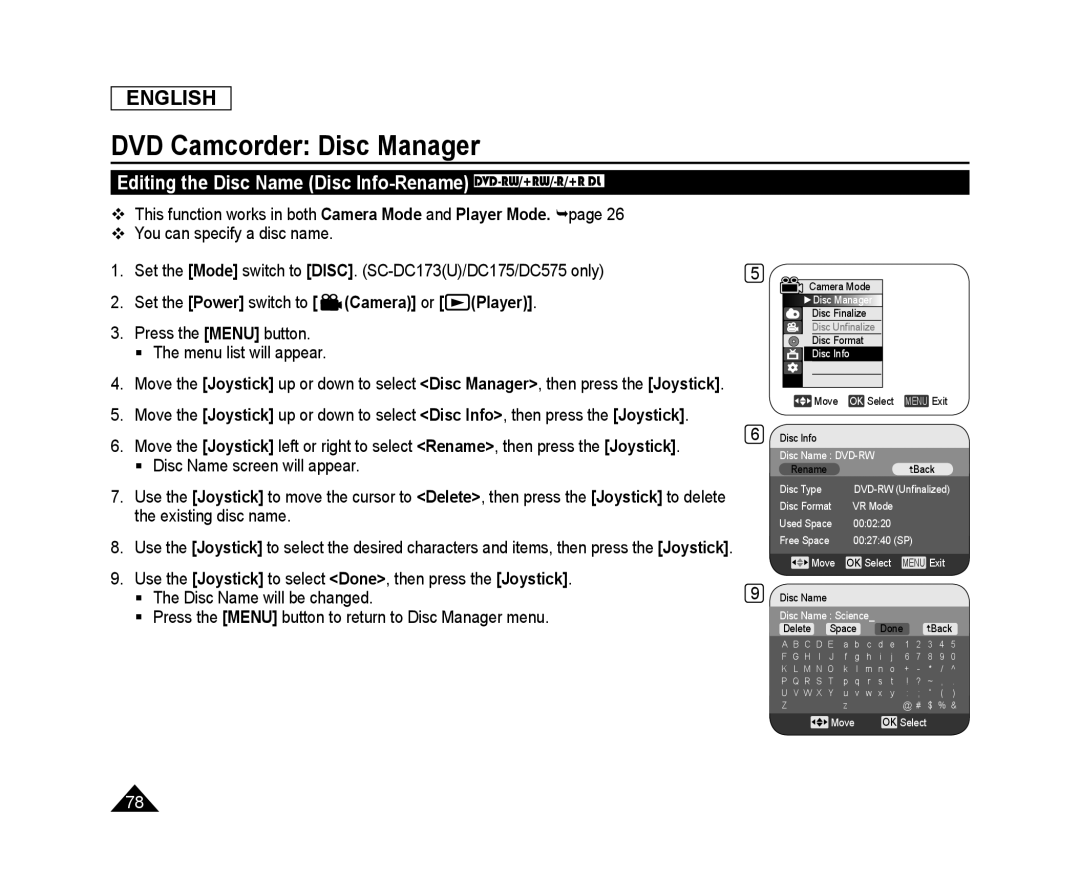 Editing the Disc Name (Disc Info-Rename) DVD-RW/+RW/-R/+RDL
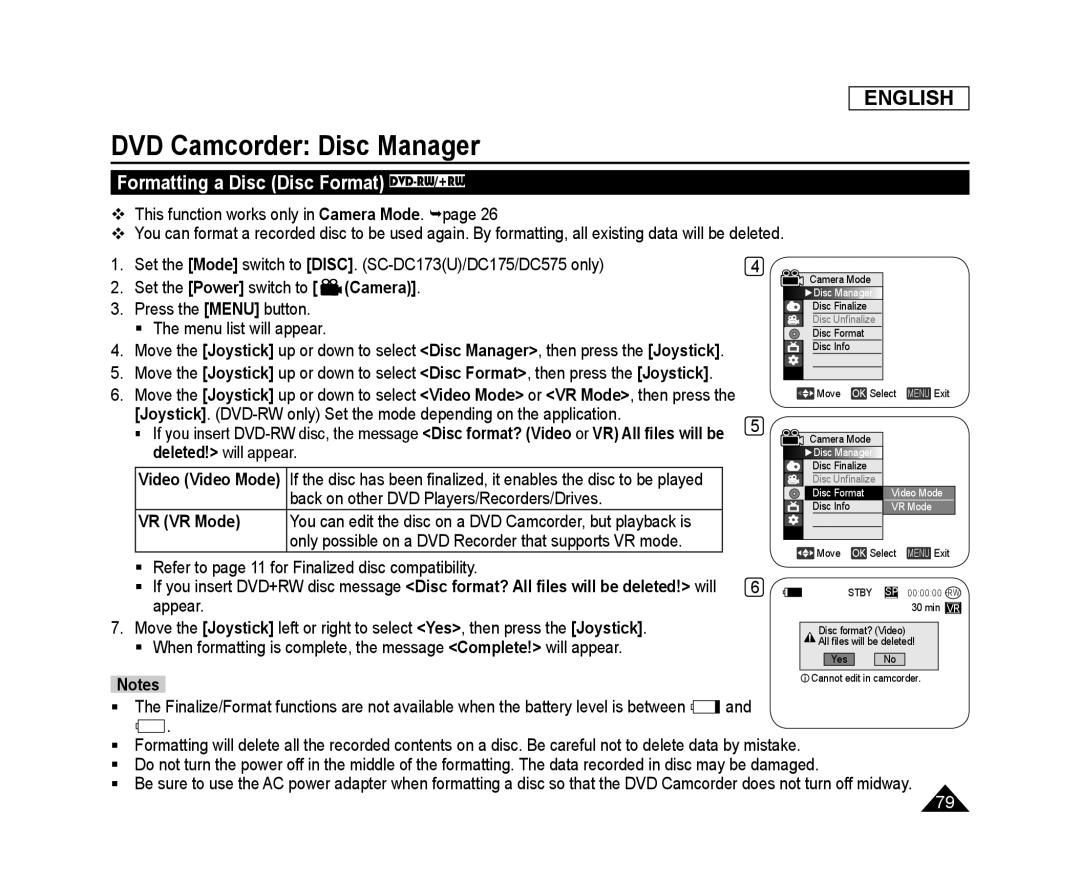 Formatting a Disc (Disc Format) DVD-RW/+RW
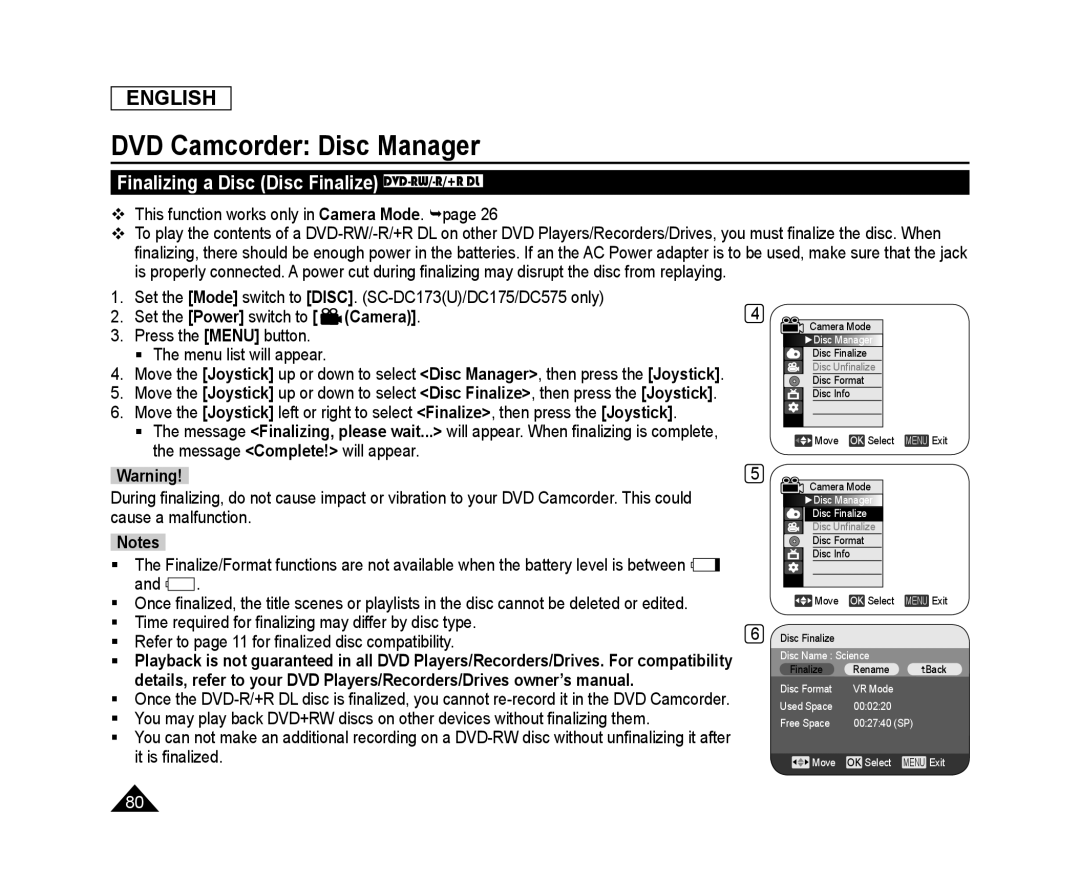 Finalizing a Disc (Disc Finalize) DVD-RW/-R/+RDL
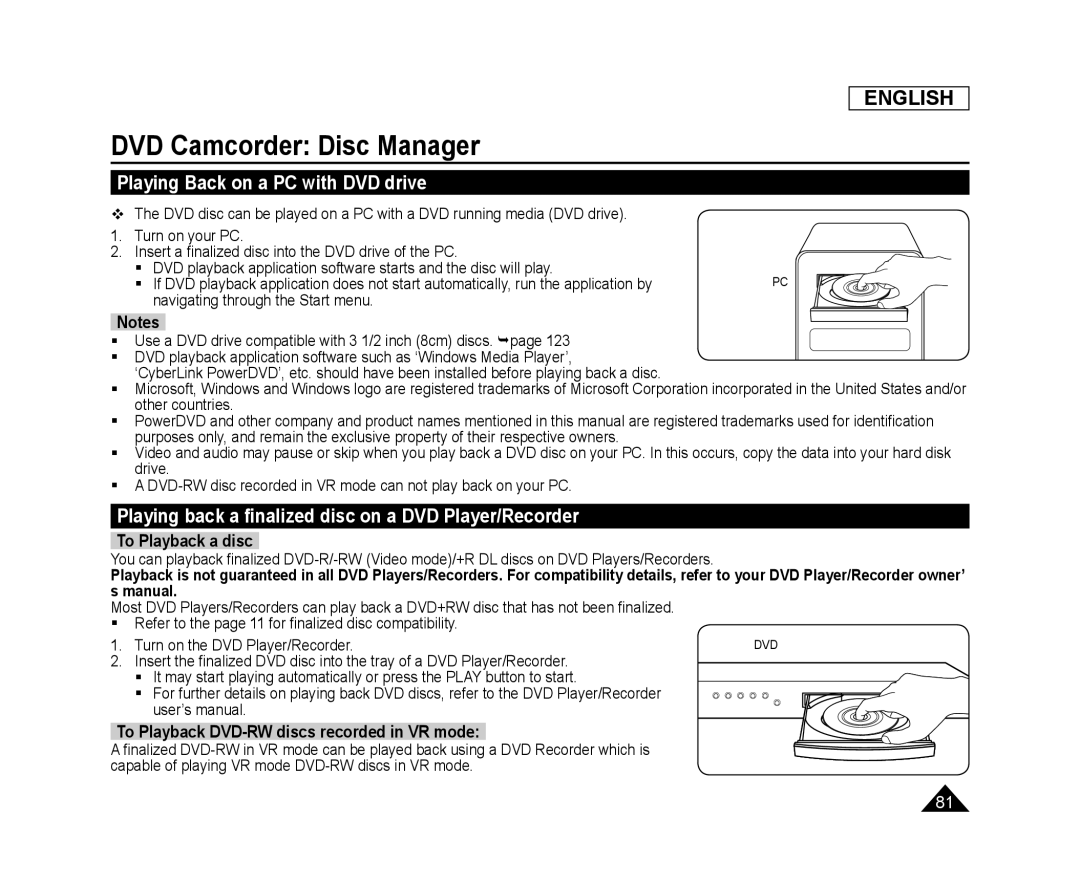 Playing Back on a PC with DVD drive
Playing back a finalized disc on a DVD Player/Recorder
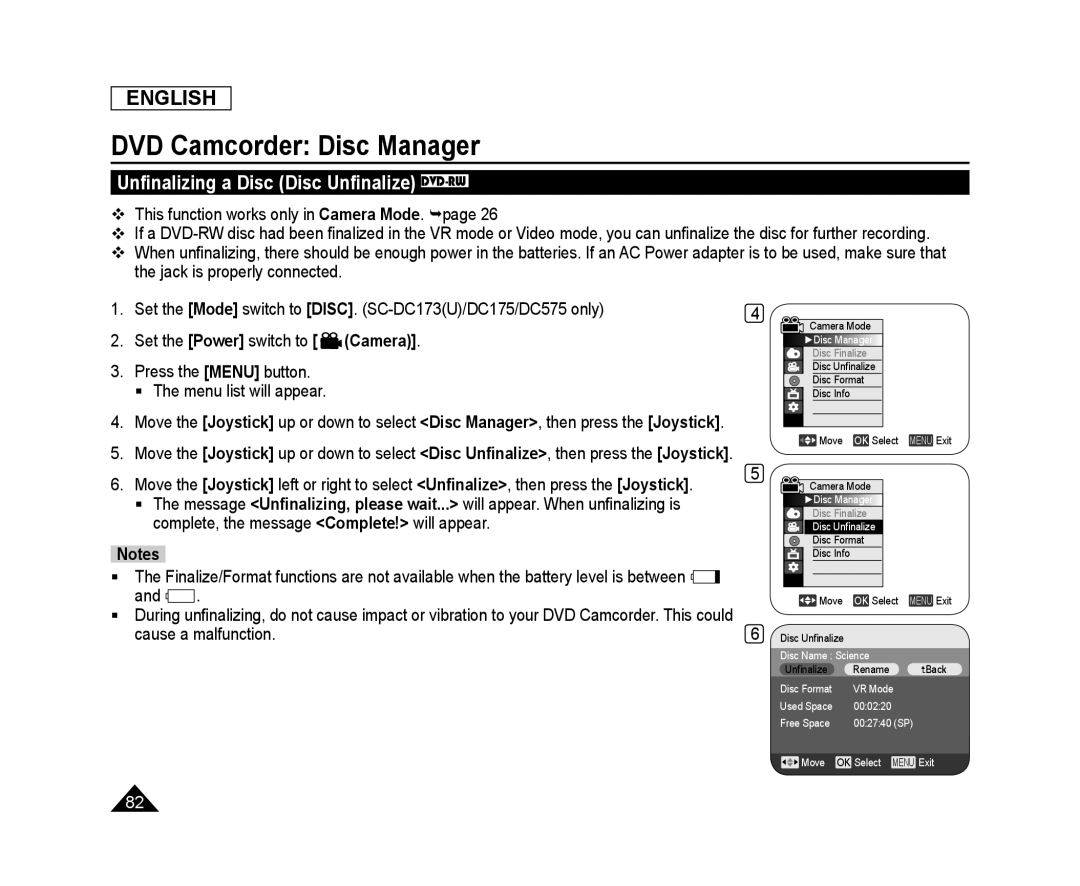 Unfinalizing a Disc (Disc Unfinalize) DVD-RW
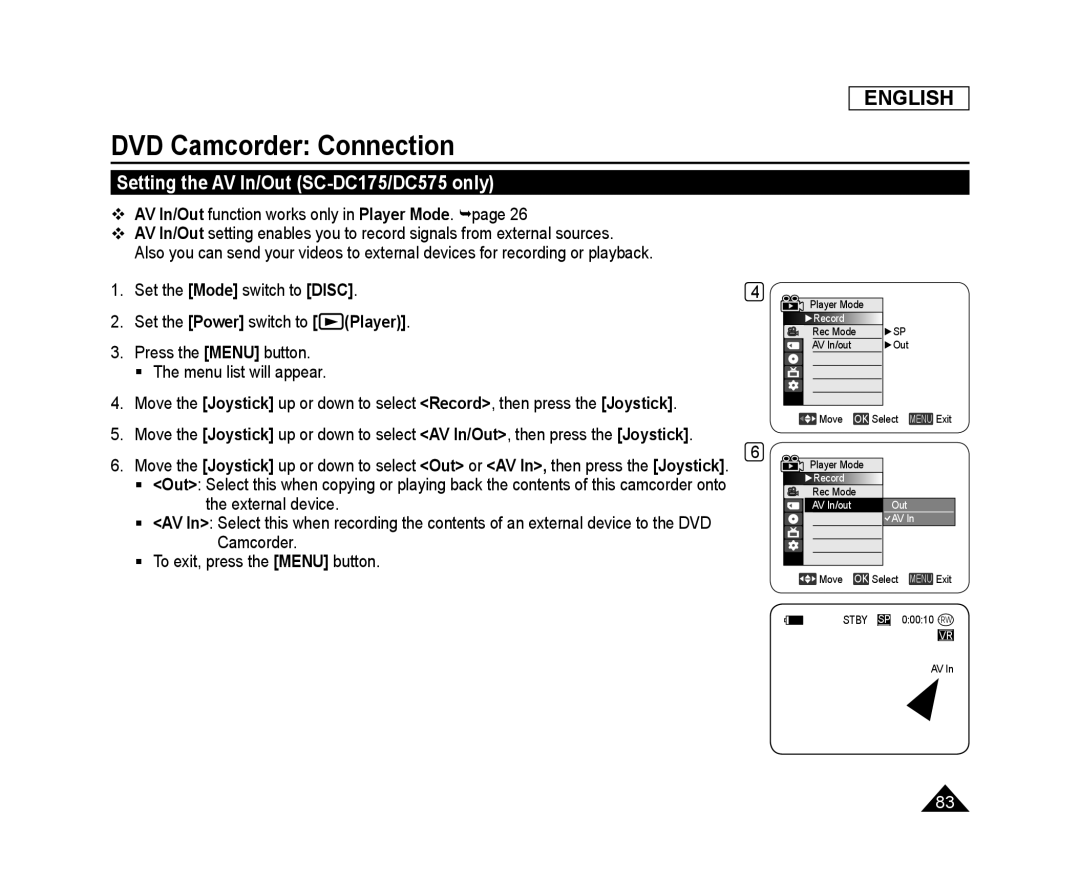 DVD Camcorder: Connection
Setting the AV In/Out (SC-DC175/DC575only)
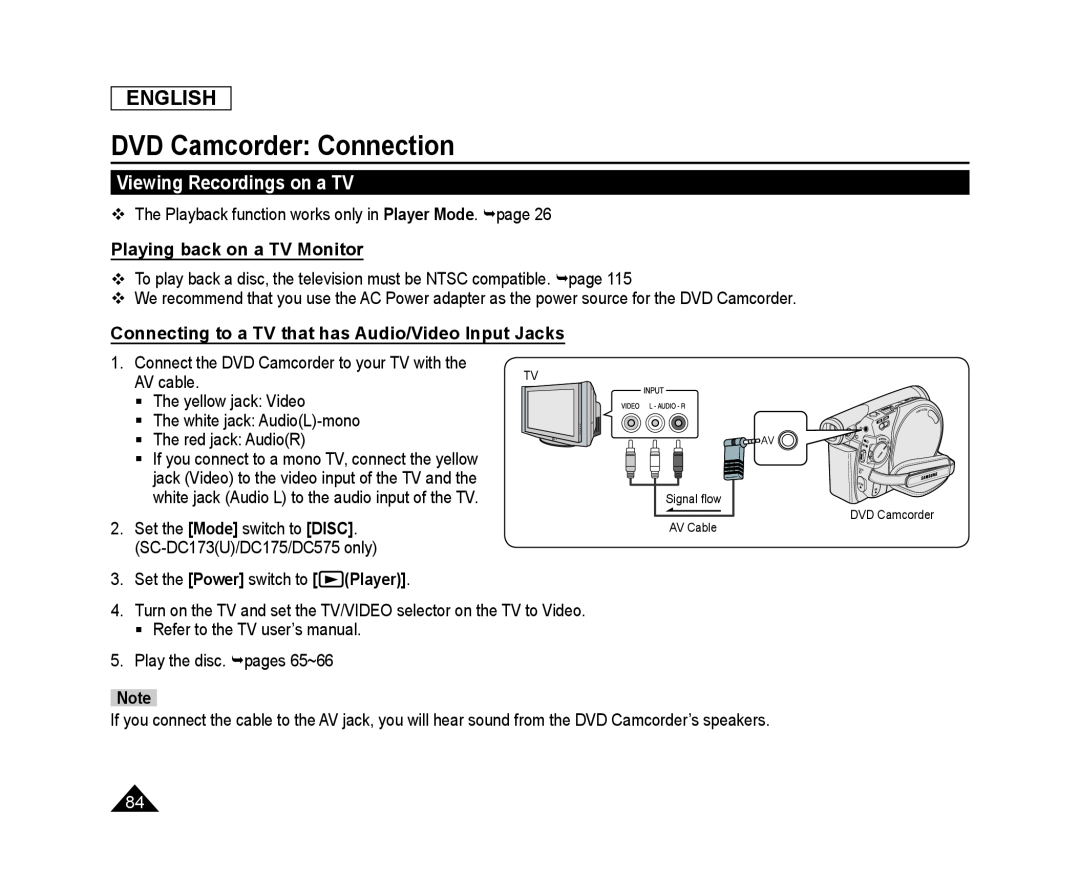 Viewing Recordings on a TV
Playing back on a TV Monitor
Connecting to a TV that has Audio/Video Input Jacks
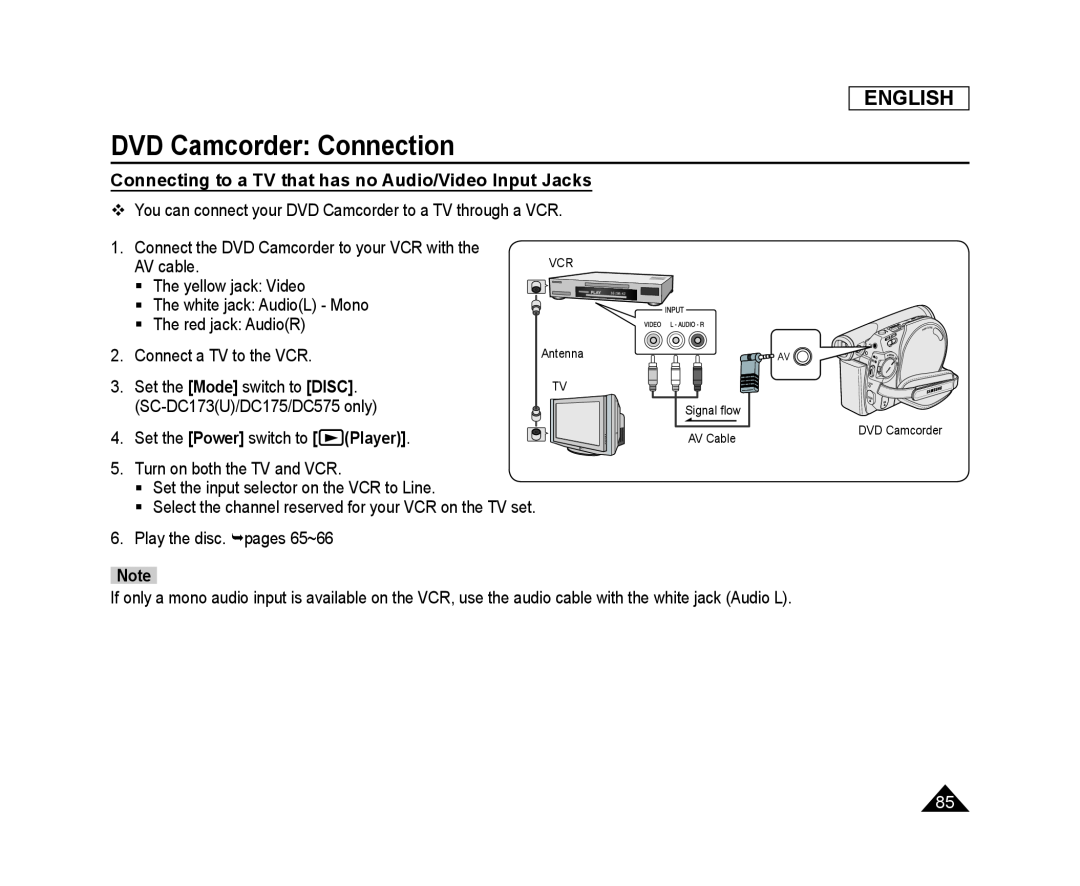 Connecting to a TV that has no Audio/Video Input Jacks
 Copying a Disc onto a Tape
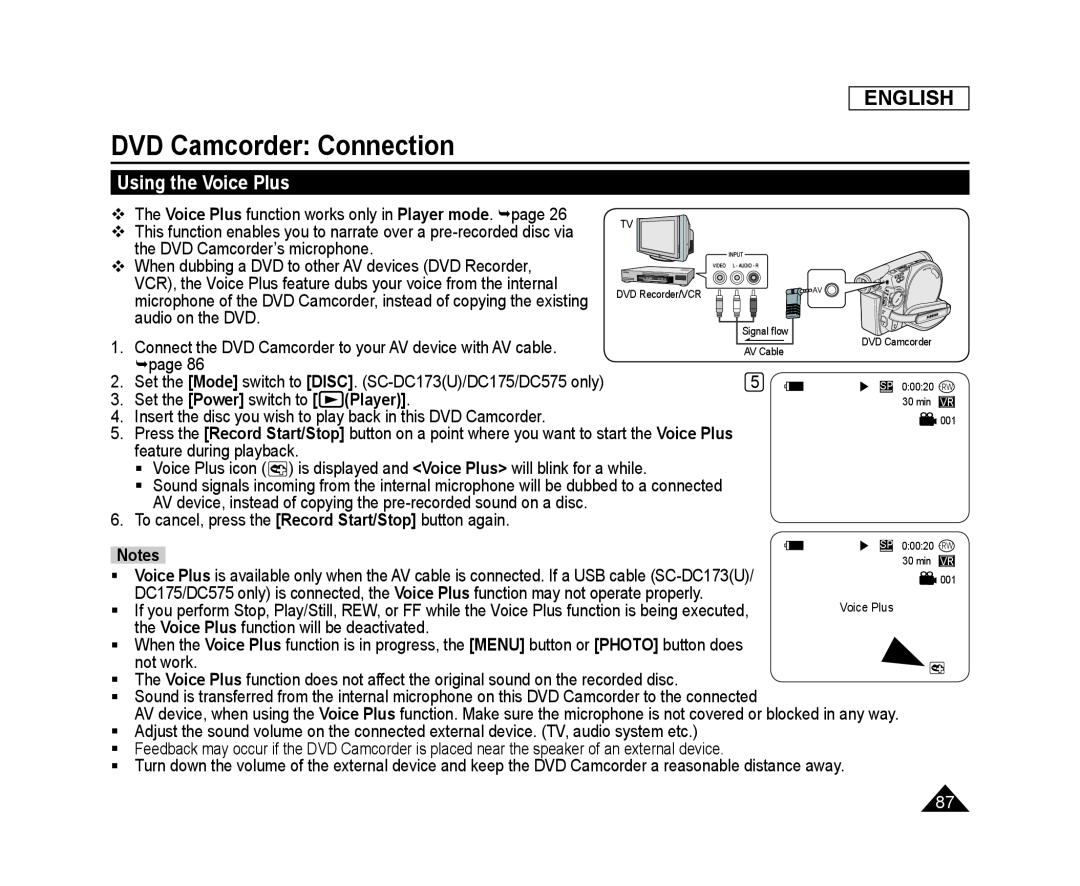 Using the Voice Plus
 Recording (Copying) a TV Program or Video Tape onto a Disc (SC-DC175/DC575only)
 Digital Still Camera Mode (SC-DC173(U)/DC175/DC575only)
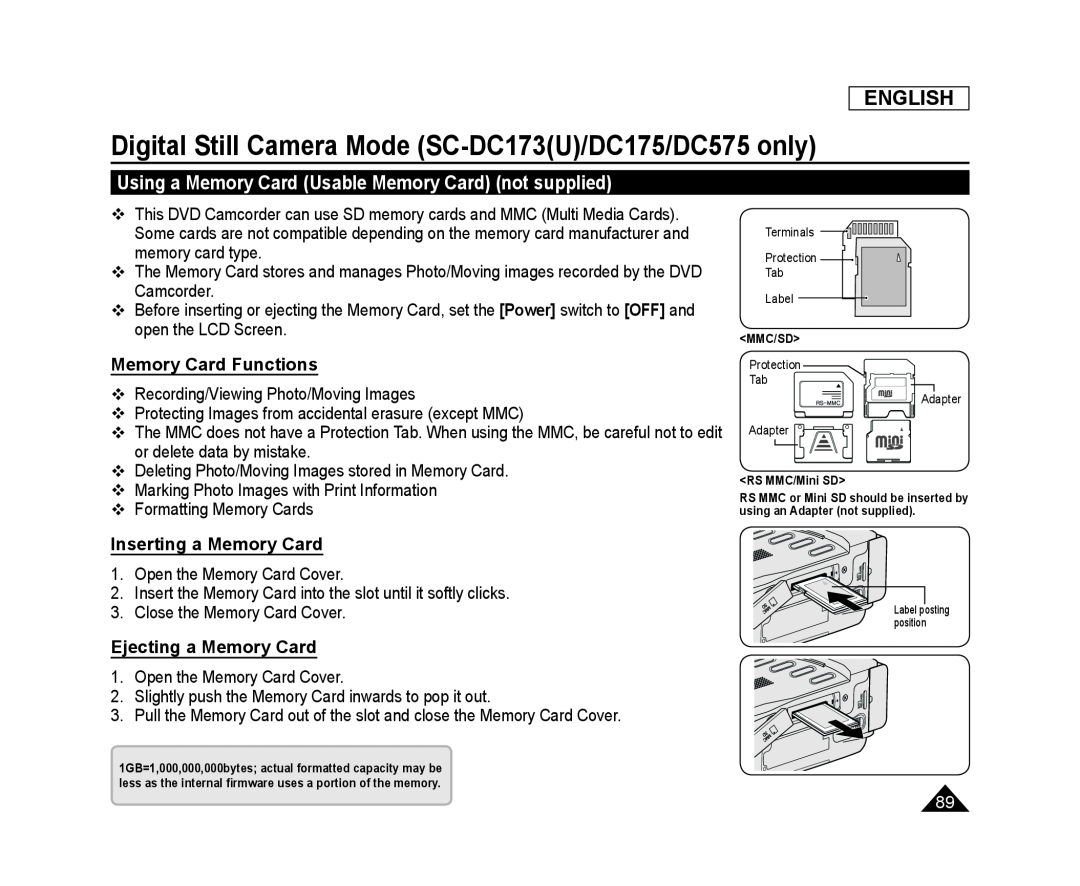
Using a Memory Card (Usable Memory Card) (not supplied)
Memory Card Functions
Inserting a Memory Card
Ejecting a Memory Card
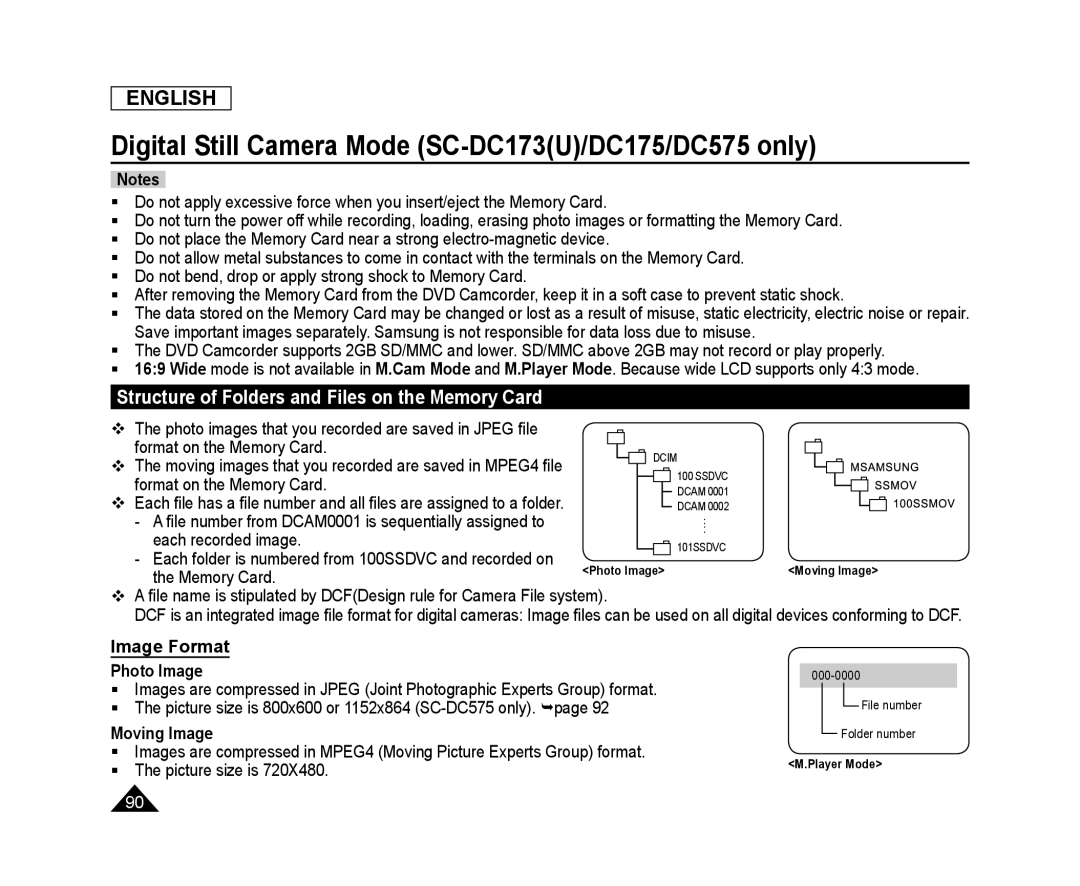 Structure of Folders and Files on the Memory Card
Image Format
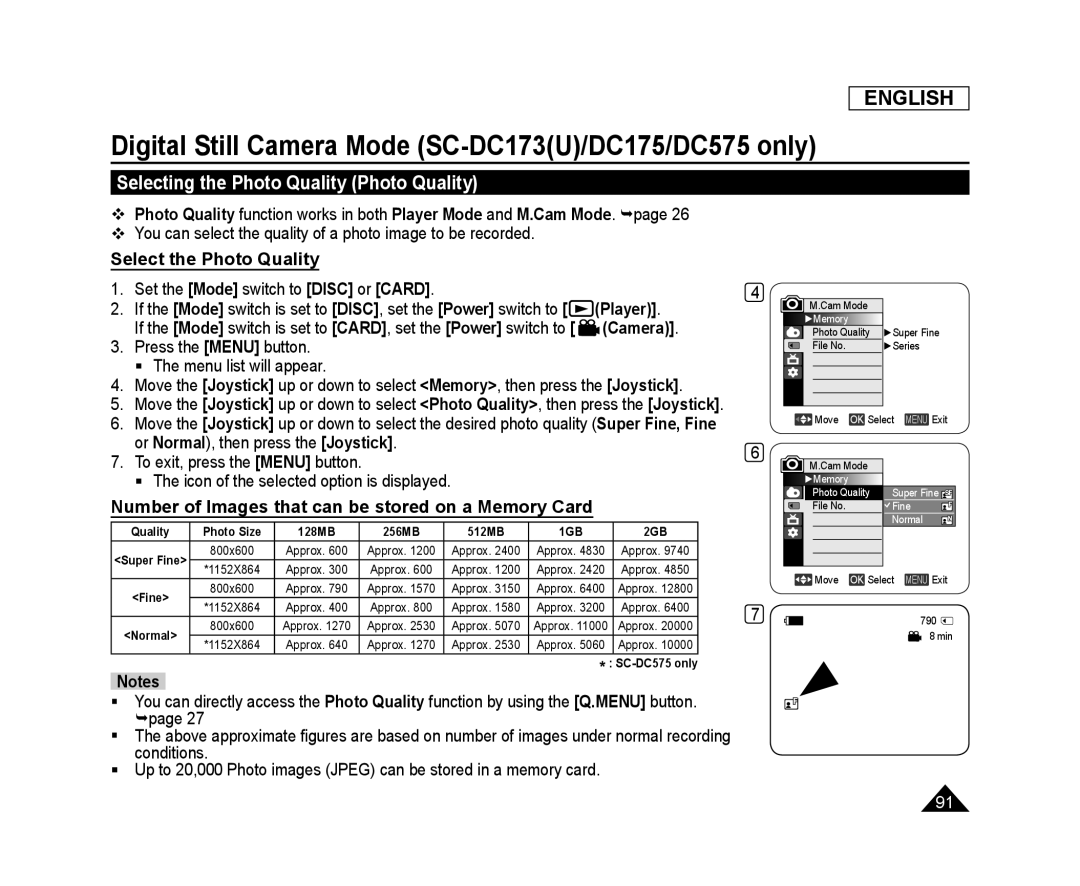 Selecting the Photo Quality (Photo Quality)
Select the Photo Quality
Number of Images that can be stored on a Memory Card
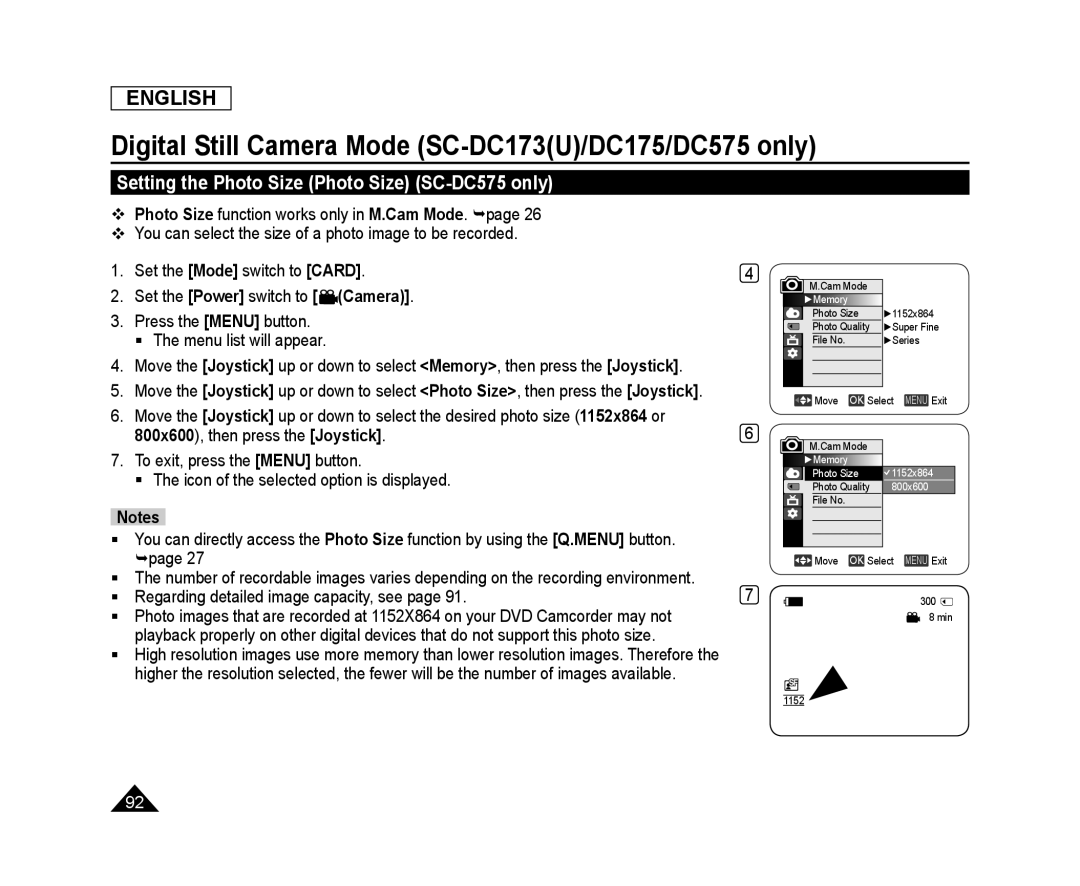 Setting the Photo Size (Photo Size) (SC-DC575only)
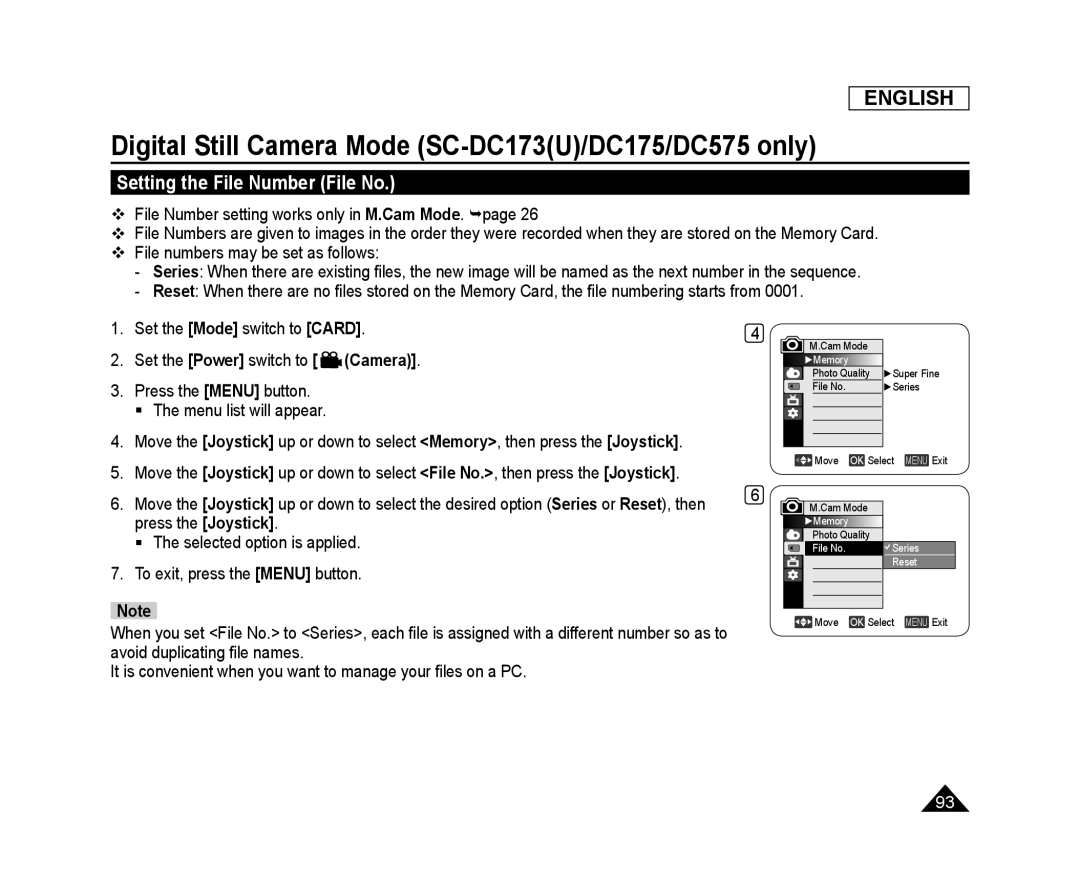 Setting the File Number (File No.)
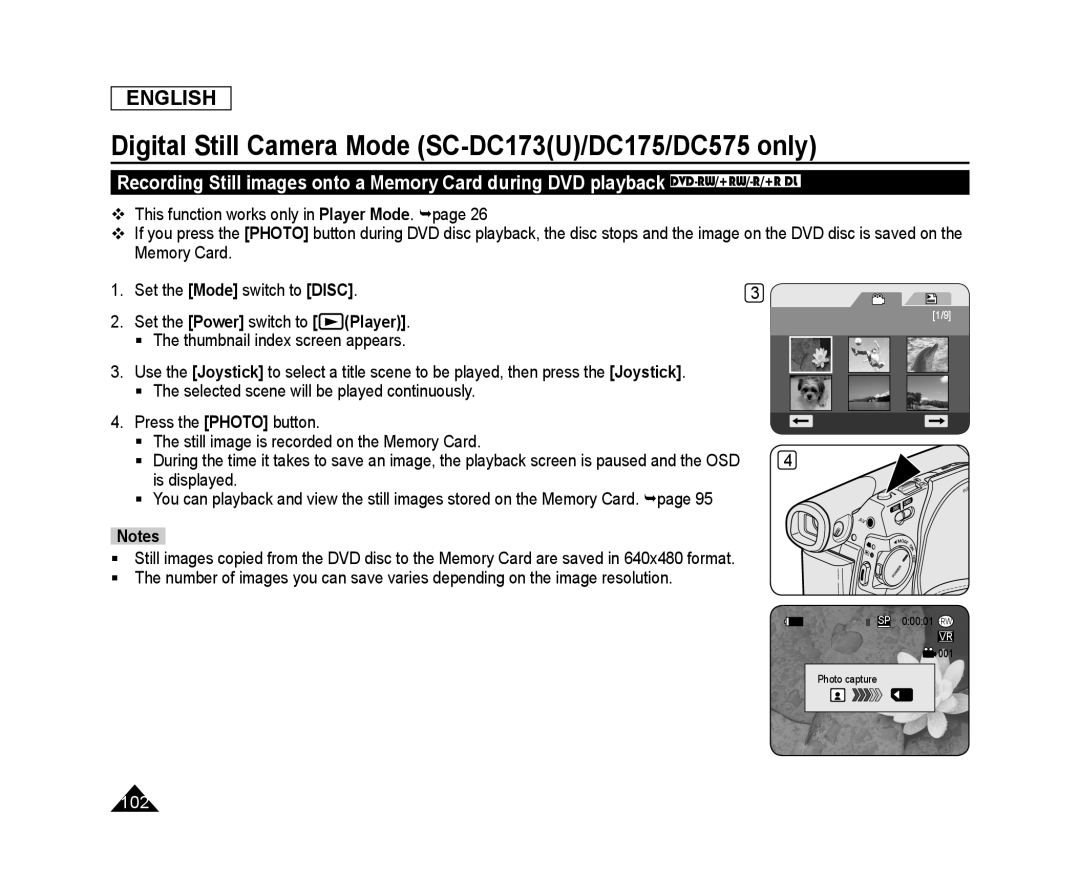
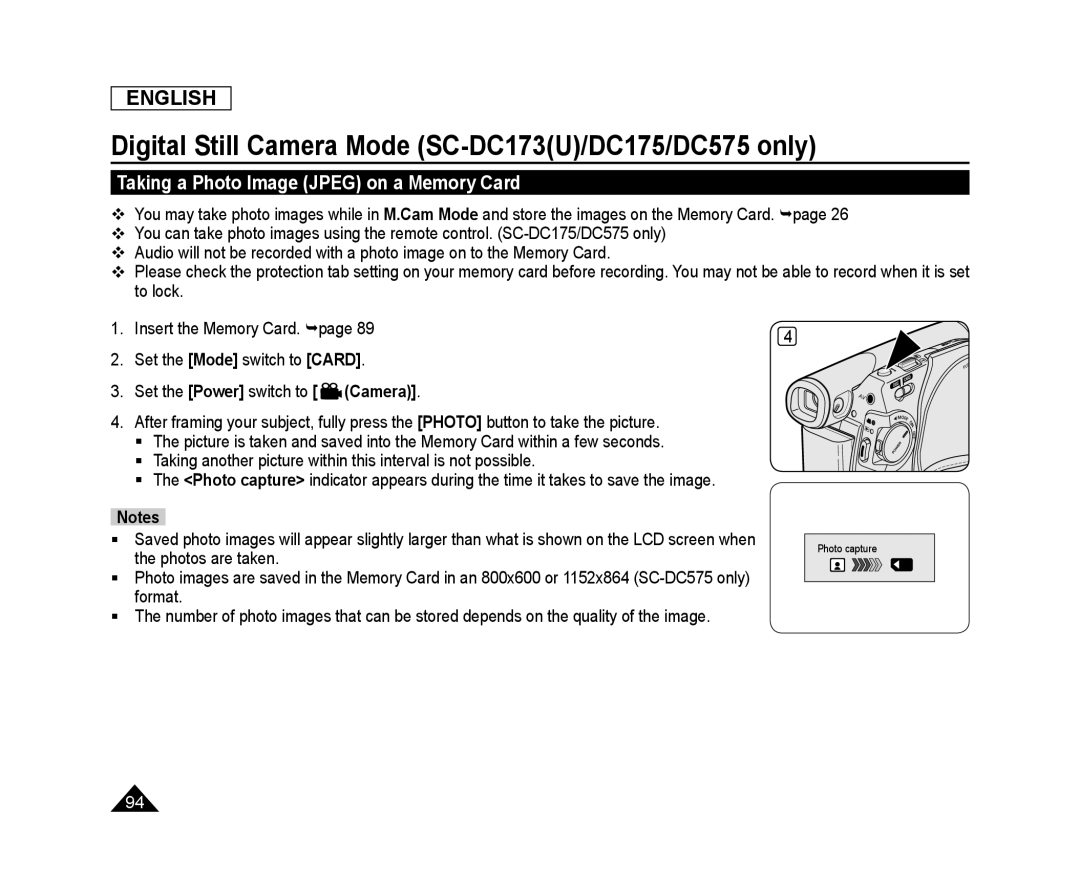 Taking a Photo Image (JPEG) on a Memory Card
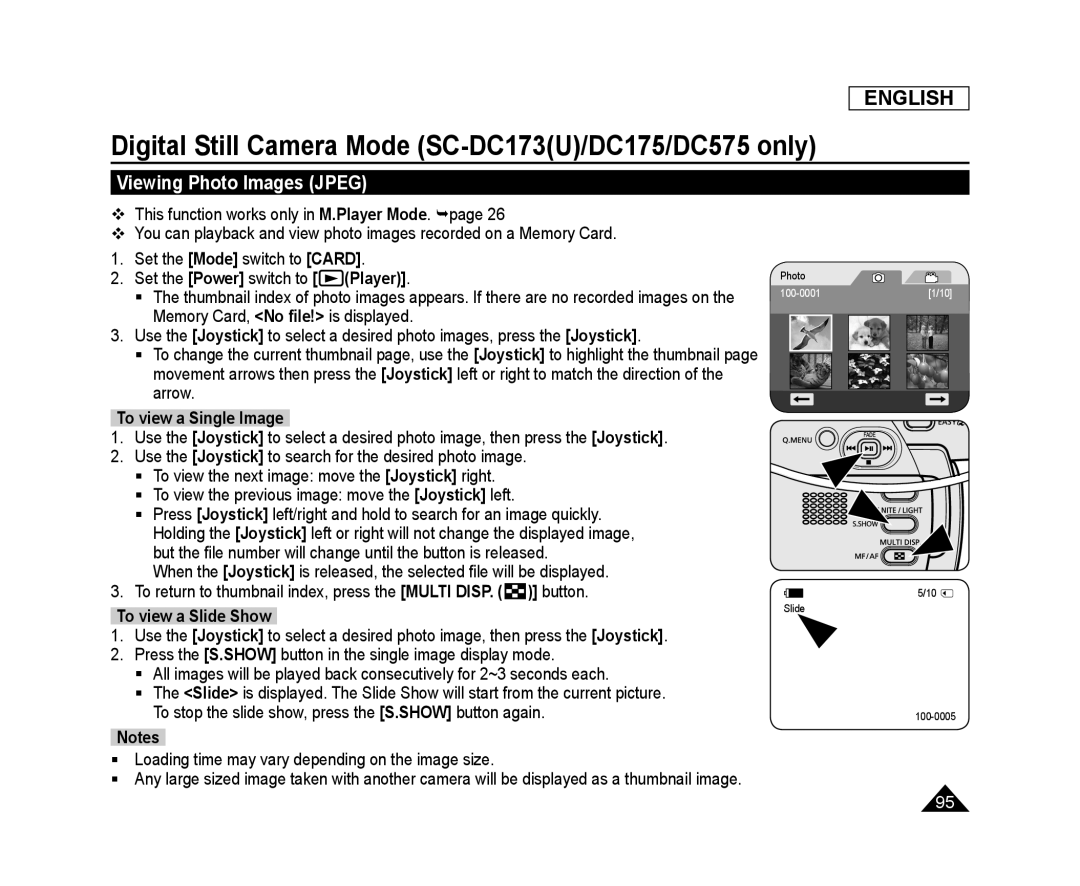 Viewing Photo Images (JPEG)
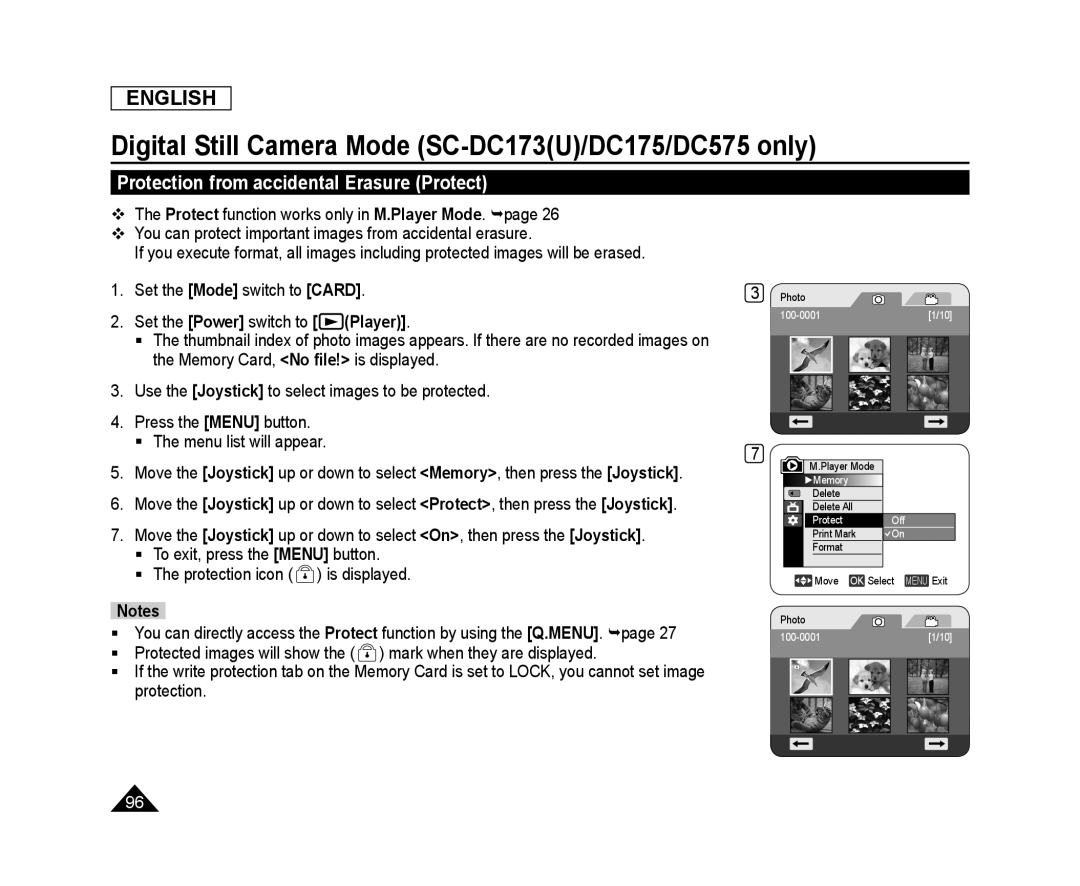 Protection from accidental Erasure (Protect)
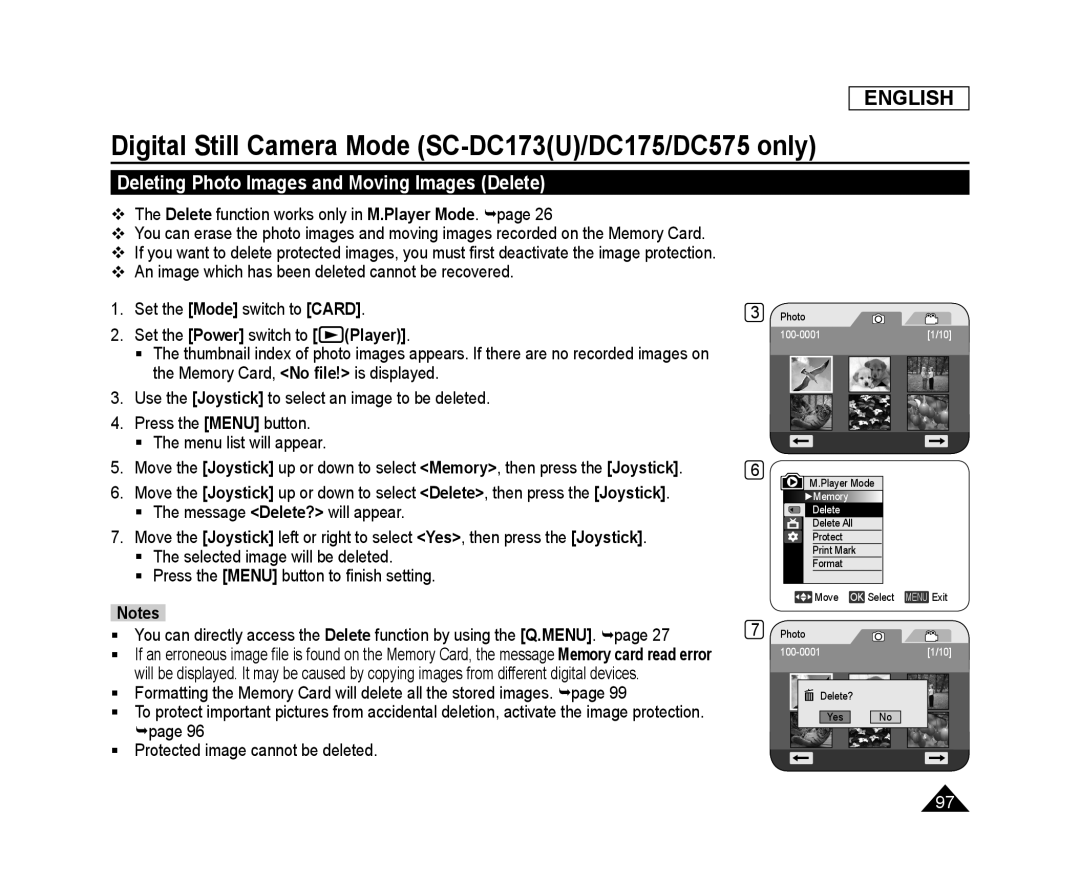 Deleting Photo Images and Moving Images (Delete)
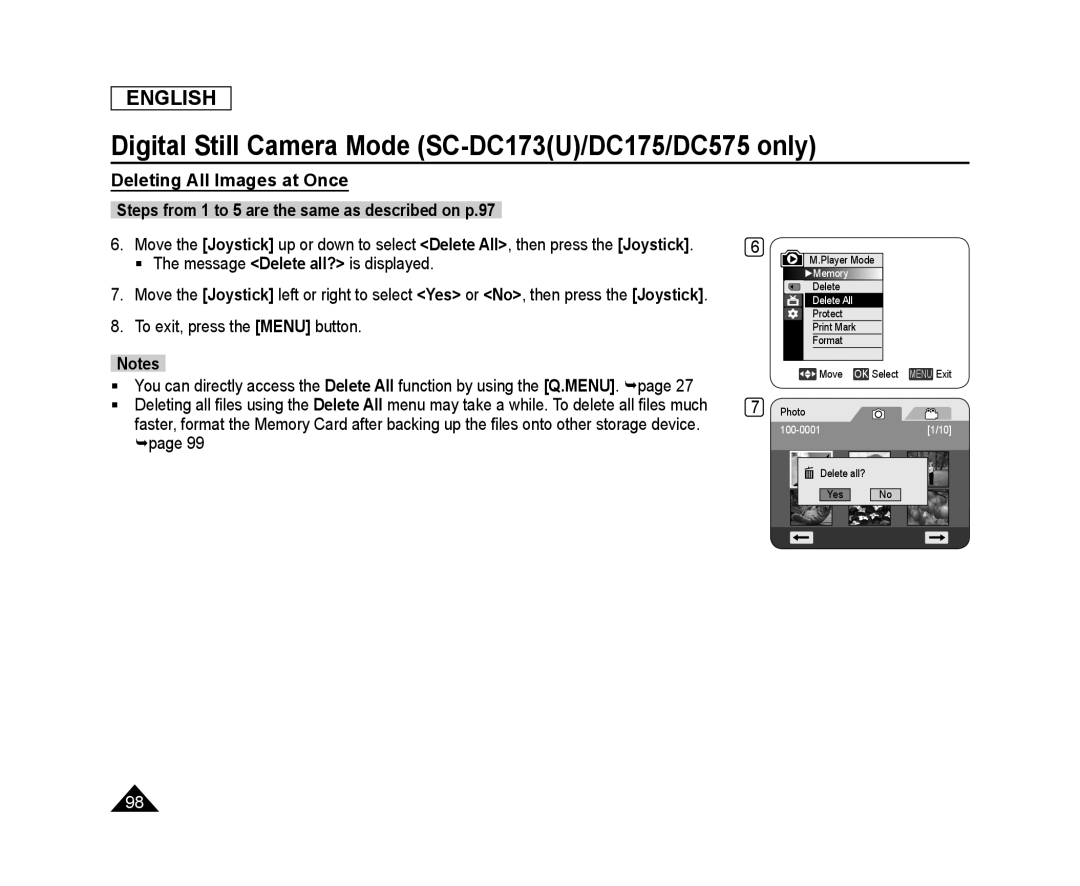 Deleting All Images at Once
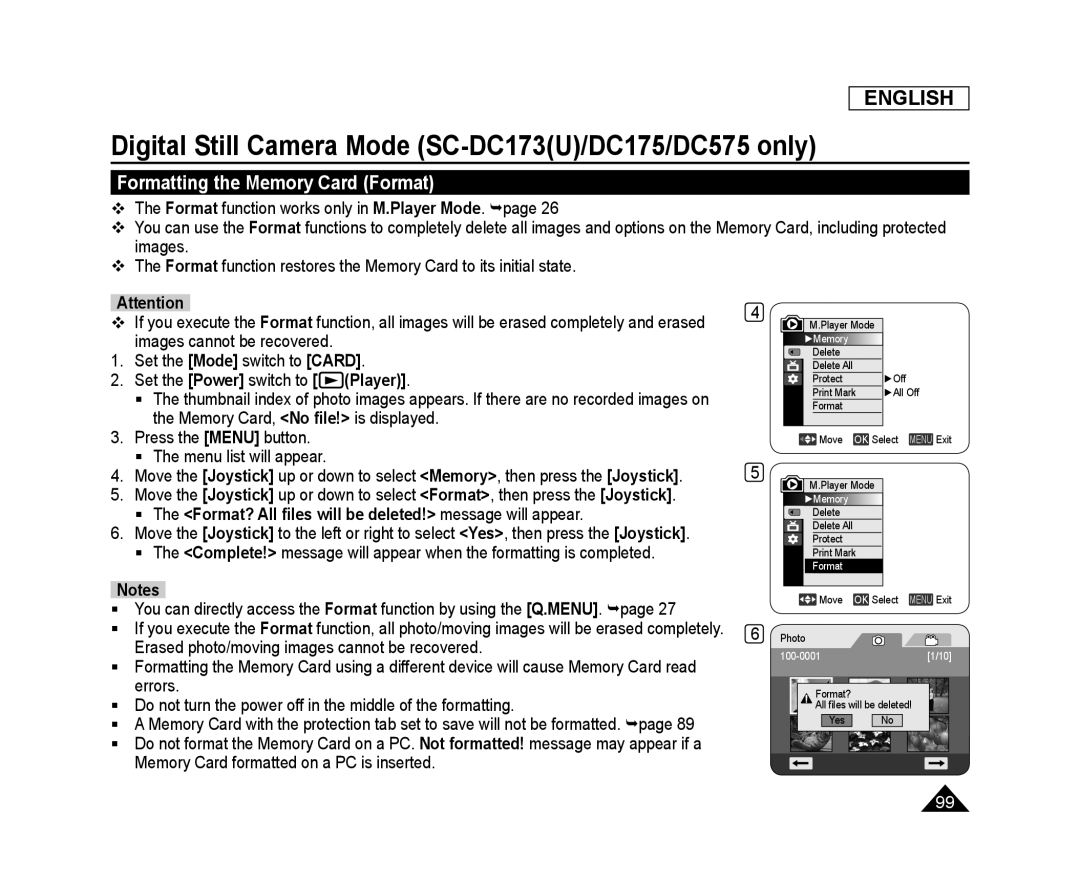 Formatting the Memory Card (Format)
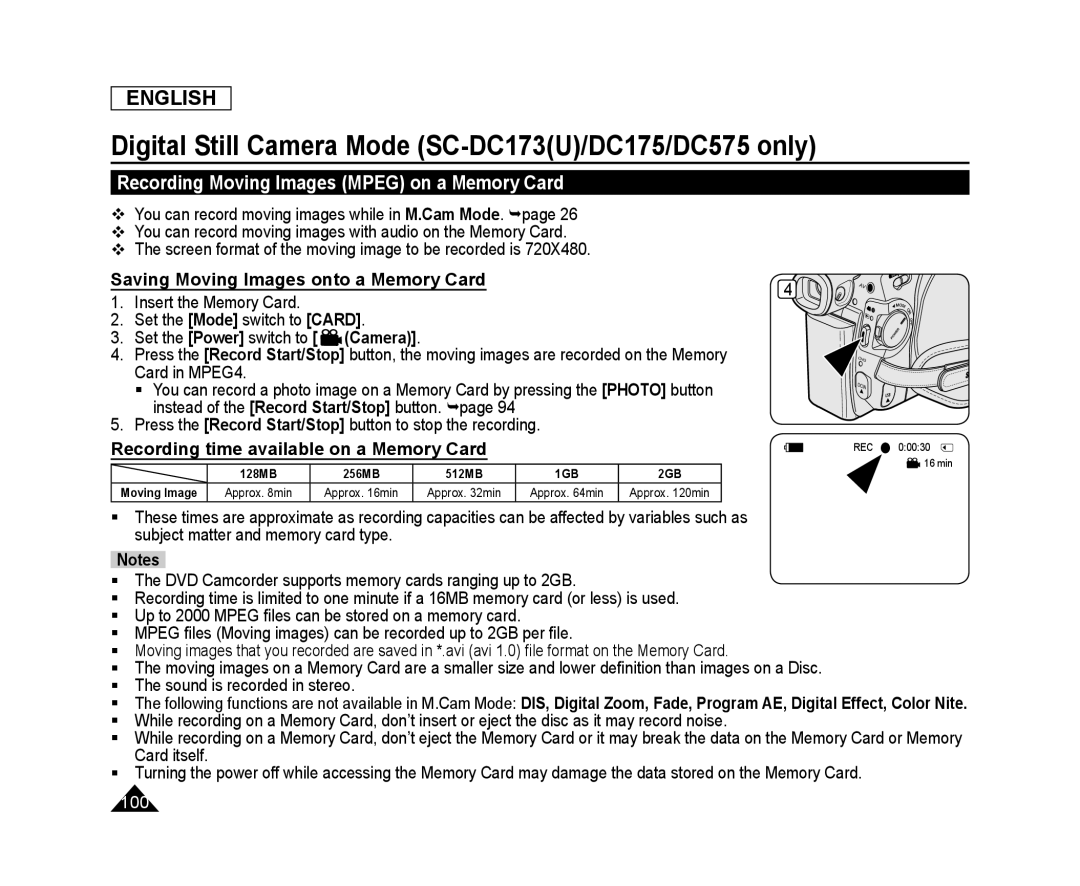 Recording Moving Images (MPEG) on a Memory Card
Saving Moving Images onto a Memory Card
Recording time available on a Memory Card
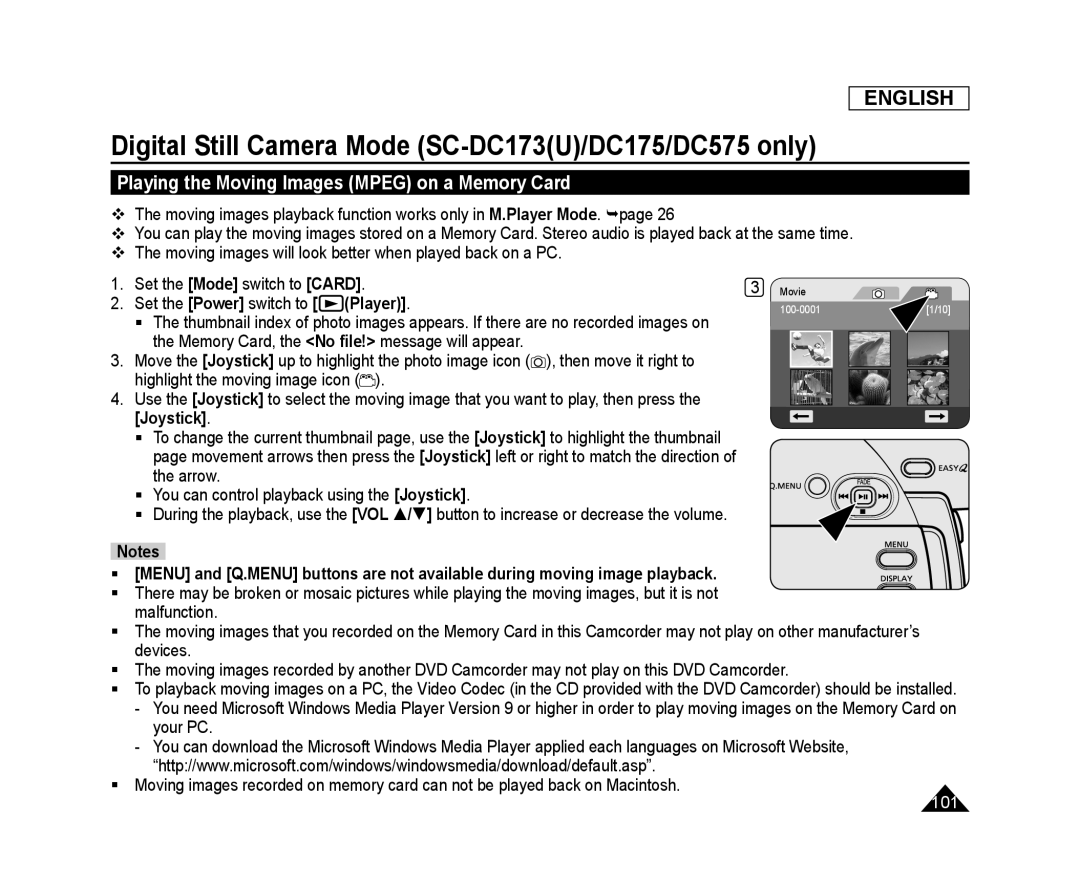 Playing the Moving Images (MPEG) on a Memory Card
 ENGLISH
Digital Still Camera Mode (SC-DC173(U)/DC175/DC575only)
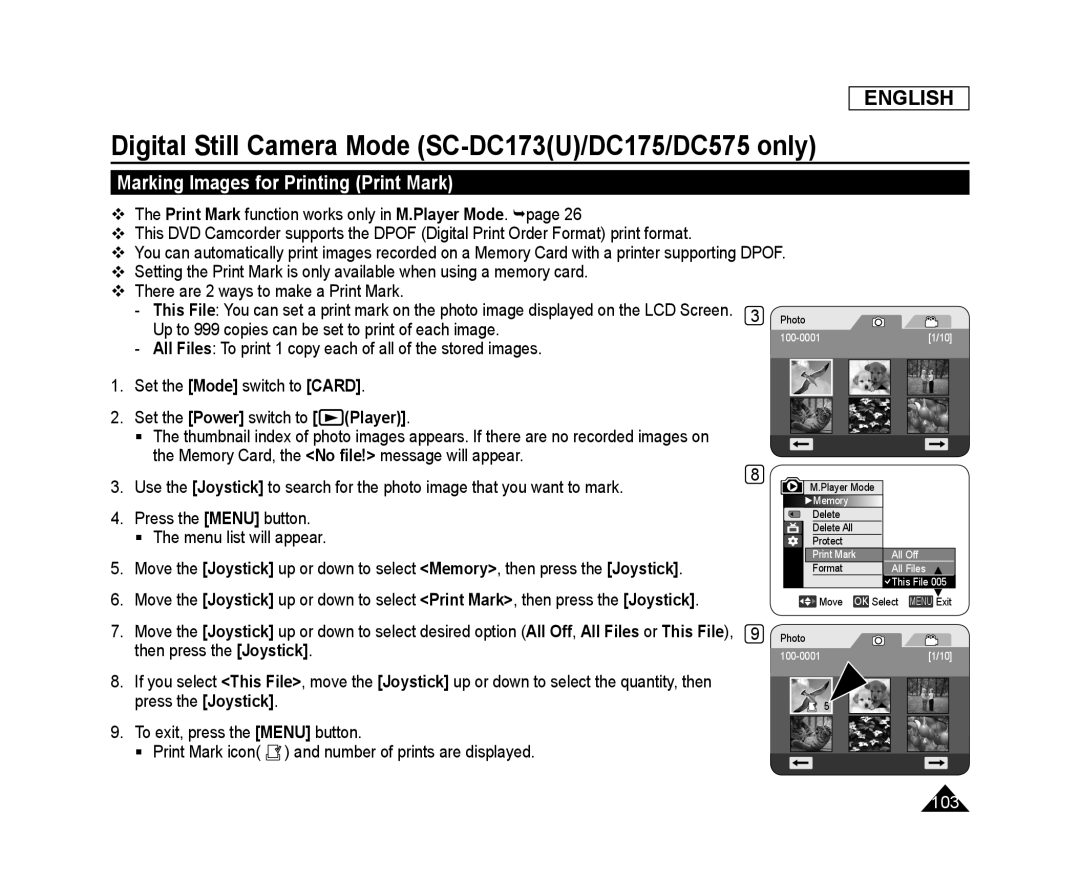 Marking Images for Printing (Print Mark)
 Removing the Print Mark
 PictBridge™ (SC-DC173(U)/DC175/DC575only)
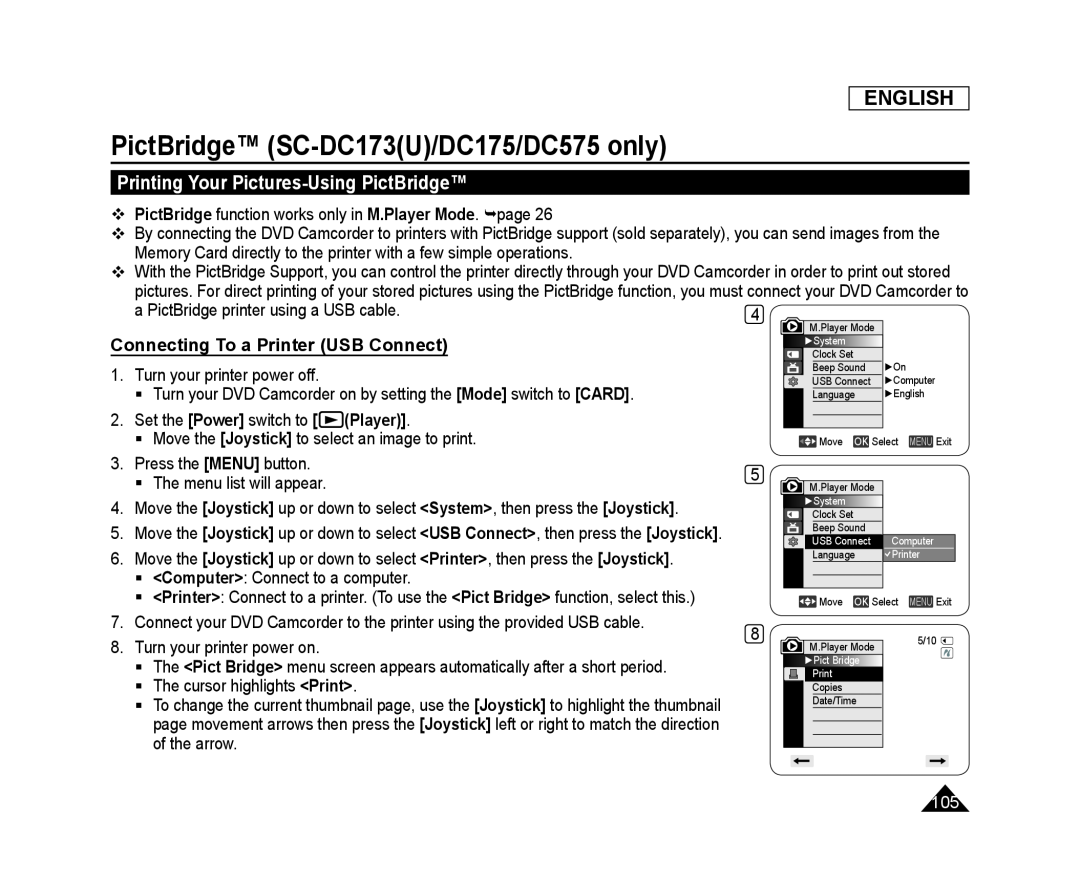
Printing Your Pictures-UsingPictBridge™
Connecting To a Printer (USB Connect)
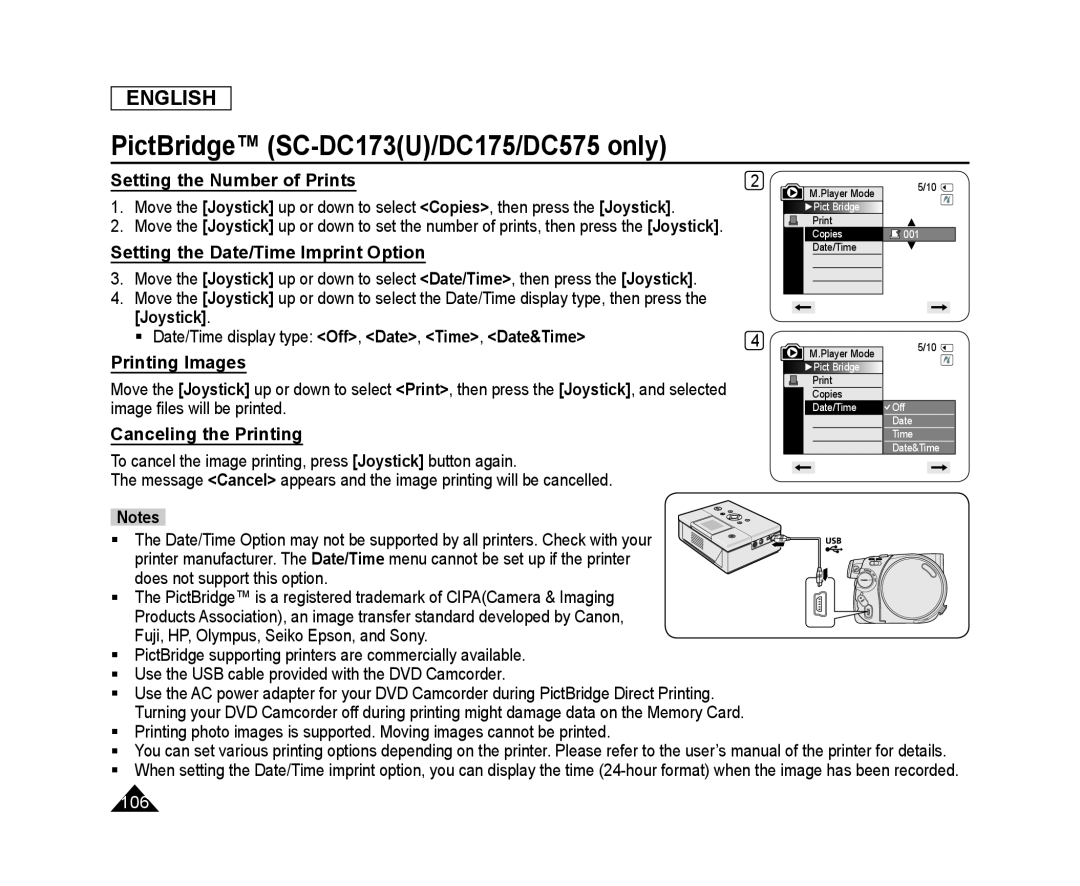 Setting the Number of Prints
Setting the Date/Time Imprint Option
Printing Images
Canceling the Printing
 USB Interface (SC-DC173(U)/DC175/DC575only)
Using USB Interface
Transferring a Digital Image through a USB Connection
USB Connection Speed (depending on the System)
System Requirements
 ENGLISH
USB Interface (SC-DC173(U)/DC175/DC575only)
Notes
M.Cam Mode
M.Player Mode
USB Streaming requires Video Codec, DV Driver and DirectX
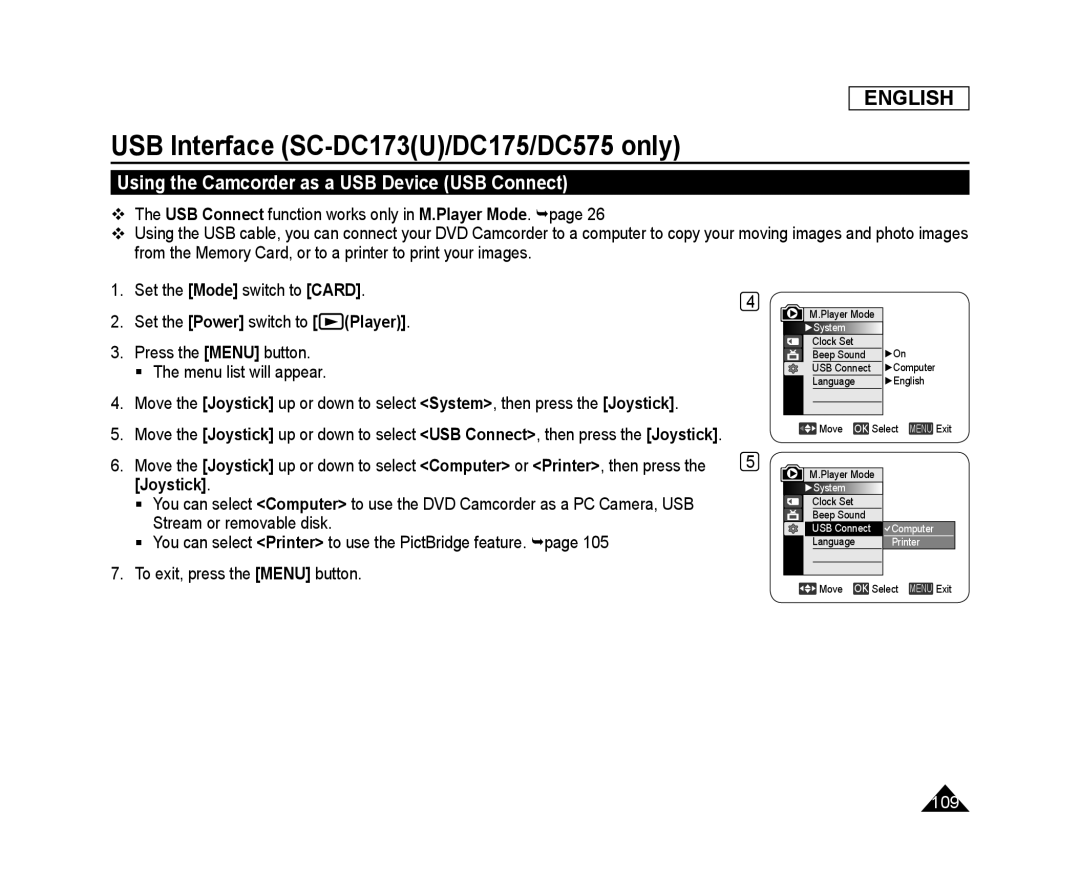 Using the Camcorder as a USB Device (USB Connect)
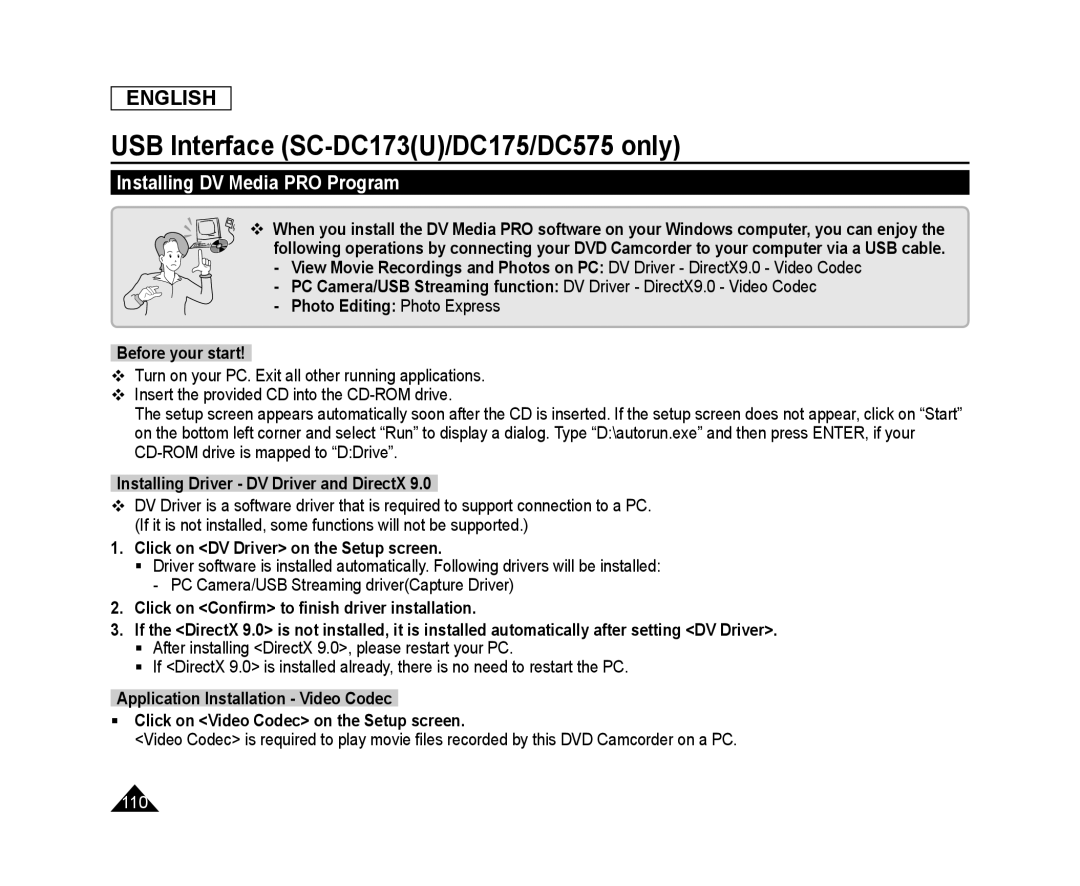 Installing DV Media PRO Program
 ENGLISH
USB Interface (SC-DC173(U)/DC175/DC575only)
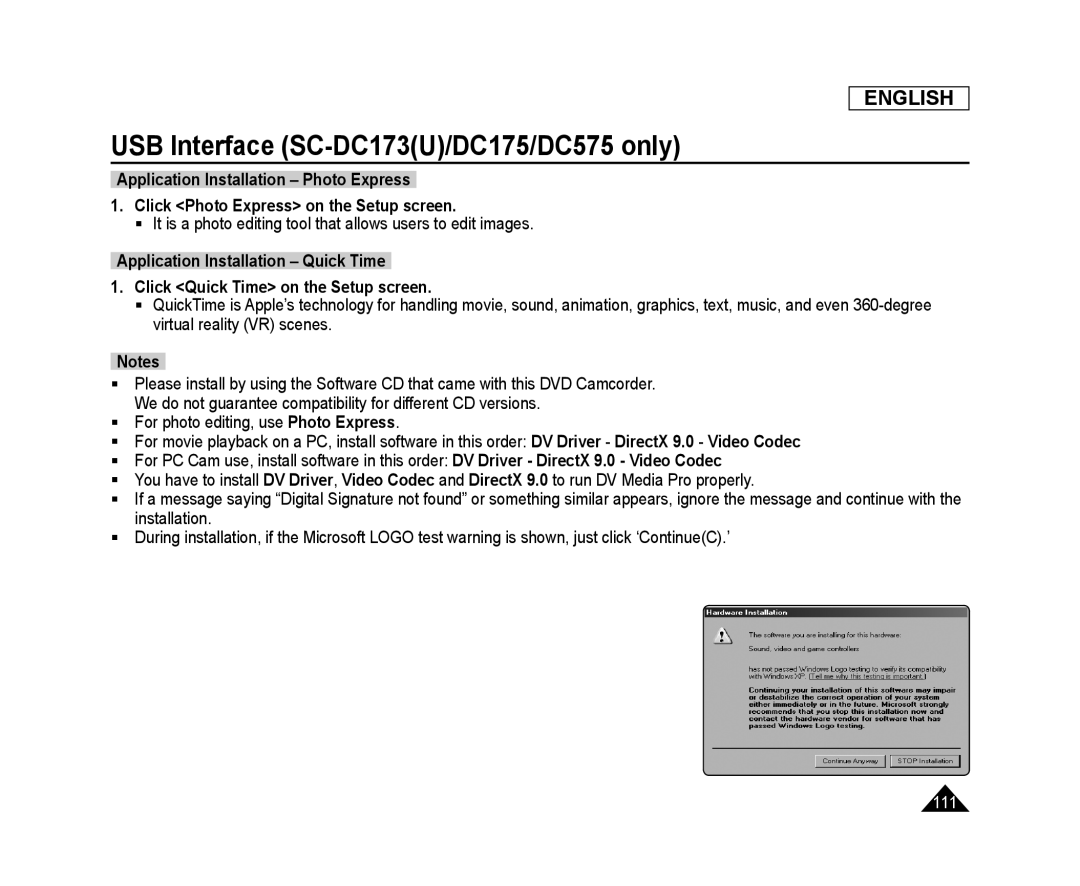
Application Installation – Photo Express
1.Click <Photo Express> on the Setup screen
Application Installation – Quick Time
1.Click <Quick Time> on the Setup screen
Notes
Photo Express
DV Driver
DirectX
Video Codec
DV Driver - DirectX 9.0 - Video Codec
DV Driver
Video Codec
DirectX
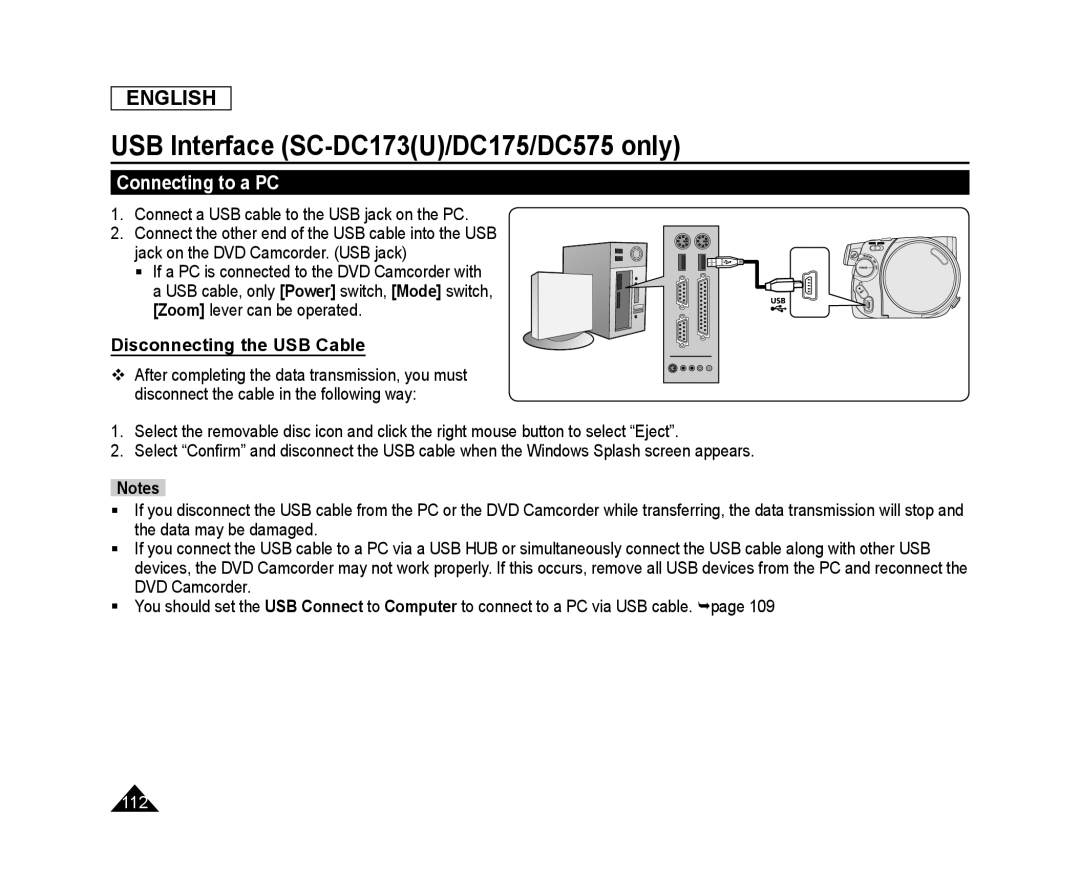 Connecting to a PC
Disconnecting the USB Cable
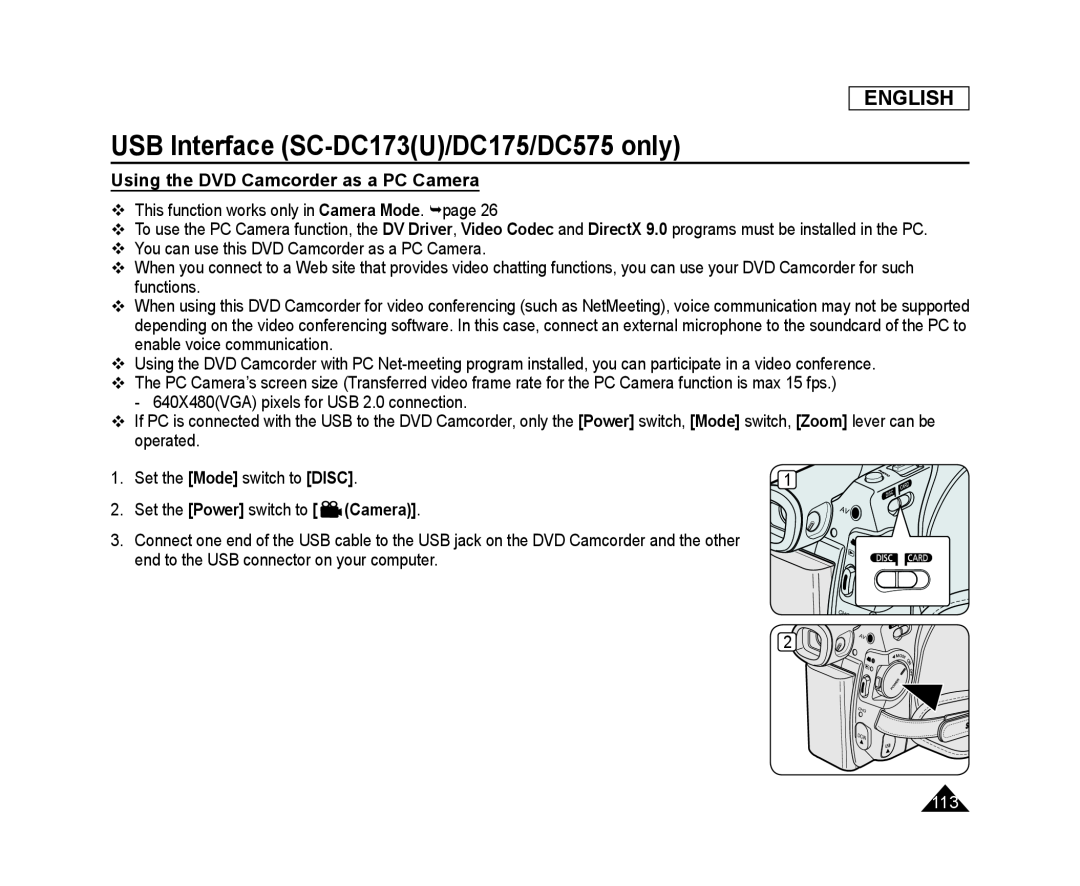 Using the DVD Camcorder as a PC Camera
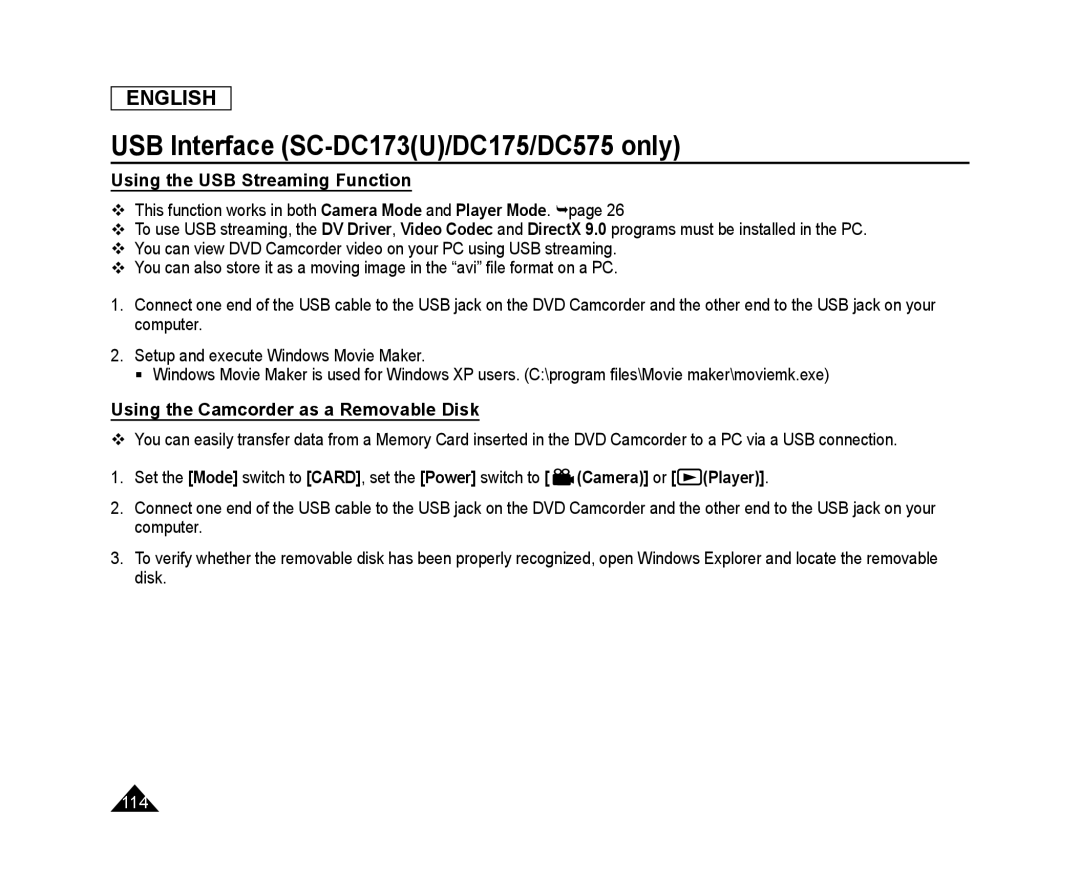 Using the USB Streaming Function
Using the Camcorder as a Removable Disk
 Maintenance
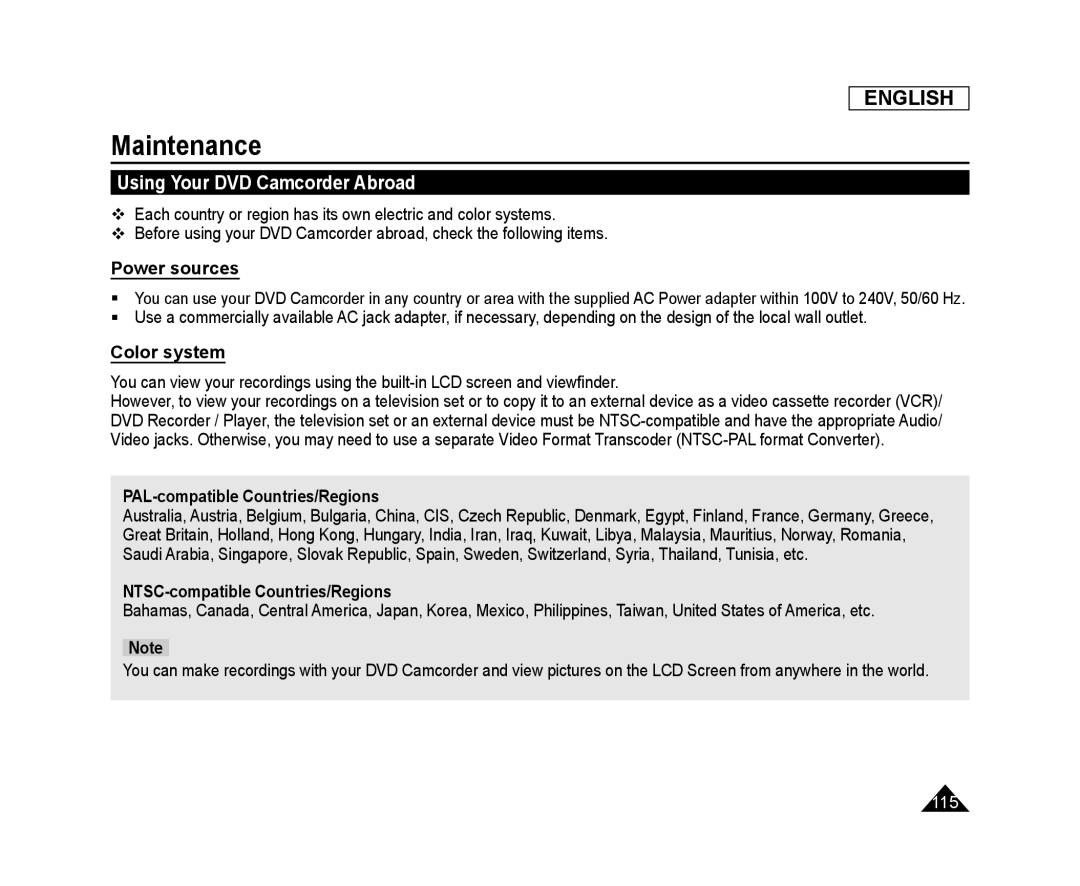
Using Your DVD Camcorder Abroad
Power sources
Color system
 Troubleshooting
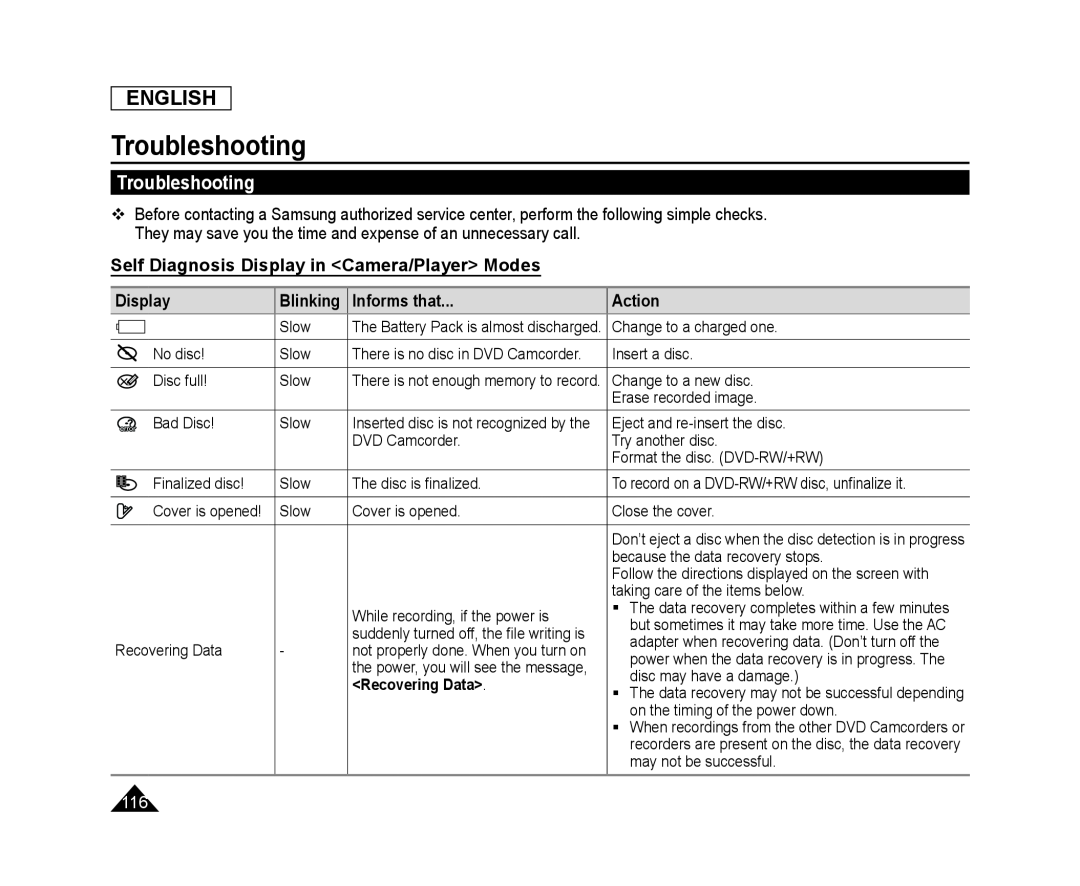
Troubleshooting
Self Diagnosis Display in <Camera/Player> Modes
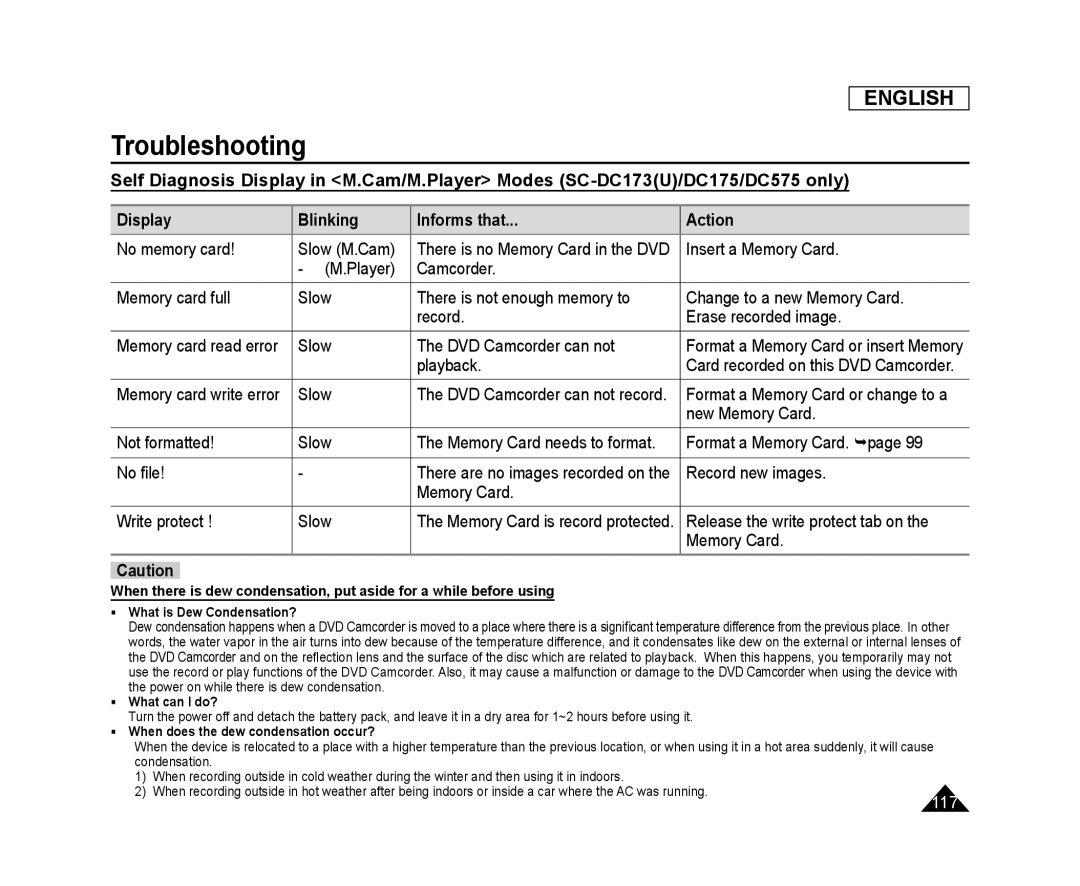 Self Diagnosis Display in <M.Cam/M.Player> Modes (SC-DC173(U)/DC175/DC575only)
 ENGLISH
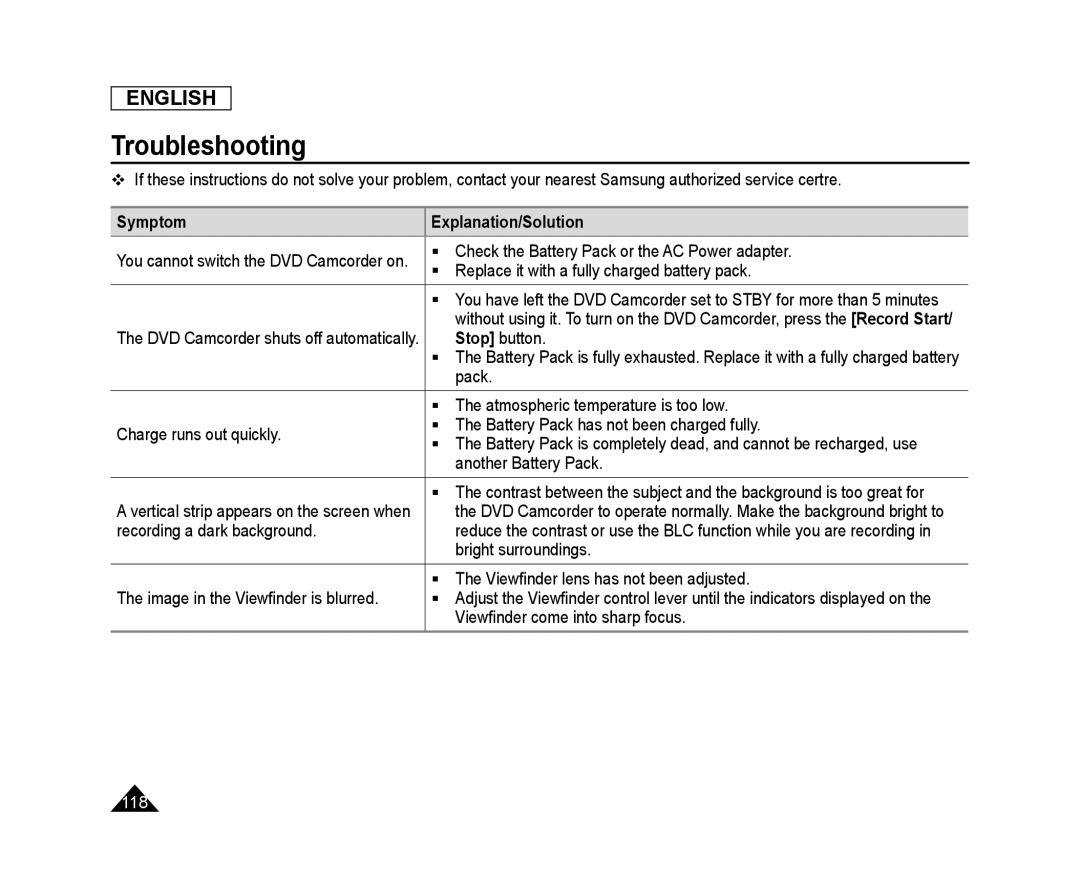
Troubleshooting
Symptom
Explanation/Solution
Stop]
 ENGLISH
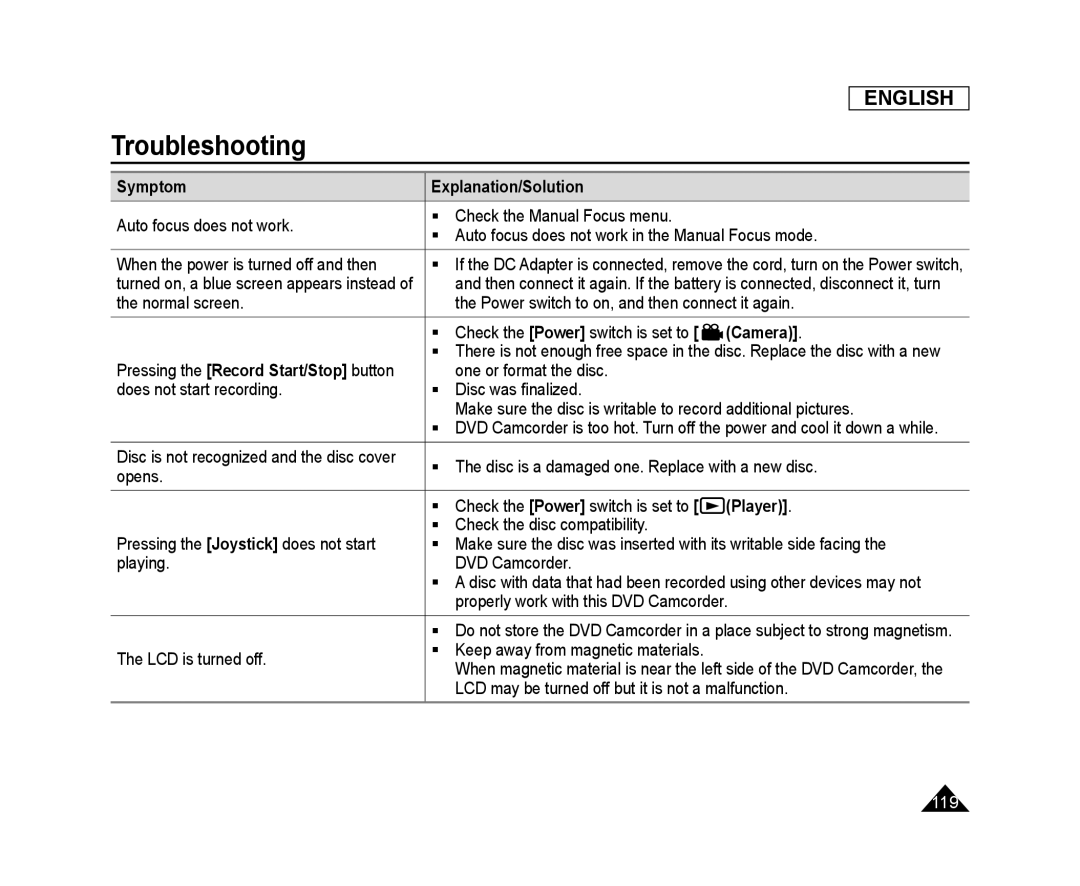
Troubleshooting
![[OPEN] ENGLISH](/images/prints/7794/120.1080.webp) ENGLISH
ENGLISHTroubleshooting
[OPEN]
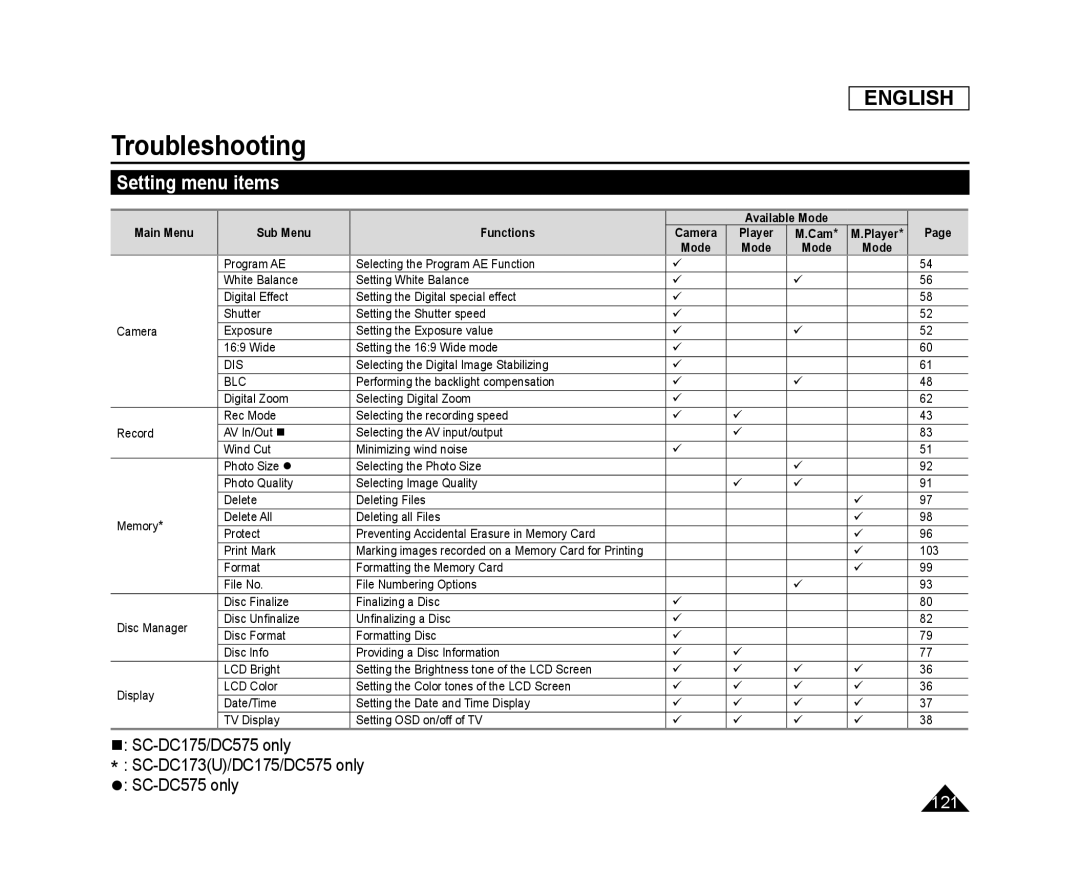 Setting menu items
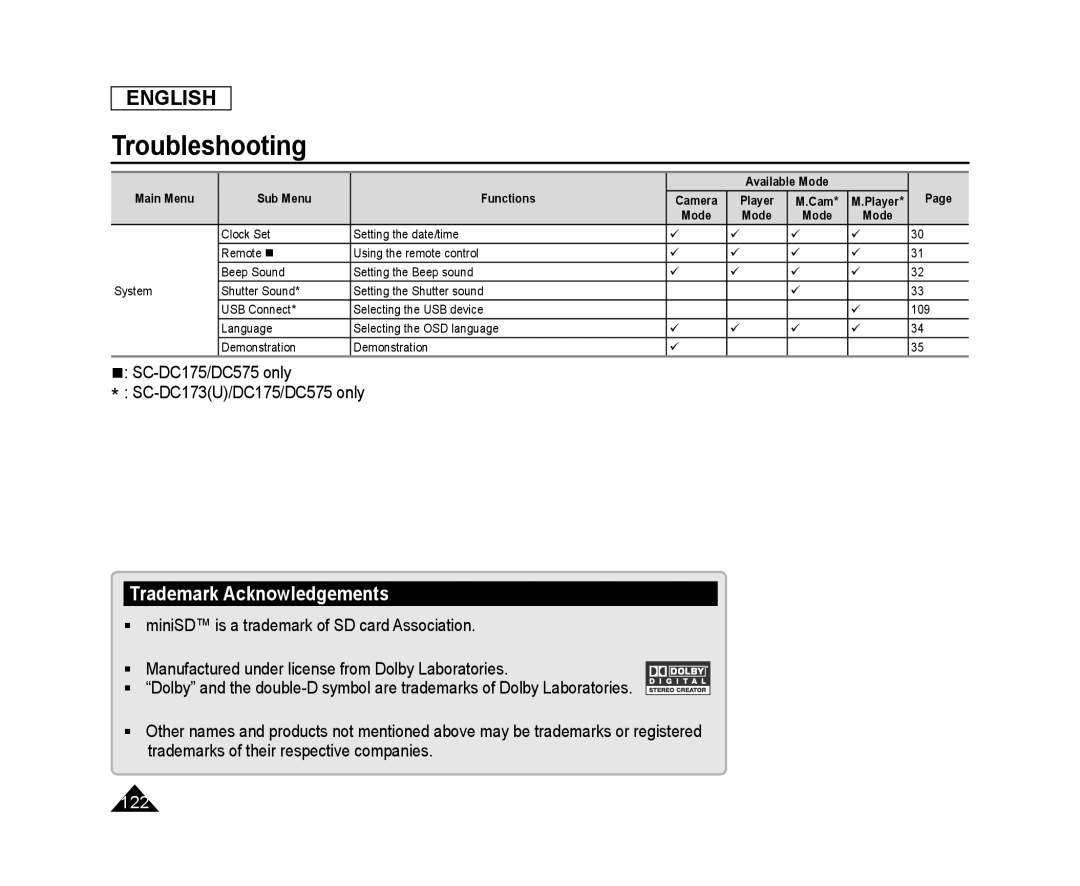 Trademark Acknowledgements
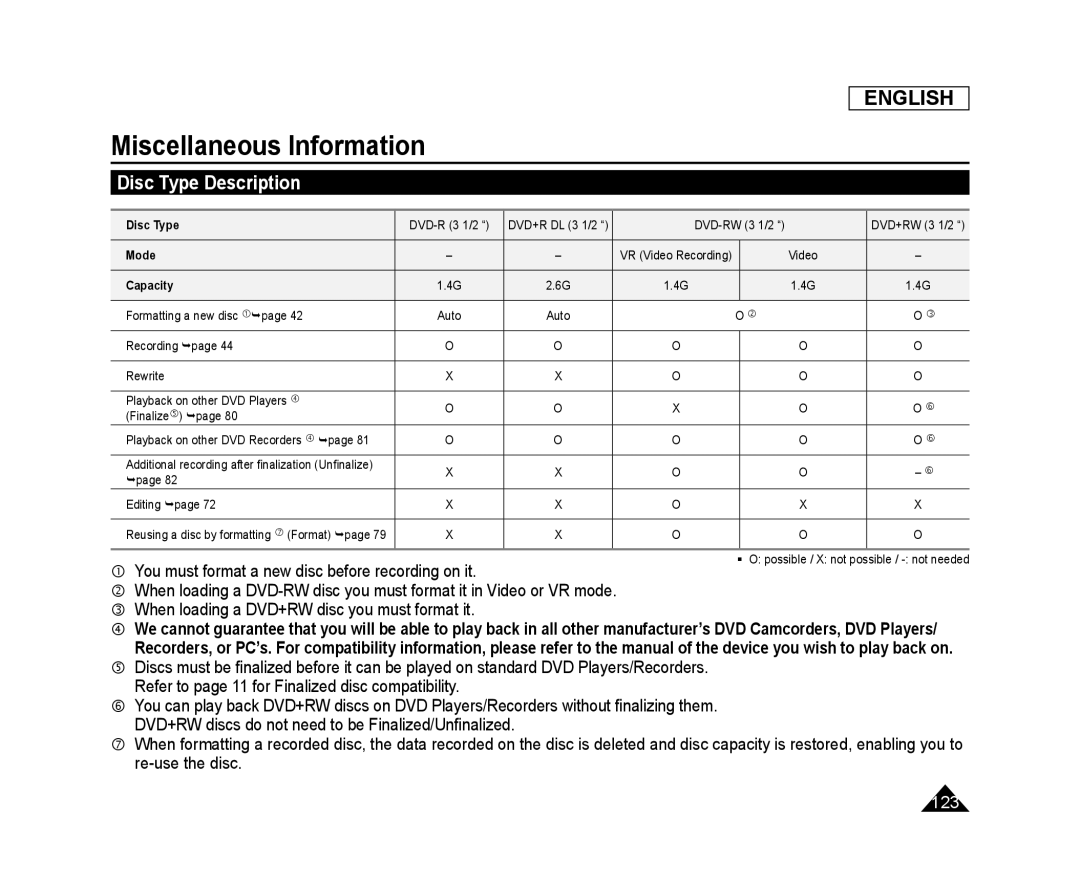 Miscellaneous Information
Disc Type Description
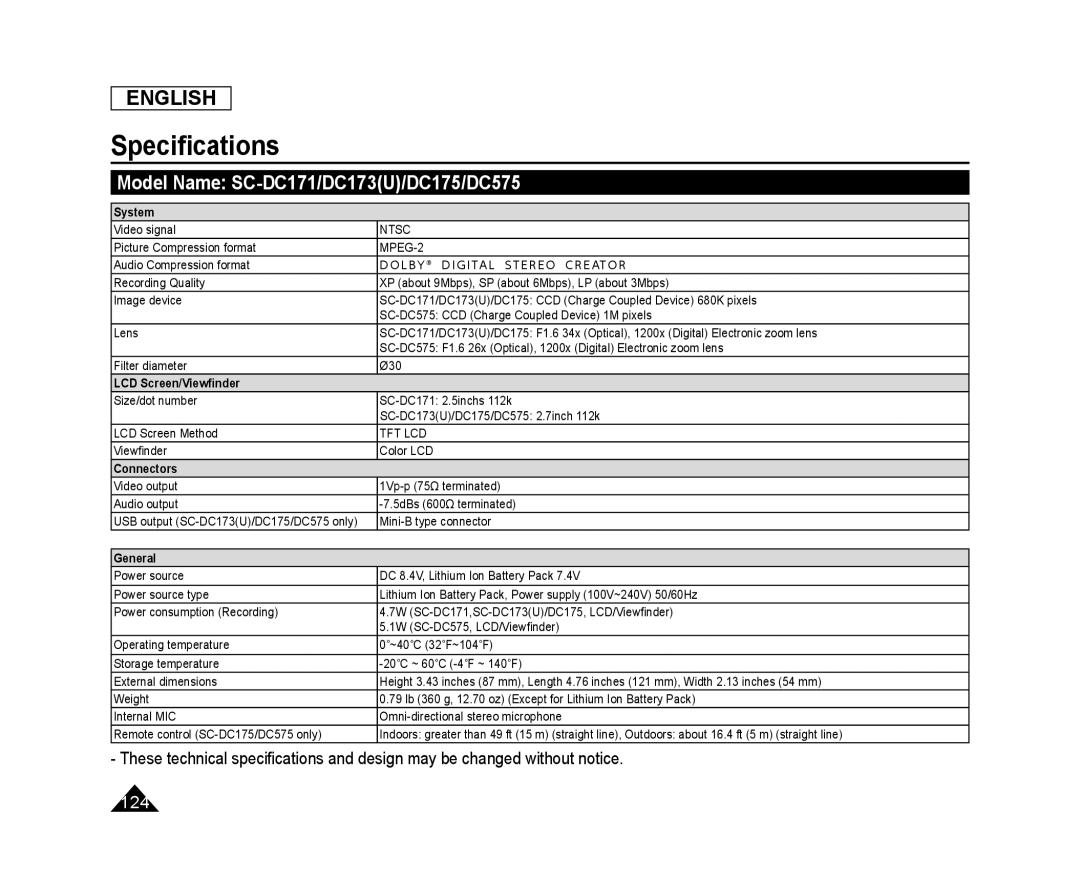 Specifications
Model Name: SC-DC171/DC173(U)/DC175/DC575
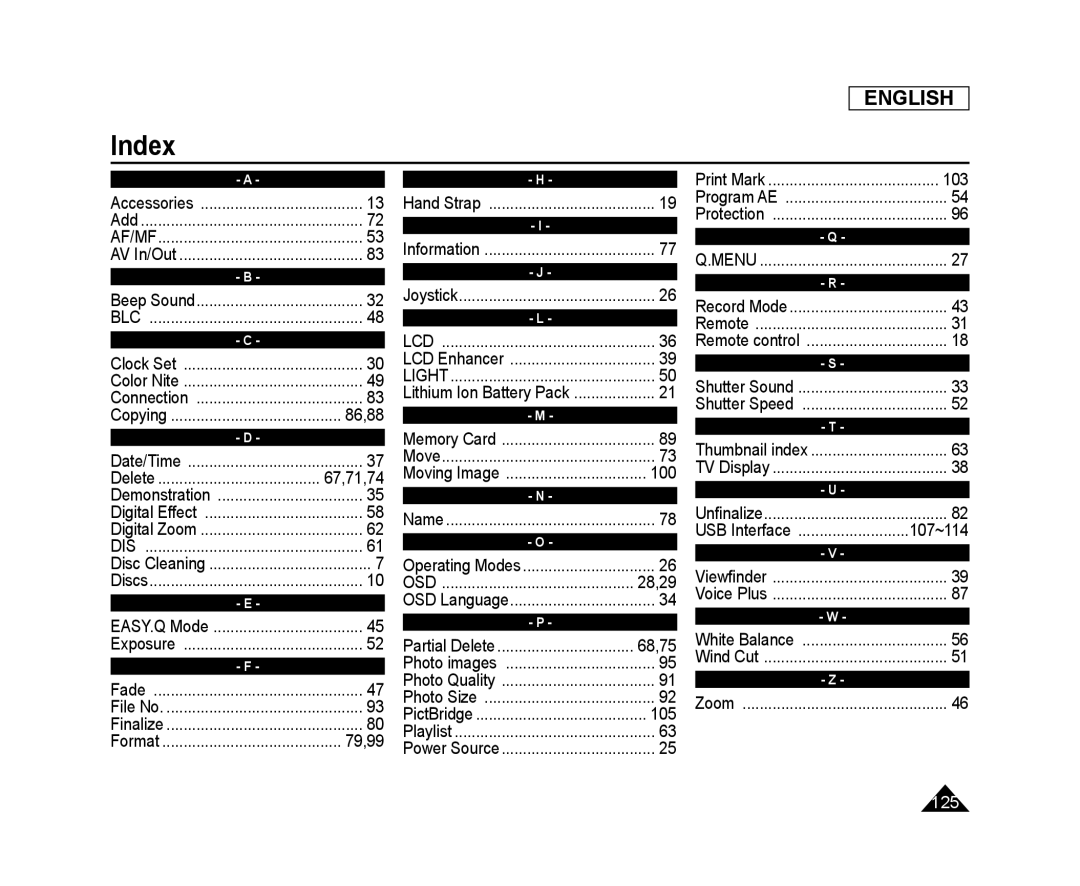 Index
Index
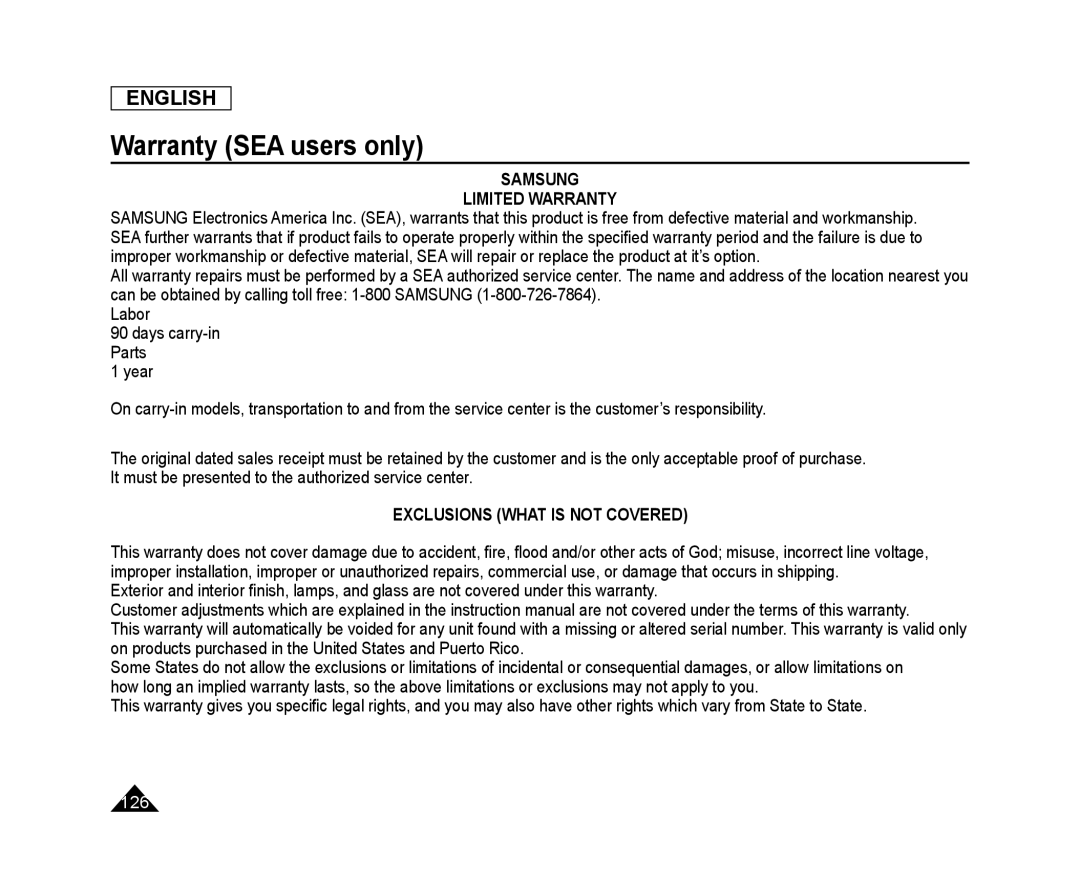 Warranty (SEA users only)
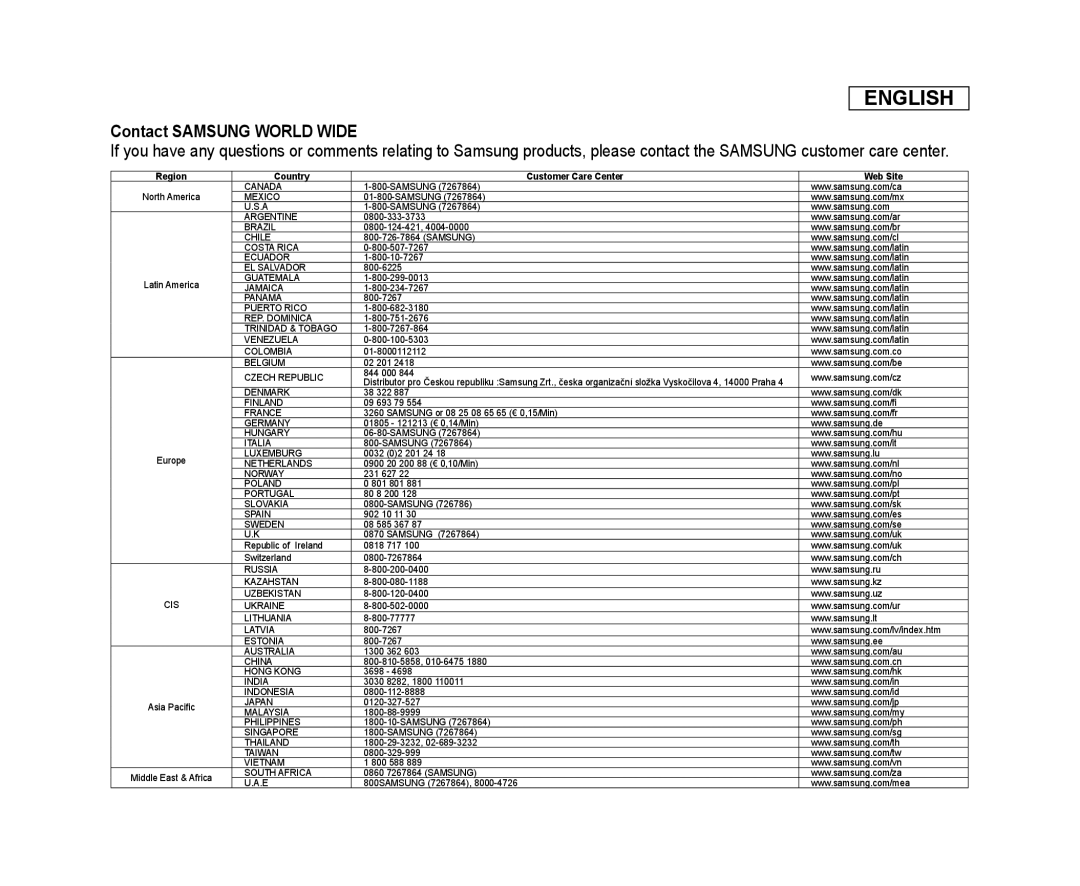 ENGLISH
Contact SAMSUNG WORLD WIDE
 ENGLISH
THIS DVD CAMCORDER IS MANUFACTURED BY:
RoHS compliant