 www.samsung.com/register
HMX-M20SN
HMX-M20BN
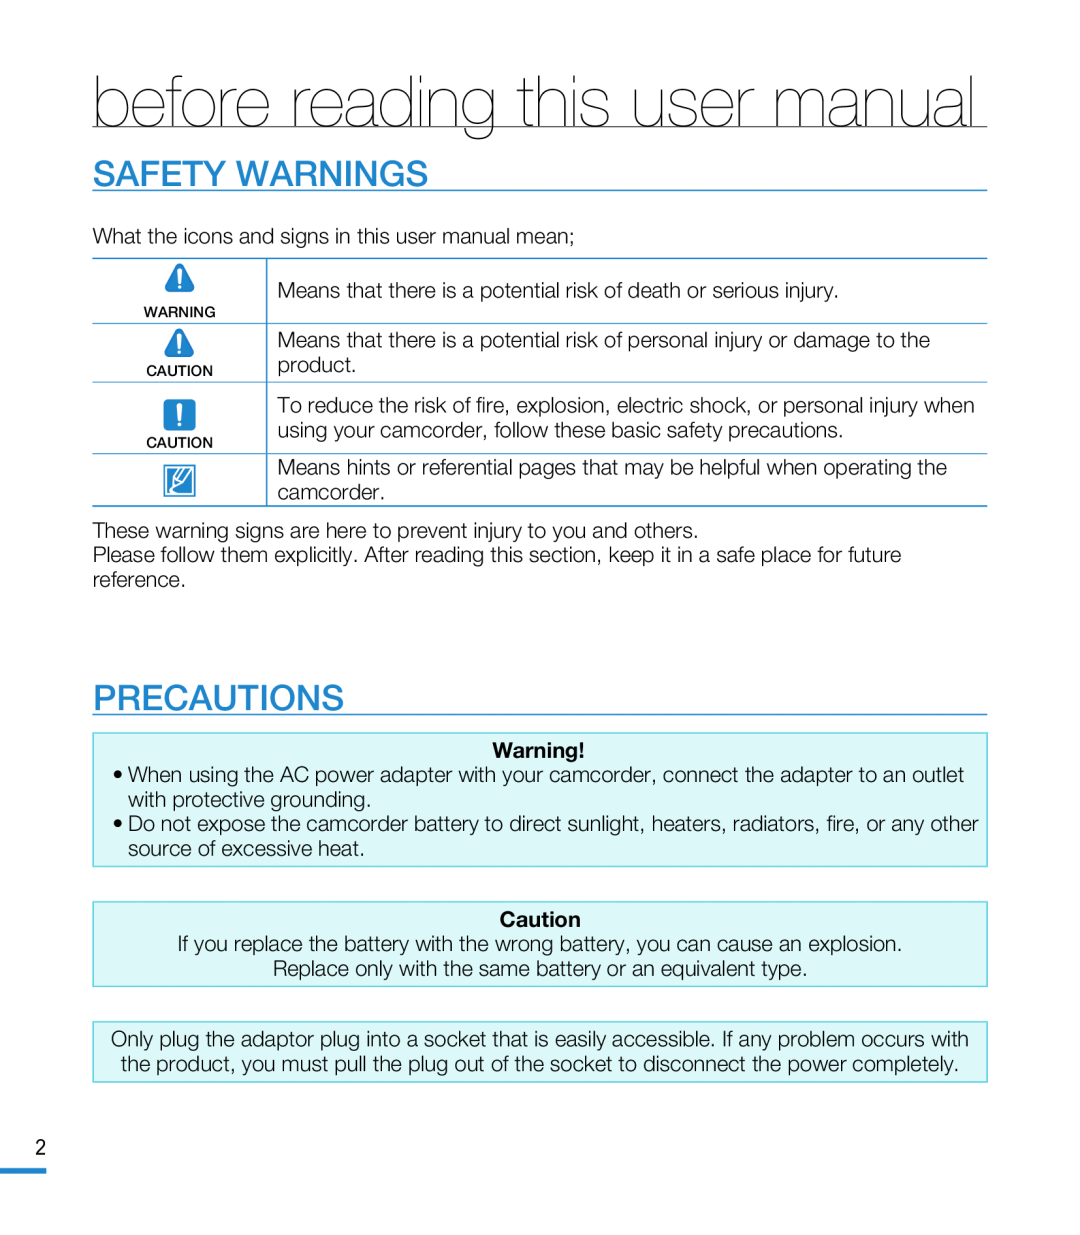 SAFETY WARNINGS
PRECAUTIONS
 IMPORTANT INFORMATION ON USE
Before using this camcorder
About this user manual
 Notes regarding trademarks
 important safety instructions
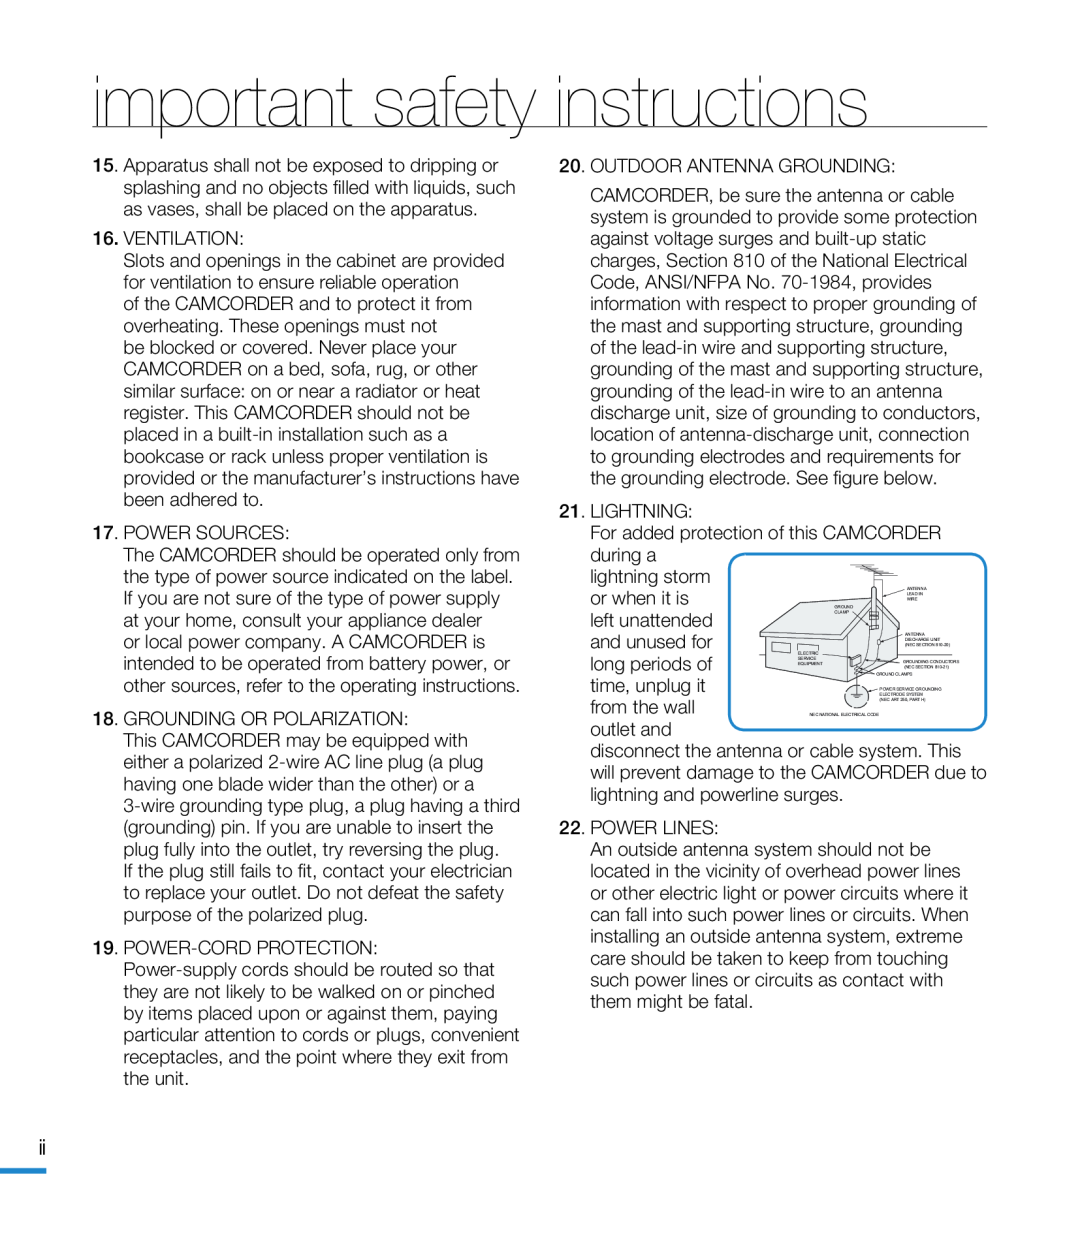
 important safety instructions
 important safety instructions
USER INSTALLER CAUTION:
NOTE:
FCC Warning
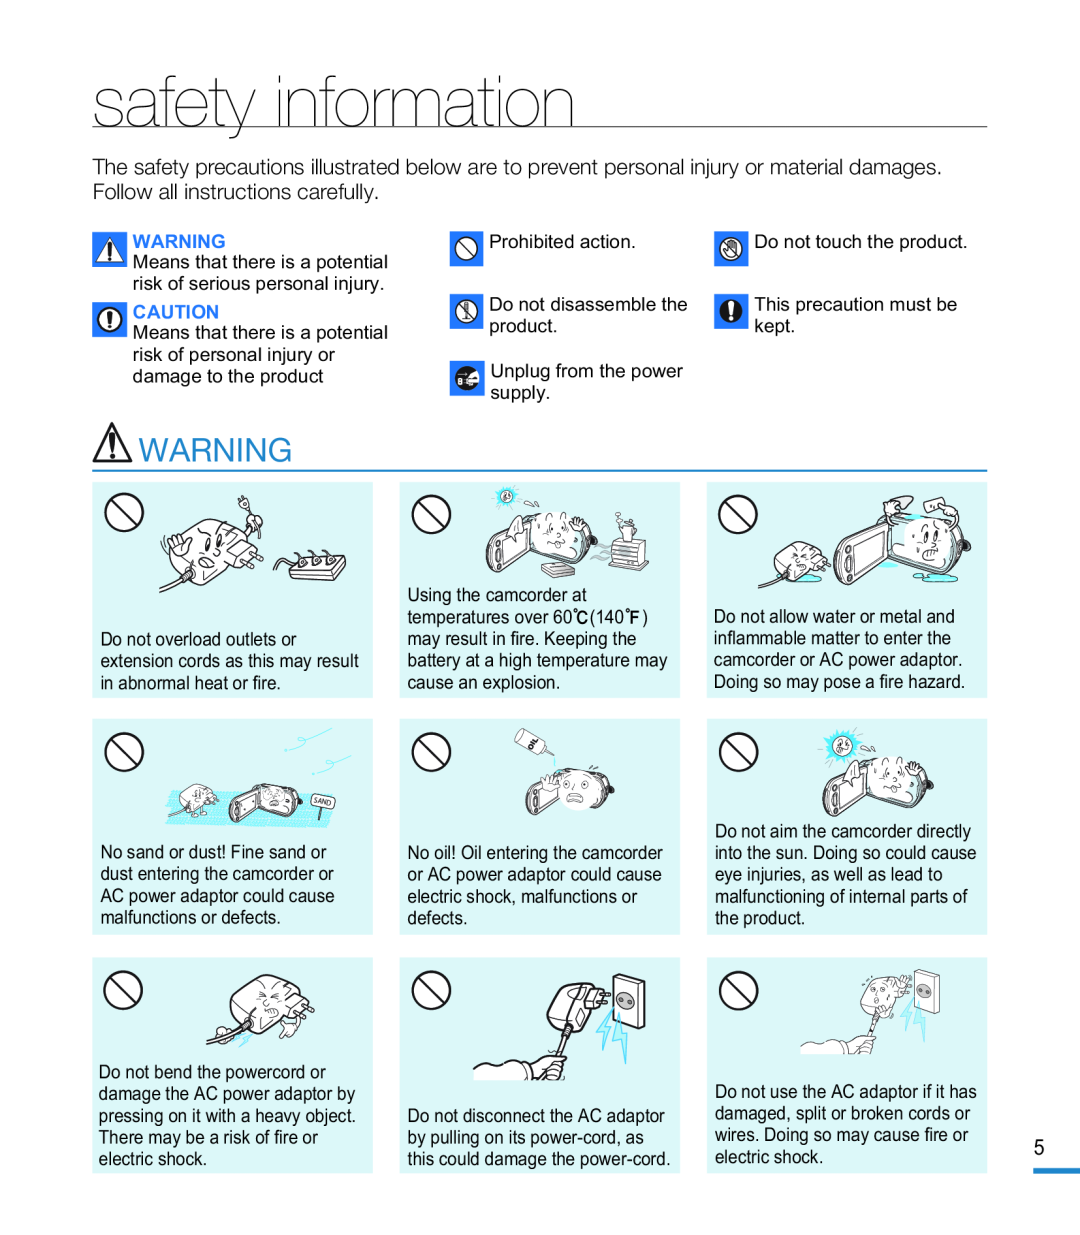 safety information
WARNING
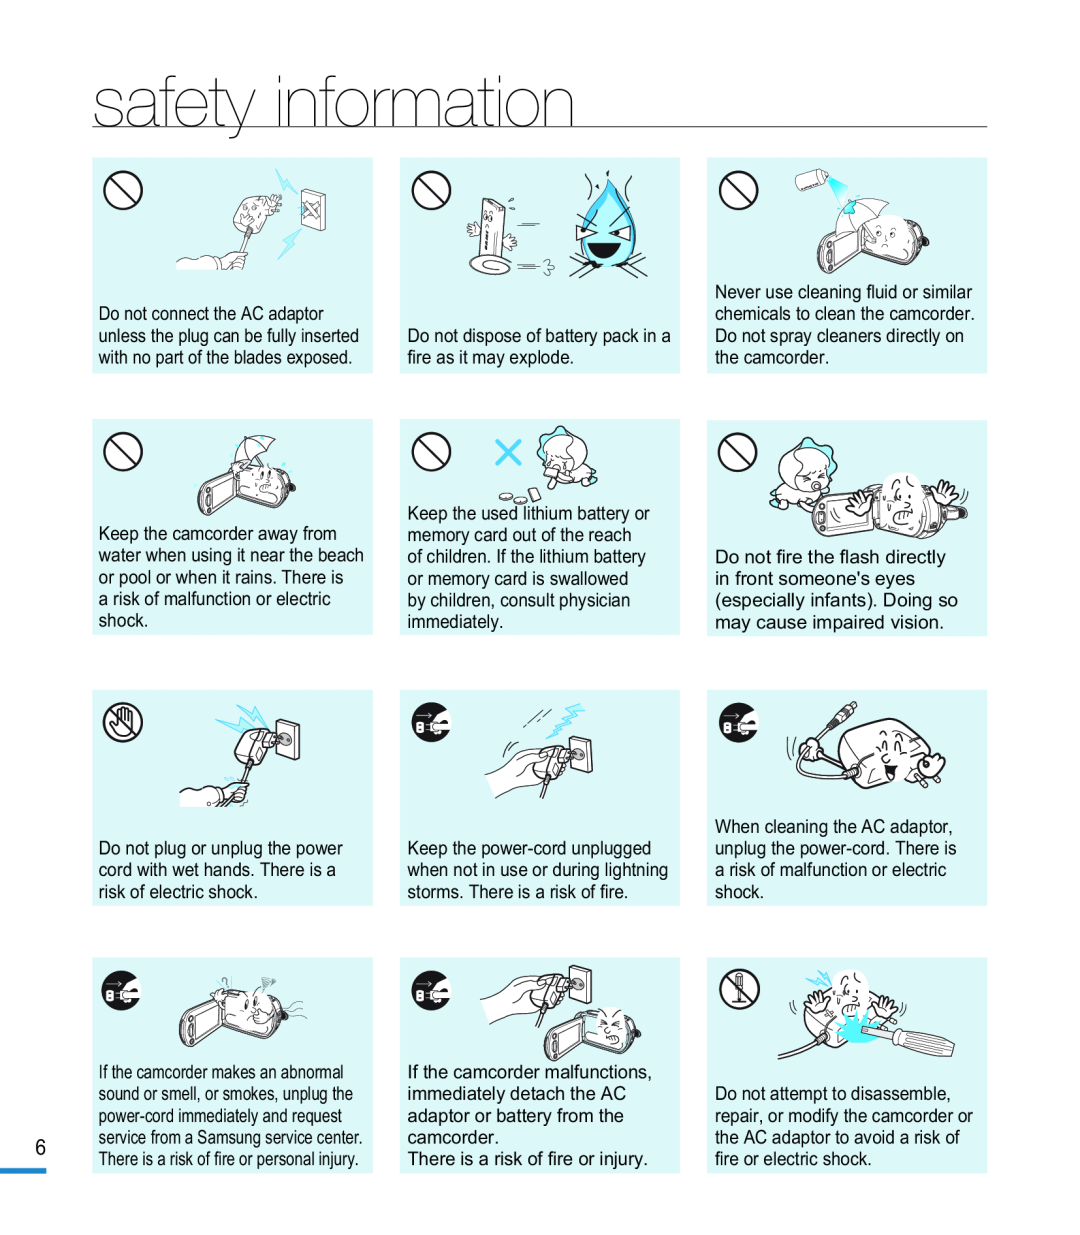 safety information
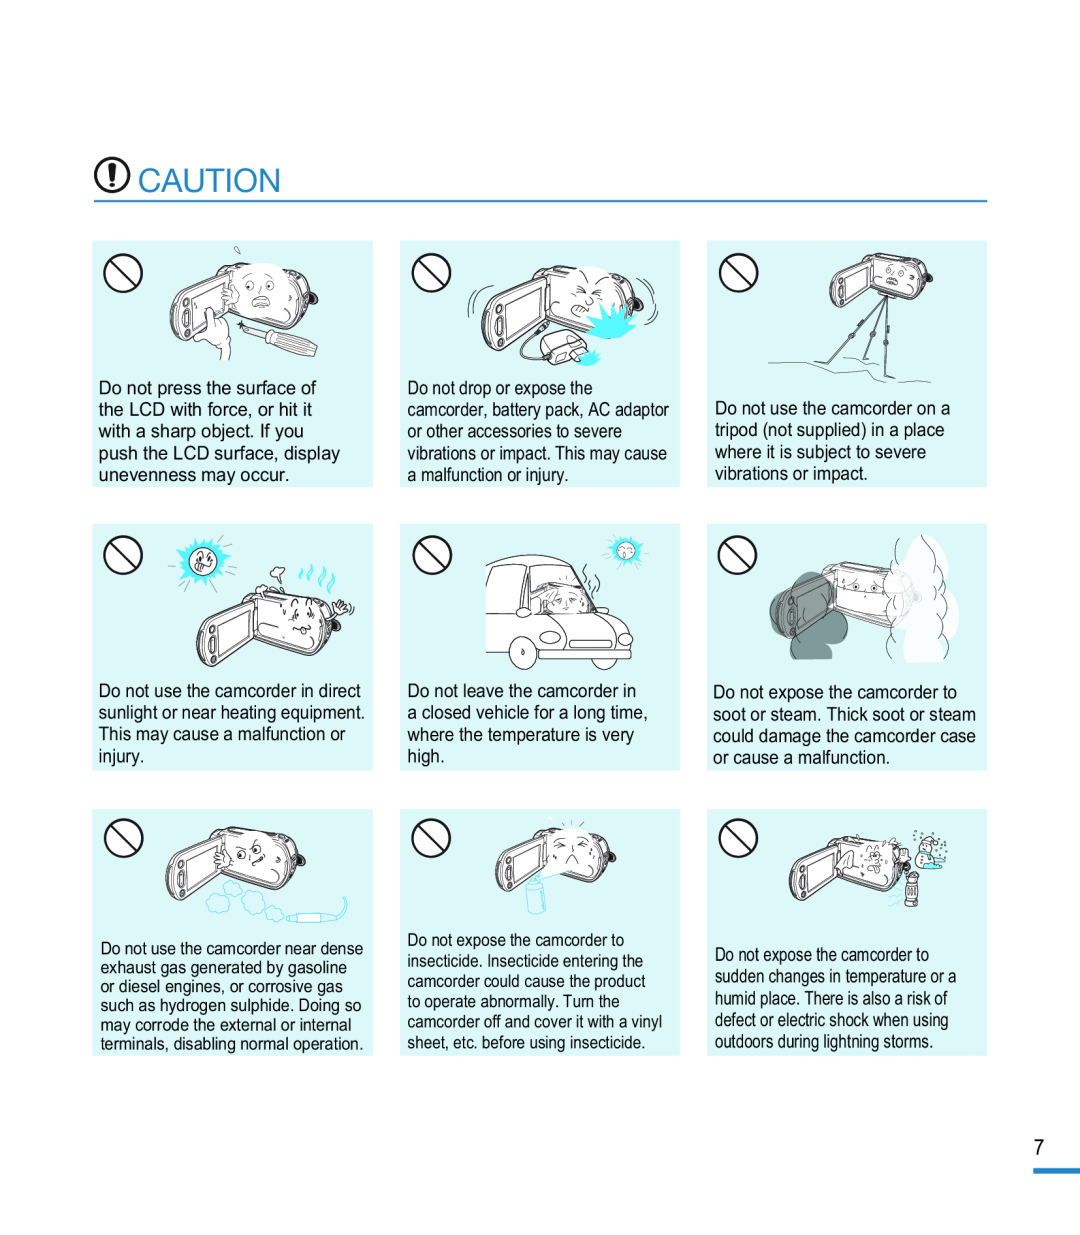 CAUTION
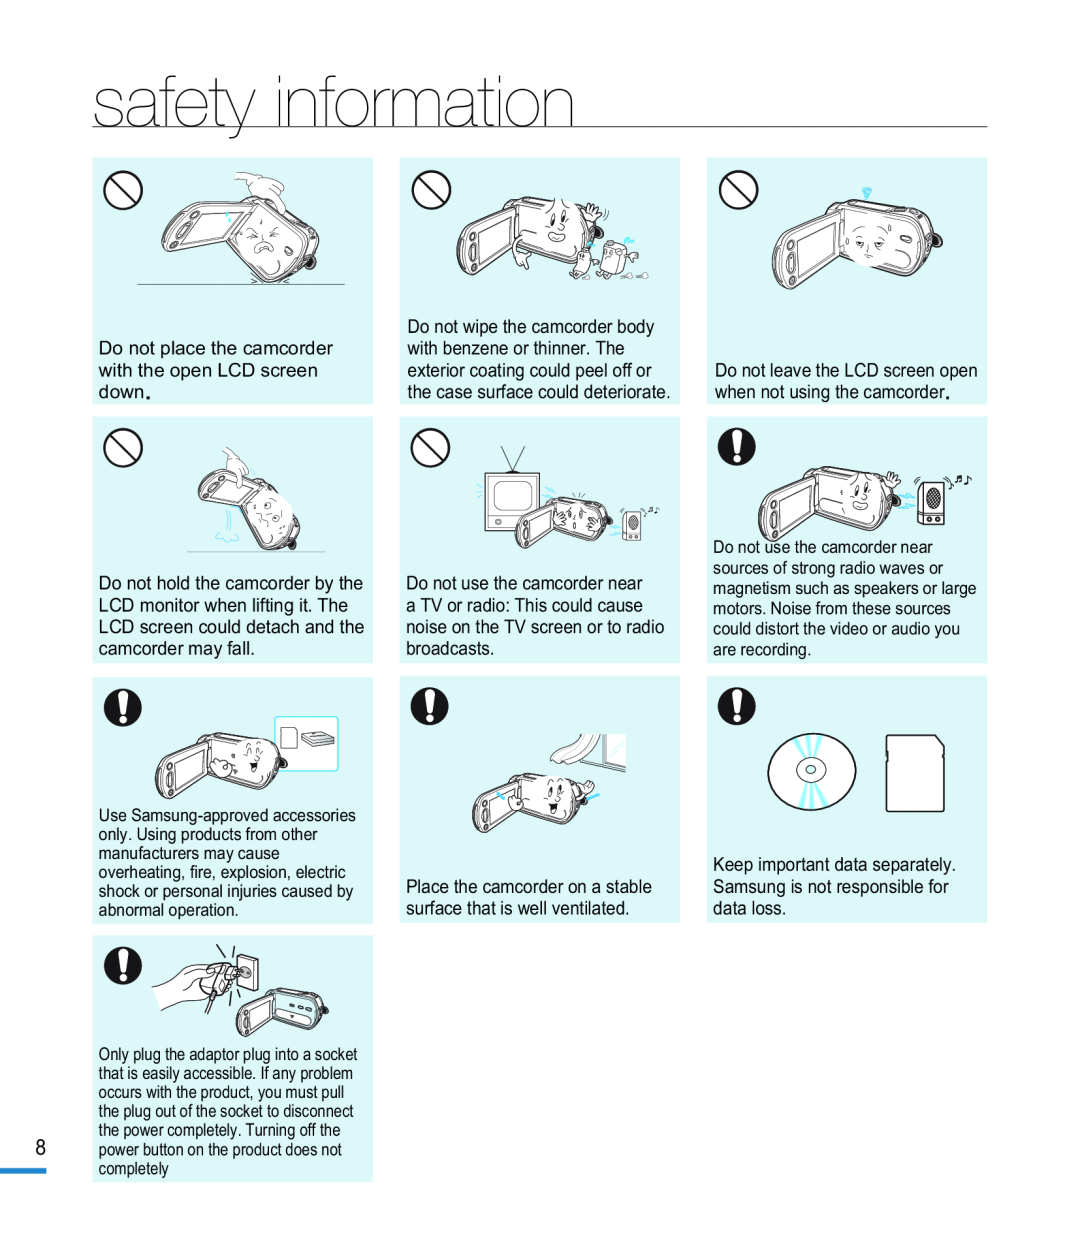 safety information
 contents
PREPARATION
BASIC OPERATION
 ADVANCED OPERATION
 ADVANCED OPERATION
 EDITING VIDEO
EXTERNAL CONNECTIONS
USING A COMPUTER
OTHER INFORMATION
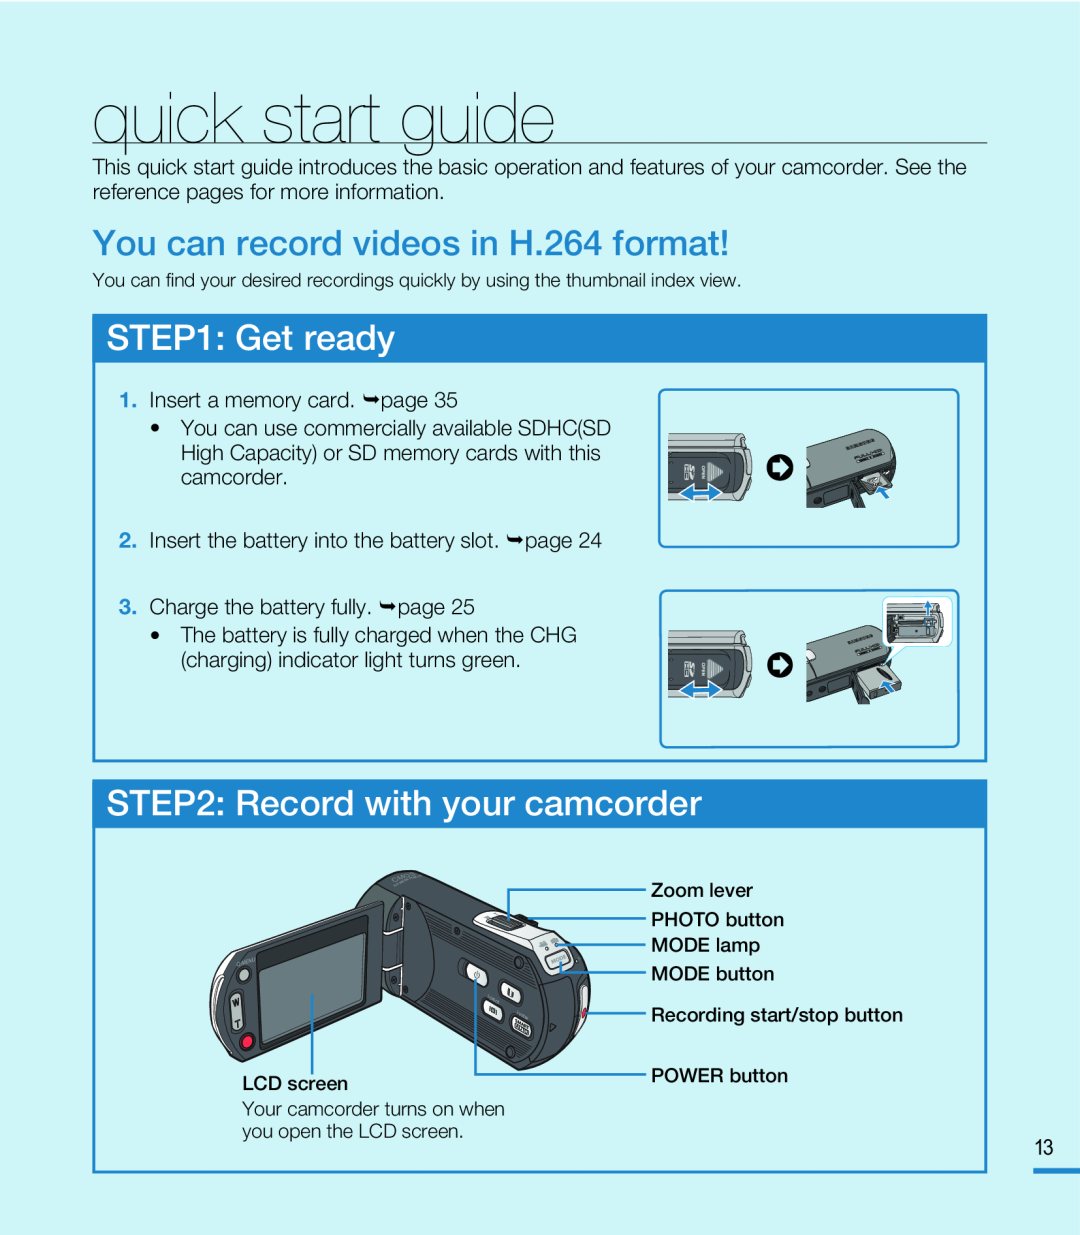 quick start guide
You can record videos in H.264 format
STEP1: Get ready
STEP2: Record with your camcorder
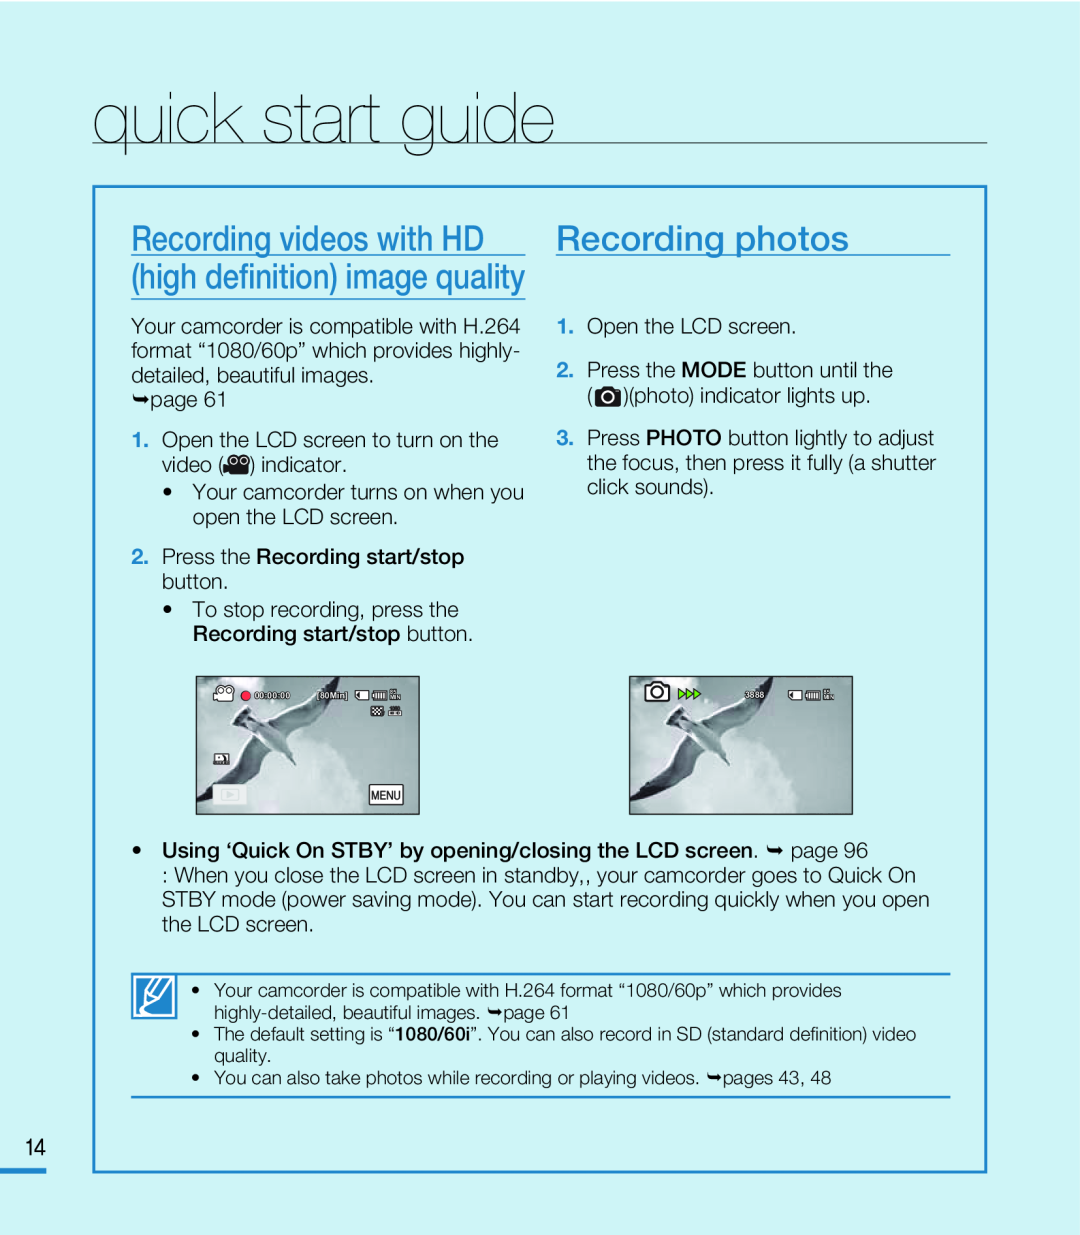 Recording videos with HD
(high definition) image quality
Recording photos
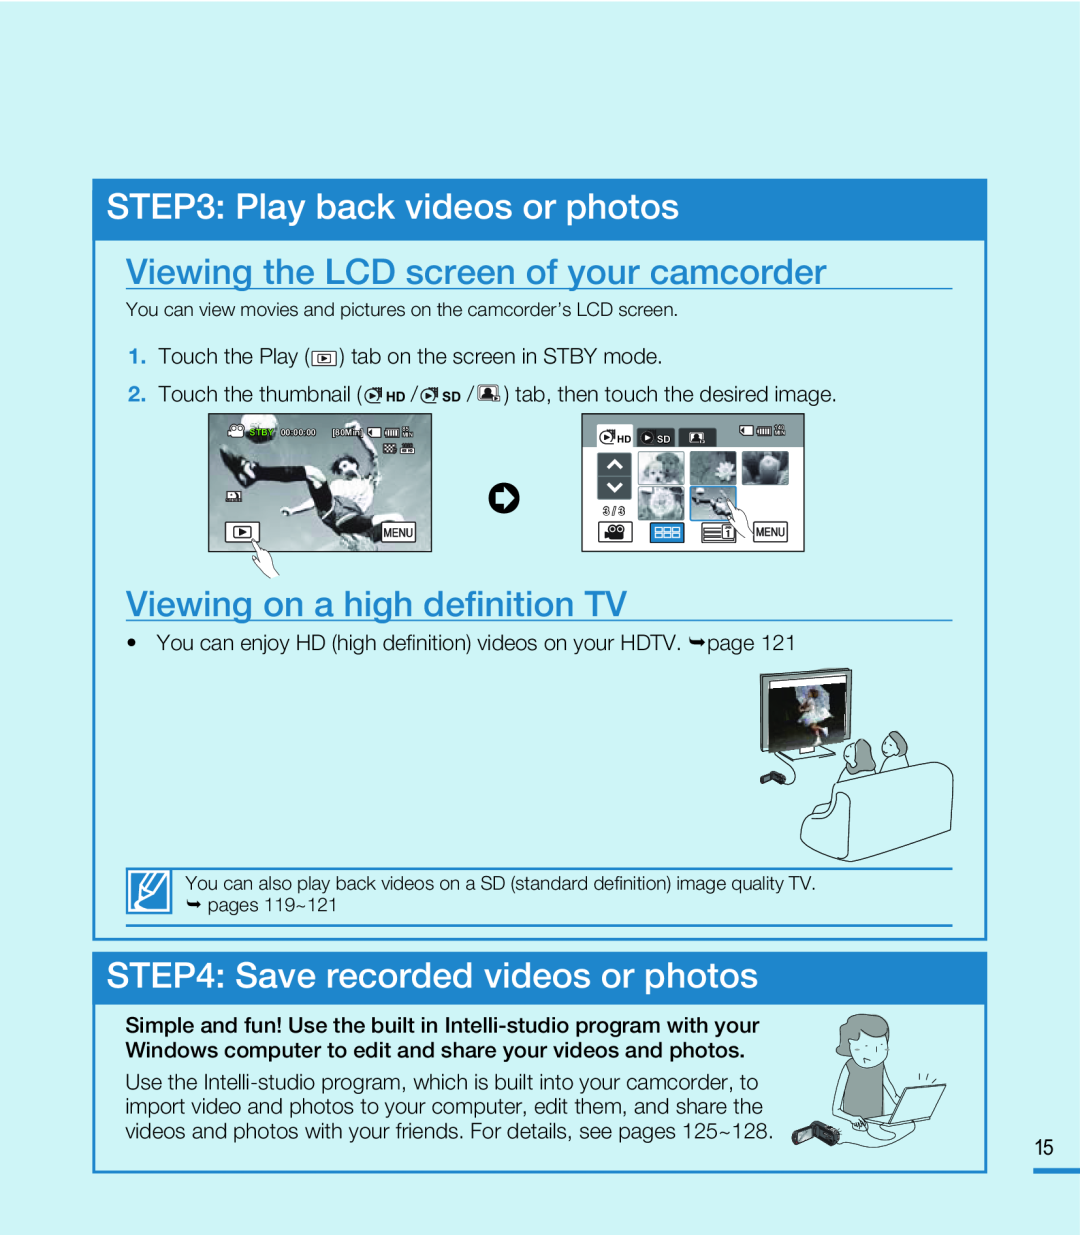 STEP3: Play back videos or photos
Viewing the LCD screen of your camcorder
Viewing on a high definition TV
STEP4: Save recorded videos or photos
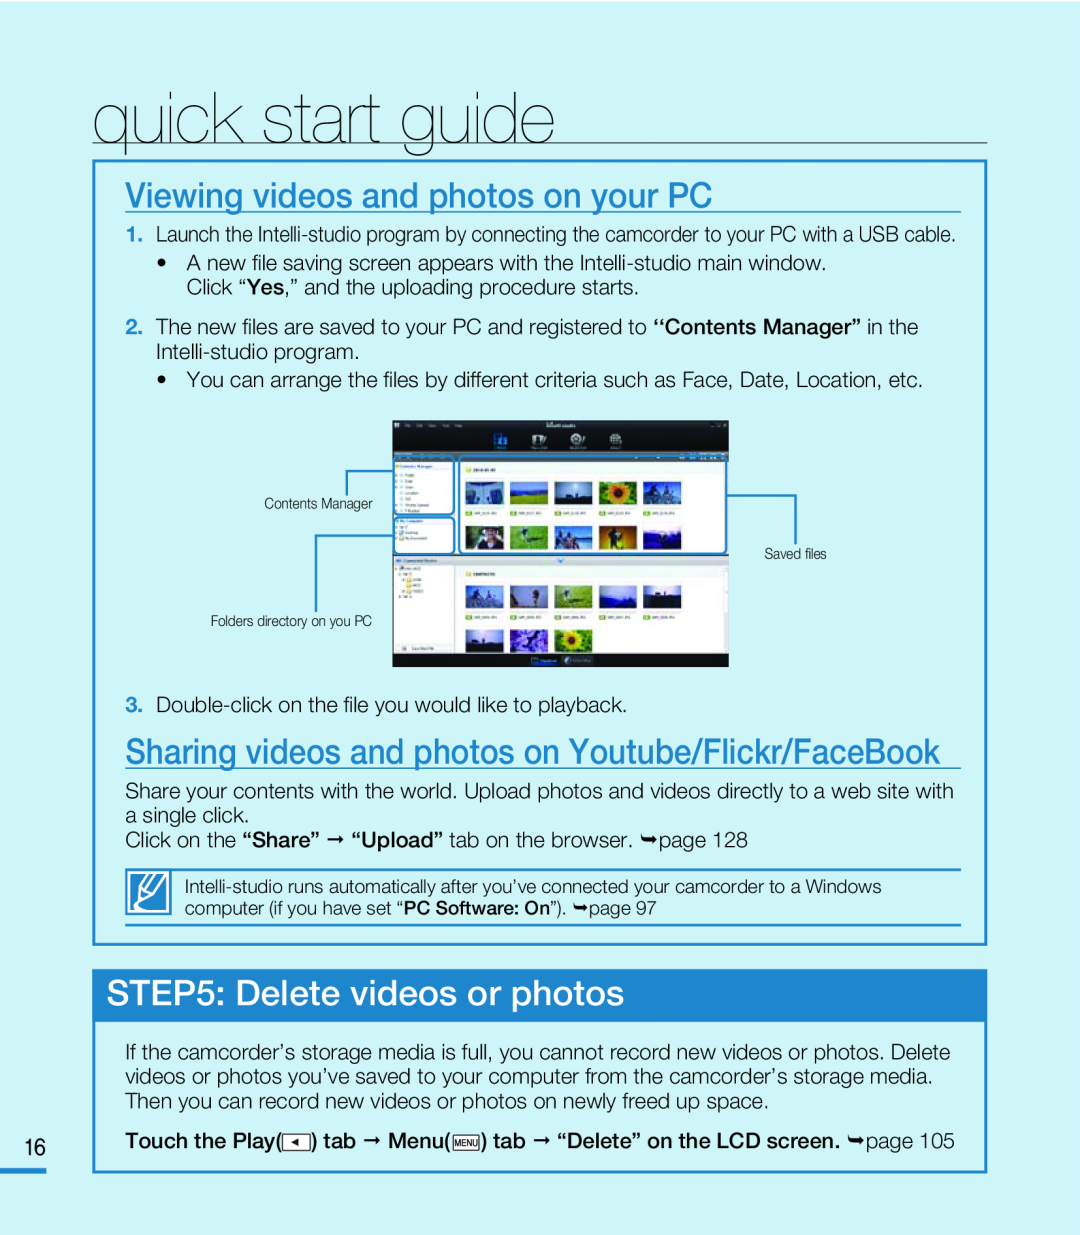 Viewing videos and photos on your PC
Sharing videos and photos on Youtube/Flickr/FaceBook
STEP5: Delete videos or photos
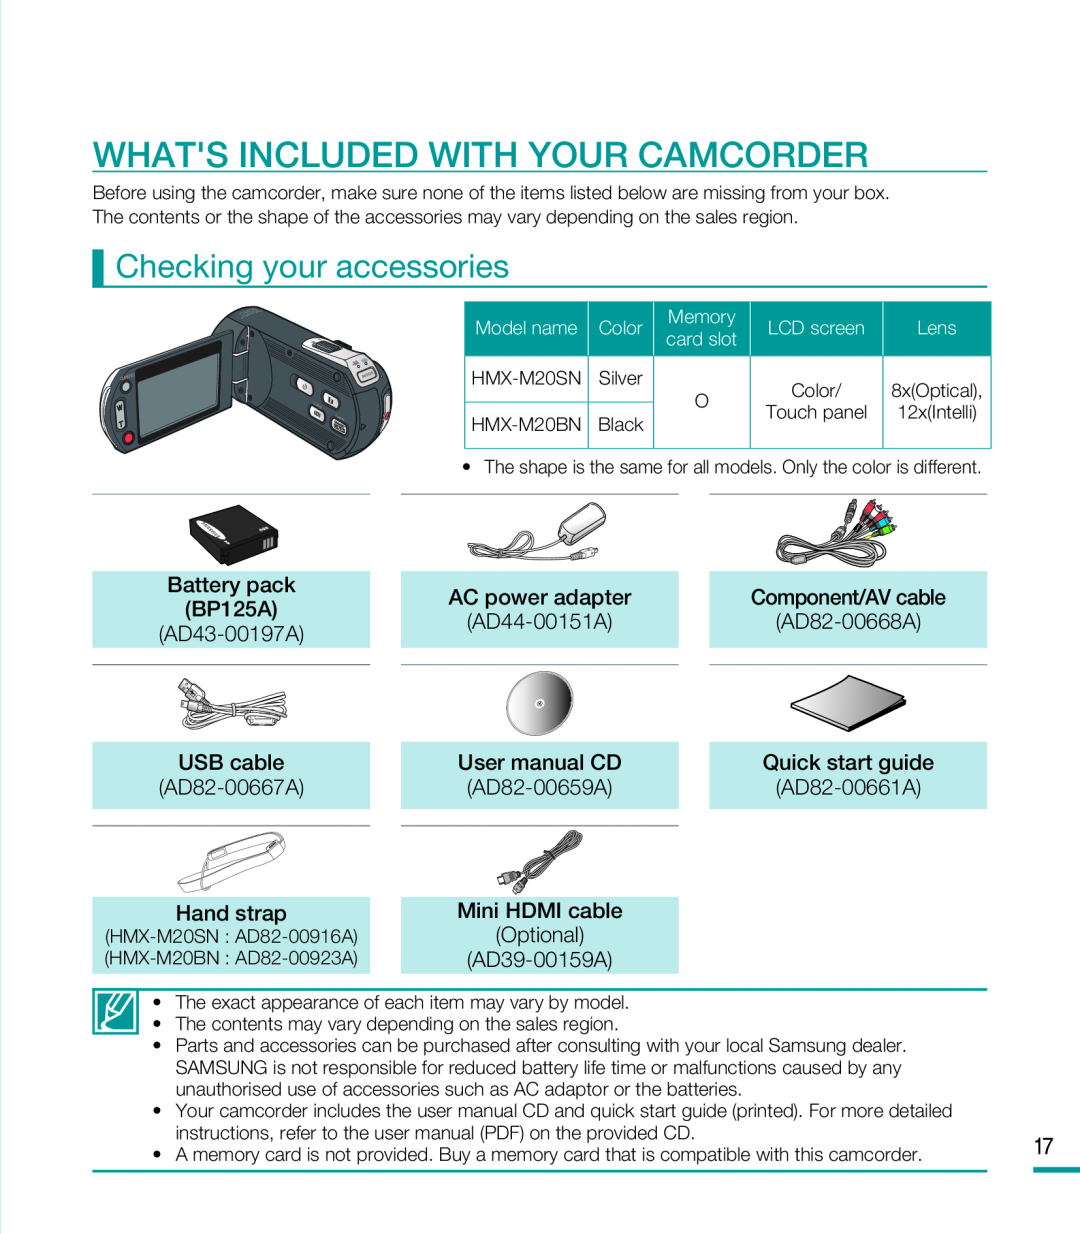 WHAT'S INCLUDED WITH YOUR CAMCORDER
Checking your accessories
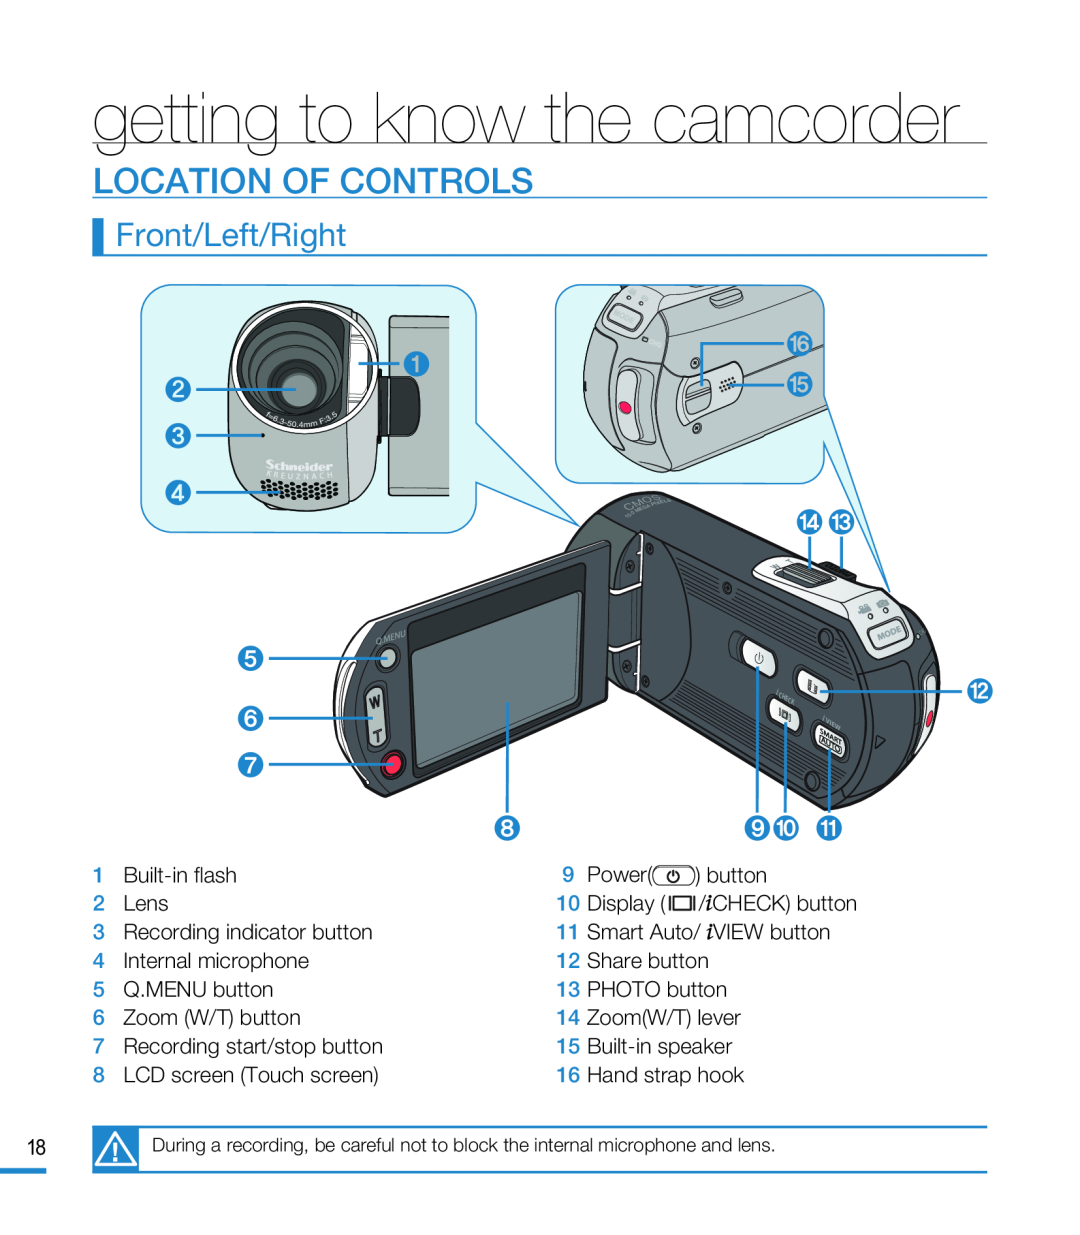 getting to know the camcorder
LOCATION OF CONTROLS
Front/Left/Right
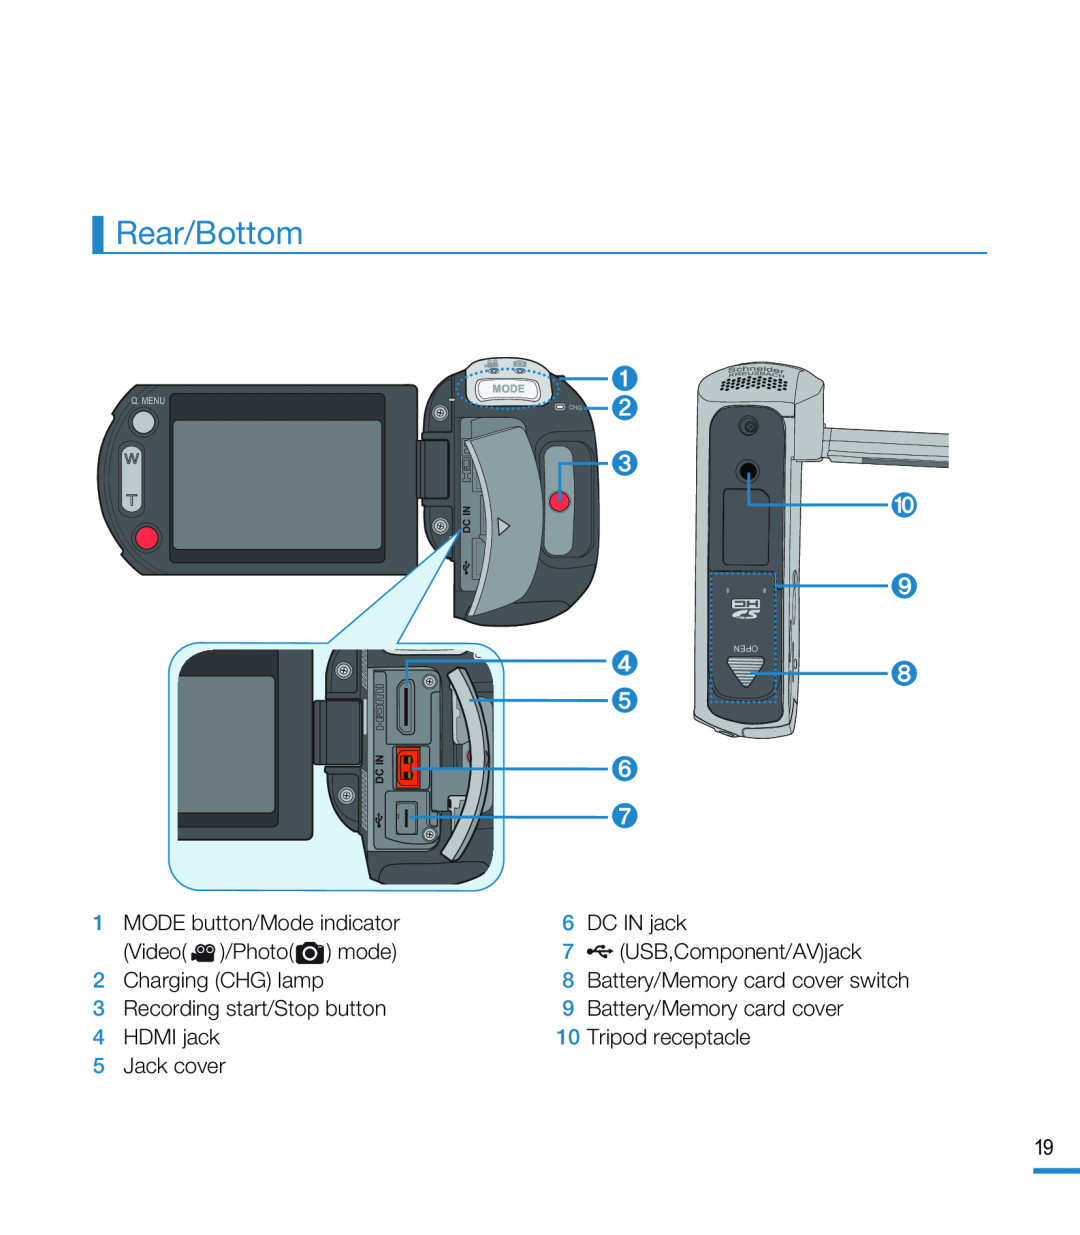 Rear/Bottom
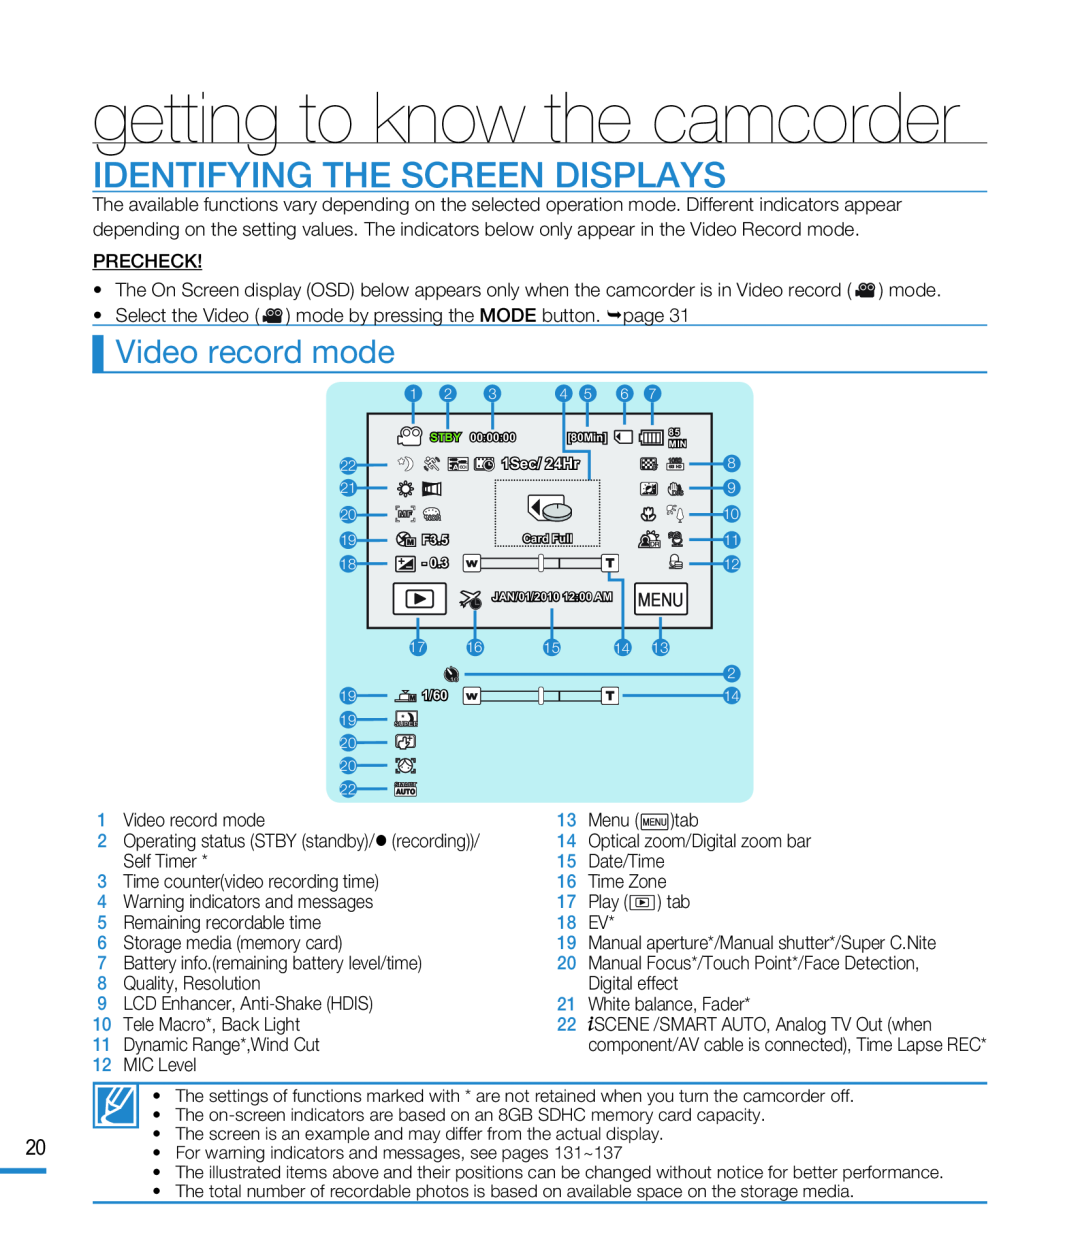 IDENTIFYING THE SCREEN DISPLAYS
Video record mode
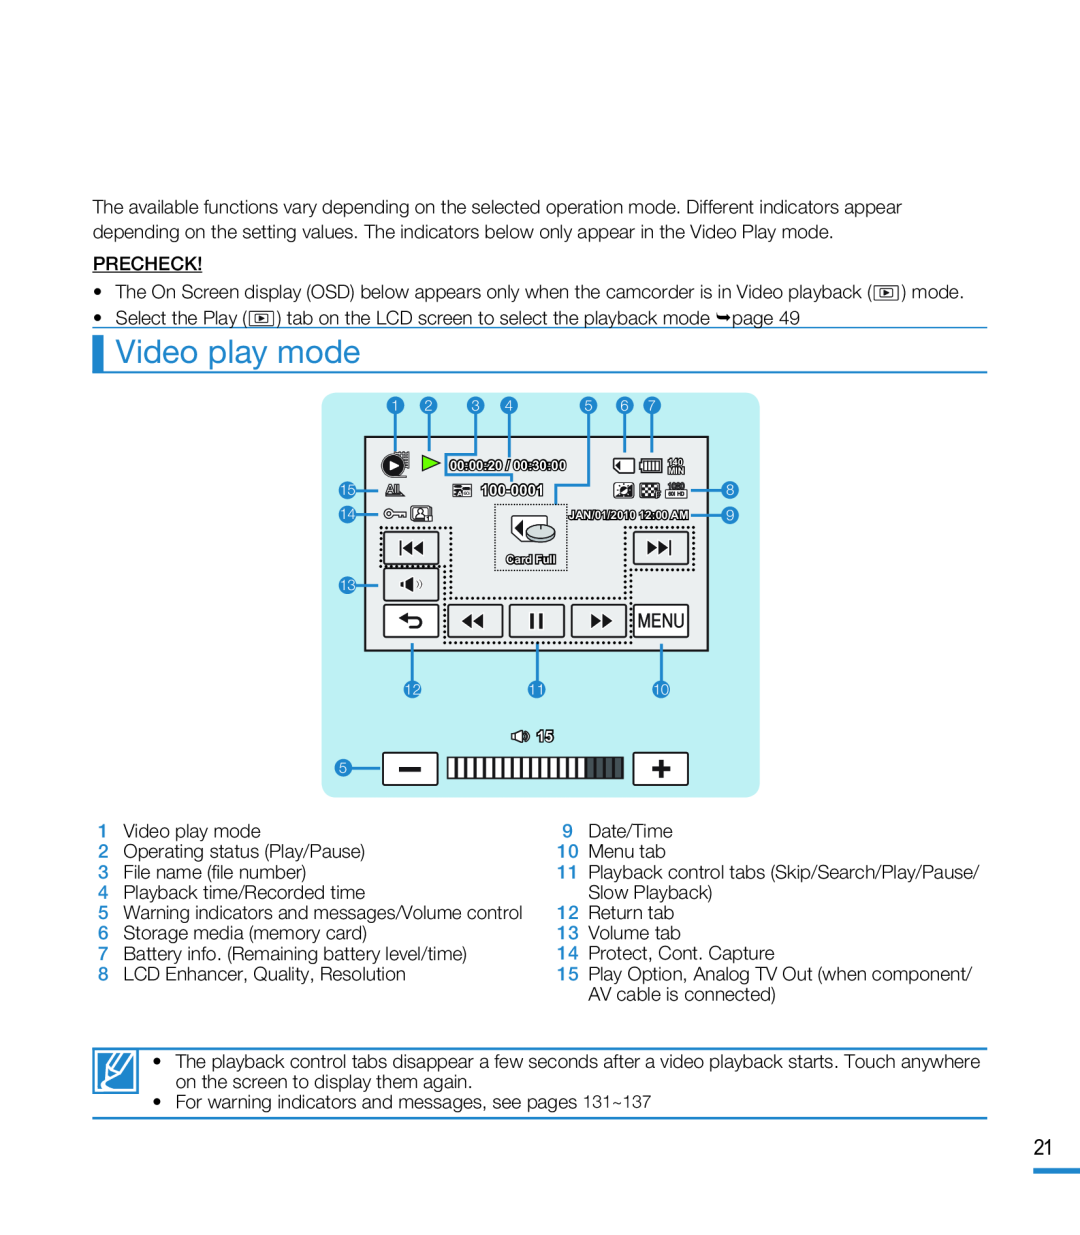 Video play mode
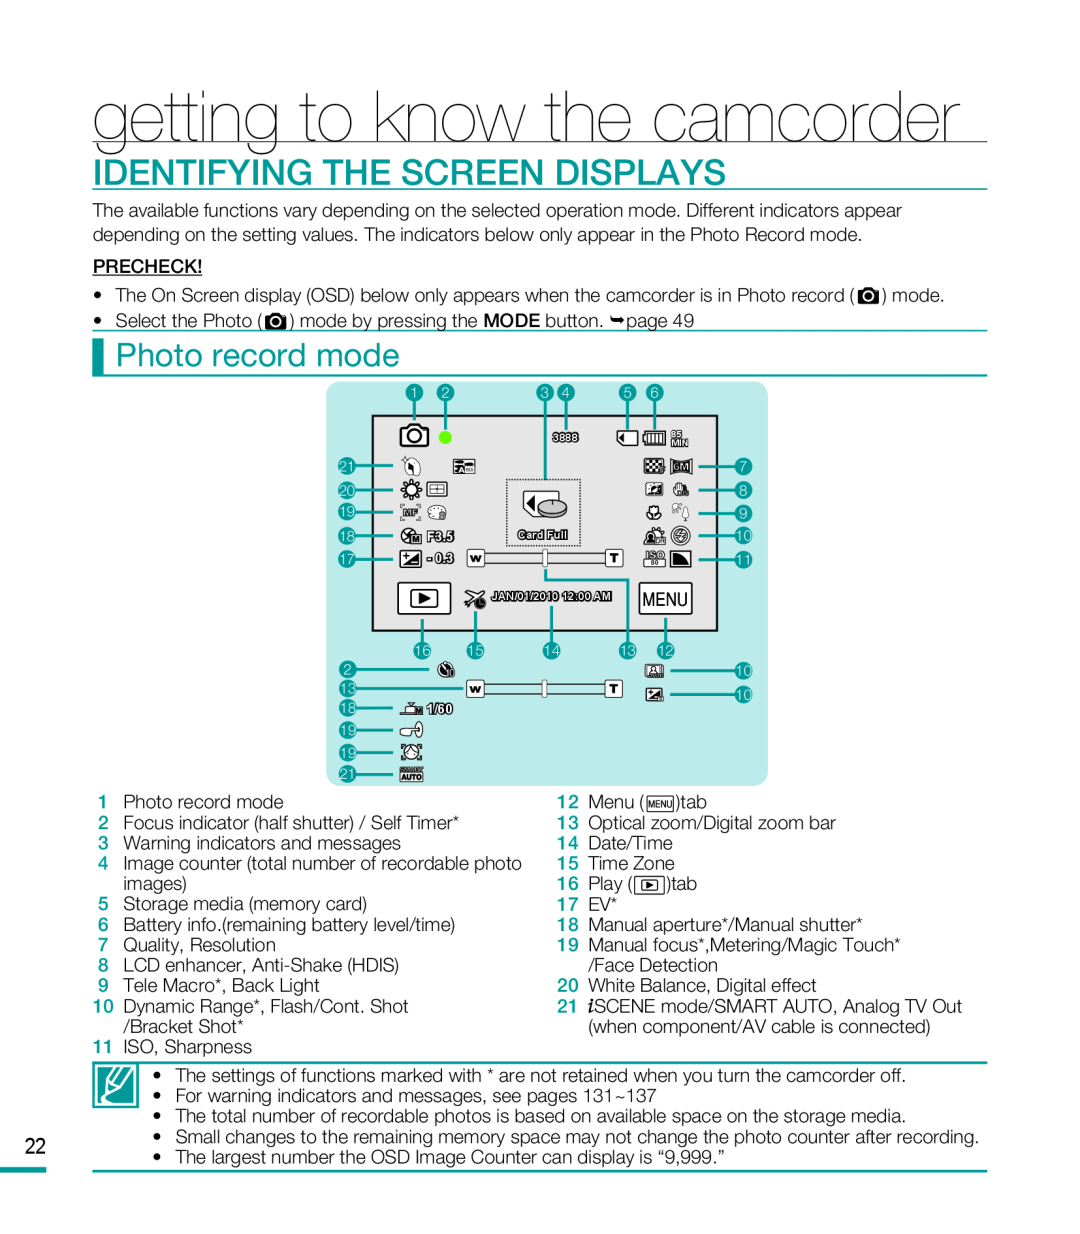 Photo record mode
 Photo play mode
 getting started
USING THE BATTERY PACK
Inserting the battery pack
Ejecting the battery pack
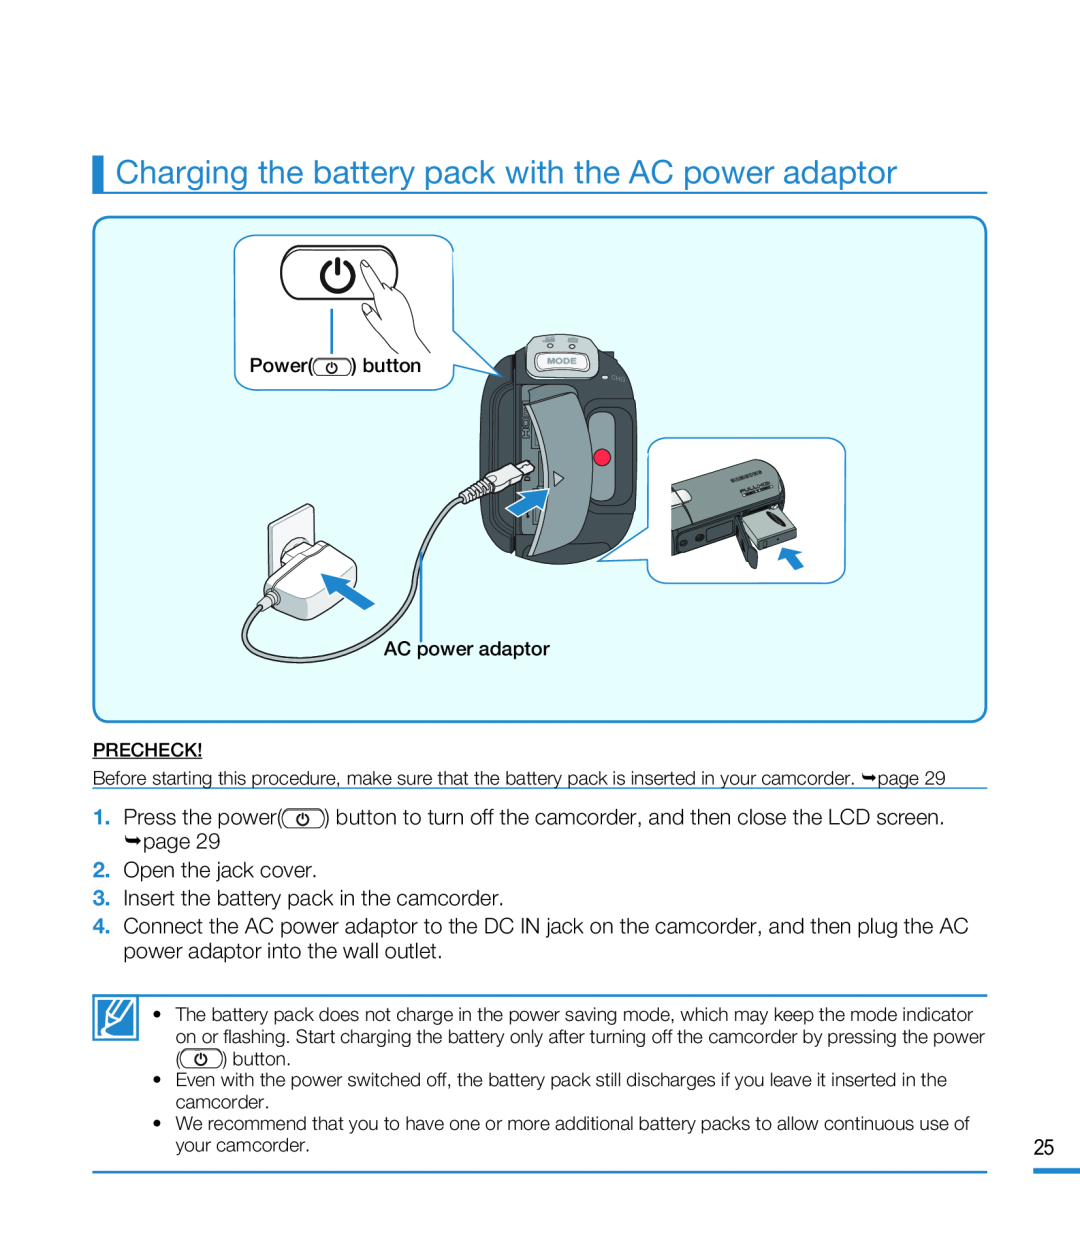 Charging the battery pack with the AC power adaptor
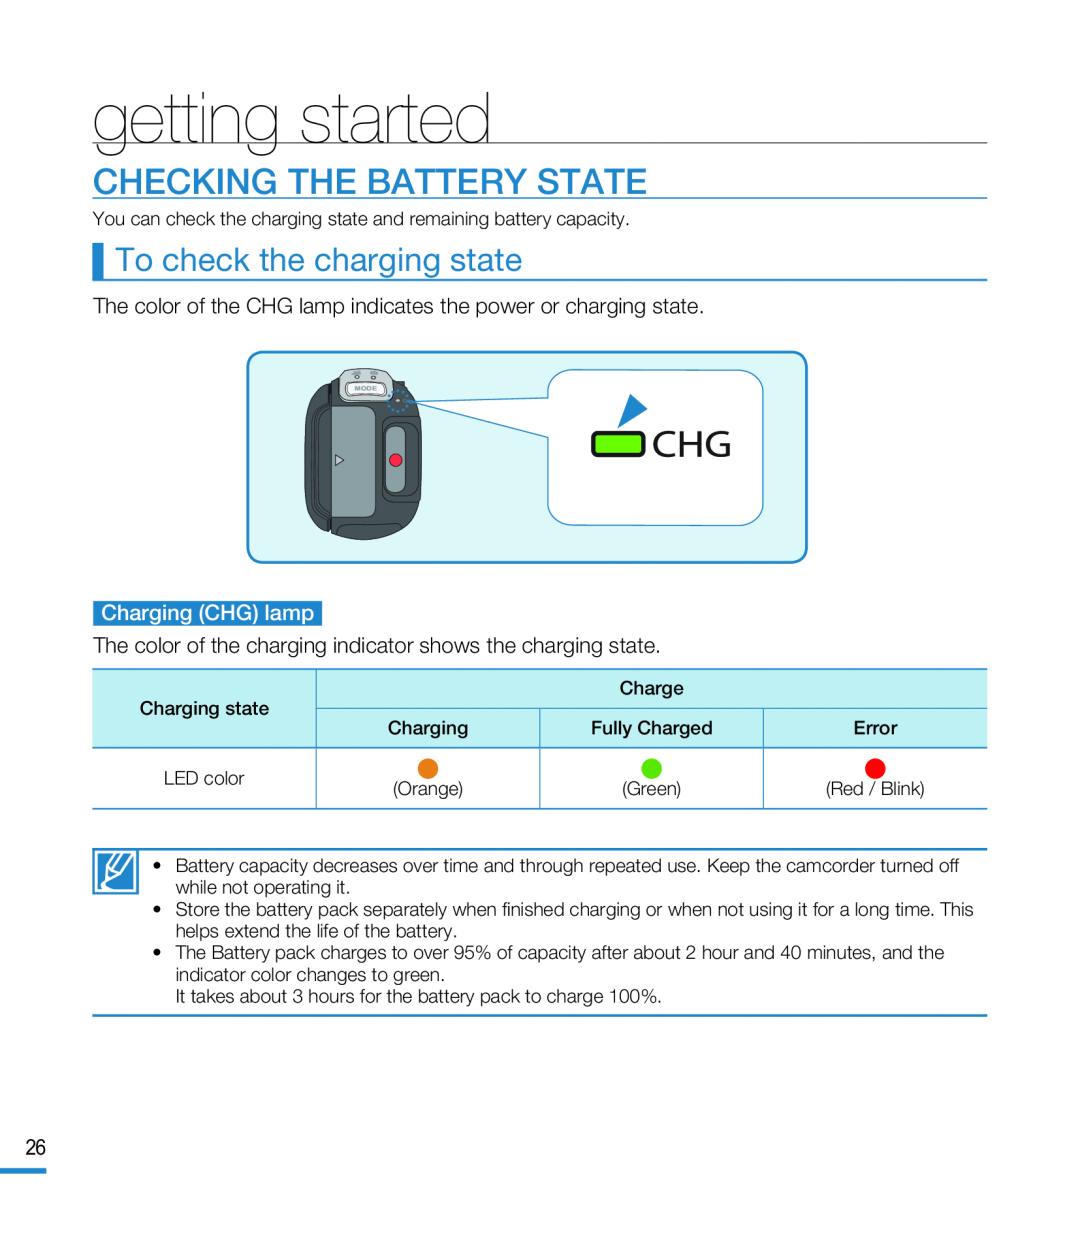 CHECKING THE BATTERY STATE
To check the charging state
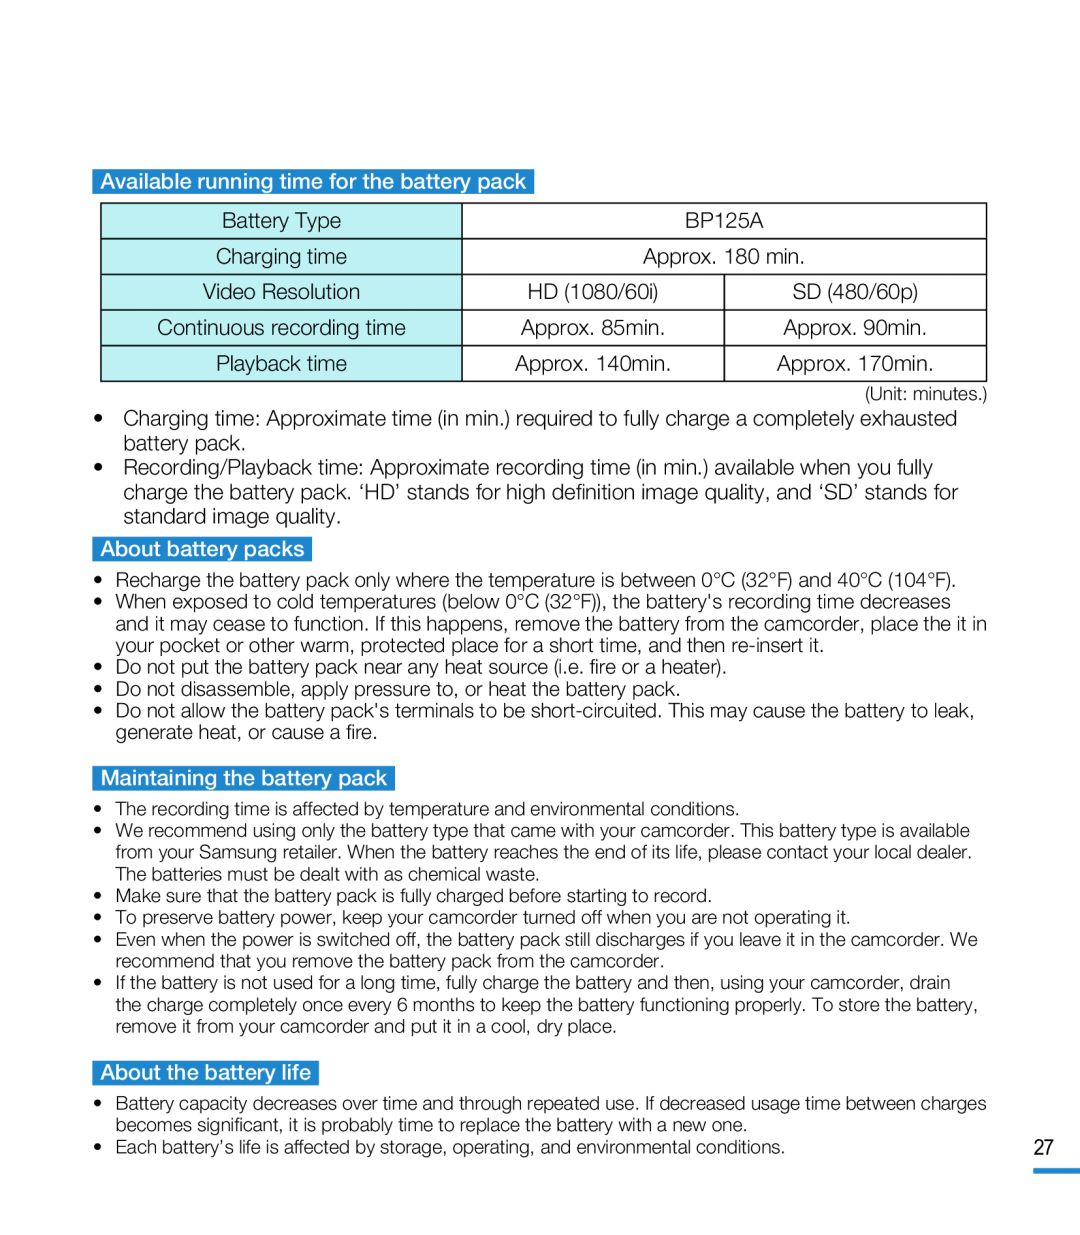 Available running time for the battery pack
Battery Type
BP125A
About battery packs
Maintaining the battery pack
About the battery life
 Using an AC power source
 basic operation of the camcorder
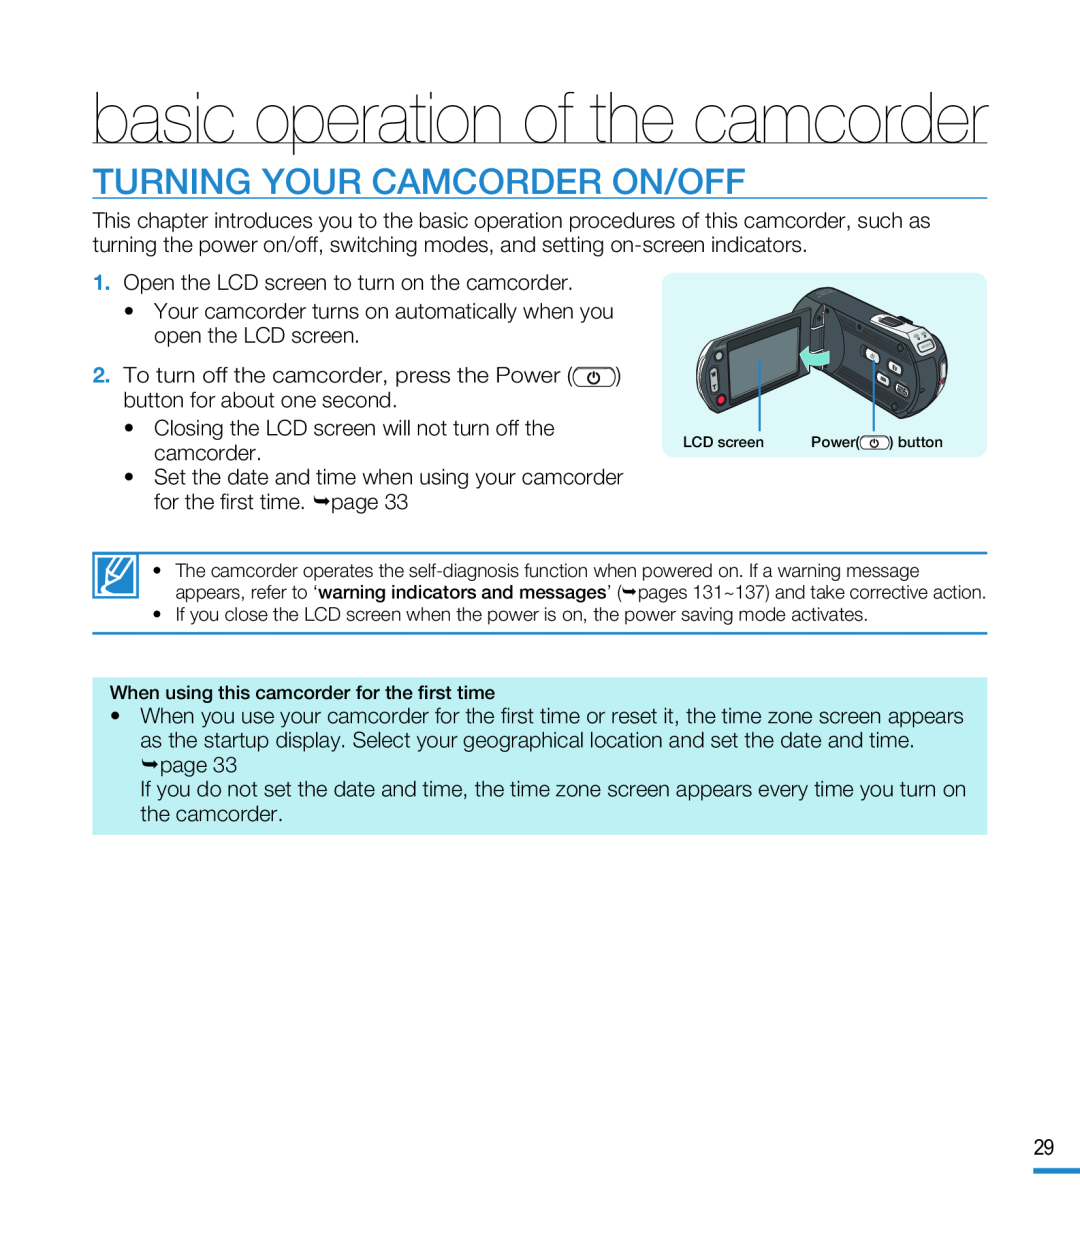
TURNING YOUR CAMCORDER ON/OFF
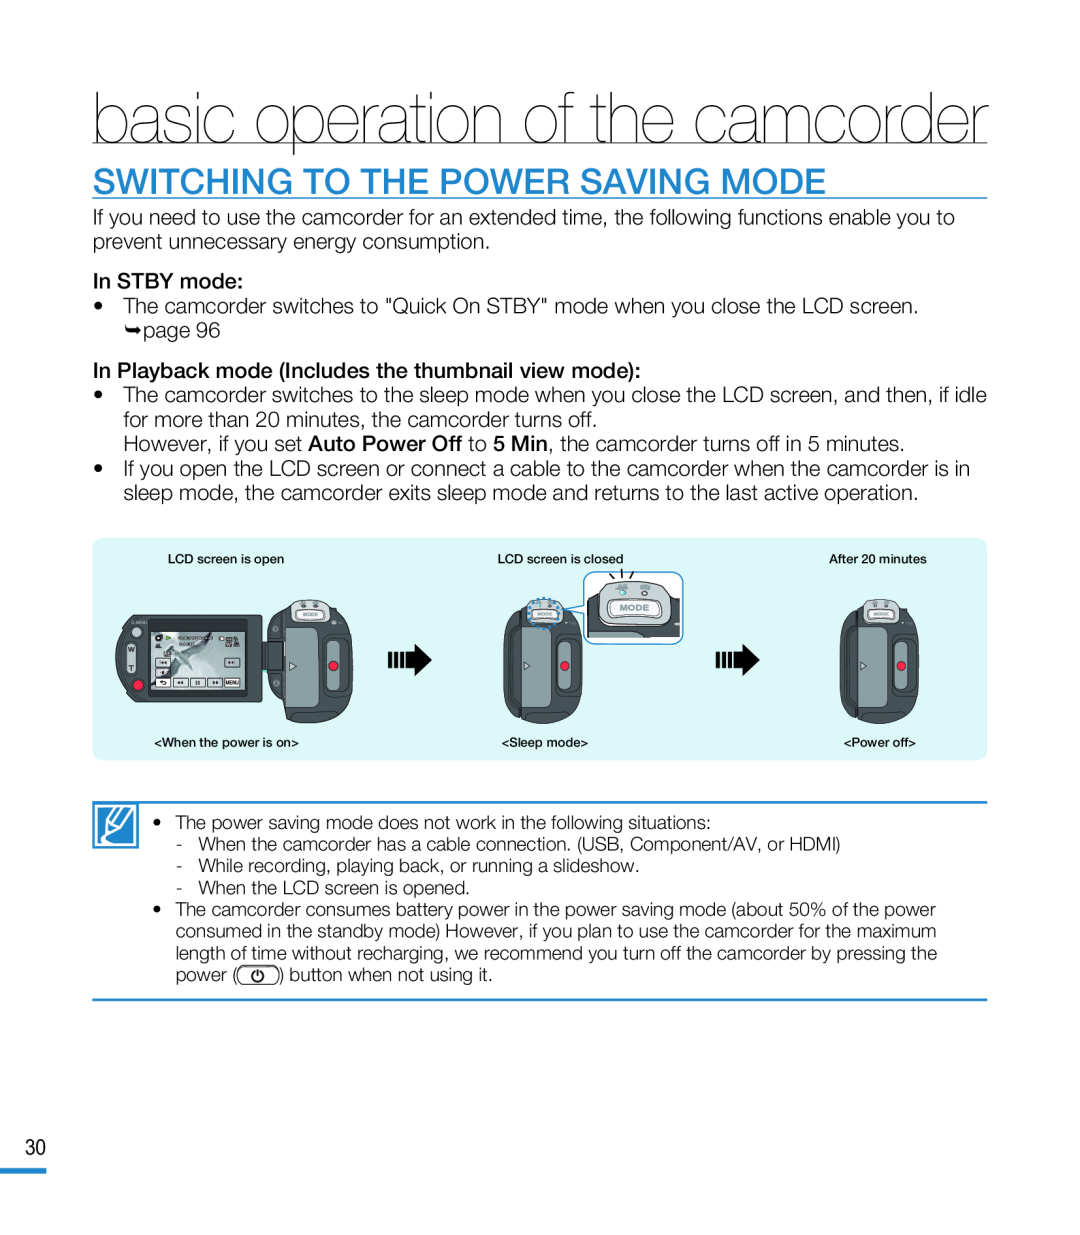 SWITCHING TO THE POWER SAVING MODE
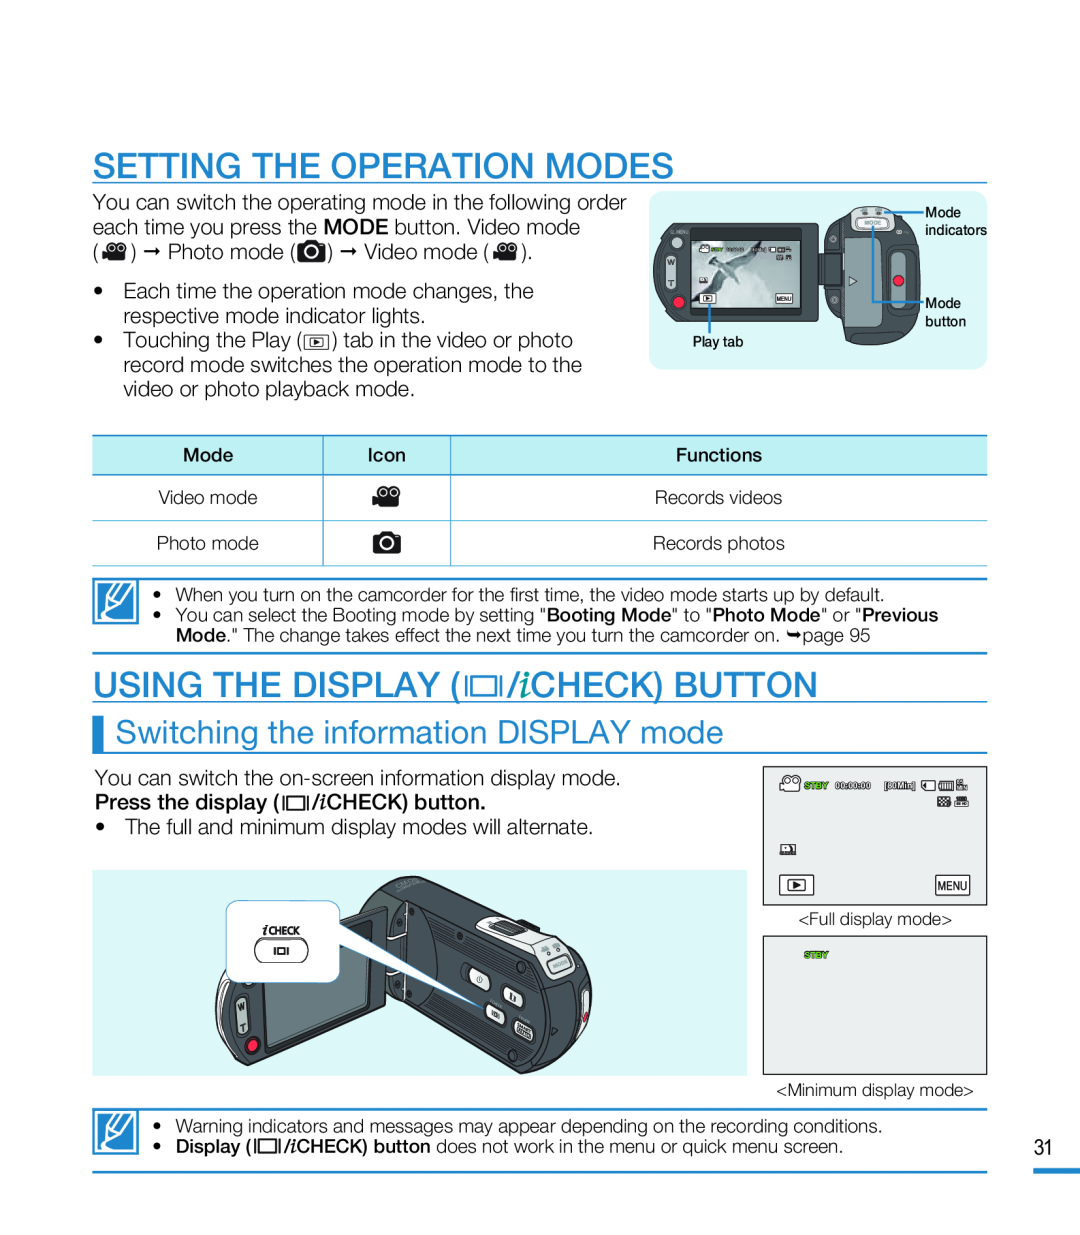 SETTING THE OPERATION MODES
USING THE DISPLAY ( /CHECK) BUTTON
Switching the information DISPLAY mode
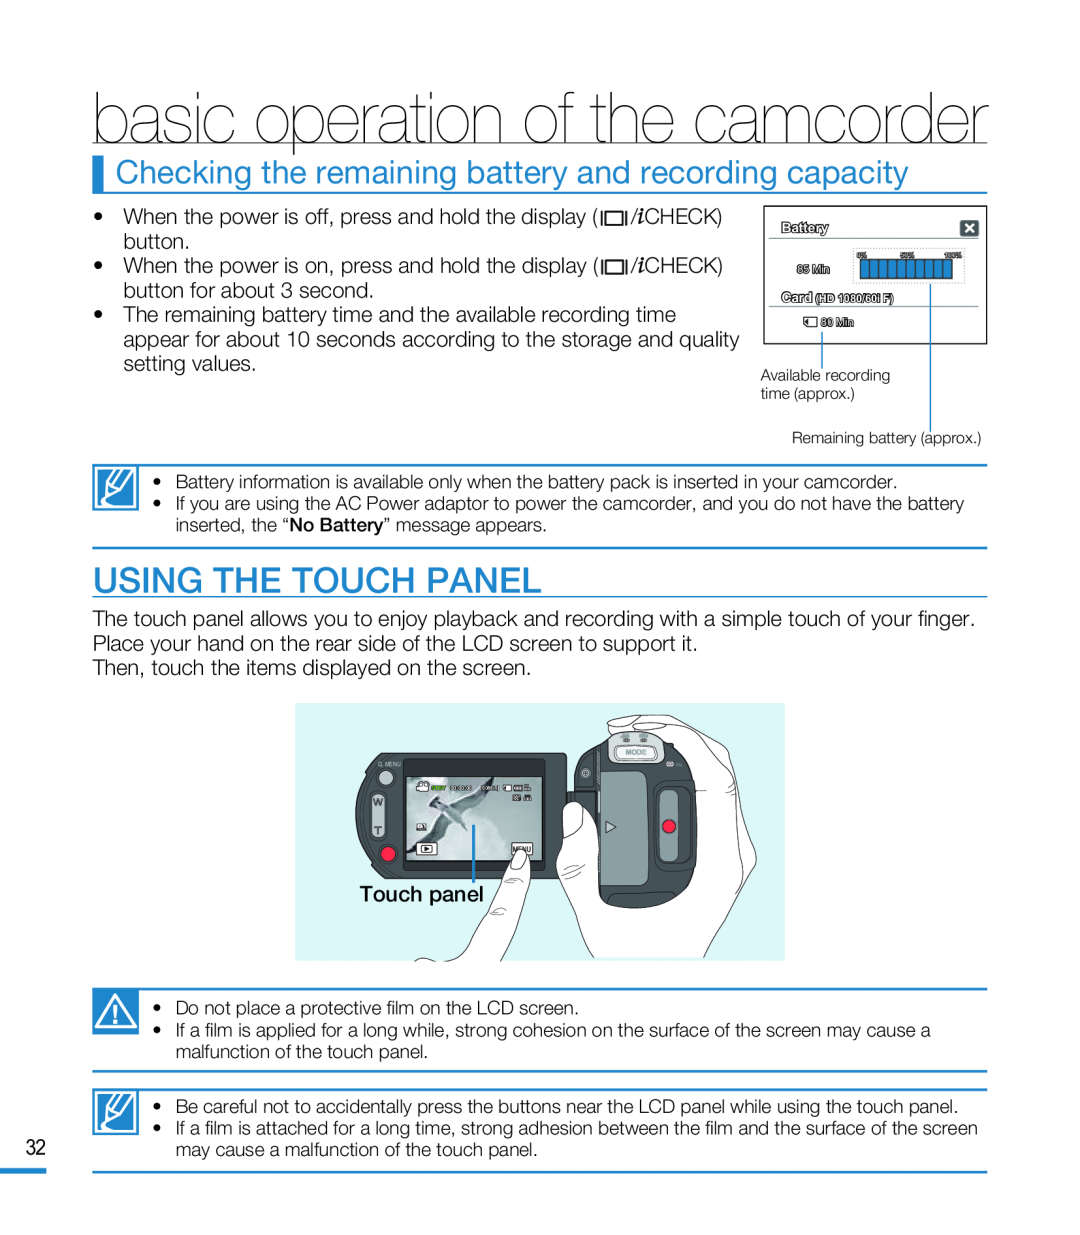 Checking the remaining battery and recording capacity
USING THE TOUCH PANEL
 first time settings
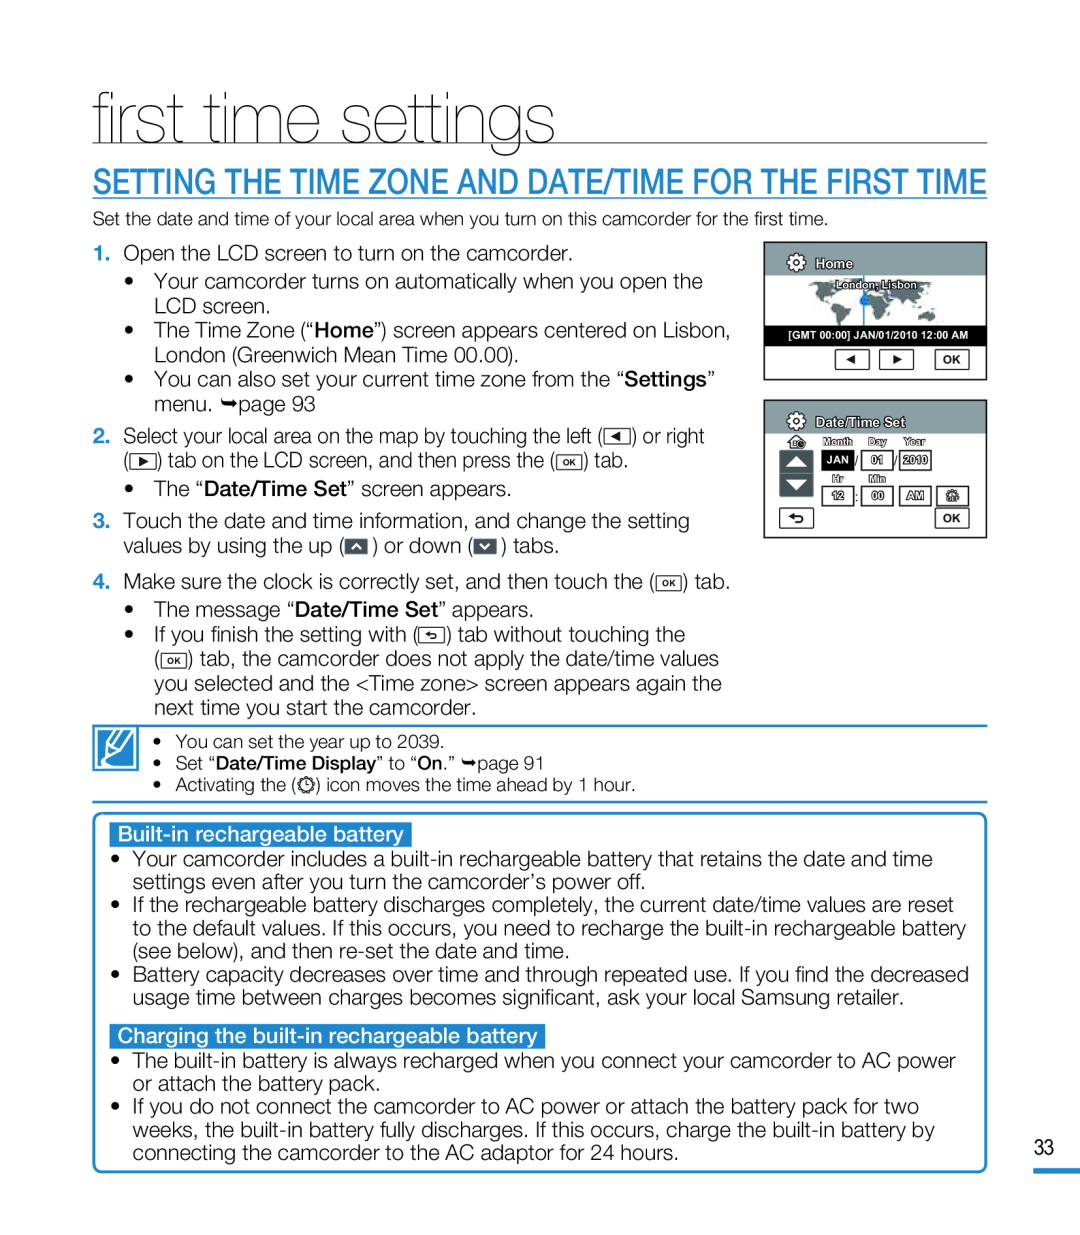
SETTING THE TIME ZONE AND DATE/TIME FOR THE FIRST TIME
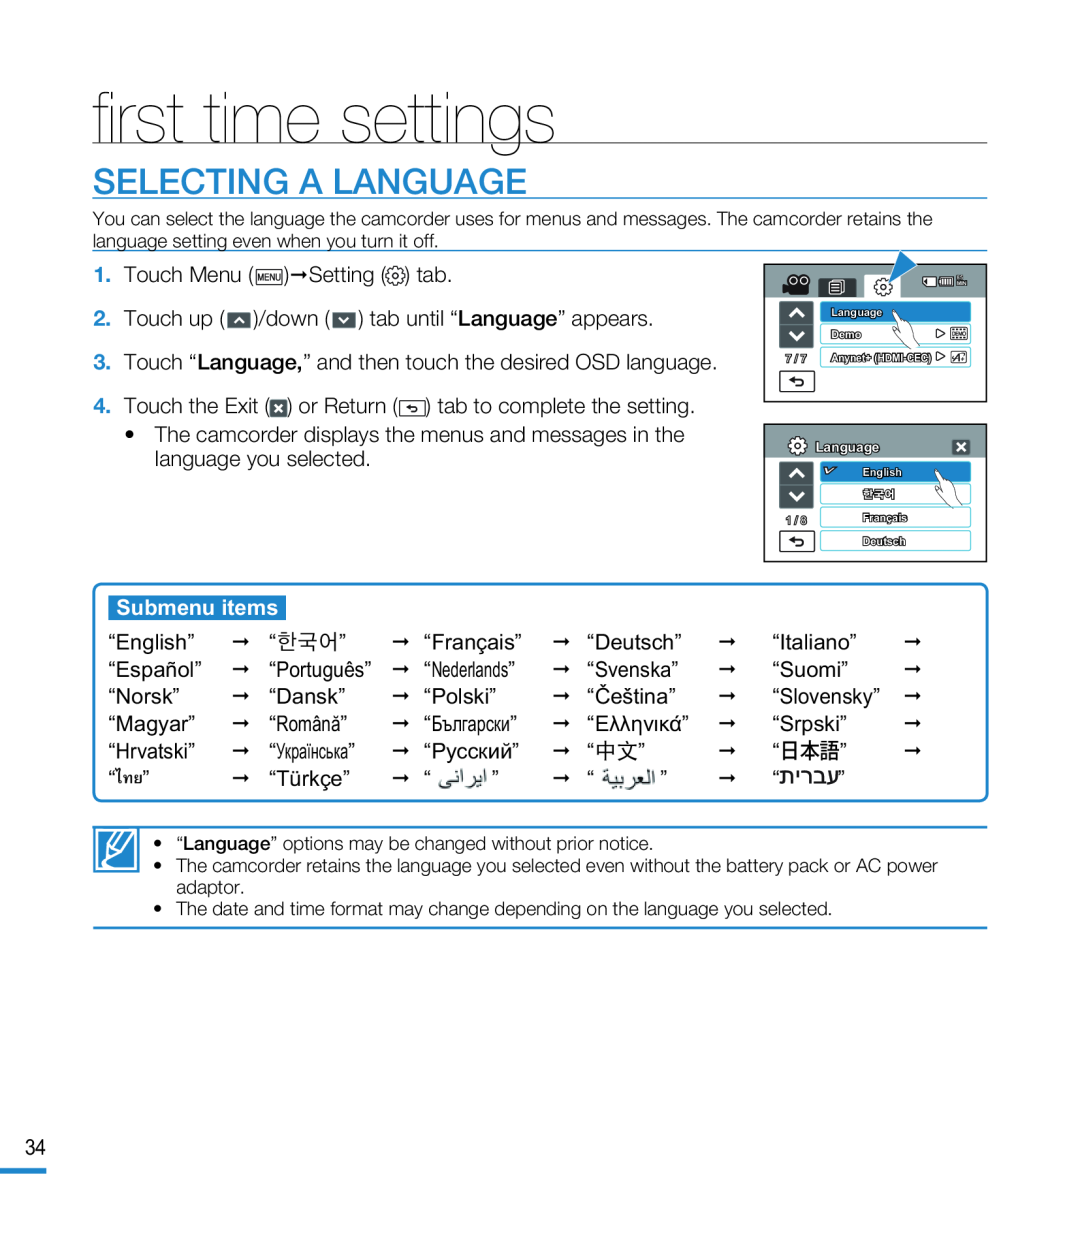 SELECTING A LANGUAGE
 getting ready to start recording
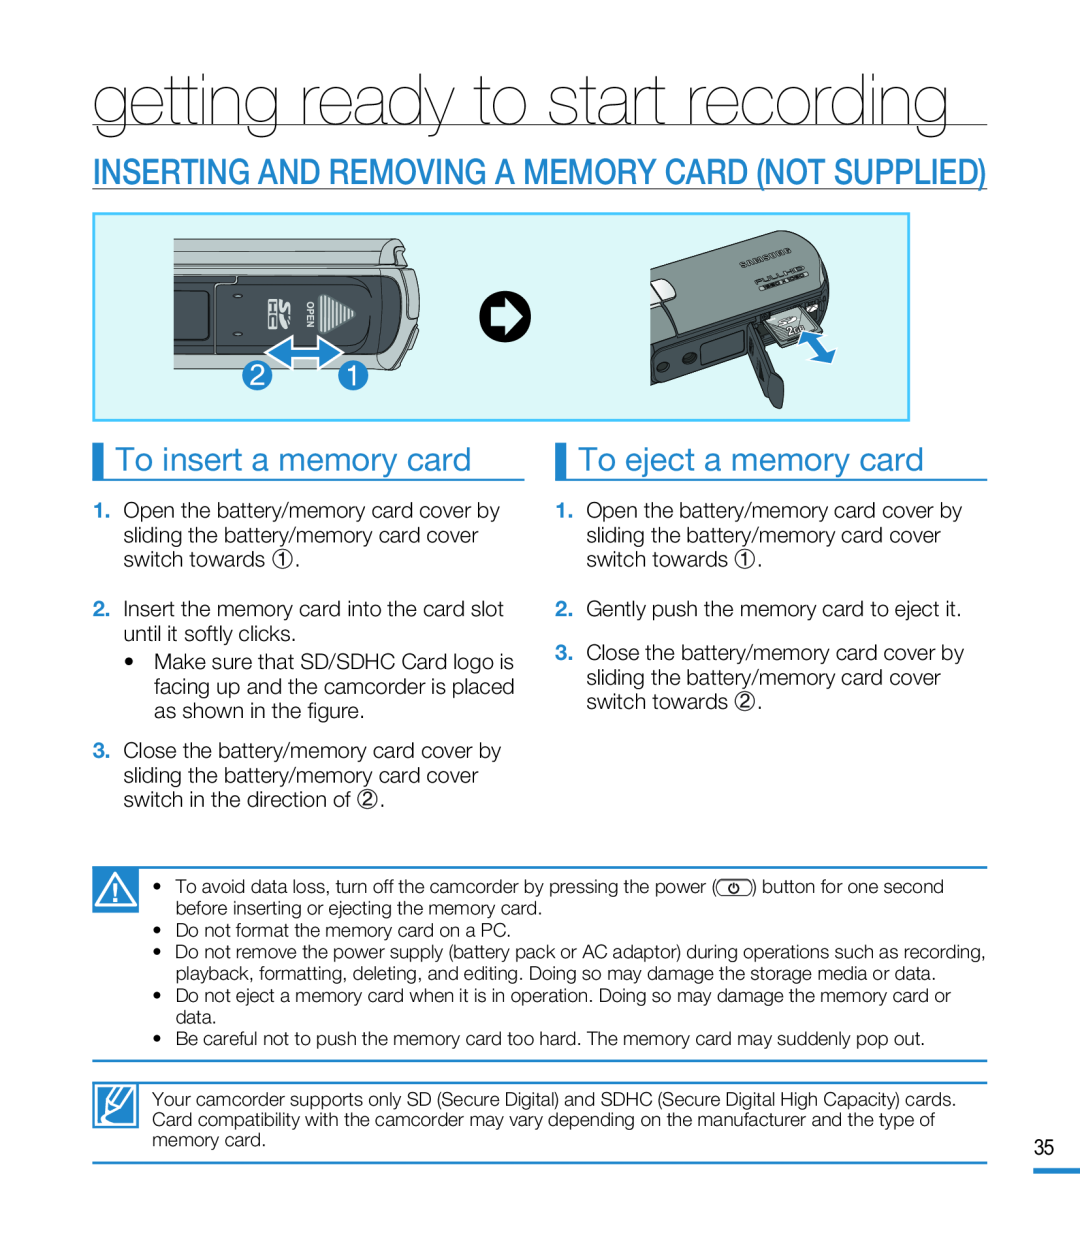
INSERTING AND REMOVING A MEMORY CARD (NOT SUPPLIED)
To insert a memory card
To eject a memory card
 SELECTING A SUITABLE MEMORY CARD
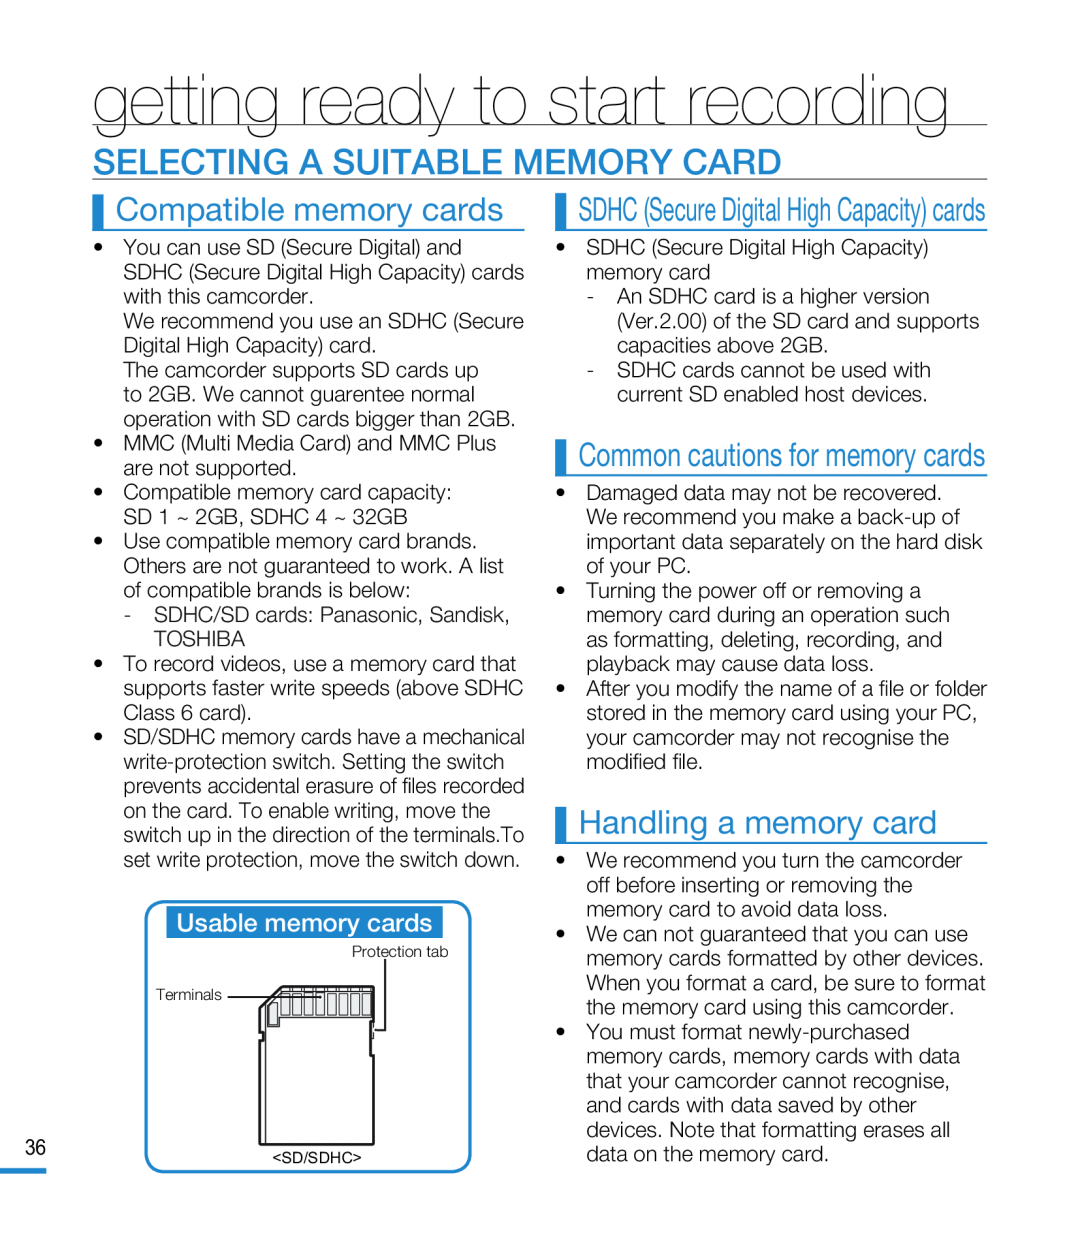
Compatible memory cards
Common cautions for memory cards
Handling a memory card
 Notes on use
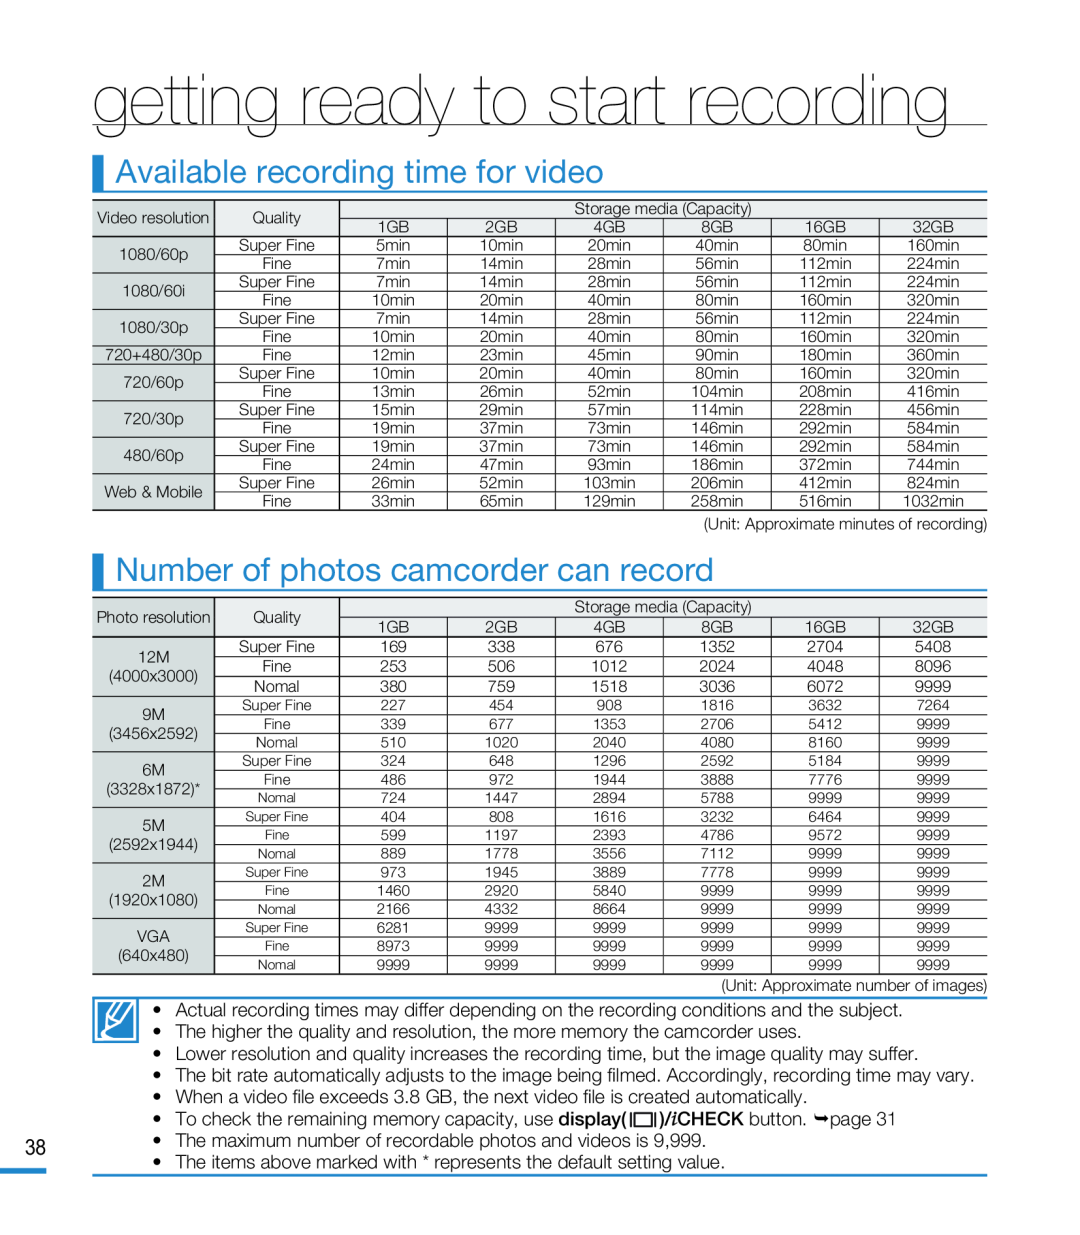 Available recording time for video
Number of photos camcorder can record
 USING THE HAND STRAP
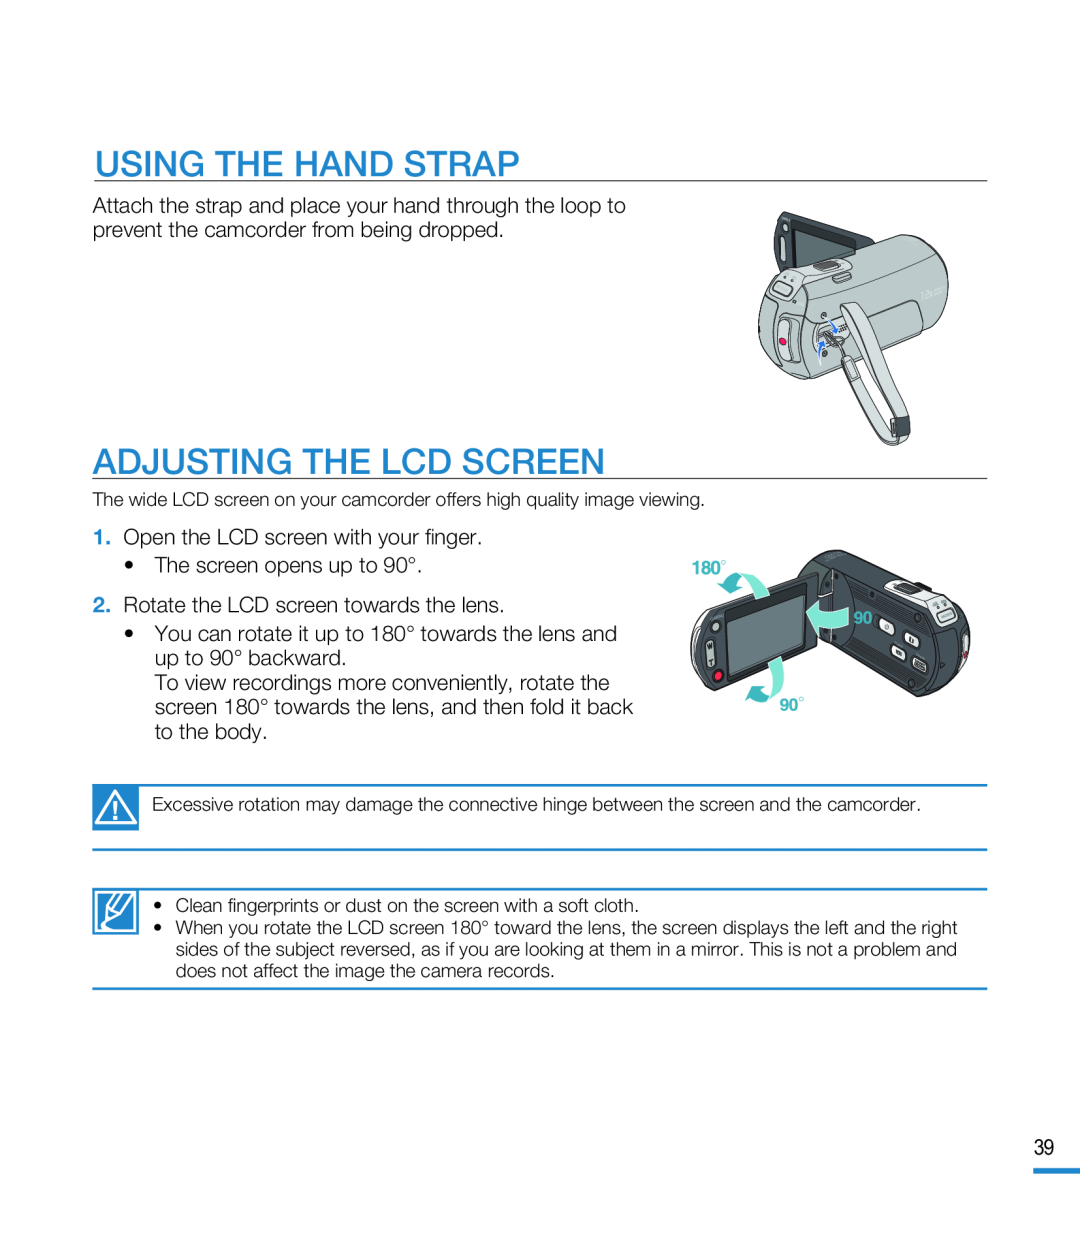
ADJUSTING THE LCD SCREEN
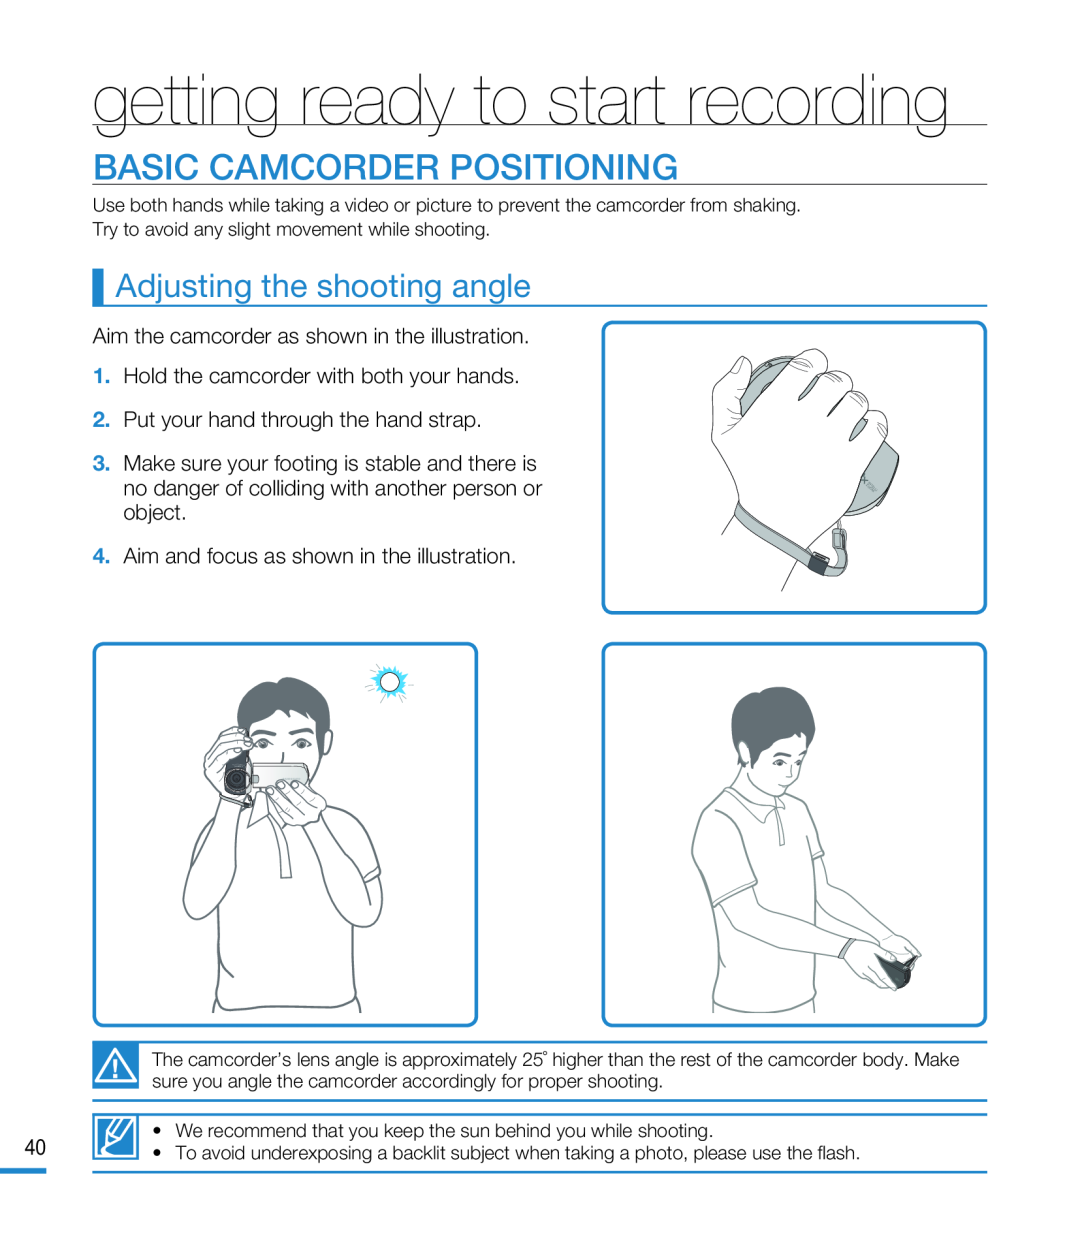 BASIC CAMCORDER POSITIONING
Adjusting the shooting angle
 basic recording
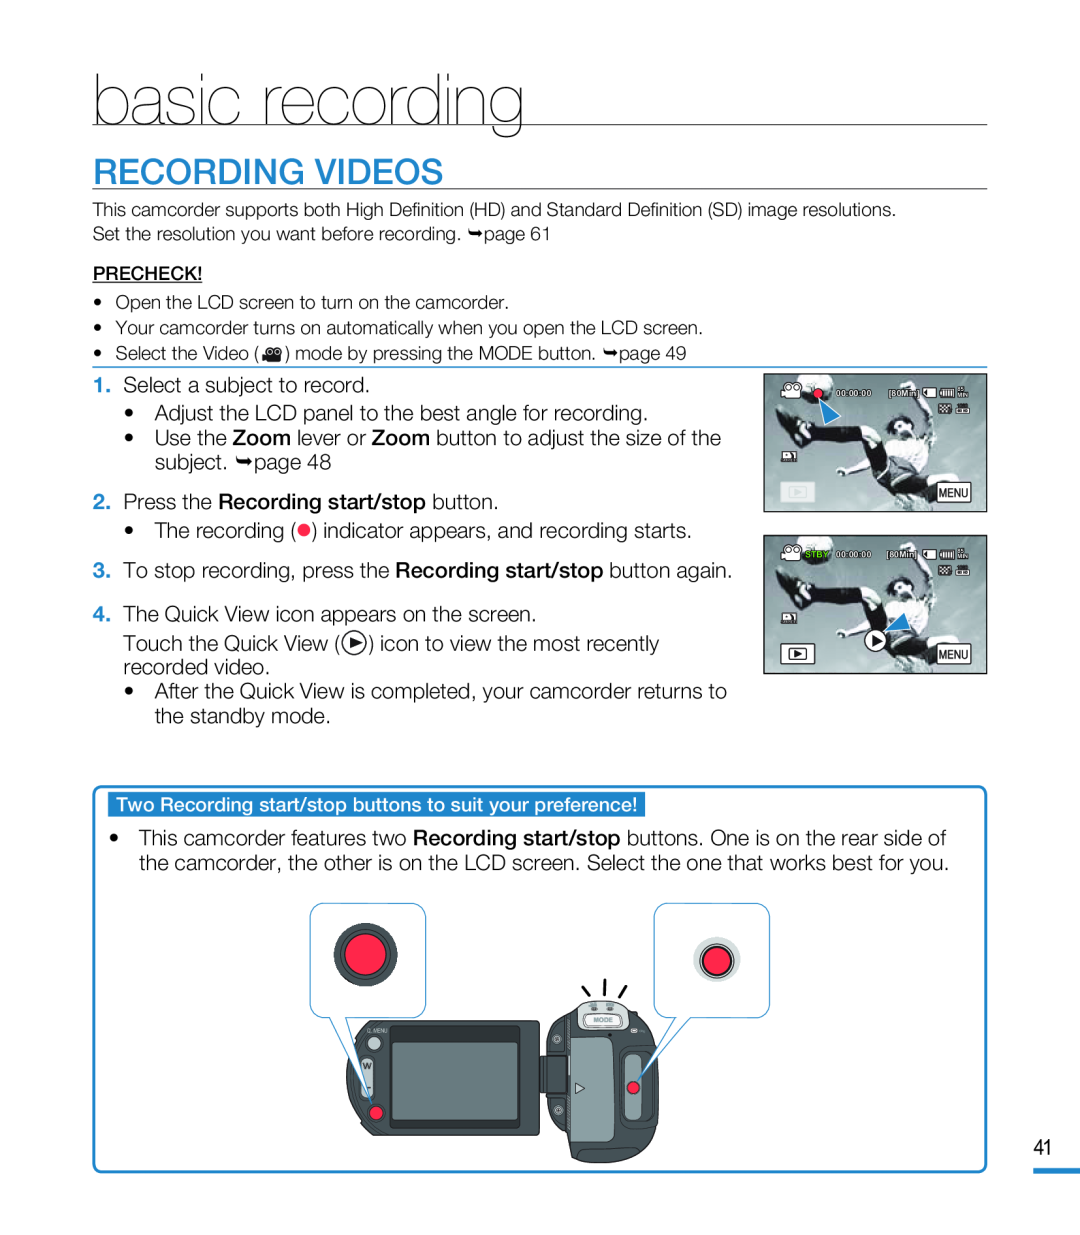
RECORDING VIDEOS
 basic recording
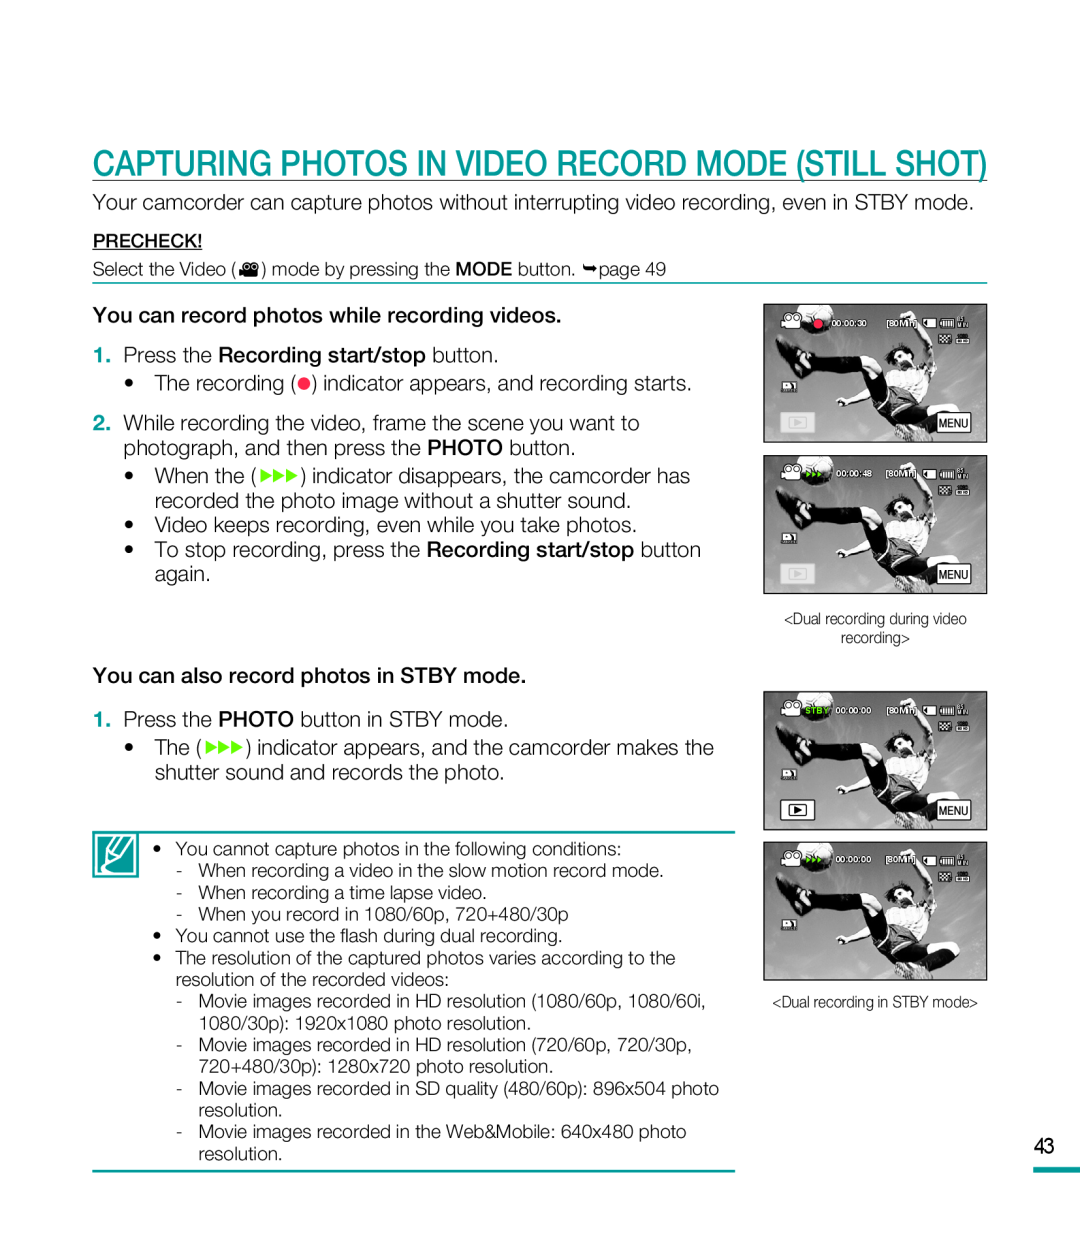 Capturing Photos in Video Record Mode (STILL SHOT)
 RECORDING PHOTOS
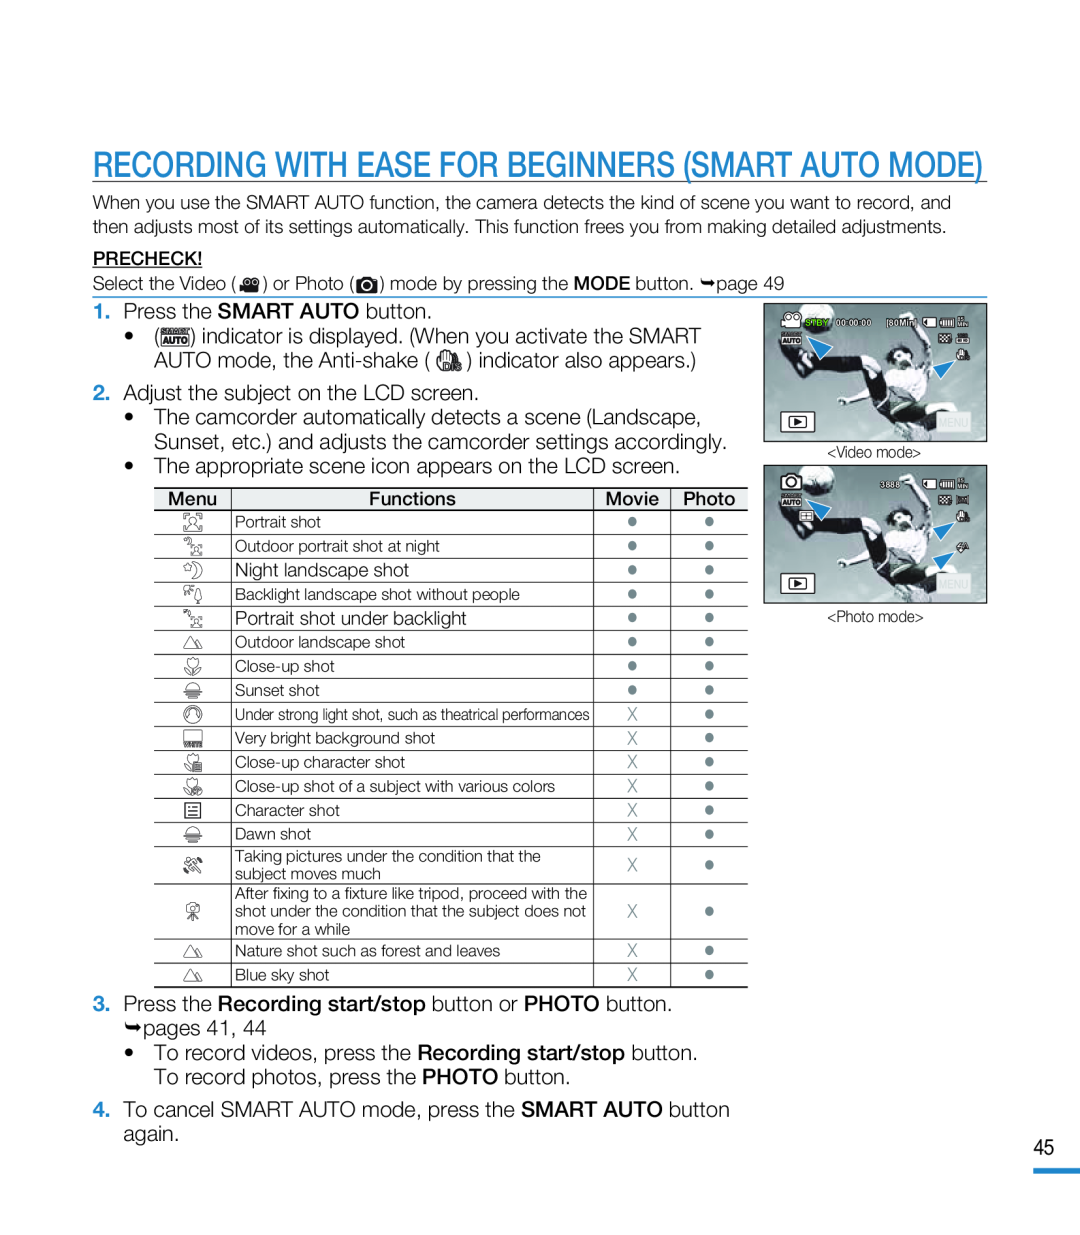 RECORDING WITH EASE FOR BEGINNERS (SMART AUTO MODE)
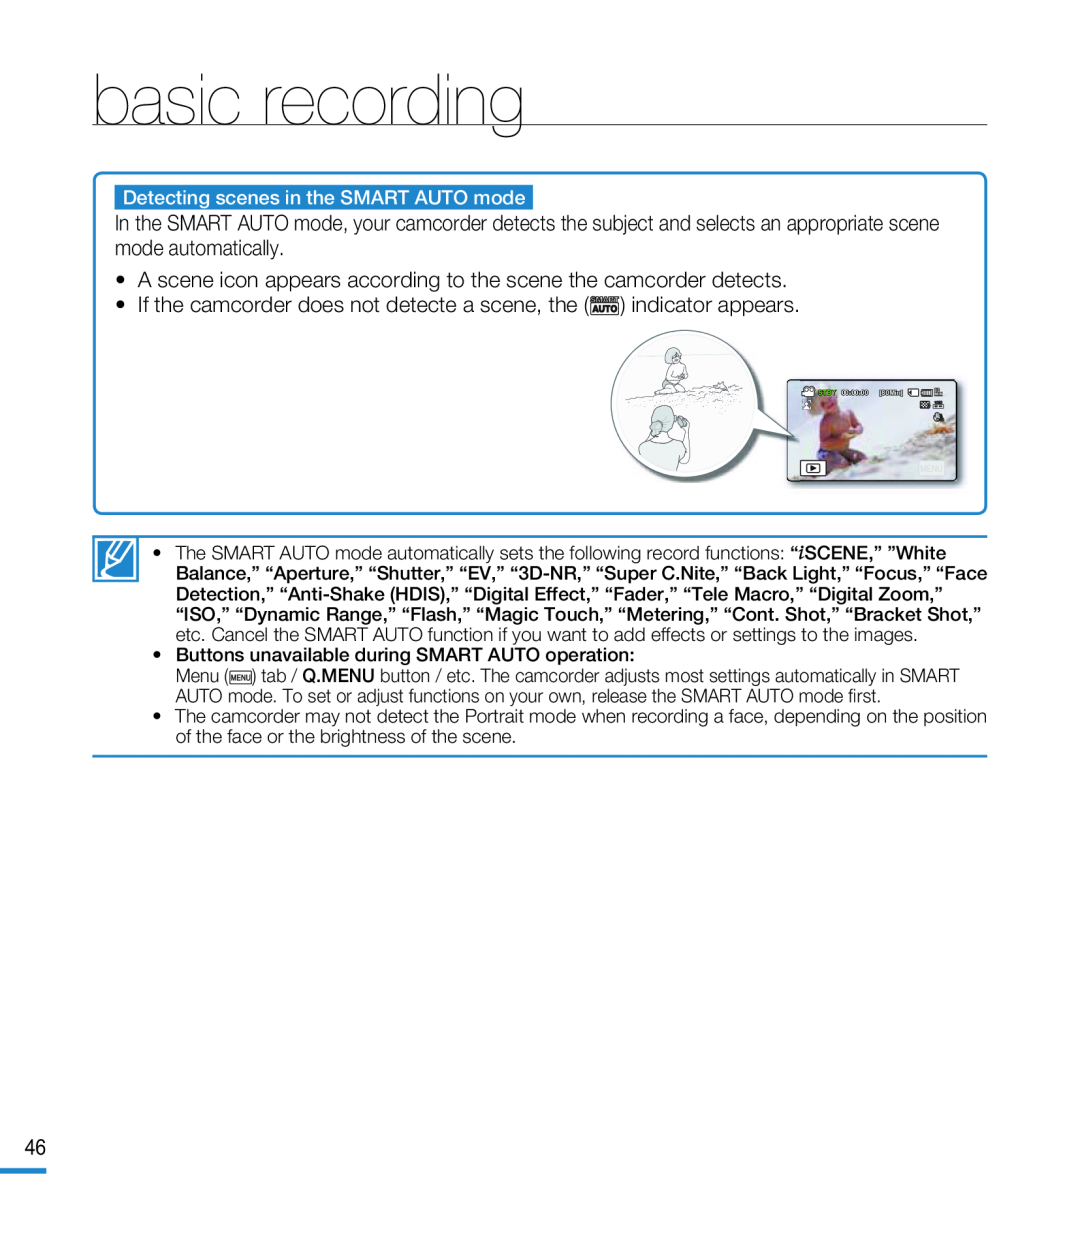 basic recording
•A scene icon appears according to the scene the camcorder detects
•If the camcorder does not detecte a scene, the () indicator appears
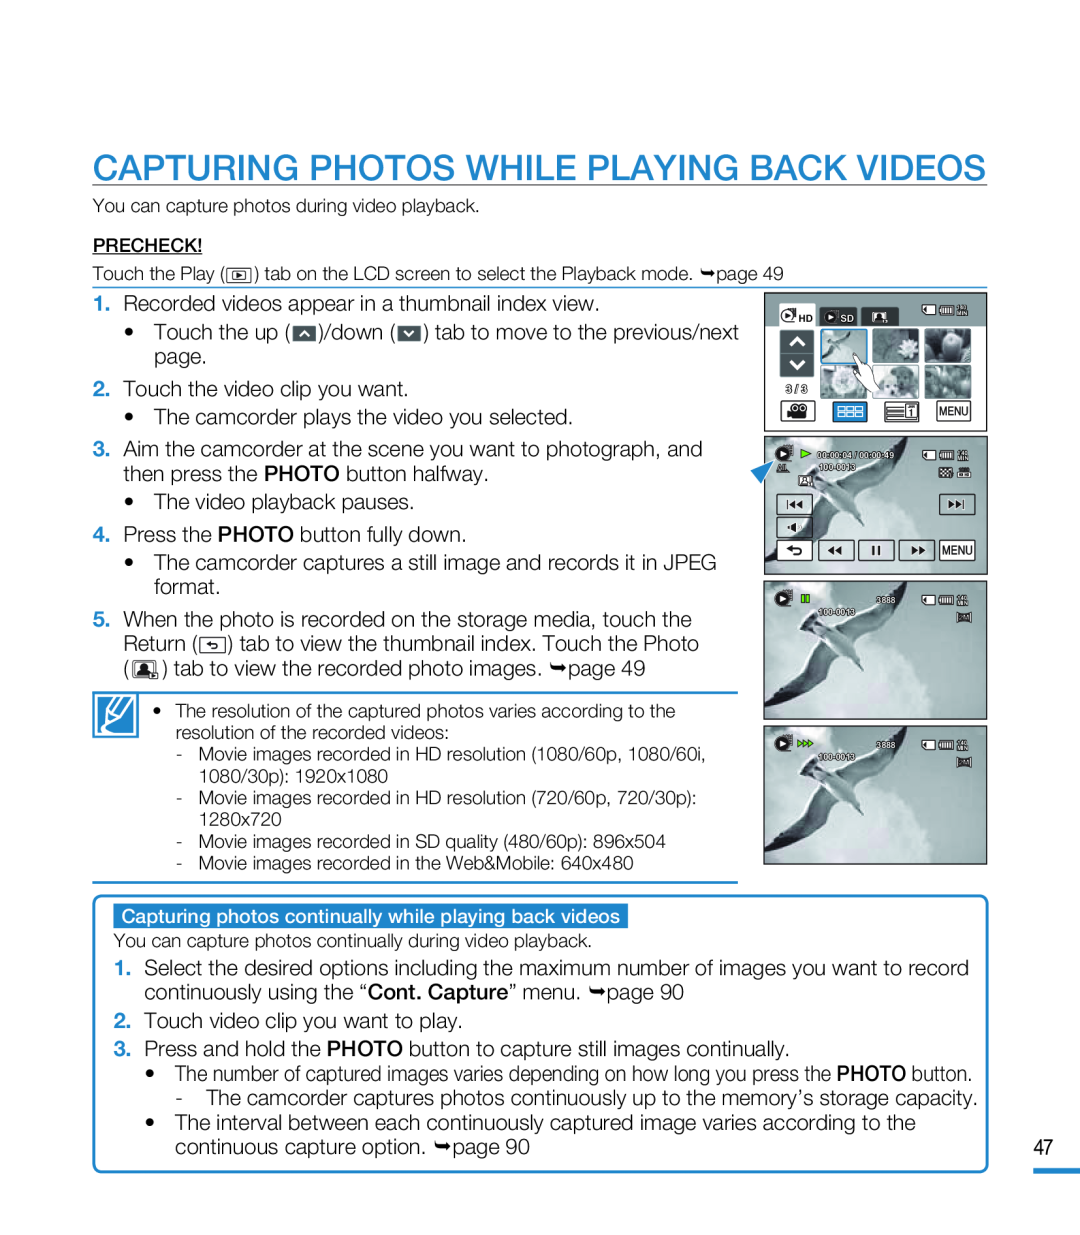 CAPTURING PHOTOS WHILE PLAYING BACK VIDEOS
 ZOOMING
To zoom in
To zoom out
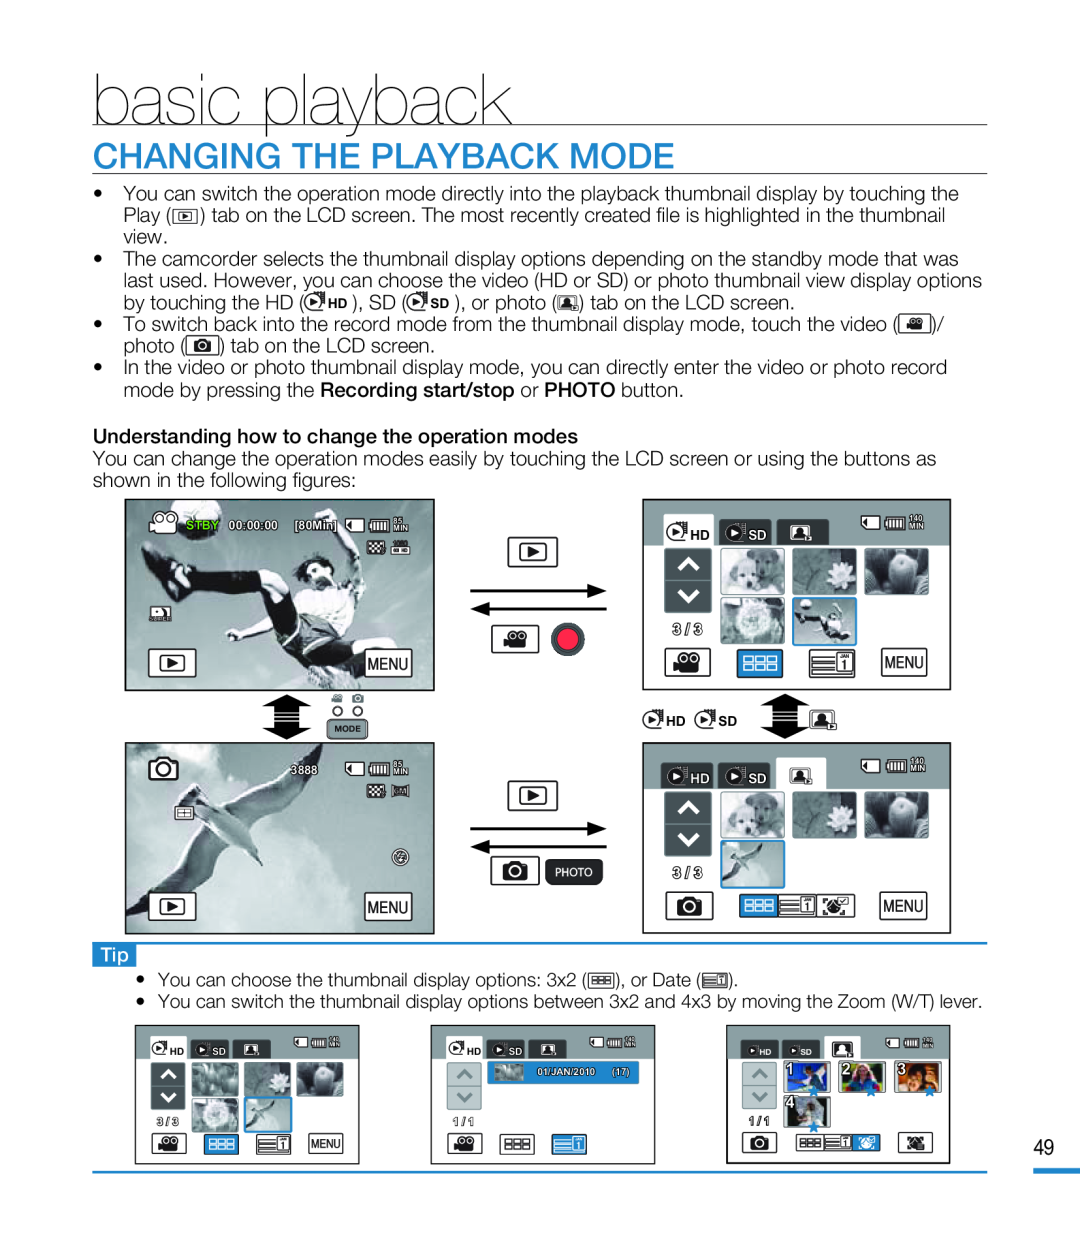 basic playback
CHANGING THE PLAYBACK MODE
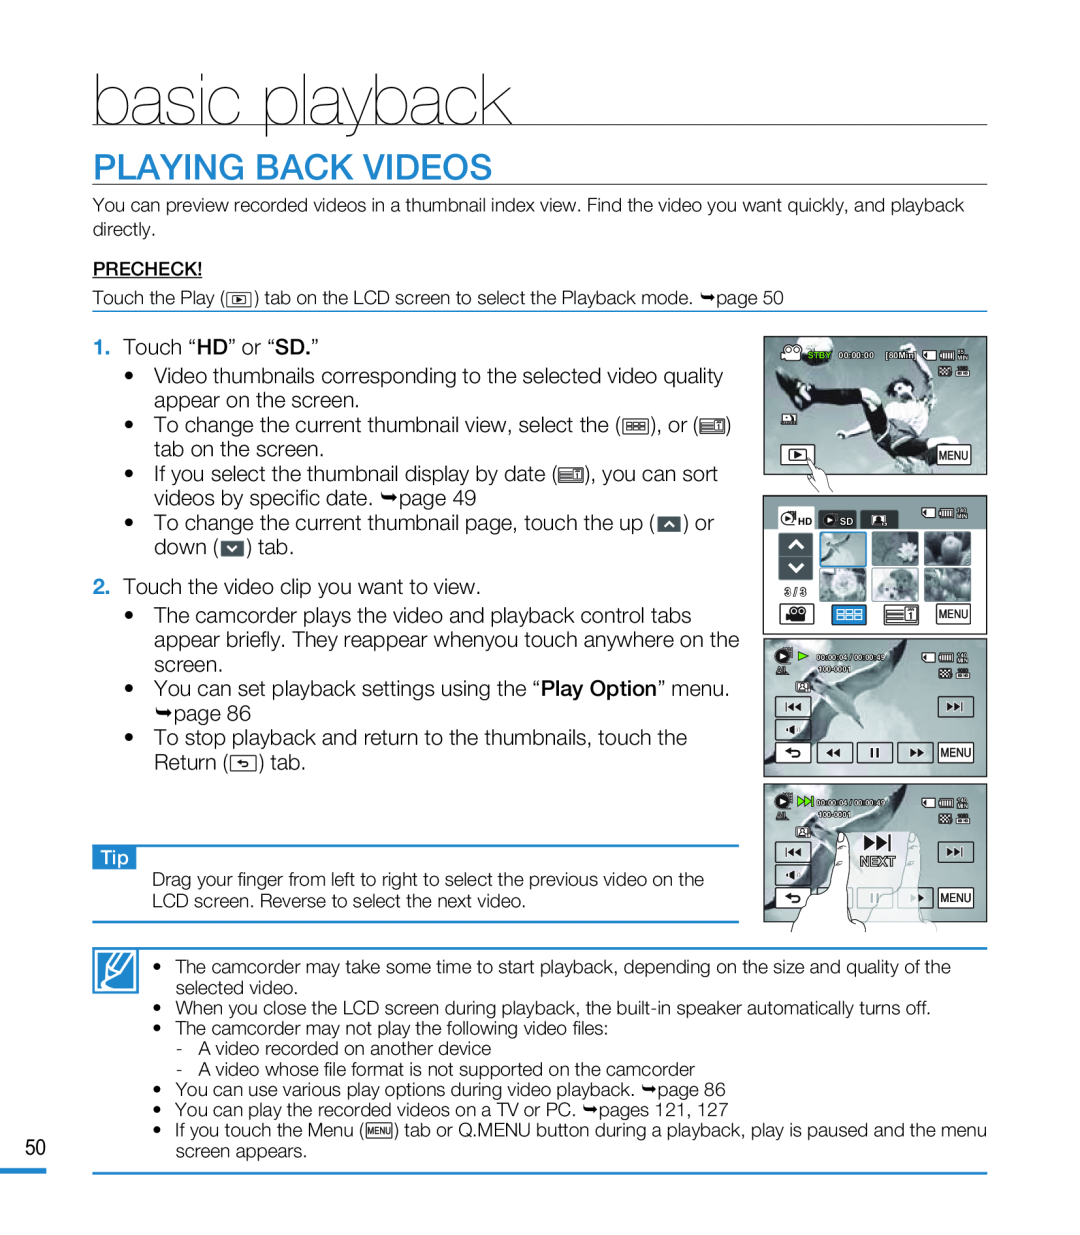 PLAYING BACK VIDEOS
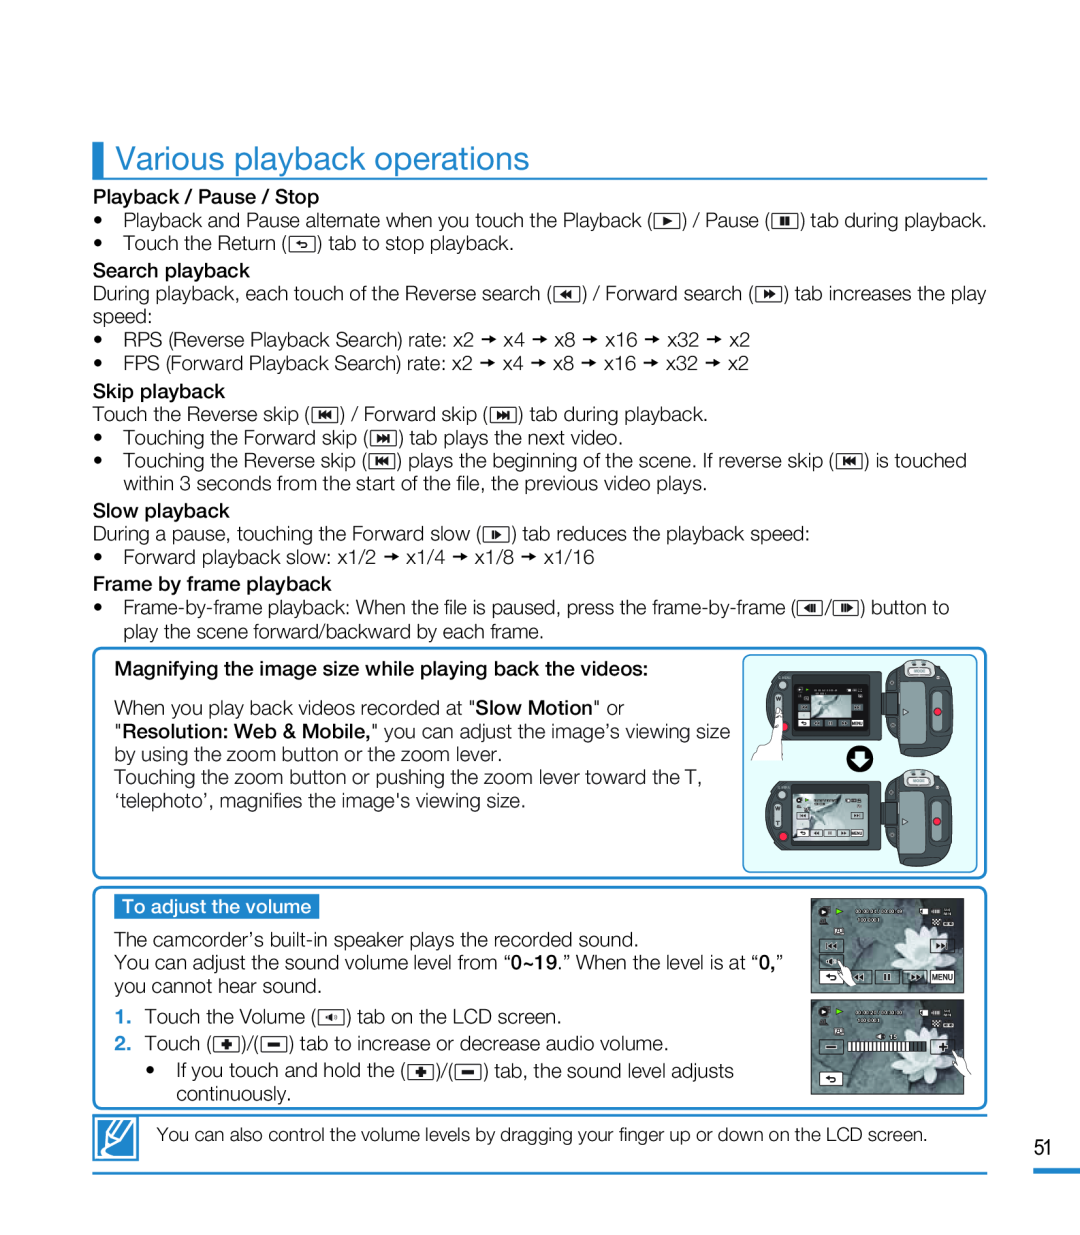 Various playback operations
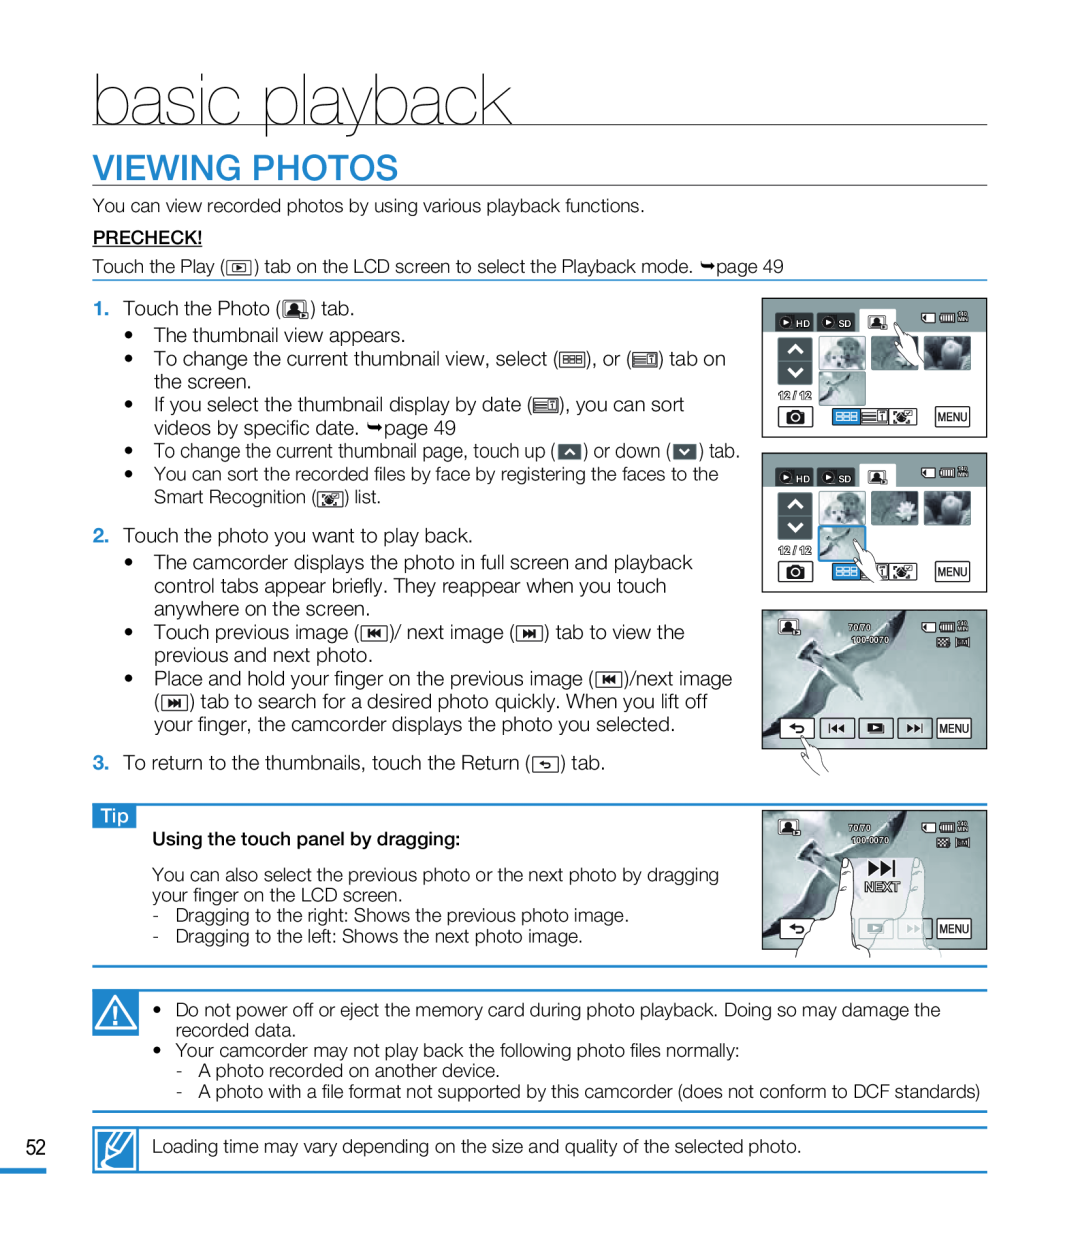 VIEWING PHOTOS
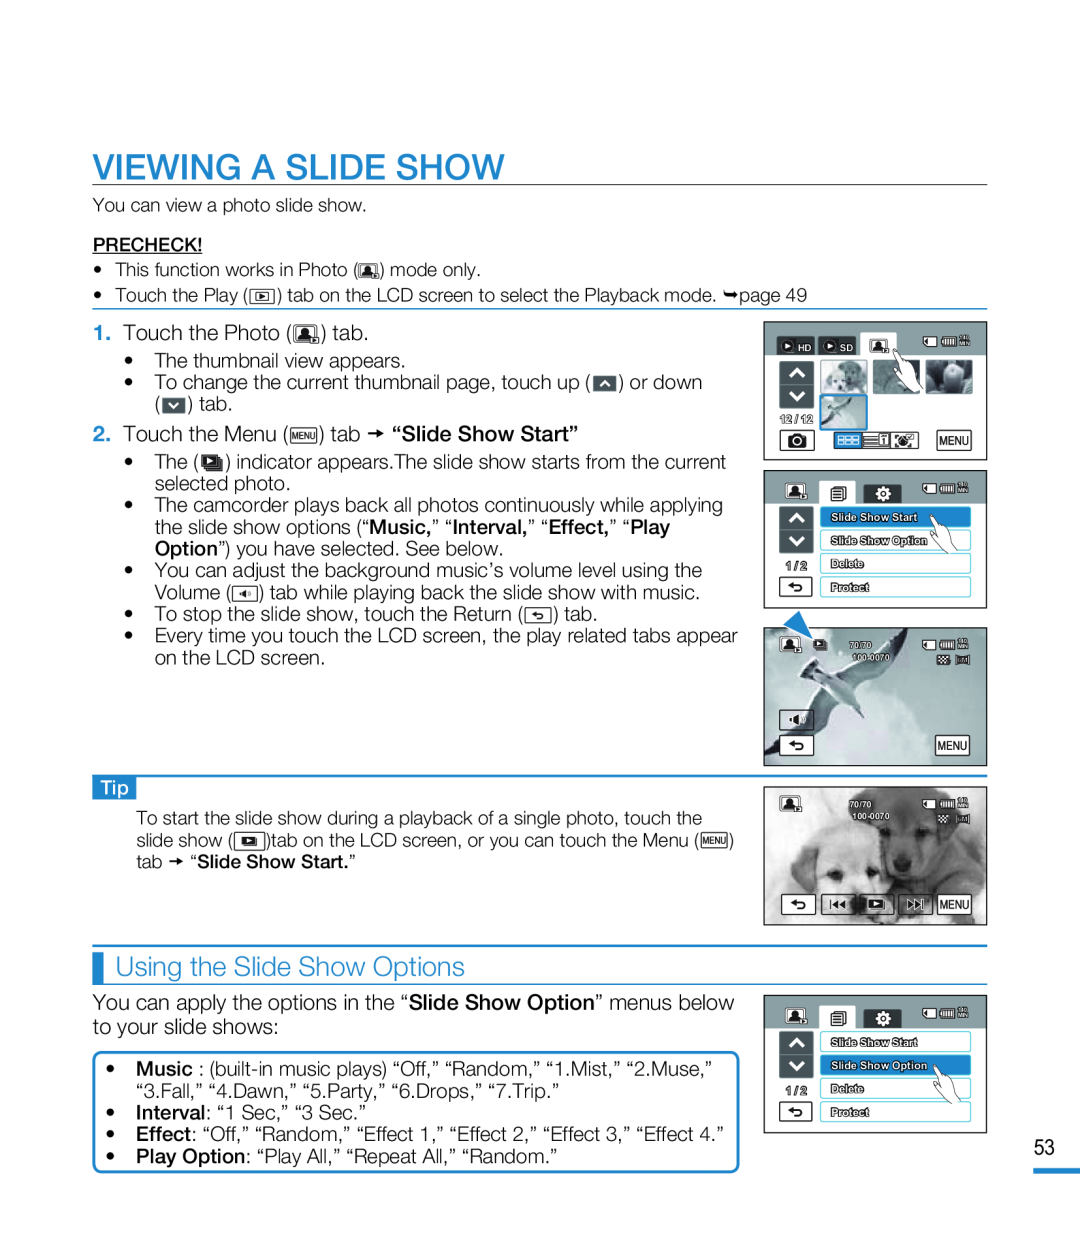 VIEWING A SLIDE SHOW
Using the Slide Show Options
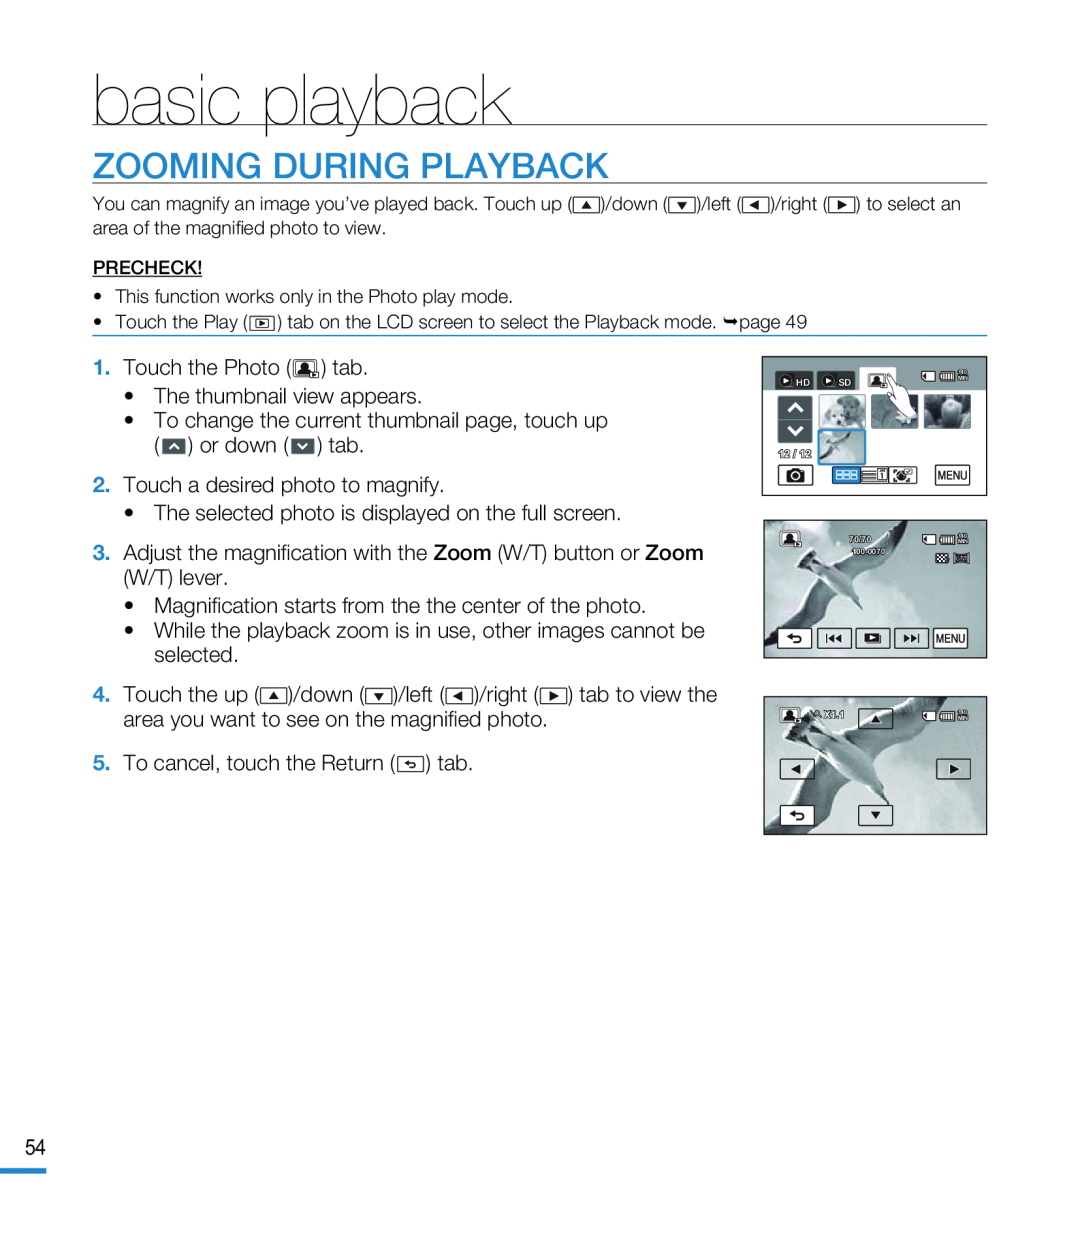 ZOOMING DURING PLAYBACK
 advanced recording
HANDLING MENUS AND Q.MENUS
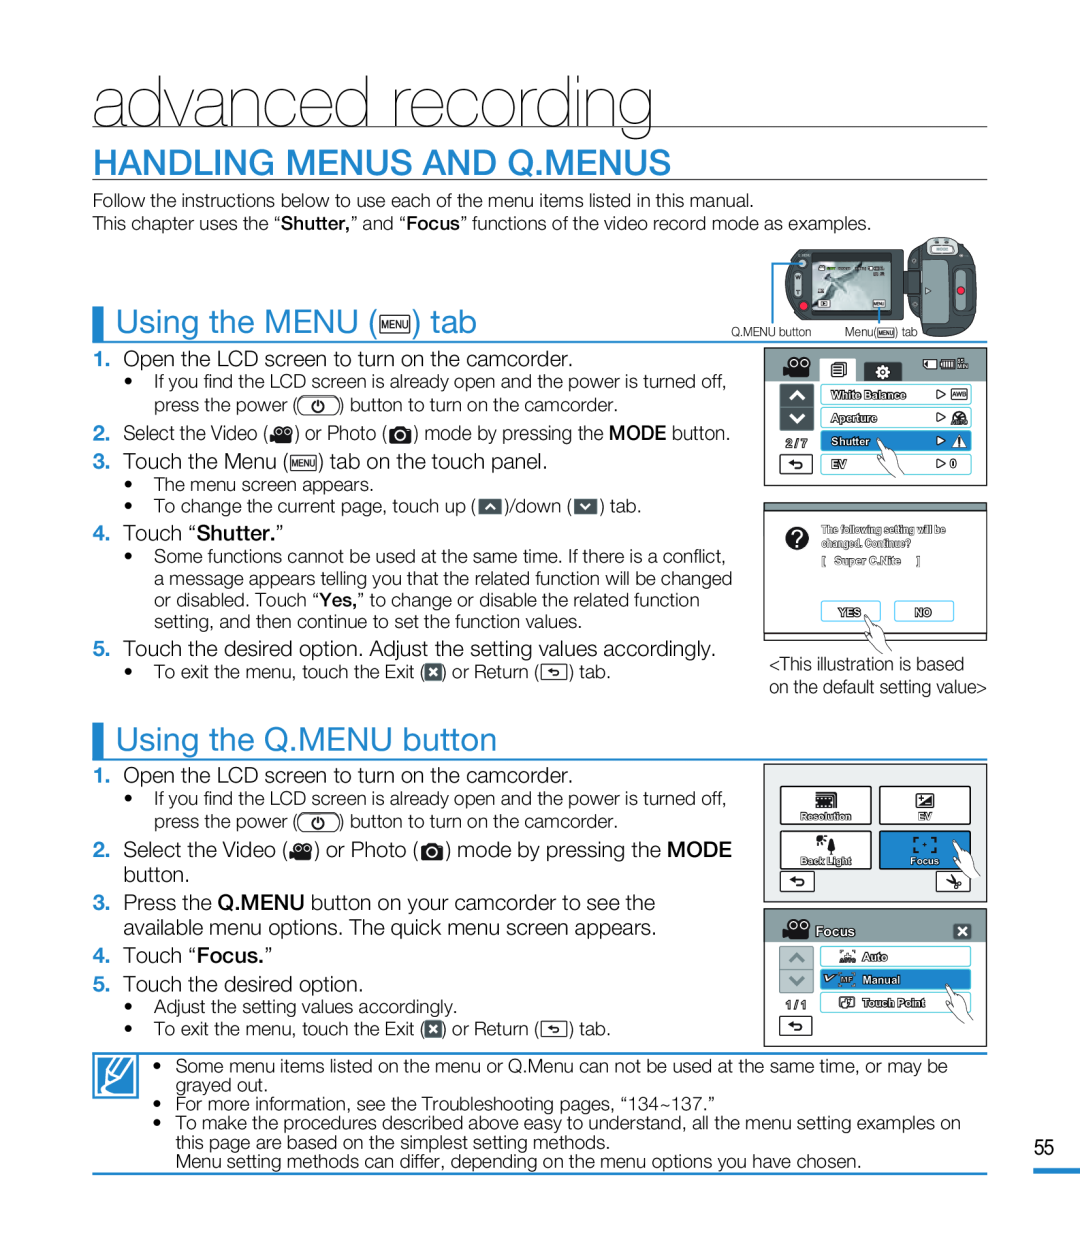
Using the MENU
) tab
Using the Q.MENU button
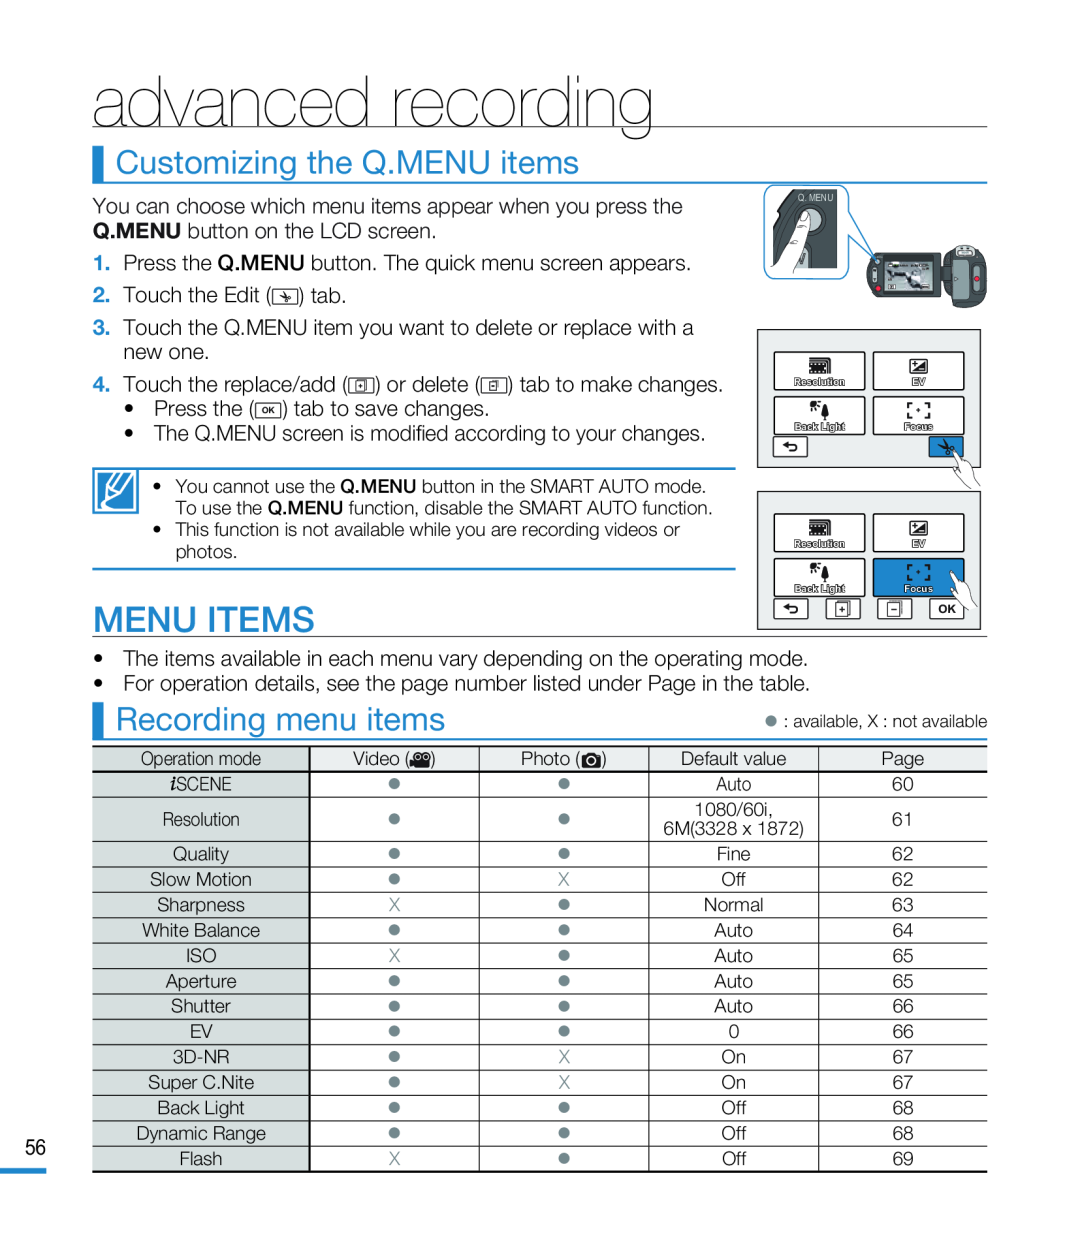 Customizing the Q.MENU items
MENU ITEMS
Recording menu items
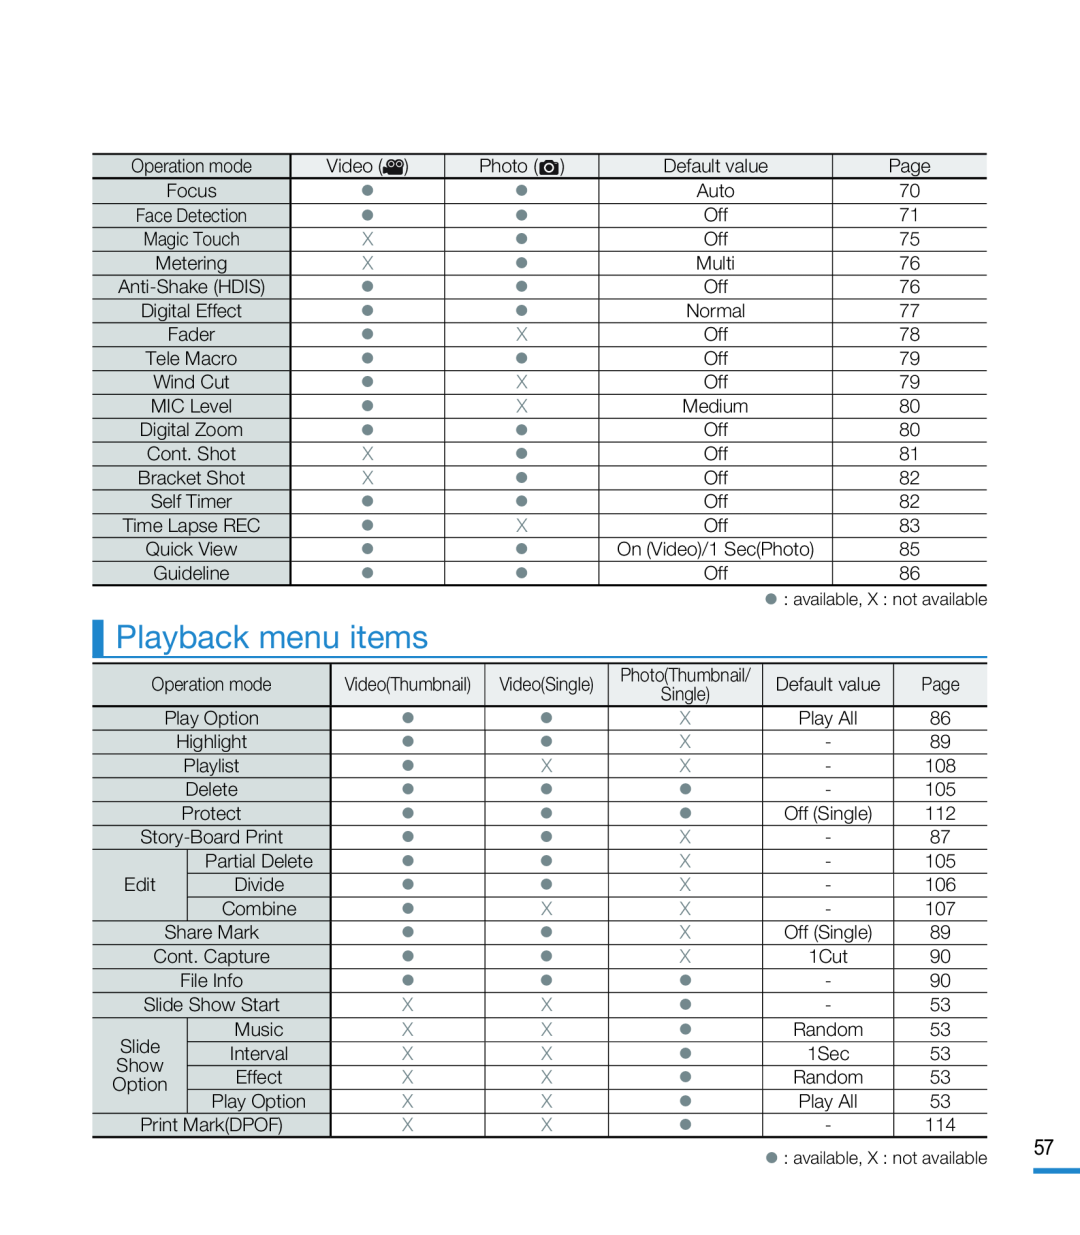 Playback menu items
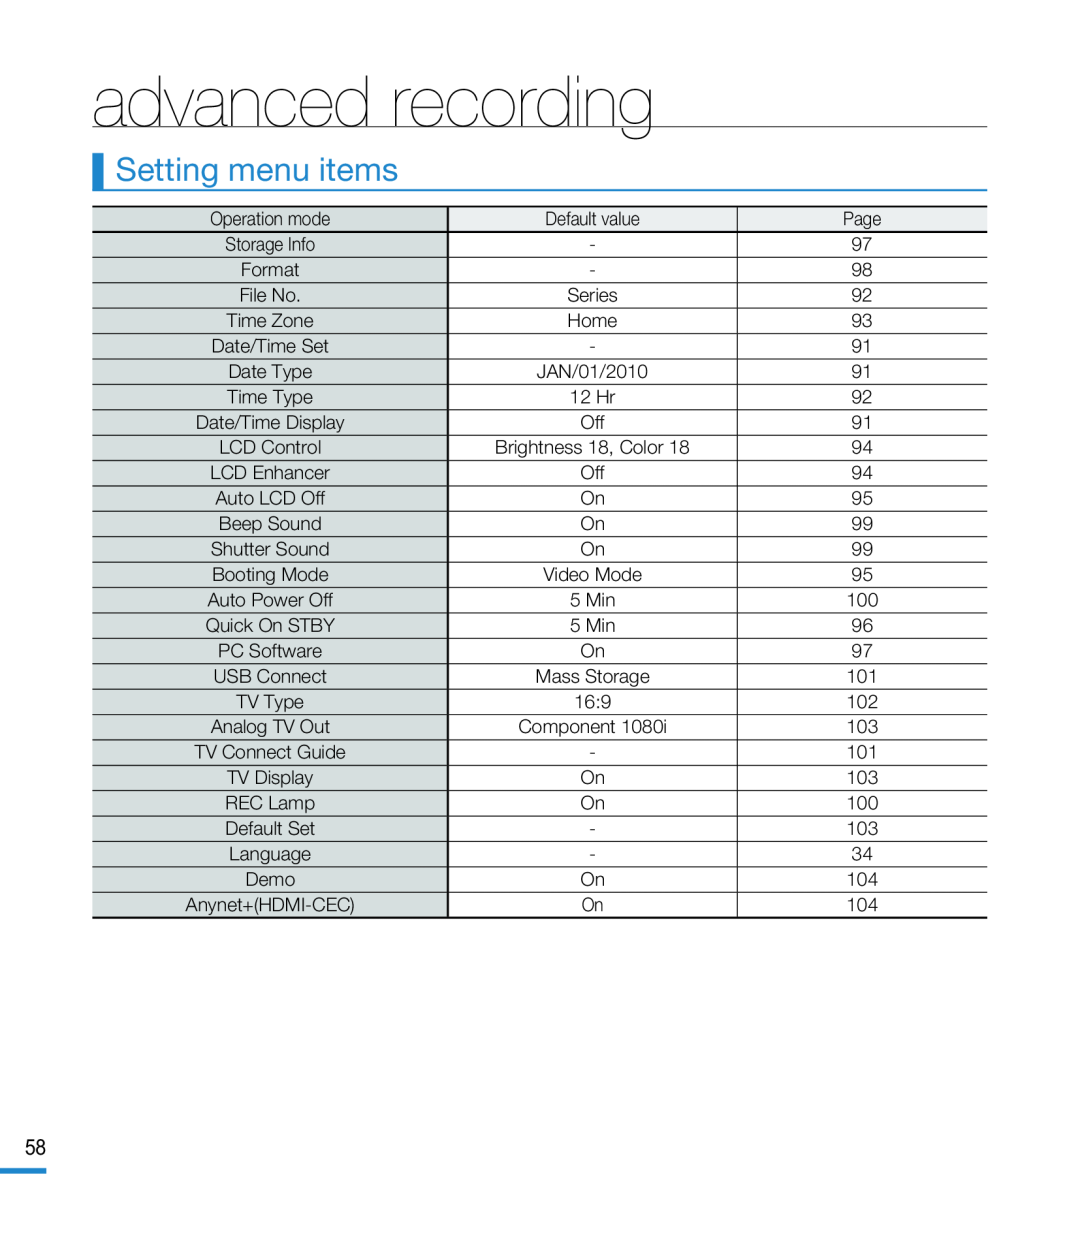 Setting menu items
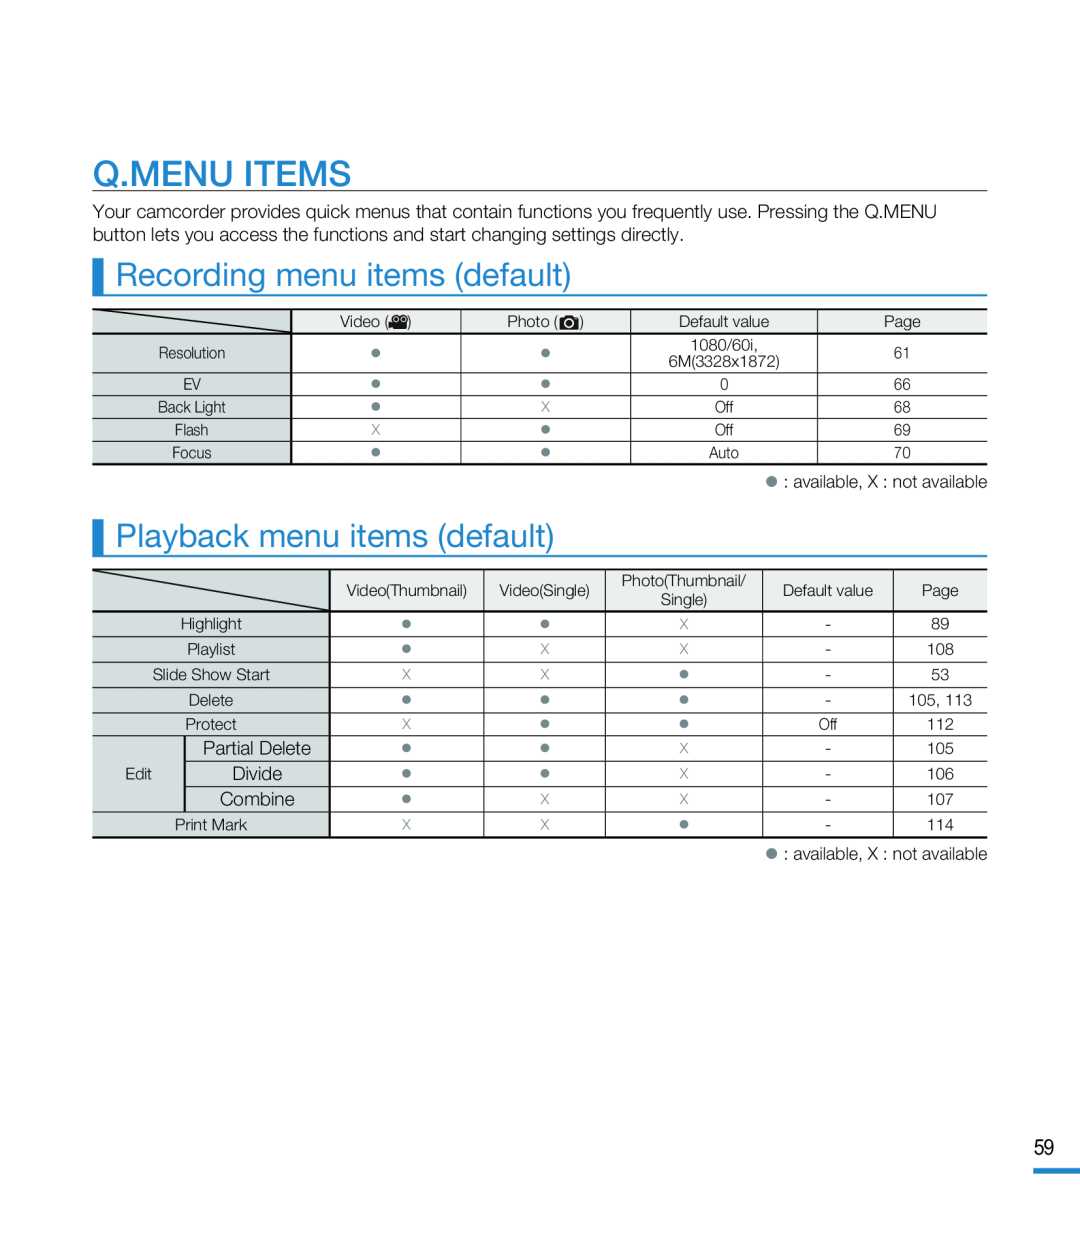 Q.MENU ITEMS
Recording menu items (default)
Playback menu items (default)
 advanced recording
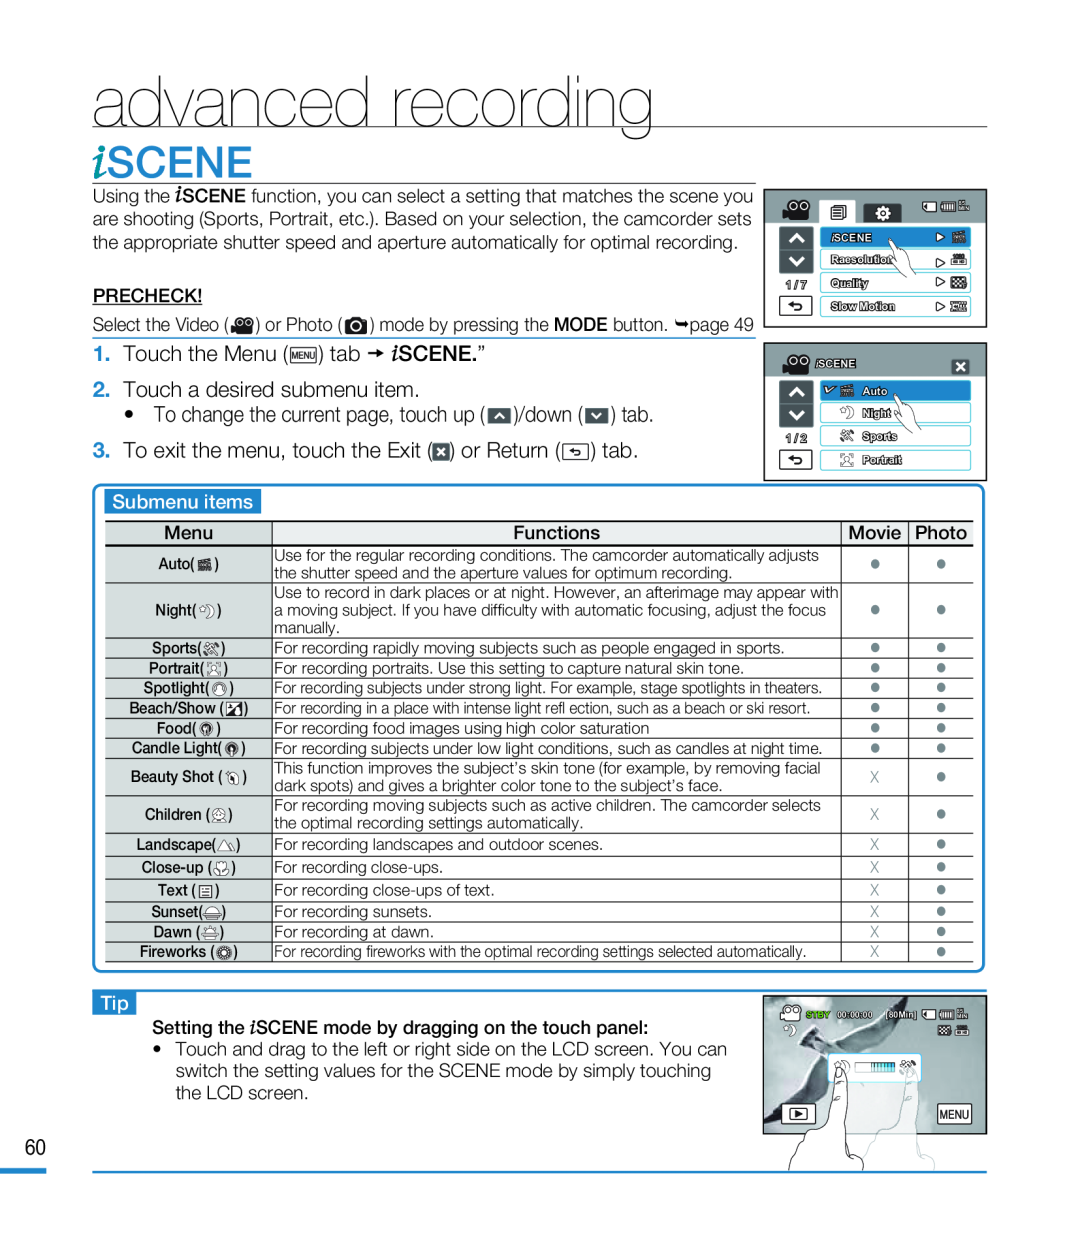
1. Touch the Menu () tab SCENE.”
2.Touch a desired submenu item
• To change the current page, touch up ( )/down ( ) tab
3.To exit the menu, touch the Exit () or Return () tab
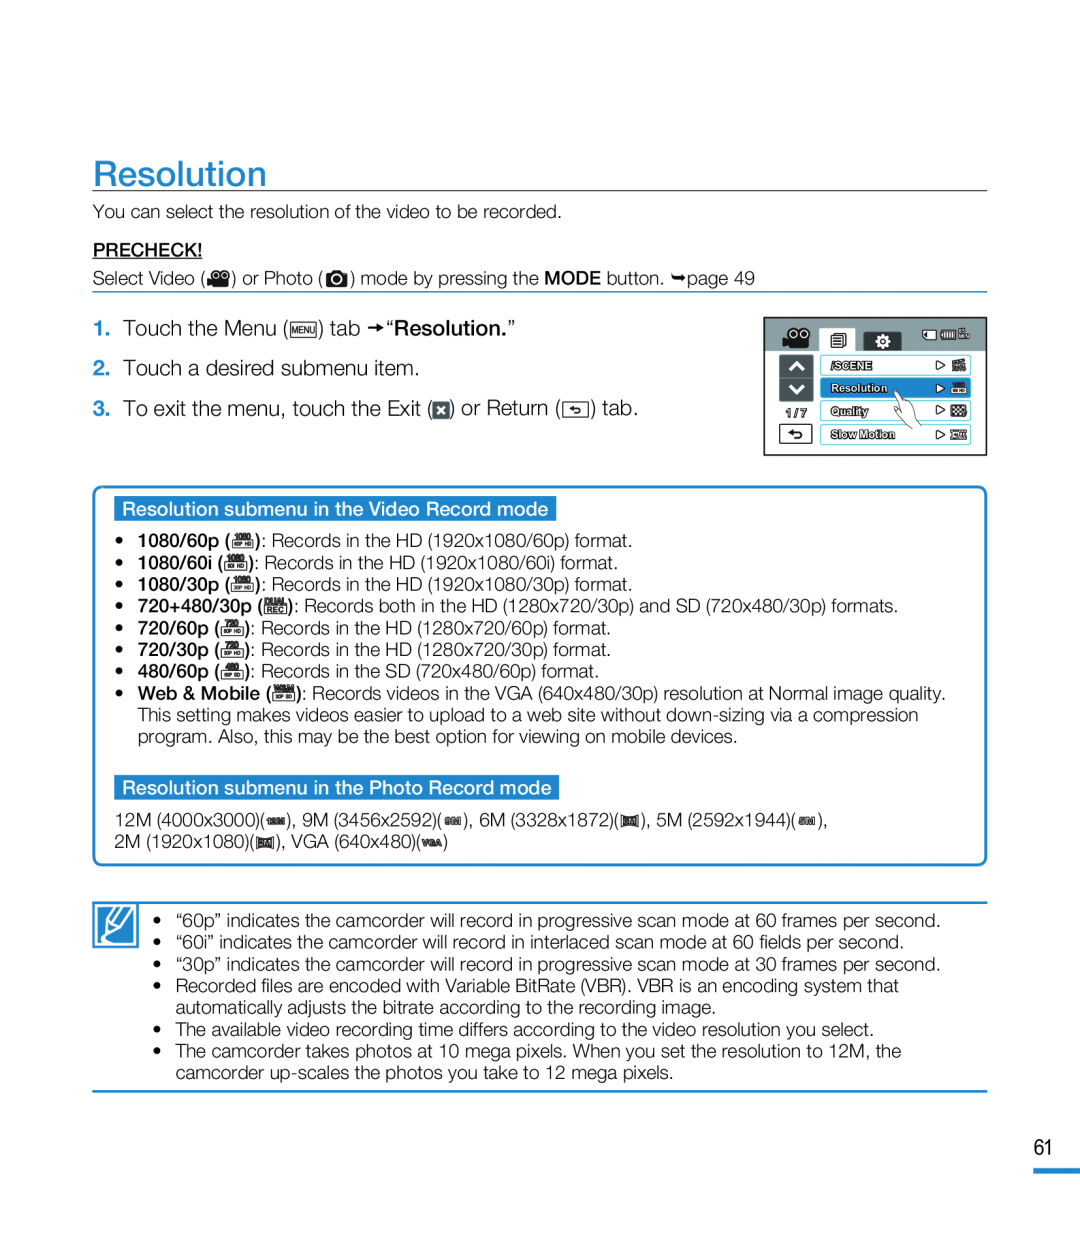 Resolution
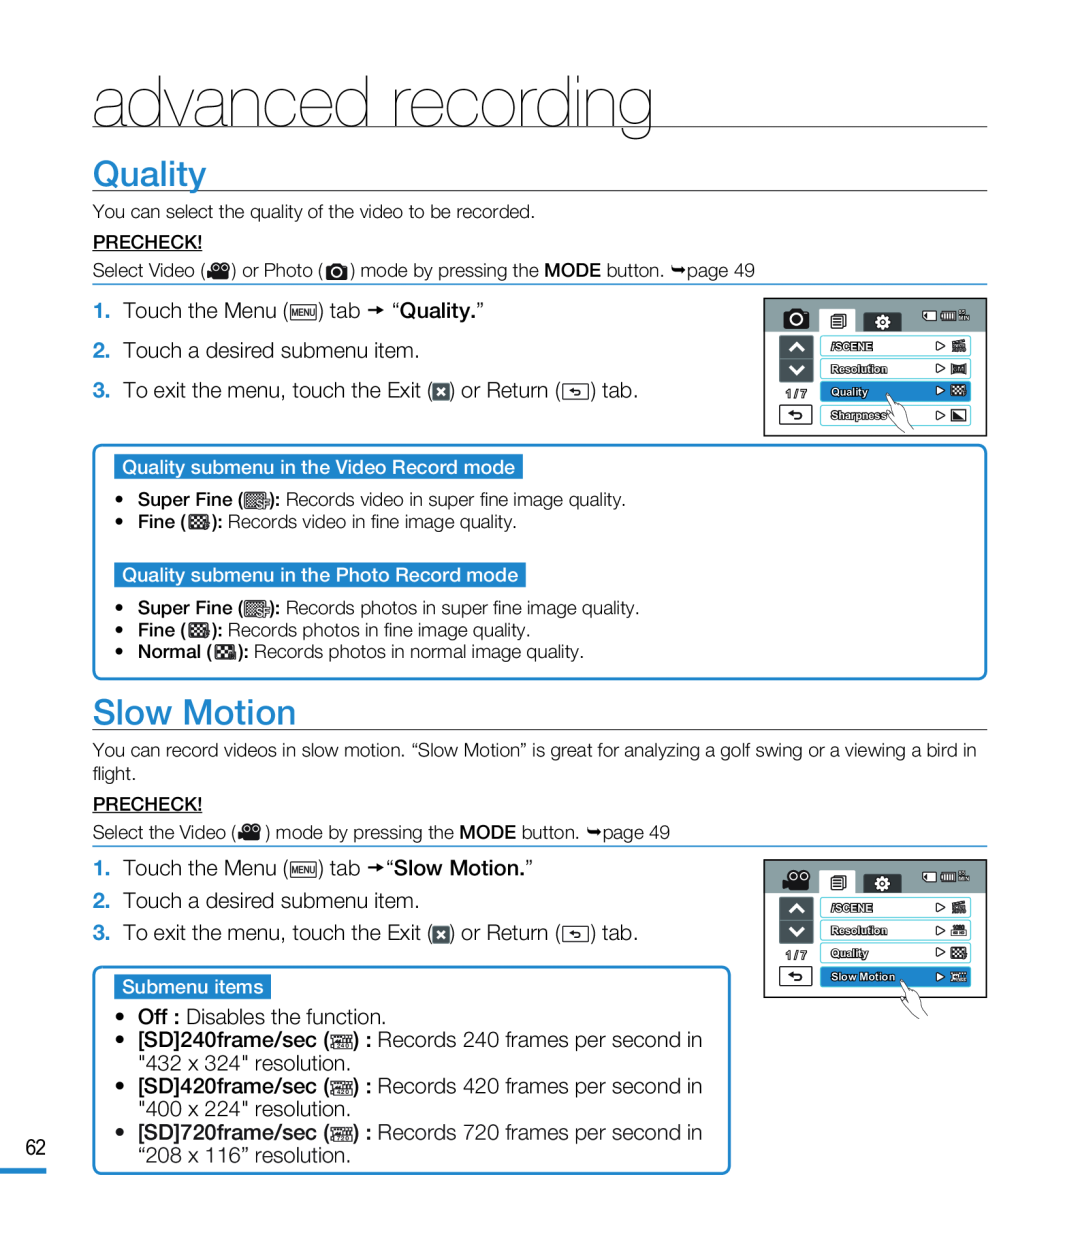 Quality
Slow Motion
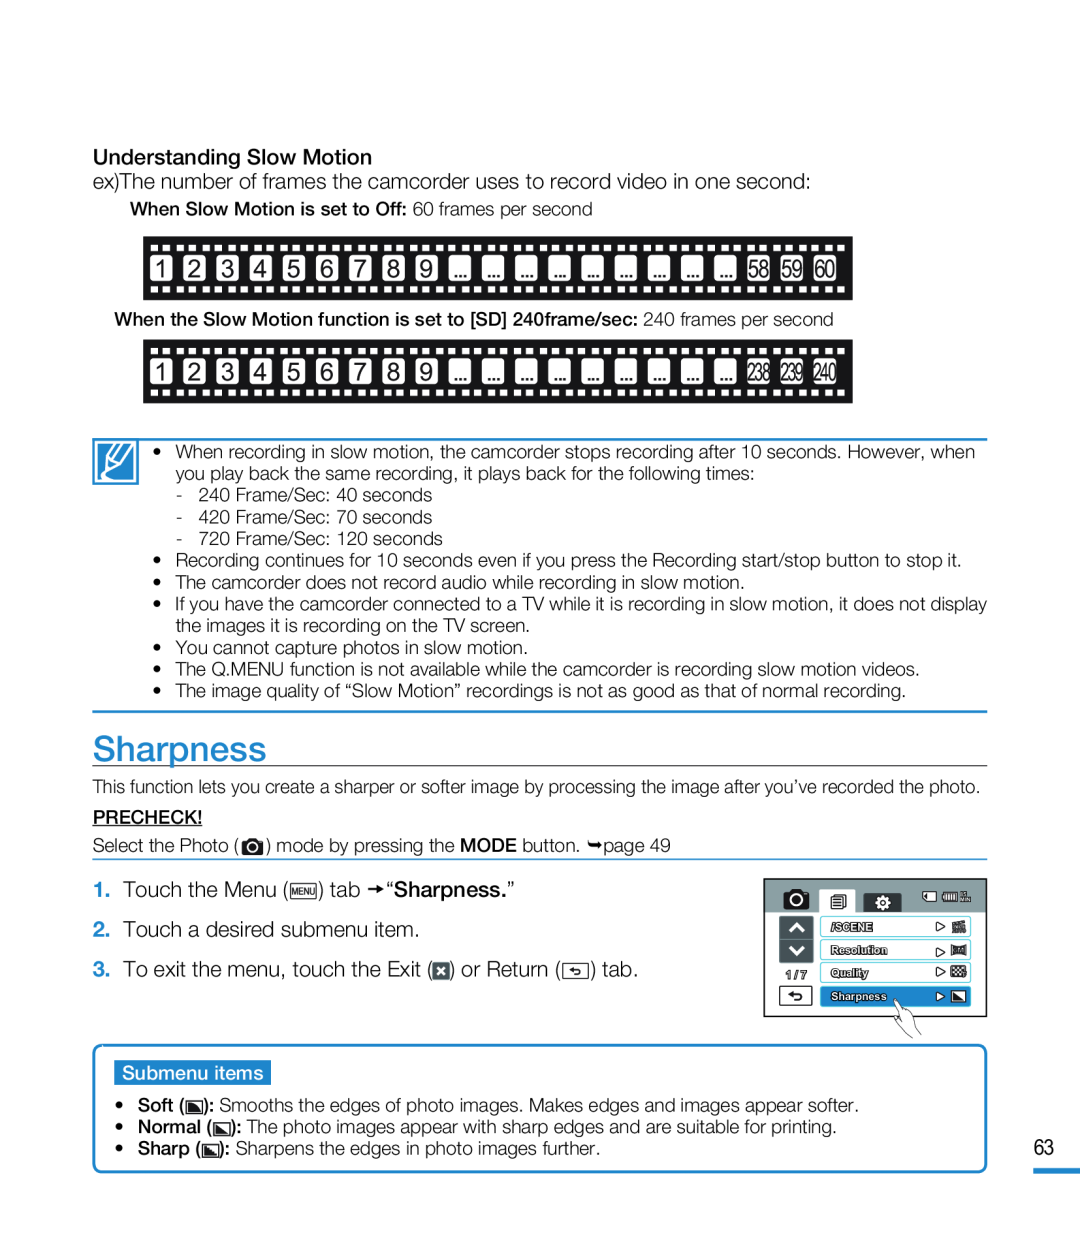 Sharpness
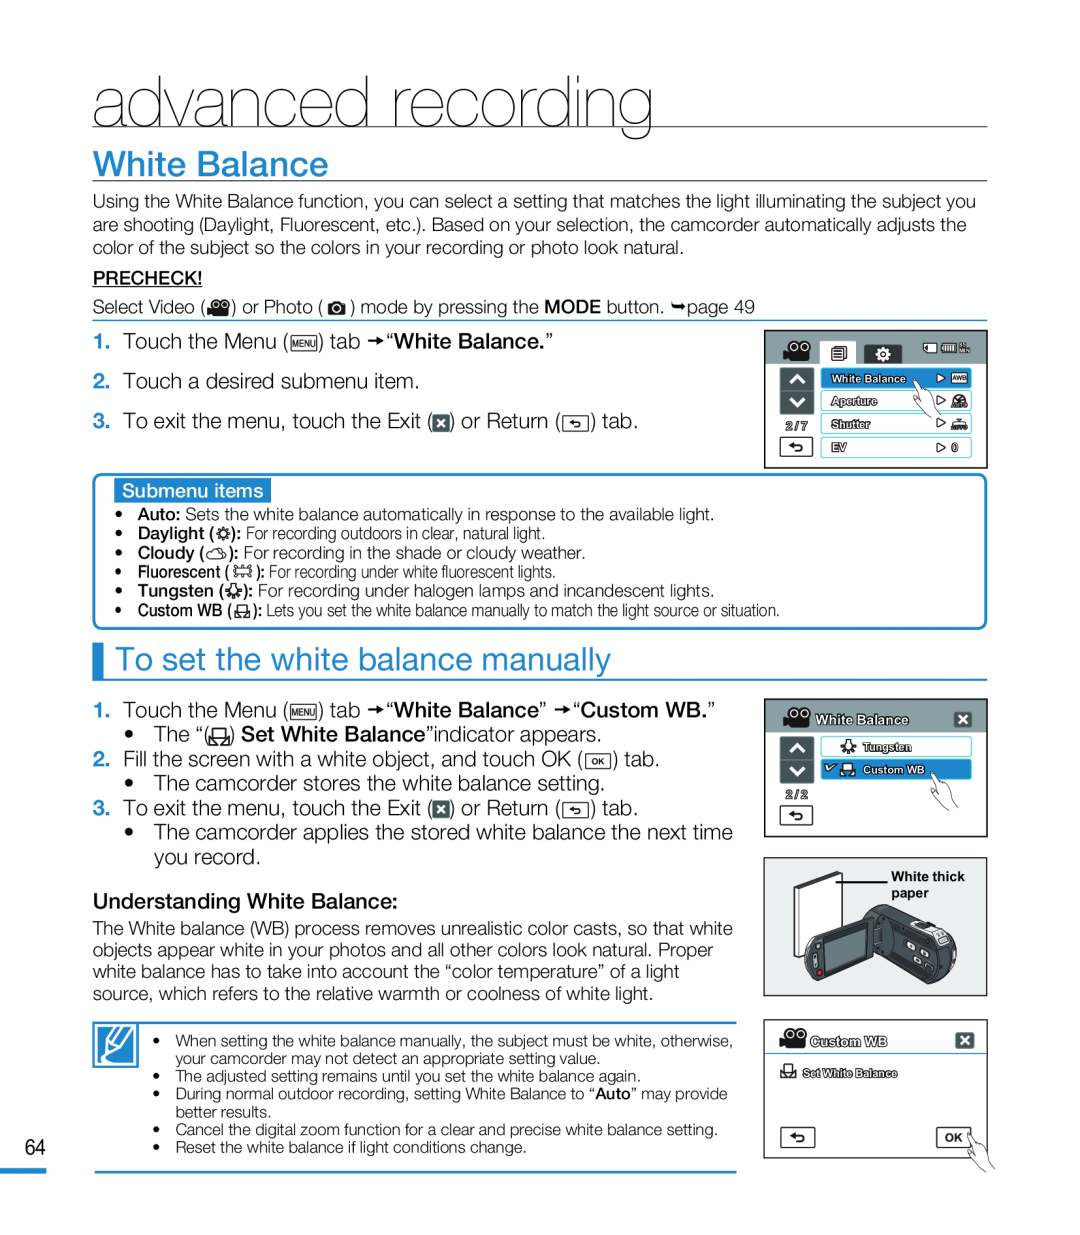 White Balance
To set the white balance manually
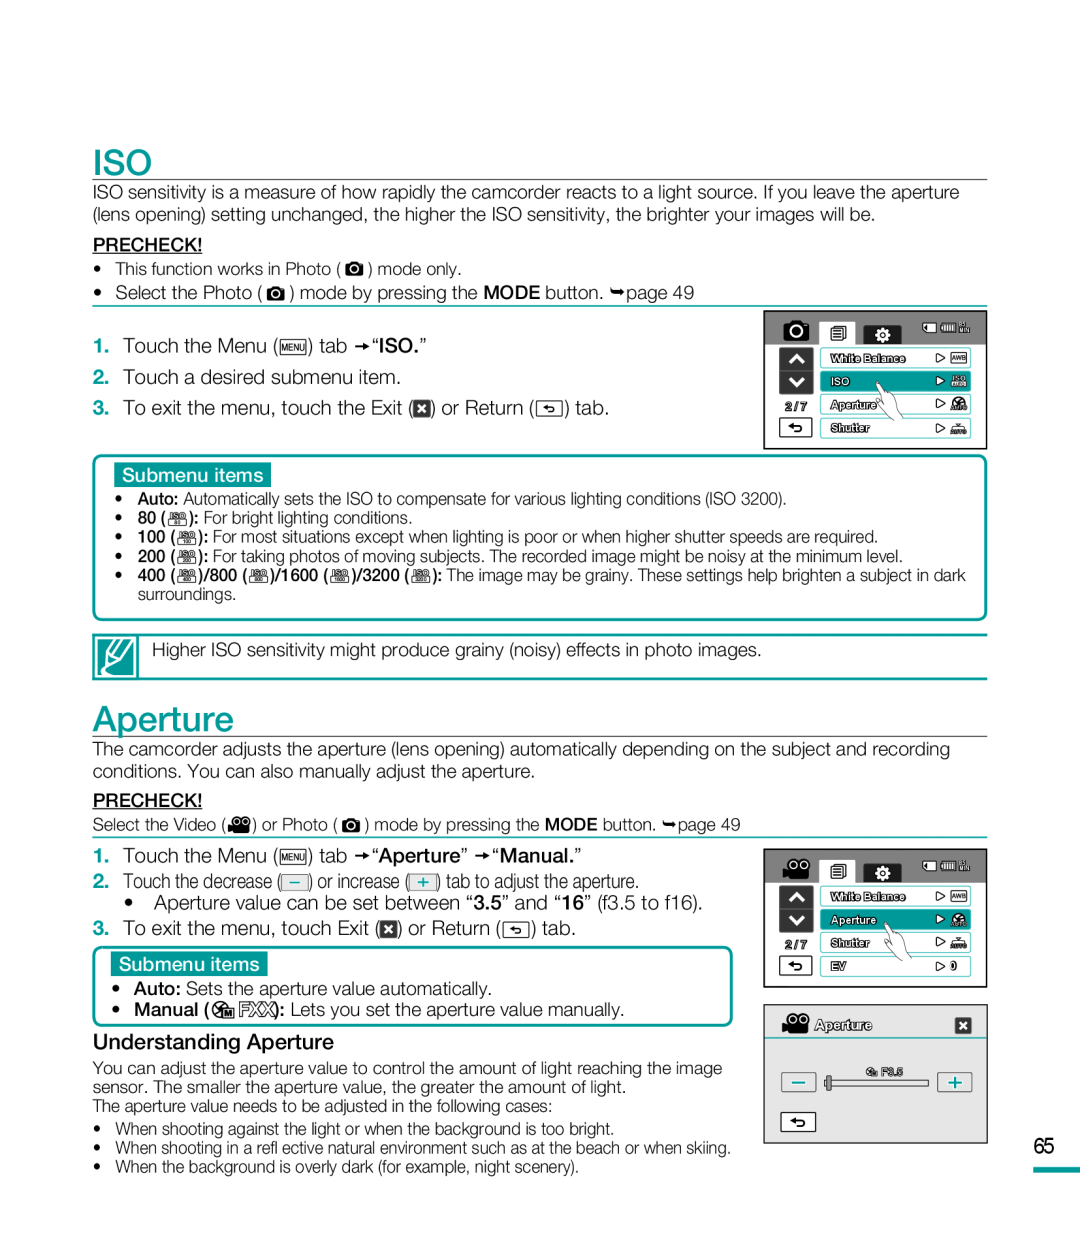 ISO
ISOAperture
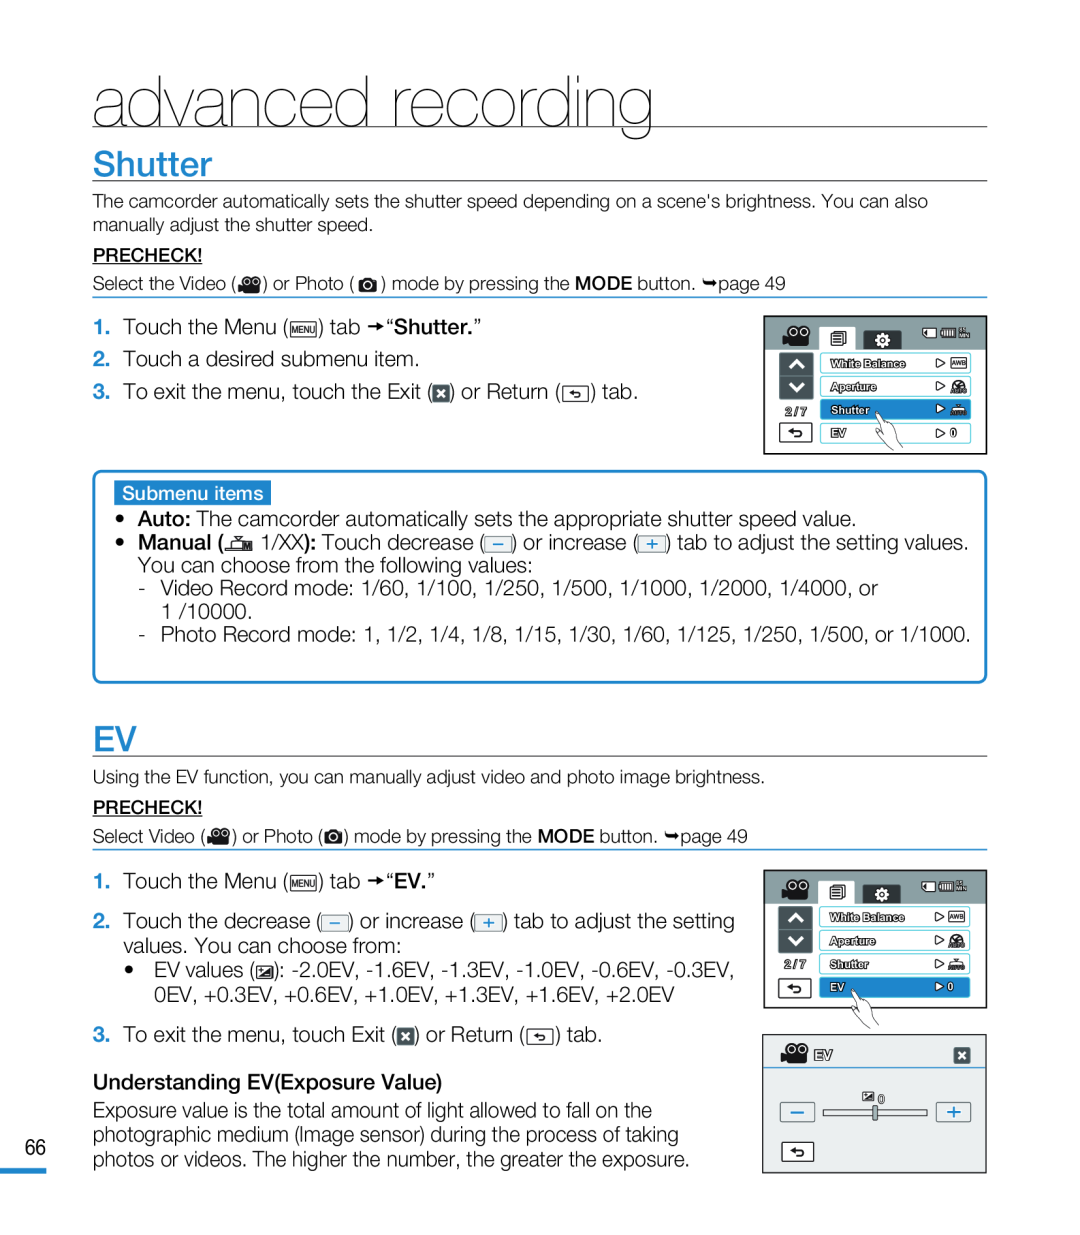 Shutter
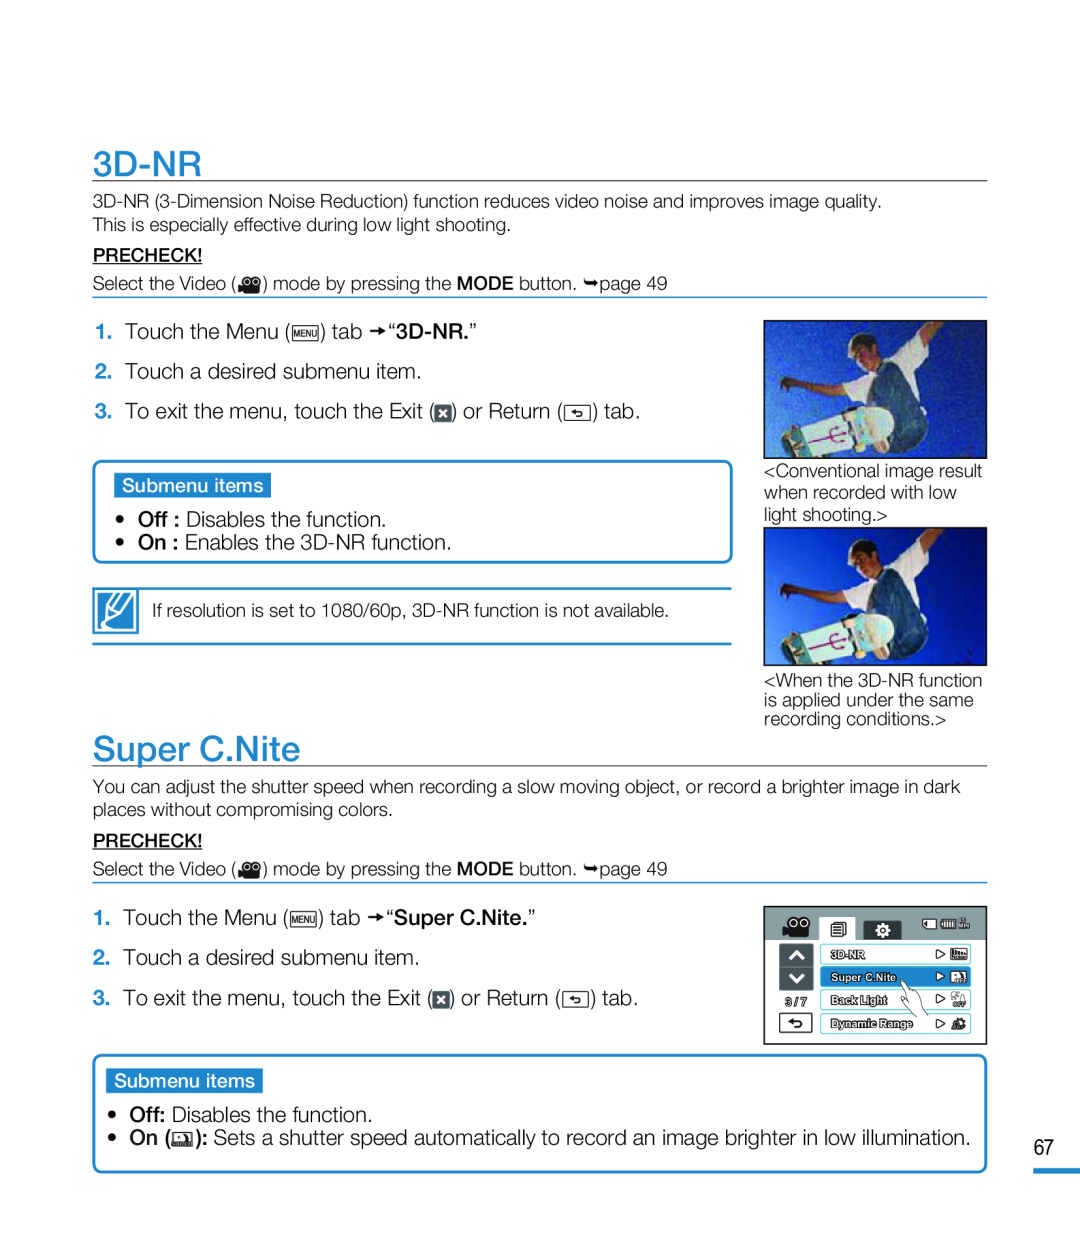 3D-NR
3D-NRSuper C.Nite
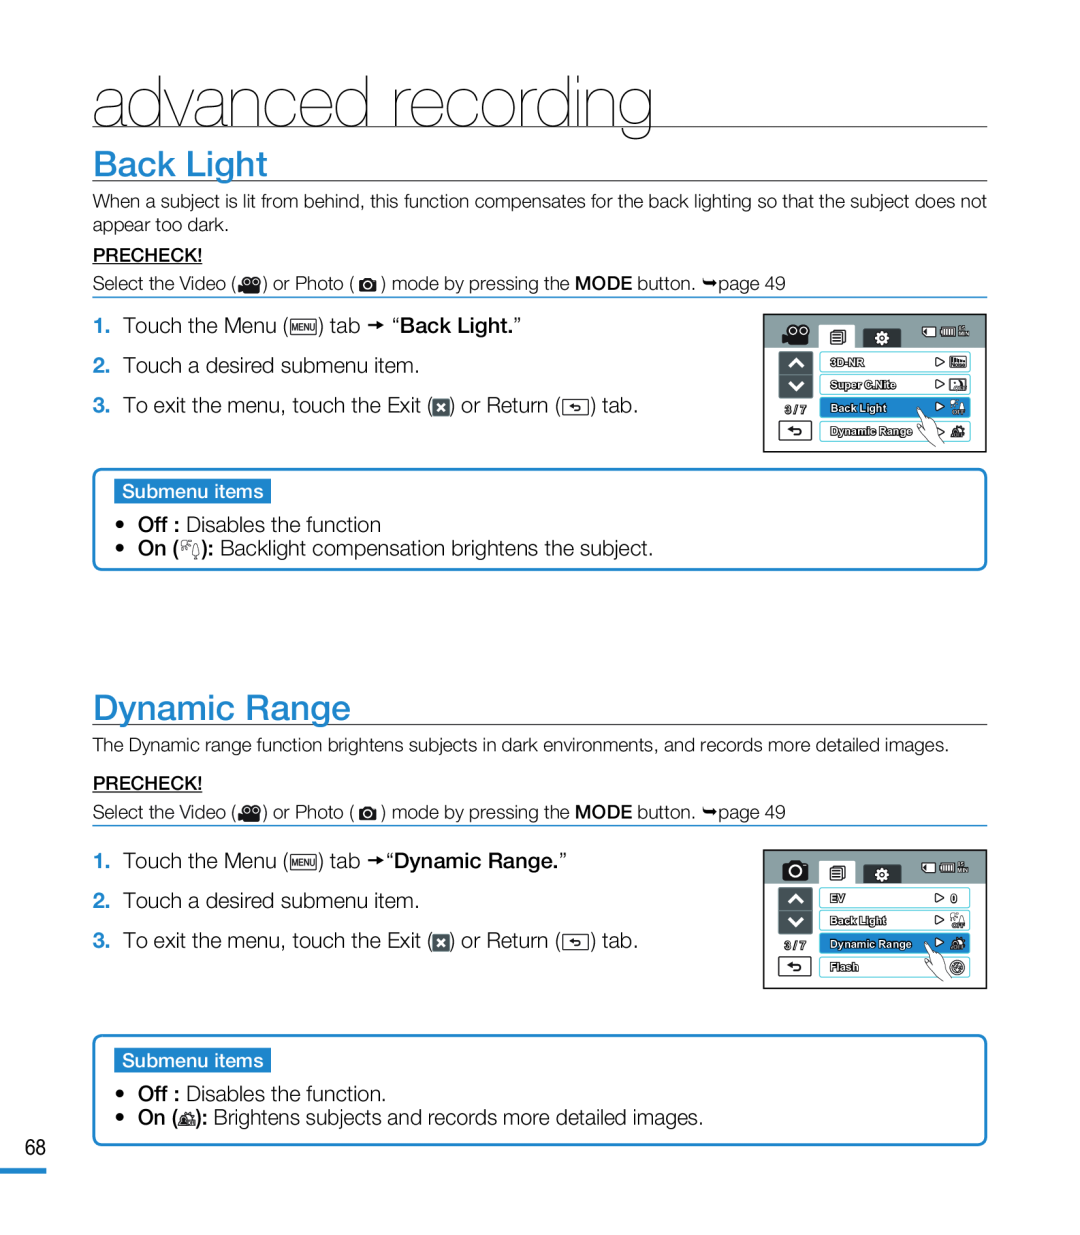 Back Light
Dynamic Range
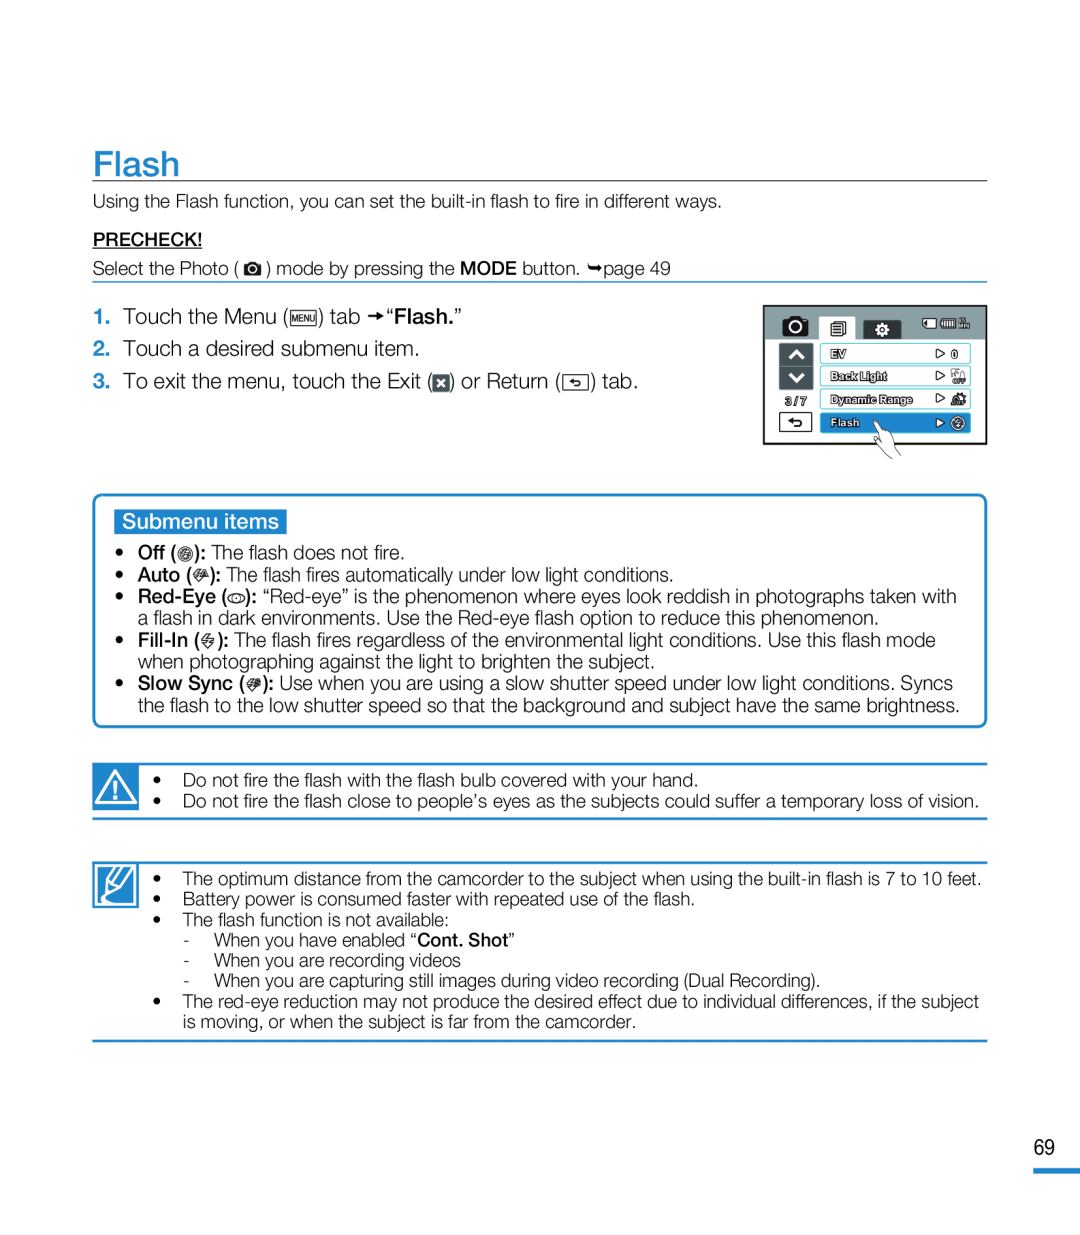 Flash
Flash
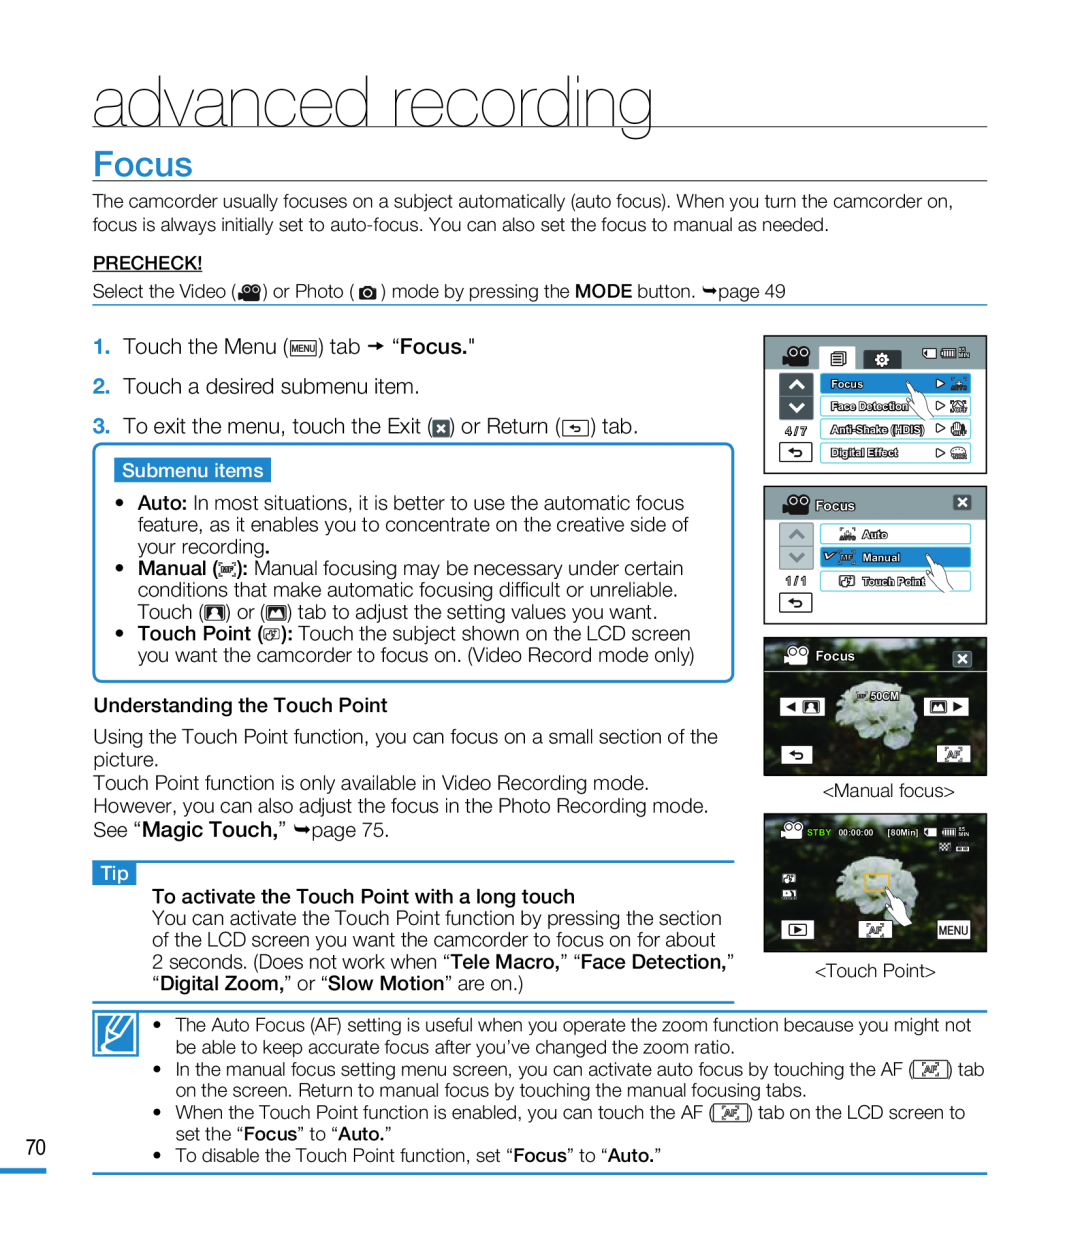 Focus
Focus
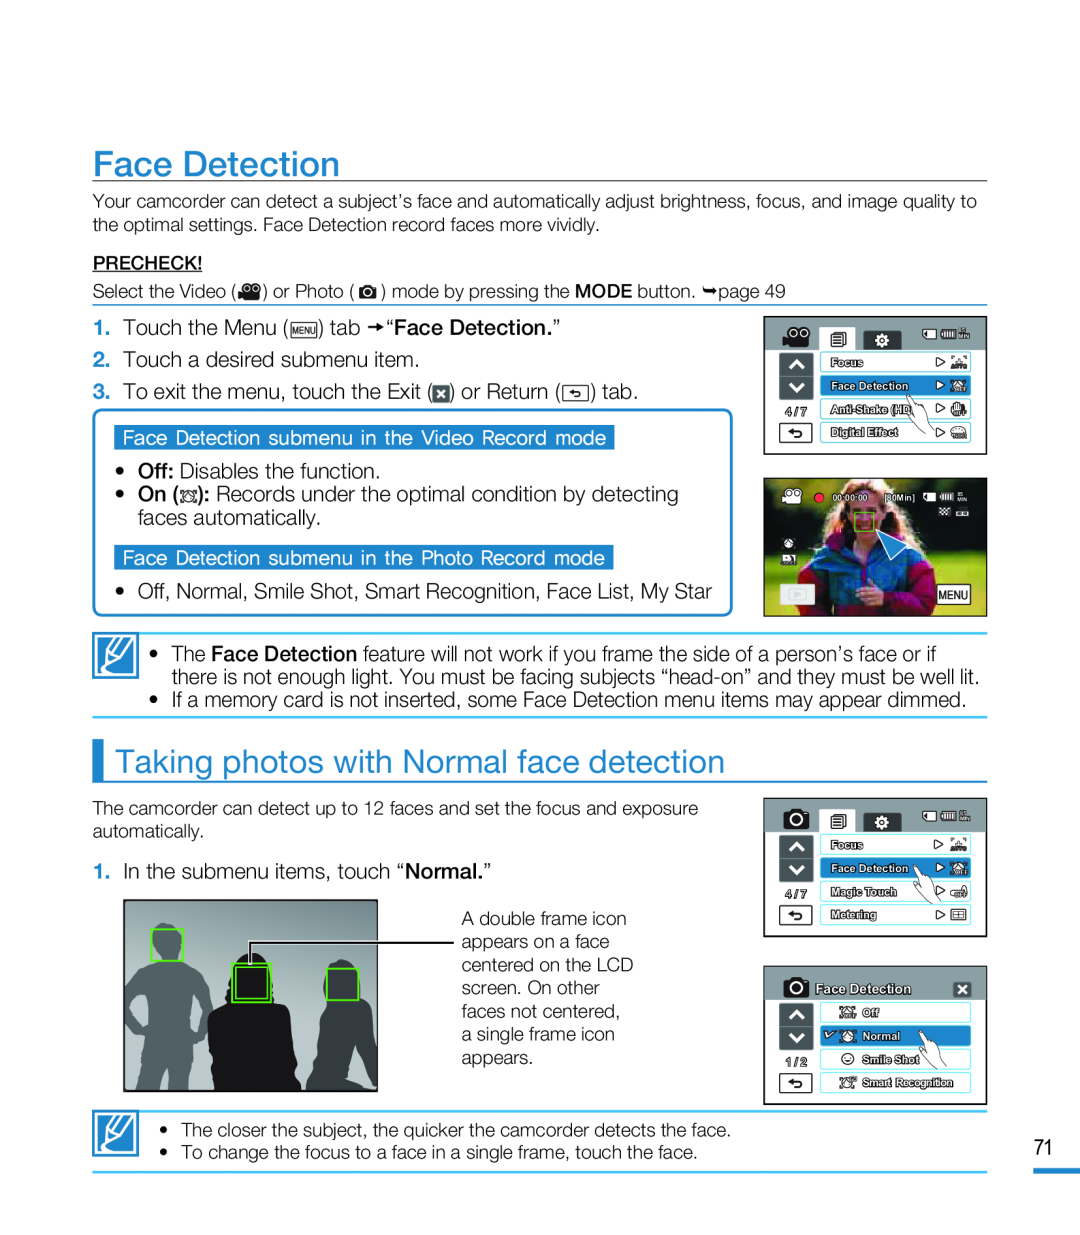 Face Detection
Taking photos with Normal face detection
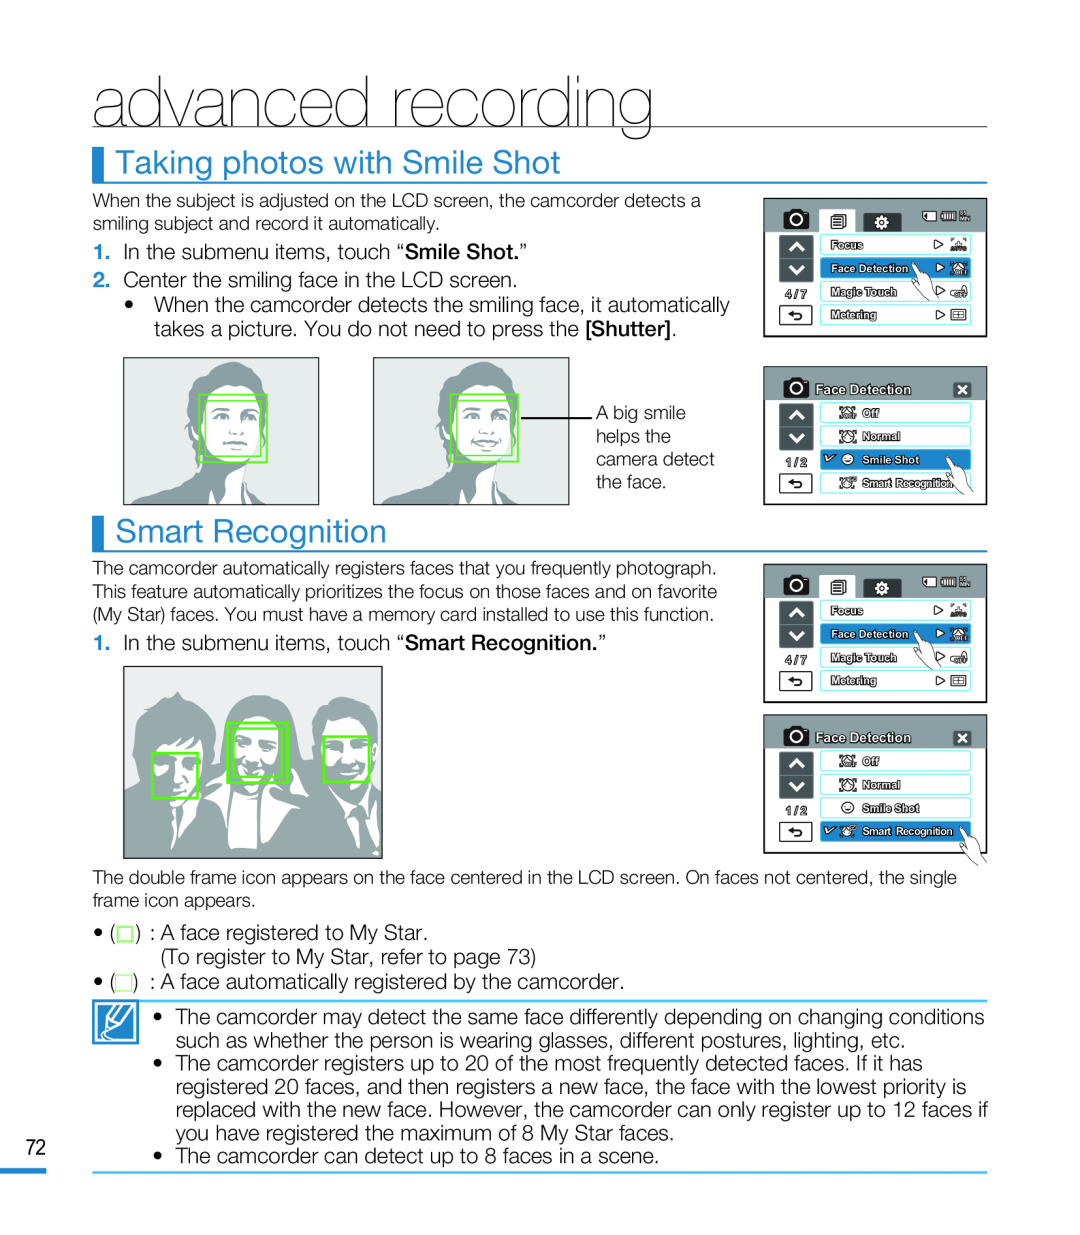 Taking photos with Smile Shot
Smart Recognition
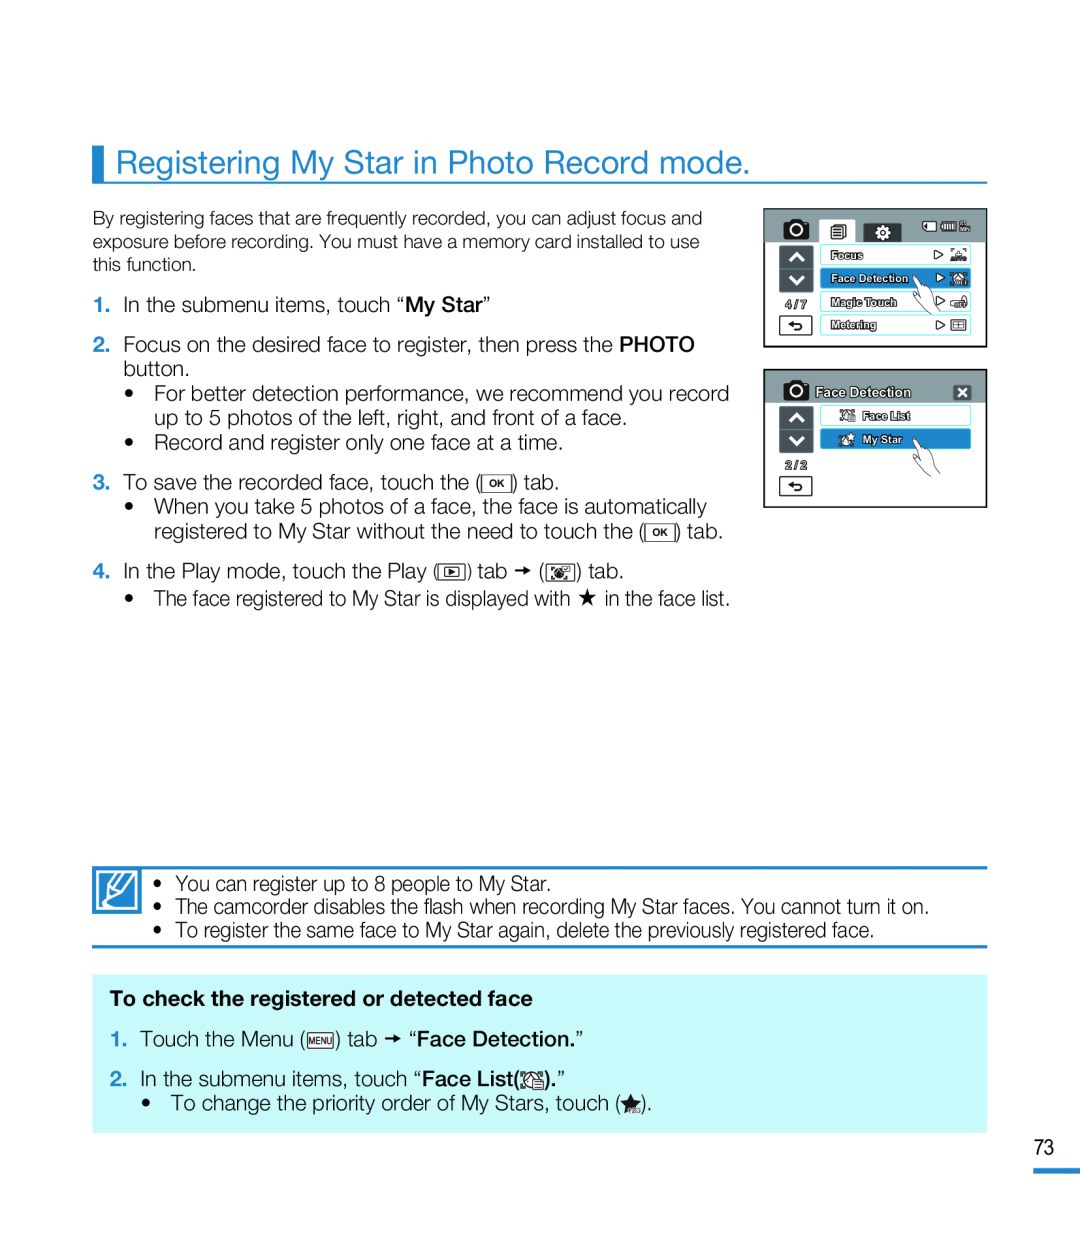 Registering My Star in Photo Record mode
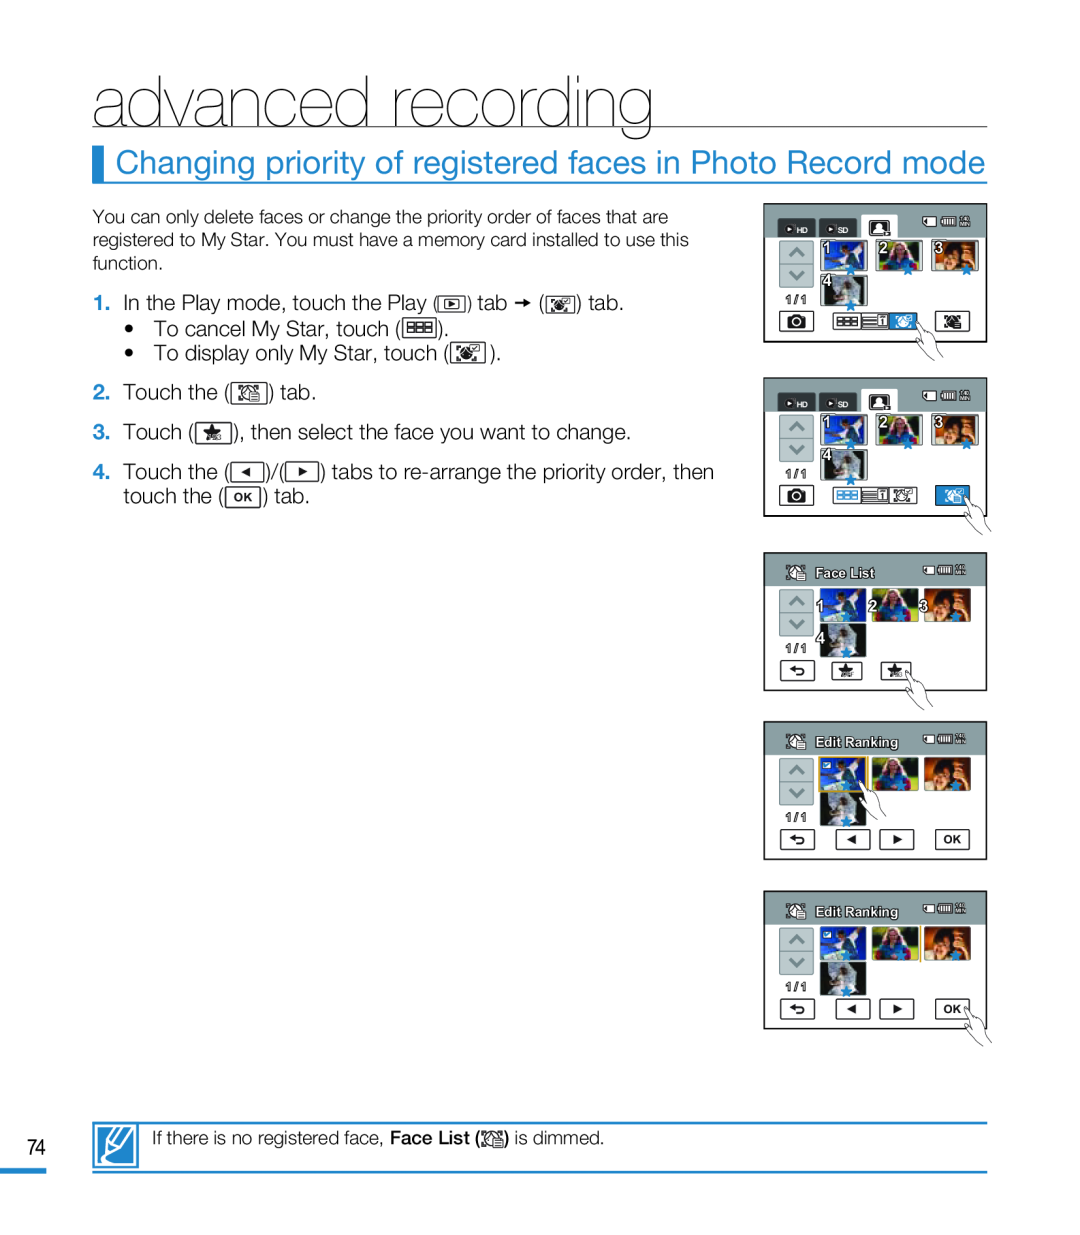 Changing priority of registered faces in Photo Record mode
 Magic Touch
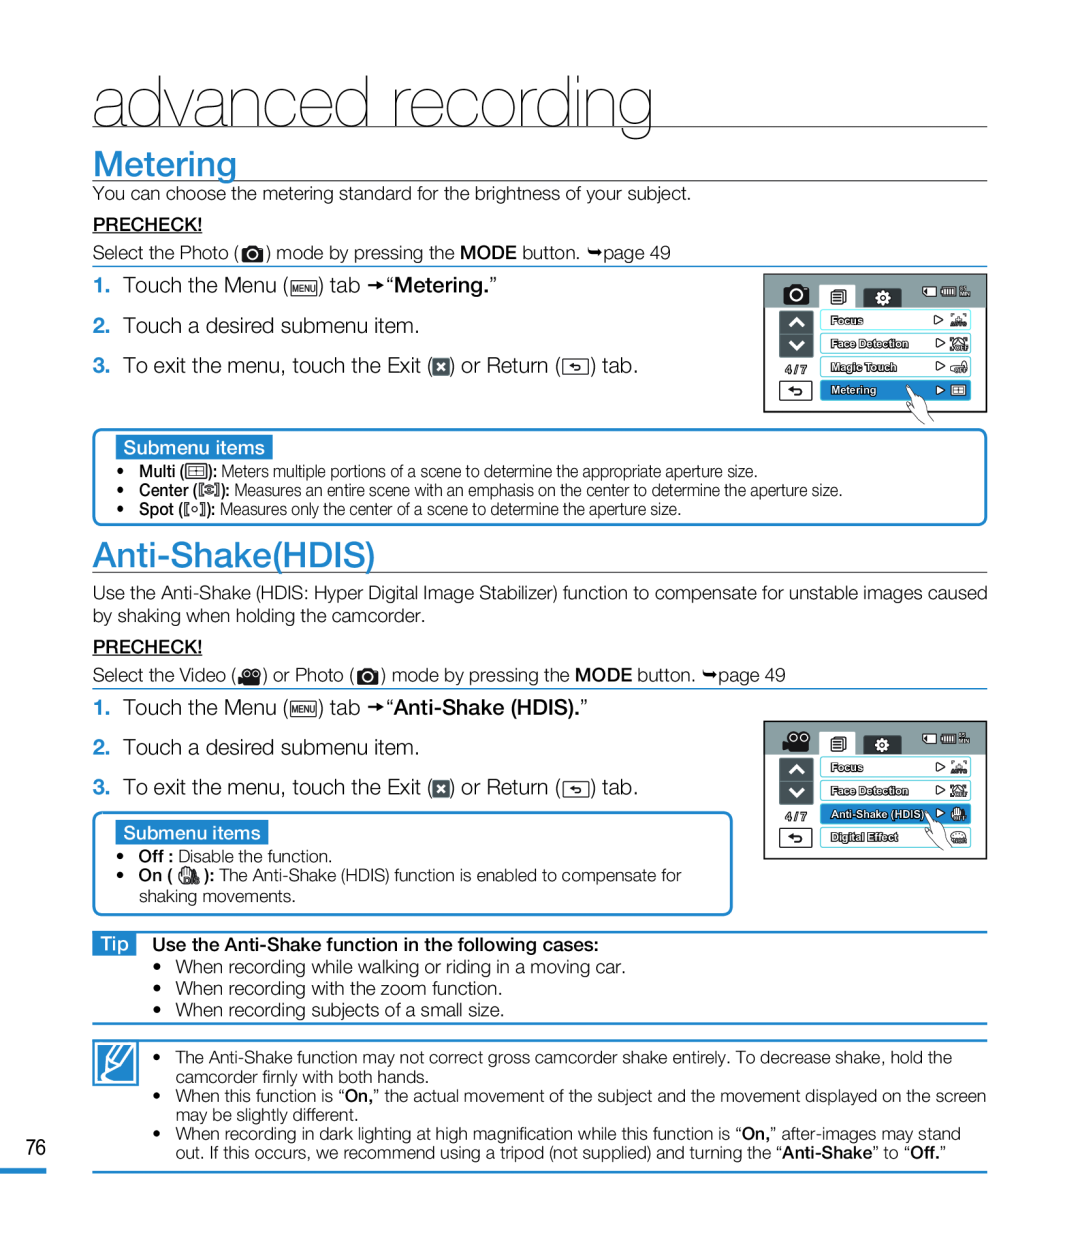 Metering
Anti-Shake(HDIS)
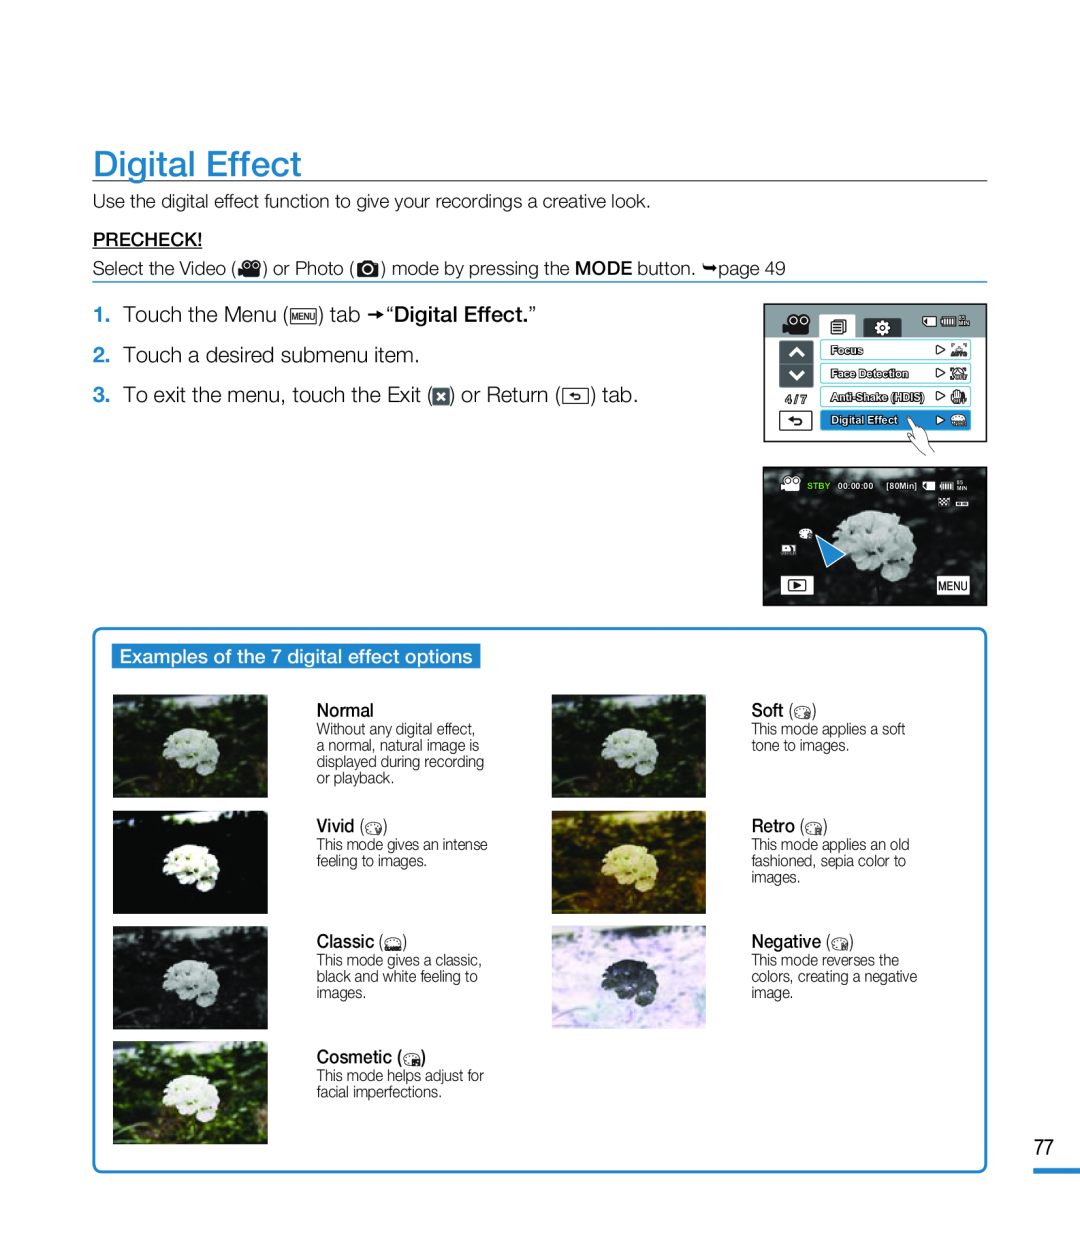 Digital Effect
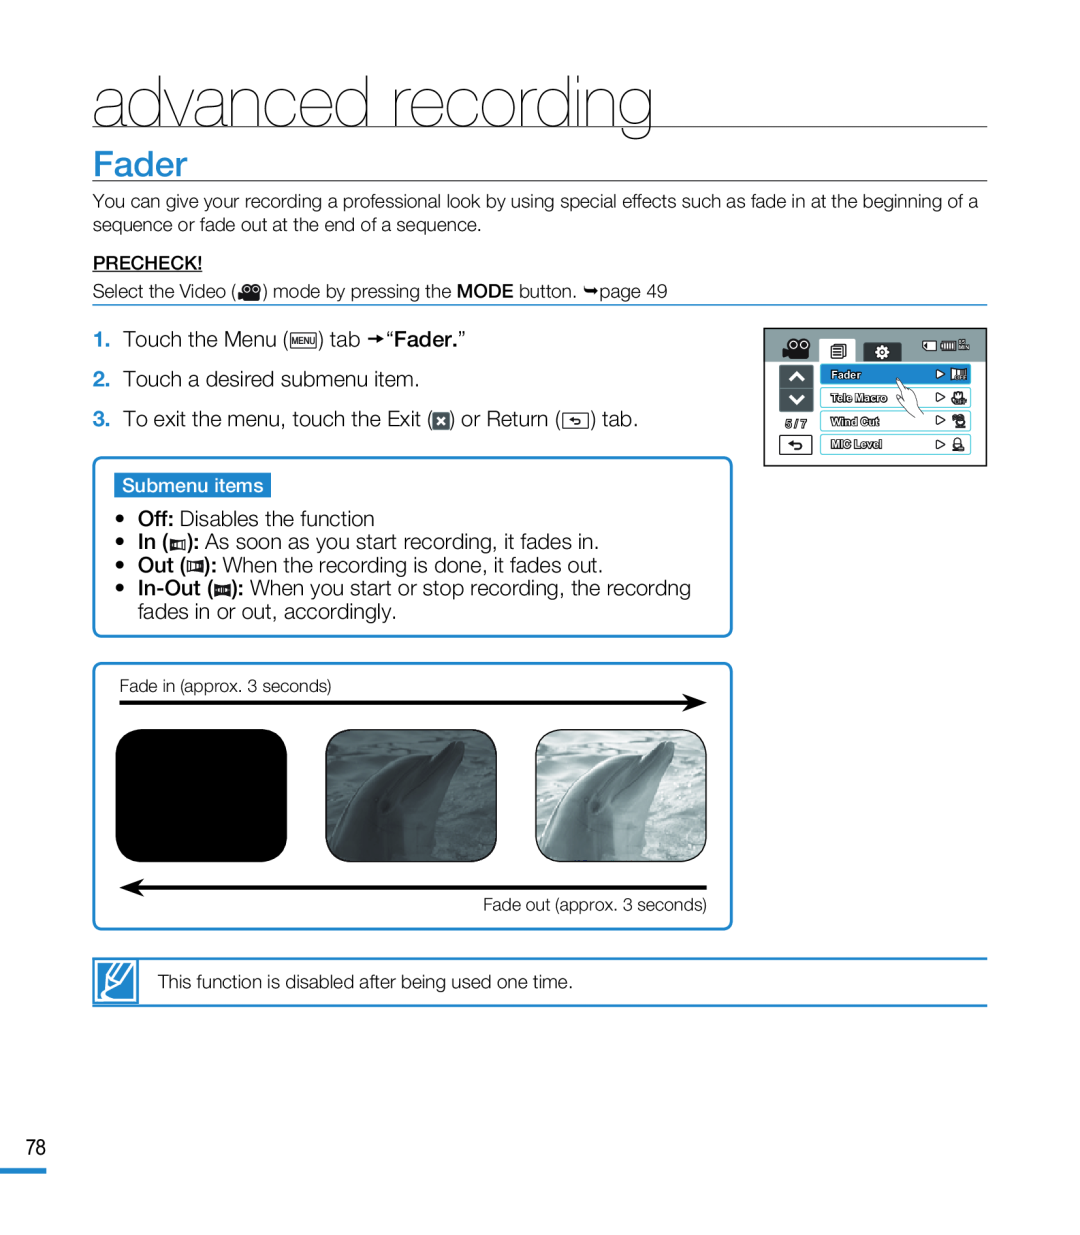 Fader
Fader
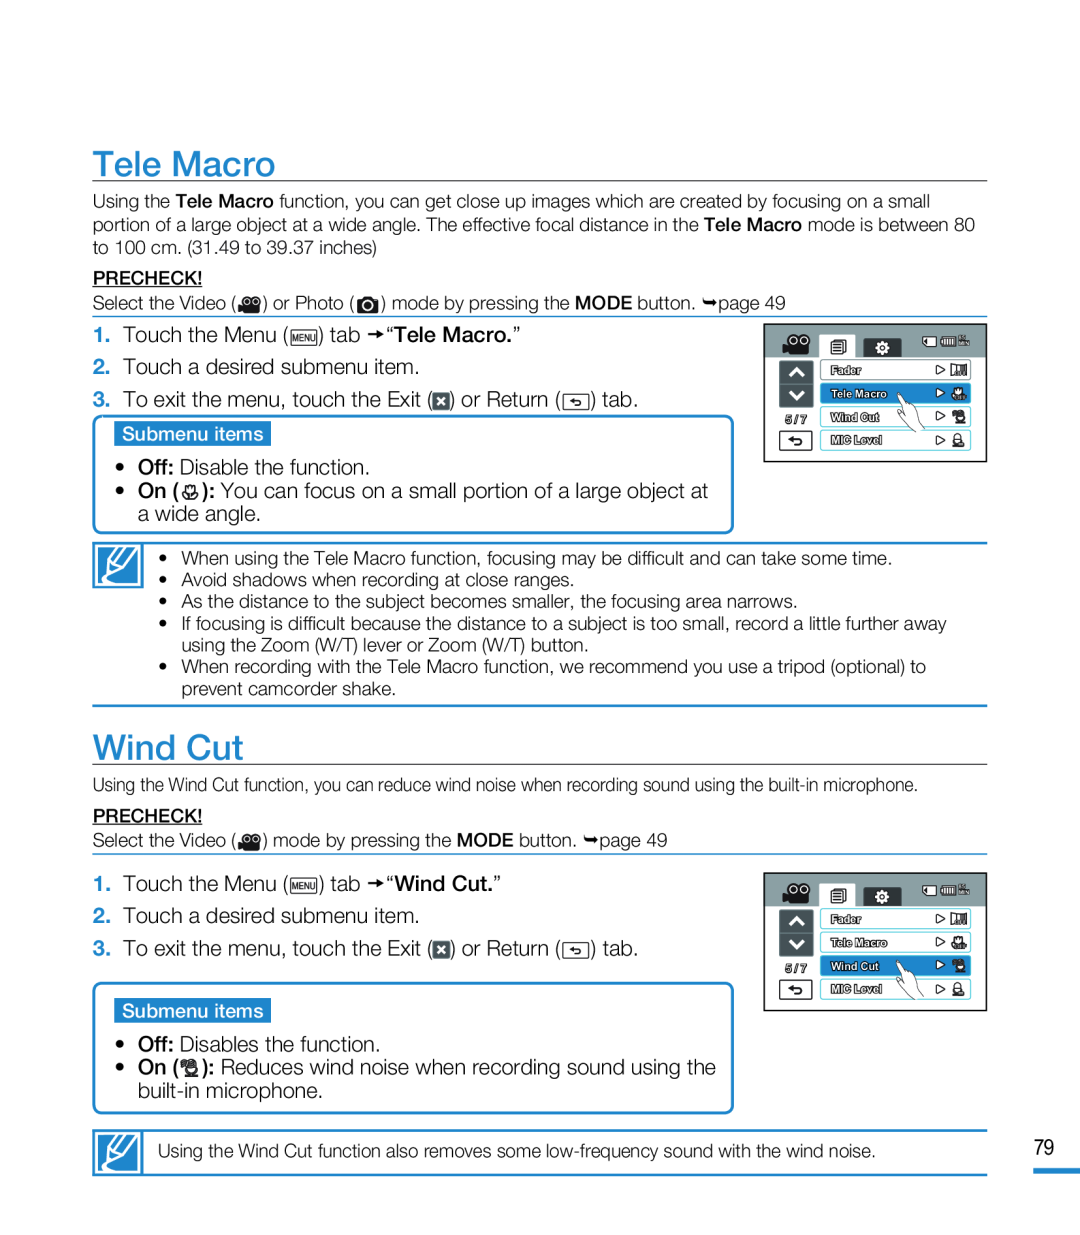 Tele Macro
Wind Cut
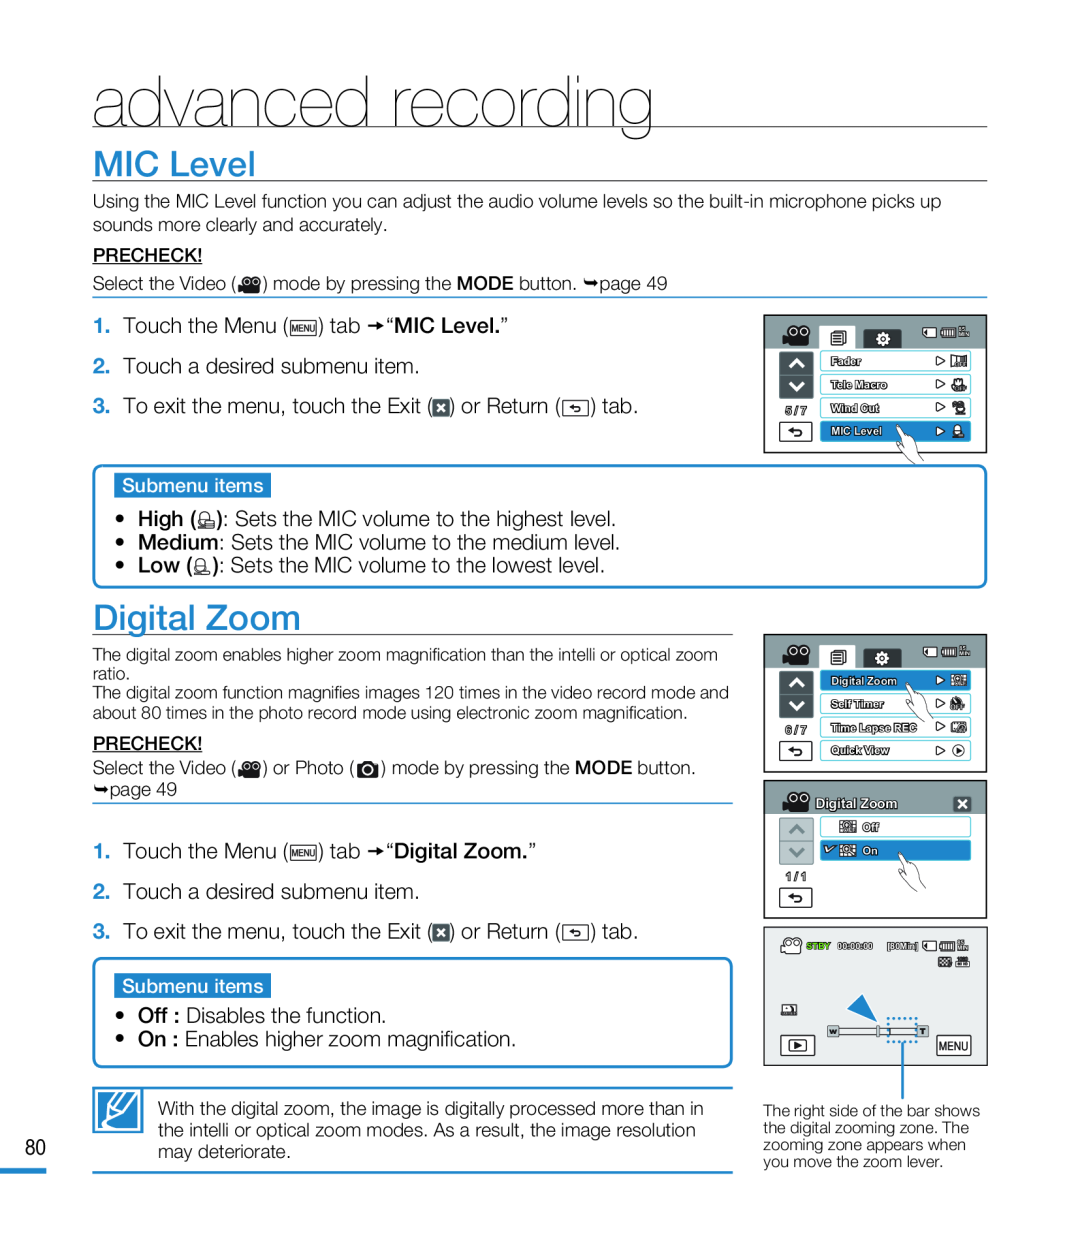 MIC Level
Digital Zoom
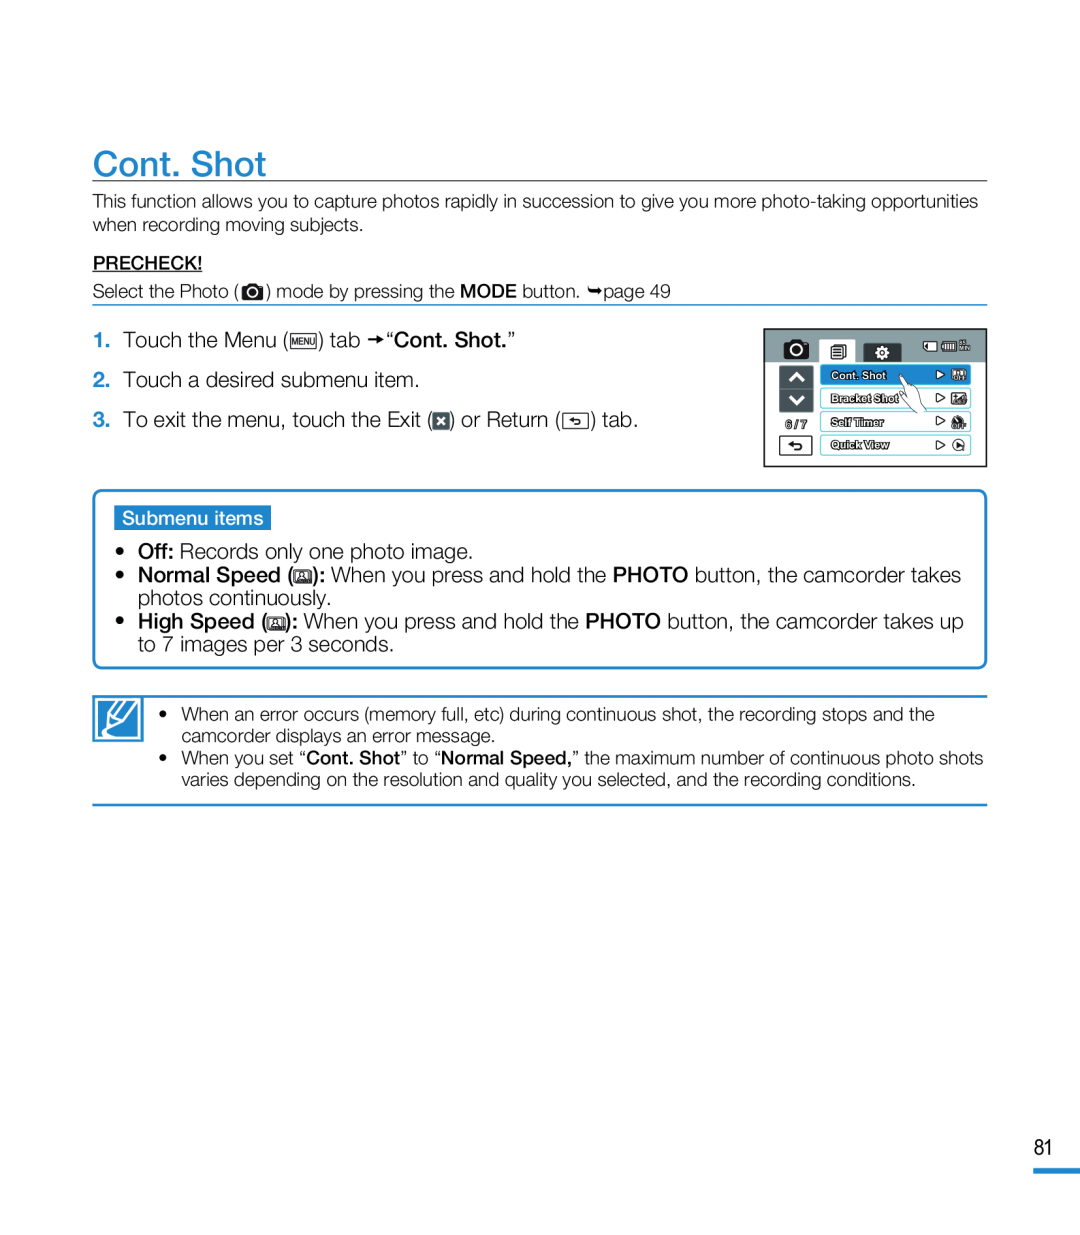 Cont. Shot
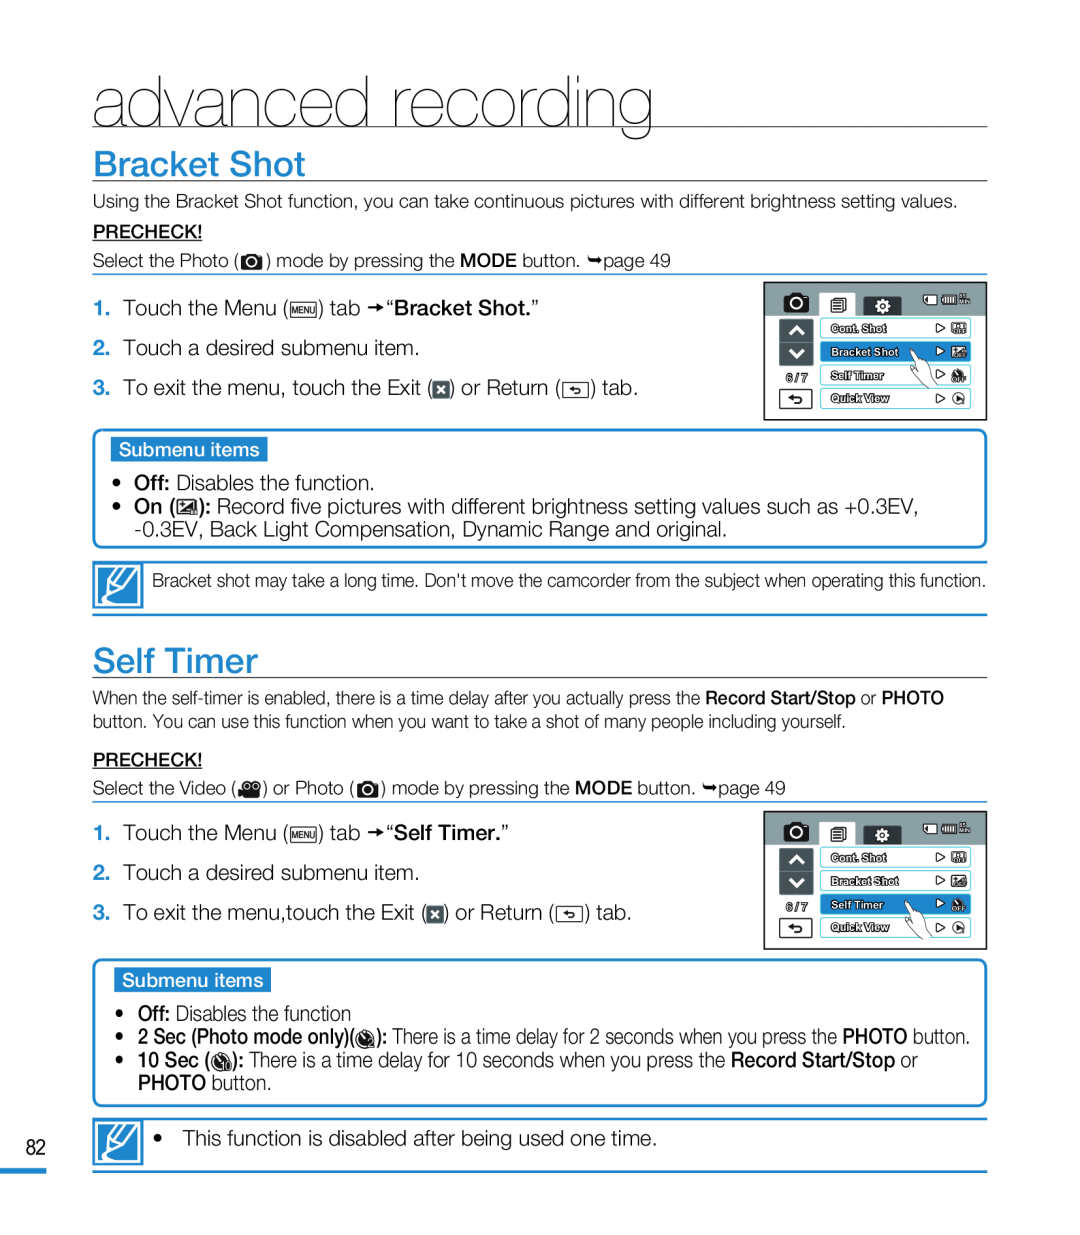 Bracket Shot
Self Timer
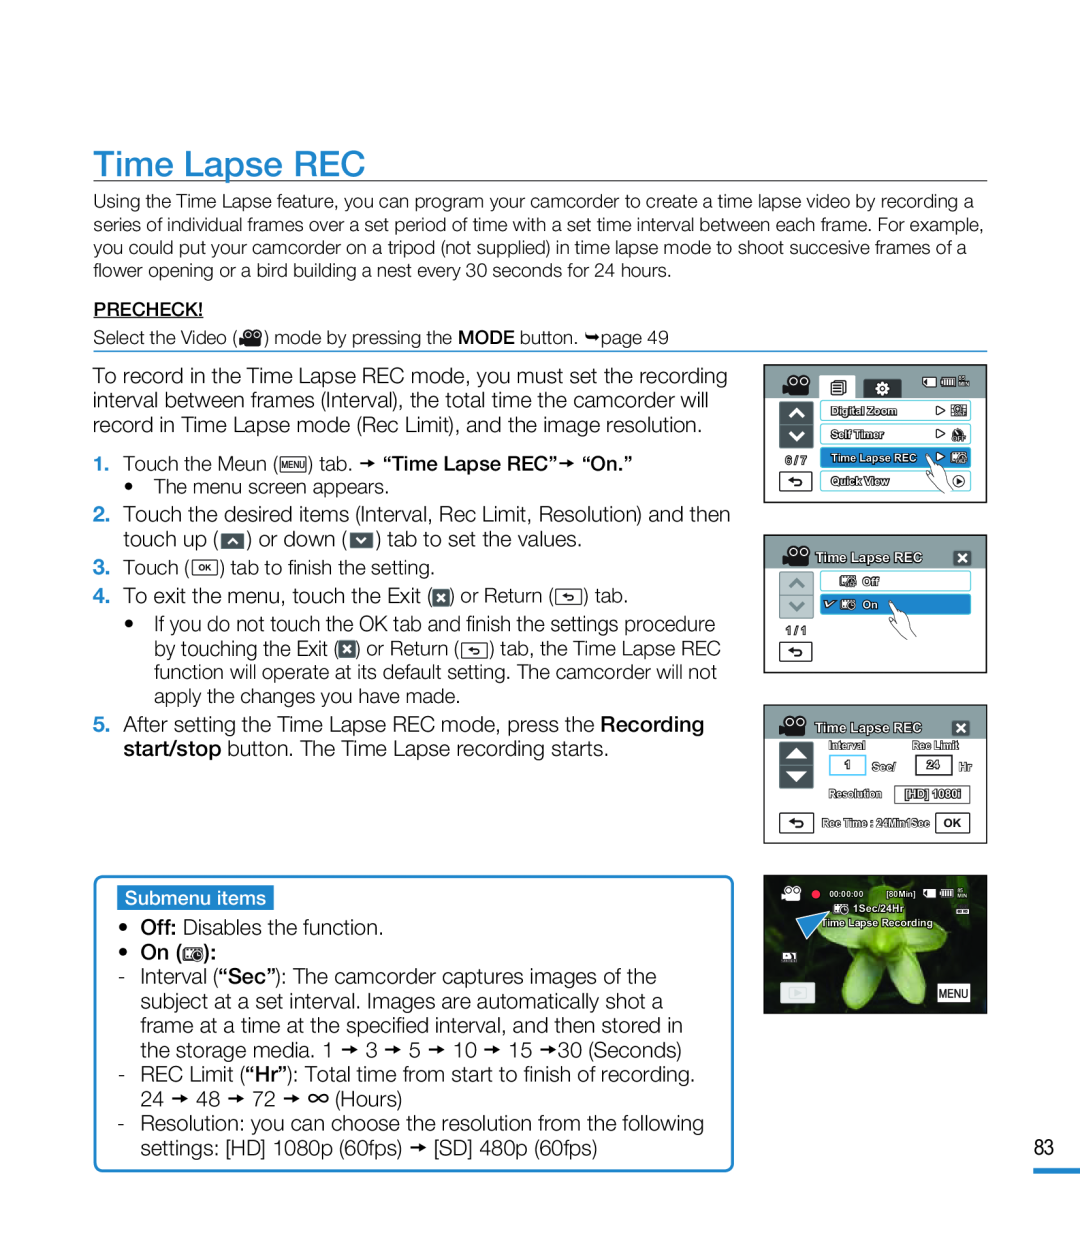 Time Lapse REC
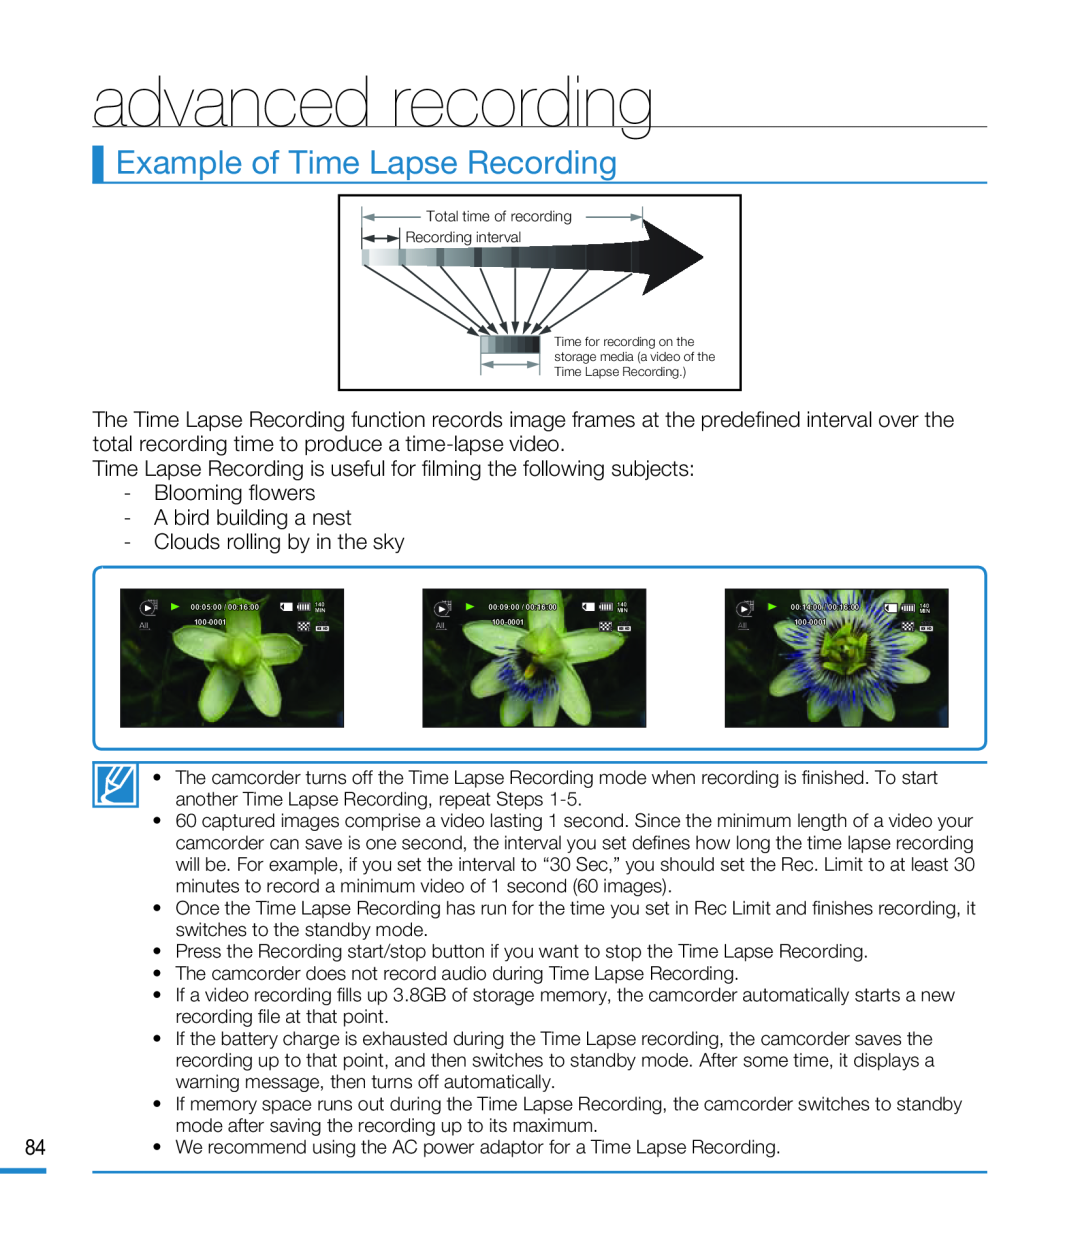 Example of Time Lapse Recording
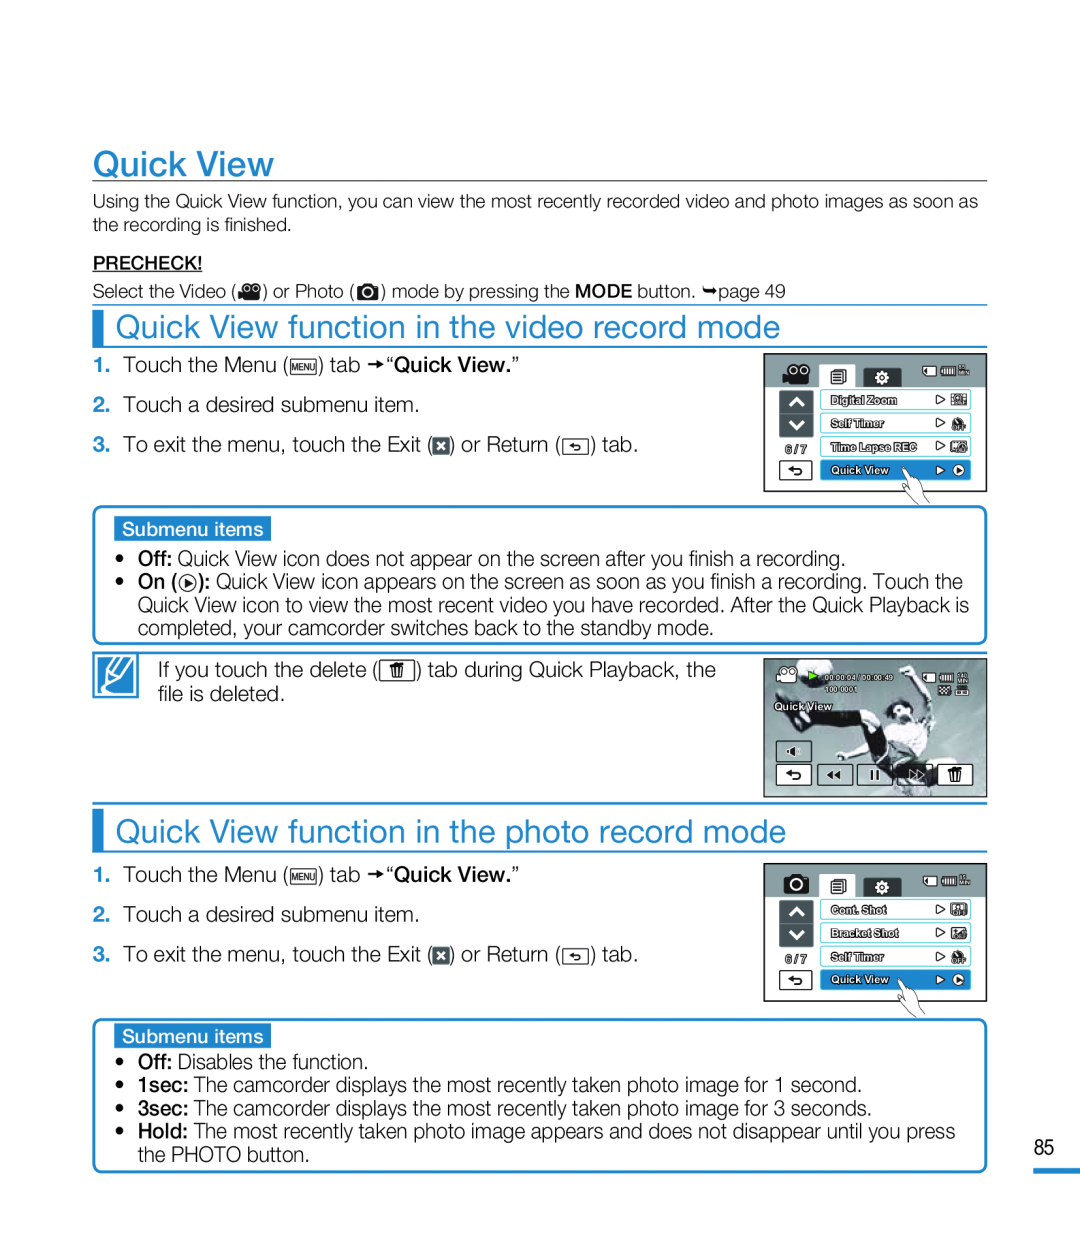 Quick View
Quick View function in the video record mode
Quick View function in the photo record mode
 advanced playback
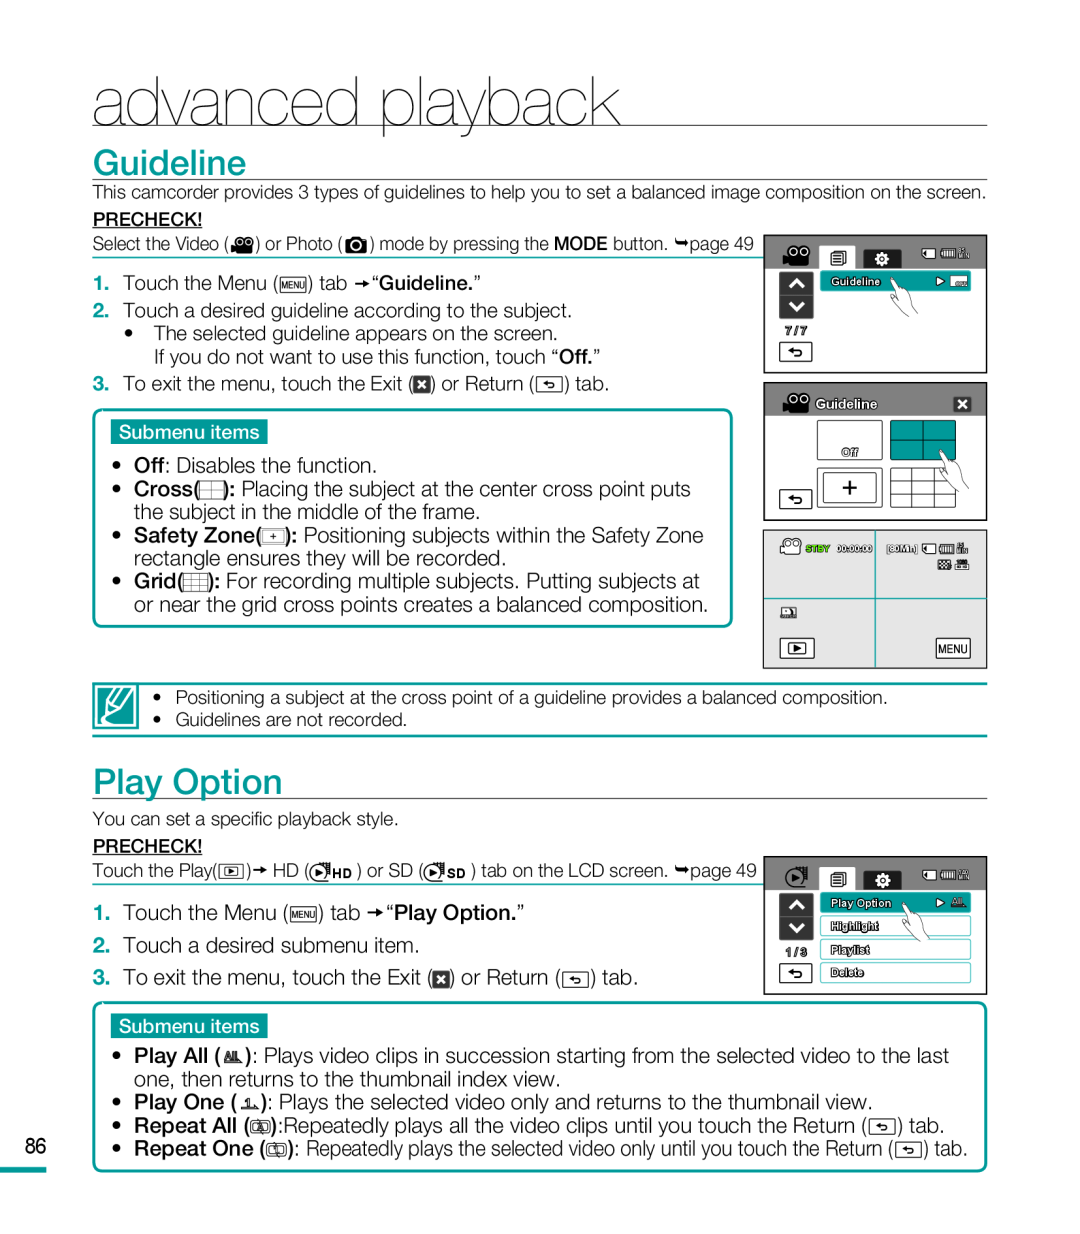
Guideline
Play Option
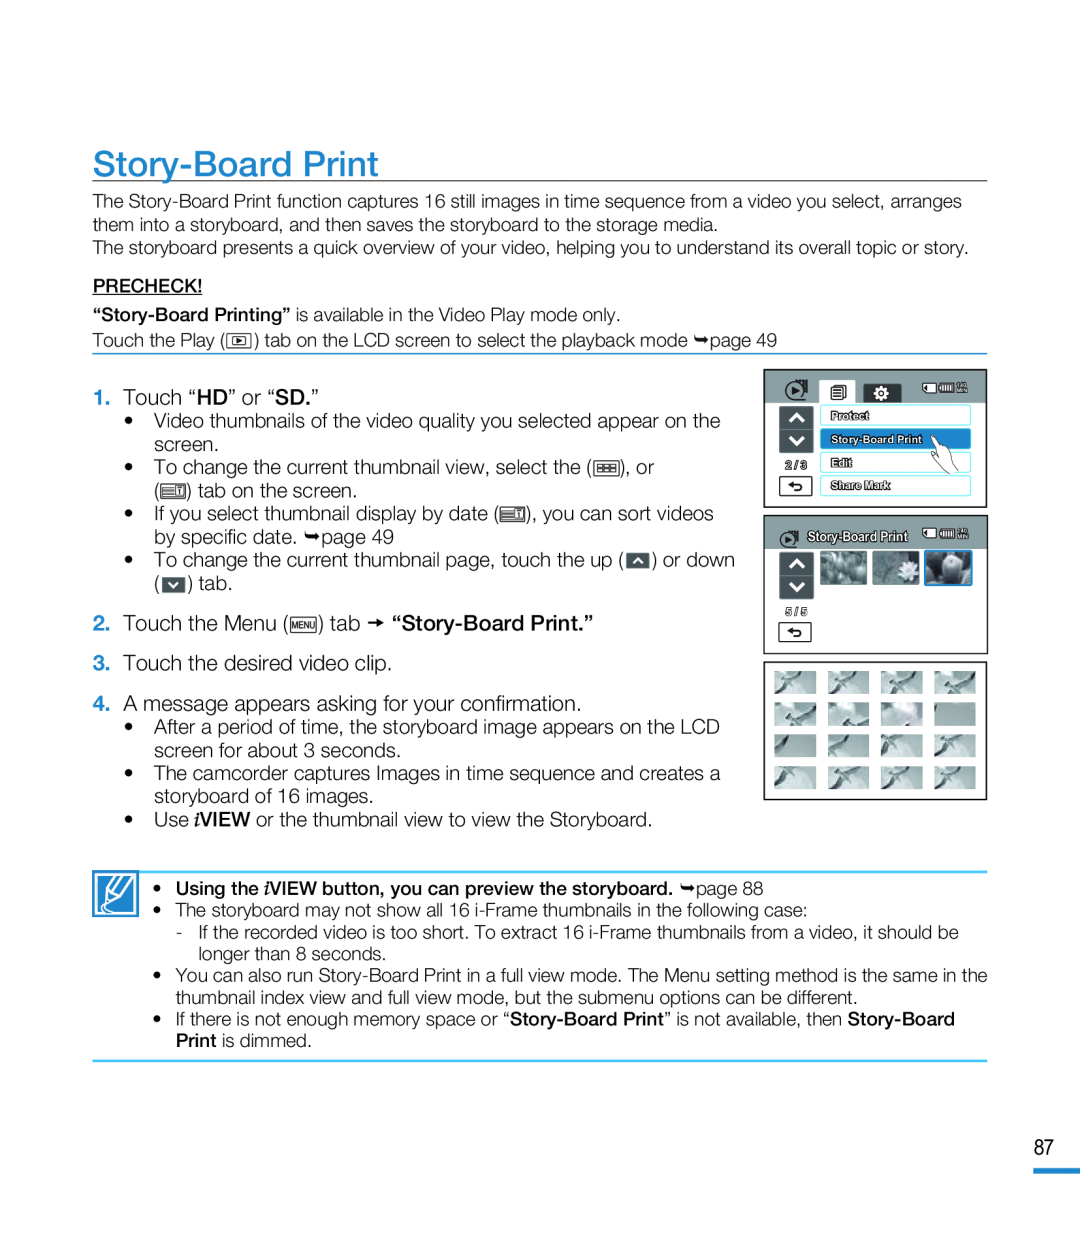 Story-BoardPrint
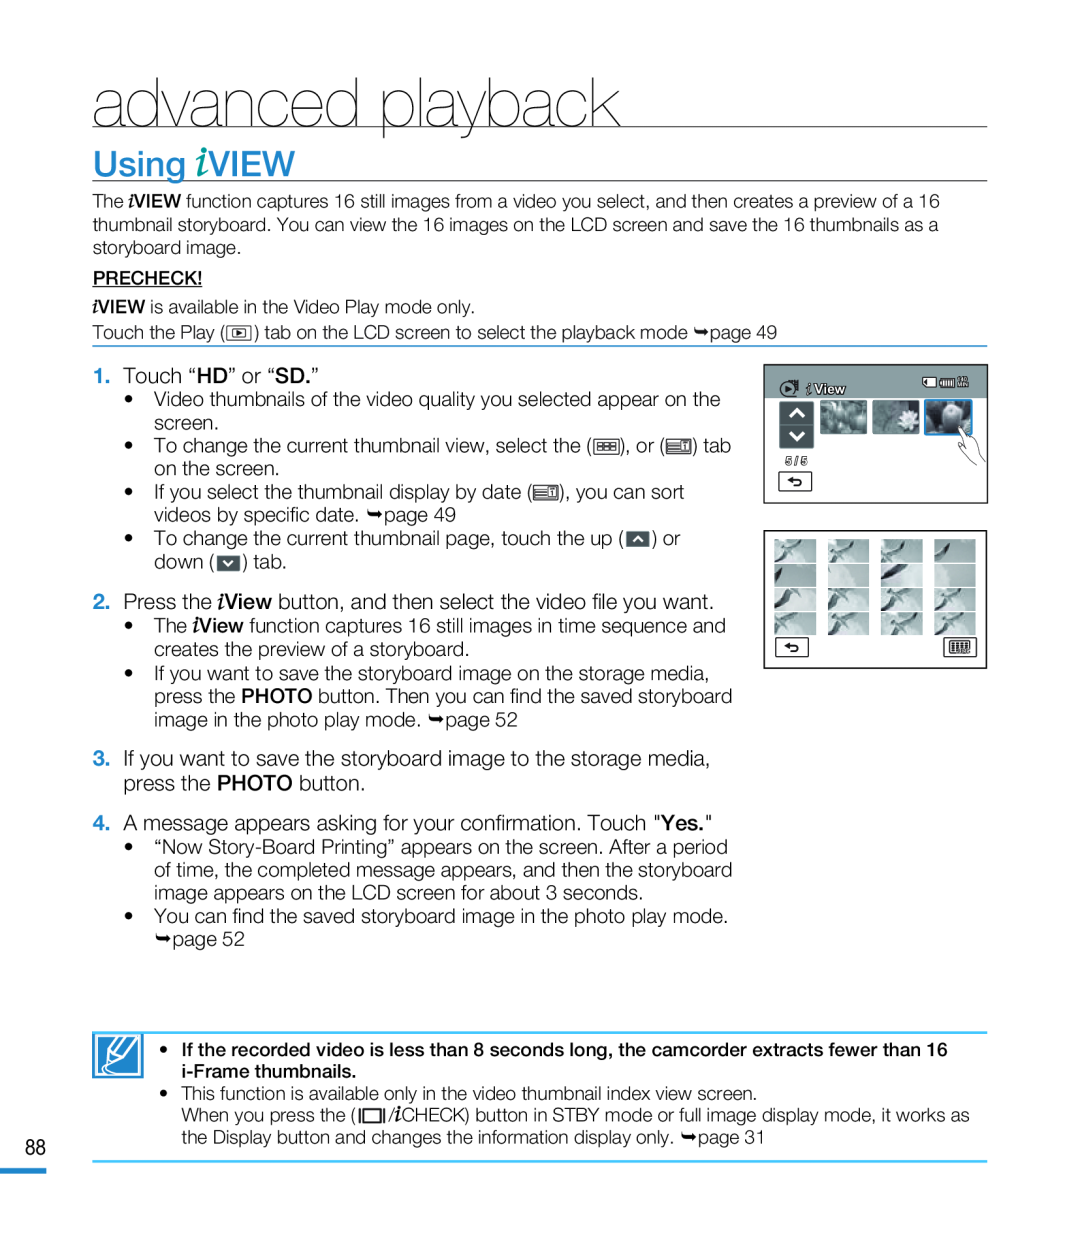 Using VIEW
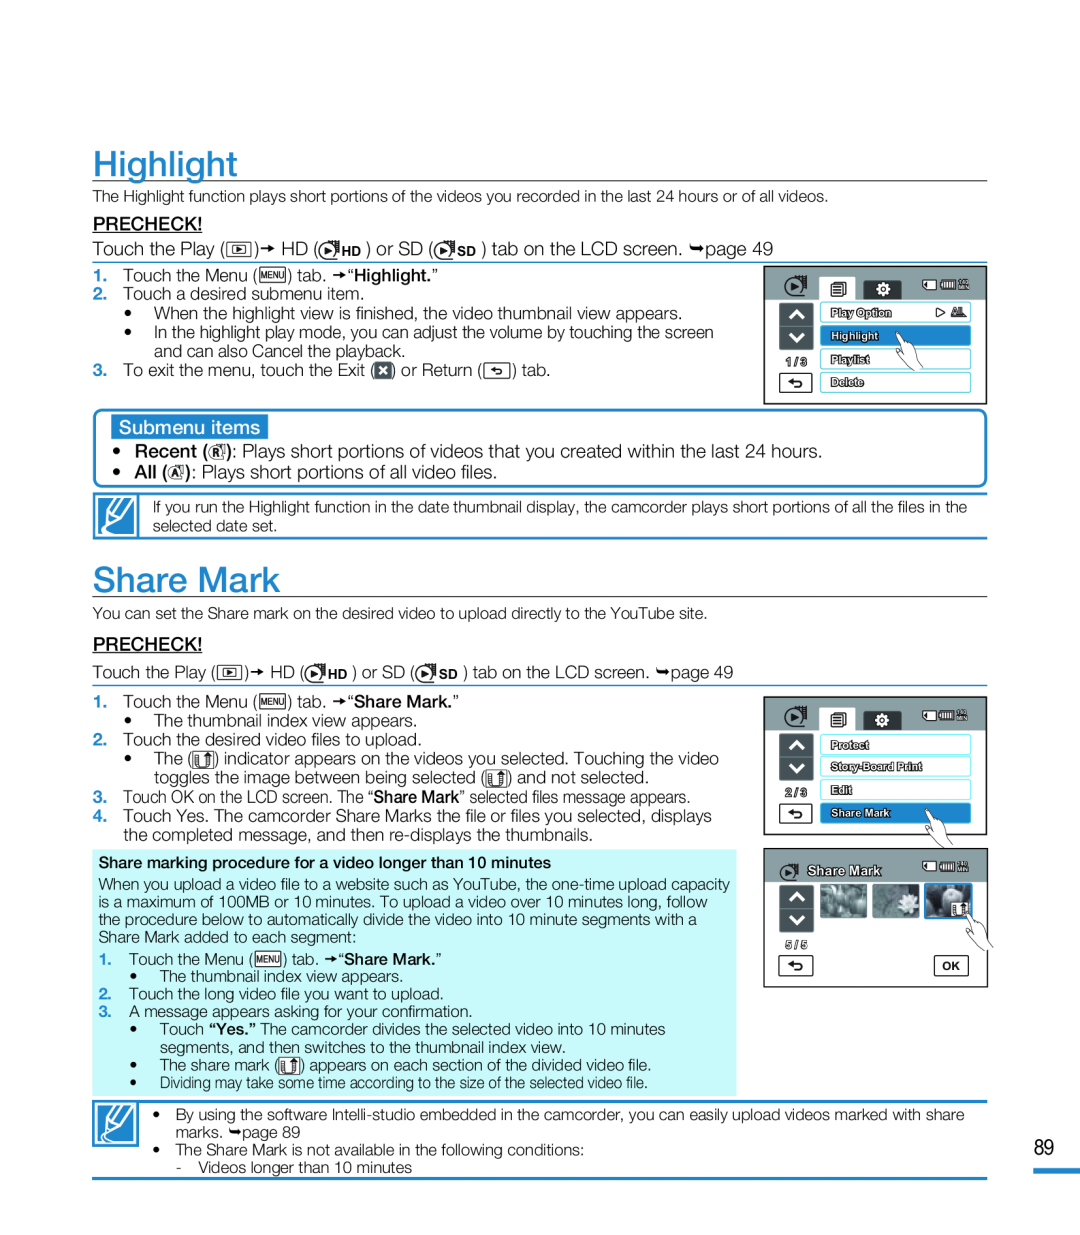 Highlight
Share Mark
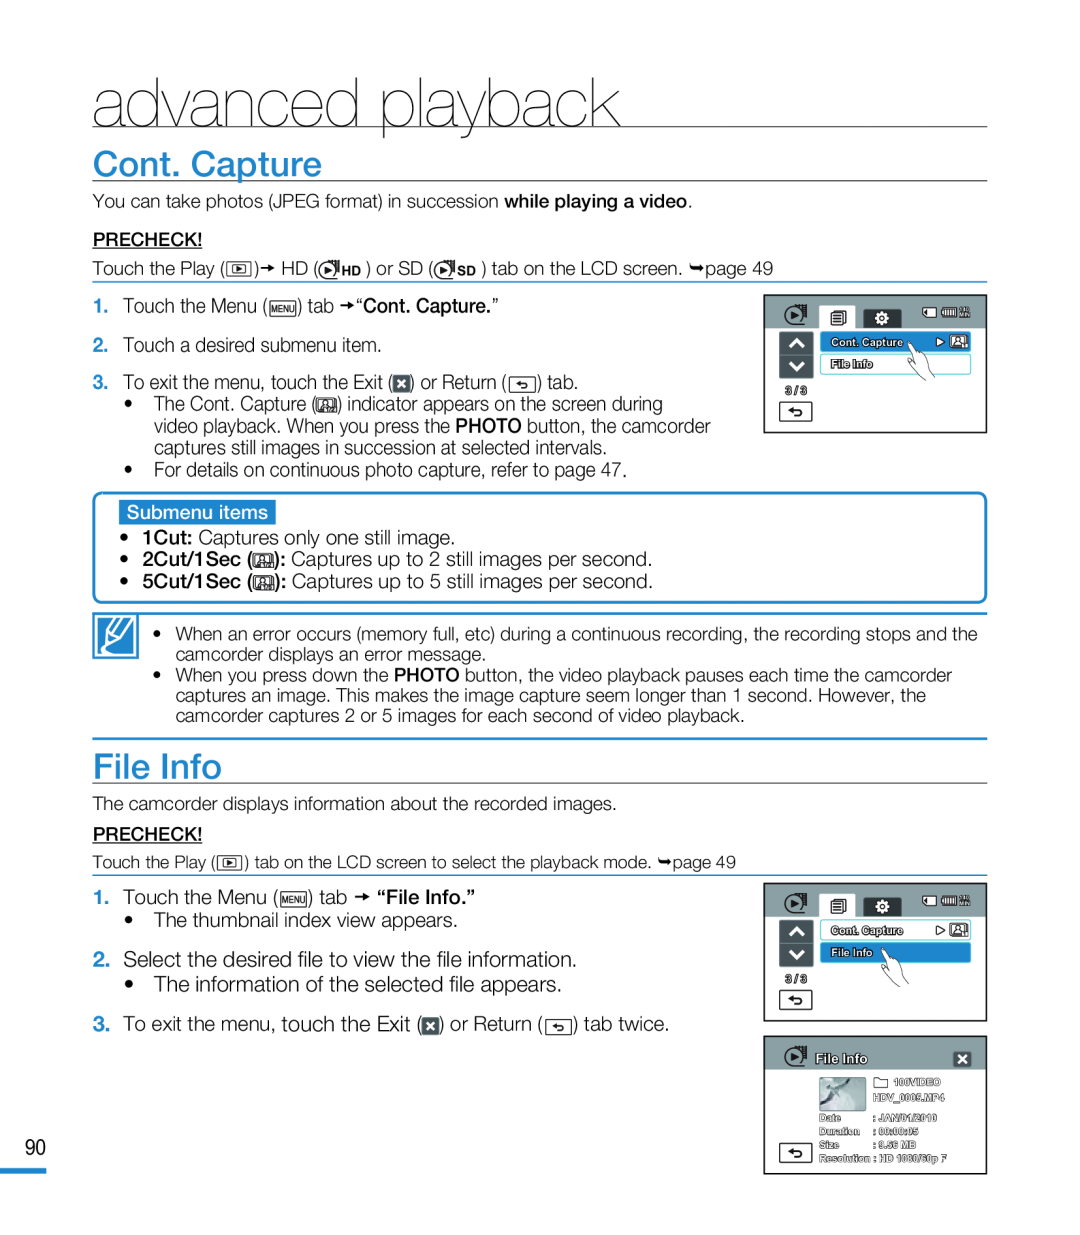 Cont. Capture
File Info
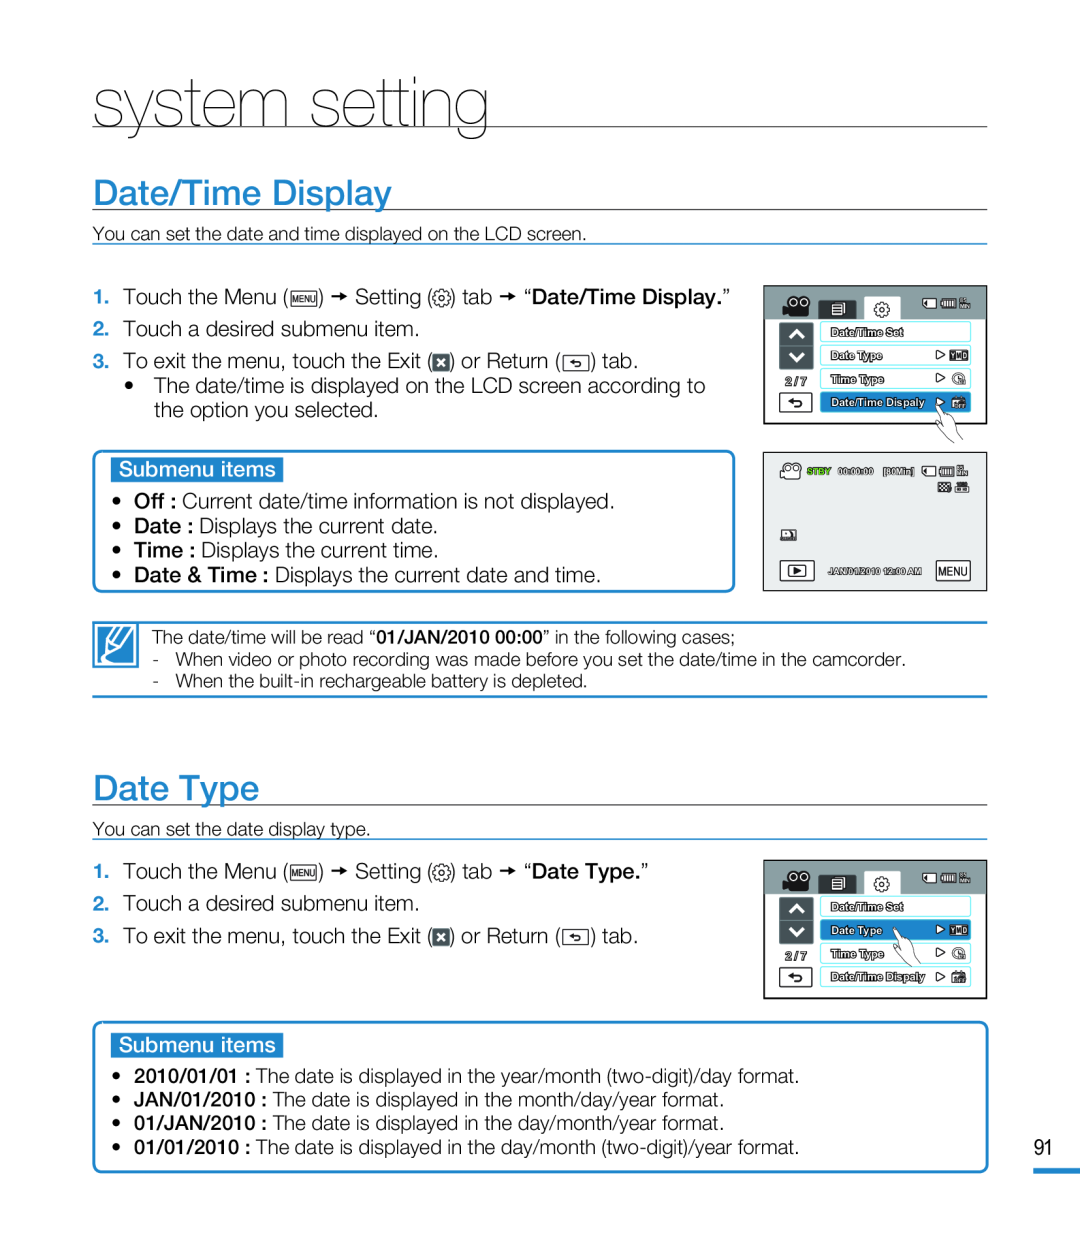 Date/Time Display
Date Type
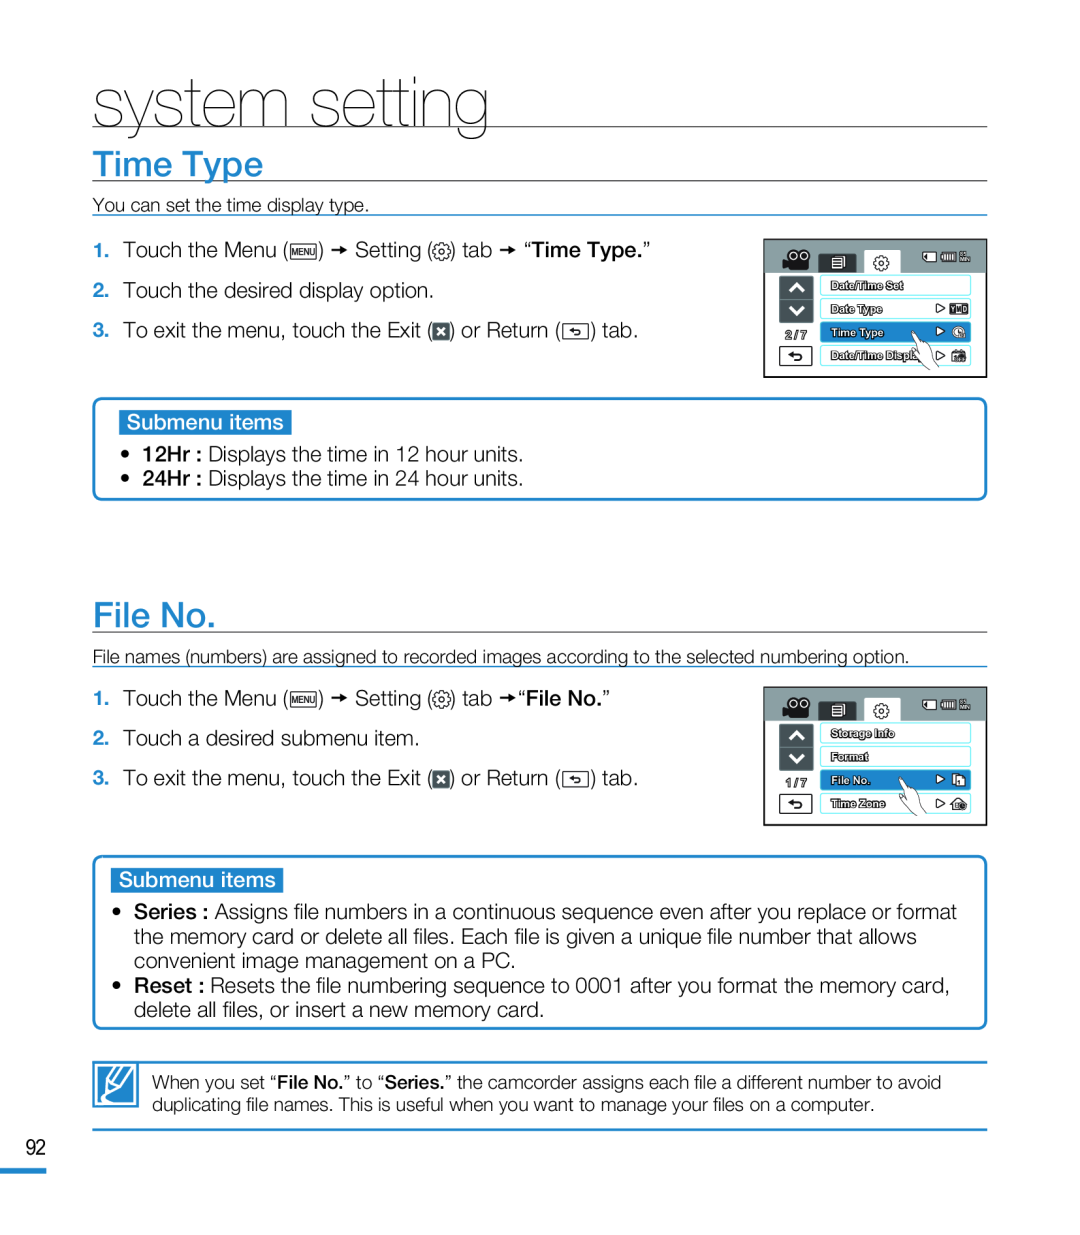 Time Type
File No
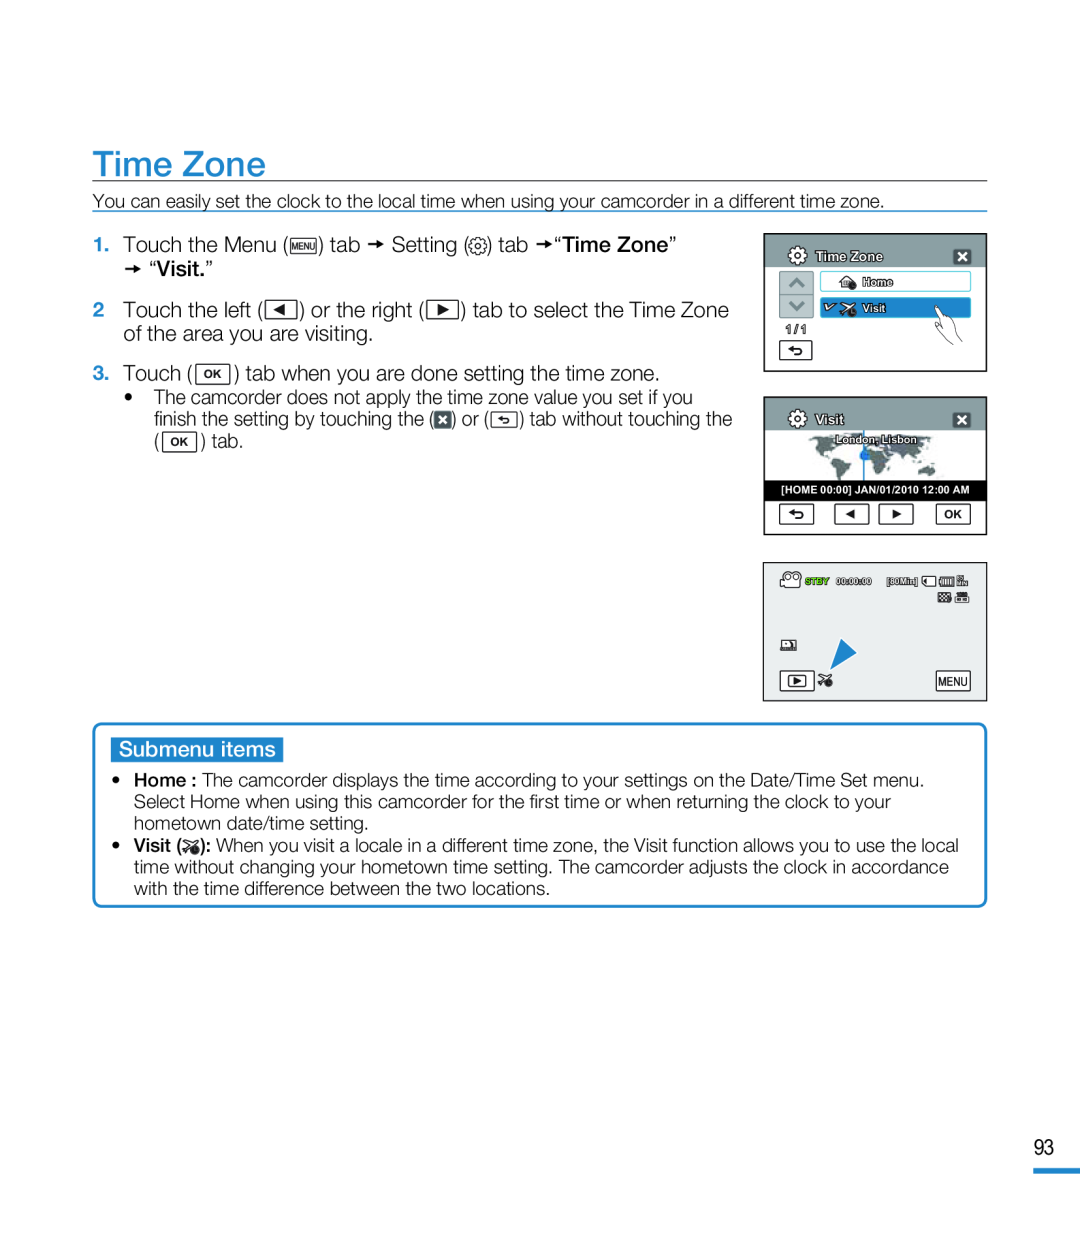 Time Zone
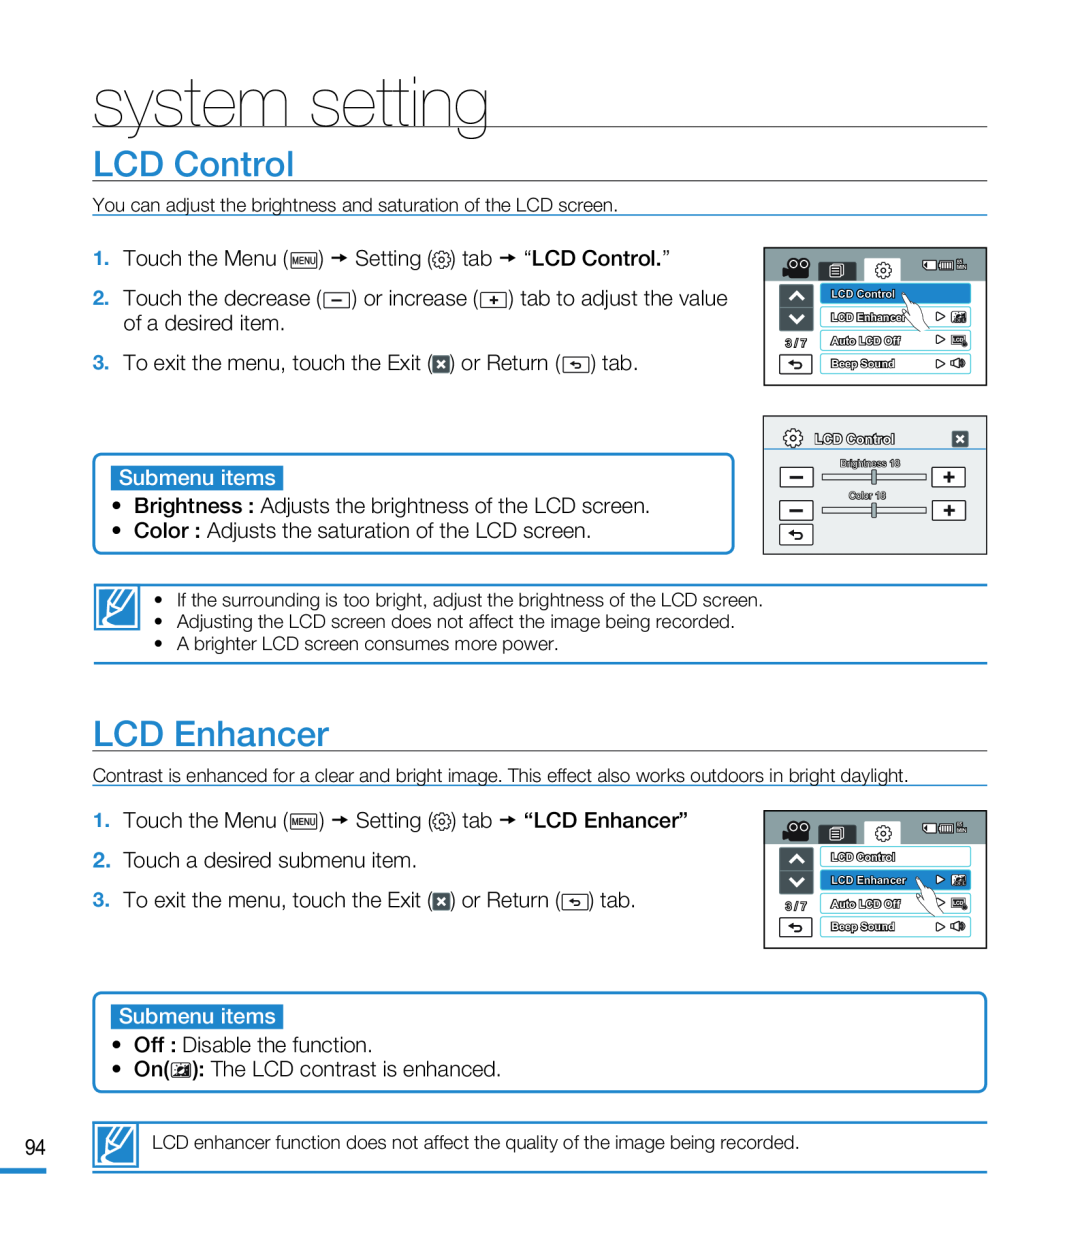 LCD Control
LCD Enhancer
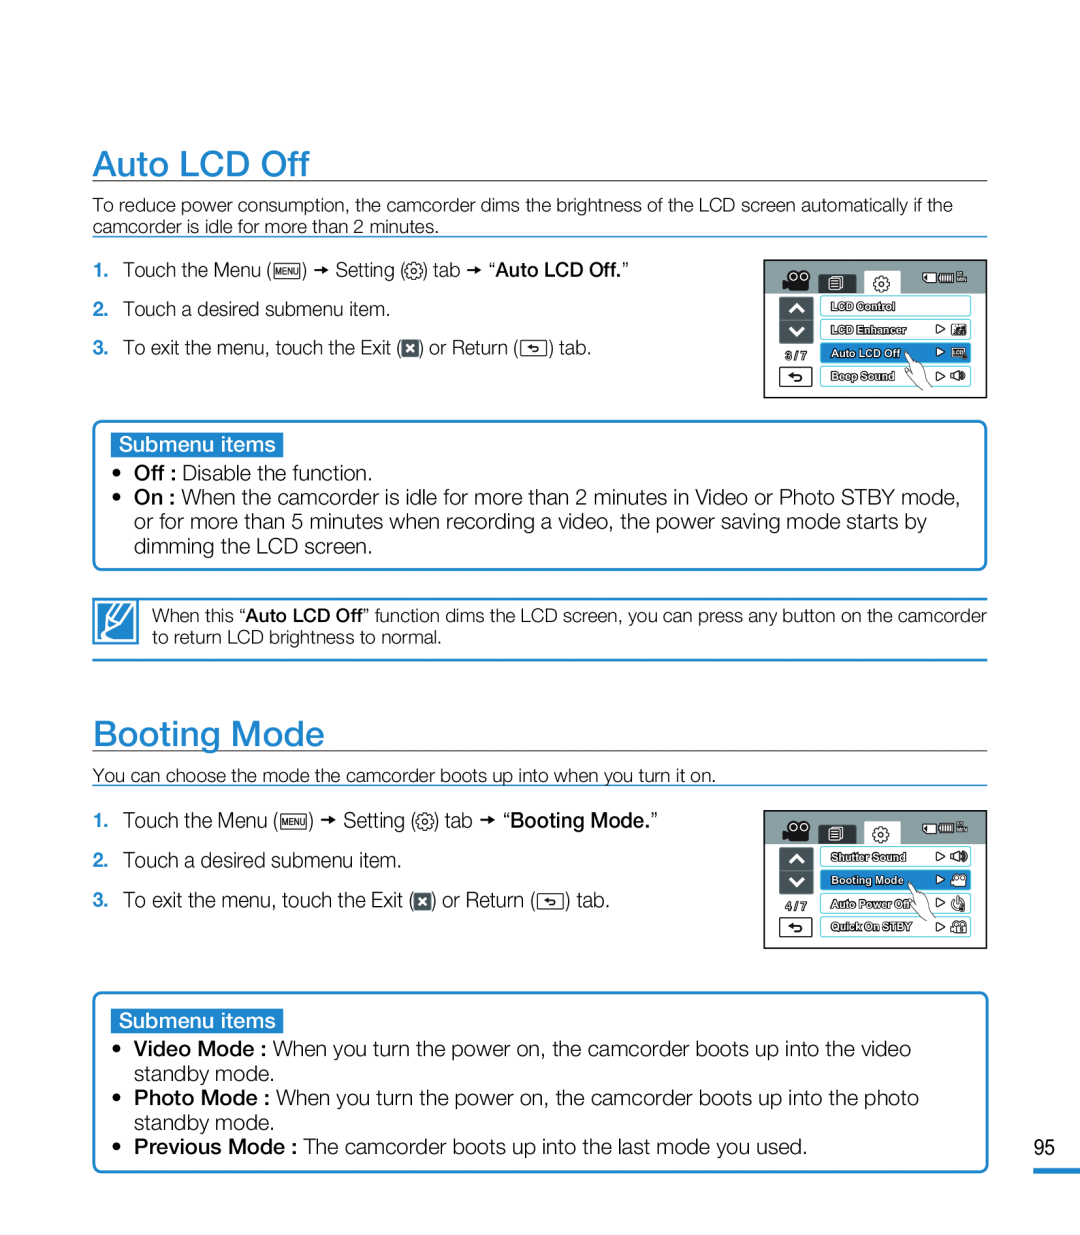 Auto LCD Off
Booting Mode
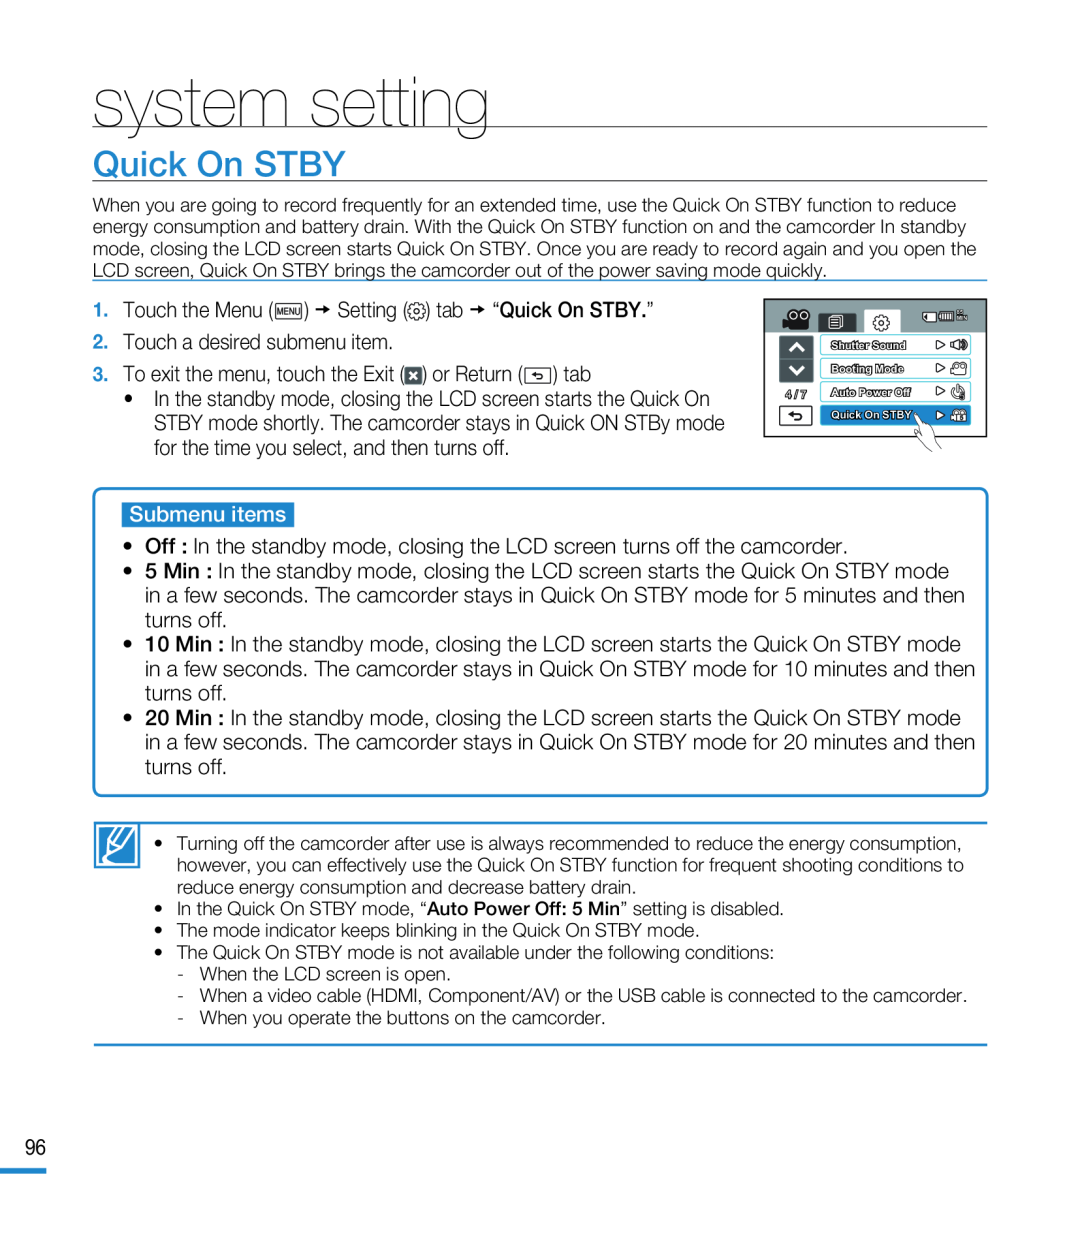 Quick On STBY
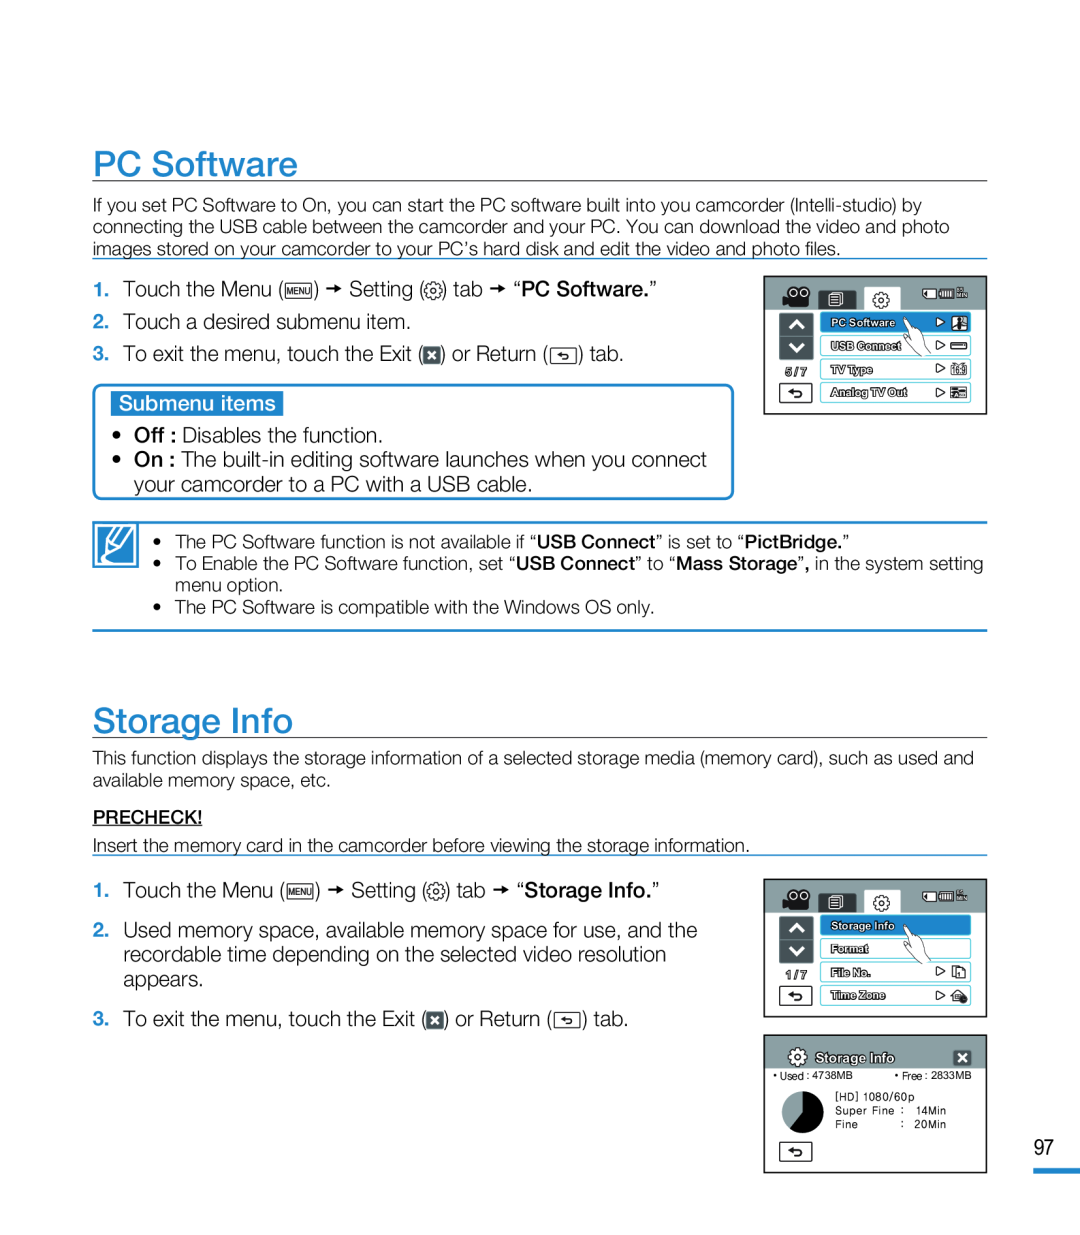 PC Software
Storage Info
 system setting
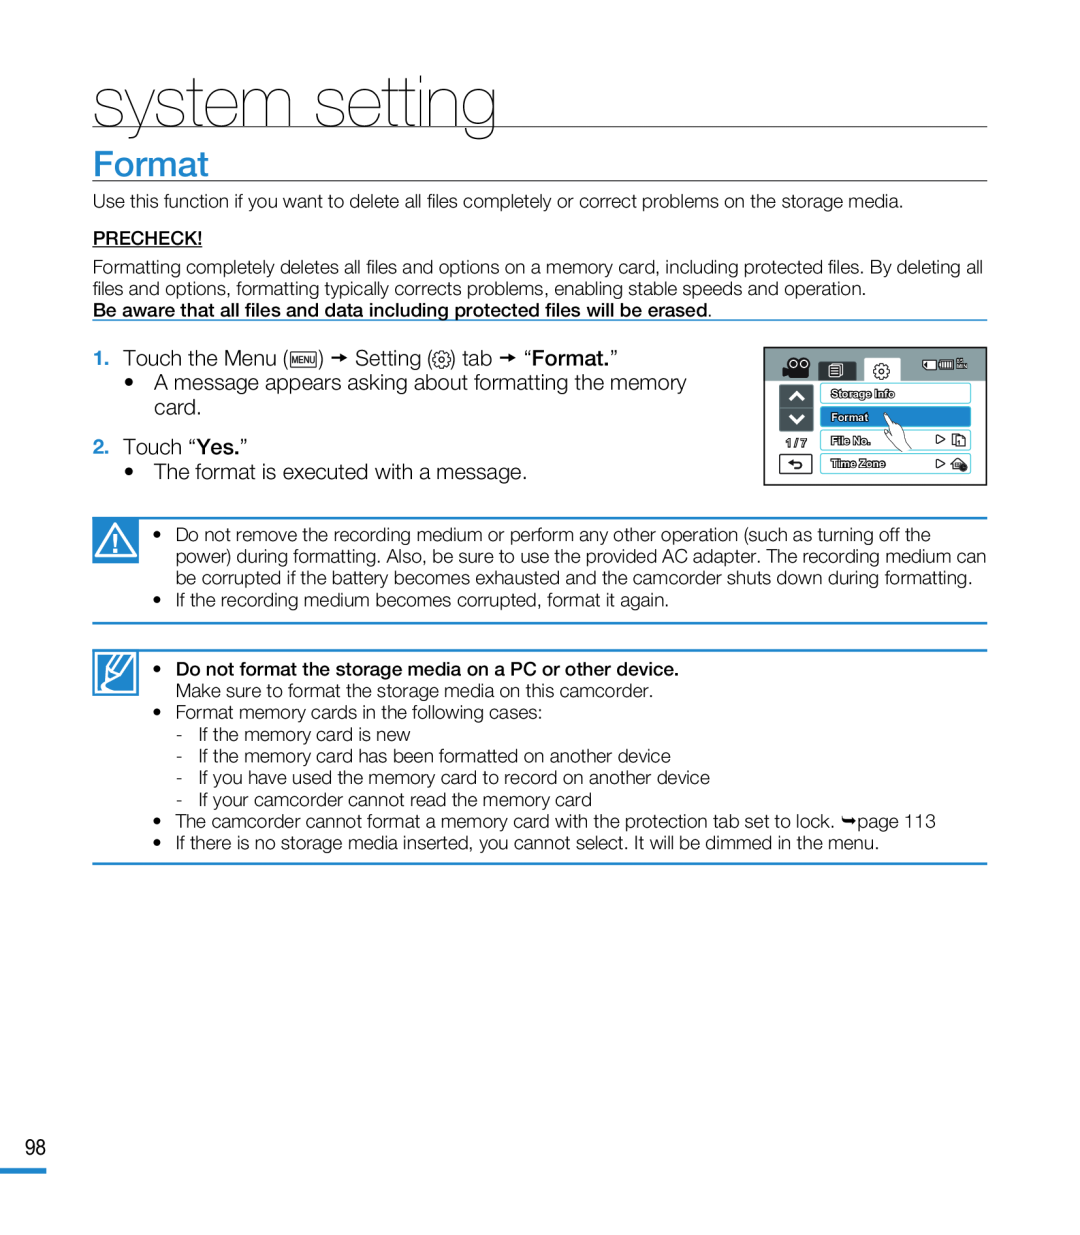
Format
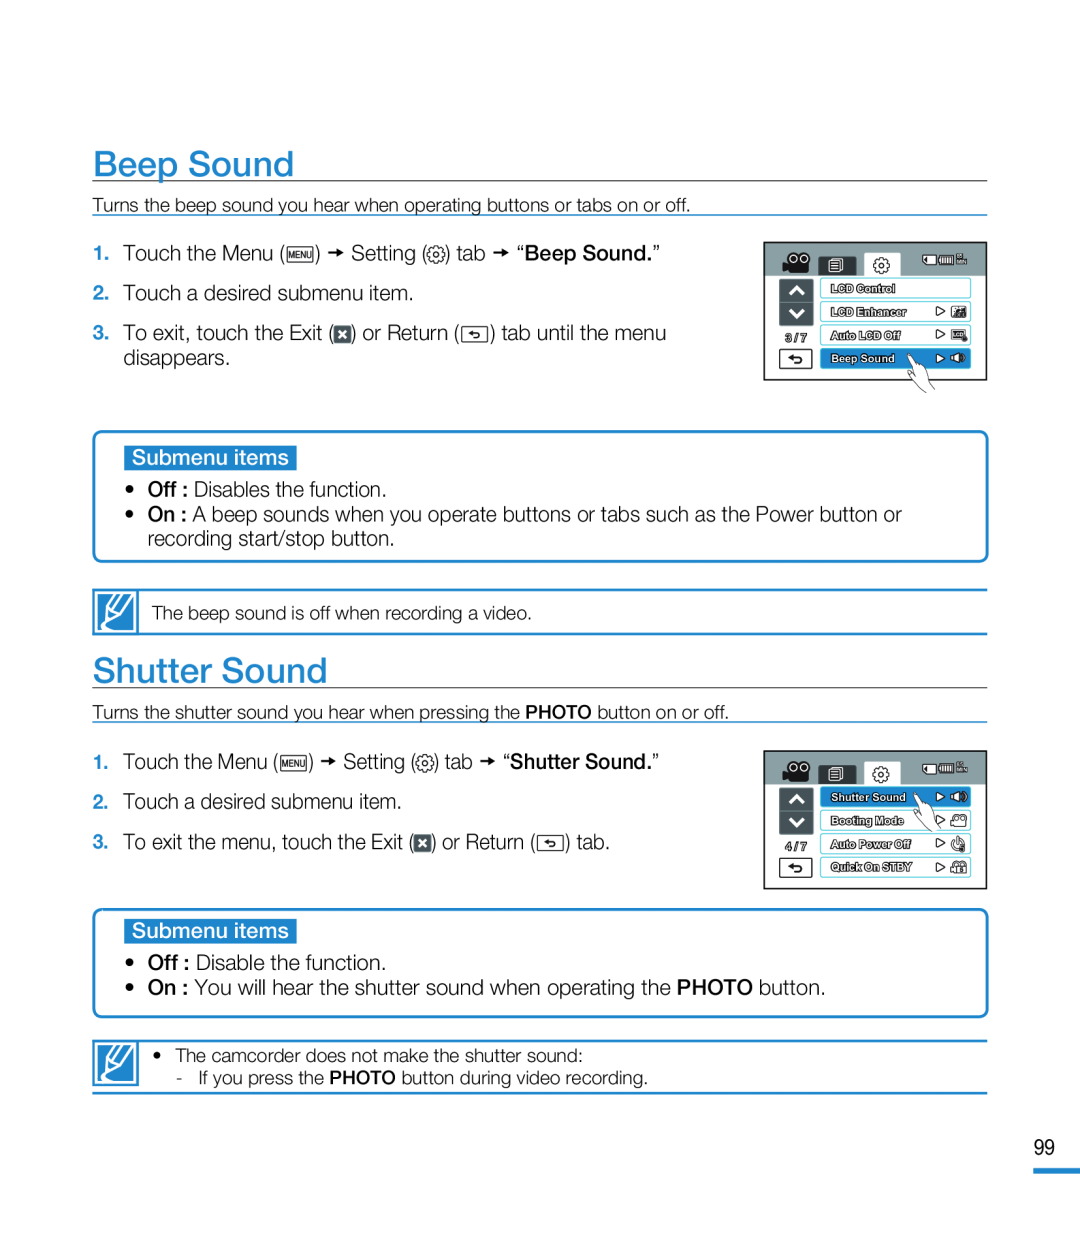 Beep Sound
Shutter Sound
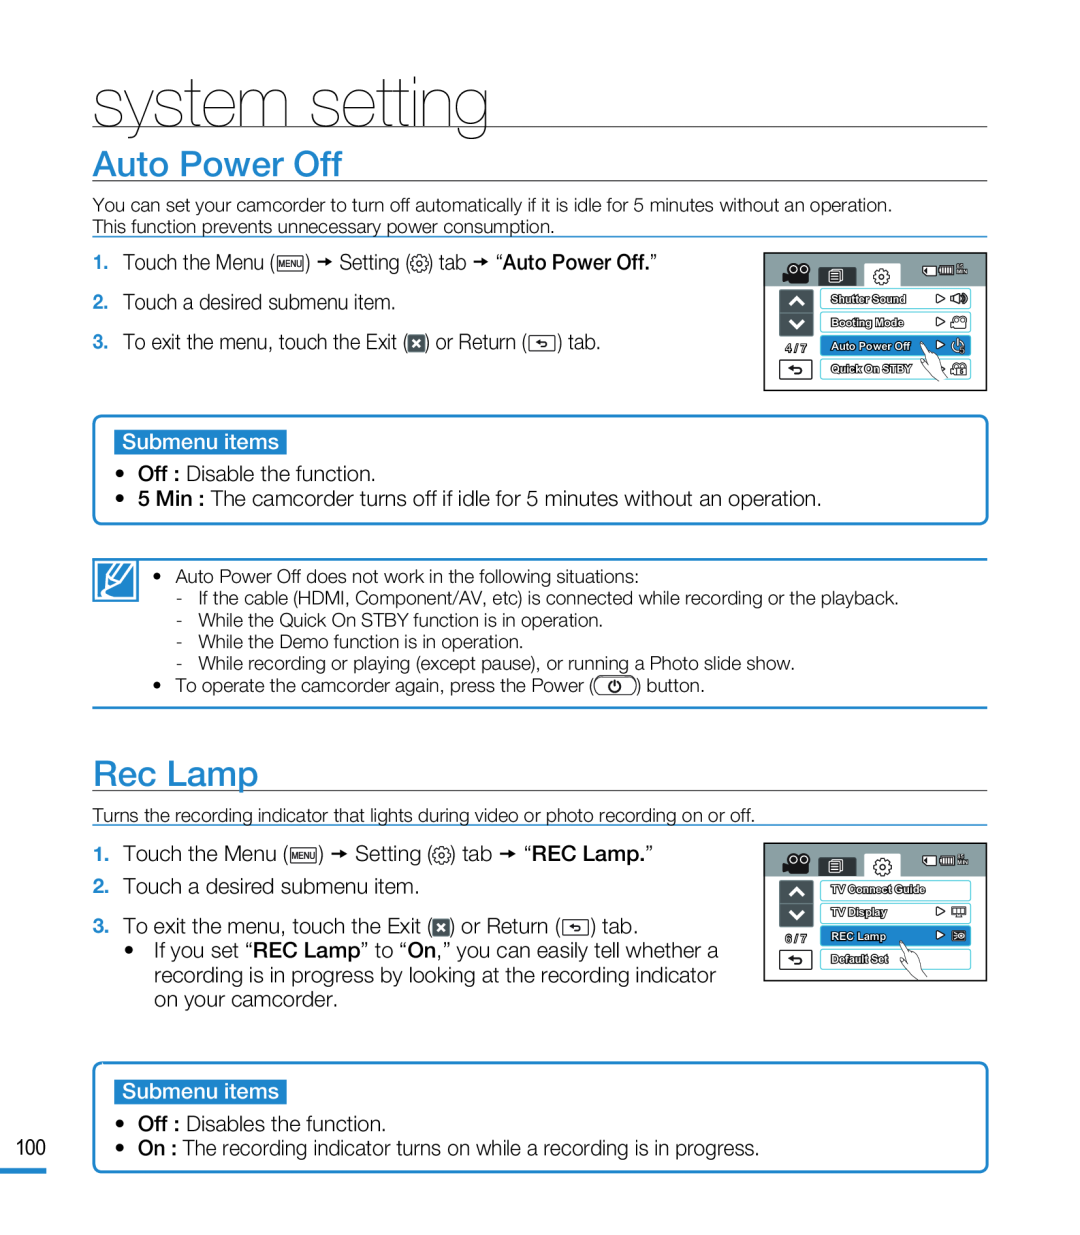 Auto Power Off
Rec Lamp
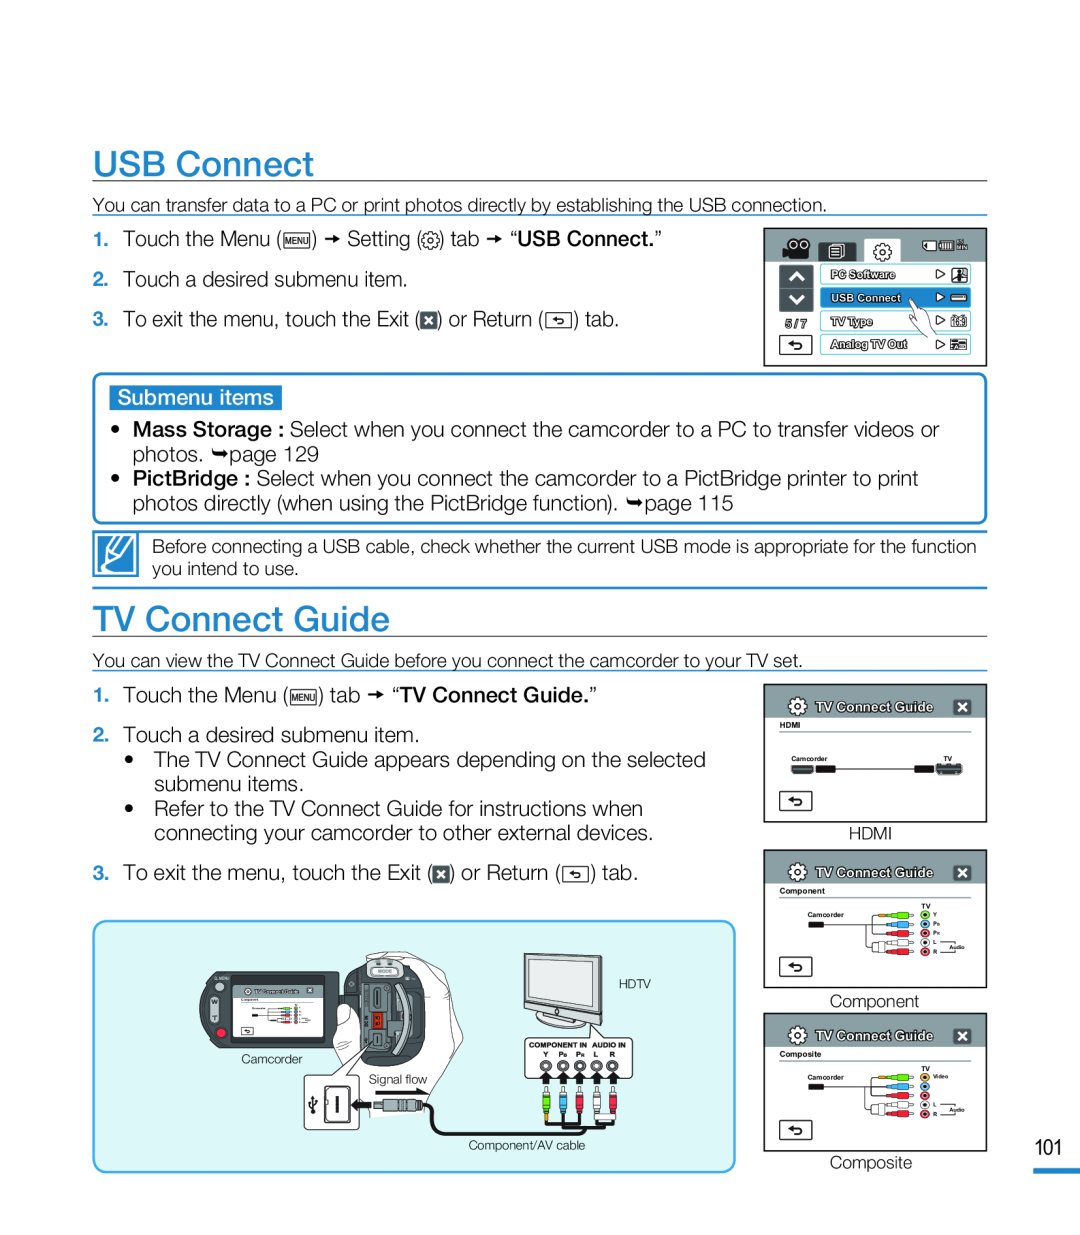 USB Connect
TV Connect Guide
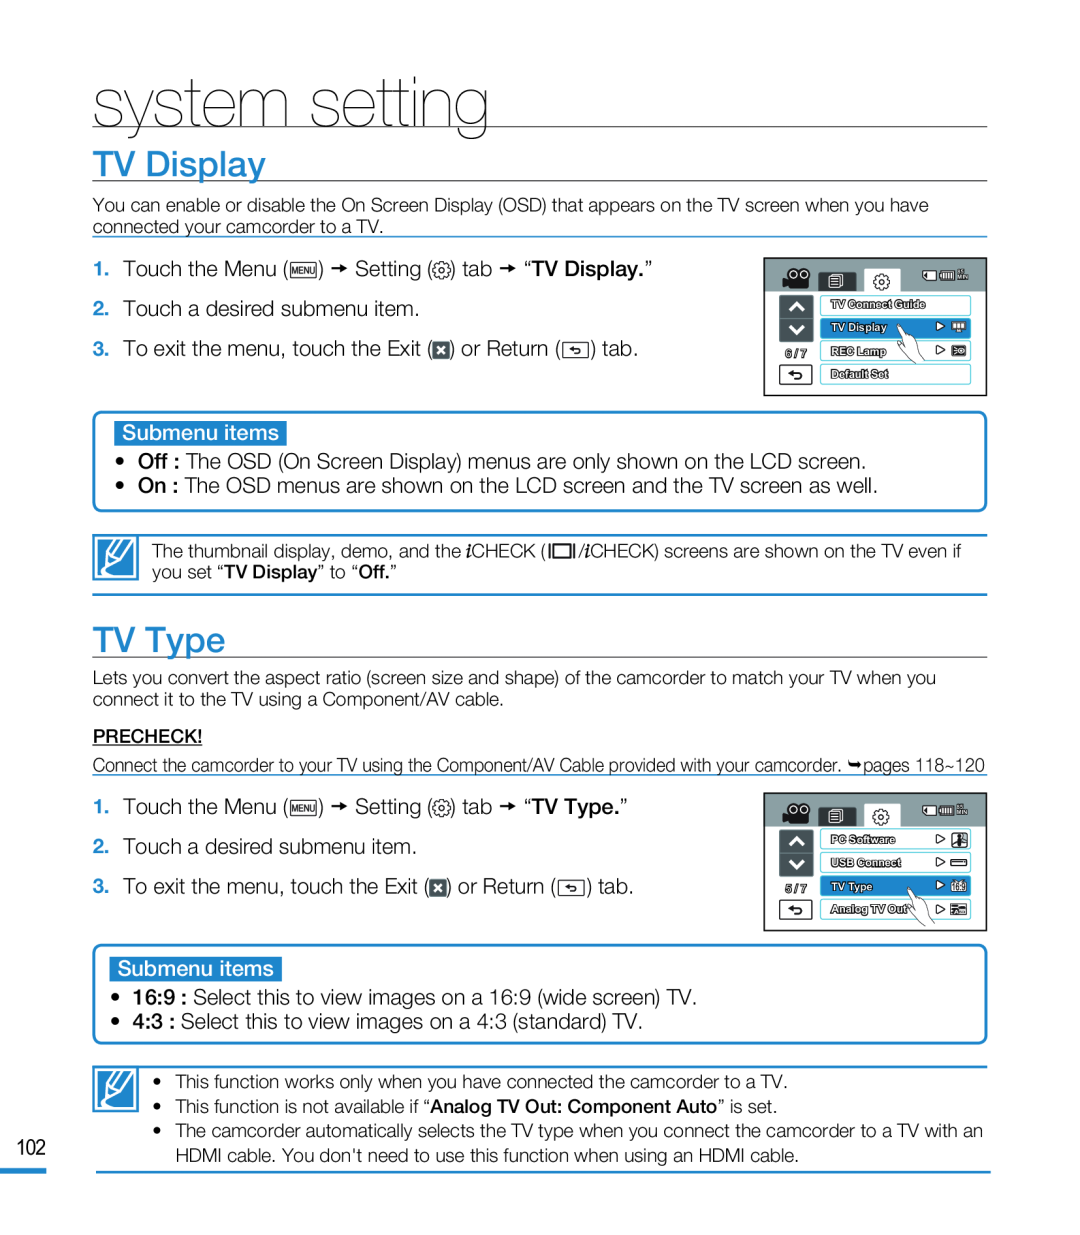 TV Display
TV Type
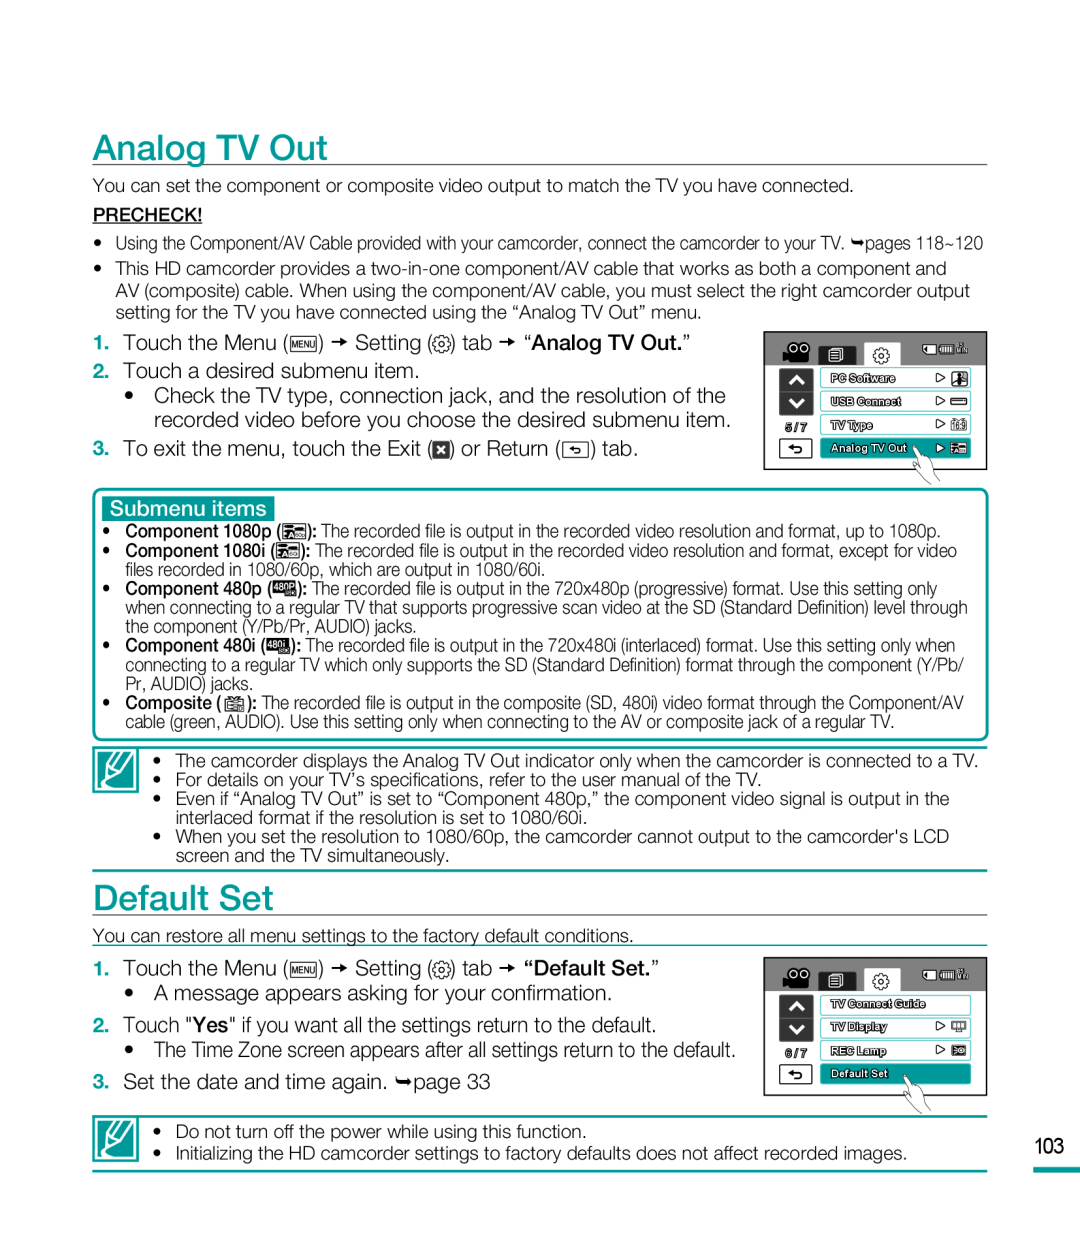 Analog TV Out
Default Set
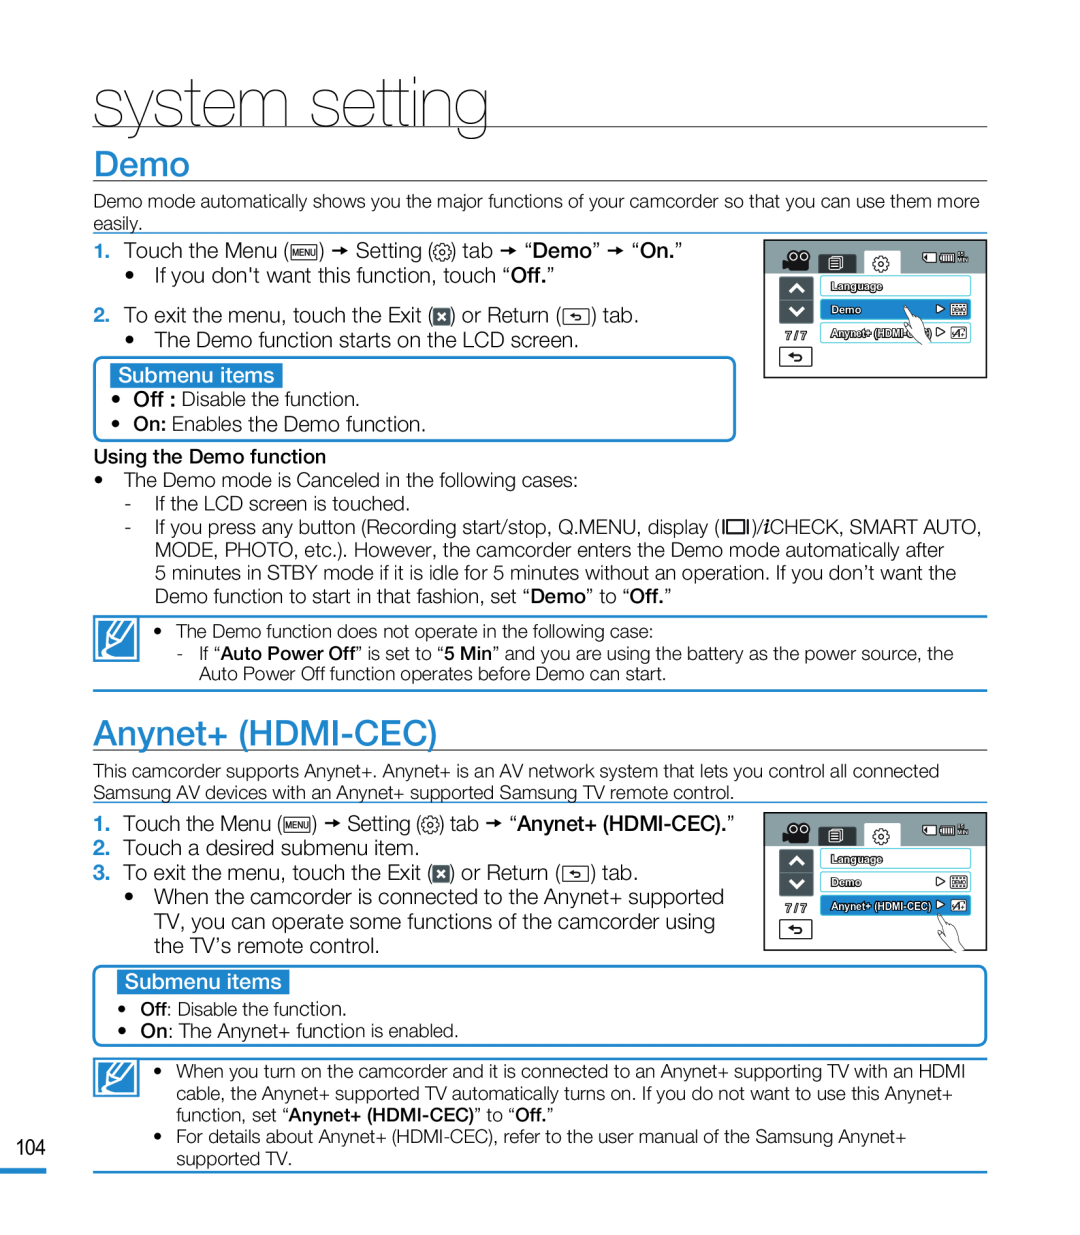 Demo
DemoAnynet+ (HDMI-CEC)
 editing video clips
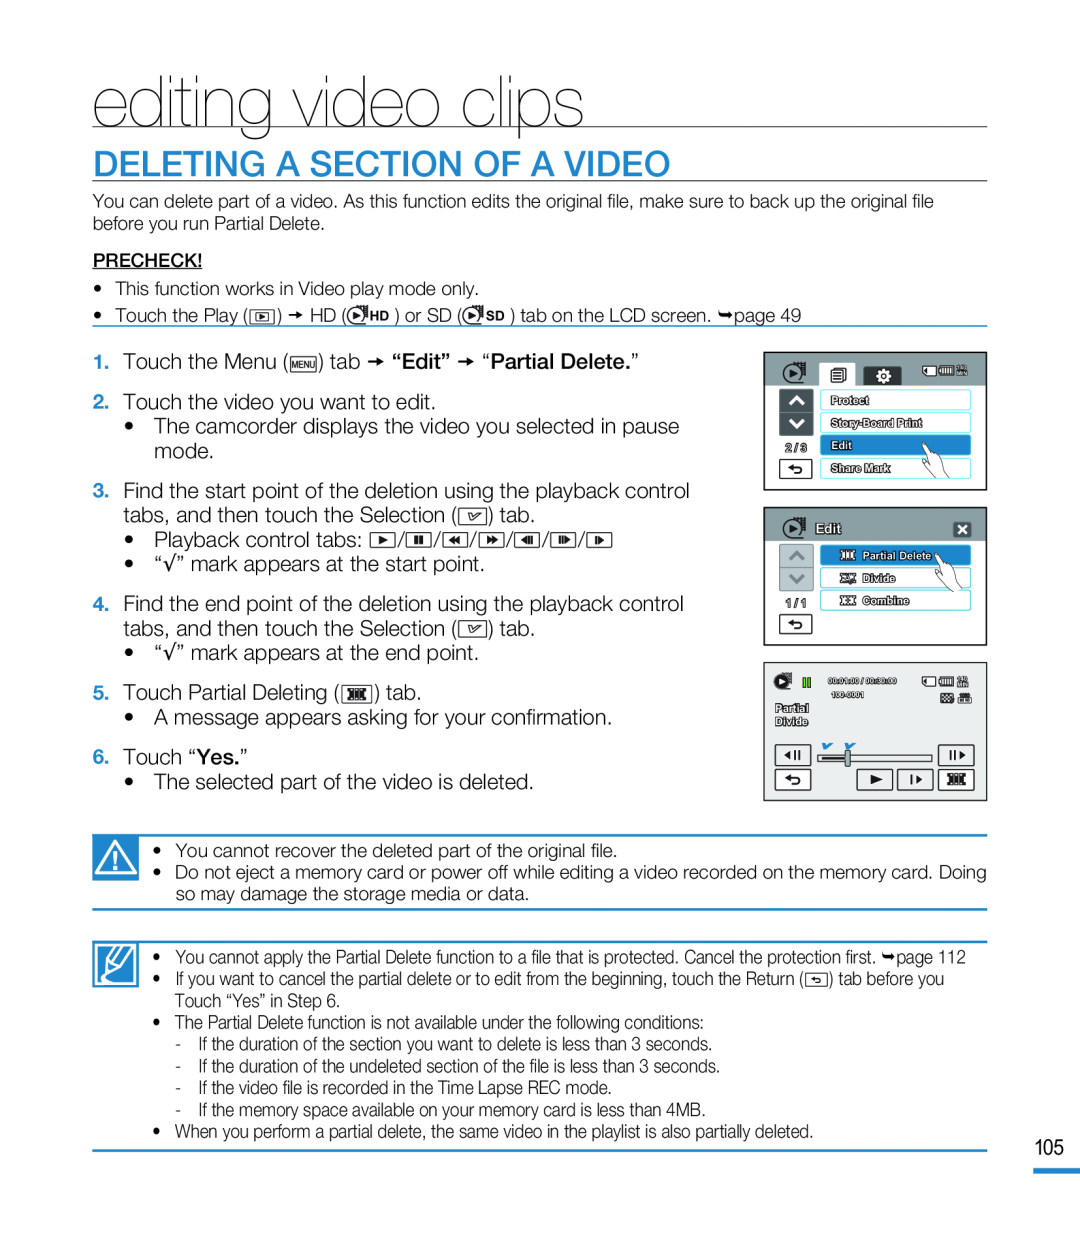
DELETING A SECTION OF A VIDEO
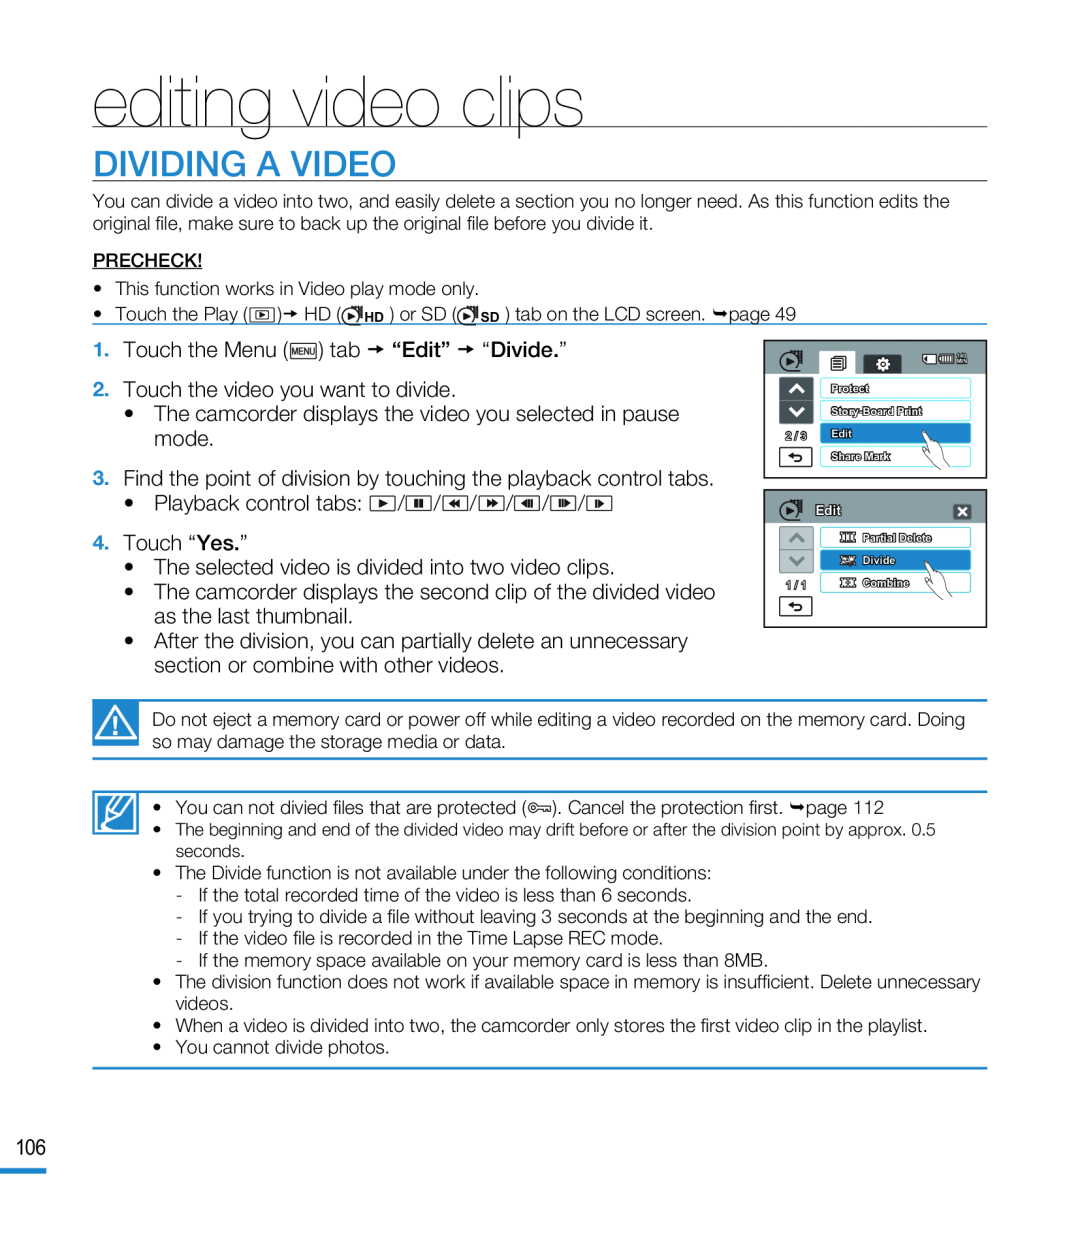 DIVIDING A VIDEO
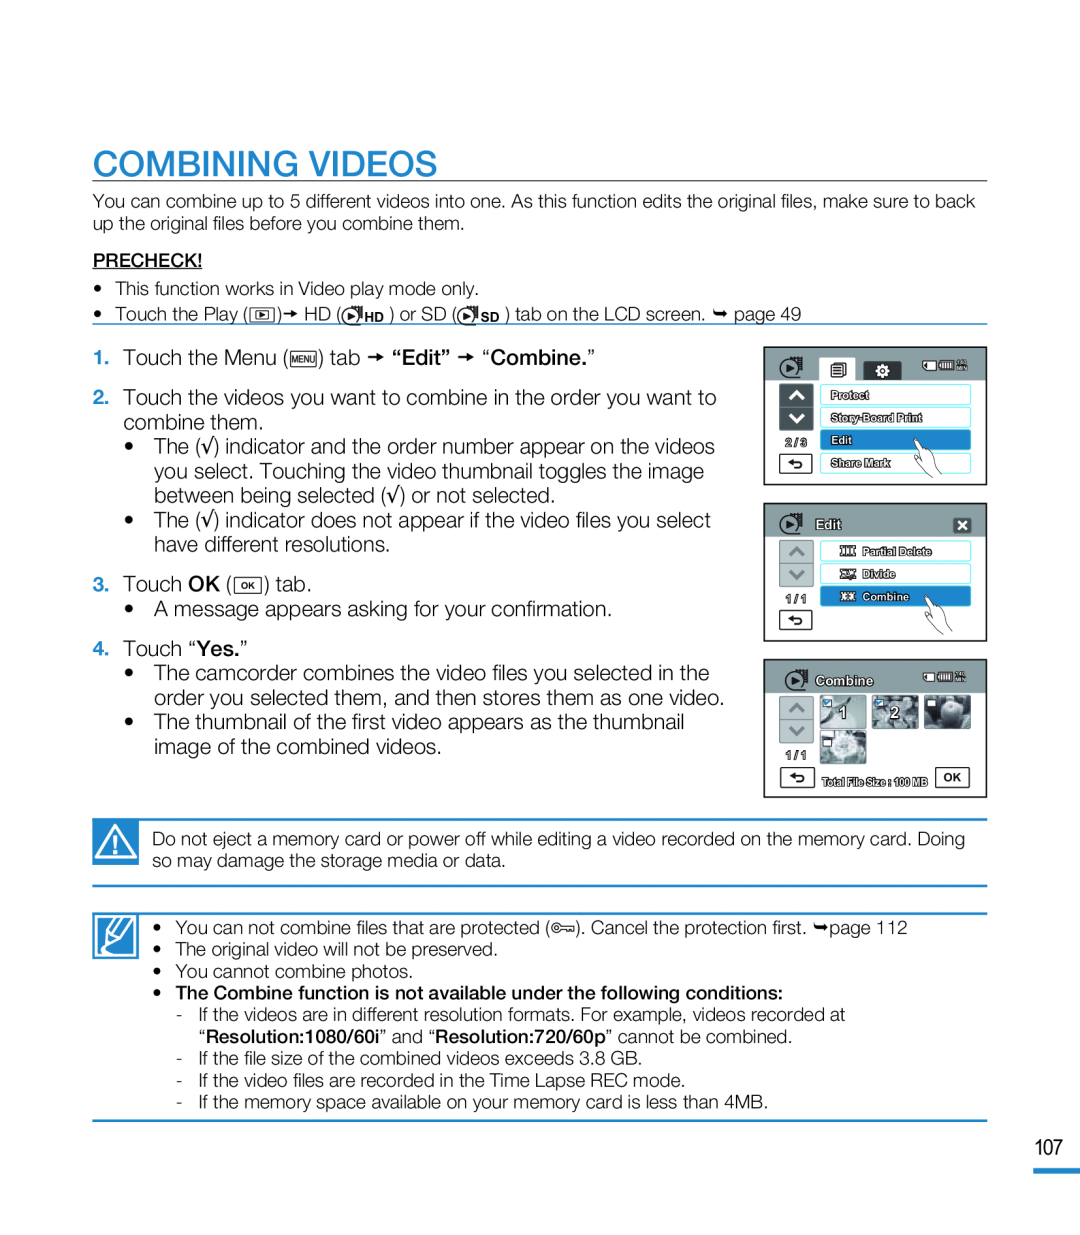 COMBINING VIDEOS
 editing the playlist
PLAYLIST
What’s a “Playlist?”
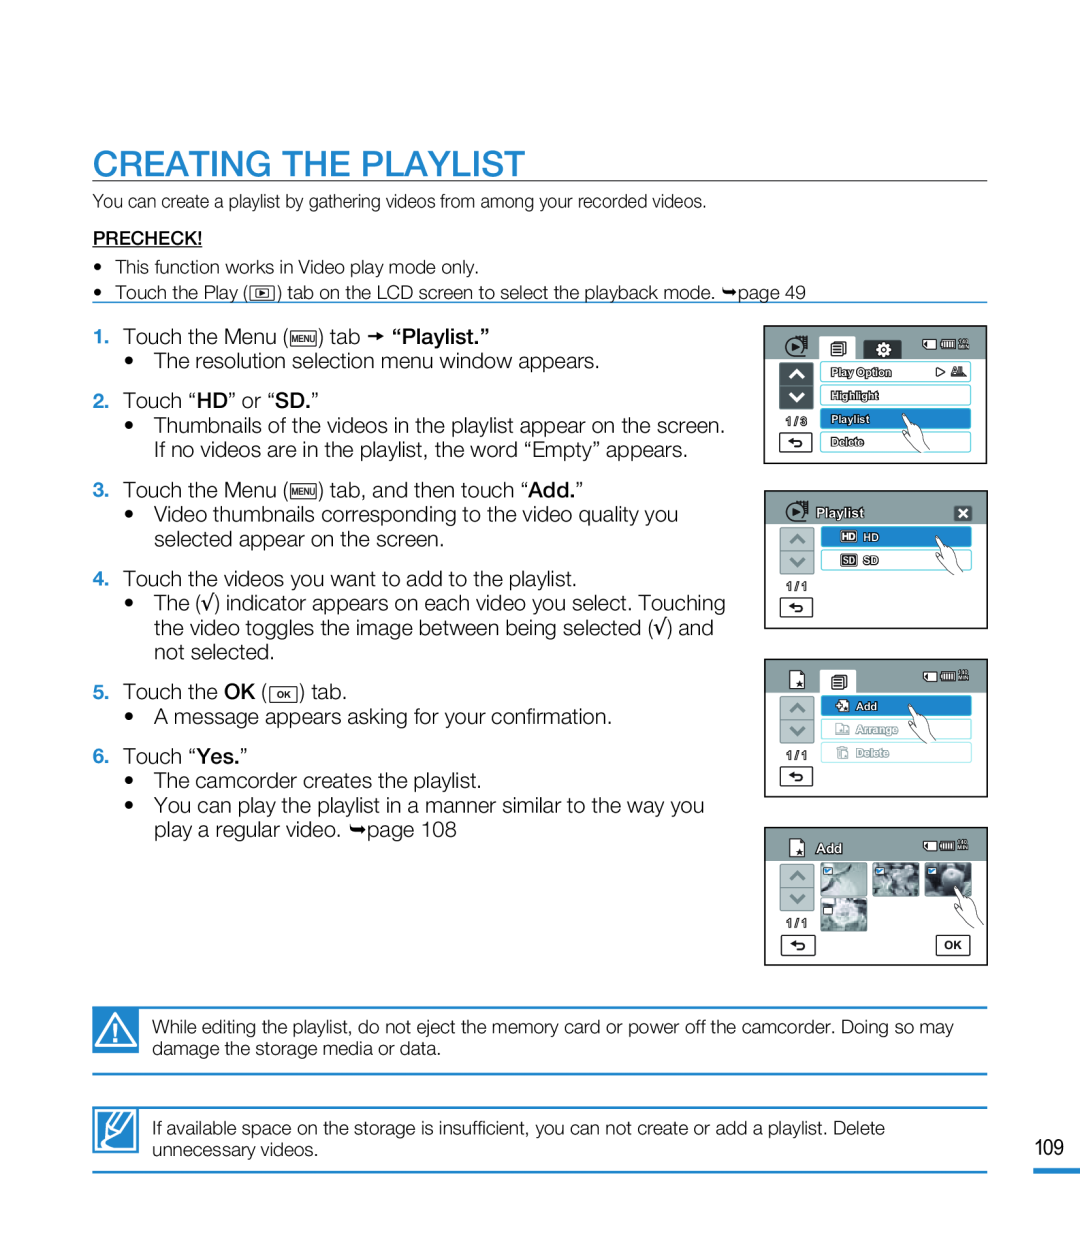 CREATING THE PLAYLIST
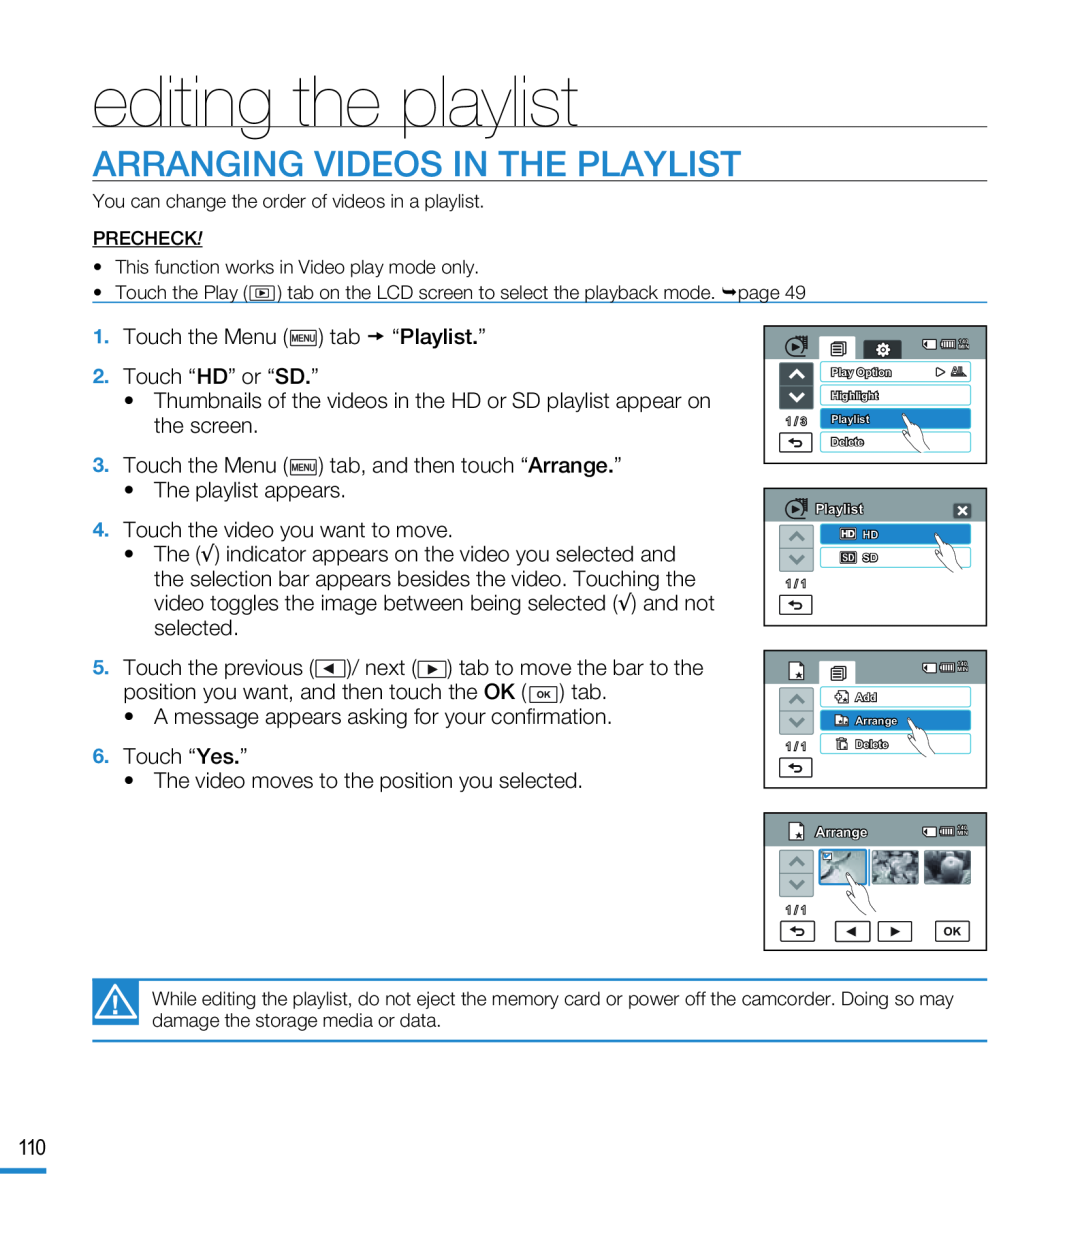 ARRANGING VIDEOS IN THE PLAYLIST
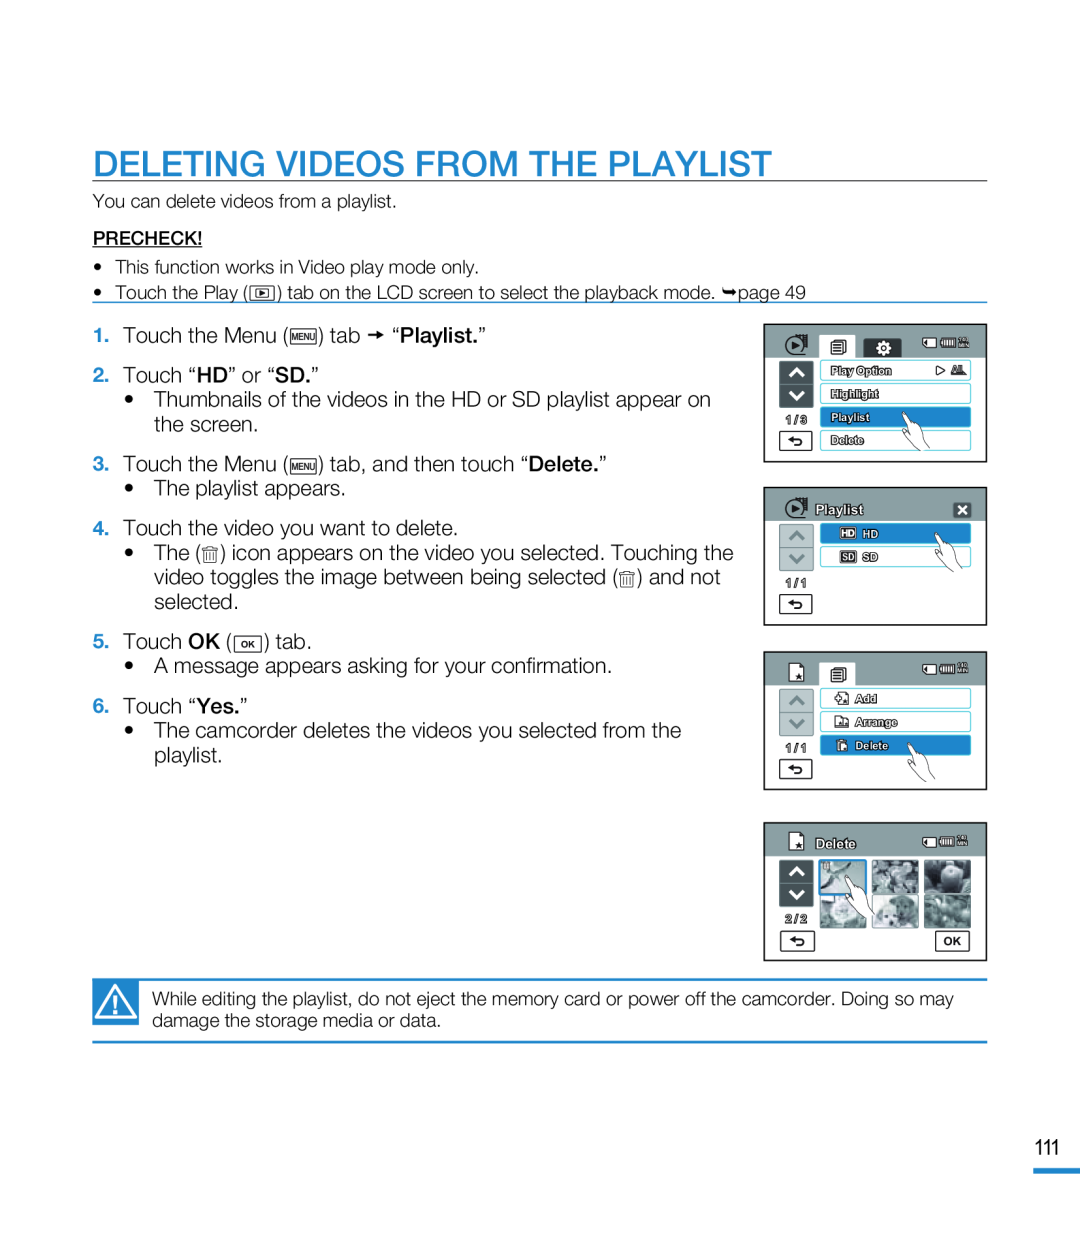 DELETING VIDEOS FROM THE PLAYLIST
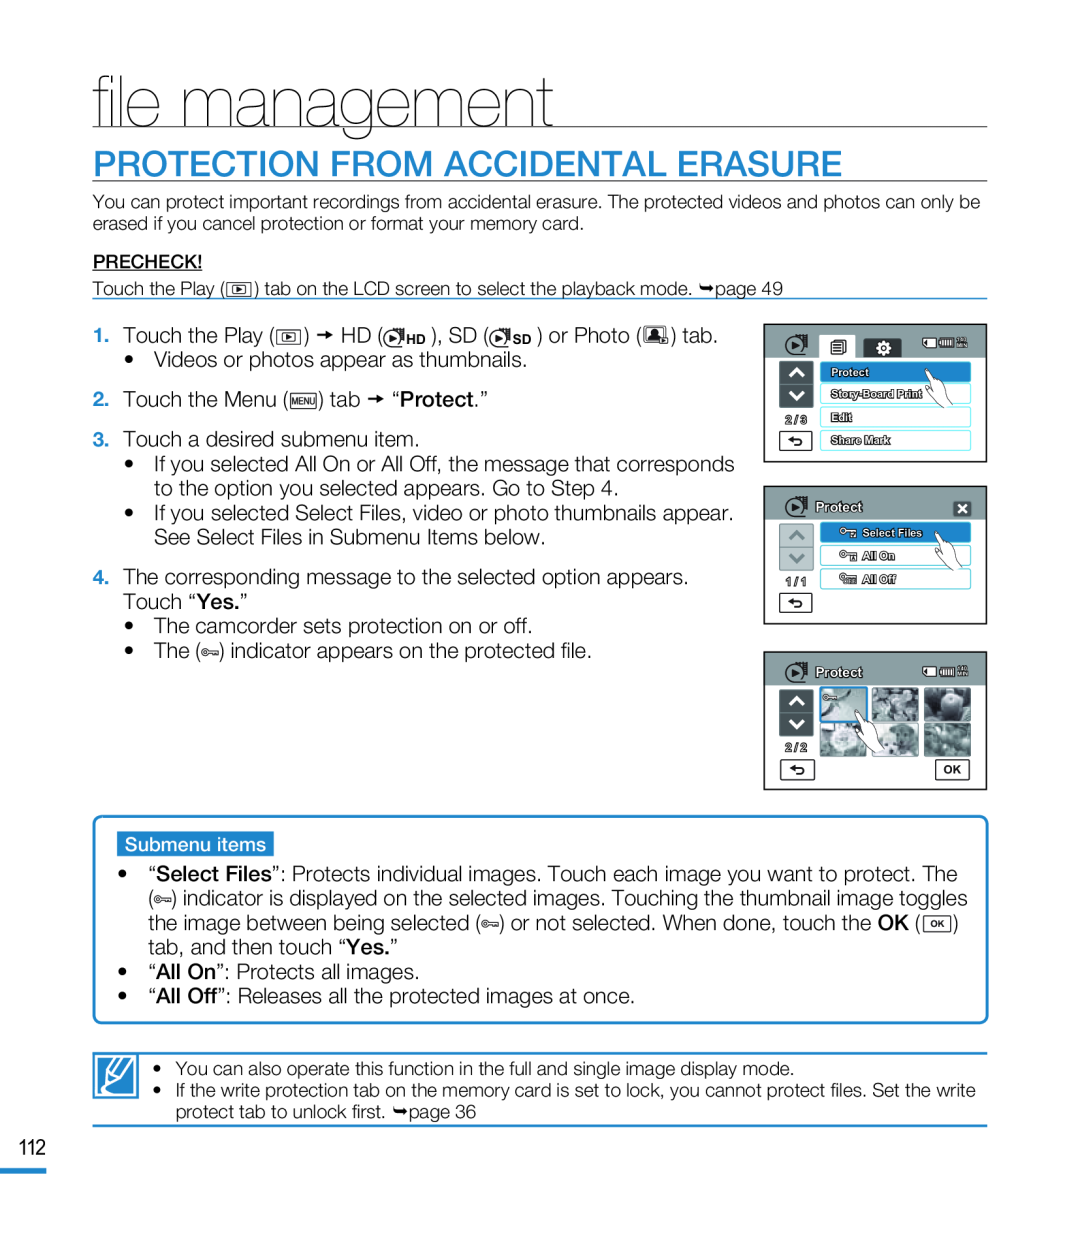 file management
PROTECTION FROM ACCIDENTAL ERASURE
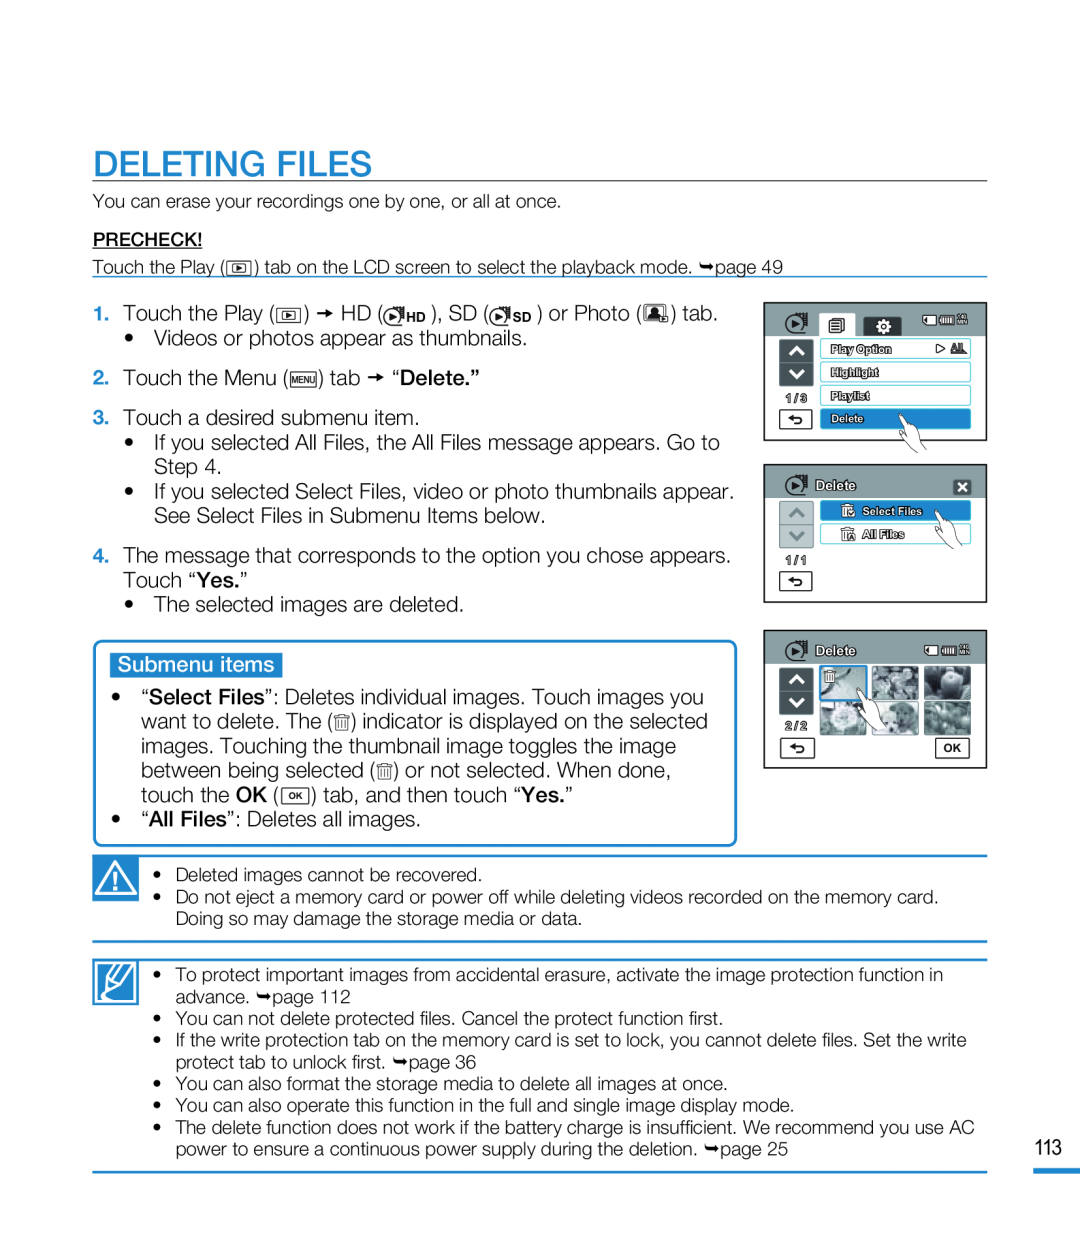 DELETING FILES
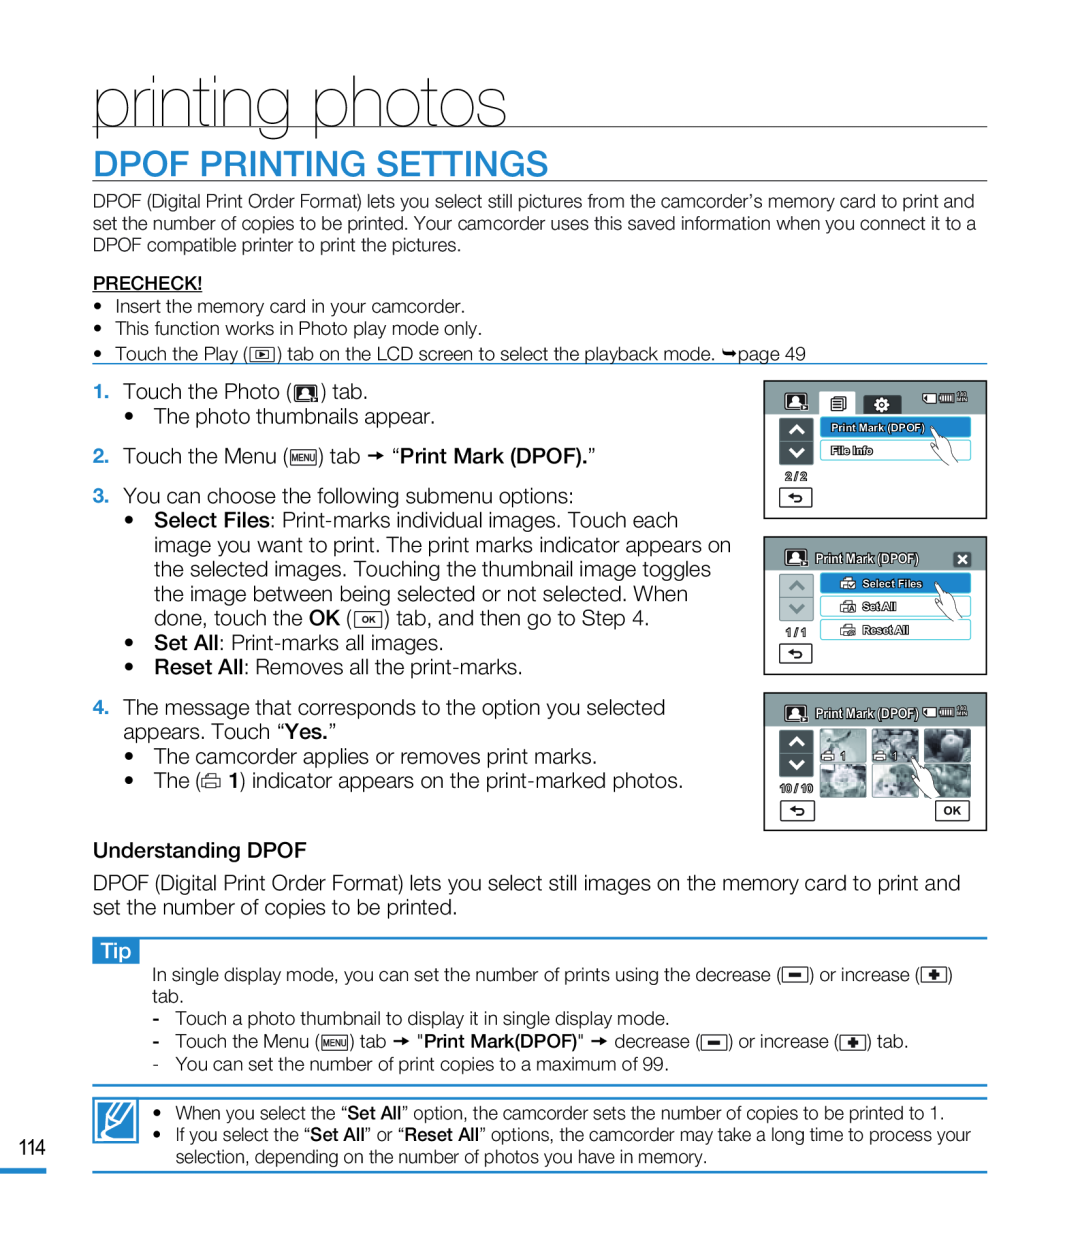 printing photos
DPOF PRINTING SETTINGS
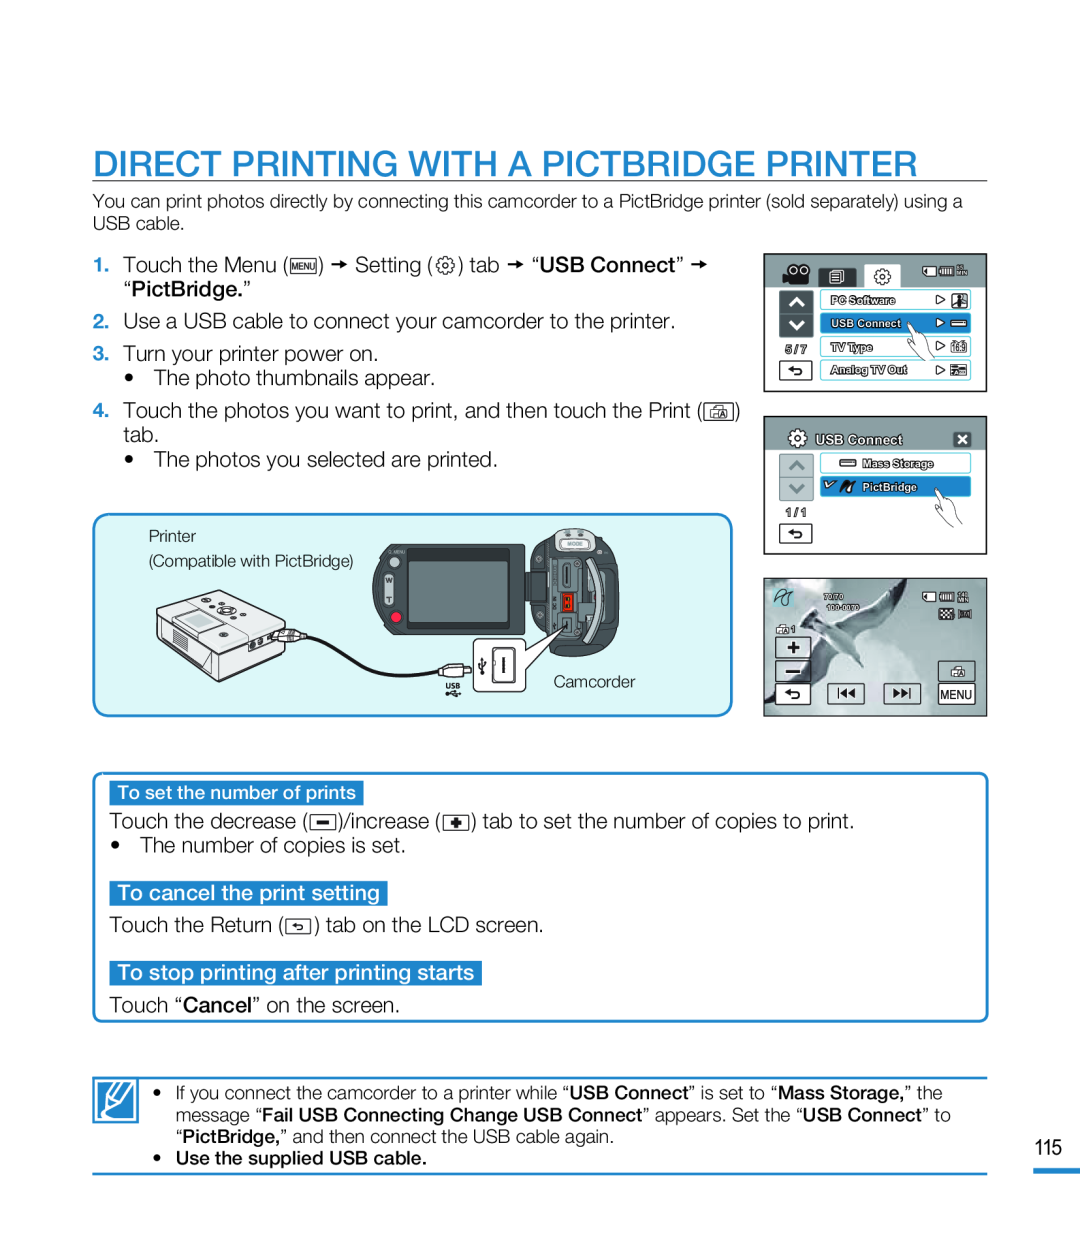 DIRECT PRINTING WITH A PICTBRIDGE PRINTER
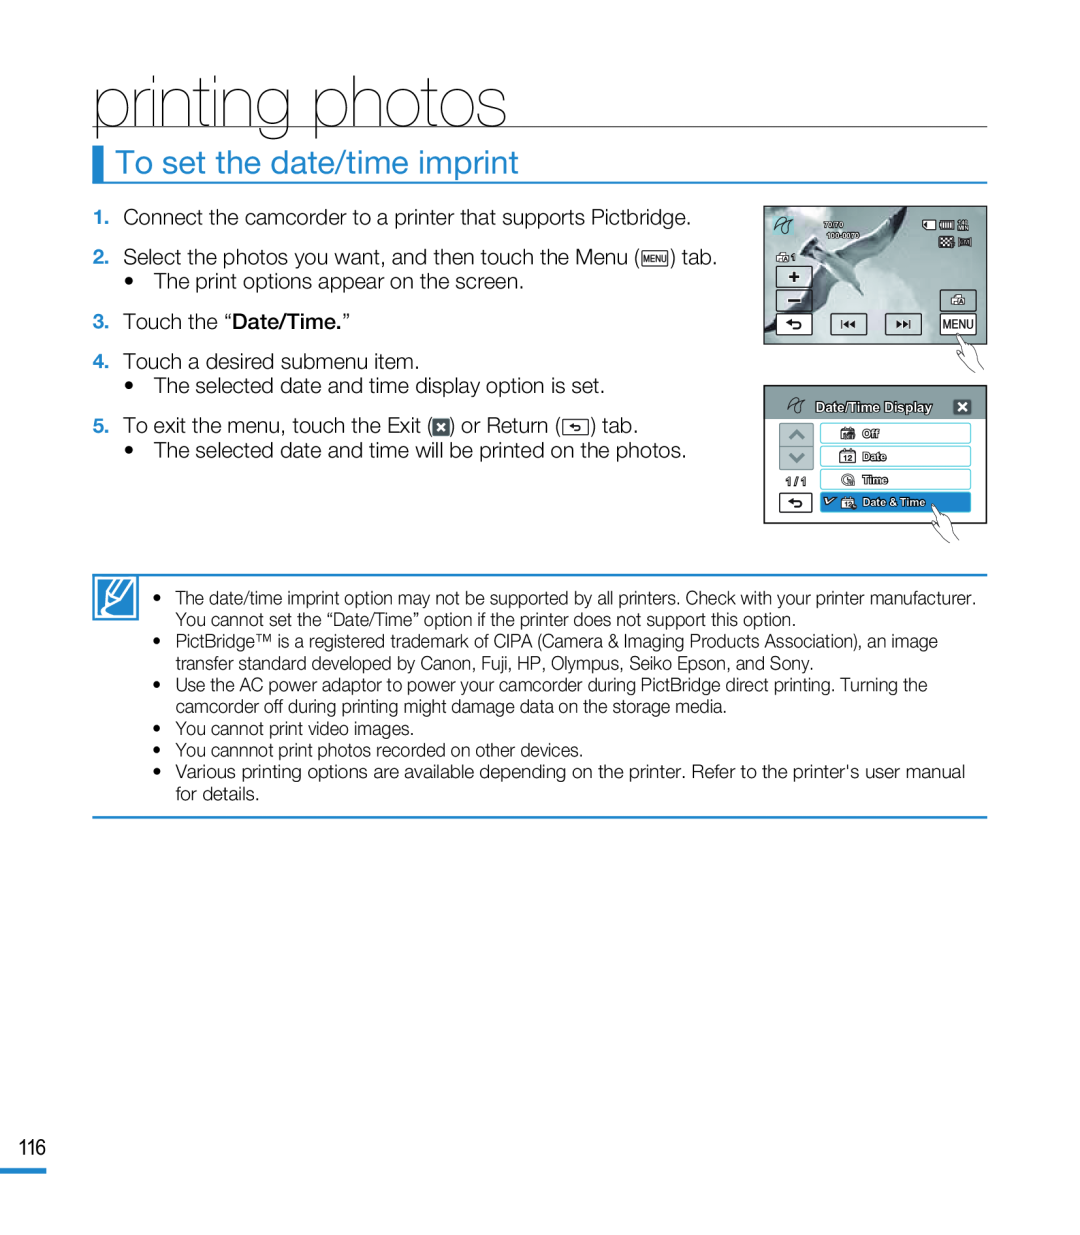 To set the date/time imprint
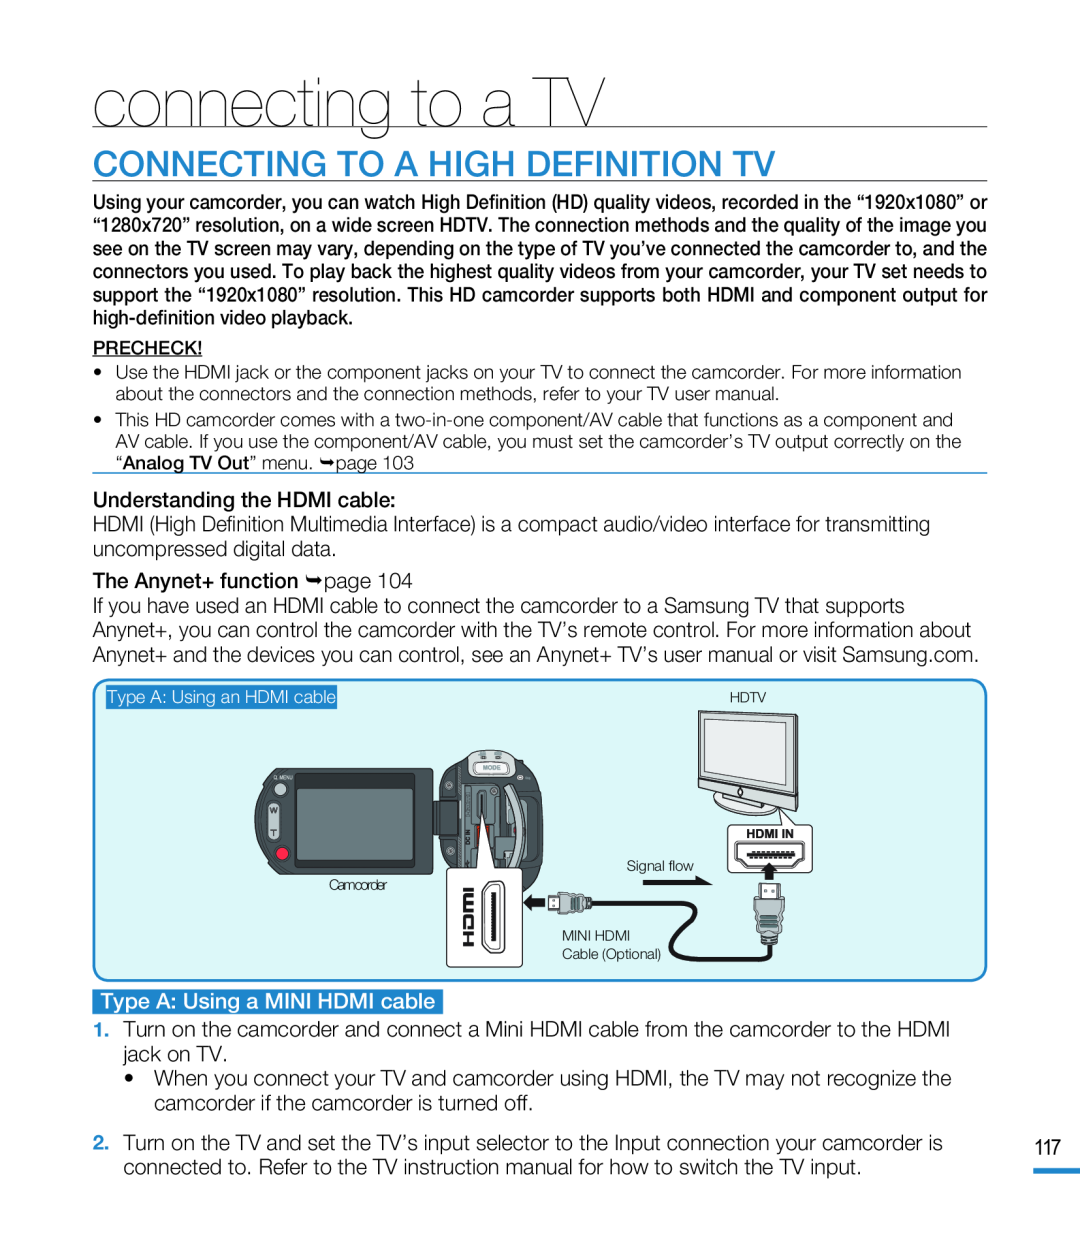 connecting to a TV
CONNECTING TO A HIGH DEFINITION TV
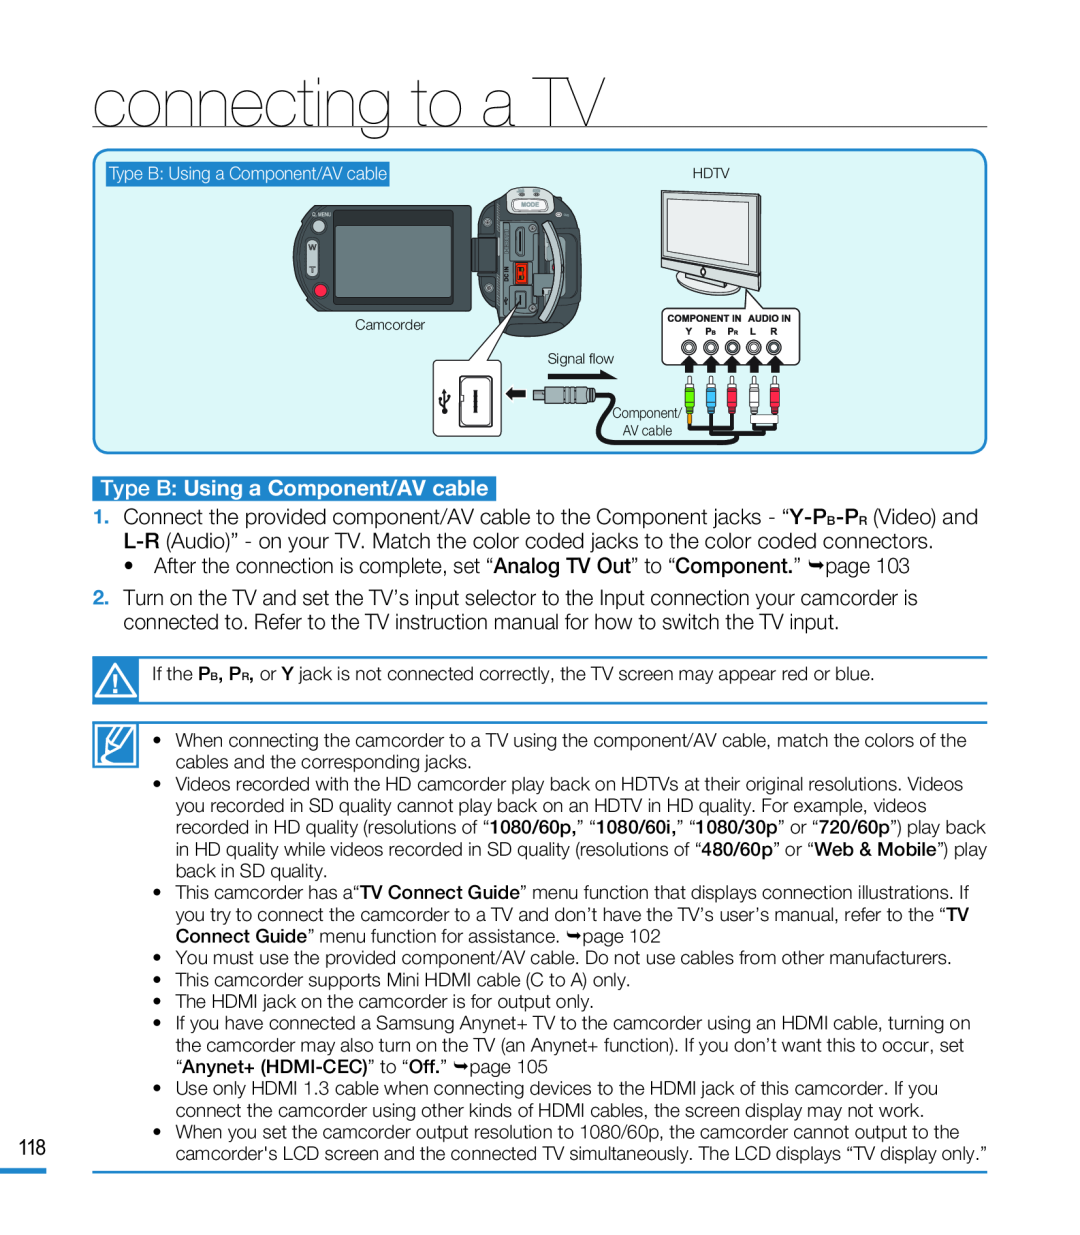 connecting to a TV
Type B: Using a Component/AV cable
Type B:
• After the connection is complete, set “Analog TV Out” to “Component.” page
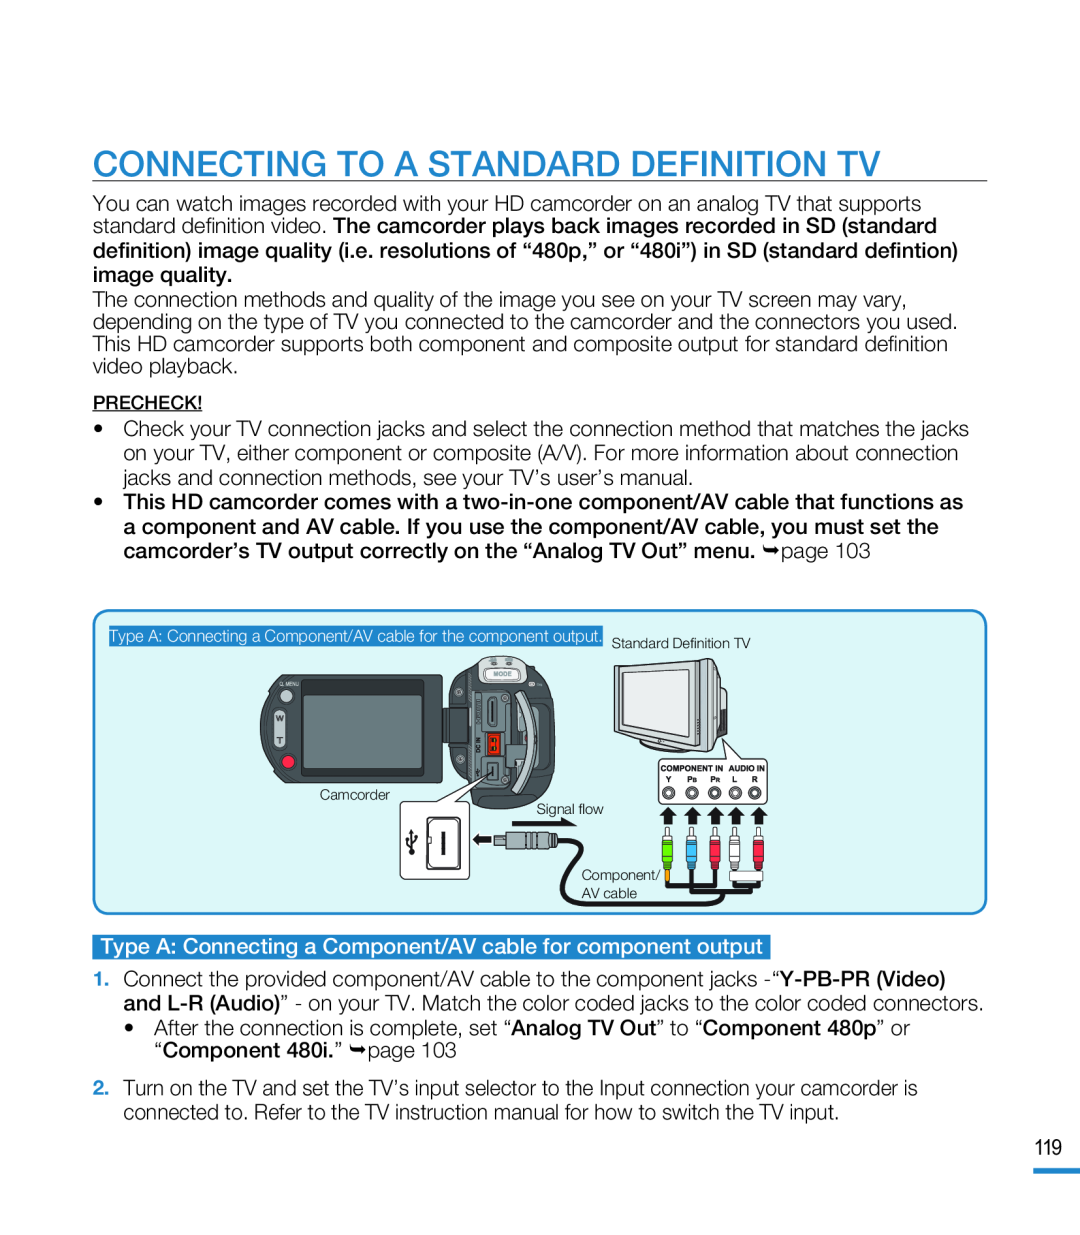 CONNECTING TO A STANDARD DEFINITION TV
 connecting to a TV
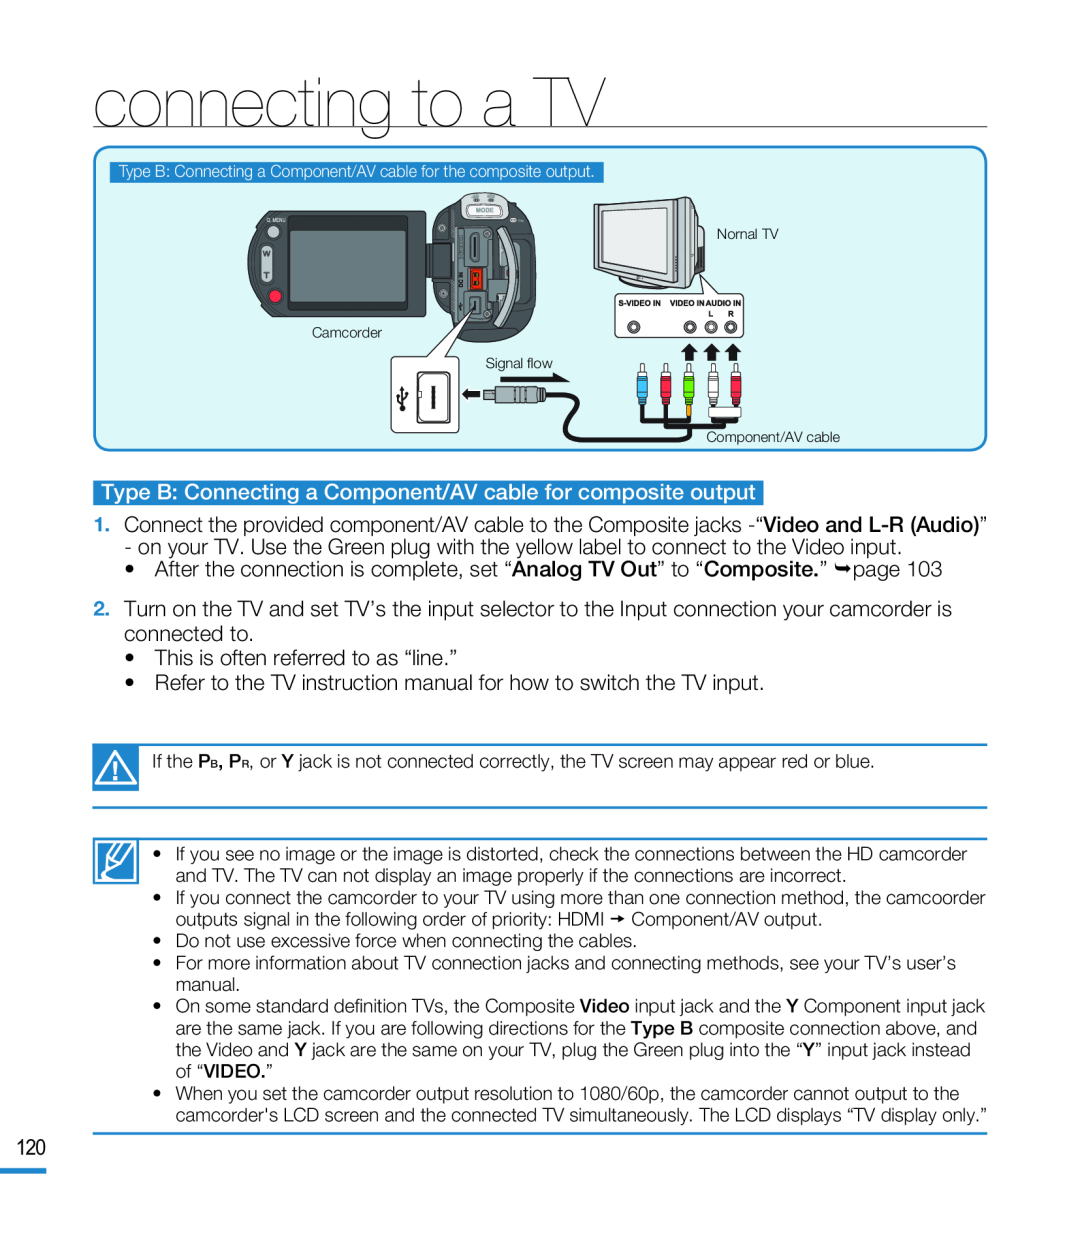
Type B: Connecting a Component/AV cable for composite output
•After the connection is complete, set “Analog TV Out” to “Composite.” page
•This is often referred to as “line.”
•Refer to the TV instruction manual for how to switch the TV input
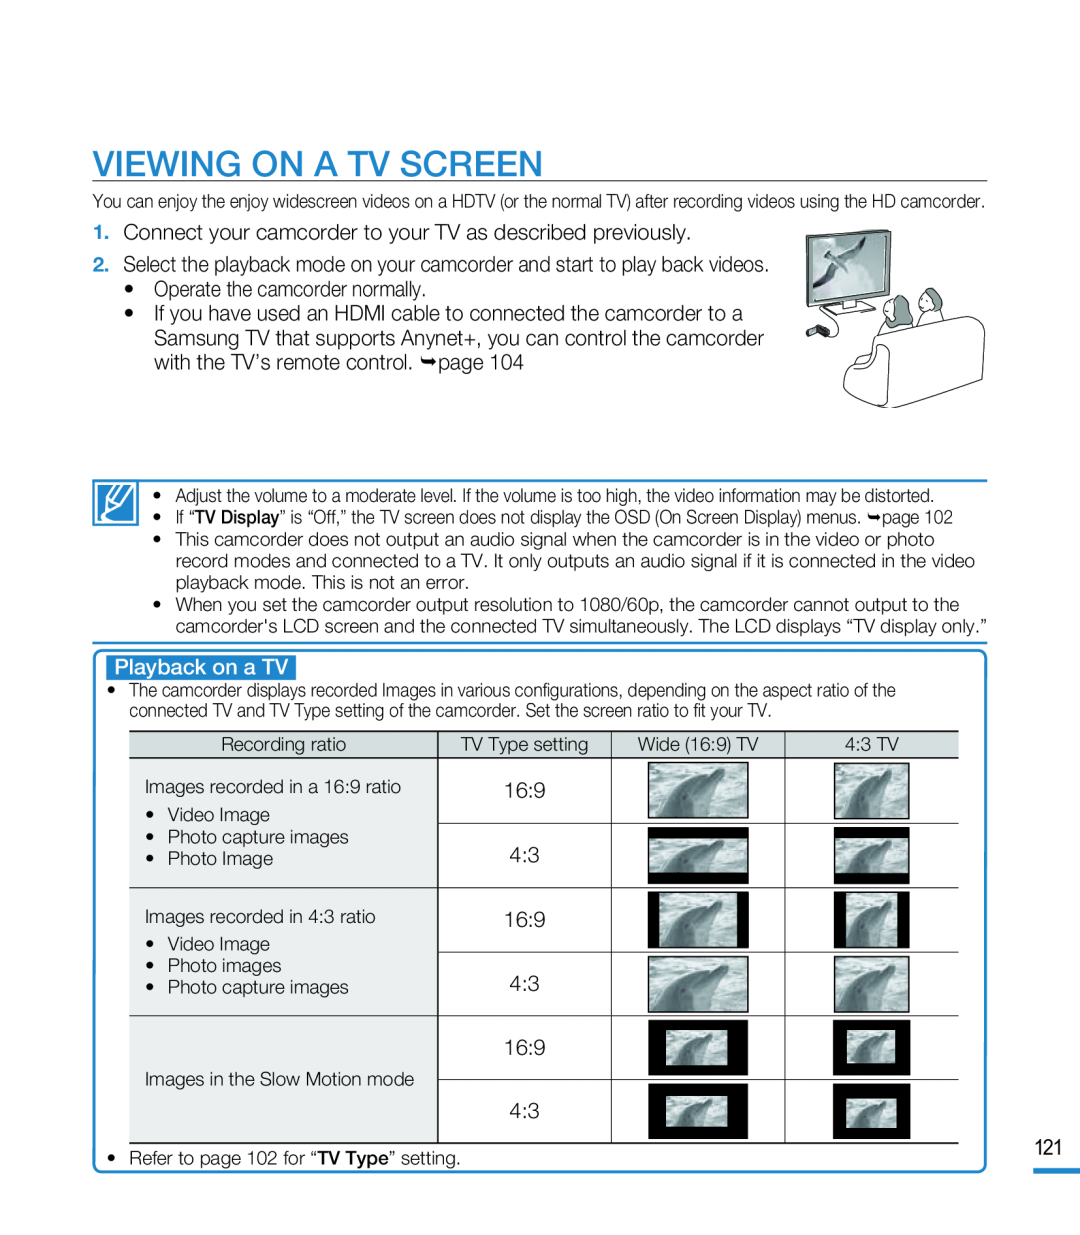 VIEWING ON A TV SCREEN
 dubbing videos
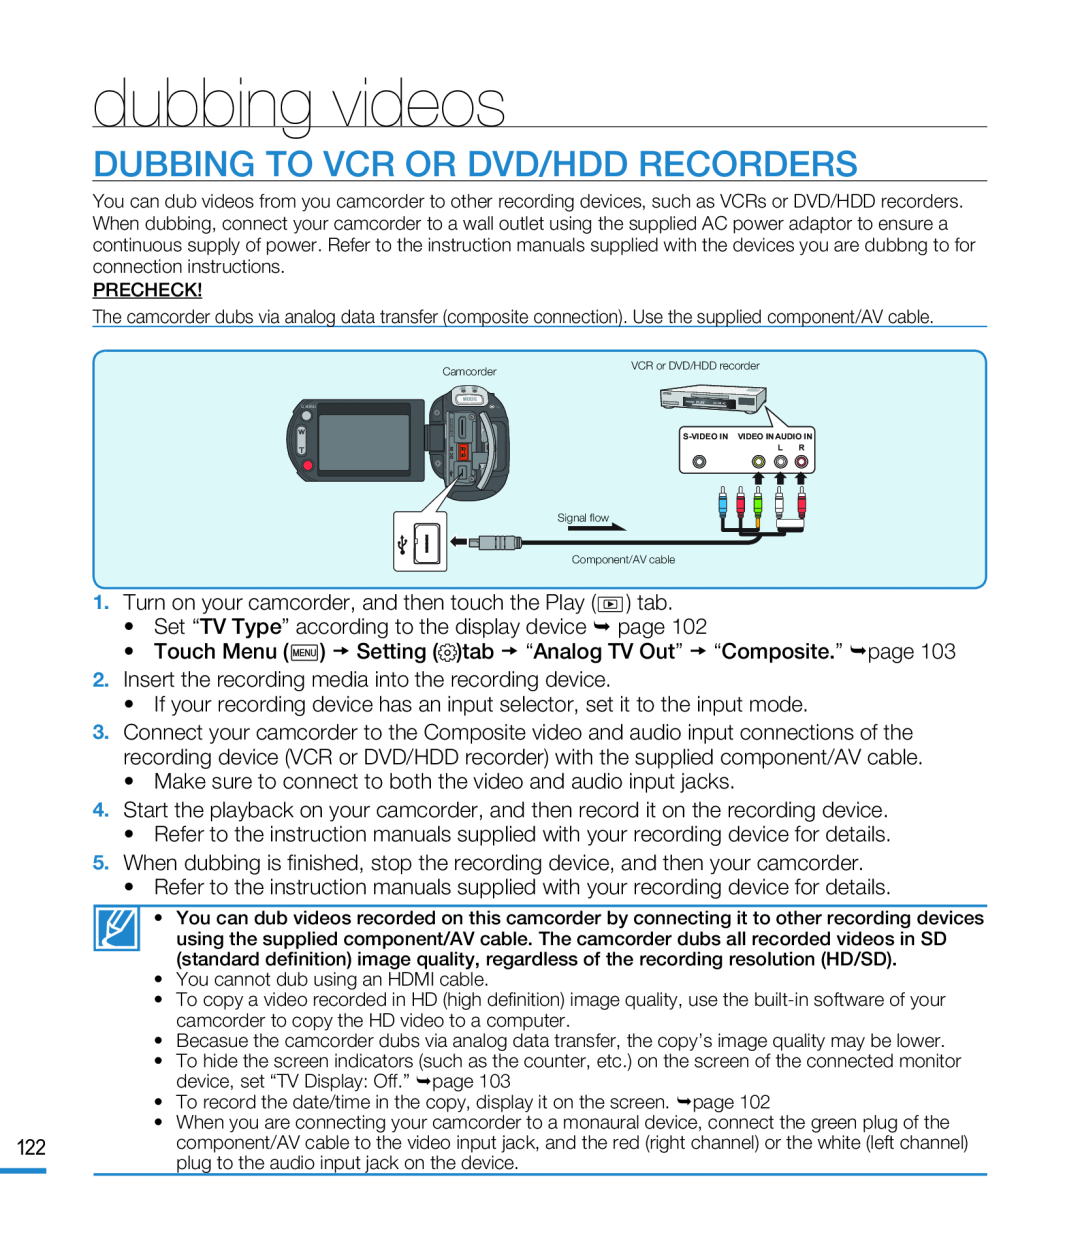
DUBBING TO VCR OR DVD/HDD RECORDERS
 using with a Windows computer
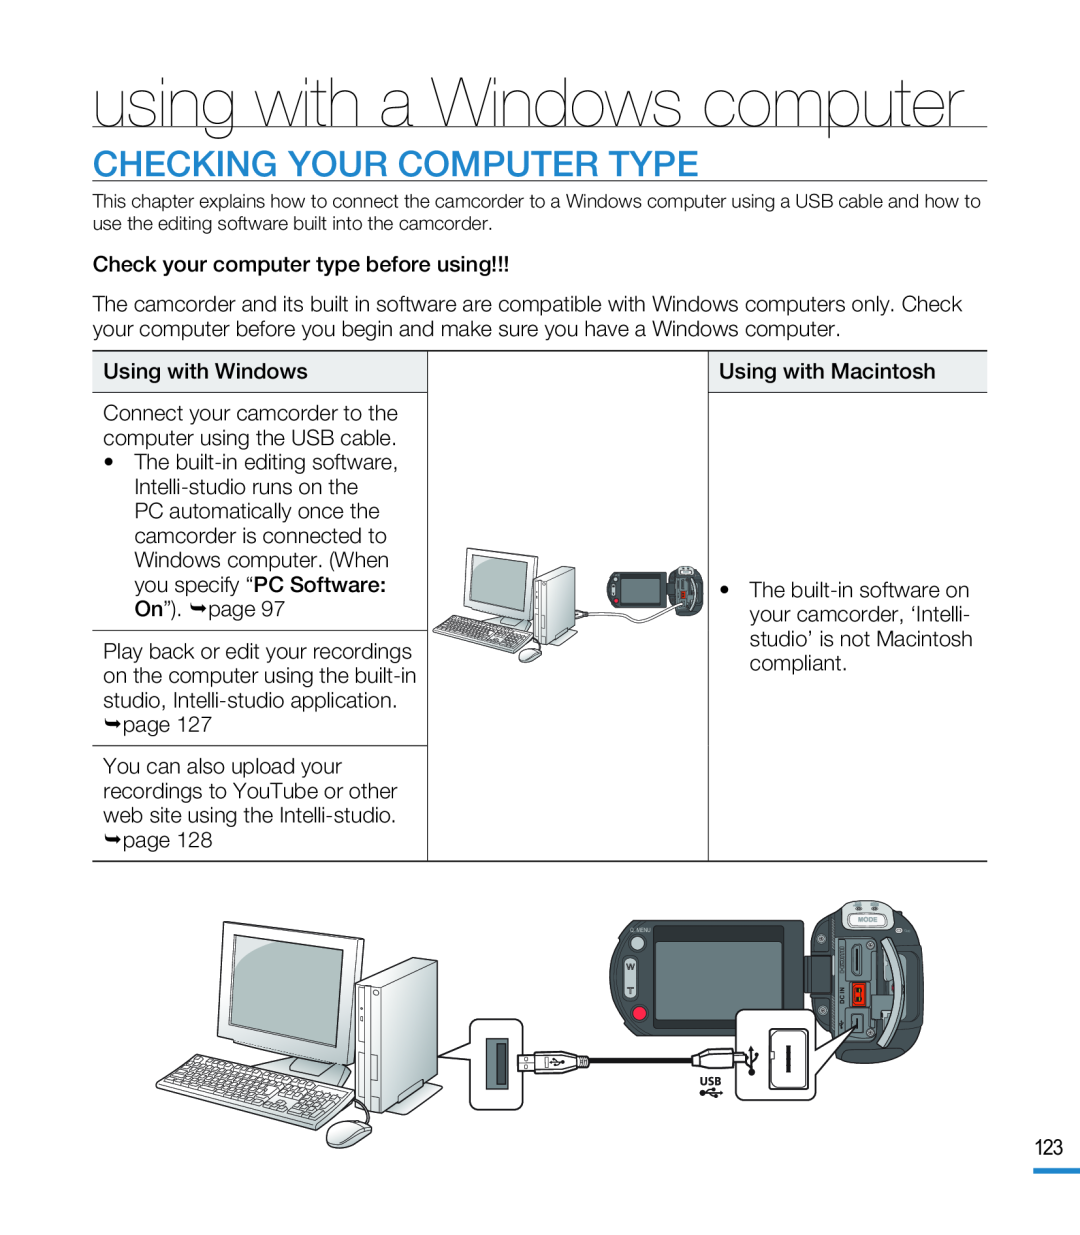
CHECKING YOUR COMPUTER TYPE
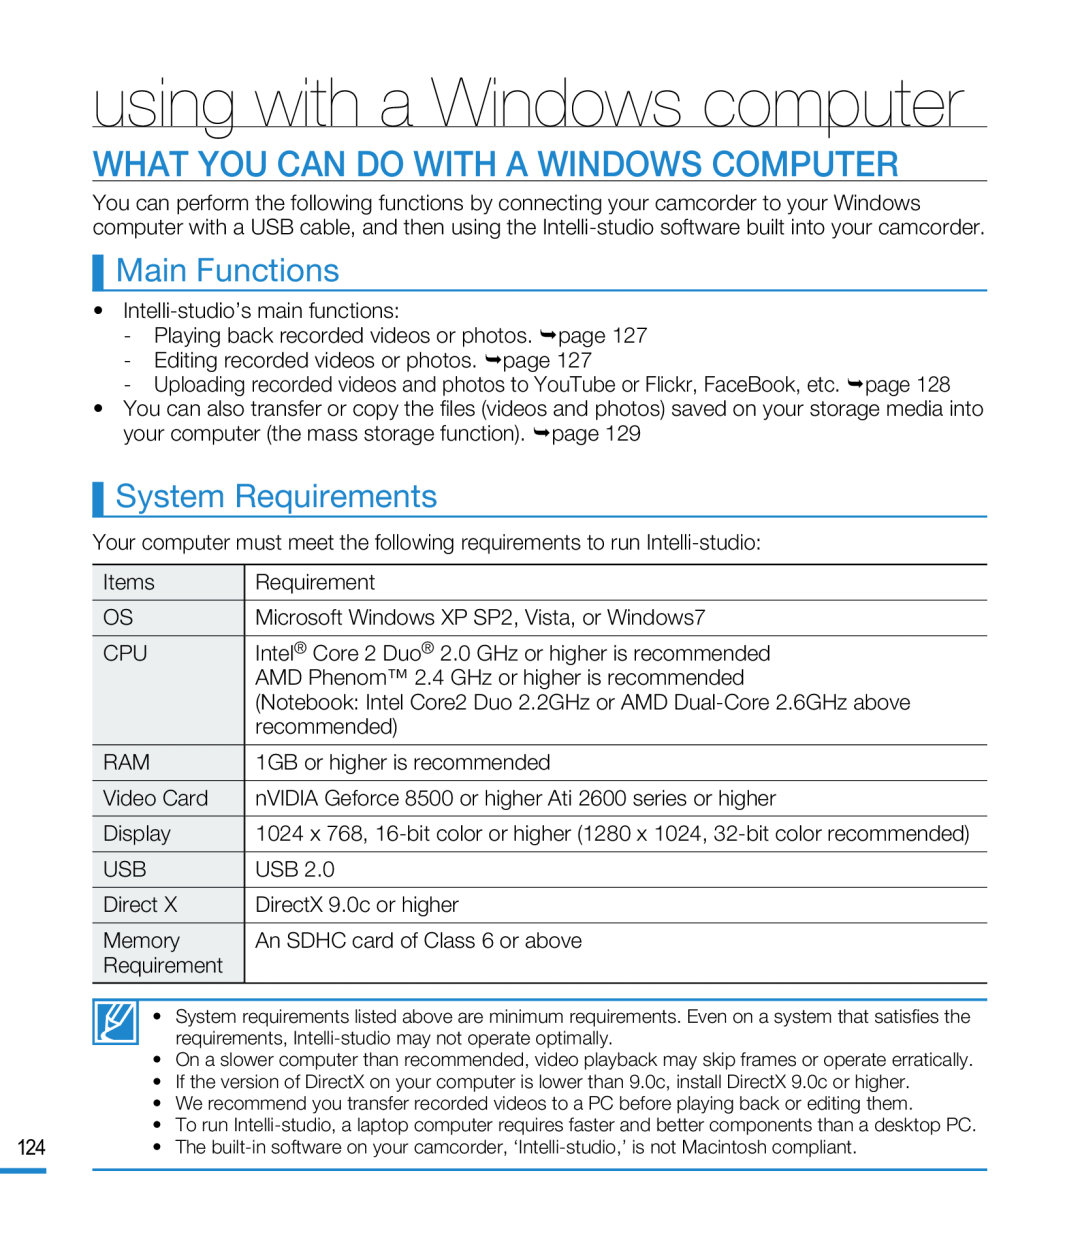 WHAT YOU CAN DO WITH A WINDOWS COMPUTER
Main Functions
System Requirements
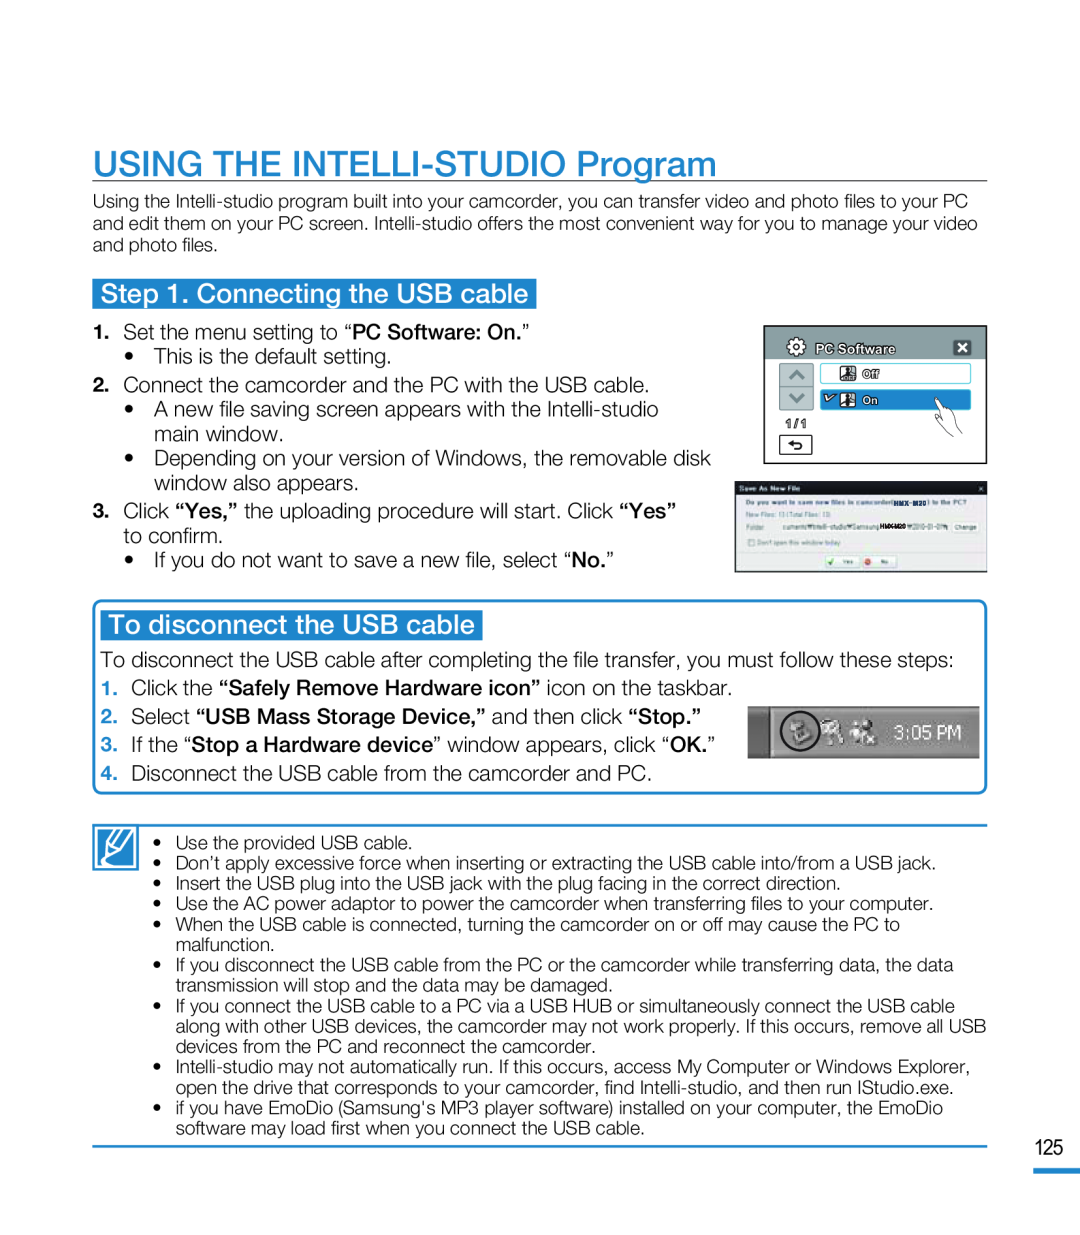 USING THE INTELLI-STUDIOProgram
Step 1. Connecting the USB cable
To disconnect the USB cable
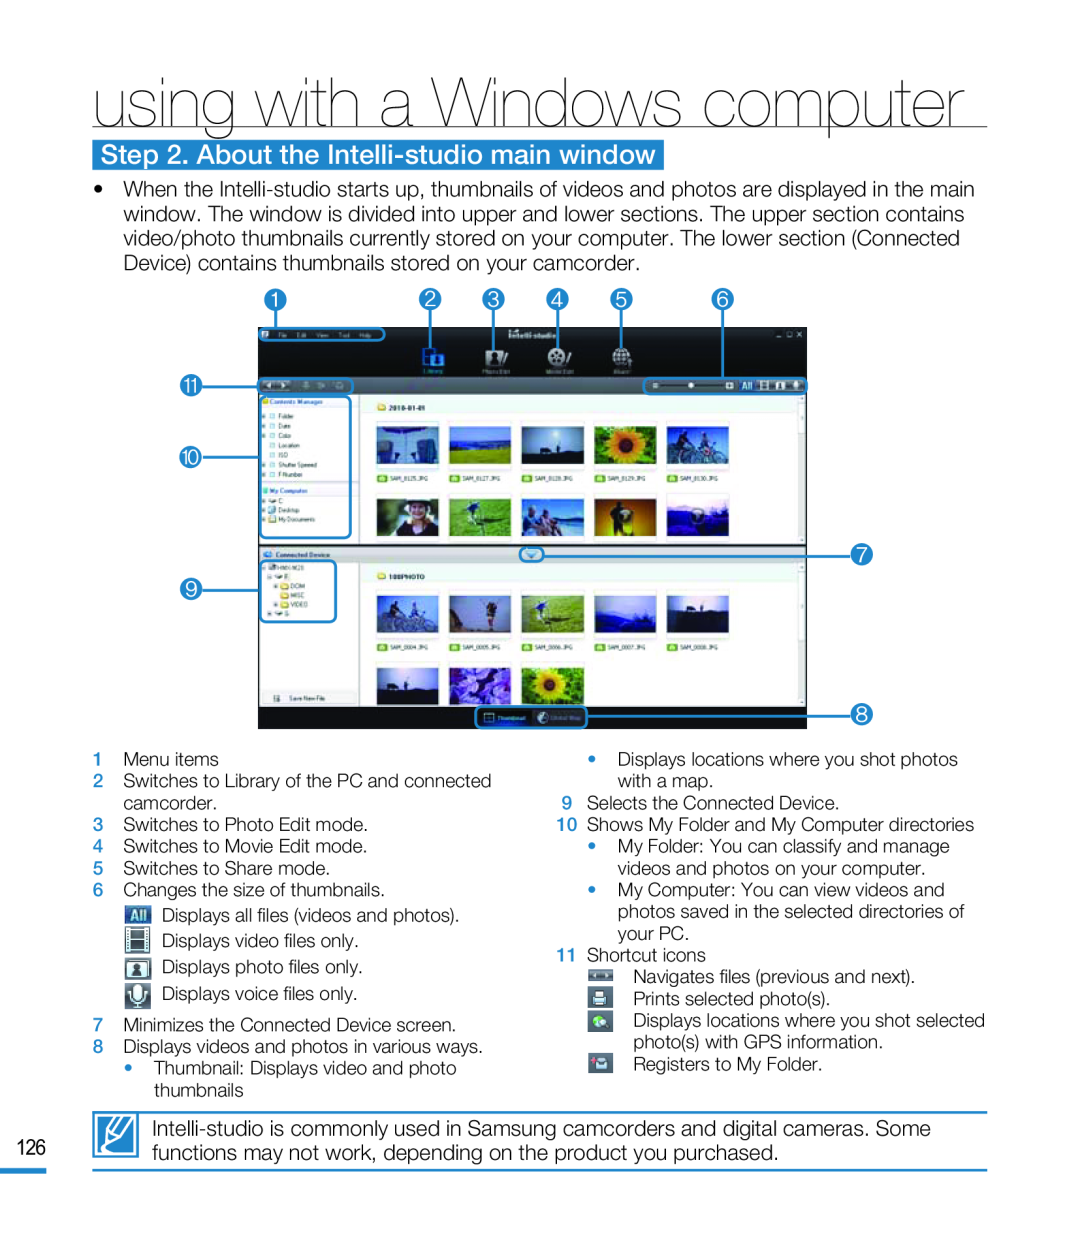 Step 2. About the Intelli-studiomain window
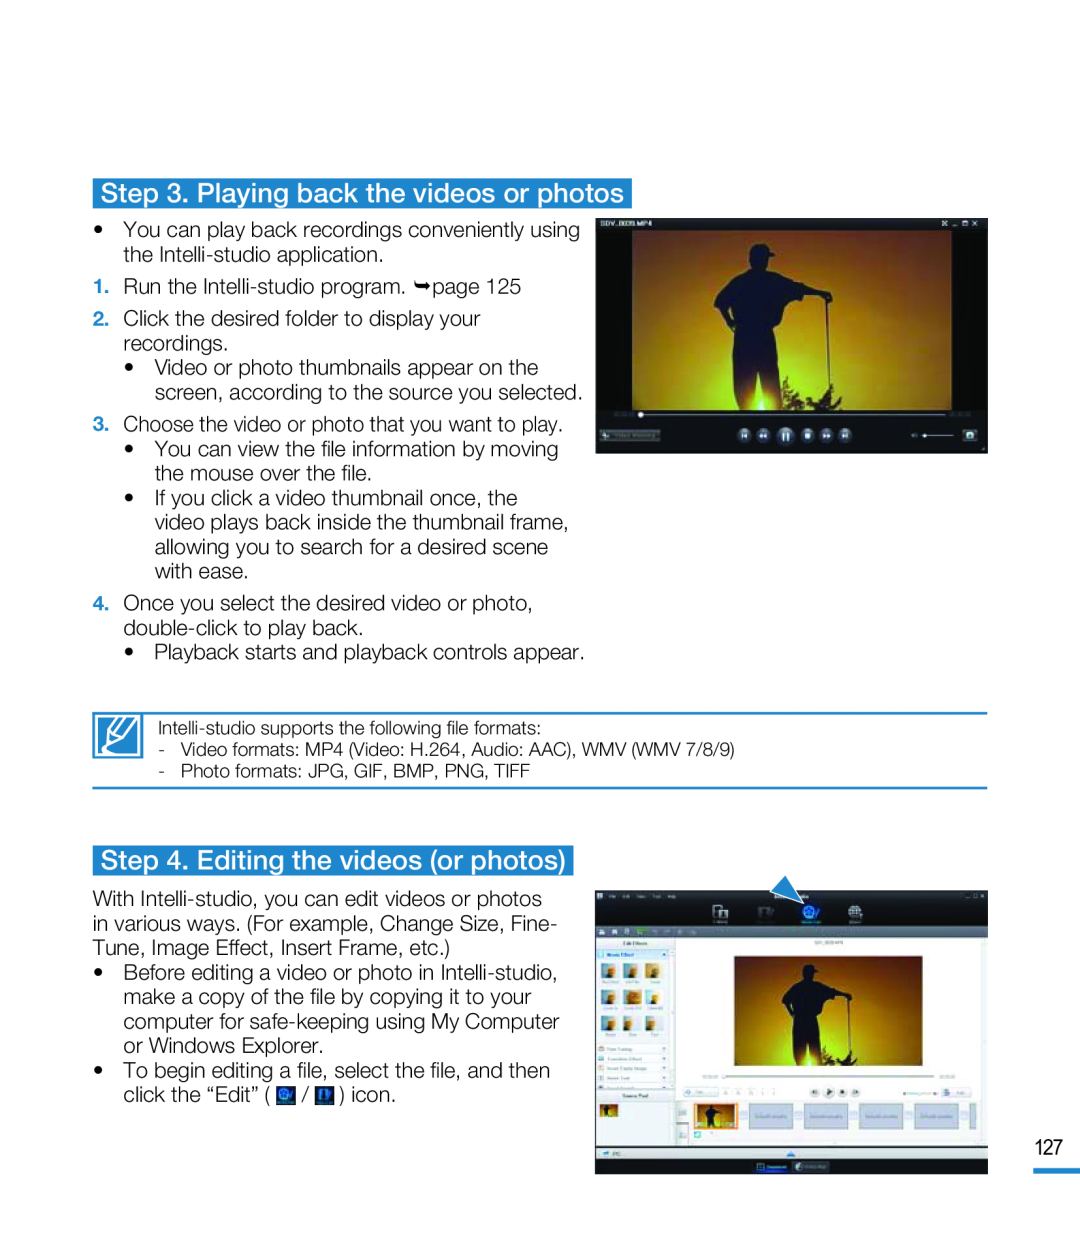 Step 3. Playing back the videos or photos
Step 4. Editing the videos (or photos)
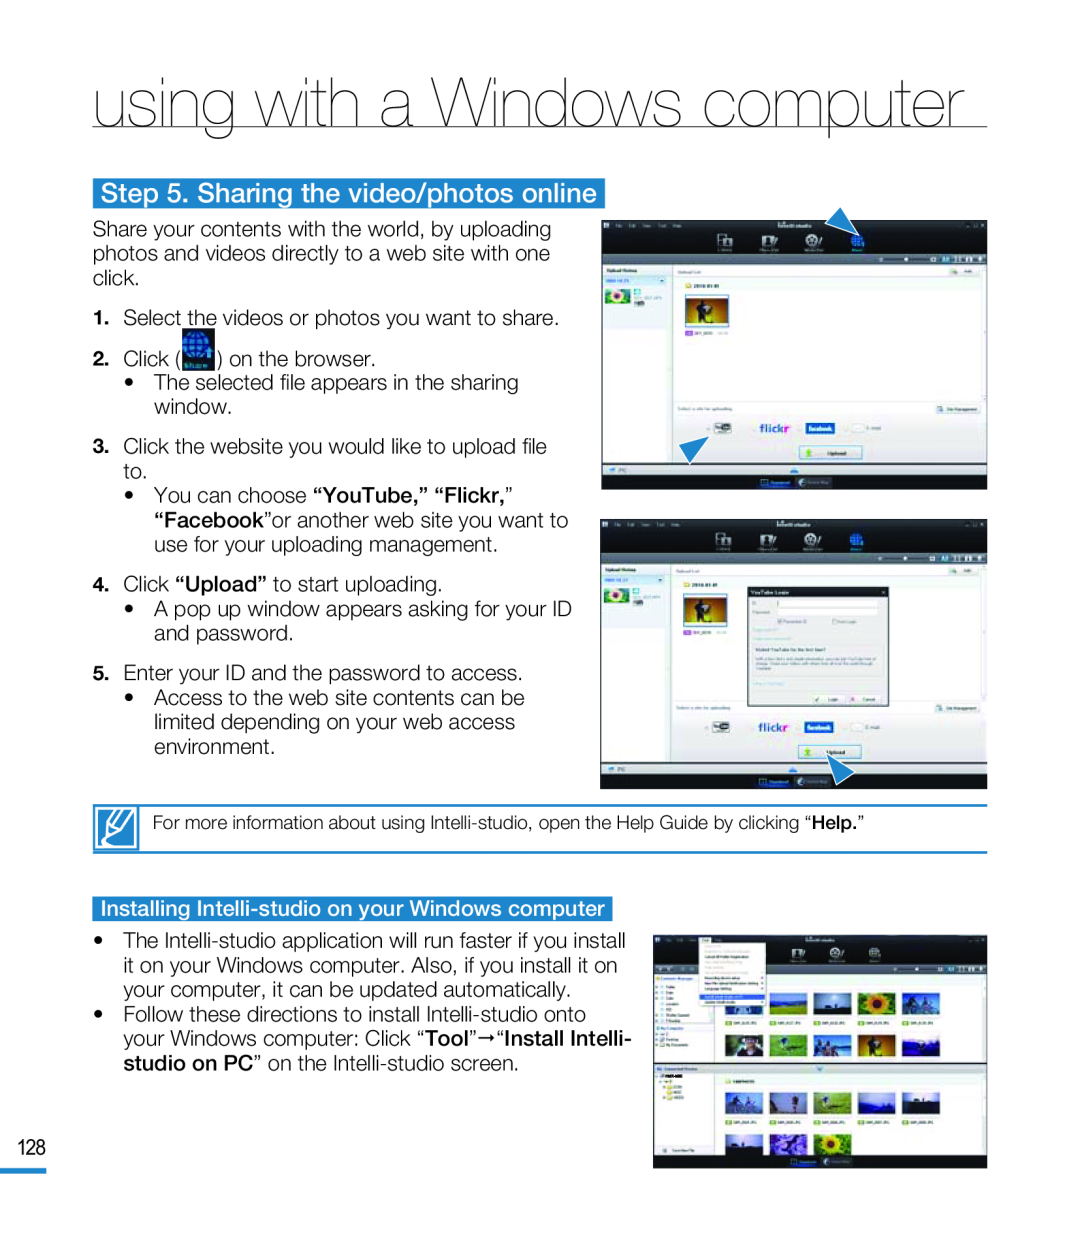 Step 5. Sharing the video/photos online
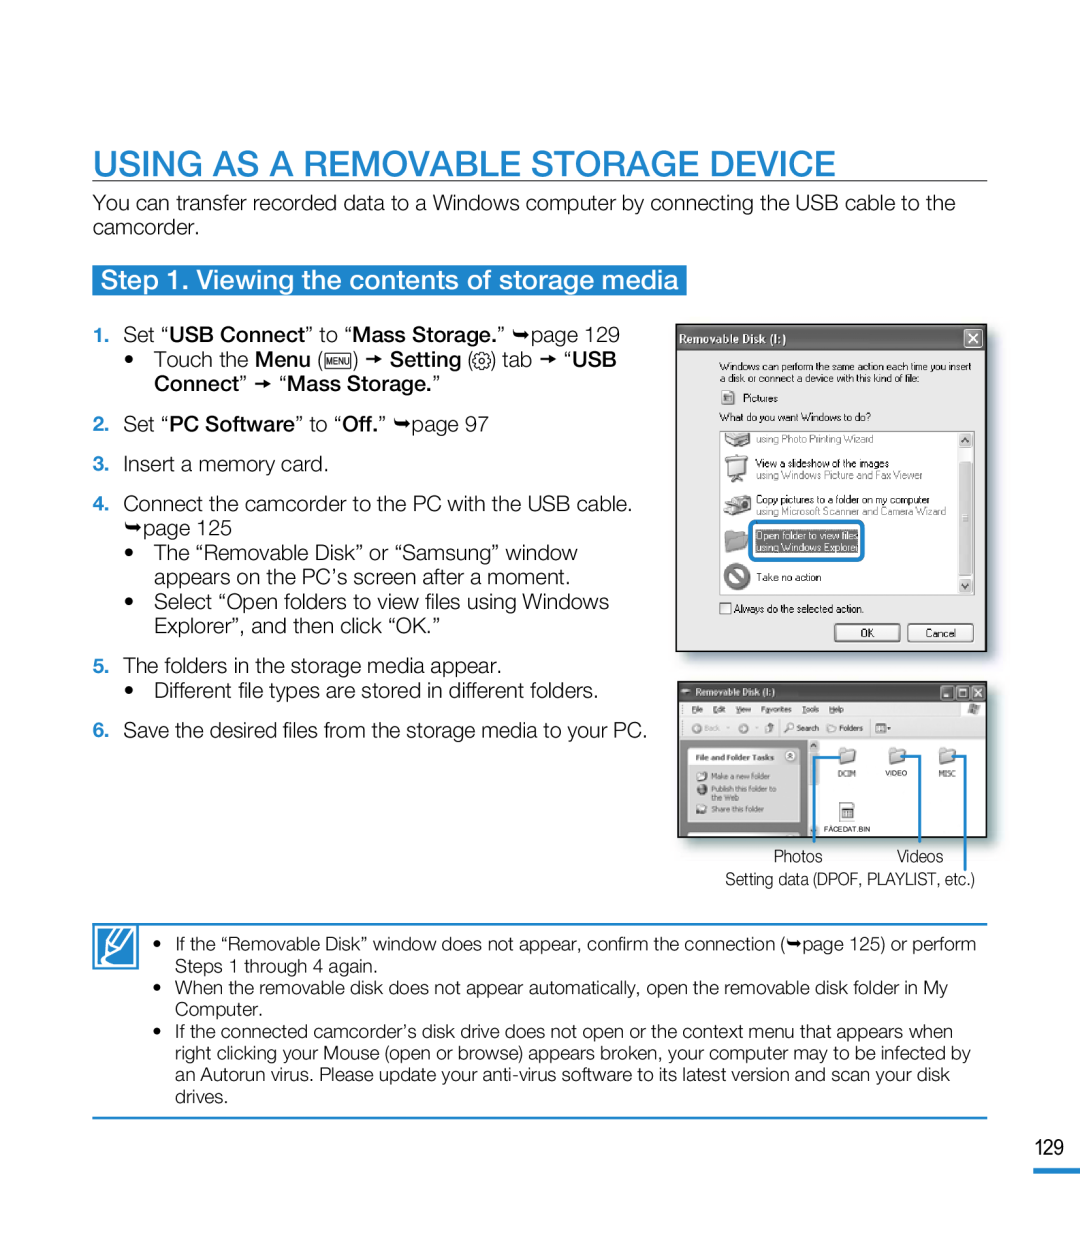 USING AS A REMOVABLE STORAGE DEVICE
Step 1. Viewing the contents of storage media
 using with a Windows computer
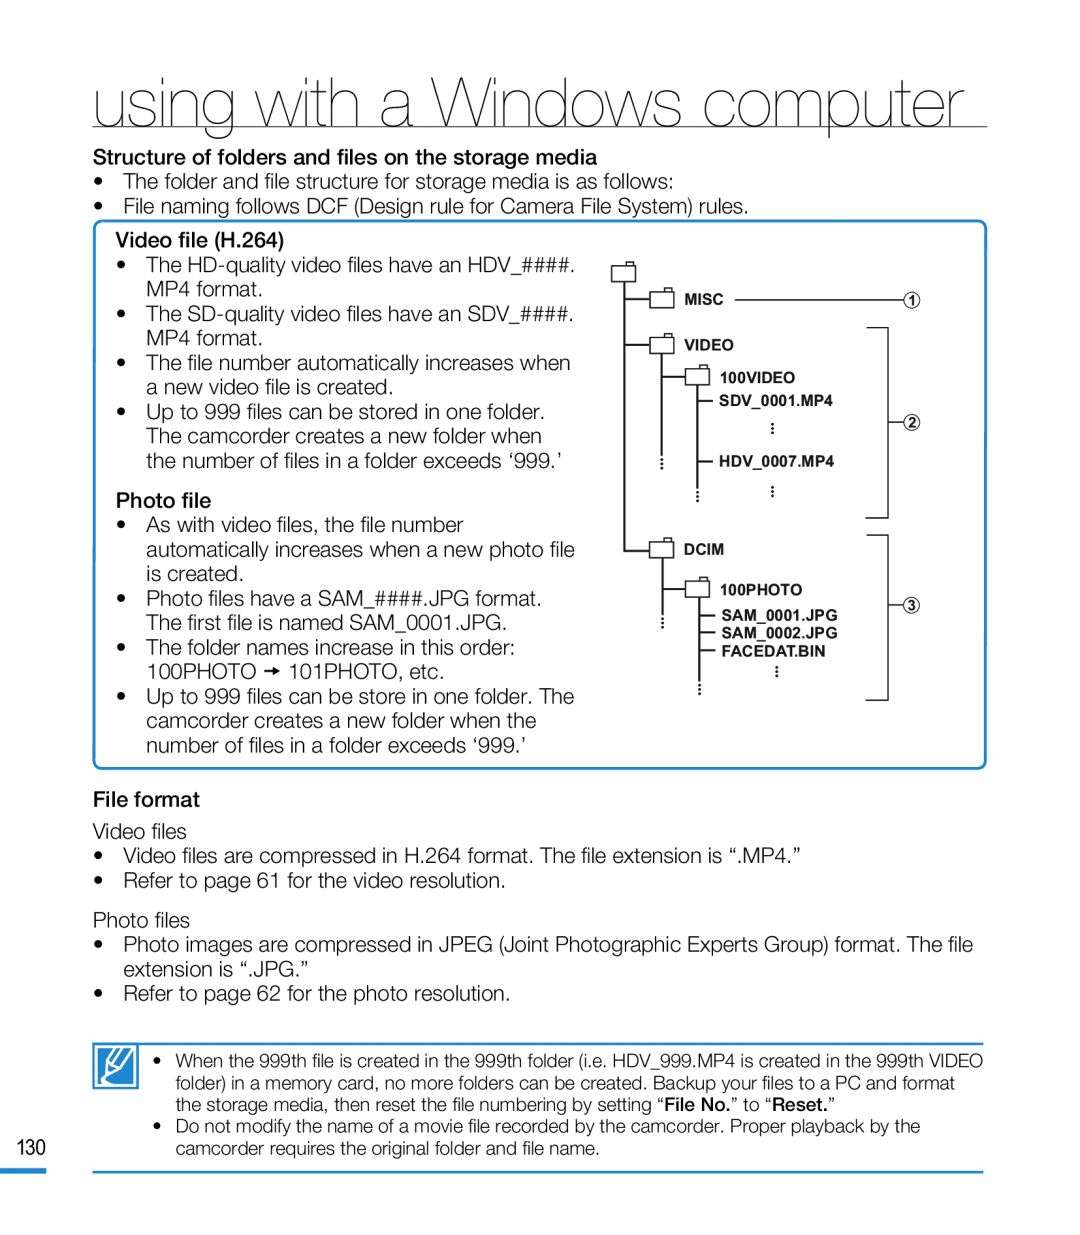
Structure of folders and files on the storage media
•The folder and file structure for storage media is as follows:
•File naming follows DCF (Design rule for Camera File System) rules
Video file (H.264)
•The HD-qualityvideo files have an HDV_####
MP4 format
•The SD-qualityvideo files have an SDV_####
MP4 format
•The file number automatically increases when a new video file is created
Photo file
•The folder names increase in this order:
100PHOTO 101PHOTO, etc
File format
Video files
•Video files are compressed in H.264 format. The file extension is “.MP4.”
•Refer to page 61 for the video resolution
Photo files
•Refer to page 62 for the photo resolution
 warning indicators and messages
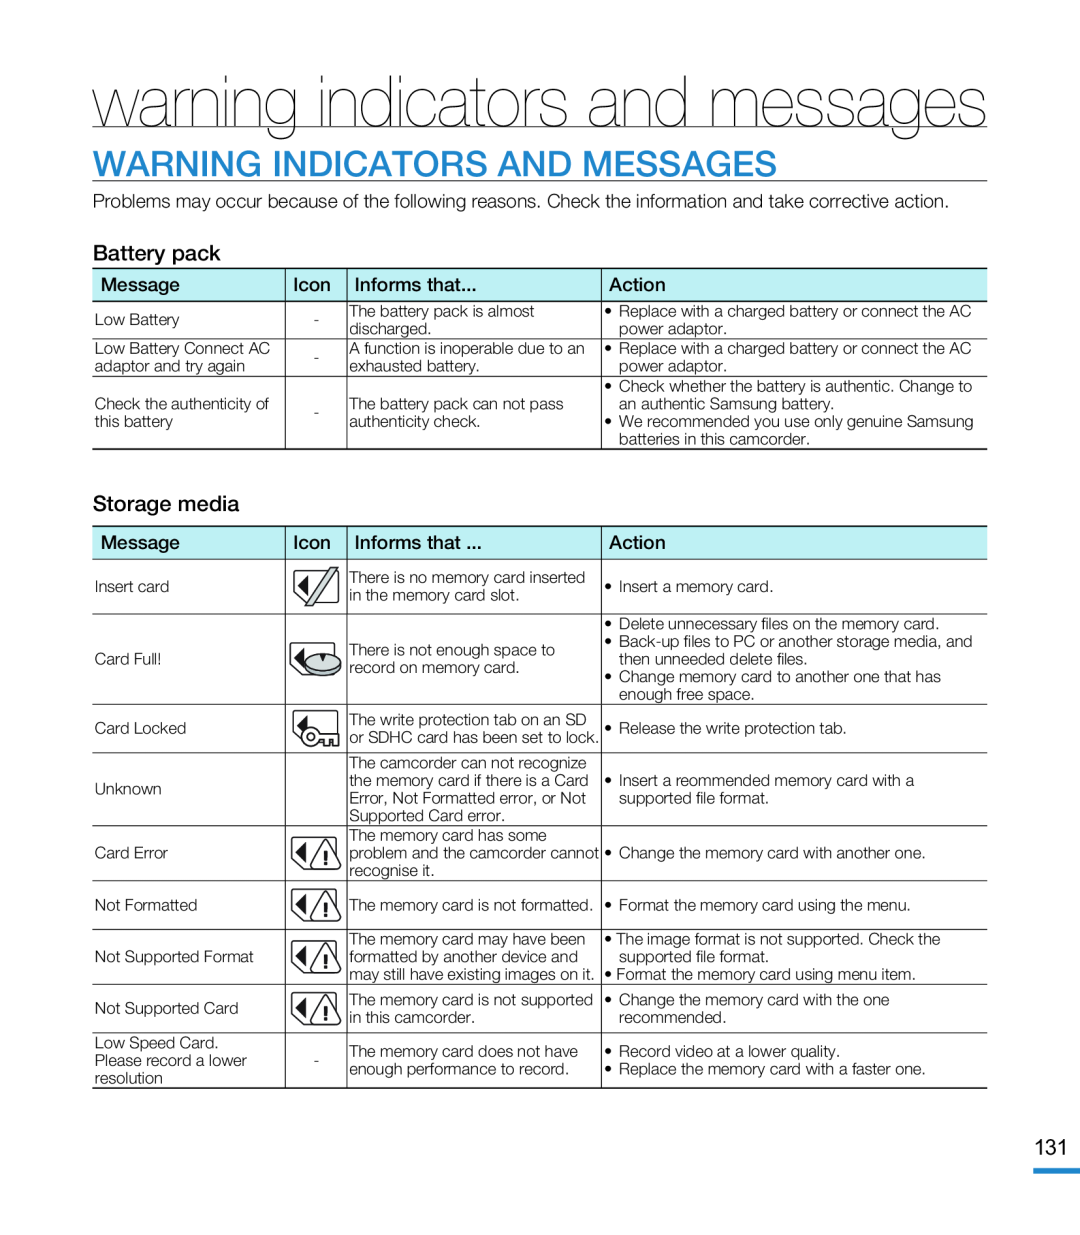
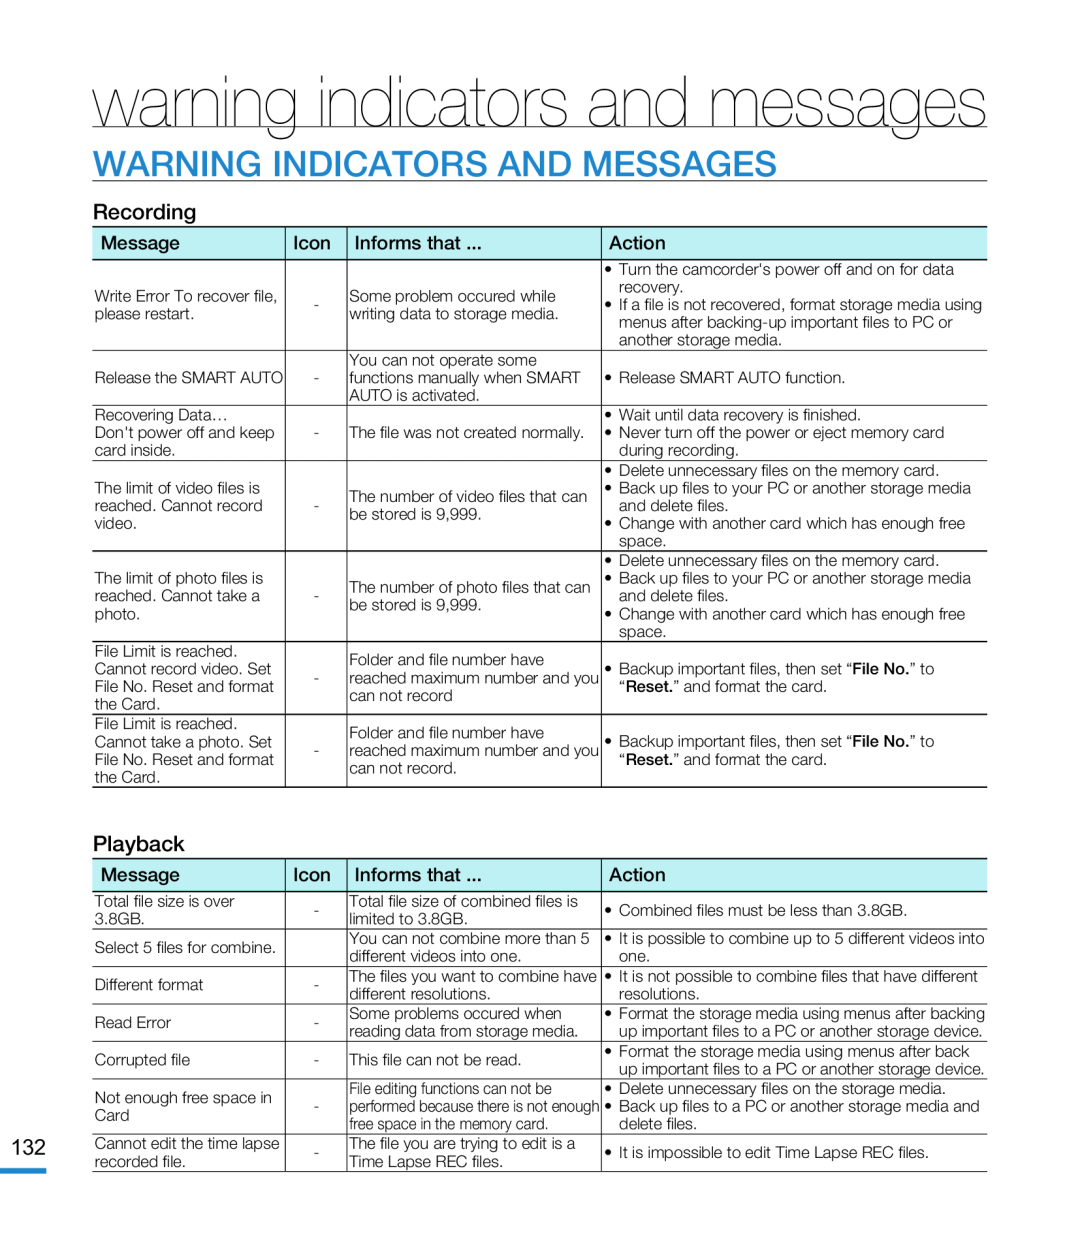
WARNING INDICATORS AND MESSAGES
 warning indicators and messages
WARNING INDICATORS AND MESSAGES
Recording
Playback
 WARNING INDICATORS AND MESSAGES
 warning indicators and messages
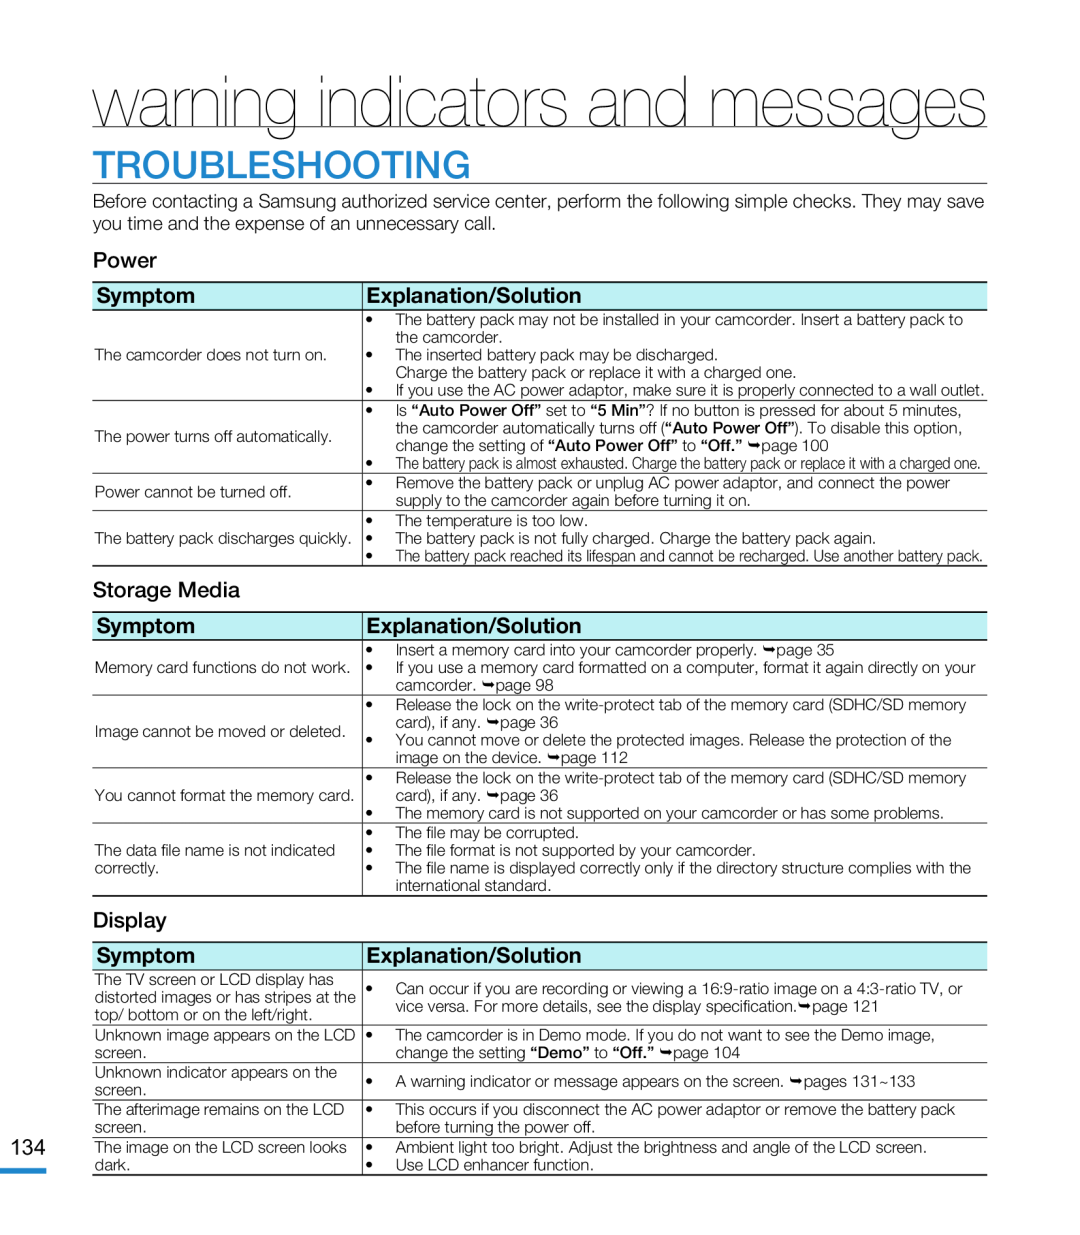
TROUBLESHOOTING
Power
Symptom
Explanation/Solution
Storage Media
Symptom
Explanation/Solution
Display
Symptom
Explanation/Solution
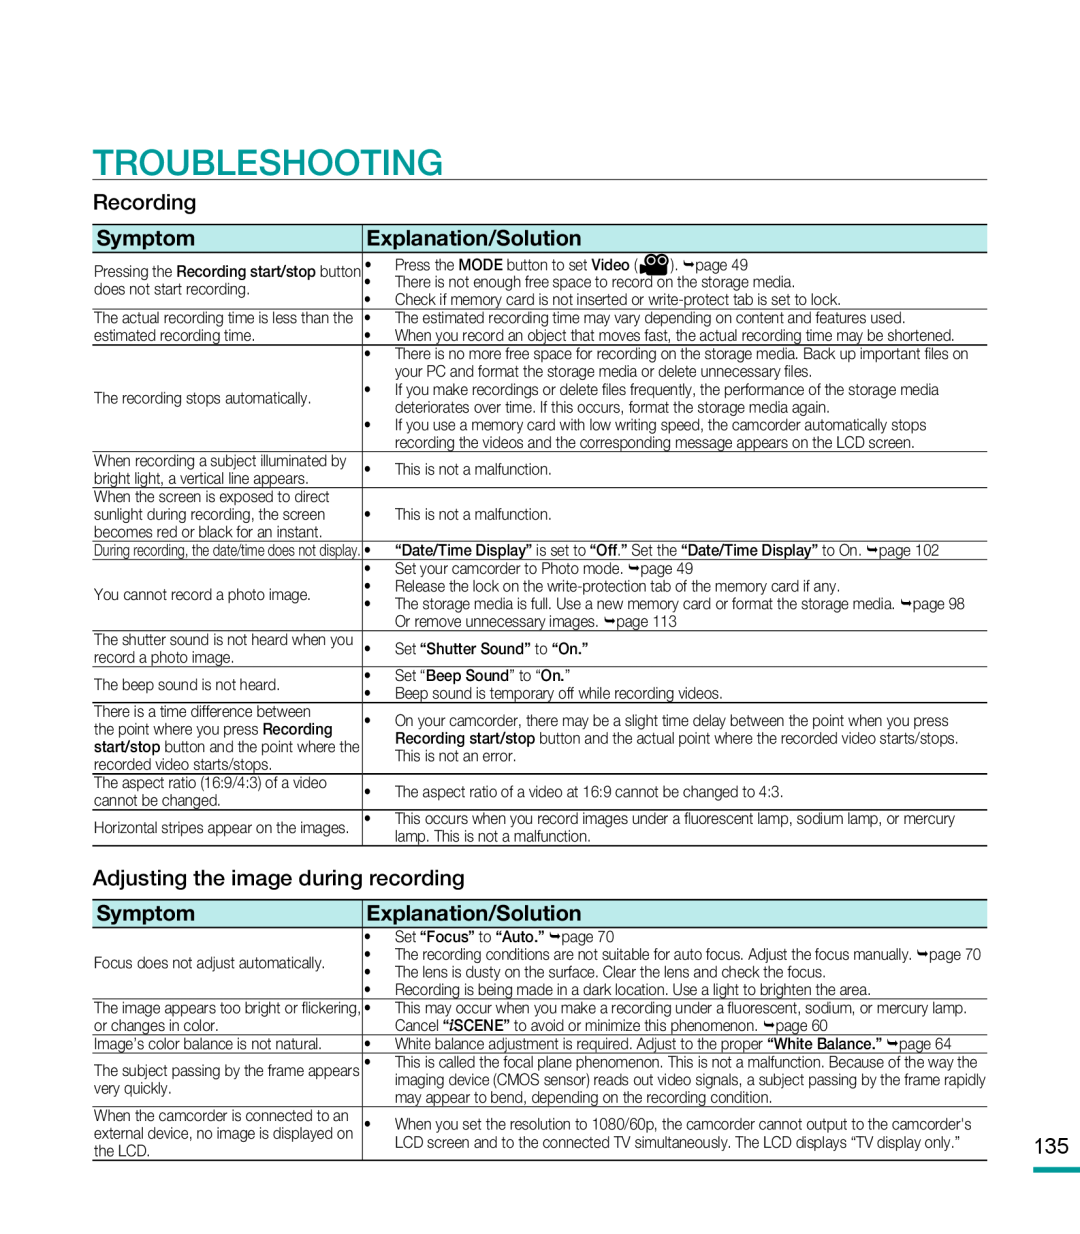 TROUBLESHOOTING
 warning indicators and messages
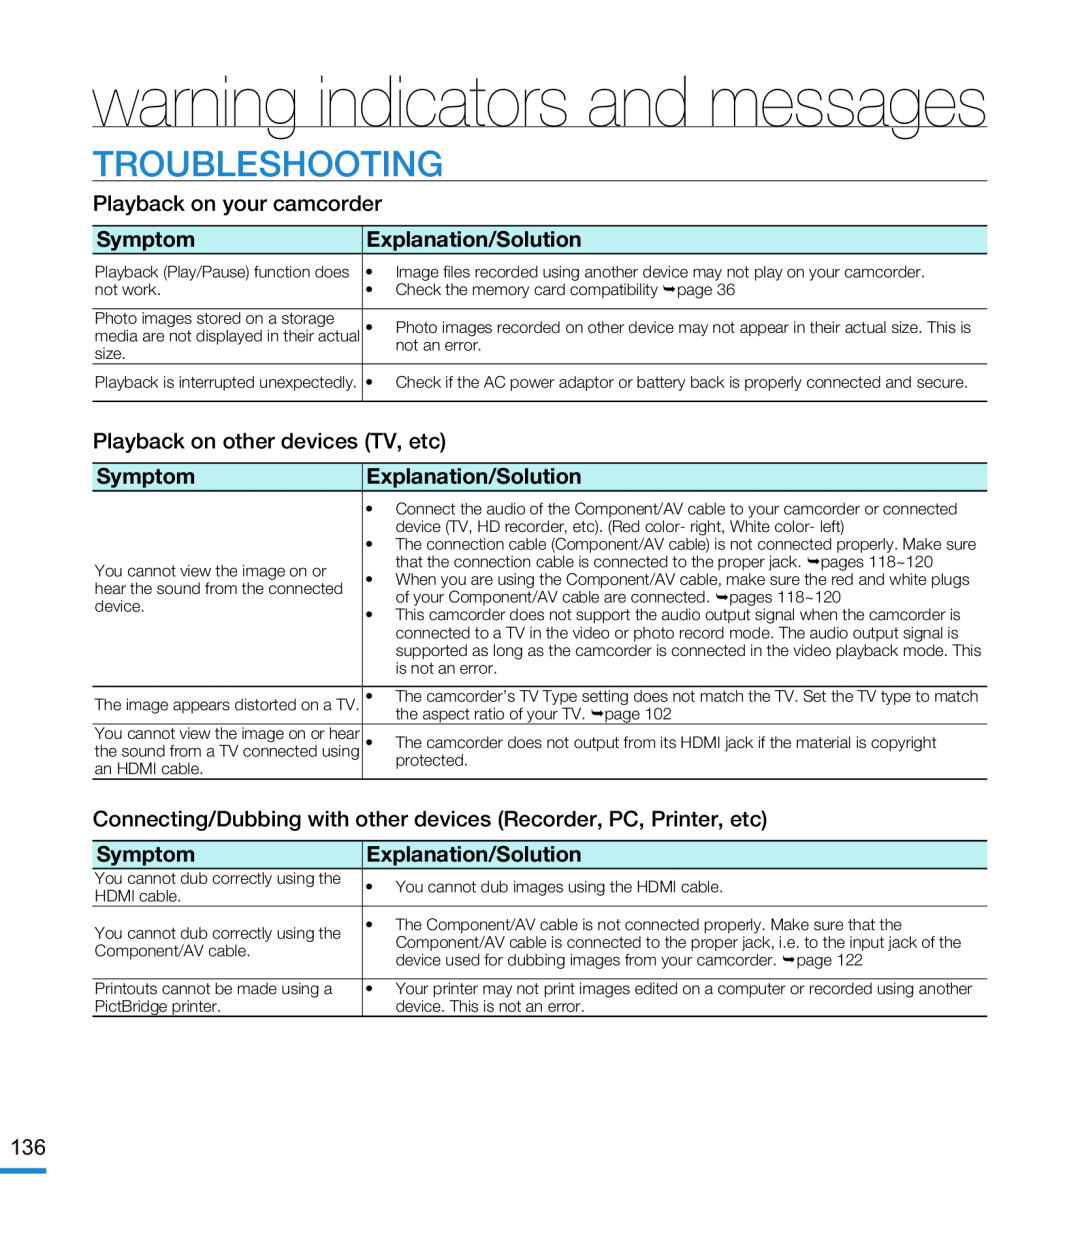
TROUBLESHOOTING
Playback on your camcorder
Playback on other devices (TV, etc)
Connecting/Dubbing with other devices (Recorder, PC, Printer, etc)
 TROUBLESHOOTING
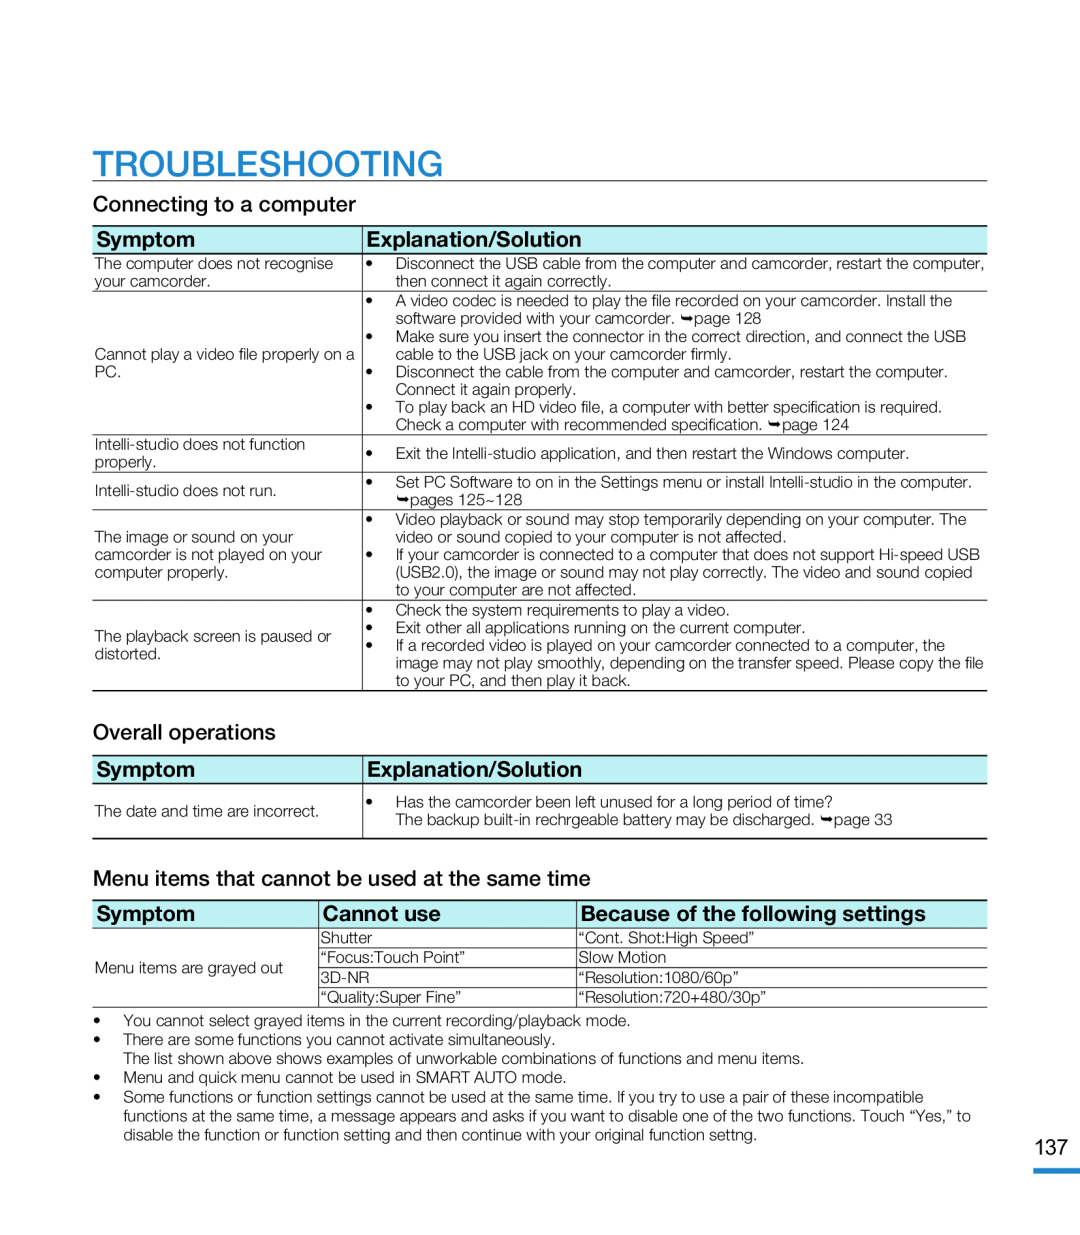
Connecting to a computer
Symptom
Explanation/Solution
Overall operations
Symptom
Explanation/Solution
Menu items that cannot be used at the same time
Symptom
Cannot use
Because of the following settings
 MAINTENANCE
 ADDITIONAL INFORMATION
 USING YOUR CAMCORDER ABROAD
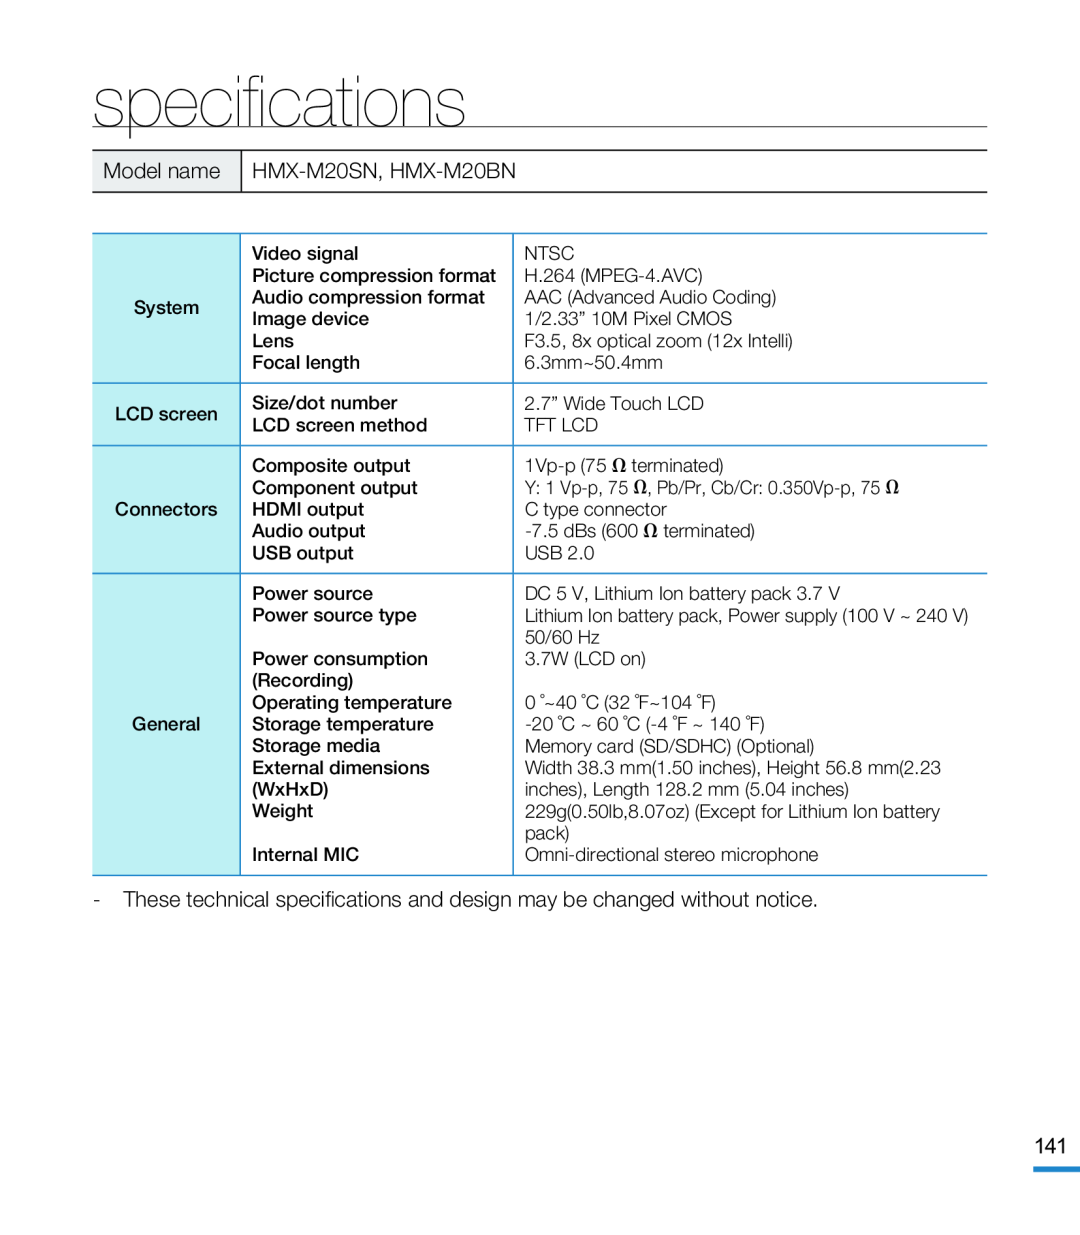 specifications
 warranty
SAMSUNG
LIMITED WARRANTY
EXCLUSIONS (WHAT IS NOT COVERED)
 1-800-SAMSUNG (726-7864)