 M O B I L E P L A Y E R
 Intellectual Property
Open Source Software
http://opensource.samsung.com
Disclaimer of Warranties; Exclusion of Liability
 Address: 85 Challenger Road
Ridgefield Park
New Jersey
Toll Free 1-800-SAMSUNG
Internet http://www.samsung.com
 Wi-Fiis a registered trademark of the Wireless Fidelity Alliance, Inc
Swype is a trademark of Swype, Inc
Applications
Settings
About device
Legal Information
Licence settings
DivX® VOD
Register
vod.divx.com
 Table of Contents
 Section 5: Messaging
Section 7: Music
Section 9: Connections
 Section 11: Settings
Wireless and Network
Accounts and Sync
SD Card and Device Storage
 Index
Index
 Section 1: Getting Started
Understanding This User Manual
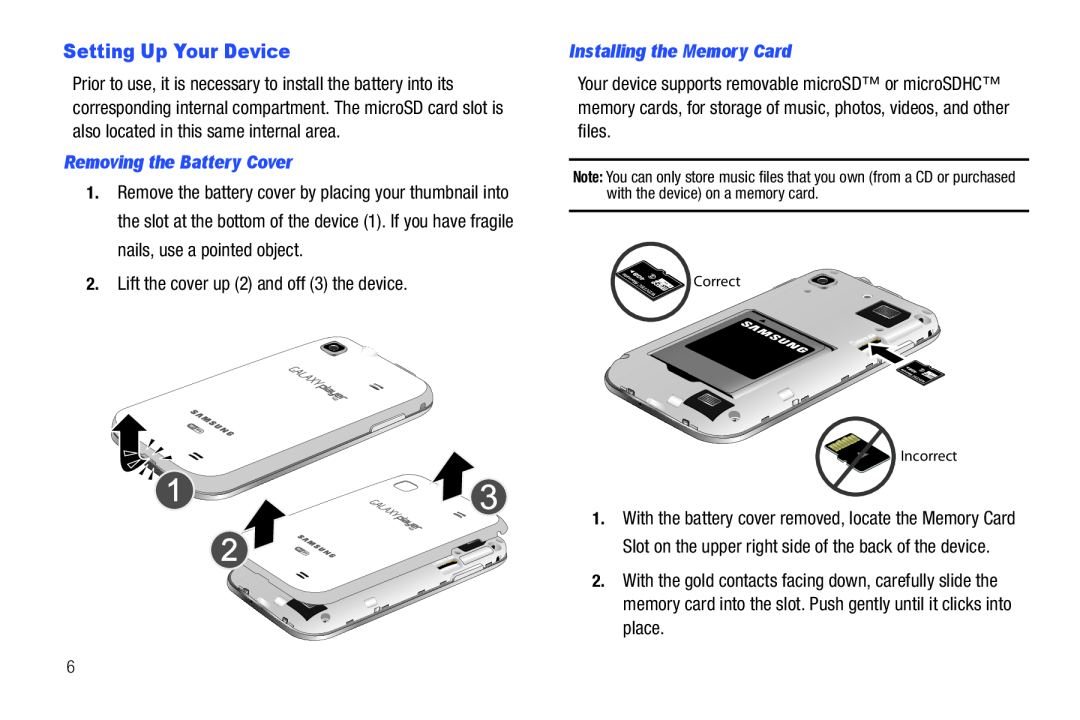 Setting Up Your Device
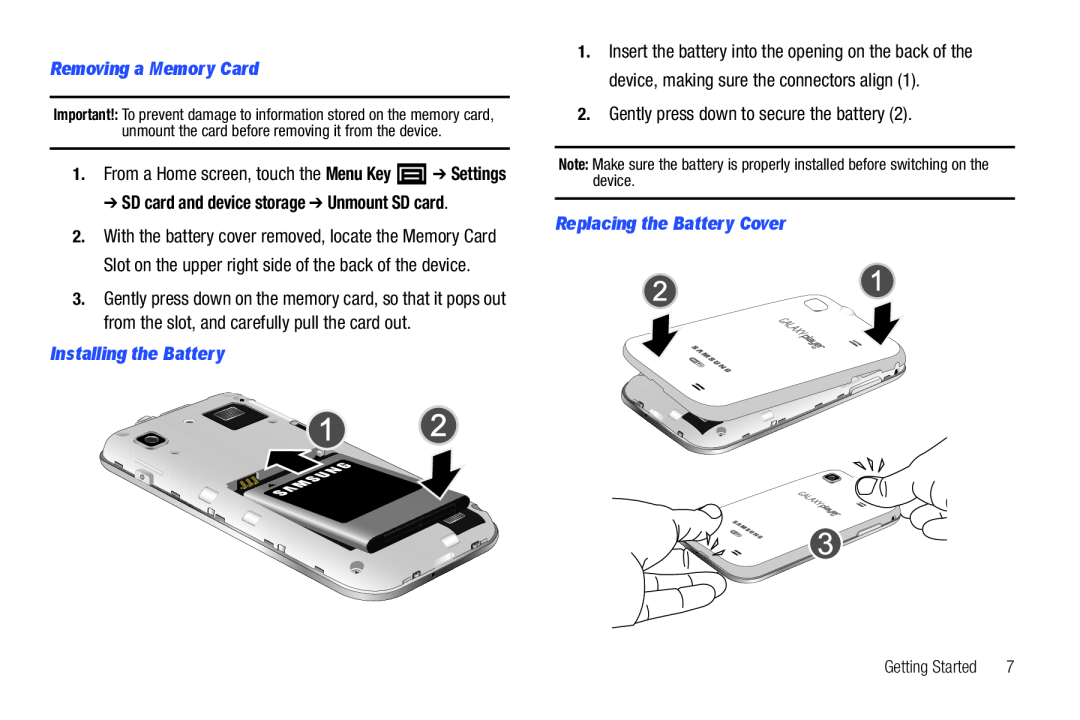 Removing a Memory Card
➔ SD card and device storage ➔ Unmount SD card
Installing the Battery
2.Gently press down to secure the battery (2)
Replacing the Battery Cover
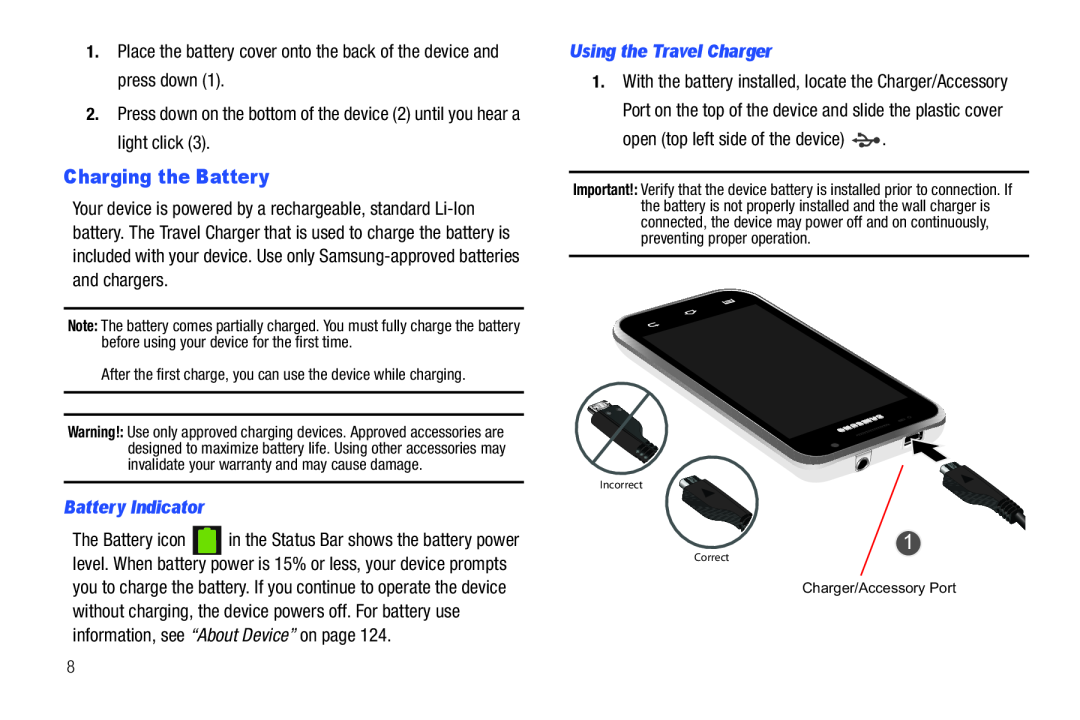 Charging the Battery
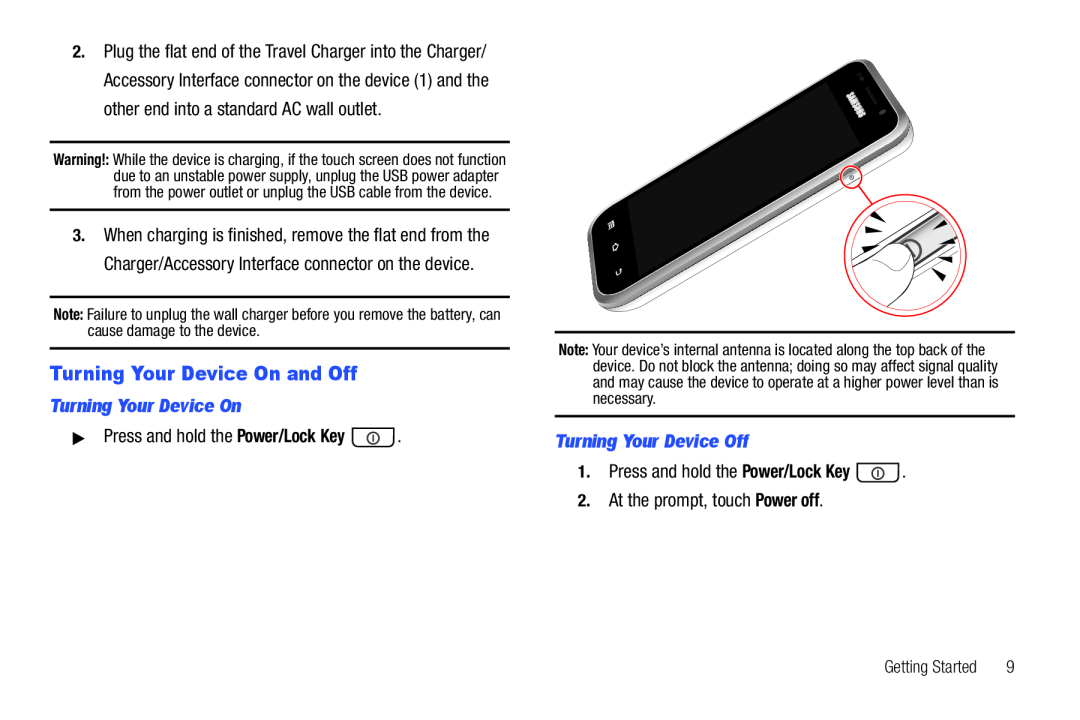 Turning Your Device On and Off
 Your Google Account
Using Google Maps
Task Manager
 Galaxy Player 4.0 Accessories
Securing Your Device
 Troubleshooting
Android System Recovery
 Section 2: Understanding Your Device
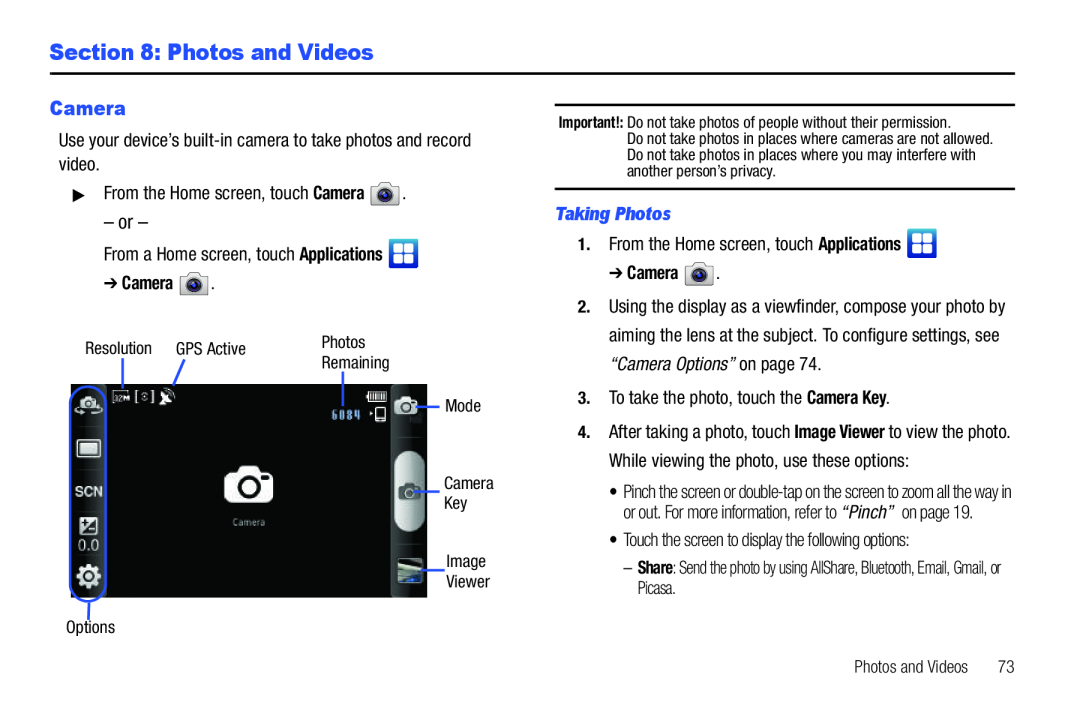
Features
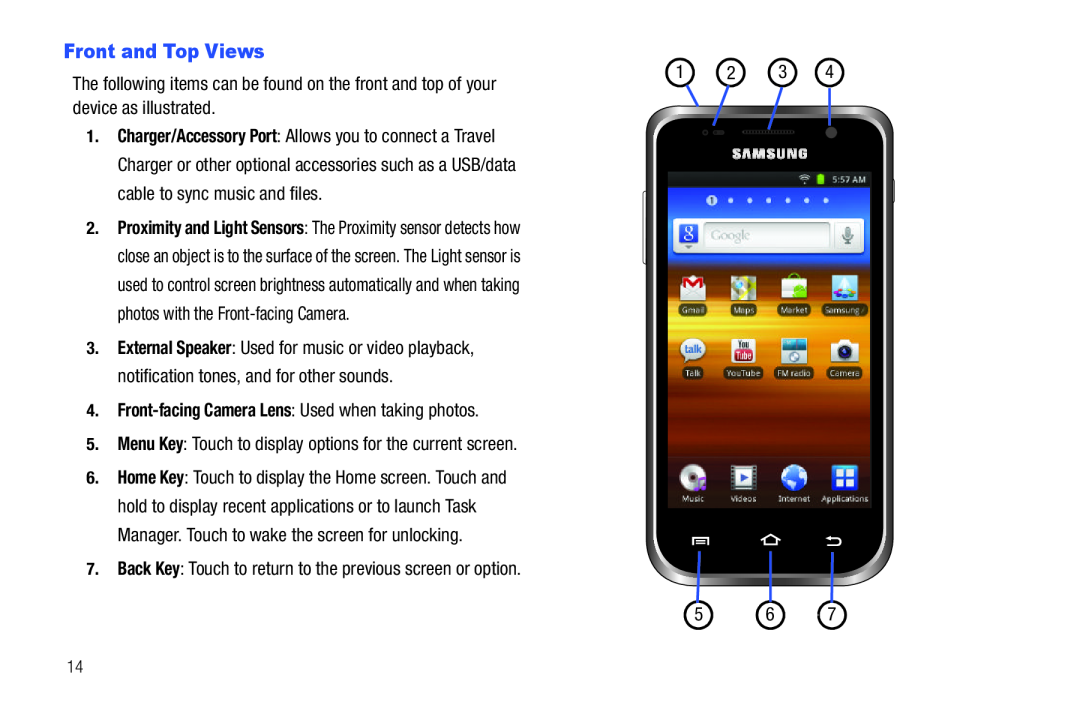 Front and Top Views
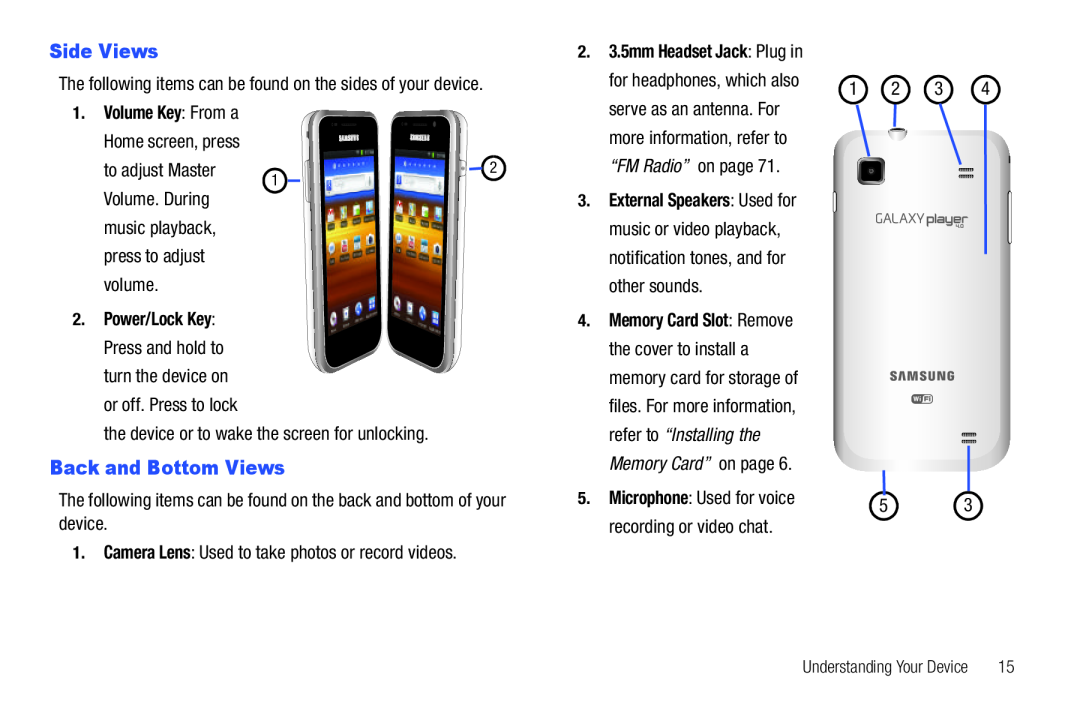 Side Views
Back and Bottom Views
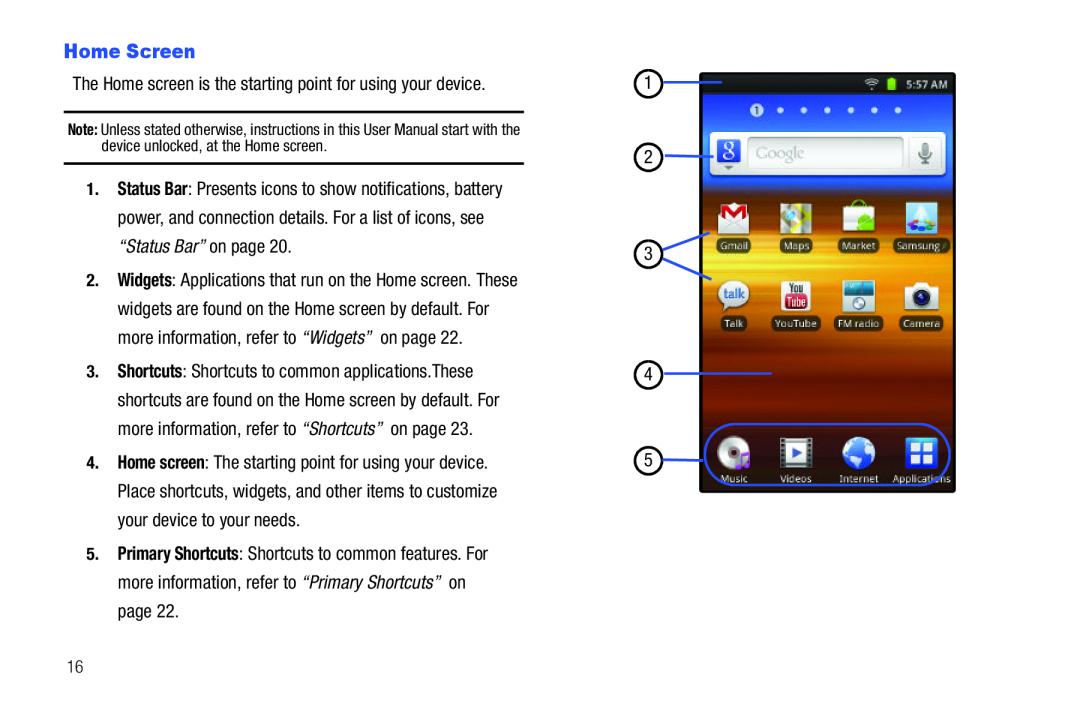 Home Screen
 Extended Home Screen
Customizing the Home Screen
Add to Home screen
•Widgets: For more information, refer to “Widgets” on page
Widgets
•Folders: For more information, refer to “Folders” on page
Folders
•Wallpapers: For more information, refer to “Wallpapers” on page
Wallpapers
Display Settings
“Display”
Adding and Removing Home Screen Panels
1.From a Home screen, touch the Menu Key ➔ Edit
Menu Key
Edit
2.Use these controls to configure panels:
3.To rearrange the order of panels, touch and drag a panel to a new location
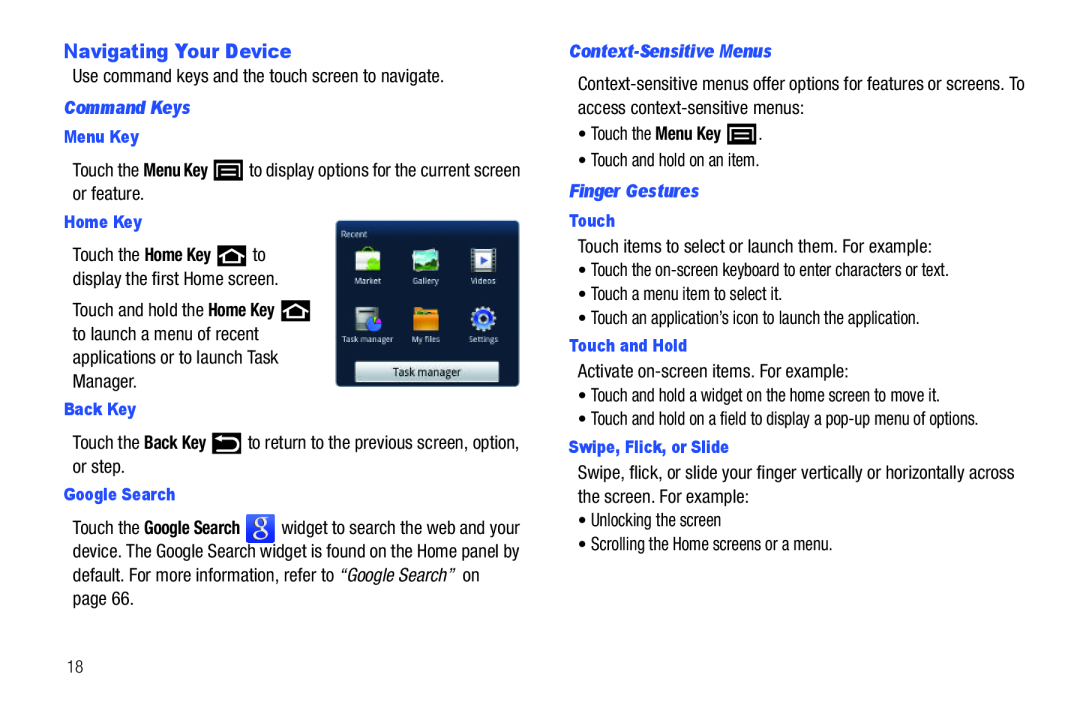 Navigating Your Device
 Notification Panel
 – or –
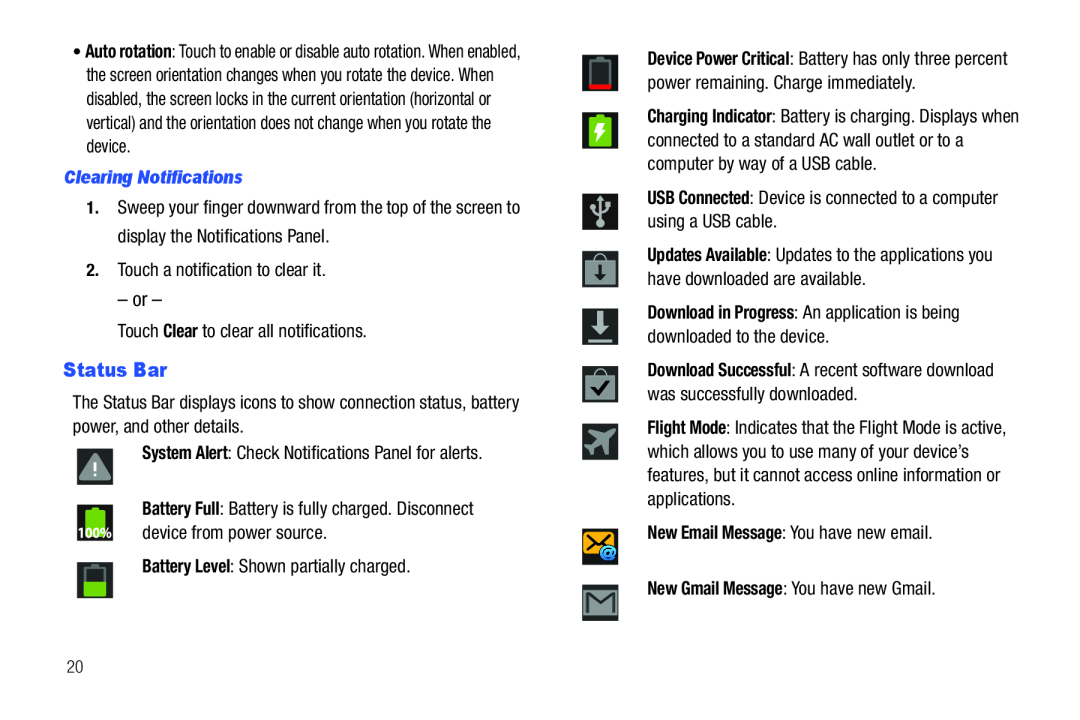
Status Bar
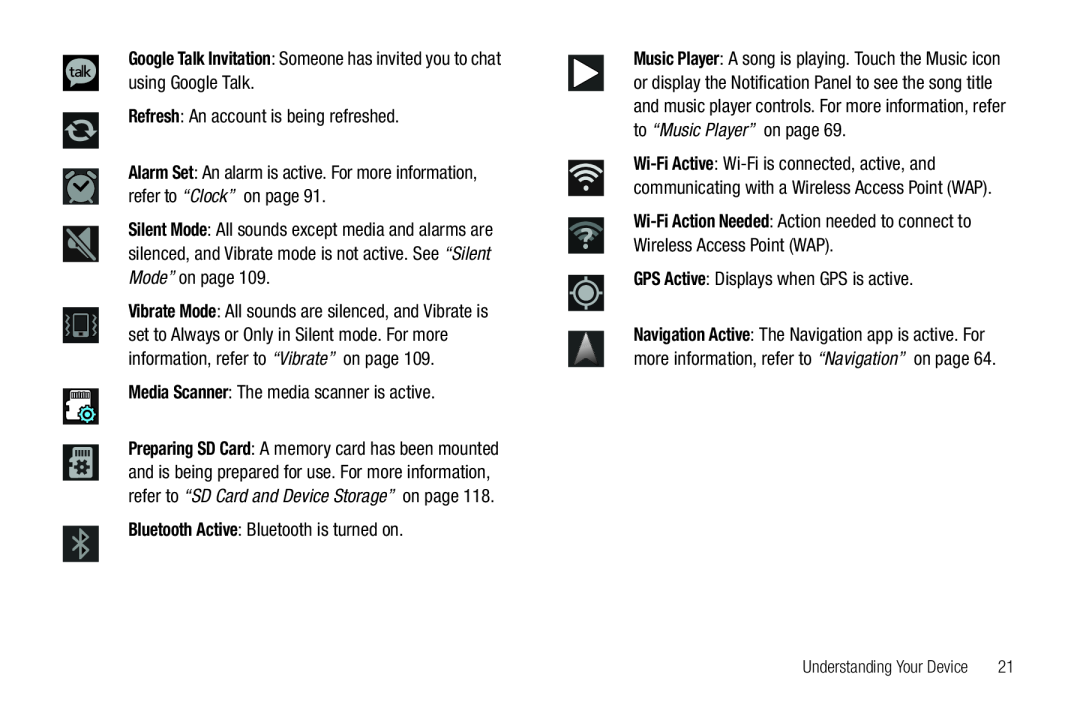 Google Talk Invitation: Someone has invited you to chat using Google Talk
Refresh: An account is being refreshed
Refresh
Alarm Set: An alarm is active. For more information, refer to “Clock” on page
Alarm Set
Silent Mode
“Silent Mode”
Media Scanner: The media scanner is active
Media Scanner
Bluetooth Active: Bluetooth is turned on
Bluetooth Active
Music Player
“Music Player”
Wi-FiAction Needed: Action needed to connect to Wireless Access Point (WAP)
GPS Active: Displays when GPS is active
GPS Active
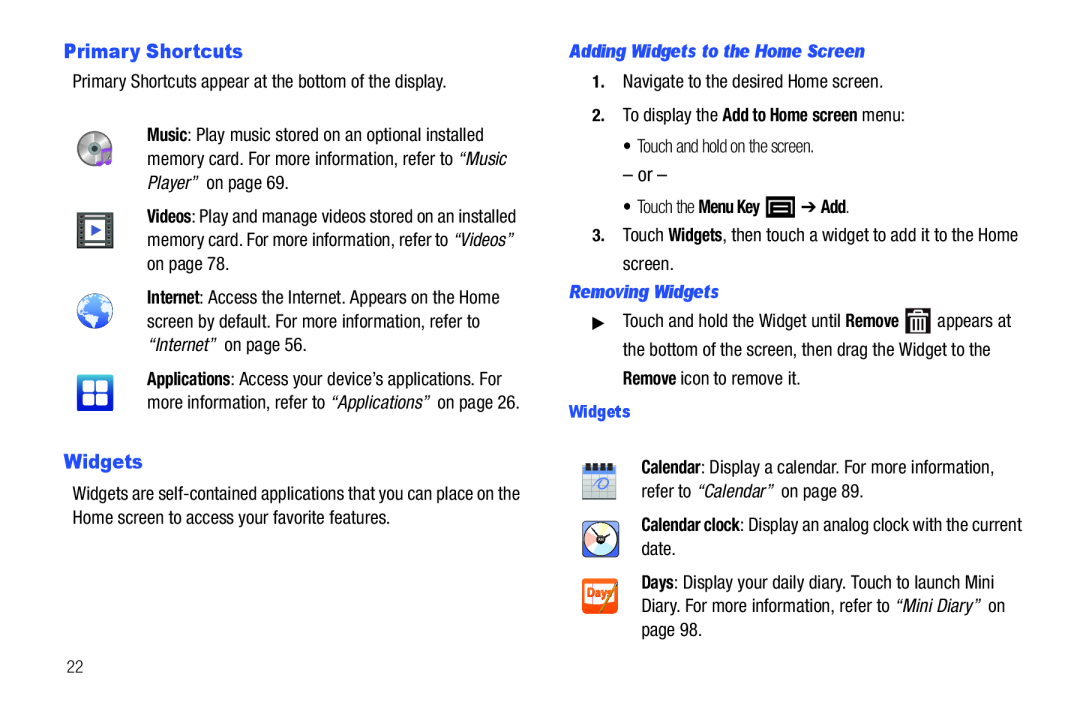 Primary Shortcuts
Widgets
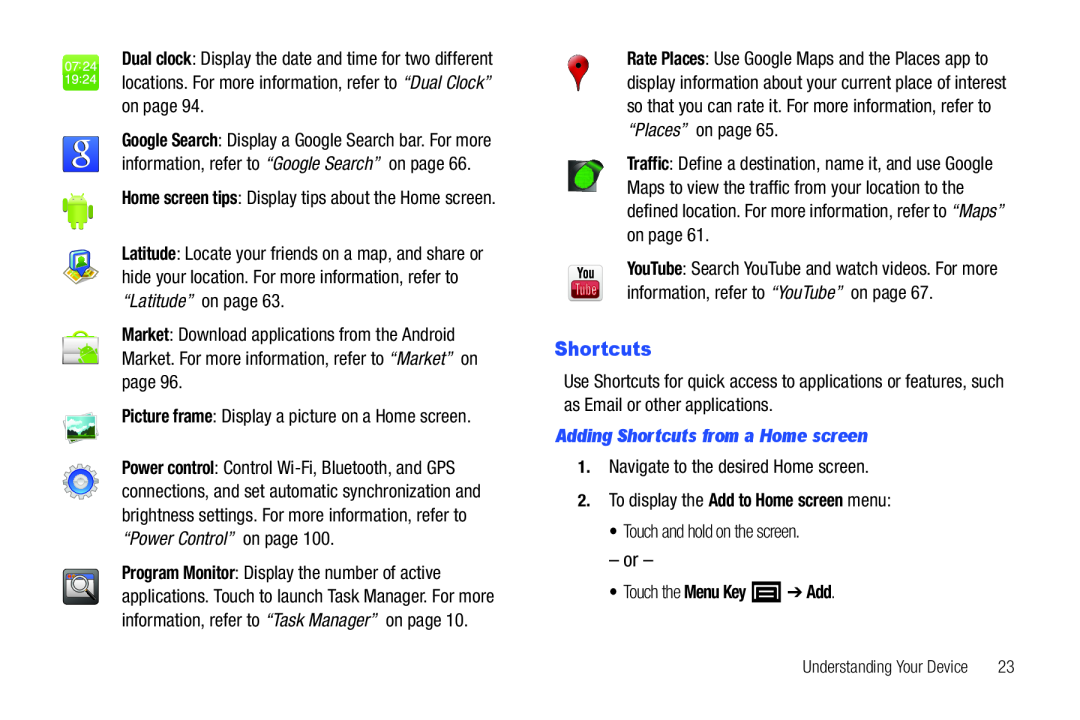 Shortcuts
 Folders
 Wallpapers
 Applications
1.From a Home screen, touch Applications
Applications
3.Touch an icon to launch the application
Customizing the Applications Screens
1.From a Home screen, touch Applications
Applications
2.Touch the Menu Key ➔ Edit
3.Touch and hold an application icon, then drag it to a new location
Applications List
Calculator
“Calculator”
Calendar
“Calendar”
Clock
“Clock”
 Downloads
“Downloads”
free music from your local FM radio stations. A
shortcut to FM radio appears on the Main Home
Radio” on page
Gmail
“Gmail”
Google Search
“Google Search”
Internet
“Internet”
Maps
“Maps”
Market
“Market”
Memo
“Memo”
 Mini Diary
“Mini Diary”
My files
“My Files”
Samsung Apps
“Samsung Apps”
Settings
“Settings”
Task manager
“Task Manager”
 Voice Search
“Voice Search”
YouTube
“YouTube”
 Section 3: Entering Text
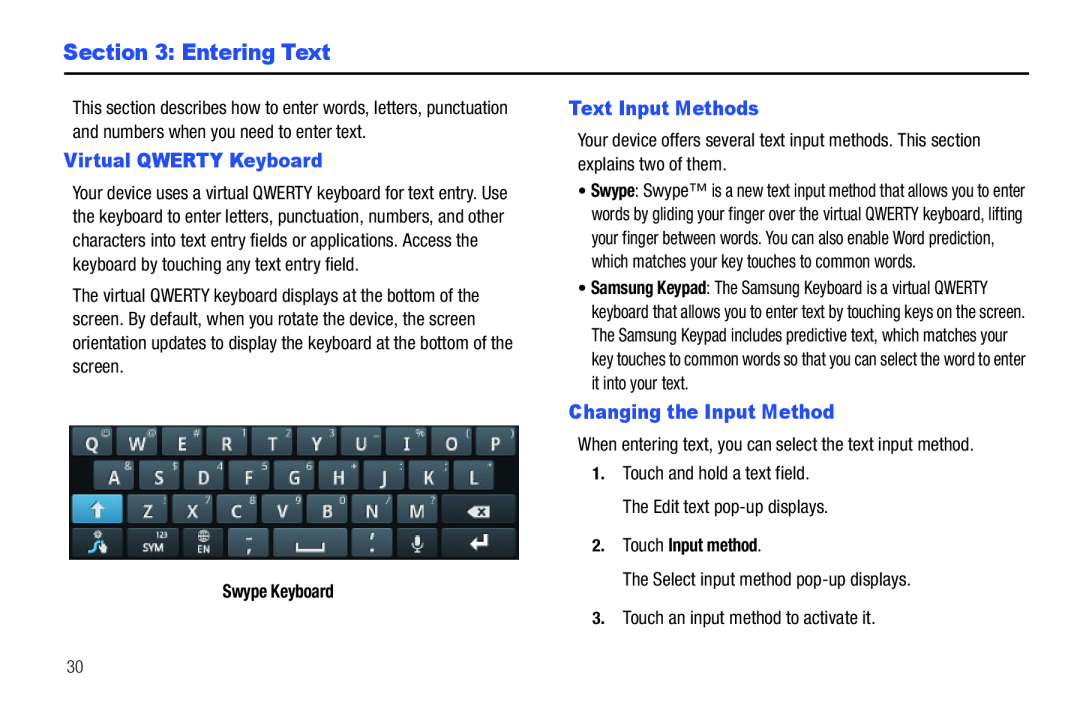
Virtual QWERTY Keyboard
Text Input Methods
Changing the Input Method
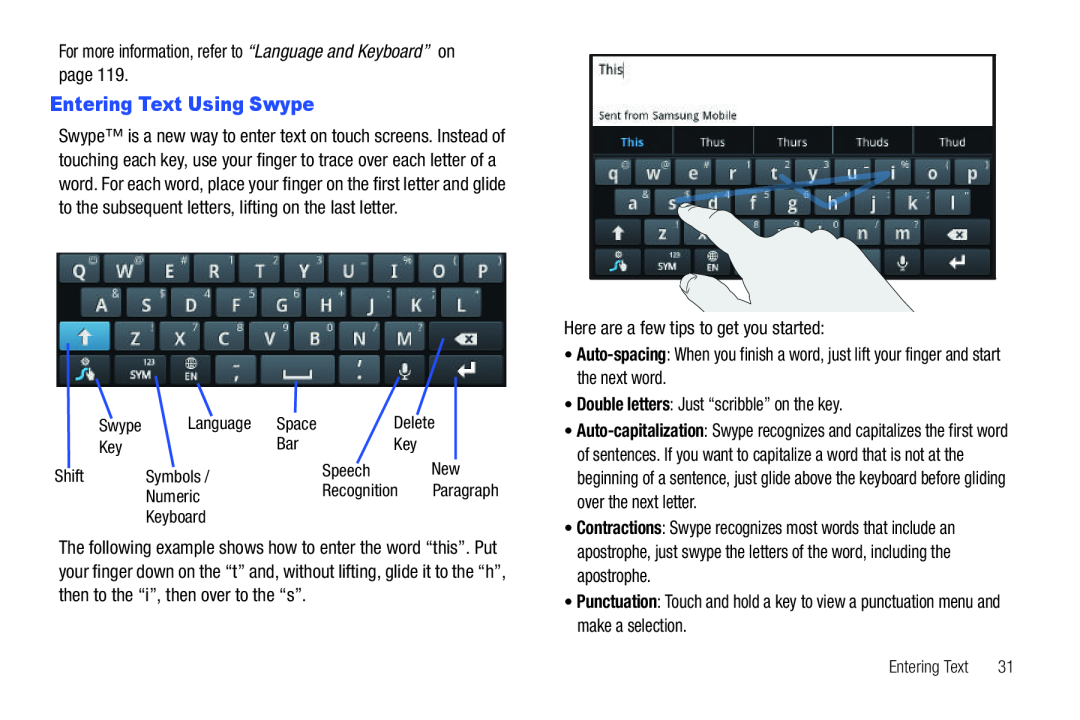 Entering Text Using Swype
 Error correction
Configuring Swype
Configure Swype to your preferences
•For more information, refer to “Swype Keypad” on page
•While entering text, touch and hold the Swype Key to change input methods
Swype Key
Swype Help
While entering text, you can get help for using Swype
•Touch Shift , then touch and hold the Swype Info Key to display Swype Help
Shift
Swype Info Key
•Touch Tutorial for an interactive tutorial
Tutorial
•Touch Settings to display Swype settings
Settings
Entering Symbols and Numbers
Using the Swype Keyboard:
•Touch and hold on a key to enter the symbol or number at the top of the key
•For more symbols, touch Shift , then touch the corresponding key
Shift
•Touch to switch to the symbols keyboard
•To display the alphabetic keyboard, touch
•Touch to display the alphabetic keyboard
Using Swype Speech Recognition
Enter text by speaking. Swype recognizes your speech and enters text for you
▶Touch . At the Speak now prompt, speak the text you want to enter
Speak now
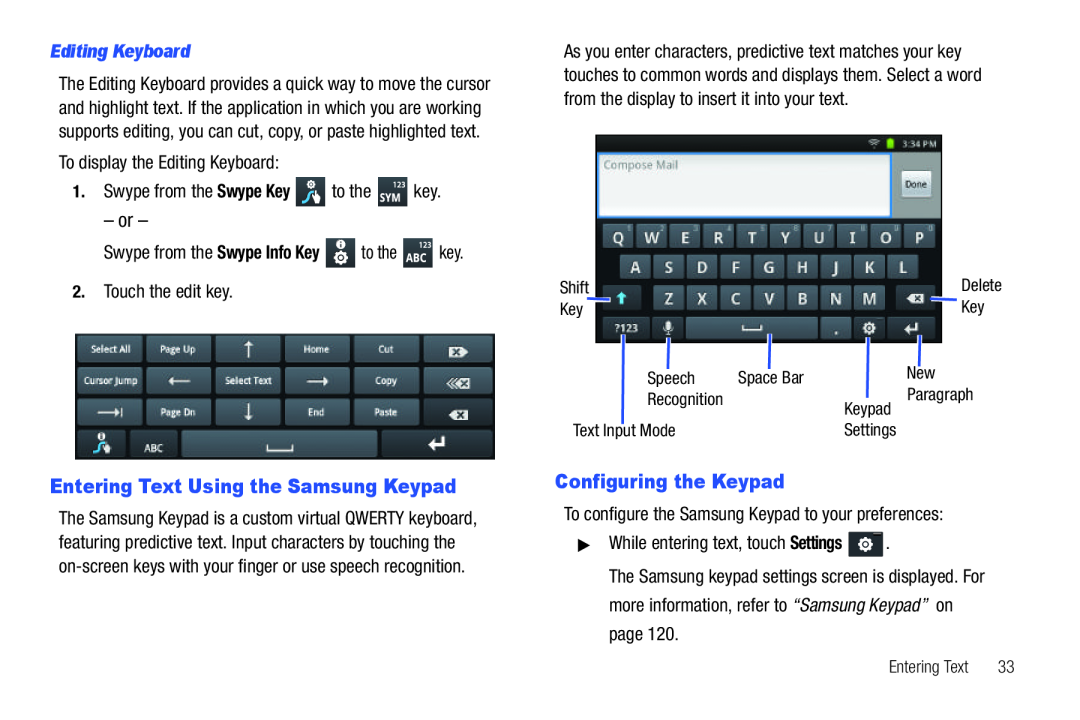 Entering Text Using the Samsung Keypad
Configuring the Keypad
 Entering Upper and Lower Case Letters
Entering Symbols and Numbers
Using XT9 Predictive Text
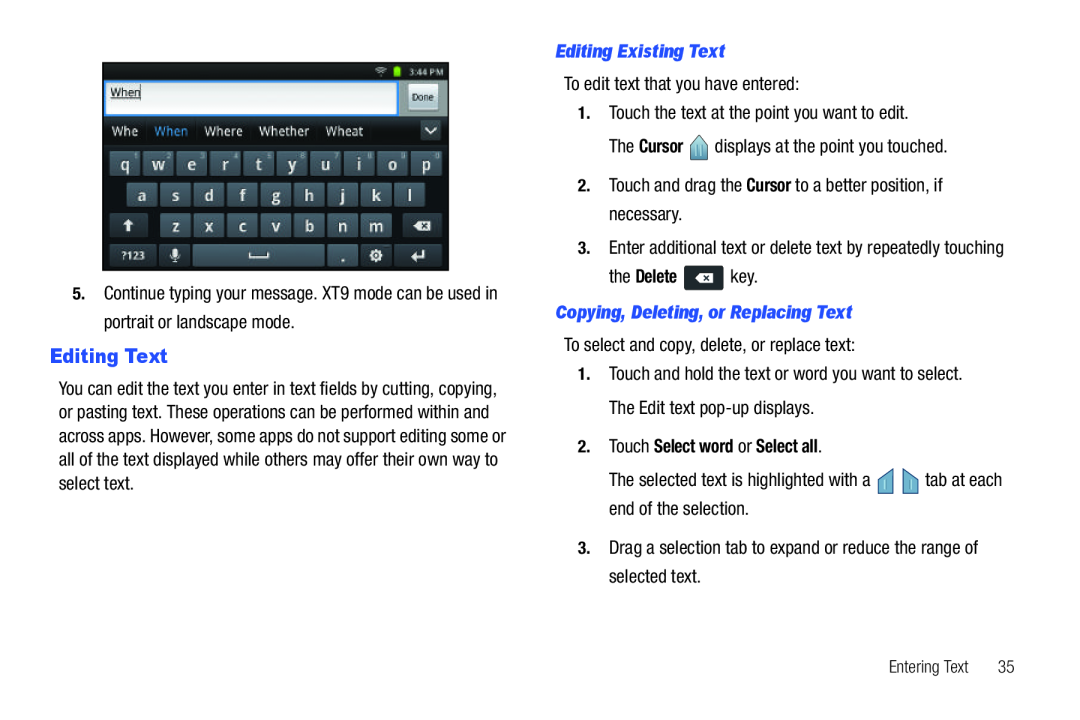 Editing Text
 Using the Handwriting Feature
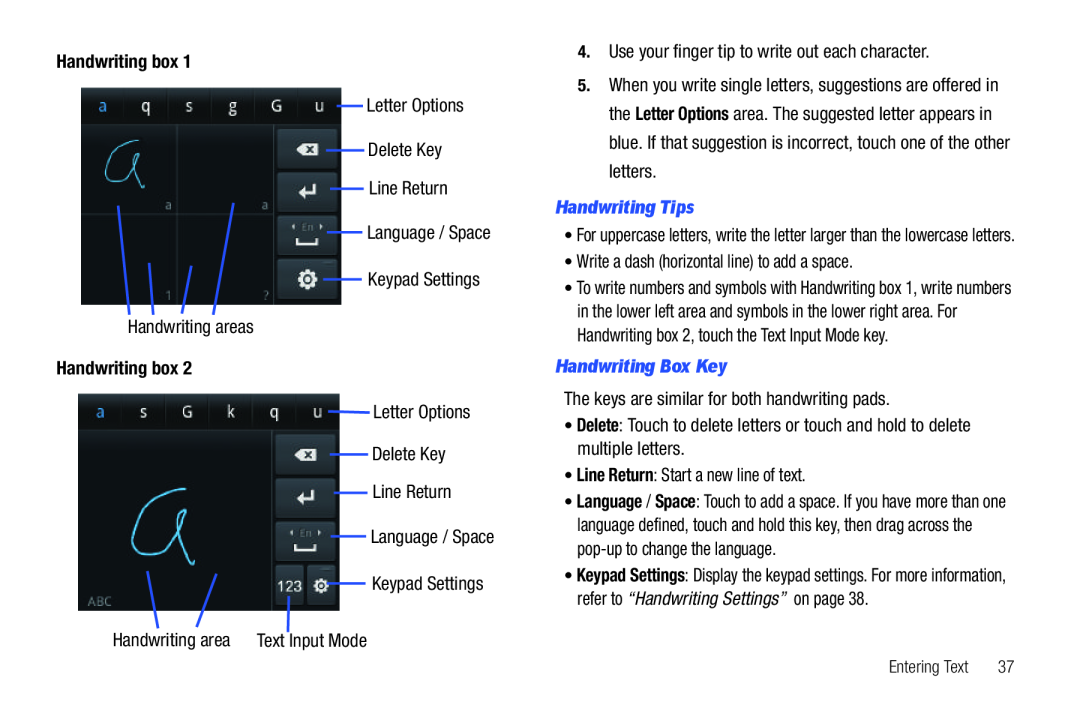 Handwriting box
Letter Options
Delete Key
Line Return
Language / Space
Keypad Settings
Handwriting areas
Handwriting box
Letter Options
Delete Key
Line Return
Language / Space
Keypad Settings
Handwriting area Text Input Mode
4.Use your finger tip to write out each character
When you write single letters, suggestions are offered in the
Letter Options
Handwriting Tips
•Write a dash (horizontal line) to add a space
Handwriting Box Key
The keys are similar for both handwriting pads
•Delete: Touch to delete letters or touch and hold to delete multiple letters
Delete
•Line Return: Start a new line of text
Line Return
Language
Space
Keypad Settings
“Handwriting Settings”
 Using Speech Recognition
 Section 4: Contacts and Accounts
Accounts
 Setting Up a Facebook Account
➔ Accounts and sync ➔ Add account ➔ Facebook
The Set up your Facebook account screen displays
2.Touch Next
Next
4.Follow the prompts to complete the set-up
Setting Up a Twitter Account
➔ Accounts and sync ➔ Add account ➔ Twitter
The Set up your Twitter account screen displays
2.Touch Next
Next
3.Enter your Username or email address and Password, then touch Login
Username or email
Password
Login
4.Follow the prompts to complete the set-up
Setting Up a MySpace Account
➔ Accounts and sync ➔ Add account ➔ MySpace
The Set up your MySpace account screen displays
2.Touch Next
Next
3.Enter your Email and Password, then touch Login
Password
Login
4.Follow the prompts to complete the set-up
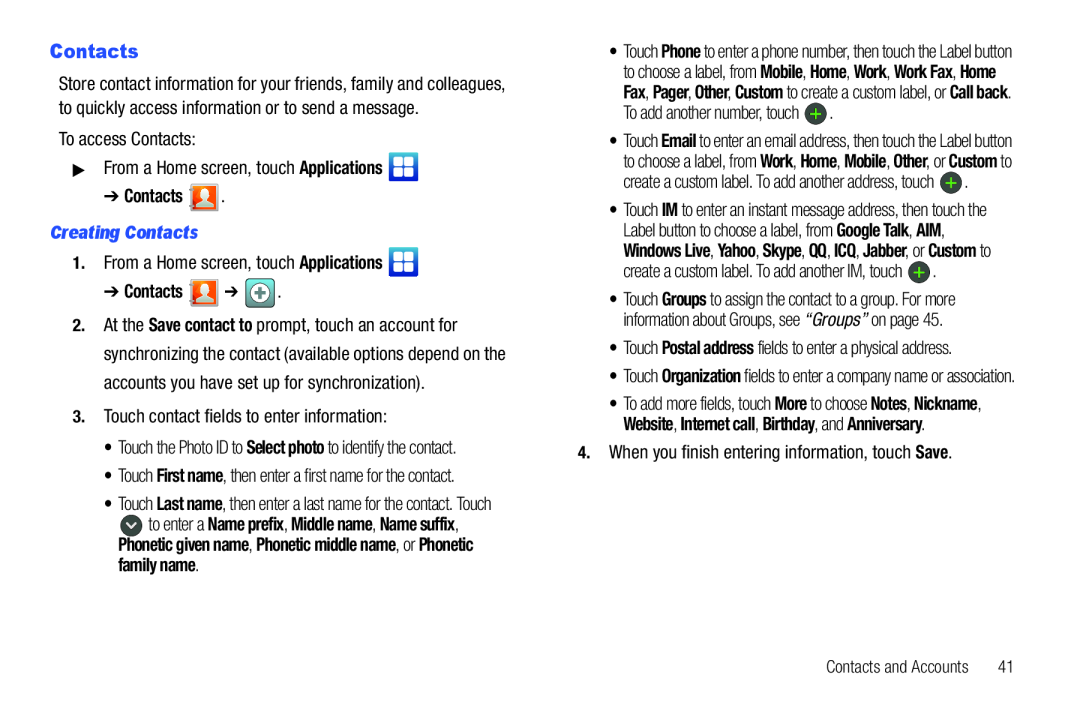 Contacts
To access Contacts:
▶From a Home screen, touch Applications
Applications
➔ Contacts
Creating Contacts
1.From a Home screen, touch Applications
Applications
➔ Contacts ➔
3.Touch contact fields to enter information:
• Touch the Photo ID to Select photo to identify the contact
Select photo
• Touch First name, then enter a first name for the contact
First name
•Touch Postal address fields to enter a physical address
Postal address
4.When you finish entering information, touch Save
Save
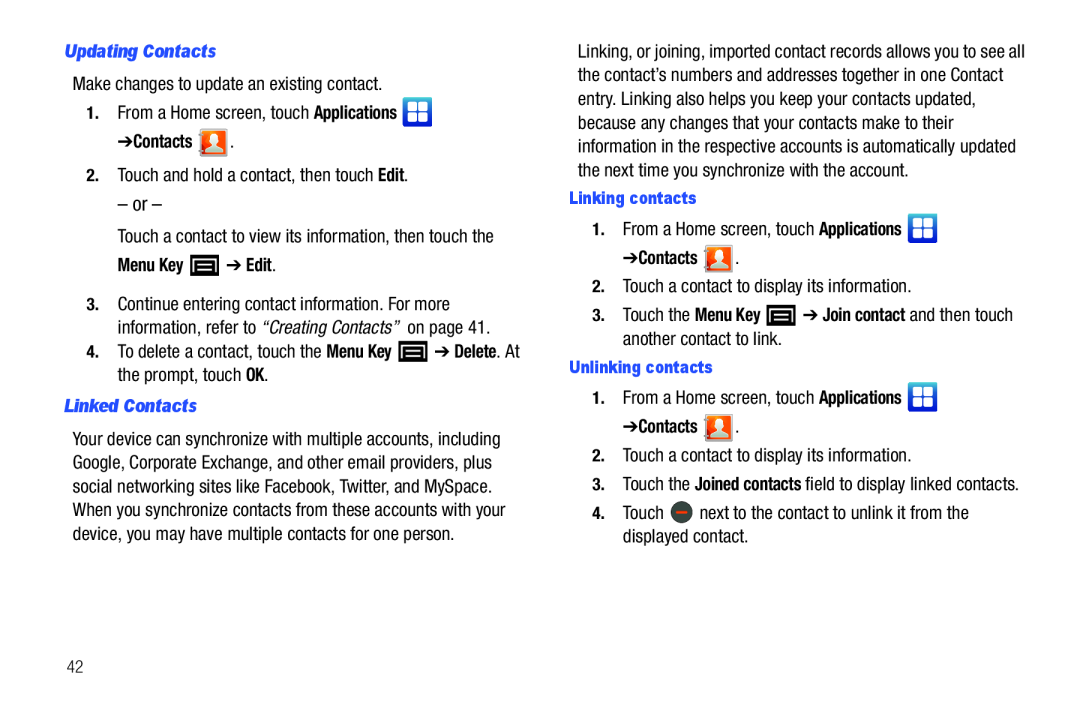 Updating Contacts
Make changes to update an existing contact
1.From a Home screen, touch Applications
Applications
➔Contacts
2.Touch and hold a contact, then touch Edit
Edit
– or –
Touch a contact to view its information, then touch the
Menu Key ➔ Edit
4.To delete a contact, touch the Menu Key ➔ Delete. At the prompt, touch OK
Menu Key
Delete
Linked Contacts
Linking contacts
1.From a Home screen, touch Applications
Applications
➔Contacts
2.Touch a contact to display its information
3.Touch the Menu Key ➔ Join contact and then touch another contact to link
Unlinking contacts
1.From a Home screen, touch Applications
Applications
➔Contacts
2.Touch a contact to display its information
3.Touch the Joined contacts field to display linked contacts
Joined contacts
4.Touch next to the contact to unlink it from the displayed contact
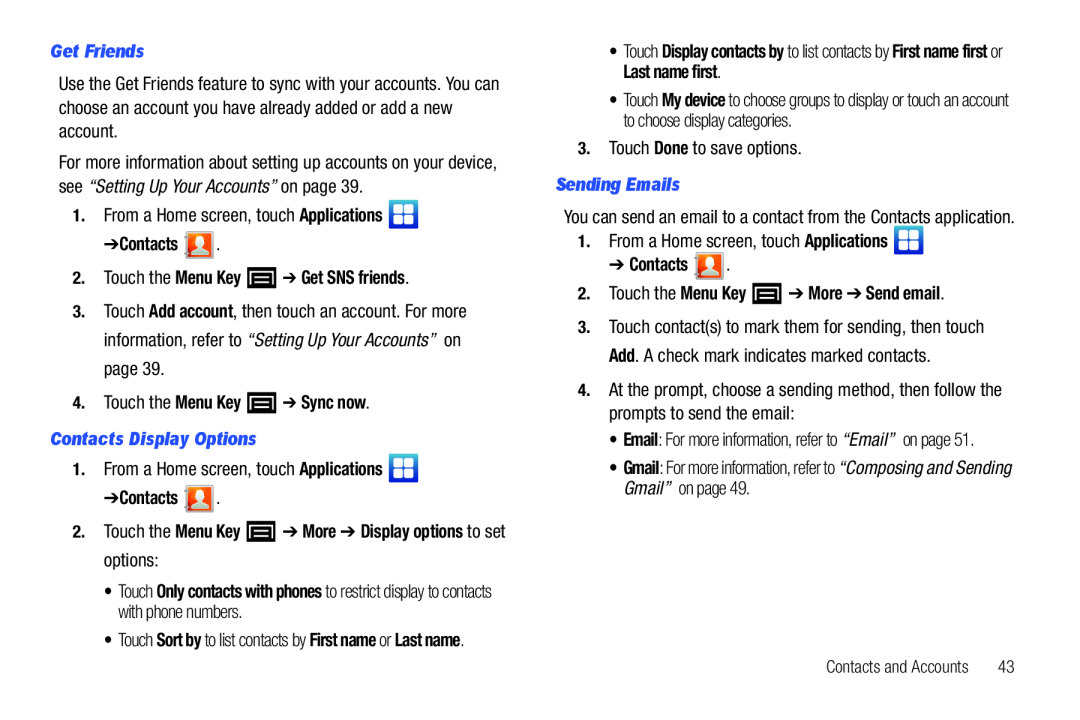 Get Friends
“Setting Up Your Accounts”
1.From a Home screen, touch Applications
Applications
➔Contacts
2.Touch the Menu Key ➔ Get SNS friends
Touch
Add account
“Setting Up Your Accounts”
4.Touch the Menu Key ➔ Sync now
Contacts Display Options
1.From a Home screen, touch Applications
Applications
➔Contacts
2.Touch the Menu Key ➔ More ➔ Display options to set options:
Touch
to restrict display to contacts with phone numbers
Touch
Display contacts by
First name first
Last name first
Touch
My device
3.Touch Done to save options
Done
Sending Emails
You can send an email to a contact from the Contacts application
1.From a Home screen, touch Applications
Applications
➔ Contacts
2.Touch the Menu Key ➔ More ➔ Send email
• Email: For more information, refer to “Email” on page
• Gmail: For more information, refer to “Composing and Sending Gmail” on page
• Gmail
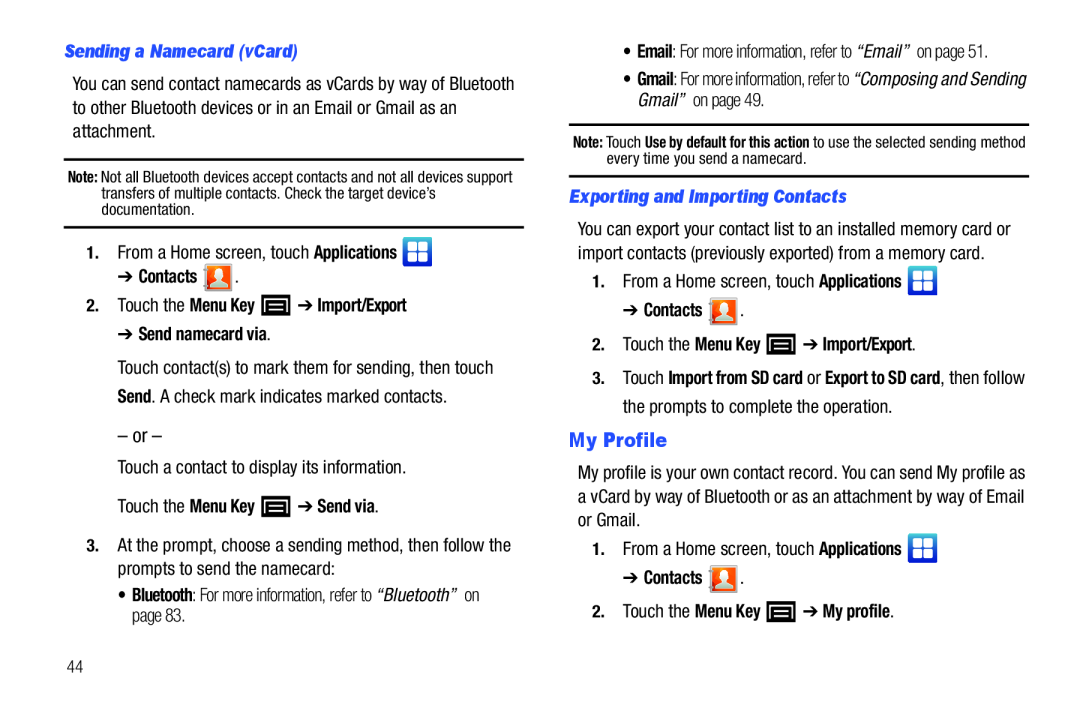 My Profile
 Groups
 Editing a Group
1.From a Home screen, touch Applications
Applications
➔ Contacts ➔ Groups
2.Touch a Group to display it
3.Touch the Menu Key ➔ Edit group
4.Touch Save to save the changes
Save
Adding and Removing Group Members
1.From a Home screen, touch Applications
Applications
➔ Contacts ➔ Groups
2.Touch a Group to display it
3.Touch the Menu Key ➔ Add member
– or –
Touch the Menu Key ➔ Remove member
Select all
Add
– or –
Sending a Message to Group Members
1.From a Home screen, touch Applications
Applications
➔ Contacts ➔ Groups
2.Touch a Group to display it
Group
3.Touch the Menu Key ➔ Send email to create a new email
Touch contacts to mark them as recipients for the new message, then touch
Send
 Activities
 Section 5: Messaging
Types of Messages
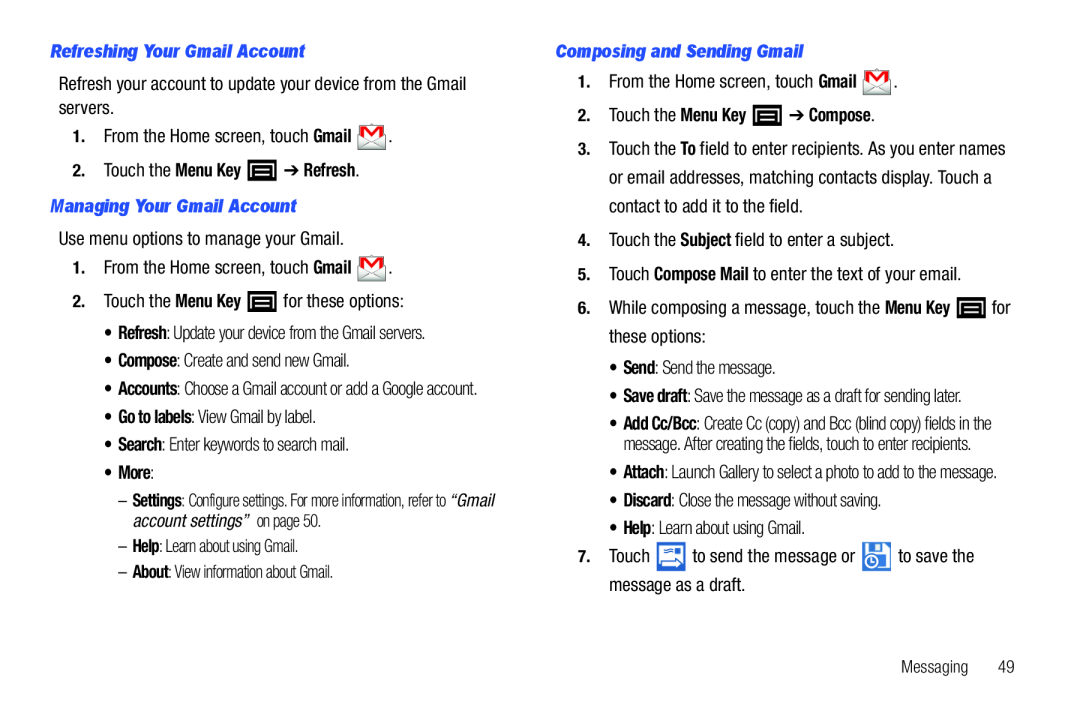 Refreshing Your Gmail Account
Refresh your account to update your device from the Gmail servers
1.From the Home screen, touch Gmail
Gmail
2.Touch the Menu Key ➔ Refresh
Managing Your Gmail Account
Use menu options to manage your Gmail
1.From the Home screen, touch Gmail
Gmail
2.Touch the Menu Key for these options:
Menu Key
•Refresh: Update your device from the Gmail servers
Refresh
•Compose: Create and send new Gmail
Compose
•Go to labels: View Gmail by label
Go to labels
•Search: Enter keywords to search mail
Search
•More:
–Help: Learn about using Gmail
Help
–About: View information about Gmail
About
Composing and Sending Gmail
1.From the Home screen, touch Gmail
Gmail
2.Touch the Menu Key ➔ Compose
Touch the
4.Touch the Subject field to enter a subject
Subject
5.Touch Compose Mail to enter the text of your email
Compose Mail
6.While composing a message, touch the Menu Key for these options:
Menu Key
•Send: Send the message
Send
•Save draft: Save the message as a draft for sending later
Save draft
•Discard: Close the message without saving
Discard
•Help: Learn about using Gmail
Help
7.Touch to send the message or to save the message as a draft
Messaging
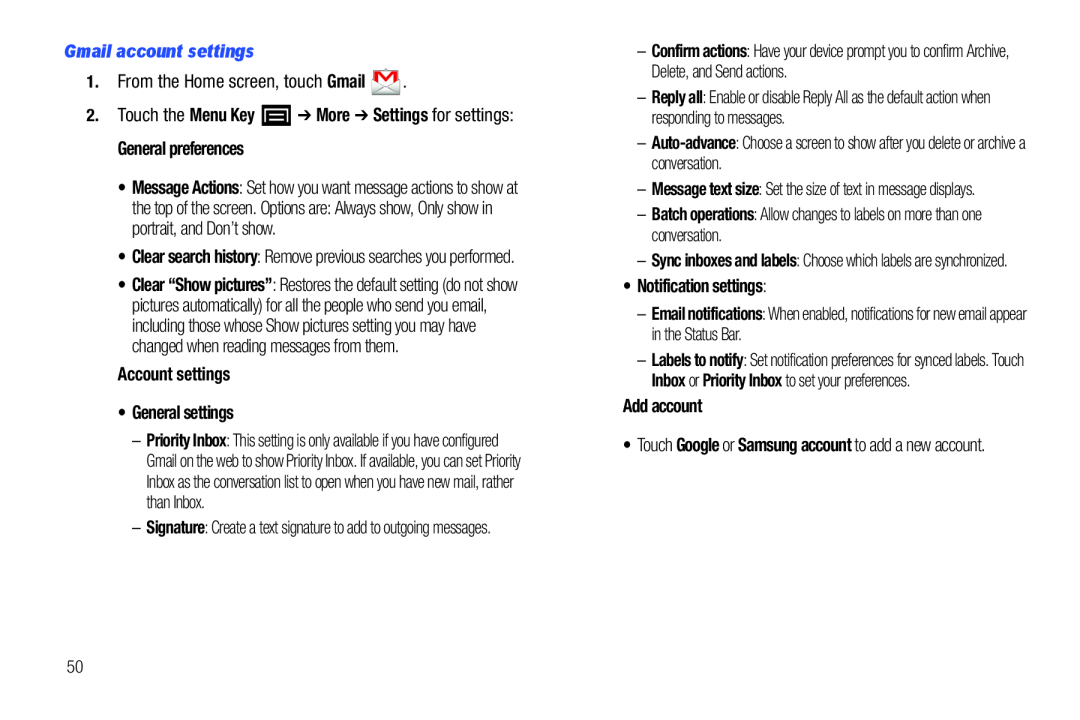 Gmail account settings
1.From the Home screen, touch Gmail
Gmail
2.Touch the Menu Key ➔ More ➔ Settings for settings:
Menu Key
More
Settings
General preferences
Account settings
•General settings
Reply all
Auto-advance
–Batch operations: Allow changes to labels on more than one conversation
Batch operations
•Notification settings:
Email notifications
Add account
 Email
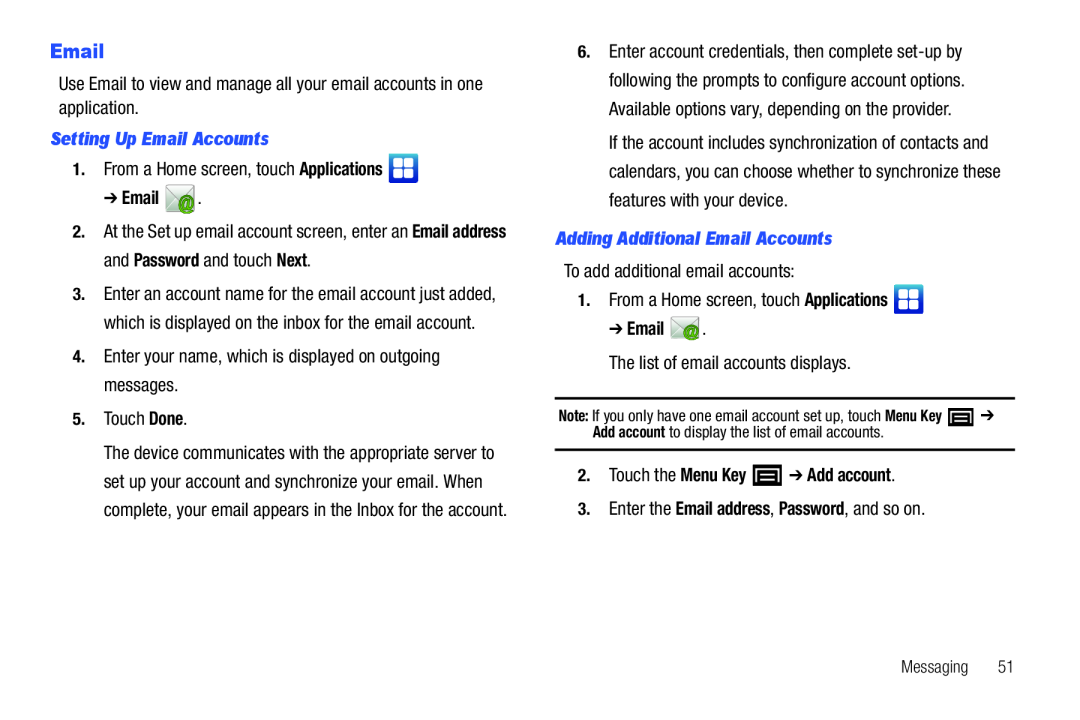
EmailUse Email to view and manage all your email accounts in one application
Setting Up Email Accounts
1.From a Home screen, touch Applications
Applications
At the Set up email account screen, enter an
Email address
Password
Next
4.Enter your name, which is displayed on outgoing messages
5.Touch Done
Done
Adding Additional Email Accounts
To add additional email accounts:
1.From a Home screen, touch Applications
Applications
The list of email accounts displays
2.Touch the Menu Key ➔ Add account
3.Enter the Email address, Password, and so on
Email address
Password
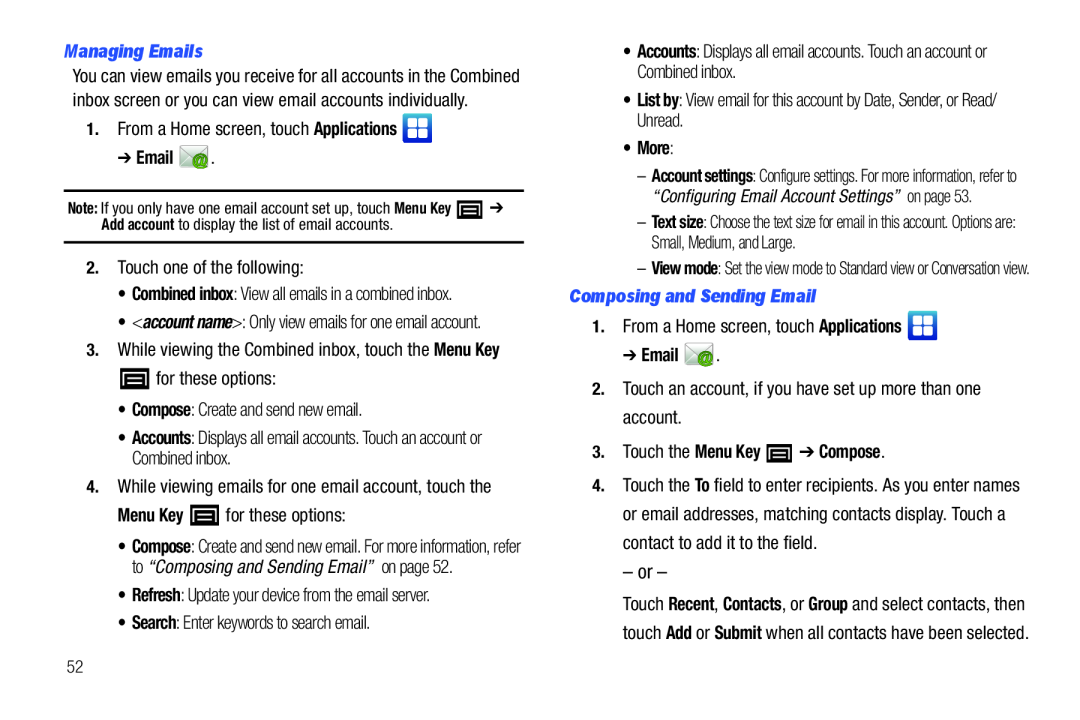 Managing Emails
1.From a Home screen, touch Applications
Applications
2.Touch one of the following:
•Combined inbox: View all emails in a combined inbox
Combined inbox
3.While viewing the Combined inbox, touch the Menu Key
Menu Key
for these options:
•Compose: Create and send new email
Compose
•Accounts: Displays all email accounts. Touch an account or Combined inbox
Accounts
4.While viewing emails for one email account, touch the
Menu Key for these options:
Menu Key
•Refresh: Update your device from the email server
Refresh
•Search: Enter keywords to search email
Search
•Accounts: Displays all email accounts. Touch an account or Combined inbox
Accounts
•List by: View email for this account by Date, Sender, or Read/ Unread
List by
•More:
Text size
Composing and Sending Email
1.From a Home screen, touch Applications
Applications
2.Touch an account, if you have set up more than one account
3.Touch the Menu Key ➔ Compose
Touch the
– or –
 5.Touch Cc/Bcc to enter recipients in the Cc or Bcc fields
Cc/Bcc
Bcc
6.Touch the Subject field to enter a subject
Subject
7.Touch the text field to enter the email text
8.Touch Attach to add an attachment. Choices are:
Attach
•File: Select a file from My files
File
•Pictures: Select a picture from Gallery
Pictures
•Videos: Select a video from Gallery
Videos
•Audio: Select an audio file from My files
Audio
•Take picture: Open the camera and take a picture
Take picture
Contacts
•Memo: Open the Memo app and attach a memo
Memo
The selected or created file is attached. Touch to remove the attachment
9.While composing a message, touch the Menu Key for these options:
Menu Key
•Save as draft: Save the message in Drafts
Save as draft
•Add text: Lets you add text to your email from:
Add text
–Memo: Touch one or more memos, then touch Attach
Memo
Attach
10.Touch Send to send the message or Discard to cancel the email
Send
Discard
Configuring Email Account Settings
To configure email account settings at any time:
1.From a Home screen, touch Applications
Applications
2.Touch an account, if you have set up more than one account
Messaging
 Google Talk
 1.From the Home screen, touch Talk
Talk
– or –
From a Home screen, touch Applications ➔ Talk
Applications
Talk
2.Touch Next to set up a Google account or to Sign in
Next
3.Touch Create to create a new Google account
Create
– or –
Touch Sign in, if you have an existing Google account
Sign in
4.After entering your user name and password, touch Done
Done
5.Touch Sign in
Sign in
Once sign in is complete, the Talk screen displays
6.Touch the Menu Key to display the following options:
Menu Key
•All friends / Most popular: List all friends or the most popular friends
Add friend
Send invitation
•Search: Enter a search term and search Google Talk
Search
•Sign out: Close Google Talk and display the Home screen
Sign out
•Settings: Offers various settings for Google talk
Settings
•More: Displays the following options:
More
–Invites: Lists any pending invitations that you have sent
Invites
–Blocked: Lists any friends that you have blocked
Blocked
8. Touch a Friend’s entry to display the Chat entries for that Friend
Messaging
 Section 6: Web and Social Networking
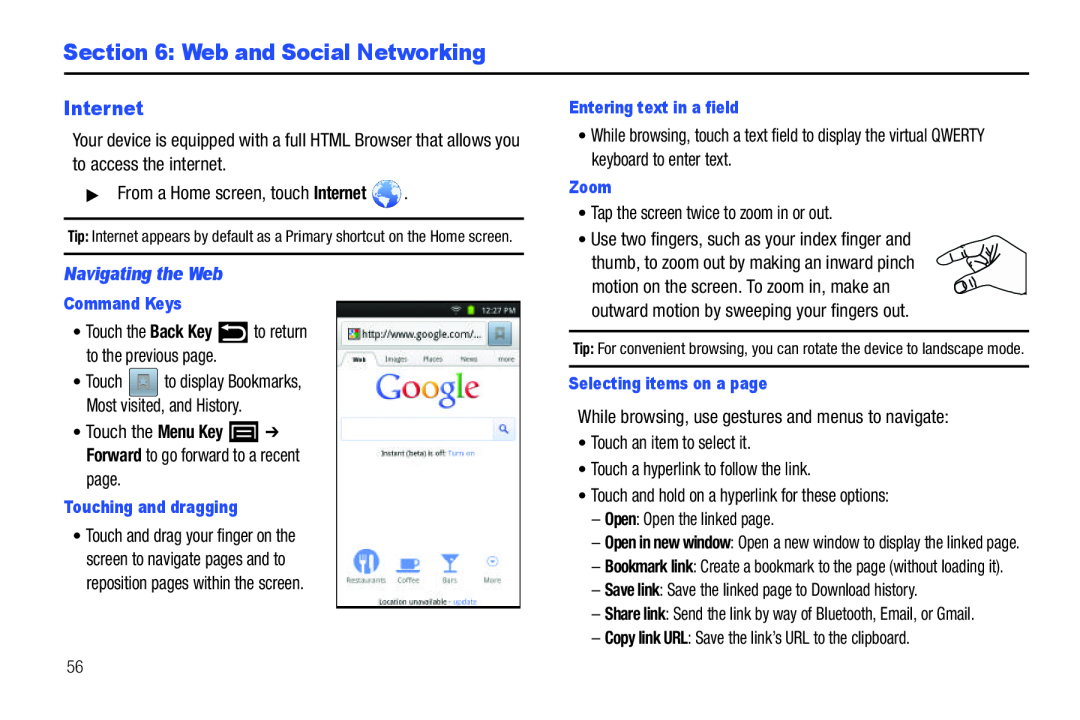
 Using Internet Windows
1.From a Home screen, touch Internet
Internet
2.Touch the Menu Key
Menu Key
3.To open a new window, touch New window
New window
– or –
Touch Windows ➔ New window
Entering a URL
Access a web site quickly by entering the URL
1.From a Home screen, touch Internet
Internet
URL
As you enter characters, potential matches display
3.Touch a match to complete the URL
– or –
Continue entering characters and touch to load the page
Copying Fields or Text
Selecting Text
1.From a Home screen, touch Internet
Internet
2.Browse to a web page
The text is highlighted
4.Touch and drag the left or right text selector to select more or less text
 5.To copy the highlighted text, touch
Share as text
Share as image
Bluetooth
Gmail
Picasa
Copying a Hyperlink or URL
1.From a Home screen, touch Internet and browse to a web page
Internet
2.Touch and hold on the link or URL
Touch and hold on the link or URL, then touch
Copy link URL
Pasting Text, Hyperlinks, or URLs
To paste copied text, hyperlinks, or URLs:
1.Navigate to the desired field or to another application
2.Touch and hold in a text field
3.Touch Paste on the pop-upmenu
Paste
Using Bookmarks
While browsing, bookmark a site to quickly access it later
Creating a Bookmark
1.From a Home screen, touch Internet and browse to a web page
Internet
2.Touch ➔ Bookmarks
3.Touch Add
Add
The Add bookmark prompt displays
Add bookmark
Confirm the Name and URL for the bookmark, then touch
Accessing Bookmarks, Most Visited, and History
Launch a bookmarked page or most visited page, or reload recent pages
1.From a Home screen, touch Internet
Internet
2.Touch
3.On the Bookmarks tab, use these options:
Bookmarks
•Touch a bookmark to load the page
•Touch and hold on a bookmark for these options:
–Open: Launch the bookmarked page
Open
 –Edit bookmark: Change the bookmark name or URL
Edit bookmark
–Copy link URL: Save the link’s URL to the clipboard
Copy link URL
–Delete bookmark: Remove the bookmark
Delete bookmark
4.On the Most visited tab, use these options:
Most visited
•Touch a link to reload it
•Touch the star next to a link to bookmark or unbookmark it
•Touch and hold on a link for these options:
–Open: Launch the web page
Open
–Copy link URL: Save the link’s URL to the clipboard
Copy link URL
5.On the History tab, use these options:
History
•Touch a link to load it
Touch
, or
for lists of recent pages
•Touch the star next to a link to bookmark or unbookmark it
•Touch and hold on a link for these options:
–Open: Launch the web page
Open
–Share link: Use Bluetooth, Email, or Gmail to send the link
Share link
–Copy link URL: Save the link’s URL to the clipboard
Copy link URL
–Remove from history: Remove the record of this page
Remove from history
Internet Menu
While viewing a web page, touch the Menu Key for the following options:
Menu Key
•New window: Open a window
New window
•Windows: View the windows you have open
Windows
•Refresh: Redisplay the current web page
Refresh
•Forward: Go forward to a recent page
Forward
•Add bookmark: Create a bookmark for the current page
Add bookmark
•More:
–Find on page: Search for content on the current page
Find on page
 –Downloads: View and manage recent downloads
Downloads
Settings
“Internet Settings”
Internet Settings
1.From a Home screen, touch Internet
Internet
2.Touch the Menu Key ➔ More ➔ Settings for the following options:
Page content settings
•Default zoom: Choose a default zoom level for web pages
Default zoom
Open pages in overview
: When enabled, displays an overview of
newly-opened
pages
•Text encoding: Choose a default character set for web pages
Text encoding
Landscape view only
•Open in background: When enabled, new windows open behind the current window
Open in background
Set home page
•Default storage: The default location for downloads
Default storage
Privacy settings
•Clear history: Delete the list of previously-visitedpages
Clear history
•Clear all cookie data: Delete cookie information saved to the device
•Clear form data: Deletes saved form information
Clear form data
Enable location
 Security settings
Advanced settings
Choices are: Google, Yahoo!, and Bing
•Website settings: View and manage settings for individual web sites
Website settings
Reset to default:
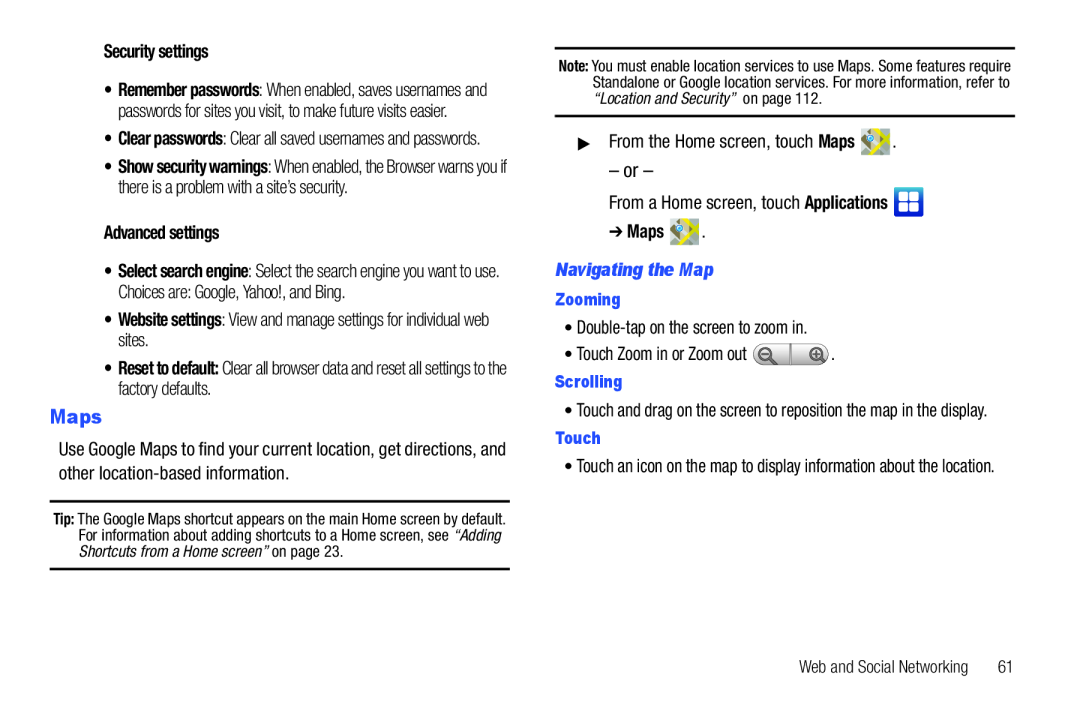
Maps
▶From the Home screen, touch Maps
Maps
– or –
From a Home screen, touch Applications
Applications
➔Maps
Navigating the Map
Zooming
•Double-tapon the screen to zoom in
•Touch Zoom in or Zoom out
Scrolling
•Touch and drag on the screen to reposition the map in the display
Touch
•Touch an icon on the map to display information about the location
 Maps Menu
1.From a Home screen, touch Maps
Maps
2.While viewing a map, touch the Menu Key for these options:
Menu Key
•Search: Find a location
Search
•My Places: Display starred locations
My Places
•Clear Map: Remove search results from the map
Clear Map
•More:
–Labs: Access experimental features
Labs
–Sign In: Enter your Google Username and Password, then touch Sign In
Sign In
Sign In
–Help: Learn about Google maps
Help
–About: View information about Maps
About
Other Map Options
Touch the indicated icon to use these additional Map options:
Places: Launch the Places app. For more information, refer to “Places” on page
Places
Compass
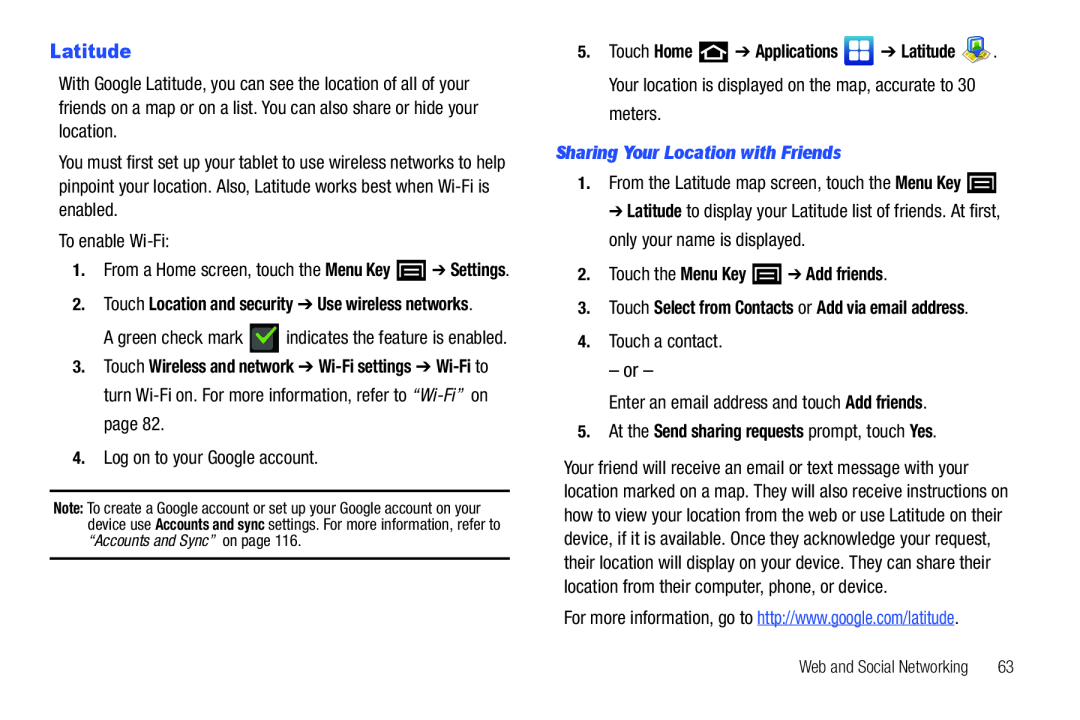 Latitude
To enable Wi-Fi:
A green check mark indicates the feature is enabled
Touch
to turn
Wi-Fi
on
For more information, refer to
on page
4.Log on to your Google account
Touch
. Your location is displayed on the map, accurate to 30 meters
Sharing Your Location with Friends
1.From the Latitude map screen, touch the Menu Key
Menu Key
Latitude
2.Touch the Menu Key ➔ Add friends
3.Touch Select from Contacts or Add via email address
4.Touch a contact
– or –
Enter an email address and touch Add friends
Add friends
5.At the Send sharing requests prompt, touch Yes
For more information, go to http://www.google.com/latitude
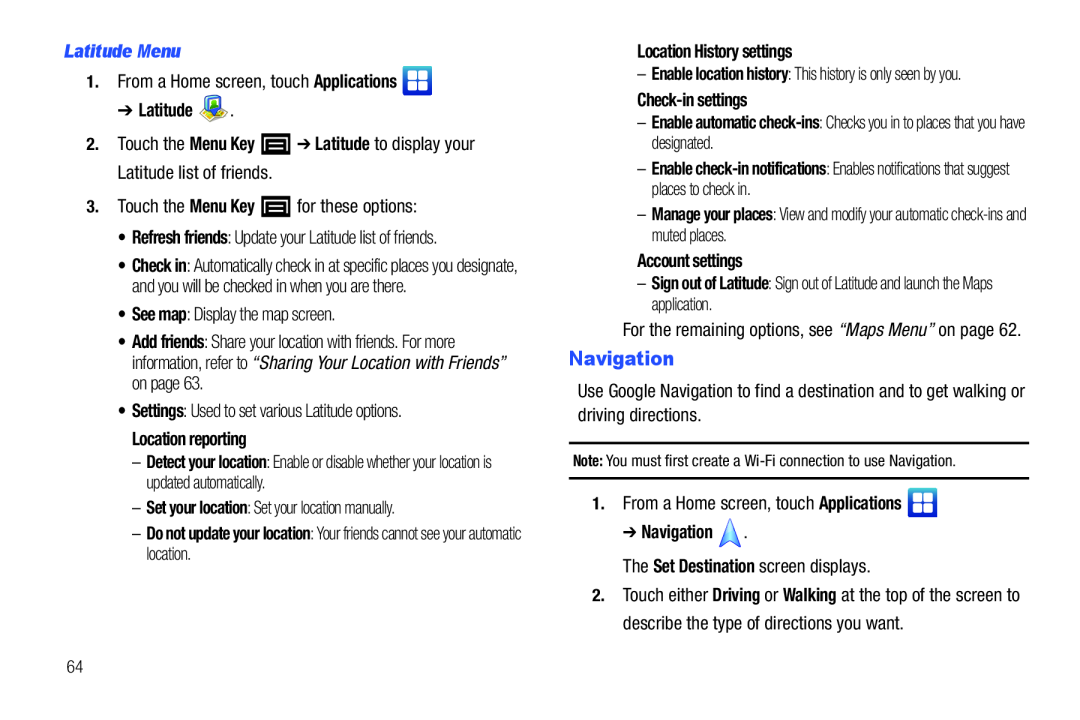 Navigation
 Places
 –or –
–or –Voice Search
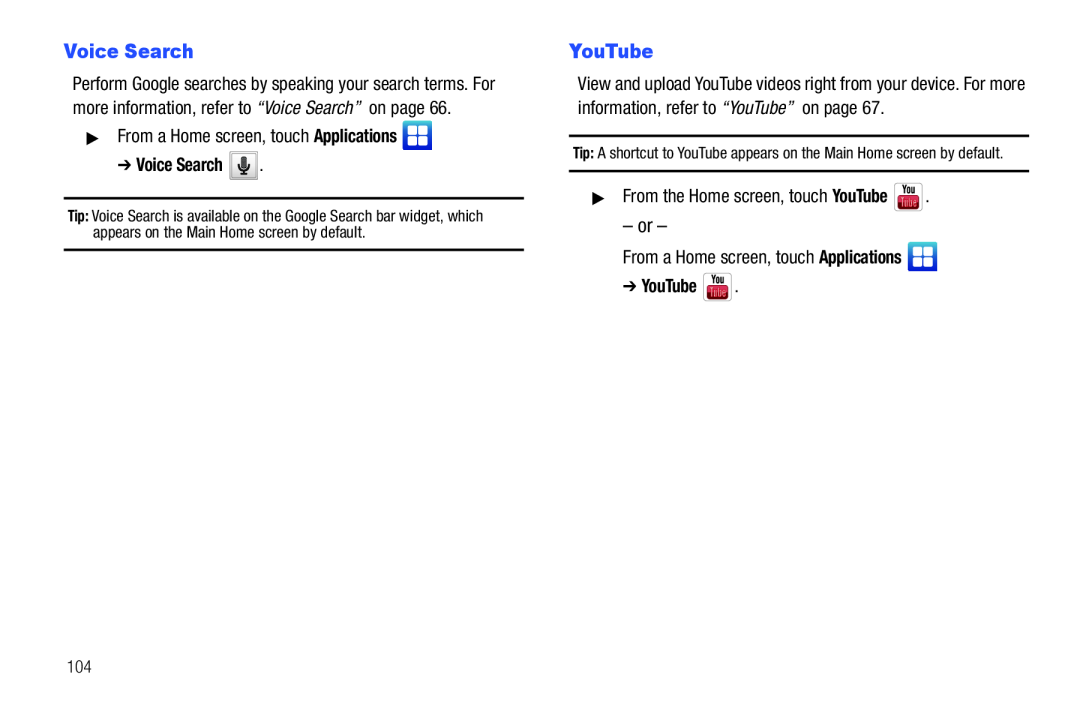
 YouTube
View and upload YouTube videos right from your device
1.From the Home screen, touch YouTube
YouTube
– or –
From a Home screen, touch Applications
Applications
➔ YouTube
3.Browse and select videos for viewing
YouTube Menu
While browsing or viewing a YouTube page, touch the
Menu Key for the following options:
Menu Key
•Home: Display the main YouTube screen
Home
•Browse: View videos by category such as Comedy, Education, or Music
Browse
•Search: Enter criteria to find videos
Search
•My Channel: Add an account and configure account settings
My Channel
•Upload: Transfer a video from your device to YouTube
Upload
Settings
 YouTube Settings
1.From the Home screen, touch YouTube
YouTube
2.Touch the Menu Key ➔ Settings for the following options:
General settings
Caption font size
Small
Medium
Large
Extra Large
Search settings
SafeSearch filtering
Don’t filter
Moderate
Strict
About
–Help: Displays the YouTube Help web site
Help
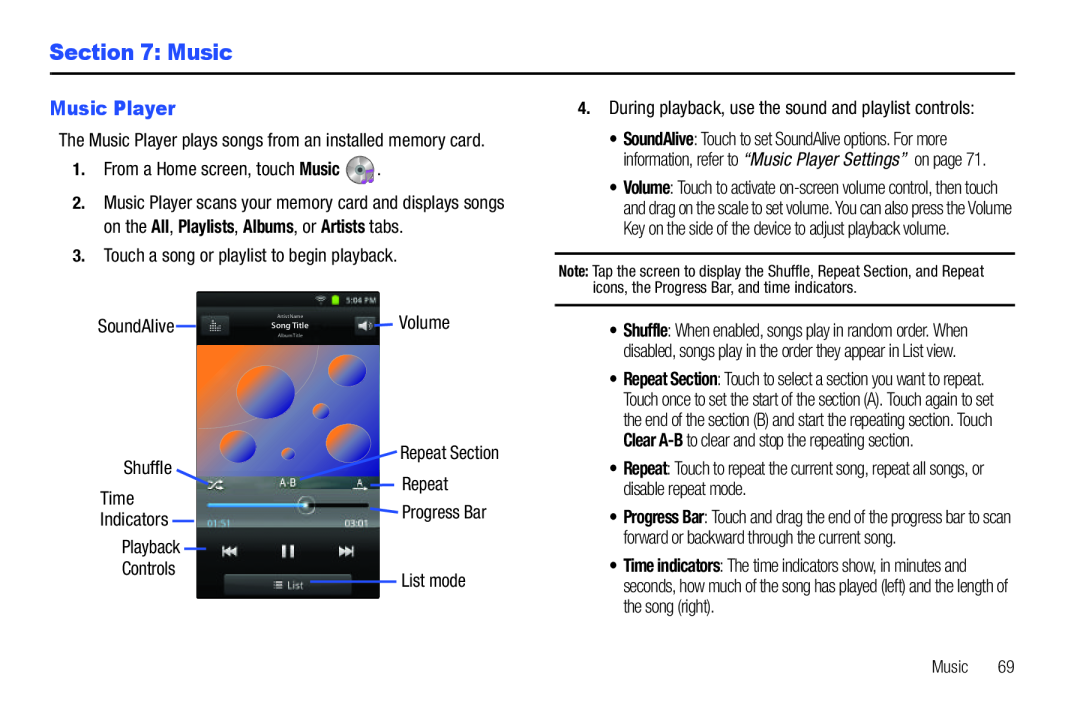 Section 7: Music
Music Player
 •Playback controls:
Music Player Options
To access additional options while playing a song, follow these steps:
From a Home screen, touch
Music
2.Touch the Menu Key
Menu Key
The follow options are available:
Share music via
•Set as alarm tone: Create an alarm that uses the current song as the tone
Set as alarm tone
•More: Access the following additional options:
More
Creating a Playlist
1.From a Home screen, touch Music , then touch the Playlists tab
Music
Playlists
3.Touch Save to save the new playlist
Save
Adding Songs to Playlists
1.From a Home screen, touch Music , then touch the Playlists tab
Music
Playlists
2.Touch a playlist
3.Touch Add music
– or –
Touch the Menu Key ➔ Add
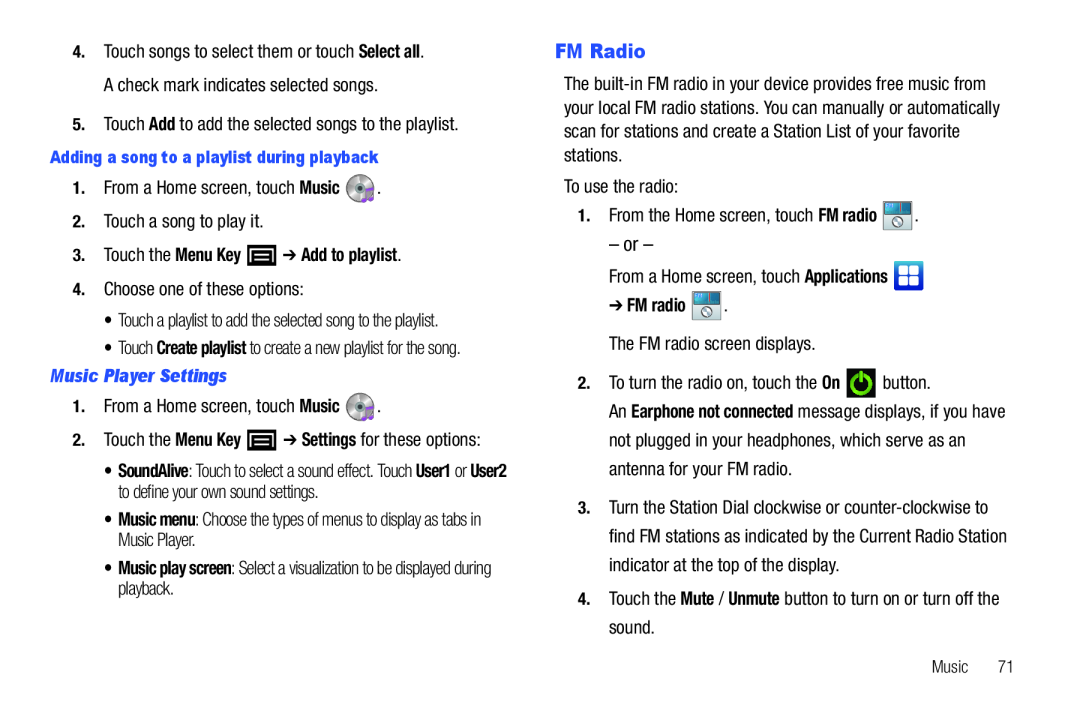 FM Radio
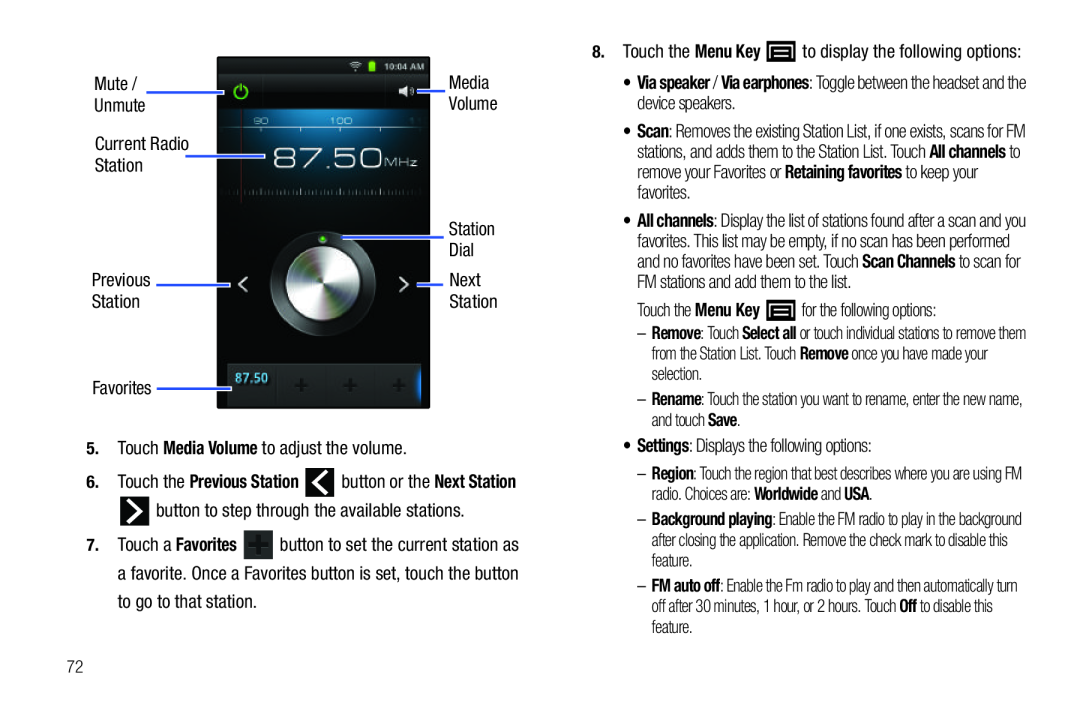 Mute
MuteMedia
Unmute
Current Radio
Station
Dial
Next
Station
Favorites
5.Touch Media Volume to adjust the volume
Media Volume
6.Touch the Previous Station button or the Next Station
button to step through the available stations
to go to that station
8.Touch the Menu Key to display the following options:
Menu Key
Via speaker
: Toggle between the headset and the device speakers
Touch the Menu Key for the following options:
Menu Key
Rename
Save
•Settings: Displays the following options:
Settings
radio. Choices are: Worldwide and USA
Worldwide
USA
 Section 8: Photos and Videos
 –Delete: To erase the photo, touch OK
Delete
•Touch the Back Key to return to the Camera to take more photos
Back Key
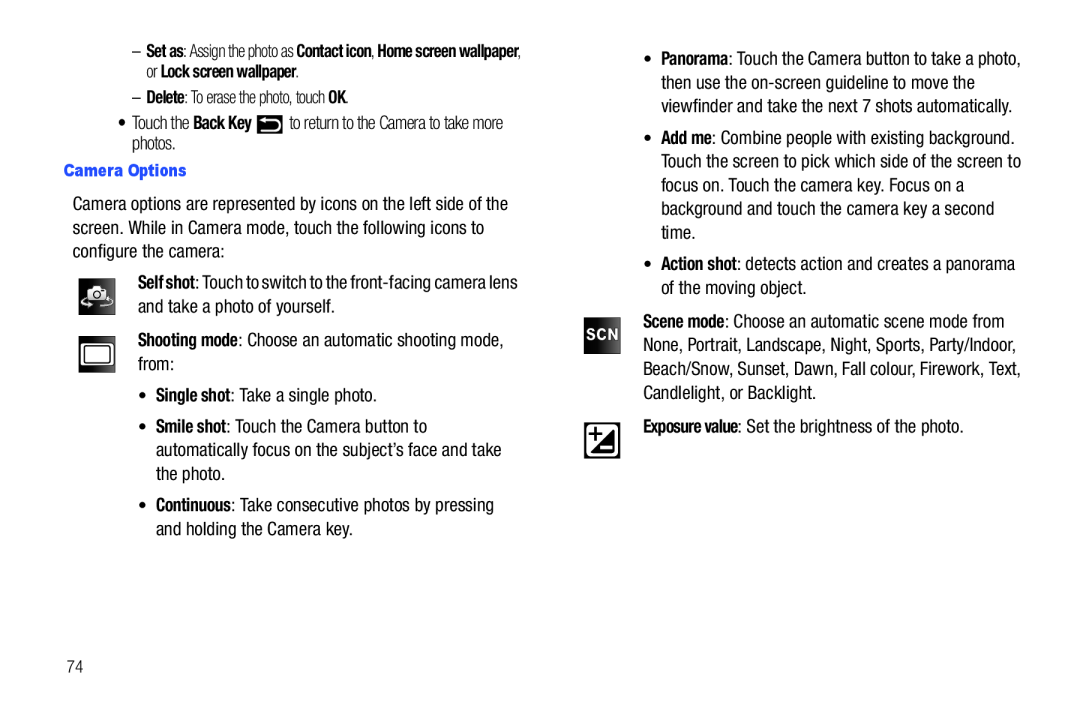
Camera Options
Self shot
Shooting mode: Choose an automatic shooting mode, from:
Shooting mode
•Single shot: Take a single photo
Single shot
Smile shot
•Continuous: Take consecutive photos by pressing and holding the Camera key
Continuous
• Add me: Combine people with existing background
Add me
focus on. Touch the camera key. Focus on a
time
of the moving object
Candlelight, or Backlight
 Settings: Touch for the following options:
Settings
•Outdoor visibility: Allows you to take better pictures when outdoors
Outdoor visibility
•Timer: Set a 2, 5, or 10 second timer
Timer
•Resolution: Set a size for the image. Options
Resolution
ISO
•Metering: Set how the camera measures or meters
Metering
the light source: Center-weighted,Spot, or Matrix
•Image quality: Choose a quality setting for photos
Image quality
Options are: Superfine, Fine, or Normal
•Adjust: Used to adjust Contrast, Saturation, and Sharpness
Adjust
Settings: Touch for the following options:
Settings
•Guidelines: Used to enable or disable the guidelines
Guidelines
Review
•GPS: Enable or disable tagging of photos with your
GPS
GPS location. displays on the screen when this option is active
•Shutter sound: Enable or disable one of the camera’s three shutter sounds
Shutter sound
•Storage: Set the storage location. Options are: Internal memory or SD card
Storage
•Reset: Set all Camera settings back to the defaults
Reset
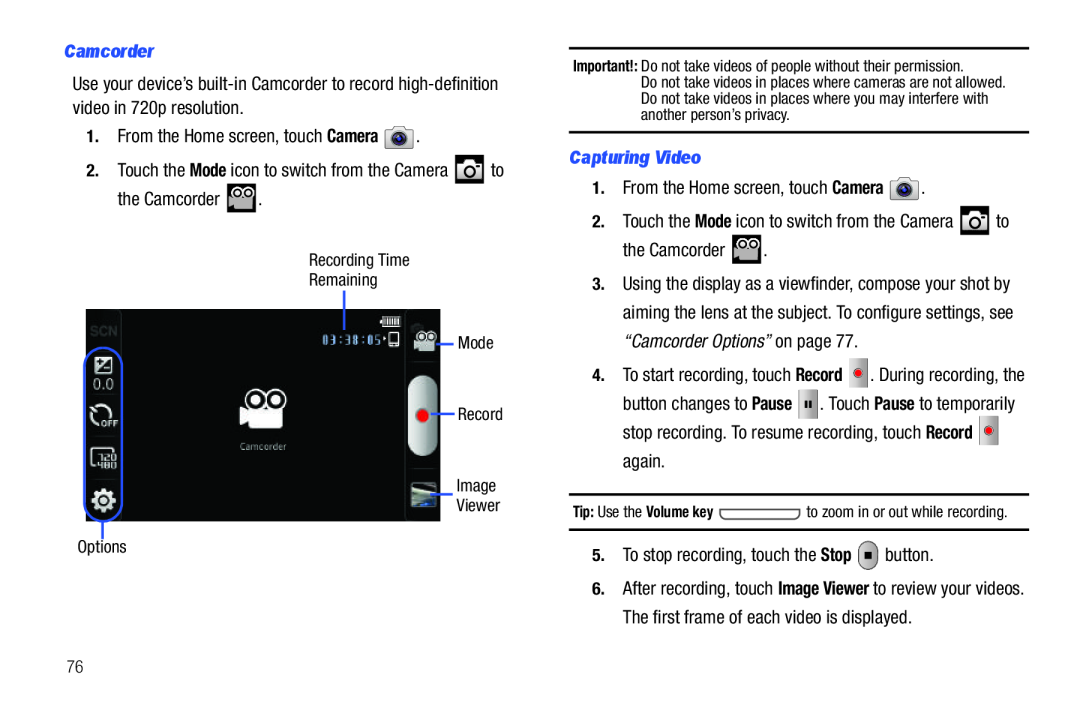 Camcorder
1.From the Home screen, touch Camera
Camera
2.Touch the Mode icon to switch from the Camera to
the Camcorder
Recording Time
Remaining
Mode
Record
Image
Viewer
Options
Capturing Video
1.From the Home screen, touch Camera
Camera
2.Touch the Mode icon to switch from the Camera to
the Camcorder
“Camcorder Options”
To start recording, touch
Record
Pause
Pause
Record
5.To stop recording, touch the Stop button
Stop
 7.Sweep across the screen to review all videos. While reviewing the videos:
•Double-tapon the screen to zoom all the way in or out
•Touch the screen to display the following options:
–Share: Send the video by using AllShare, Bluetooth, Email, Gmail, or YouTube
Share
–Play: Play video being displayed
Play
–Delete: Erase the video being displayed
Delete
•Touch the Back Key to return to the Camcorder
Back Key
Camcorder Options
Configure the camcorder
SCN Scene: Not available for videos
SCN
Scene
Exposure value: Set the brightness of the video
Exposure value
Timer: Set a timer for how long to wait before recording a
Timer
video. Options are: Off, 2 sec, 5 sec, and 10 sec
Resolution: Set the video size to either: 720x480, 640x480, 320x240, or
Resolution
Settings: Touch for the following options:
Settings
•Outdoor visibility: Allows you to take better videos when outdoors
Outdoor visibility
•Video quality: Choose a quality setting for videos
Video quality
Options are: Superfine, Fine, or Normal
•Adjust: Used to adjust Contrast, Saturation, and Sharpness
Adjust
Settings: Touch for the following options:
Settings
•Guidelines: Used to enable or disable the guidelines
Guidelines
•Audio recording: Enable to record sound along with video
Audio recording
Storage
•Reset: Set all Camcorder settings back to the defaults
Reset
 Videos
1.From a Home screen, touch Videos
Videos
2.While viewing the Videos list, touch the Menu Key for options:
Menu Key
•Remove: Touch videos to select them or touch Select all to remove all videos
Remove
Select all
4.During playback, touch the Menu Key for options:
Menu Key
•Share video: Send the video by AllShare, Bluetooth, YouTube, Email, or Gmail
Share video
•Via Bluetooth: Scans for a Bluetooth device on which to play the video
Via Bluetooth
•Play speed: Use the slider to adjust the video play speed
Play speed
Settings
•Subtitles: View subtitles for the video, if available
Subtitles
•Original Size ( ): Play the video in its original size
Original Size
Full-Screen
): Enlarge the video as much as possible without becoming distorted
Full-Screen
View
•5.1 ch: Touch to activate 5.1 Virtual Surround Sound
5.1 ch
to resume playing
Previous / Rewind
Exit
 Gallery
Use Gallery to view, capture, and manage photos and videos
Gallery Options
To manage these folders:
1.From a Home screen, touch Applications
2.Touch the Menu Key
and
3.Touch Select all or touch the folders you want to select (the
–Details: Displays details about the folders selected
4.Touch a folder to display the folder’s contents
5.Touch the Menu Key
6.Select all or touch the pictures or videos you want to select
–Details: Displays details about the items selected
 Access the Camera from Gallery
To access the Camera from the Gallery:
1.From a Home screen, touch Applications
Applications
➔ Gallery
Touch
“Camera”
Viewing Videos
➔ Gallery
2.Touch a category, then touch a video to play it
3.While viewing a video, touch the Menu Key for these options:
Menu Key
•Share video: Send the video by AllShare, Bluetooth, YouTube, Email, or Gmail
Share video
•Via Bluetooth: Scans for a Bluetooth device on which to play the video
Via Bluetooth
•Play speed: Use the slider to adjust the video play speed
Play speed
•Subtitles: View subtitles for the video, if available
Subtitles
For more information, refer to “Videos” on page
Viewing Photos
1.From a Home screen, touch Applications
Applications
➔Gallery
2.Touch a category, then touch a photo to view it
3.While viewing a photo, touch the screen for these options:
• Slideshow: Touch to view a slideshow of photos
• Slideshow
• Menu: Touch to display the following options:
• Menu
Share
–More: Touch for more options:
More
•Details: Display details about the photo
Details
•Show on map: Show on a map where the picture was taken, if available
Show on map
 Touch Home screen wallpaper
– or –
to stop without cropping the picture
Touch Lock screen wallpaper
degrees
Setting a Photo as a Contact Icon
Sharing Photos and Videos
2.Touch a category, then touch a photo to select it
3.Touch Menu ➔ More ➔ Set as ➔ Contact icon
Touch a contact entry, crop the picture, if necessary, and touch
Save
Setting a Photo as Wallpaper
Share photos and videos with your friends
1.From a Home screen, touch Applications
Applications
➔ Gallery
2.Touch a category to display thumbnails, then select items for sharing:
Touch a category, then touch a photo to select it
Touch Menu ➔ More ➔ Set as
 Section 9: Connections
Wi-Fi
 Bluetooth
 Samsung Kies
 Memory Card
 5.When finished, exit Windows Media Player and disconnect the USB cable
Connecting as a Mass Storage Device
2.From a Home screen, touch the Menu Key ➔ Settings
➔Wireless and network ➔ USB settings, then touch
Mass storage
4.Touch Connect storage to PC
A pop-upwindow displays on the PC when connected
5.Open the folder to view files
6.Copy files from the PC to the memory card
7.When finished, close the PC folder and disconnect the USB cable
 Section 10: Applications and Widgets
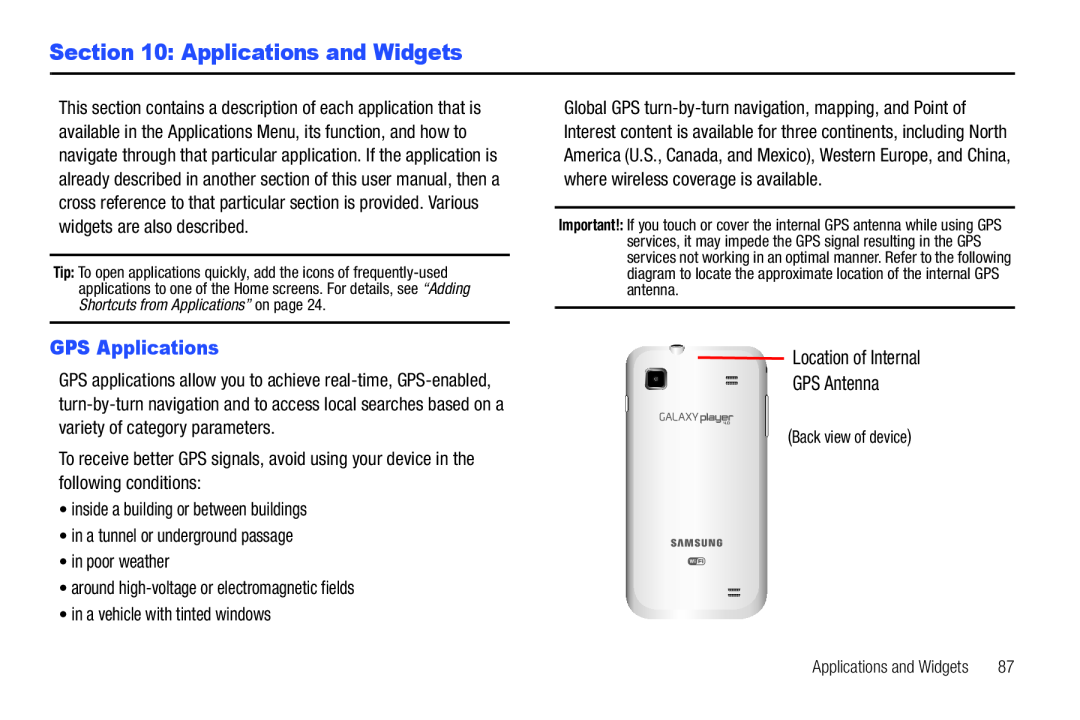
GPS Applications
Location of Internal
GPS Antenna
 AllShare
 Calculator
Calendar
 Creating a Calendar Event
To create a calendar event:
1.From a Home screen, touch Applications
Applications
➔ Calendar
2.Touch the date for which you want to enter an event
3.Enter the event information in the Create event screen, then touch Save
Save
Customizing the Calendar
1.From a Home screen, touch Applications
Applications
➔ Calendar
View settings
• Calendars: View all your calendars
• Calendars
• View days as
Time grid
Event list
: Choose whether
is the first day of the week
Notification settings
•Set alerts & notifications: Set alert behavior for calendar notifications
•Vibrate: Set vibration behavior for calendar notifications
Sending Calendar Events
Send events as vCalendar files by using Bluetooth or as attachments to Email
1.From a Home screen, touch Applications
Applications
➔ Calendar
 Clock
Clock
 Sound
SoundAlarm type
5.Touch Save to save the alarm
Save
Editing an Alarm
1.From a Home screen, touch Applications
Applications
➔ Clock
2.Touch an alarm in the list of alarms
3.Touch and edit the desired fields as described in “Setting Alarms” on page
Deleting Alarms
1.From a Home screen, touch Applications
Applications
➔ Clock
2.Touch the Menu Key ➔ Delete
3.Touch alarms to mark them for removal or touch Select All
Select All
4.Touch Delete to remove the selected alarms
Delete
World Clock
View the date and time in any time zone
1.From a Home screen, touch Applications
Applications
➔ Clock
2.Touch the World clock tab at the top of the Clock screen
World clock
3.Touch Add city or touch the Menu Key ➔ Add
4.Choose a city by typing a city name or scrolling through the list
5.Touch the Menu Key for the these additional options:
Menu Key
• Delete: Select cities to remove from the display
• Delete
6.Touch and hold a city in the for these options:
• Delete: Remove the city from the display
• Delete
 Downloads
 Dual Clock
 Gmail
Gmail▶From the Home screen, touch Gmail
Gmail
– or –
From a Home screen, touch Applications
Applications
➔Gmail
Google Search
▶From the Home screen, touch Google Search
Google Search
– or –
From a Home screen, touch Applications
Applications
➔Google Search
Internet
▶From a Home screen, touch Internet
Internet
Latitude
▶From a Home screen, touch Applications
Applications
➔ Latitude
 Market
 Memo
Memo
 Mini Diary
 Music
MusicMy Files
 Power Control
Places
▶From a Home screen, touch Applications
Applications
➔ Places
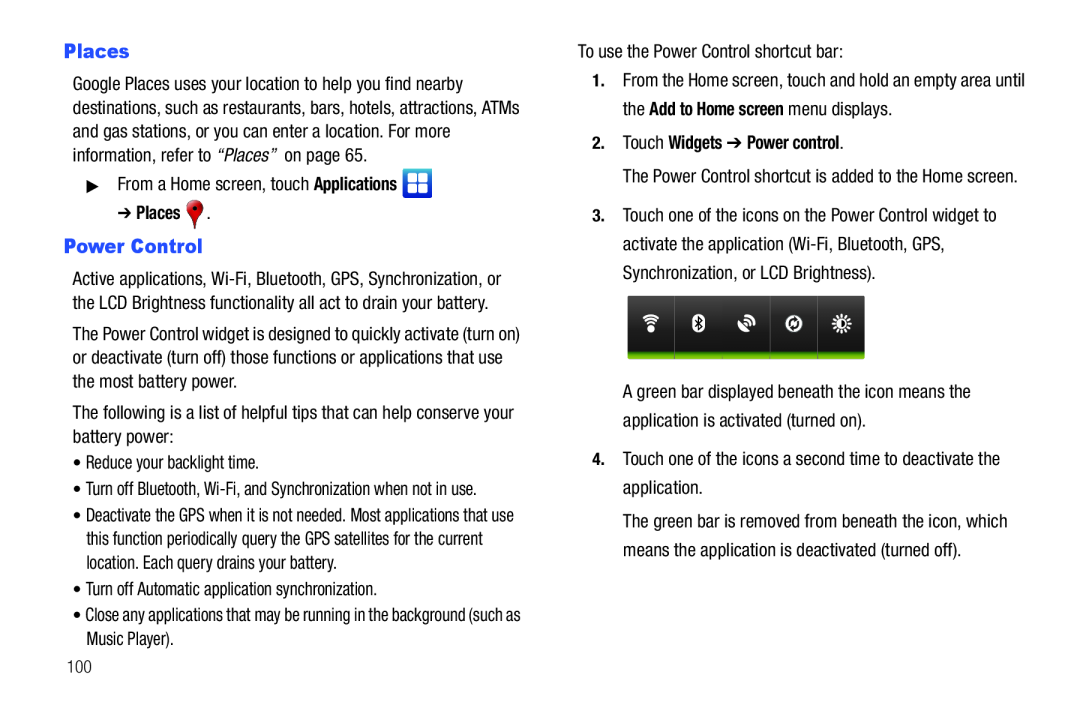
To use the Power Control shortcut bar:
From the Home screen, touch and hold an empty area until the
2.Touch Widgets ➔ Power control
The Power Control shortcut is added to the Home screen
Touch one of the icons on the Power Control widget to activate the application
4.Touch one of the icons a second time to deactivate the application
 Samsung Apps
Settings
Social Hub
 Talk
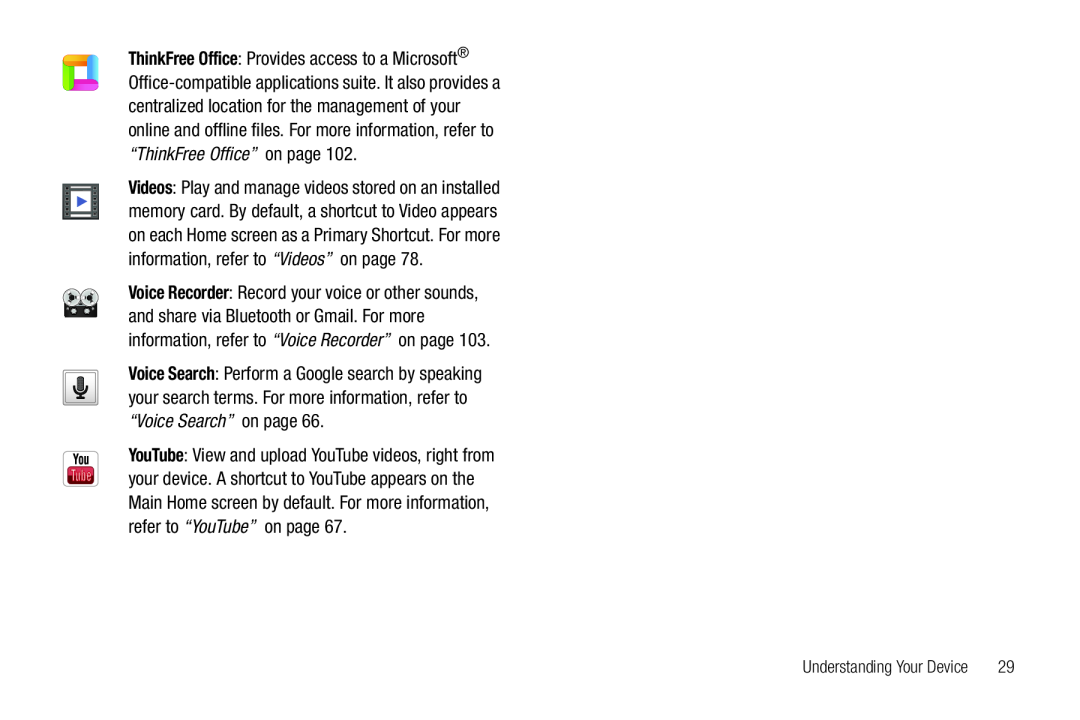
TalkThinkFree Office
 Voice Recorder
 Voice Search
▶From a Home screen, touch Applications
Applications
➔ Voice Search
YouTube
▶From the Home screen, touch YouTube
YouTube
– or –
From a Home screen, touch Applications
Applications
➔YouTube
 Section 11: Settings
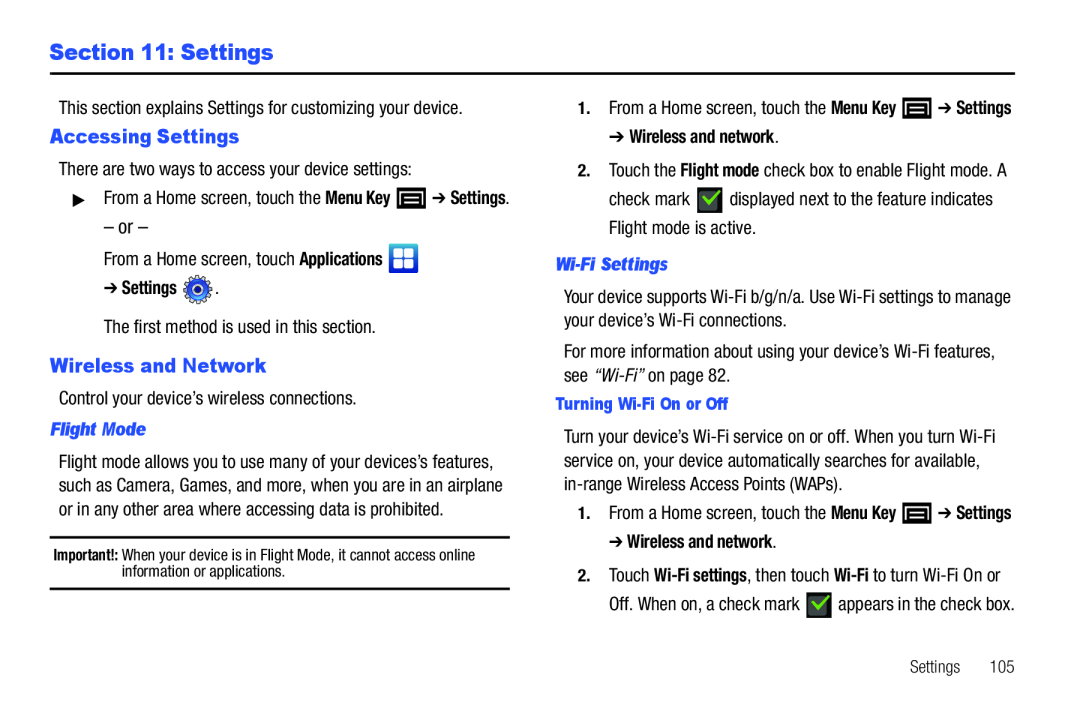
Accessing Settings
Wireless and Network
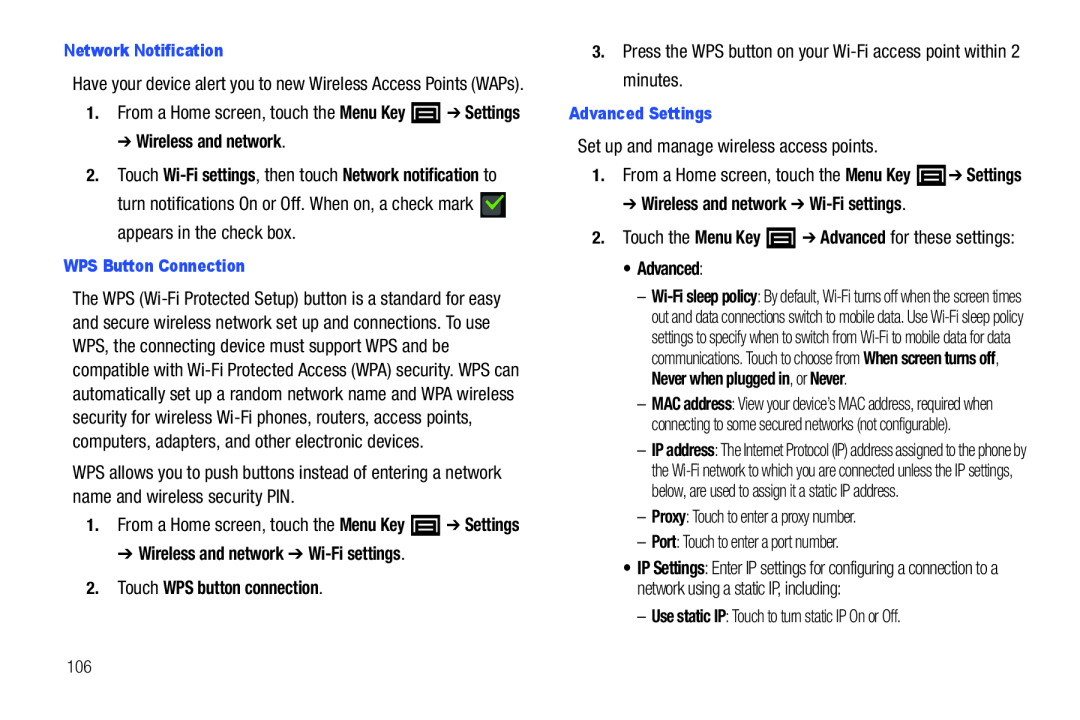 Network Notification
➔ Wireless and network
Touch
, then touch
to turn notifications On or Off. When on, a check mark
appears in the check box
WPS Button Connection
➔ Wireless and network ➔ Wi-Fisettings
2.Touch WPS button connection
3.Press the WPS button on your Wi-Fiaccess point within 2 minutes
Advanced Settings
Set up and manage wireless access points
➔Wireless and network ➔ Wi-Fisettings
• Advanced:
–Proxy: Touch to enter a proxy number
Proxy
–Port: Touch to enter a port number
Port
– Use static IP: Touch to turn static IP On or Off
Use static IP
 –IP address: Enter the IP address
IP address
–Gateway: Enter the gateway
Gateway
–Netmask: Enter the netmask
Netmask
–DNS 1: Enter the DNS1
DNS
–DNS 2: Enter the DNS2
DNS
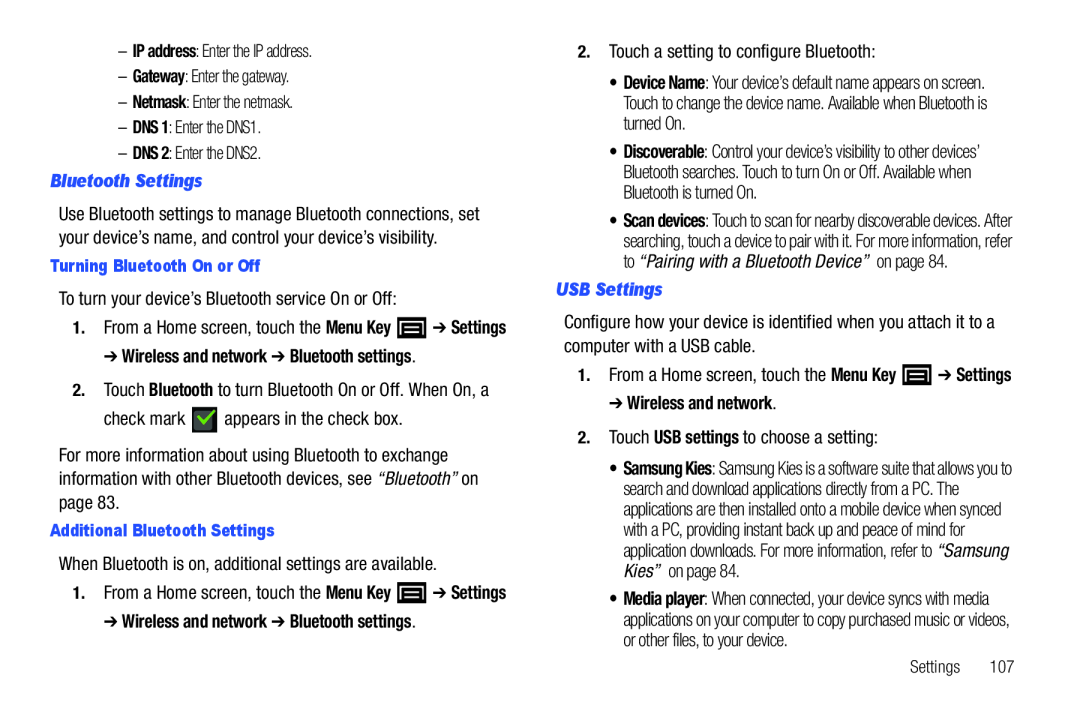
Bluetooth Settings
Turning Bluetooth On or Off
To turn your device’s Bluetooth service On or Off:
➔ Wireless and network ➔ Bluetooth settings
2.Touch Bluetooth to turn Bluetooth On or Off. When On, a
Bluetooth
check mark appears in the check box
Additional Bluetooth Settings
When Bluetooth is on, additional settings are available
➔ Wireless and network ➔ Bluetooth settings
2.Touch a setting to configure Bluetooth:
Device Name
USB Settings
1.From a Home screen, touch the Menu Key ➔ Settings
Menu Key
Settings
➔ Wireless and network
2.Touch USB settings to choose a setting:
USB settings
Settings
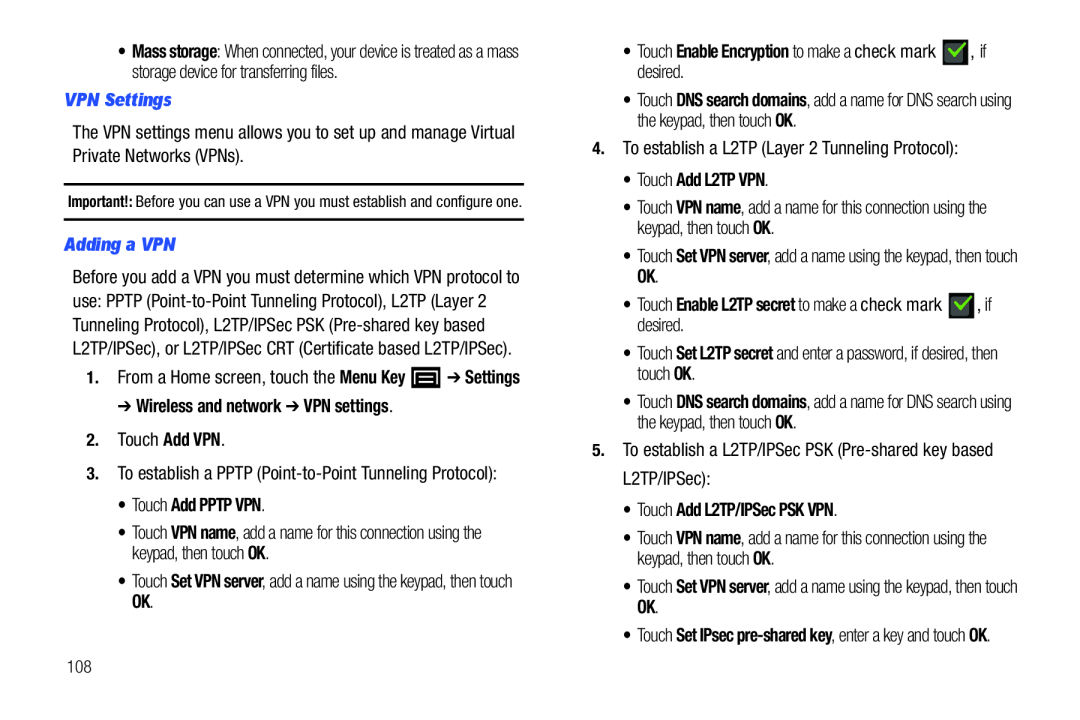 VPN Settings
Adding a VPN
1.From a Home screen, touch the Menu Key ➔ Settings
Menu Key
Settings
➔ Wireless and network ➔ VPN settings
2.Touch Add VPN
Add VPN
3.To establish a PPTP (Point-to-PointTunneling Protocol):
• Touch Add PPTP VPN
VPN name
• Touch Set VPN server, add a name using the keypad, then touch OK
Set VPN server
•Touch Enable Encryption to make a check mark , if desired
Touch
DNS search domains
4.To establish a L2TP (Layer 2 Tunneling Protocol):
•Touch Add L2TP VPN
Touch
VPN name
•Touch Set VPN server, add a name using the keypad, then touch OK
Set VPN server
•Touch Enable L2TP secret to make a check mark , if desired
•Touch Set L2TP secret and enter a password, if desired, then touch OK
Set L2TP secret
Touch
DNS search domains
5.To establish a L2TP/IPSec PSK (Pre-sharedkey based L2TP/IPSec):
•Touch Add L2TP/IPSec PSK VPN
Touch
VPN name
•Touch Set VPN server, add a name using the keypad, then touch OK
Set VPN server
 Sound
Sound
 Volume
Set the volume level for all types of sounds
➔ Sound ➔ Volume
2.Touch and drag the sliders to set:
• Media volume: Playback of music, videos, and other multimedia content
• Media volume
• System volume: Application sounds and other sounds made by your device
• System volume
• Notification volume: Sounds for alerts to new messages and other events
• Notification volume
3.Touch OK to save your setting
Notifications
Notification Ringtone
Select a default ringtone for message, alarm, and other notifications
➔ Sound ➔ Notification ringtone
2.Touch a ringtone to hear a sample and select it
3.Touch OK to save the setting
Feedback
Audible Selection
When enabled, tones play when you touch screen items
➔ Sound
2.Touch Audible selection to enable or disable tones. When
Audible selection
enabled, a check mark appears in the check box
 Display
 Location and Security
 My Location
Use Wireless Networks
➔ Location and security
Touch
Use wireless networks
Use GPS Satellites
➔ Location and security
2.Touch Use GPS satellites to enable the GPS satellite
Use GPS satellites
Use Sensor Aiding
➔ Location and security
Screen Unlock Settings
Set Screen Lock
“Securing Your Device”
1.From a Home screen, touch the Menu Key ➔ Settings
Menu Key
Settings
➔ Location and security
2.Touch Set screen lock/Change screen lock for these settings:
• None: Touch to disable all screen lock settings
• None
• PIN
Settings
 Passwords
Visible Passwords
➔ Location and security
of password characters. When enabled, a check mark appears in the check box
Device Administration
Add or remove device administrators
➔ Location and security
2.Touch Select device administrators
Credential Storage
Use Secure Credentials
➔ Location and security
2.Touch Use secure credentials to enable or disable. When
Use secure credentials
enabled, a check mark appears in the check box
Install Encrypted Certificates
Install encrypted certificates from an installed memory card
➔ Location and security
Set Password
Set or change a password to protect credentials
➔ Location and security
2.Touch Set password, then follow the prompts
Set password
 Clear Storage
Clear stored credentials and reset the password
➔ Location and security
2.Touch Clear storage to clear stored credentials and reset the password
Clear storage
Applications
Unknown Sources
➔ Applications
2.Touch Unknown sources to enable or disable the setting
Unknown sources
When enabled, a check mark appears in the check box
Manage Applications
Manage and remove applications from your device
1.From a Home screen, touch the Menu Key ➔ Settings
Menu Key
Settings
➔ Applications ➔ Manage applications
Running Services
View and control services running on your device
1.From a Home screen, touch the Menu Key ➔ Settings
Menu Key
Settings
➔ Applications ➔ Running services
To stop a service, touch the service, then touch
Stop
Development
Set options for application development
Settings
 Accounts and Sync
 ➔ Accounts and sync
2.Touch Background data to enable or disable the setting
Background data
When enabled, a check mark appears in the check box
Auto-Sync
When enabled, all accounts sync data at any time, automatically
➔ Accounts and sync
2.Touch Auto-sync to enable or disable the setting. When
Auto-sync
enabled, a check mark appears in the check box
Manage Accounts
Use Manage accounts to set up and configure your accounts
➔ Accounts and sync
2.Under Manage accounts, touch the account to modify its settings
Manage accounts
For more information about accounts, see “Setting Up Your Accounts” on page
Adding an Account
1.From a Home screen, touch the Menu Key ➔ Settings
Menu Key
Settings
➔ Accounts and sync
Removing an Account
1.From a Home screen, touch the Menu Key ➔ Settings
Menu Key
Settings
➔ Accounts and sync
2.Touch an account to display its settings
Settings
 Privacy
SD Card and Device Storage
 Language and Keyboard
 •Show tips: Show helpful tips from Swype
Show tips
Swype Advanced Settings
•Word suggestion: Suggest possible matching words as you enter text
Word suggestion
•Auto-spacing:Insert spaces automatically when you pause entering text
Auto-spacing
Auto-capitalization
•Show complete trace: Briefly display the Swype trace
Show complete trace
•Personal dictionary: Add or remove words from your personal dictionary
Personal dictionary
Reset Swype’s dictionary
: Delete all the words you have added to Swype’s dictionary
Help
•Swype help: View the Swype User Manual
Swype help
•Tutorial: View a tutorial for learning how to Swype
Tutorial
About
•Version: View the current Swype software version
Version
Samsung Keypad
“Entering Text Using the Samsung Keypad”
➔Language and keyboard
• Portrait keypad types: Select a text input method:
• Portrait keypad types
–Qwerty Keypad
–3x4 Keypad
–Handwriting box
–Handwriting box
•Input languages: Set a default text entry language
Input languages
 Voice Input and Output
 Accessibility
 Date and Time
 About Device
 Section 12: Health and Safety Information
Exposure to Radio Frequency (RF) Signals
 Interphone Study
 http://www.ukcosmos.org/index.html
not increase. Additional information about SEER can be found at
http://seer.cancer.gov
Cell Phone Industry Actions
•Design cell phones in a way that minimizes any RF exposure to the user; and
Reducing Exposure: Hands-FreeKits and Other Accessories
Steps to Reduce Exposure to Radio Frequency Energy
 •Reduce the amount of time spent using your cell phone;
Hands-FreeKits
Cell Phone Accessories that Claim to Shield the Head from RF Radiation
Children and Cell Phones
•Reduce the amount of time spent on the cell phone;
 Specific Absorption Rate (SAR) Certification Information
 FCC Part 15 Information to User
 Smart Practices While Driving
 Battery Use and Safety
 Samsung Mobile Products and Recycling
 UL Certified Travel Charger
Display / Touch-Screen
 GPS
GPSCare and Maintenance
 Responsible Listening
 Always turn the volume down before plugging the earphones into an audio source
American Academy of Audiology
11730 Plaza American Drive, Suite
Reston, VA
Voice: (800)
Email: info@audiology.org
Internet:
http://www.audiology.org/Pages/default.aspx
 Operating Environment
 For more information see: http://www.fcc.gov/oet/rfsafety/rf- faqs.html#
Other Medical Devices
Vehicles
Posted Facilities
Potentially Explosive Environments
When your Device is Wet
 Restricting Children's Access to Your Mobile Device
FCC Notice and Cautions
Other Important Safety Information
 Section 13: Warranty Information
Standard Limited Warranty
 What are SAMSUNG’s obligations
What must you do to obtain warranty service
What are the limits on SAMSUNG’s liability
 What is the procedure for resolving disputes
 End User License Agreement for Software
 end user receiving the Software must agree to all the EULA terms
 10.Disclaimer of Warranty Regarding Third-PartyApplications

 Social Hub
Legal Terms and Privacy
socialhub.samsungmobile.com
Social Hub Terms and Conditions
Acceptance of the Terms
 Eligibility
Your Information
Termination of Service
Your Material
 Using the Service
You agree to:
•Comply with applicable laws, the Terms and good manners;
•Respect the privacy of others;
Restrictions
Actions Required by Law
 Third Party Sites and Content
Subscription Information
Availability
Dealings with Others
 LIMITATION OF LIABILITY
 Social Hub Privacy Policy
 INFORMATION THAT WE COLLECT
 USE OF INFORMATION WE COLLECT
DISCLOSURE OF INFORMATION TO THIRD PARTIES
 CHILDREN
 CHAT ROOMS AND OTHER PUBLIC AREAS
CONTESTS AND SWEEPSTAKES
 Social Hub End User License Agreement
 4.CONFIDENTIALITY
4.2The provisions of clause 4.1 will not apply to any information which is:
5.WARRANTY AND SUPPORT
 6.LIMITATION AND EXCLUSION OF LIABILITY
6.1Licensor does not exclude its liability (if any) to you:
6.1.1for personal injury or death resulting from Licensor's negligence;
6.1.2for fraud; or
ANY BREACH BY LICENSOR OF ANY OF THE EXPRESS OR IMPLIED TERMS OF THIS LICENSE;
6.3.3ANY USE MADE OF THE SOFTWARE; OR
6.4Disclaimer of Certain Damages. IN NO EVENT SHALL
 6.6Any rights that you have as a consumer are not affected by this clause
7.TERM AND TERMINATION
8.GOVERNING LAW AND JURISDICTION
The courts in New York City will have
9.COMPLIANCE WITH APPLICABLE LAW
 10.GENERAL
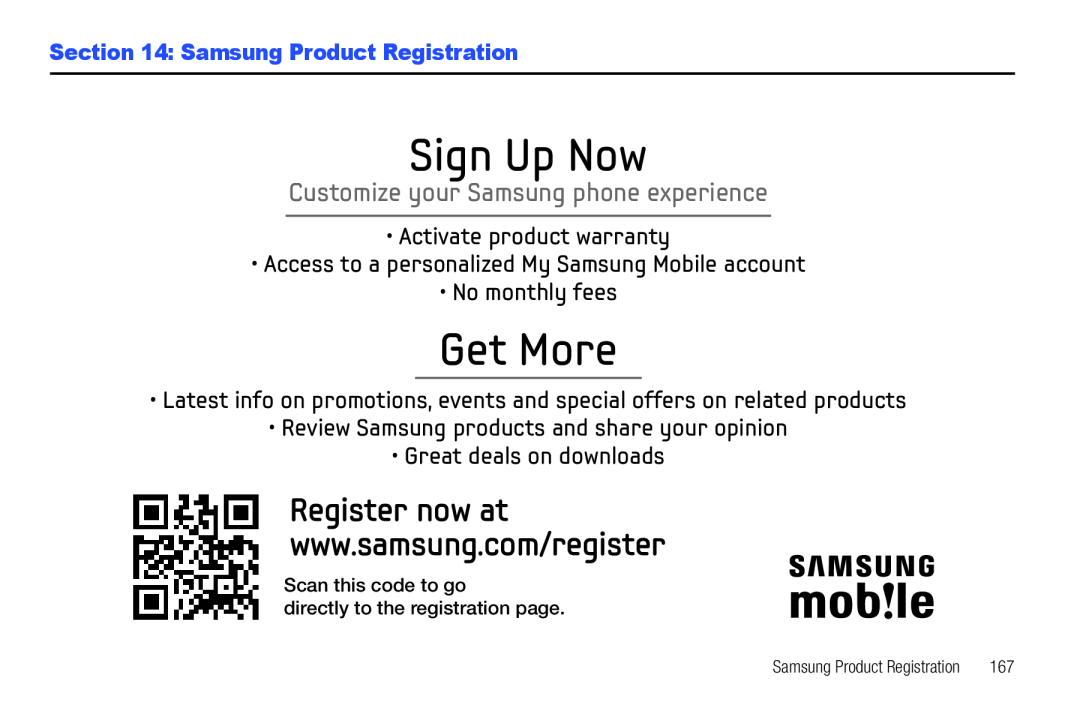 Section 14: Samsung Product Registration
 Index
Index
 Horizontal Calibration 112 power saving mode 112 screen timeout
DivX®
registration code
Do cell phones pose a health hazard
Exposure to Radio Frequency (RF) Signals
setting up an account
FCC Notice and Cautions
FM Radio
Gallery
Get Friends
Getting Started
setting up your phone
Gmail
GPS
GPS Applications
Groups
creating
sending a message
Handwriting
Health and Safety Information 125 Home key
Home screen
Icons
Status Bar
Internet
settings
Language and keyboard settings
select input method 119 select locale
Location and security settings
 Wallpaper
Warranty Information
Widgets
Wi-Fi
WiFi (see Wi-Fi)
Windows Media Player
YouTube 67
Wireless Networking